AAC to AC3 conversion guideStory:
Just recently I thought of transfering some of my anime collections to DVD-video so that they can be played on DVD (besides saving some space on the hard drive. However a set of my anime series were using
MKV format, with
AAC audio codec.
AAC is not compatible for DVD authoring therefore it needed to be converted to other audio format. Since it was a 6 channel audio, better if we convert it to
5.1 AC3 format instead to preserve the sound channels.
The tools.....
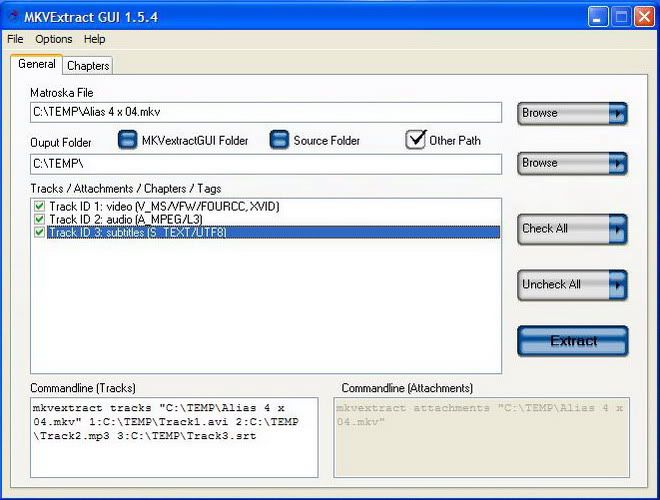
1. Mkvtoolnix (includes mkvmerge & mkvextract)
2. mkvextract GUI (if you prefer GUI instead of CLI)
3. aacDECdrop
4. BeSweet
5. Wavewizard
6. Soft Encode
Wait.....
Before we start, I just want to clarify that this is guide is only about converting AAC to AC3, not the whole DVD authoring process. For DVD authoring guide, you may want to refer from other source such as Afterdark forum. Some of the tools used were available as freeware, shareware or trial version but it is recommended to use full version to avoid any limitations. It is recommended to have all the necessary codecs such as MKV, AAC and AC3. I had these codecs from K-lite Codec Pack. Other than that, make sure you already install all the tools accordingly, with the right path.
Common problems.....
There are actually a few method of doing this. A fast way is by using GraphEdit. With GraphEdit, you can convert AAC to AC3 without the need of going through AAC to WAV conversion. However, there is one common problem using this method. The output AC3 file usually had very low volume. Eventhough you can adjust the AC3 volume using AC3filter, the sound will be still very low if you play your DVD on the DVD player that you have to crank the TV volume up. My method eliminates this problem although the job is a little bit tedious.
Let's get started.....
1. Extract AAC from videoRun mkvextract. Tick the audio stream that u wanted and extract. Make sure you remember the location.
2. Convert AAC to WAVOpen aacDECdrop and drag your AAC file to it. It will create a 6 channel WAV file.
3. Separate a 6 channel WAV file to six mono channel WAV filesUse BeSweet to do the job. I used BeSweet with GUI to do this. All options were left at default. Make sure you select 'six waves' for the output. Then, click on WAV to WAV to convert. You will have six mono channel WAV files. They are named as ***-FL.wav, ***-FR.wav, ***-C.wav, ***-SL.wav, ***-SR.wav and ***-LFE.wav
However, these files are actually not in the correct order. Don't ask me why, I found out about this in other forums and the information is seemed to be true. We will recorrect this problem later on.
4. Check audio for the correct samplingDVD supported audio must be in 48000Hz sampling. If your WAV file is using other sampling (eg: 44100Hz, 22050Hz) you need to upsample it to 48KHz. To do this, add all the mono wav files into WaveWizard. Make sure in the 'Preferences' you set the sampling rate to 48000Hz and 'Sound Level Control' set to 'none'. Then proceed with conversion. New wav files will be generated. They're named as ***-FL(1).wav, ***-FR(1).wav etc.
5. Re-correct audio position and AC3 conversionOpen Soft Encode. Load all the re-sampled WAV files. With this tool, you can re-adjust the position of the mono WAVs. Re-arrange the WAV channels to:
***-FL(1).wav = Center
***-FR(1).wav = Front Left
***-C(1).wav = Front Right
***-SL(1).wav = Surround Right
***-SR(1).wav = LFE
***-LFE(1).wav = Surround Left
I use Soft Encode's default setting and there was no problem. Proceed with 'Encode' by clicking on the circle red button.
Finish

You can check your AC3 file with AC3fix, but as I was lazy and confident enough with my work I just skip it

Now you can use AC3 as sound source for your DVD authoring
Note 1 - You can skip step 3. Step 3 purpose is to have each WAV file in smaller sizes.
Note 2 - *** is your WAV file name


 Mar 18 2004, 11:44 AM, updated 15y ago

 Quote
Quote


 better than nero of course.


 Do i need a special hardware to properly decode *.TS file? I believe my pc is not slow at all. Tried it on my fren P43.0EGhz also same.


 how that happen


 )
)

 thanks in advance.


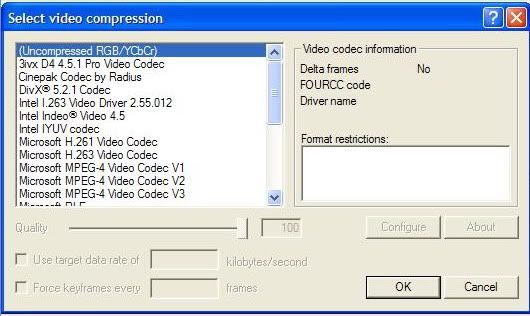
 anyone know how to make it no compression??


 0.1066sec
 0.38
0.38
 6 queries
 GZIP Disabled