Simple guide to software RAID in hackintosh Lion:-
Things that you`ll need
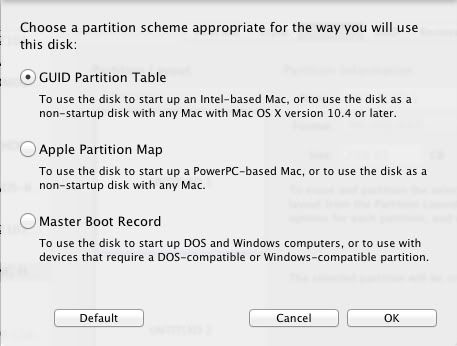
1) A working hackintosh with the necessary kexts (FakeSMC , etc…) , a working DSDT for your motherboard, latest Chameleon (at least 1200) org.chameleon.Boot.plist and 2 new drives to set up the RAID drive. (SSD's would be perfect)
2) Fire up disk utility, create your raid disk by selecting RAID and add the disk you want to add to your RAID array. Create Raid Disk, name it what ever you want it, i named mine LionRaid

3) Select your volume "LionRaid" and click Information , copy your RAID Identifier "xxxxxxxx-xxxx-xxxx-xxxx-xxxxxxxxxxxx" add this string in your org.chameleon.Boot.plist

<key>RootUUID</key>
<string>xxxxxxxx-xxxx-xxxx-xxxx-xxxxxxxxxxxx</string>
4) Also add the UseKernelCache flag to your org.Chameleon.Boot.plist
<key>UseKernelCache</key>
<string>Yes</string>
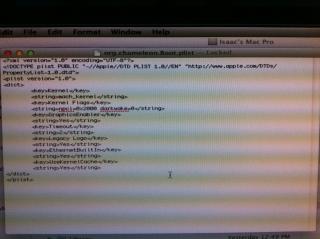
Your org.chameleon.Boot.plist should look something like this
CODE
∑<?xml version="1.0" encoding="UTF-8"?>
<!DOCTYPE plist PUBLIC "-//Apple//DTD PLIST 1.0//EN" "http://www.apple.com/DTDs/PropertyList-1.0.dtd">
<plist version="1.0">
<dict>
<key>Boot Banner</key>
<string>No</string>
<key>GenerateCStates</key>
<string>Yes</string>
<key>GeneratePStates</key>
<string>Yes</string>
<key>Kernel Flags</key>
<string>npci=0x2000</string>
<key>Kernel</key>
<string>mach_kernel</string>
<key>Graphics Mode</key>
<string>1680x1050x32</string>
<key>GraphicsEnabler</key>
<string>Yes</string>
<key>EthernetBuiltIn</key>
<string>Yes</string>
<key>USBBusFix</key>
<string>Yes</string>
<key>UseKernelCache</key>
<string>Yes</string>
<key>RootUUID</key>
<string>xxxxxxxx-xxxx-xxxx-xxxx-xxxxxxxxxxxx</string>
<key>Theme</key>
<string>bootcamp</string>
<key>Timeout</key>
<string>1</string></dict>
</plist>
5) Clone your working install to the new Raid Volume via Carbon Copy Cloner.
6) Copy all Kext from Extra/Extensions to the System/Library/Extensions folder on your RAID disk
Bootloader
1) Now we need to install the boot loader (Chameleon) on each of the RAID slice disk boot partition named "Boot OS X"
*"Boot OS X" is the 3rd partition on each of the RAID slice disk, this is where were going to put our Extra folder in it.
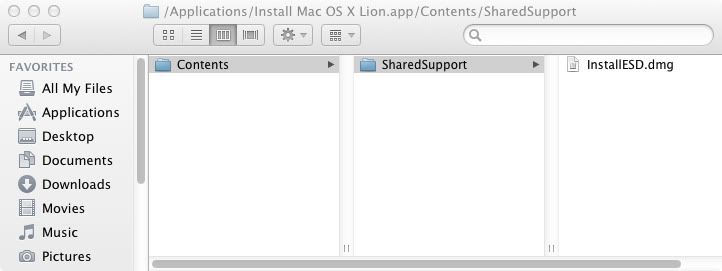
2) Copy Chameleon i386 folder(refer attached for Chameleon) and Extra folder (contains DSDT.aml, org.Chameleon.Boot.plist, smbios.plist, Themes) to desktop
3) Fire up terminal and Type: diskutil list
4) Locate your raid slice disk , Look for "Boot OS X" and its IDENTIFIER diskXs3 , where X is the disk number for first drive. 2nd drive should be diskYs3 (where X and Y is the disk number in your build)
5) Navigate to cd ~/Desktop/i386
6) Install boot0 to MBR of both disk:
CODE
sudo fdisk -f boot0 -u -y /dev/rdiskX
sudo fdisk -f boot0 -u -y /dev/rdiskY
7) Install boot1h to the boot sector of each "Boot OS X" partition
CODE
sudo dd if=boot1h of=/dev/rdiskXs3
sudo dd if=boot1h of=/dev/rdiskYs3
13) Copy boot and Extra Folder to both "Boot OS X" partition
1st Partition
CODE
sudo diskutil mount diskXs3
sudo cp boot /Volumes/Boot\ OS\ X/
sudo cp -R ~/Desktop/Extra /Volumes/Boot\ OS\ X/
sudo diskutil unmount diskXs3
2nd Partition
CODE
sudo diskutil mount diskYs3
sudo cp boot /Volumes/Boot\ OS\ X/
sudo cp -R ~/Desktop/Extra /Volumes/Boot\ OS\ X/
sudo diskutil unmount diskYs3
Once the boot loader is installed on both of the RAID slice disk, run KextWizard tick
a) System/Library/Extensions
b) Repair Permissions
c) Rebuild cache
Target disk : choose your new Raid Disk
Click "Execute"
Once finish shutdown and remove your current boot drive or change the boot order to boot your RAID drive. At chameleon boot screen choose
the raid disk and boot into Lion.
Eveytime you add kext to /S/L/E remember to repair permissions.
Enjoy.
Thank you to vboyz and nathan7 from insanelymac forums link
here and
here, also to Janek for the KextWizard.
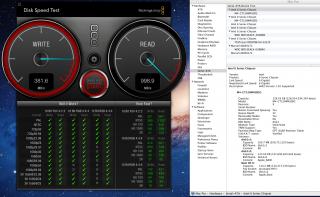
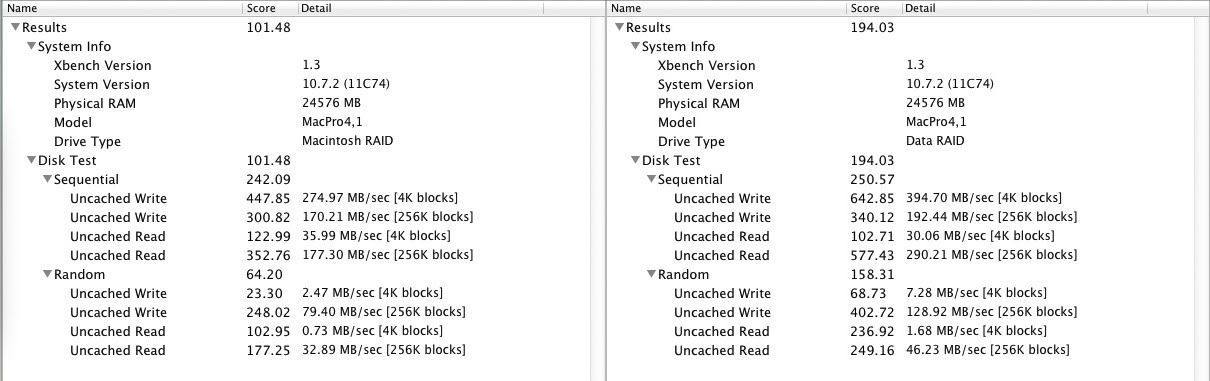
Some Benchies
read and write results with Crucial M4 RAID 0
Boot times improve tremendously.
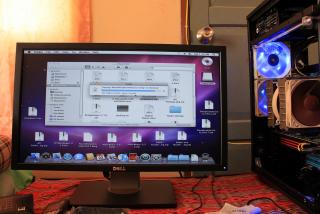
Specs for my build
i72600k , Gigabyte Z68XP-UD3P, 8GB RAM, GTX 260+


 Jul 15 2011, 02:21 PM, updated 5y ago

 Quote
Quote


 Don't own a hackintosh myself but I've always enjoyed reading this thread

 There are many others who've been running Hackintosh in their PCs for ages
  As for me, I'm just starting up few months ago after my MBP which I've been using for 5 years now running out of juice (battery I mean.. and replacing it will cost me RM500++ and from my previous experience, how careful I'm with charging/discharging, I could only get it to last for a year). I'm however eagerly waiting for an MBA announcement


 technical


 awesome setup bro. raid-0 SSD summore. dayyum. does it work with apple keyboard and magic mouse? and what monitor setup r u using? i will ask u more if i decide to do the same


 it's working now...I just unplugged and plugged it back again...so far so good, all 8 cores are working too, I can even watch 1080p movies....HDMI, DVI are working as well as dual monitor setup....


 just not SLi


 0.2362sec
 0.78
0.78
 6 queries
 GZIP Disabled