Welcome Guest ( Log In | Register )

Outline · [ Standard ] · Linear+

 Seeking ways to design & renovate your house?, Happy Learning Together!

views
     
TSMy Maison
post Jul 12 2021, 12:26 PM, updated 2y ago

Casual
***
Junior Member
319 posts

Joined: Jun 2018
I believe that most of us would like to know more before starting any design/ renovation work. Here is a platform for all of you who are willing to share and learn. I will keep on updating any great design, technology and construction works to share with all of you. For better understanding, there will be real-life scenario photos posted here. laugh.gif laugh.gif

I will always try my best to answer your questions. We can always have a great and fun discussion to seek for better/ pro ideas as no one is always 100% correct all the time. nod.gif

Letโ€™s make mutual agreement to ensure a conducive learning platform!

You can-
Ask questions related to Construction/ Renovation work
Ask interior design ideas and trend, design style, design tricks

You are not allowed-
To speak vulgar words/ insult/ criticize othersโ€™ opinion (no one is 100% correct)
No pirated software, pornography or any other materials prohibited

This post has been edited by My Maison: Jul 12 2021, 12:38 PM
TSMy Maison
post Jul 12 2021, 12:32 PM

Casual
***
Junior Member
319 posts

Joined: Jun 2018
user posted image


PROJECT A-
Topic: Preparation Works rclxms.gif

Firstly, before starting off with our sharing today, let me slightly introduce to you about the project. I will name it as PROJECT A from now onwards for better indication in future. From a single-storey terrace house, we are going to dismantle almost the entire lot and come up with a brand-new one and a half-storey house design. From time to time, we will share our on-site photos to share our progress with you.
So before any demolition work starts, we must always get ready with initial preparation and protection works.
1. Built-in cupboard is protected with canvas to prevent damage.
2. Canvas is used to minimise the amount of dirty dust blowing into neighbour's houses.
3. Air-cond indoor units will be covered while outdoor units are dismantled temporarily.
4. Construction disposal bin is rented to store construction waste when the work starts. It is placed in front of the house.

This post has been edited by My Maison: Jul 12 2021, 12:34 PM
mini orchard
post Jul 12 2021, 04:20 PM

10k Club
********
All Stars
14,511 posts

Joined: Sep 2017
Why didnt take down the indoor AC unit together ? I am sure you gonna service the unit later. Just in case your next unit is smaller, the old paint will be obvious if not painted in total.

Since you are doing reno, change the concealed piping if is not R32 gas compliant. Otherwise use a black tape to seal the piping to prevent construction dust or insect to crawl inside if you intend to reuse the piping.
TSMy Maison
post Jul 14 2021, 04:06 PM

Casual
***
Junior Member
319 posts

Joined: Jun 2018
Yes, you are right! thumbup.gif
Initially, the owner haven't decide whether still wanna to remain the units. He informed us to cover it first while doing site protection. However, after getting his final decision, we actually removed everything once the renovation work starts. thumbsup.gif


TSMy Maison
post Jul 14 2021, 04:35 PM

Casual
***
Junior Member
319 posts

Joined: Jun 2018
user posted image


user posted image


user posted image


user posted image


PROJECT A-
Topic: Hacking & Demolition Works rclxms.gif

We hack the unwanted brick walls and floors which are not going to be used in future design. At the same time, we indicate the new column locations with labels before starting to dig the hole for the foundation of your house.

Portable hacking machine is very important in this step!! thumbsup.gif

We dig the hole right to the ground below. A square base is formed. You will definitely create a lot of mess as a lot of construction waste, ground mud etc are scattered around. However, all of these are normal! So, don't forget to clean up the working area and accumulate the waste in your construction bin outside. icon_idea.gif

Next, we also dismantle the plaster ceilings for the entire house. You could see clearly all of the supporting structures and piping concealed above your house now. Similarly, we dispose of all of the waste into the bin. Get rid of them by lorry once it is full.

Remember that the dismantling job can take up some cost on you as well when doing renovation. Thus, do remember to include this step while considering your budget.
rolleyes.gif


This post has been edited by My Maison: Jul 14 2021, 04:42 PM
TSMy Maison
post Jul 14 2021, 04:35 PM

Casual
***
Junior Member
319 posts

Joined: Jun 2018
Disclaimer: All of the posts above are works before MCO. biggrin.gif . Just for sharing purpose ya!

This post has been edited by My Maison: Jul 14 2021, 04:39 PM
TSMy Maison
post Jul 16 2021, 03:26 PM

Casual
***
Junior Member
319 posts

Joined: Jun 2018
user posted image


user posted image


user posted image


user posted image


PROJECT A-
Topic: Constructing Column Footing

After cleaning up all of the unwanted wastes, we start to build footing for our columns.
Pour the concrete inside with steel rods added as reinforcement to form a strong rc footing.

This post has been edited by My Maison: Jul 16 2021, 03:27 PM
TSMy Maison
post Jul 18 2021, 10:44 PM

Casual
***
Junior Member
319 posts

Joined: Jun 2018
user posted image

user posted image

user posted image

user posted image


TSMy Maison
post Jul 18 2021, 10:46 PM

Casual
***
Junior Member
319 posts

Joined: Jun 2018
Project A -
Topic: Preparing Rebar and Constructing Ground Beam rclxm9.gif

Construction of RC ground beam is important in maintaining the structural stability of a building. We firstly prepare the reinforcement bar structure with desired length, as shown in the diagram above. icon_idea.gif

We excavate the ground for the allocation of the ground beam. Before casting concrete, we lay bricks along the perimeter, forming the shape. Next, we place the rebar inside, fitting nicely before pouring concrete inside.

Wait for the concrete mixture to dry and your RC ground beam is ready! icon_rolleyes.gif

Zwean
post Jul 18 2021, 10:57 PM

Regular
******
Senior Member
1,269 posts

Joined: Dec 2019
How to remove existing beam?

Possible?

The middle one

user posted image

This post has been edited by Zwean: Jul 18 2021, 11:45 PM
TSMy Maison
post Jul 19 2021, 07:33 PM

Casual
***
Junior Member
319 posts

Joined: Jun 2018
QUOTE(Zwean @ Jul 18 2021, 11:57 PM)
How to remove existing beam?

Possible?

The middle one

user posted image
*
user posted image

May I know which components you are mentioning and planning to remove?
Zwean
post Jul 19 2021, 07:57 PM

Regular
******
Senior Member
1,269 posts

Joined: Dec 2019
QUOTE(My Maison @ Jul 19 2021, 07:33 PM)
user posted image

May I know which components you are mentioning and planning to remove?
*
Wow so geng can highlight

The Red one.

Edit: bodoh layman like me dunno difference between beam and column hahaha

This post has been edited by Zwean: Jul 19 2021, 07:57 PM
TSMy Maison
post Jul 20 2021, 05:50 PM

Casual
***
Junior Member
319 posts

Joined: Jun 2018
QUOTE(Zwean @ Jul 19 2021, 08:57 PM)
Wow so geng can highlight

The Red one.

Edit: bodoh layman like me dunno difference between beam and column hahaha
*
Is okay Zwean, no one is 100% pro. We learn from each others ahhaha icon_rolleyes.gif
However to answer your question, normally we don't remove the column as it is the structural support for the building, without it, the building might collapse. However, if you insist to remove the column away, an engineer will need to consider the loads and overcome the structural issue by referring to the house design. All of the changes made will be complying to the safety code and suit to the new proposed design. thumbsup.gif
TSMy Maison
post Jul 20 2021, 05:59 PM

Casual
***
Junior Member
319 posts

Joined: Jun 2018
user posted image


user posted image


user posted image


user posted image
TSMy Maison
post Jul 20 2021, 06:00 PM

Casual
***
Junior Member
319 posts

Joined: Jun 2018
Project A -
Topic: Dismantling the roof, ceiling structure and walls

From the pictures shown above, we ensure that the construction bin is empty before demolition works continue. We then remove the roof tiles and the structure above.

Ceiling boards and roof structures are removed as well. To follow the new design configuration, we hack all the non-structural brick walls, tidy up the area and lastly to transport all of the construction wastes to the disposal area.

This post has been edited by My Maison: Jul 20 2021, 06:01 PM
Zwean
post Jul 20 2021, 08:05 PM

Regular
******
Senior Member
1,269 posts

Joined: Dec 2019
QUOTE(My Maison @ Jul 20 2021, 05:50 PM)
Is okay Zwean, no one is 100% pro. We learn from each others ahhaha icon_rolleyes.gif
However to answer your question, normally we don't remove the column as it is the structural support for the building, without it, the building might collapse. However, if you insist to remove the column away, an engineer will need to consider the loads and overcome the structural issue by referring to the house design. All of the  changes made will be complying to the safety code and suit to the new proposed design.  thumbsup.gif
*
Another stupid question. Possible to relocate the beam along the T axis? or must maintain current position?
TSMy Maison
post Jul 22 2021, 12:01 AM

Casual
***
Junior Member
319 posts

Joined: Jun 2018
QUOTE(Zwean @ Jul 20 2021, 09:05 PM)
Another stupid question. Possible to relocate the beam along the T axis? or must maintain current position?
*
What do you mean by T-axis ya? in which T ?
However to answer your question whether it is a must to maintain current position, my answer is YES if there is no changes of design in your renovation work.
TSMy Maison
post Jul 22 2021, 08:26 PM

Casual
***
Junior Member
319 posts

Joined: Jun 2018
user posted image

user posted image

user posted image

user posted image
TSMy Maison
post Jul 22 2021, 08:27 PM

Casual
***
Junior Member
319 posts

Joined: Jun 2018
PROJECT A -
Topic: Preparation for Column Construction rclxm9.gif

A stable RC column is important in resisting the compressive and tensile forces. Without proper reinforcement, concrete columns can buckle or burst outward.

For the rebar, rectangular stirrups (ties) are firstly bent with the bending tool. The stirrups encircle the vertical pieces of main rebar with proper span among each other. Use a pair of pliers and tie wire to tie each end of overlap, as shown in the illustrations above.

After locating each rebar at its own place, you can start cutting the plywood to the required size, as the preparation for the construction of traditional timber formwork. icon_rolleyes.gif

This post has been edited by My Maison: Jul 22 2021, 08:27 PM
TSMy Maison
post Jul 24 2021, 06:55 PM

Casual
***
Junior Member
319 posts

Joined: Jun 2018
user posted image


user posted image


user posted image


user posted image
TSMy Maison
post Jul 24 2021, 06:56 PM

Casual
***
Junior Member
319 posts

Joined: Jun 2018
PROJECT -
Topic: Traditional Timber Formwork & Scaffolding icon_rolleyes.gif

To construct the columns, firstly we need to prepare the timber formwork. It is easy to produce but has a relatively short lifespan. However, due to the low labour costs and flexibility, this method is extensively used.

We ensure that each board is rigidly constructed, propped and braced both horizontally and vertically to retain its shape. Ensure that the formwork has no damage to the concrete. They should be resting on the firm base. From the diagrams above, it shows that the concrete has cast perfectly after removal of the formwork.

Next, to construct and support formwork in the level above, scaffolding is used as a temporary structure. It provides workers the platform around the building to work at heights. It is a movable platform as well, which is very important in construction work. rclxm9.gif


TSMy Maison
post Jul 26 2021, 11:42 PM

Casual
***
Junior Member
319 posts

Joined: Jun 2018
PROJECT A-
Topic: Beam and Slab Formwork

user posted image


user posted image


user posted image


user posted image
TSMy Maison
post Jul 26 2021, 11:44 PM

Casual
***
Junior Member
319 posts

Joined: Jun 2018
PROJECT A -
Topic: Beam and Slab Formwork bruce.gif

Slab formwork essentially supports the weight of the concrete during the curing process. As you can see in the pictures above, the timber is cut and arranged in that way, forming flat surfaces for the construction of beams and slabs.

We then placed reinforcement steels inside the spacings. The steel reinforcing and welded wire reinforcement should be supported and sufficiently tied together to minimise movements during concrete placing. The reinforcement steels are then supported to ensure that there is no sag between supports. Otherwise, the reinforcement may not be properly located in the slab. rclxm9.gif

TSMy Maison
post Jul 28 2021, 02:54 PM

Casual
***
Junior Member
319 posts

Joined: Jun 2018
PROJECT A-
Topic: Concrete Mixing


user posted image


user posted image


user posted image
TSMy Maison
post Jul 28 2021, 02:55 PM

Casual
***
Junior Member
319 posts

Joined: Jun 2018
PROJECT A -
Topic: Concrete Mixing rclxm9.gif

After all of the preparation work is done, it's time to mix and cast concrete. Cement mixer truck is used to mix dry ingredients with water and other additives as needed to deliver the exact quantity of concrete for small and large concrete pours. Then, the fresh concrete is brought upwards using a concrete crane.

A mechanical vibrator should be used to compact the concrete. The vibrator is poke into the fresh concrete until the concrete settles. Ensure the steel reinforcements remain in its own place. Level the surface of the concrete with a screeding board to further compact the concrete.

Once the concrete is set, the formwork is stripped. Your beam and slab is now ready. thumbsup.gif

TSMy Maison
post Jul 30 2021, 06:58 PM

Casual
***
Junior Member
319 posts

Joined: Jun 2018
PROJECT A-
Topic: Casting First Floor Column, Roof Beam and Slab


user posted image


user posted image


user posted image


user posted image
TSMy Maison
post Jul 30 2021, 06:59 PM

Casual
***
Junior Member
319 posts

Joined: Jun 2018
PROJECT A-
Topic: Casting First Floor Column, Roof Beam and Slab flex.gif

As the project is a one and a half-storey design, we will then construct columns on top of the first floor slab to transmit all of the loads from the roof above to the supporting elements below. As usual, we get ready with the rebar tightened up with the stirrups, preparing the wooden formworks for the columns and lastly pouring concrete into the formworks for the casting process.

After the curing process was done, we moved the scaffoldings below up to the first floor. Similarly, they are used to support the timber horizontal joists and timber panels which act as a formwork for the construction of roof beams and slab.

KaLs
post Aug 1 2021, 02:32 PM

Getting Started
**
Junior Member
148 posts

Joined: Jan 2011
Your structural work is really neat. What's the purpose of the diagonal rebar? Btw is that a water outlet pipe inside Ground floor new column ?
TSMy Maison
post Aug 3 2021, 12:06 AM

Casual
***
Junior Member
319 posts

Joined: Jun 2018
QUOTE(KaLs @ Aug 1 2021, 03:32 PM)
Your structural work is really neat. What's the purpose of the diagonal rebar? Btw is that a water outlet pipe inside Ground floor new column ?
*
Thanks flex.gif. We always put a lot of effort in creating a safe and neat structural work for our clients.
For your information, the diagonal rebar we used is known as Y16 steel bar. It gives a better mechanical anchoring to the reinforced concrete. It enhances the stiffness of the structural system even more, which is what we emphasize on in every project we made. nod.gif

Ya, you are right. the pipe concealed inside the new column is the rainwater downpipe right in front of the car porch. This is to hide the downpipe from viewers, as it may affect the aesthetic of the house if left exposed. However, there is no right or wrong in this case. thumbup.gif


TSMy Maison
post Aug 3 2021, 10:19 PM

Casual
***
Junior Member
319 posts

Joined: Jun 2018
PROJECT A-
Topic: Roof Slab and Brick Walls Construction


user posted image


user posted image


user posted image


user posted image

TSMy Maison
post Aug 3 2021, 10:20 PM

Casual
***
Junior Member
319 posts

Joined: Jun 2018
PROJECT A-
Topic: Roof Slab and Brick Walls Construction biggrin.gif


From the pictures above, you could clearly see that the roof slab construction is exactly having the same working process as the 1st floor slab done previously. Rebars are placed technically while fresh concrete is levelled properly.
With the new design, brick walls on the first floor are added up to the roof as shown in the picture. Lastly, plaster the gable end brick walls on both sides.

TSMy Maison
post Aug 5 2021, 05:46 AM

Casual
***
Junior Member
319 posts

Joined: Jun 2018
PROJECT A-
Topic: Construction of Internal Walls, Door Frame, and Staircase


user posted image


user posted image


user posted image


user posted image


TSMy Maison
post Aug 5 2021, 05:46 AM

Casual
***
Junior Member
319 posts

Joined: Jun 2018
PROJECT A-
Topic: Construction of Internal Walls, Door Frame, and Staircase

Moving into the internal parts of the house, brick walls are laid according to the layout. To lay the bricks perfectly, we would need a string line acting as a guide. While laying the bricks, the top of each brick in the row should just touch the top of the line. Apply mortar on the sides to affix the bricks next to it.

The door frames are also constructed on site, built as โ€œHโ€ frames with steel angles screwed on both sides so that the bricks can be laid on top of it, binding together with mortar. Lay all the bricks up to the beam above.
bruce.gif

Before the construction of the concrete staircase, ensure that the starting of the entire staircase is connected to the small concrete foundation so that the loads are transferred into the ground successfully and to resist the movement of stairs. We prepare a proper formwork, a standard angle of flight with proper dimension of treads and risers. Next, we place the steel bars inside as reinforcement and fix the wooden boards to create the steps. Lastly, pour the concrete into the formwork and wait for the stairs to dry out completely to prevent cracks due to thermal expansion.

rebecca_choo
post Aug 5 2021, 05:32 PM

Getting Started
**
Junior Member
103 posts

Joined: Sep 2018
Hi,

I recently bought a new house that comes with laminated flooring at the upper floor. Do you know how durable and reliable it is? My whole life I've been living on a tiled-floor and this is the first time I'm going to experience laminated flooring (undercon project)

TSMy Maison
post Aug 11 2021, 01:46 AM

Casual
***
Junior Member
319 posts

Joined: Jun 2018
QUOTE(rebecca_choo @ Aug 5 2021, 06:32 PM)
Hi,

I recently bought a new house that comes with laminated flooring at the upper floor. Do you know how durable and reliable it is? My whole life I've been living on a tiled-floor and this is the first time I'm going to experience laminated flooring (undercon project)
*
Sorry for the late reply! notworthy.gif

For your information, laminate flooring is actually durable but it depends on the types of quality. It is suitable to use in high traffic areas like living room. The pricing is also lower than those engineered wood. Laminate flooring can withstand with scratches and dents which is very good in properties. So, you can have a try on it. But remember, not to install laminate flooring in wet areas, which are not so suitable!
thumbsup.gif
TSMy Maison
post Aug 11 2021, 01:52 AM

Casual
***
Junior Member
319 posts

Joined: Jun 2018
PROJECT B - Renovation of Toilet Areas

Topic: Preparation Work

user posted image


user posted image


user posted image

This post has been edited by My Maison: Aug 11 2021, 01:54 AM
TSMy Maison
post Aug 11 2021, 01:52 AM

Casual
***
Junior Member
319 posts

Joined: Jun 2018
QUOTE(My Maison @ Aug 11 2021, 02:52 AM)
PROJECT B - Renovation of Toilet Areas

Topic: Preparation Work

user posted image
*
The topic that we are going to share with you today is a renovation project of toilets in residential housing.

Throughout this few weeks, we will share more about
a) preparation/protection works we had actually done
b) hacking, concrete works
c) piping and waterproofing, installation of fixtures
d) High-skilled Tiling work process rclxm9.gif rclxm9.gif

From time to time, we will update photos of work in site until the completion works for sharing.
For today's topic, we will start off with preparation work. As you can see, we put a lot of efforts in protecting the condition of the house surrounding including furniture, tiles in other areas. We have to ensure that along the route to the working areas (toilet), they are always in good condition and no damaged is caused. We cover them with canvas for future ease hygiene. thumbsup.gif

TSMy Maison
post Aug 15 2021, 02:21 AM

Casual
***
Junior Member
319 posts

Joined: Jun 2018
PROJECT B - Renovation of Toilet Areas

Topic: Hacking and Plumbing

user posted image


user posted image


user posted image


user posted image

TSMy Maison
post Aug 15 2021, 02:23 AM

Casual
***
Junior Member
319 posts

Joined: Jun 2018
PROJECT B - Renovation of Toilet Areas

Topic : Hacking and Plumbing Works


After done all of the protection and preliminary works, we move on into the hacking process to remove all of the old unwanted walls layout, wall and floor tiles, bathtub etc. As shown in the illustrations, all of the wastes are then packed into a few packets of disposal bag before disposing outside.

While hacking work is done, at the same time, we do consider about the pipeline flow. Places for piping to be embedded inside are made, and they are installed and being concealed inside. Lastly, plaster them with cement. biggrin.gif
TSMy Maison
post Aug 16 2021, 12:48 AM

Casual
***
Junior Member
319 posts

Joined: Jun 2018
PROJECT B- Renovation of Toilet Areas
Topic: Formwork and Countertop


user posted image

user posted image

user posted image

user posted image

This post has been edited by My Maison: Aug 16 2021, 12:51 AM
TSMy Maison
post Aug 16 2021, 12:50 AM

Casual
***
Junior Member
319 posts

Joined: Jun 2018
PROJECT B- Renovation of Toilet Areas
Topic: Countertop

With all of the plumbing routes ready, we move on to construction of bathroom countertop. Similarly, we build the formwork first, cut and place segments of rebar lengthwise within the form to give the concrete added structural integrity. Pour the concrete mixture, level it and let it dry.

Complete your installation with any finishing of countertop you preferred. Basin are also installed in place.

This post has been edited by My Maison: Aug 16 2021, 12:52 AM
TSMy Maison
post Aug 18 2021, 01:34 AM

Casual
***
Junior Member
319 posts

Joined: Jun 2018
PROJECT B: Renovation of Toilet Areas

Topic: Waterproofing and Setting of Tiles

user posted image

user posted image

user posted image

user posted image


This post has been edited by My Maison: Aug 18 2021, 01:36 AM
TSMy Maison
post Aug 18 2021, 01:37 AM

Casual
***
Junior Member
319 posts

Joined: Jun 2018
PROJECT B: Renovation of Toilet Areas biggrin.gif

Topic: Waterproofing and Setting of Tiles

We apply waterproofing agent on the surface for the first step. It helps to prevent leaking of water if there is any gaps or cracks in the concrete. Ensure the surface is always clean before work so that the final outcome is levelled.
For your information, we use laser as an indication and guideline while laying tiles and apply thin set of mortar as binding agent during installation.
In today's topic, we emphasize on the initial setting of first tile, this helps to minimise wastage of tile, save cost and ensure aesthetic in the toilet tile layout. We will share more steps in future. Stay tuned. rclxms.gif
KIT39
post Aug 21 2021, 12:42 AM

New Member
*
Junior Member
43 posts

Joined: Jan 2010


Single story build reno to double story? What is the cost?
TSMy Maison
post Aug 21 2021, 11:36 PM

Casual
***
Junior Member
319 posts

Joined: Jun 2018
QUOTE(KIT39 @ Aug 21 2021, 01:42 AM)
Single story build reno to double story? What is the cost?
*
This is a very subjective question. rclxm9.gif It actually depends on your budget and the scale of works you are consider with. Approach the contractor/designer, share your thoughts and review them after having a site visit together with your reliable contractor/ designer. You may find your answer then ! ๐Ÿ˜ฌ

This post has been edited by My Maison: Aug 21 2021, 11:44 PM
TSMy Maison
post Aug 21 2021, 11:41 PM

Casual
***
Junior Member
319 posts

Joined: Jun 2018
PROJECT B- Renovation of Toilet Areas

Topic: Continuous of Tiling Works

user posted image


user posted image


user posted image
TSMy Maison
post Aug 21 2021, 11:43 PM

Casual
***
Junior Member
319 posts

Joined: Jun 2018
PROJECT B- Renovation of Toilet Areas

Topic: Continuous of Tiling Works rclxm9.gif

After setting up the first reference point of tiling in the toilet, we then install the remaining tiles along the straight lines by applying thin set of mortar using trowel. We press the tile in place while twisting it slightly to secure it into
position and ensure each bottom of the tiles are in contact with the mortar. While laying tiles, we place tile spacers in between each of them to get even and consistent spacing and joints.rclxm9.gif

We do cut any tiles to size for the end rows next to the walls or either the floor trap location. Good workmanship is required here. thumbsup.gif
KIT39
post Aug 21 2021, 11:45 PM

New Member
*
Junior Member
43 posts

Joined: Jan 2010


QUOTE(My Maison @ Aug 21 2021, 11:36 PM)
This is a very subjective question.  rclxm9.gif It actually depends on your budget and the scale of works you are consider with. Approach the contractor/designer, share your thoughts and review them after having a site visit together with your reliable contractor/ designer. You may find your answer then ! ๐Ÿ˜ฌ
*
Are you contractor /designer ?
TSMy Maison
post Aug 24 2021, 11:12 PM

Casual
***
Junior Member
319 posts

Joined: Jun 2018
QUOTE(KIT39 @ Aug 22 2021, 12:45 AM)
Are you contractor /designer ?
*
Yes. We do provide renovation works for those who are interested. We have a team to serve for the demand. Do check your pm if you want to know more.
TSMy Maison
post Aug 24 2021, 11:23 PM

Casual
***
Junior Member
319 posts

Joined: Jun 2018
PROJECT B- Renovation of Toilet Areas

Topic: Tile Spacing, Grouting Works, Installation of Fixtures

user posted image


user posted image


user posted image


user posted image

This post has been edited by My Maison: Aug 24 2021, 11:24 PM
TSMy Maison
post Aug 24 2021, 11:25 PM

Casual
***
Junior Member
319 posts

Joined: Jun 2018
PROJECT B: Renovation of Toilet Areas

Topic: Tile Spacing, Grouting Works, Installation of Fixtures

As mentioned above, you can realise that we actually put a lot of effort while dealing with the tile works around the socket outlets and the water outlets location.

After installing the all of the tiles, we allow it to cure overnight. Fill the tile joints with grout. It helps to seal the lines between the tiles and withstand most stains, expansion and contraction over a period of time. The grout can come in variation and can be a decoration purpose as well. We then wipe off the residue with a damp sponge. Wait for the grout to cure and your are nearly done! rclxms.gif

After all tiling works done, install the bathroom fixture and shower screen in place. We will post more out complete works in our next posts! icon_idea.gif
deathTh3Cannon
post Aug 25 2021, 02:30 PM

Getting Started
**
Junior Member
248 posts

Joined: Aug 2011
Is it a modern practice to cover or block stairs from living room view in a double storey house? normally houses now can see stairs in living room.

This post has been edited by deathTh3Cannon: Aug 26 2021, 01:13 PM
TSMy Maison
post Aug 26 2021, 11:16 PM

Casual
***
Junior Member
319 posts

Joined: Jun 2018
QUOTE(deathTh3Cannon @ Aug 25 2021, 03:30 PM)
Is it a modern practice to cover or block stairs from living room view in a double storey house? normally houses now can see stairs in living room.
*
I guess it depends on the users preference. It actually depends on the theme you set for the design. Explore different possibilities and suit the way with your living lifestyle. rclxm9.gif thumbsup.gif
TSMy Maison
post Aug 26 2021, 11:31 PM

Casual
***
Junior Member
319 posts

Joined: Jun 2018
PROJECT B: Renovation of Toilet Areas

Topic: Completion of Works and Review

user posted image

user posted image

user posted image

user posted image

user posted image

user posted image

This post has been edited by My Maison: Aug 26 2021, 11:31 PM
TSMy Maison
post Aug 26 2021, 11:33 PM

Casual
***
Junior Member
319 posts

Joined: Jun 2018
PROJECT B: Renovation of Toilet Areas biggrin.gif biggrin.gif

Topic: Completion of Works and Review

Proceeding with the final works, lighting fixtures are on set and everything are ready to use.
Sometimes there can be some tips while designing your toilet. Niche wall is one of it. You may consider it to reduce destruction on your wall such as screwing racks on your wall.
tay tuned for our next sharing! I hope you are satisfied and enjoy with the outcome. They are all our valuable works and efforts! rclxms.gif rclxms.gif bye.gif
TSMy Maison
post Sep 10 2021, 08:41 PM

Casual
***
Junior Member
319 posts

Joined: Jun 2018
PROJECT C: Erection of Bungalow in Kota Kemuning

Topic: Site Preparation

user posted image

user posted image

user posted image

user posted image


This post has been edited by My Maison: Sep 10 2021, 08:42 PM
TSMy Maison
post Sep 10 2021, 08:43 PM

Casual
***
Junior Member
319 posts

Joined: Jun 2018
PROJECT C: Erection of Bungalow in Kota Kemuning

Topic: Site Preparation

In today's sharing, we will be talking about our previous project done, a residential bungalow erected from none till completion.
After getting approval from the authorities, we start the entire work from preparing hoarding along the boundary, with the intention of safety and prevention of intruder. Next, setting up the site by performing site clearance while preparing the soil condition with the mechanical shovel. Ensuring that the building ground is free of plant as the topsoil usually has little bearing strength only.
rclxm9.gif
Referring to the working drawings, contractor and workers marked up the structure points, as the setting up of the entire building. We will then start constructing foundation and so on. icon_rolleyes.gif icon_rolleyes.gif
TSMy Maison
post Sep 12 2021, 05:42 PM

Casual
***
Junior Member
319 posts

Joined: Jun 2018
PROJECT: Erection of Bungalow in Kota Kemuning

Topic: Erection of supporting elements, Application of dpm and antitermite

user posted image

user posted image

user posted image

user posted image


This post has been edited by My Maison: Sep 12 2021, 05:42 PM
TSMy Maison
post Sep 12 2021, 05:43 PM

Casual
***
Junior Member
319 posts

Joined: Jun 2018
PROJECT: Erection of Bungalow in Kota Kemuning

Topic: Erection of supporting elements, Application of dpm and antitermite biggrin.gif

You could refer to our previous posts regarding to the construction process of erecting the columns. With the preparation of one-time used formwork, sufficient rebars and materials, construction of rc columns and ground floor slabs are crucial and required proper care and inspection from time to time. In details word, we always include certified waterproof membrane together with sufficient anti-termite protection towards the bungalow. Layering of proper soil conditions together with those details added up, it helps to reduce problems that might arise in future. bruce.gif
McLaren01
post Sep 13 2021, 11:49 AM

Getting Started
**
Junior Member
85 posts

Joined: Aug 2008
user posted image

Hi what is your opinion if i plan extend ground and 2nd floor.until toilet. Should i need piling or do footer is enough? It's about 3-4 feet. I do not have intentions to entend until max as i have plan for my backyard.
sl2007
post Sep 13 2021, 12:43 PM

Getting Started
**
Junior Member
285 posts

Joined: Jun 2010
Hi,

Depending on your existing house soil condition.
TSMy Maison
post Sep 16 2021, 10:14 PM

Casual
***
Junior Member
319 posts

Joined: Jun 2018
QUOTE(McLaren01 @ Sep 13 2021, 12:49 PM)
user posted image

Hi  what is your opinion if i plan extend ground and 2nd floor.until toilet. Should i need piling or do footer is enough? It's about 3-4 feet. I do not have intentions to entend until max as i have plan for my backyard.
*
Hi. yes it depends on soil condition, and surrounding area too. For example, if your house is near to the river or drainage. So we normally will proceed to do soil test first to justify whether need piling or not, just in case the soil condition is not good. rclxm9.gif

TSMy Maison
post Sep 16 2021, 10:17 PM

Casual
***
Junior Member
319 posts

Joined: Jun 2018
PROJECT: Erection of Bungalow in Kota Kemuning
Topic: External Envelope

user posted image

user posted image

user posted image

user posted image

user posted image

TSMy Maison
post Sep 16 2021, 10:18 PM

Casual
***
Junior Member
319 posts

Joined: Jun 2018
PROJECT: Erection of Bungalow in Kota Kemuning
Topic: External Envelope

After getting done with the rc structural frame, we move on to the construction of external envelope. In this scenario, we applied individual units of bricks with usage of mortar as binding material. Laying of bricks require skills. There might be different types of bonding such as stretcher bond or header bond,
with the intention to make the wall react as a solid structure.

We always set up the string line while laying bricks to ensure an equal height as usual. Sufficient mortar being applied between the bricks so that the strength of wall will not compromised. So, do consult an expertise as sometimes when your wall is too long, you might need to include rc stiffener in between the brick works for structural purpose.

As you can see in the photos also, above every openings either windows/doors, it is a must to include lintel, with minimum of 100mm depending on your loads and opening sizes. It acts as a small beam for safety issue.

Hope you enjoy, thanks! rclxm9.gif rclxm9.gif

Michaelbyz23
post Sep 16 2021, 10:22 PM

Sarawak Maju Makmur
*******
Senior Member
4,546 posts

Joined: Jun 2009
From: Selangor / Sarawak / New York


Great works! Thanks for sharing, and keep them coming!
TSMy Maison
post Sep 19 2021, 12:13 PM

Casual
***
Junior Member
319 posts

Joined: Jun 2018
PROJECT: Erection of Bungalow in Kota Kemuning

Topic: Structural Elements and Coverings

user posted image

user posted image

user posted image

user posted image

user posted image


This post has been edited by My Maison: Sep 19 2021, 12:14 PM
TSMy Maison
post Sep 19 2021, 12:15 PM

Casual
***
Junior Member
319 posts

Joined: Jun 2018
PROJECT: Erection of Bungalow in Kota Kemuning

Topic: Structural Elements and Coverings biggrin.gif

No matter how many storey of house, it requires rc columns and beams to transmit all of the loads from the top to the bottom. We used to discuss about formwork before. we knew that concrete is very heavy, and to wait it gets hard, it needs time. Easy way to say, metal props are needed to withstand the weight until it becomes self-supporting, and of course, concrete test is needed to ensure every single things being constructed is safe to be used by occupants later.

Talking about the roof coverings, it is a very good topic to explore which include all of the structural support, water drains issue, insulation, roof tiling and more. Hopefully we can further elaborate in future. However, from the reference photos we had shown above, you could clearly see our neat works while constructing the roof truss and laying of tiles. We concern about the functionality, including the proper spanning based on engineer's calculation, the standard roof overhang and also the detailing while concealing of the the structures with fascia board.

Hope you enjoy our works sharing. Thanks! rclxm9.gif rclxm9.gif nod.gif
TSMy Maison
post Sep 22 2021, 11:09 PM

Casual
***
Junior Member
319 posts

Joined: Jun 2018
PROJECT: Erection of Bungalow in Kota Kemuning

Topic: Tiling and Finishing

user posted image

user posted image

user posted image

user posted image


This post has been edited by My Maison: Sep 22 2021, 11:09 PM
TSMy Maison
post Sep 22 2021, 11:10 PM

Casual
***
Junior Member
319 posts

Joined: Jun 2018
PROJECT: Erection of Bungalow in Kota Kemuning

Topic: Tiling and Finishing

For your information, laying of roof tiles requires horizontal support known as batten screwing on the trusses. It is a criss-cross elements which are necessary for the tiles to hang over it. One things that you might not aware of, laying of roof tiles always start from the bottom and will be laid up to the top. If it happens in another way round, things get wrong and water seepage will occur.

Lastly, we proceed to the finishing work. The walls erected required an external layer of render or appropriate finishes material like cement render and paint to give a pleasant view. However, the finishes can be vary as it depends on the way you wish your house to look like. biggrin.gif biggrin.gif
Veronicaooi1122
post Sep 24 2021, 02:06 AM

Getting Started
**
Junior Member
159 posts

Joined: Aug 2021
QUOTE(My Maison @ Sep 22 2021, 11:10 PM)
PROJECT: Erection of Bungalow in Kota Kemuning

Topic: Tiling and Finishing

For your information, laying of roof tiles requires horizontal support known as batten screwing on the trusses. It is a criss-cross elements which are necessary for the tiles to hang over it. One things that you might not aware of, laying of roof tiles always start from the bottom and will be laid up to the top. If it happens in another way round, things get wrong and water seepage will occur.

Lastly, we proceed to the finishing work. The walls erected required an external layer of render or appropriate finishes material like cement render and paint to give a pleasant view. However, the finishes can be vary as it depends on the way you wish your house to look like. biggrin.gif  biggrin.gif
*
Noted

TSMy Maison
post Sep 26 2021, 12:08 AM

Casual
***
Junior Member
319 posts

Joined: Jun 2018
Project 4: Bungalow Design + Construction

Topic: Fast Overview of Overall Progress

user posted image

user posted image

user posted image

user posted image

user posted image

user posted image
TSMy Maison
post Sep 26 2021, 12:09 AM

Casual
***
Junior Member
319 posts

Joined: Jun 2018
Project 4: Bungalow Design + Construction

Topic: Fast Overview of Overall Progress

For our sharing today, it is definitely one of our good project. Everything starts from basic. Starting from investigating the interaction between building loads with various soil, rock and water condition below, a suitable foundation design is a must to be accounted.

Professionally consulting with all consultants, every single details in the structural members constructed were specially calculated and designed, from piling and foundation to the ground beams, columns and beams, etc. Concrete is an universal building material whereby it can be cast into different forms you like with the formworks. Do not fix your mind on rectangular design as things can still be constructed based on budgeting parameters. While for the external wall construction, we do consider a lot of basic needs, from the protection from moisture, cracks and thermal such as drip details, dpc, flashing, groove line, insulations etc. to ensure the comfort of users.

Do enjoy our photos shared on our work, as they means alot to us. Feel free to visit our previous posts shared to know more about the detailed construction projects we made. Enjoy! biggrin.gif biggrin.gif
XweienX
post Sep 28 2021, 12:44 PM

Casual
***
Junior Member
455 posts

Joined: Aug 2012


Sifu, can I ask ya, if I want to extend only ground floor without first floor (no budget), will it be very ugly?

Do we still need to depend on soil condition? Since no need to support weight for first floor.

Also, roughly how much would it cost if let's say I just do a simple rectangle with (1 wall in the middle to split) width 28 ft, extend 5ft.

Hope you understand my last question without pictures smile.gif
TSMy Maison
post Oct 2 2021, 01:31 PM

Casual
***
Junior Member
319 posts

Joined: Jun 2018
QUOTE(XweienX @ Sep 28 2021, 01:44 PM)
Sifu, can I ask ya, if I want to extend only ground floor without first floor (no budget), will it be very ugly?

Do we still need to depend on soil condition? Since no need to support weight for first floor.

Also, roughly how much would it cost if let's say I just do a simple rectangle with (1 wall in the middle to split) width 28 ft, extend 5ft.

Hope you understand my last question without pictures smile.gif
*
rclxm9.gif , it depends on the the design actually, extension on only ground floor is not a problem as long as the entire building didnt exceed the setback and boundary of your own lot. I couldnt give u a very confirm answer as everything need to be investigated on site. Whether it cost how much also varies from ppl to ppl right.
TSMy Maison
post Oct 2 2021, 01:34 PM

Casual
***
Junior Member
319 posts

Joined: Jun 2018
Project 4: Bungalow Design + Construction

Topic: Teamwork makes everything possible

user posted image

user posted image

user posted image

user posted image

user posted image

user posted image
TSMy Maison
post Oct 2 2021, 01:34 PM

Casual
***
Junior Member
319 posts

Joined: Jun 2018
Project 4: Bungalow Design + Construction thumbsup.gif thumbsup.gif

Topic: Teamwork makes everything possible

A good design without proper construction method means nothing, but with a good workmanship and skills, it can definitely turns 2D design into reality, with excellent value return.

Coming up with external envelope and internal construction, of cause we need finishing work such as plastering for the brickworks, skim coat for the brickwalls and painting as final rendering. We work together with all parties, from designer electrician to the carpentry, as all of these are about teamwork. Hope you enjoy our final outcome of design and works. Thanks!
TSMy Maison
post Oct 9 2021, 08:42 PM

Casual
***
Junior Member
319 posts

Joined: Jun 2018
Project: Alam Impian Housing Plaster Ceiling Work

Topic: Electrical Wiring Setting Out

user posted image

user posted image

user posted image

user posted image

user posted image

user posted image

user posted image
TSMy Maison
post Oct 9 2021, 08:44 PM

Casual
***
Junior Member
319 posts

Joined: Jun 2018
Project: Alam Impian Housing Plaster Ceiling Work

Topic: Electrical Wiring Setting Out

A good lighting is important in providing comfort. Beside considering on your needs with the amount of lighting for the space and also the plaster ceiling design, all of the electrical points setting out and wiring routes must firstly done.

And for sure, protection towards the area is always our concern as well. Rigid PVC conduit for electrical installation are used with other fittings suchas 2-way, 3-way, 4-way box etc. provides the route for your wiring route, helps organising your wire, giving protection while we works with other construction works.

Lets see how it works together wit plaster ceiling design on our next sharing! bruce.gif bruce.gif


TSMy Maison
post Oct 13 2021, 01:41 AM

Casual
***
Junior Member
319 posts

Joined: Jun 2018
Project: Alam Impian Housing Plaster Ceiling Work

Topic: Proposed Ceiling Design

user posted image

user posted image

user posted image

user posted image

user posted image

user posted image

user posted image

user posted image
TSMy Maison
post Oct 13 2021, 02:14 AM

Casual
***
Junior Member
319 posts

Joined: Jun 2018
Project: Alam Impian Housing Plaster Ceiling Work

Topic: Proposed Ceiling Design

After having consideration towards the lighting and switch points, we proceed with the plaster ceiling works. There are ways of designing as it depends a lot on your lighting behaviour and mood of design.
Ceiling has multiple functions such as providing a platform for lighting fixtures to install, concealing piping/ tubing / wires above for a neat work, hiding the presence of beam which can affect the aesthetic and etc. Depending on the budgeting parameter, you could design your lighting together with ceiling design such as magnetic track lighting, strip lighting, eyeball, downlight and more.

Plasterboards used are strong and light and they are very easy to install. We firstly set out the spacing of metal frame structures by marking the setting out with pencil. Each of the aluminium frame pieces are cut and screw in place, giving a platform for plasterboard to hung on it later. Cut the plasterboard according to sizing as fitted to each corner of the wall. Lastly, apply at least two layers of skim coat to fill up the gap in between different pieces of plasterboard, while at the same time creating a flat and uniform finish surface. Do consider about the proposed ceiling height as too low of ceiling might cause discomfort towards the family as the spaces might looks even smaller than before.

Hope you enjoy my sharing today ! rclxm9.gif rclxm9.gif
266K
post Oct 13 2021, 08:41 AM

On my way
****
Senior Member
648 posts

Joined: Oct 2005
From: Bukit Mertajam Penang


user posted image

Sifu, I have a almost 30 year old bungalow house, I am think of changing the tile roof to flat roof per attached pix. Do you have any bad experience with this kind of flat roof,? any advice will be highly appreciated. Thx.
TSMy Maison
post Oct 16 2021, 03:30 AM

Casual
***
Junior Member
319 posts

Joined: Jun 2018
Project: Bennington Residence, Wangsa Maju

Topic: Preliminary Stuff & Demolition Work

user posted image

user posted image

user posted image

user posted image

user posted image

user posted image
TSMy Maison
post Oct 16 2021, 03:35 AM

Casual
***
Junior Member
319 posts

Joined: Jun 2018
Project: Bennington Residence, Wangsa Maju

Topic: Preliminary Stuff & Demolition Work

We understand that not everyone is an expert in construction. This is why we share what we know with all of you, to get yourself ready before getting started with your renovation project.
Bennington Residence in Wangsa Maju, one of the unit apartment renovation in which we had done before. For your information, you should always ask for site visit with contractor to discuss about your requirement & design. Do let them to perform site measurement for future design and renovation stage. Normally, quotation can be roughly estimated, and you should ensure that the pricing made is in your acceptable range and budget.

After few meet up sessions for discussion, construction works start with entire protection work as shown. Remember that renovation work in unit apartment can involve management as well. Thus, do consult yourself with contractor and management to get permission for any demolition work done. Last but not least, demolition of wall enclosure must always be non-structural brickwall. Only non-structural wall are allowed to remove. Thus, initial planning of your future electrical setting out, activities, concept and more should be planned as early as possible to achieve a conducive, ergonomic and friendly living environment.
rclxms.gif rclxms.gif rclxms.gif
TSMy Maison
post Oct 17 2021, 02:15 PM

Casual
***
Junior Member
319 posts

Joined: Jun 2018
QUOTE(266K @ Oct 13 2021, 09:41 AM)
user posted image

Sifu, I have a almost 30 year old bungalow house, I am think of changing the tile roof to flat roof per attached pix. Do you have any bad experience with this kind of flat roof,? any advice will be highly appreciated. Thx.
*
Hi, so far there is no issue with metal proofing with proper installation.
Tile roof and metal roofing both have their own advantages and disadvantages. If you consider on metal roofing, you might consider yourself the one with PU foam or PU aluminium foil
as insultation which can help in reduction of noise and heat.


TSMy Maison
post Oct 17 2021, 03:23 PM

Casual
***
Junior Member
319 posts

Joined: Jun 2018
Project: Bennington Residence, Wangsa Maju

Topic: Consideration Of the Usage of Space

user posted image

user posted image

user posted image

user posted image

user posted image

user posted image
TSMy Maison
post Oct 17 2021, 03:24 PM

Casual
***
Junior Member
319 posts

Joined: Jun 2018
Project: Bennington Residence, Wangsa Maju

Topic: Consideration Of the Usage of Space

To create a comfortable space suitable for housing, by-laws said that every habitable room shall always be provided with natural lighting and natural ventilation by means of one or more windows having a total area of not less than 10% of clear floor area of the room. Furthermore, 5% of the total floor area shall have openings which can allow a free uninterrupted passage of air.

Besides, the area of the first habitable room in a residential building shall be not less than 11 square metres, the second habitable room be not less than 9.3 square
metres and all other rooms be not less than 6.5 square metres in area. The width of every habitable room in a residential building shall not be less than 2 metres. I believe that most completion of building unit you bought fulfill this requirement, however if there is any partition work made, ensure they could still fulfill the minimum requirement by laws.

Do remember that for every renovation you made, do consider its functionality, keep asking yourself is it relevant to your living lifestyle in the next couple of years.

For today's sharing, you could see how we fulfill our client's need and their main priority towards the space requirement. The more time you spend on the space, the more effort you should consider for the space usage. This same goes to the way we set out the electrical setting point in the wall. Eg: the height, the amount of sockets, switches, the wire looping, the coverage area etc.

This is how we worked! rclxm9.gif rclxm9.gif rclxm9.gif

This post has been edited by My Maison: Oct 17 2021, 03:29 PM
TSMy Maison
post Oct 21 2021, 12:28 AM

Casual
***
Junior Member
319 posts

Joined: Jun 2018
Project: Bennington Residence, Wangsa Maju

Topic: Progress Work of Plaster Ceiling Design

user posted image

user posted image

user posted image

user posted image

user posted image

user posted image

user posted image

user posted image
TSMy Maison
post Oct 21 2021, 12:29 AM

Casual
***
Junior Member
319 posts

Joined: Jun 2018
Project: Bennington Residence, Wangsa Maju

Topic: Consideration Of the Usage of Space

Above are some of the progress work photos on how we actually construct ceiling. As mentioned before, there are a variety patterns of ceiling to choose from, such as recessed ceiling design in which you can play with the shadows and lighting, suspended ceiling such as in public/office area, conventional flat ceiling which are lower in cost and easy to install, etc.

With the presence of plaster ceiling, you can choose a variety of lighting suitable to your house, either strip lighting within the groove line of plaster ceiling to create sense of classy , eyeballs / LED lights flushed to the ceiling, track lighting, pendant lighting, U-box, L-Box and more. With the presence of plaster ceiling, your choice of selections increases as well. Maybe in future, I can share you more about the types of lighting that can be used according to the space requirement for your further information.

However have you ever heard about ceiling pelmet before? For your information, ceiling pelmet is actually a framework used to conceal curtain fixtures. These can be used decoratively to hide the curtain rod which can be very fussy in looking. With ceiling pelmet, it helps to make the entire room more clean and neat as it provides a box-up for the allocation of curtains.

Some of the finishing work on plaster ceiling using joint compound to seal the joints between sheets pf plasterboard as shown in pictures. Layers by layers is brushed to give a smooth, seamless and pleasant surface for the design.

Hope you like our works! Thank you. flex.gif flex.gif

This post has been edited by My Maison: Oct 21 2021, 12:29 AM
tripleA+
post Oct 21 2021, 05:25 PM

On my way
****
Junior Member
523 posts

Joined: Jul 2013
I wish to add basic attic for keeping light stuff like linens beddings/clothing and possibly as an office. Is it good idea for double storey terrace 40ish year old hseWhat's the cost like?
TSMy Maison
post Oct 24 2021, 02:47 PM

Casual
***
Junior Member
319 posts

Joined: Jun 2018
Project: Bennington Residence, Wangsa Maju

Topic: Carpentry Work

user posted image

user posted image

user posted image

user posted image

user posted image

user posted image

user posted image
TSMy Maison
post Oct 24 2021, 02:59 PM

Casual
***
Junior Member
319 posts

Joined: Jun 2018
Project: Bennington Residence, Wangsa Maju

Topic: Carpentry Work

Is it necessary to have a big carpentry work as your tv cabinet? Don't you feel that it gives you sense of pressure and so called "heavy looking in design"? Yes, it used to be very popular in design, however nowadays, we are keen to design something light and luxury, eg: a light luxury hanging wall tv cabinet. It somehow bring your house design into a new level of modernism.

Kitchen cabinet is also important whereby it helps to conceal and box up your range hood from your eyesight, while storing all of your kitchen utensil neatly. Some tips for you while choosing your sink, for me I will definitely go for undermount sink, as it helps you to clean up spillover water easily and prevent dirt from staying in between the grout of your countertop and sink.

There is always a set of rule while designing wardrobe, make sure that it fulfill your requirement and always ergonomic in design. Lastly, the storage locate in your foyer is also something important as it gives you platform to place your keys, masks, sanitizer, umbrella, shoes for sure, hanging mirror as well. So, remember to consider your needs and your lifestyle.
Hope you enjoy our works as we always serve the best design and workmanship to all of you.

yuuko_san
post Oct 27 2021, 01:04 AM

New Member
*
Newbie
6 posts

Joined: Feb 2011
QUOTE(My Maison @ Oct 13 2021, 01:41 AM)
Project: Alam Impian Housing Plaster Ceiling Work

Topic: Proposed Ceiling Design

user posted image

user posted image

user posted image

user posted image

user posted image

user posted image

user posted image

user posted image
*
Hi bos!

I really hate those boxed design for a plaster ceiling. It is cheap to install like this as compared with curvy, criss cross design etc.. ? Or it is trend for this type of design which i think have seen it for almost 10yrs ... ๐Ÿ˜…

TSMy Maison
post Oct 27 2021, 11:35 PM

Casual
***
Junior Member
319 posts

Joined: Jun 2018
Project: EQ Office

Topic: Plasterboard Construction

user posted image

user posted image

user posted image

user posted image

user posted image

user posted image

user posted image
TSMy Maison
post Oct 28 2021, 06:48 AM

Casual
***
Junior Member
319 posts

Joined: Jun 2018
Project: Alam Impian Housing Plaster Ceiling Work

Topic: Proposed Ceiling Design

This is one of the previous project done for the office work. We are also a professional in drywall construction. I believe that by looking at the way we work as shown in the picture, you could clearly imagine how a partition is actually done from A to Z. For your information, a partition wall is a non-load-bearing wall usually found in a large enclosed space. We normally use it for spatial division.

It is very cost efficient and easy to install as firstly you would need to construct the framework as shown. The top and bottom track are normally fixed to the levelled surface and are tied together with steel stud in between. Drywall screws are needed in order to perform fixing works. Easy and simple ways to perform. notworthy.gif notworthy.gif


TSMy Maison
post Oct 28 2021, 07:01 AM

Casual
***
Junior Member
319 posts

Joined: Jun 2018
QUOTE(yuuko_san @ Oct 27 2021, 02:04 AM)
Hi bos!

I really hate those boxed design for a plaster ceiling. It is cheap to install like this as compared with curvy, criss cross design etc.. ? Or it is trend for this type of design which i think have seen it for almost 10yrs ... ๐Ÿ˜…
*
You can always go for any other design of ceiling if those L-box ceiling is not your favourite. Nowadays, there are also people who prefer simple and plain ceiling, and with the combination of concealed strip lighting, they can also achieve the mood they prefer. I would say construction of L-box has its own advantage as most of the time, design should also comes with aesthetic, cost and time efficient.

Yes, curvy ceiling design is definitely requiring higher skill. However, there is no right or wrong. Its just the way you prefer. biggrin.gif biggrin.gif
TSMy Maison
post Oct 30 2021, 10:38 PM

Casual
***
Junior Member
319 posts

Joined: Jun 2018
Project: EQ Office

Topic: Plasterboard Construction


user posted image

user posted image

user posted image

user posted image

user posted image

user posted image

user posted image

user posted image

user posted image


TSMy Maison
post Oct 30 2021, 10:38 PM

Casual
***
Junior Member
319 posts

Joined: Jun 2018
Project: EQ Office

Topic: Plasterboard Construction

Fixing pieces by pieces of plasterboards onto the steel framing required a lot of embedded fasteners. They ensure a very rapid installation work but secure the plasterboard and quality.
However, they have to be covered up to allow perfect, smooth and concealed finishing on the plasterboard.

In market, we use quality plaster compound to skim coating the panel surfaces and concealed the fixing entirely. We fill the joints with blade knife, spread smooth with long and parallel strokes. Apply a few coats and allow to dry. Apply a final coat and if requires, use fine sandpaper for sanding.

Hope you can like our workmanship on plasterboard construction. rclxms.gif rclxms.gif

This post has been edited by My Maison: Oct 30 2021, 10:39 PM
TSMy Maison
post Nov 4 2021, 09:11 AM

Casual
***
Junior Member
319 posts

Joined: Jun 2018
Project: EQ Office

Topic: Plaster Ceiling with Downlight

user posted image

user posted image

user posted image

user posted image

user posted image

user posted image

user posted image

user posted image

This post has been edited by My Maison: Nov 4 2021, 09:12 AM
TSMy Maison
post Nov 4 2021, 09:17 AM

Casual
***
Junior Member
319 posts

Joined: Jun 2018
Project: EQ Office

Topic: Plaster Ceiling with Downlight

Normally in office, we would go for lighting temperature suitable to the atmosphere as it should create an environment with concentration. So, when designing, we always coordinate with clients with the future design layout in the office as this could really fulfill the requirement of the usage. Each of the wiring we do has to be really sufficient not only for lighting, but also the amount of sockets, plugs etc. Thus, do remember that the entire project has to be coordinated together but not in a single way only. This is how it works, and teamwork from each consultants are important to ensure the renovation progress fast and efficient. flex.gif flex.gif flex.gif
dickybird
post Nov 4 2021, 09:12 PM

Look at all my stars!!
*******
Senior Member
2,093 posts

Joined: Apr 2005
parking
Leisman P
post Nov 5 2021, 10:53 PM

New Member
*
Probation
16 posts

Joined: Sep 2021
[quote=My Maison,Oct 24 2021, 02:47 PM]
Project: Bennington Residence, Wangsa Maju

Topic: Carpentry Work

how much are the charges for all these work?
TSMy Maison
post Nov 6 2021, 11:11 PM

Casual
***
Junior Member
319 posts

Joined: Jun 2018
Project: EQ Office

Topic: Carpet Flooring

user posted image

user posted image

user posted image

user posted image

user posted image

user posted image

user posted image

user posted image

user posted image

user posted image


This post has been edited by My Maison: Nov 6 2021, 11:13 PM
TSMy Maison
post Nov 6 2021, 11:34 PM

Casual
***
Junior Member
319 posts

Joined: Jun 2018
Project: EQ Office

Topic: Carpet Flooring

Carpet flooring for office use has always been the most practical flooring choice due to its ability to absorb sound in an open office concept layout. There are few choices for you to choose on such as wall-to-wall carpets or carpet tiles and this depends on your choice of selection. From here, you might need to consider about the difficulties of installation, wastage of carpets, and cost. There are also a lot of office carpet trend and design to be considered. You may consult with your designer/ contractor, taking the carpet samples on-site to allow you to view the carpet under the actual condition, with the presence of lighting.

Different spaces may require different types of carpet as everything we build should consider the cost as well. Office area that has high foot traffic/ high furniture movement should use more resilient types of carpet, and with your selection of cushion backing, it helps to improve comfort and carpet performance, looks nicer and last longer. Hope you understand more about carpet flooring, and loves our work as shown. notworthy.gif notworthy.gif notworthy.gif notworthy.gif notworthy.gif


TSMy Maison
post Nov 7 2021, 10:11 PM

Casual
***
Junior Member
319 posts

Joined: Jun 2018
PROJECT : Green Residence

Topic: Kitchen Work

user posted image

user posted image

user posted image

user posted image

user posted image

user posted image

user posted image

user posted image

user posted image


This post has been edited by My Maison: Nov 7 2021, 10:13 PM
Michaelbyz23
post Nov 7 2021, 10:19 PM

Sarawak Maju Makmur
*******
Senior Member
4,546 posts

Joined: Jun 2009
From: Selangor / Sarawak / New York


Great works and inspiring. Keep your projects photos coming!
Michaelbyz23
post Nov 7 2021, 10:20 PM

Sarawak Maju Makmur
*******
Senior Member
4,546 posts

Joined: Jun 2009
From: Selangor / Sarawak / New York


QUOTE(My Maison @ Nov 6 2021, 11:11 PM)
Project: EQ Office

Topic: Carpet Flooring

user posted image

user posted image

user posted image

user posted image

user posted image

user posted image

user posted image

user posted image

user posted image

user posted image
*
Btw, are you able to install plug points on Gypsum board partition?
TSMy Maison
post Nov 7 2021, 10:32 PM

Casual
***
Junior Member
319 posts

Joined: Jun 2018
Project : Green Residence

Topic: Kitchen Work

This is one of our renovation project in condominium, and as always, we tried to propose design which are practical and reaching the budget parameter. With the simple countertop design, it always start from determining your sink location and route line for your tap. Then, cast your kitchen countertop with all those formwork presence. Let it cast in-situ before complete it with finishing. Yes, there are always a lot of materials for you to choose from. The most expensive one will not always be the most durable one, each of the materials will always have their own pros and cons. Last but not the least, your choices of wall tiling is important as well, and it can vary from sizes. Try to seek for colors and patterns which really suit to your style, as it can really affect the overall looking of your kitchen ! cool2.gif cool2.gif

Hope you really enjoy seeing the way our work!
chiwawa10
post Nov 7 2021, 10:36 PM

Casual
***
Junior Member
393 posts

Joined: Nov 2006
QUOTE(My Maison @ Nov 7 2021, 10:11 PM)
PROJECT : Green Residence

Topic: Kitchen Work

user posted image

user posted image

user posted image

user posted image

user posted image

user posted image

user posted image

user posted image

user posted image
*
Bro, was wondering the kitchen table no need support column? Understand that this design (cement + tiles) is cheaper than marble top. Roughly how much is the price difference compared to using marble top?
TSMy Maison
post Nov 7 2021, 10:37 PM

Casual
***
Junior Member
319 posts

Joined: Jun 2018
[quote=Leisman,Nov 5 2021, 11:53 PM]
[quote=My Maison,Oct 24 2021, 02:47 PM]
Project: Bennington Residence, Wangsa Maju

Topic: Carpentry Work

how much are the charges for all these work?
*

[/quote]


Hi, for this site is total is around RM40K excluded loose furniture , accessories & fitting (electrical & kitchen)

This post has been edited by My Maison: Nov 7 2021, 10:37 PM
TSMy Maison
post Nov 7 2021, 10:43 PM

Casual
***
Junior Member
319 posts

Joined: Jun 2018
QUOTE(Michaelbyz23 @ Nov 7 2021, 11:20 PM)
Btw, are you able to install plug points on Gypsum board partition?
*
Yes, there is no problem on doing so.
TSMy Maison
post Nov 7 2021, 11:15 PM

Casual
***
Junior Member
319 posts

Joined: Jun 2018
QUOTE(chiwawa10 @ Nov 7 2021, 11:36 PM)
Bro, was wondering the kitchen table no need support column? Understand that this design (cement + tiles) is cheaper than marble top. Roughly how much is the price difference compared to using marble top?
*
Actually there are always cheaper/ expensive price tag for each categories, some would say the granite can varies from RM10-RM500 per sqft, depending on the types & colours.
The price range for marble can also varies differently from RM20-RM250 per sqft.
Quartz can go for RM70-RM600 per sqft.
Concrete Finish can go for RM50 per sqft.
And there are alot more of materials as finishing for you to choose from.
However, all of this pricing is just for your references only, I would suggest you to really know more about their properties, your needs, your expected value towards the usage of countertop and making your comparison while choosing for your preferences as the price can be low/high depending on your budget parameters.
noobz4ever
post Nov 7 2021, 11:26 PM

Getting Started
**
Junior Member
290 posts

Joined: Nov 2014


Do you know the cost to install 2 wall glass in bathroom? Around 1 feet to 1.5feet length and 1.8metres height?
TSMy Maison
post Nov 11 2021, 10:41 PM

Casual
***
Junior Member
319 posts

Joined: Jun 2018
Project: Green Residence

Topic: Extension of Yard for Kitchen

user posted image

user posted image

user posted image

user posted image

user posted image

user posted image

user posted image

user posted image

This post has been edited by My Maison: Nov 11 2021, 10:51 PM
TSMy Maison
post Nov 11 2021, 11:08 PM

Casual
***
Junior Member
319 posts

Joined: Jun 2018
Project: Green Residence

Topic: Maximisation of Quality Space

For today's sharing, we would like to talk about one of our great portfolio from previous project in condominium. As usual, we always look for the best and cost effective ways while coming out with proposal. We believe that a good designer and contractor should providing their best consultancy and giving alternative solutions and ideas based on variety client's needs.

For the above project shared, this is to make use of the limited condominium space, converting them into another quality spaces. We had shown u some of the comparison pictures between before and after, and Im sure that every single cent spent is worth.

As usual, after all of the protection work done, yes do consider on your kitchen future layout, and proposal on your services route for water and electrical supply. Next, construct an ergonomic kitchen countertop that fulfill body mechanism such as users' height, lifestyle etc. For example, the height of countertop is around 850mm, near to standard. Dun forget above the selection of sink type, either one big undermount sink or two single sink, as your preferences. Some of the other design considerations including stone to sink distance should be another 500mm minimum......etc .

Do consult your requirement with your designer. As usual, we get ourself ready with formwork as support, let them cast in-situ. Be patient with the process. As you can see from our progress sharing photos, this is how we select suitable sizing, colour and types of wall tiles, sanitary fittings and more. Provide your countertop with great tile finishing which literally make your house kitchen more grand in appearance. Last but not the least, the carpentry work is important as usual as a good workmanship mean alot to the users. It somehow bring your house up to the next level with the combination of lighting.

GRAND, NEAT & Classy!

Hope you enjoy our works. See you in the next episode. thumbup.gif thumbup.gif thumbup.gif thumbup.gif thumbup.gif

TSMy Maison
post Nov 14 2021, 03:39 AM

Casual
***
Junior Member
319 posts

Joined: Jun 2018
QUOTE(noobz4ever @ Nov 8 2021, 12:26 AM)
Do you know the cost to install 2 wall glass in bathroom? Around 1 feet to 1.5feet length and 1.8metres height?
*
If only 2 pieces of glass, the price will be slightly higher, it will be around RM 230 per piece. However if there is more glass works in the project, the price will definitely reduced.

TSMy Maison
post Nov 14 2021, 03:55 AM

Casual
***
Junior Member
319 posts

Joined: Jun 2018
Project: Green Residence

Topic: Installation of Electrical Points

user posted image

user posted image

user posted image

user posted image

user posted image


TSMy Maison
post Nov 14 2021, 03:56 AM

Casual
***
Junior Member
319 posts

Joined: Jun 2018
user posted image

user posted image

user posted image

user posted image

user posted image

user posted image
TSMy Maison
post Nov 14 2021, 03:56 AM

Casual
***
Junior Member
319 posts

Joined: Jun 2018
Project: Green Residence

Topic: Installation of Electrical Points

As usual, before the starting of any hacking works, canvas as protection towards existing cabinet and floor is a must. Following the electrical setting out drawings, we planned and determine the route for wiring, to run through the wall by embedding them inside the PVC pipes. We encourage more point/ possible sockets set at different heights ( Eg. 300mm / 900mm from floor levels) as it would be better to have extra than not sufficient. You might not know what appliances would you buy in future?

After all the installation works, we fill up the voids with cement plaster and white cement. They can be used for fixing small holes, cracks, plastering bot internal and external brick and plaster ceiling surface. It is easy to use by just adding clean water into plaster to form the cement paste. hmm.gif hmm.gif hmm.gif hmm.gif hmm.gif

TSMy Maison
post Nov 16 2021, 11:10 PM

Casual
***
Junior Member
319 posts

Joined: Jun 2018
Project: Green Residence

Topic: Toilet Work

user posted image

user posted image

user posted image

user posted image

user posted image

user posted image

TSMy Maison
post Nov 16 2021, 11:56 PM

Casual
***
Junior Member
319 posts

Joined: Jun 2018
Project: Green Residence

Topic: Toilet Work

As usual, we construct something suited to your lifestyle. From the post above, we did some cabinet work & shower screen installation. There are actually various of treatments we can made towards toilet, depending on what you really prefer for. For example, some would go for cabinets work either on top/ bottom of basin, with the purpose of storage. The dual function of it would be having a mirror in front of cabinet opening. Yes, you are right. However if we look it in another way round, toilet can be designed in many other ways as well.

Have u ever heard about wall niches before? It is a simple and elegant way of treatment in toilet design. It help in creating more space in your bathroom. Normally, it would takes up 15-20 cm of depth to store your bathroom utensil. It is very flexible in terms of design as two sides of the wall ( one side up and another down on each side) can be used to make niches, serving the purpose putting toilet papers, utensil, toiletries, dustbin etc. at both wet and dry areas in the toilet.

No only the choices of using shower screen, sometimes the design can be very flexible with the installation of top rail glass sliding door. It wont take up much space, however it gives more flexibility in moving.

The cabinet can also be used to concealed all the exposed piping from waste, besides storing bottles of cleaning products inside. Try to incorporate the design of having hanging/suspended/wall-mounted cabinet to allow cleaning works below easily performed. Do consider on the types of your basin as well, preferrable undermount types with sufficient width and depth.
TSMy Maison
post Nov 21 2021, 08:45 AM

Casual
***
Junior Member
319 posts

Joined: Jun 2018
Project: Green Residence

Topic: Carpentry Work

user posted image

user posted image

user posted image

user posted image

user posted image

user posted image

user posted image

user posted image

user posted image

user posted image
TSMy Maison
post Nov 21 2021, 09:02 AM

Casual
***
Junior Member
319 posts

Joined: Jun 2018
Project: Green Residence

Topic: Carpentry Work

AS pictures shown, some of the carpentry works are needed in the entire unit. They help you to store your stuff in a manners way. However, each of the cabinetry we make has to ensure its functionality, ergonomics, possibility of usage, etc.

Some of the key points that would like to mentioned here:
1. Ergonomics : Each of the compartments designed for the cabinet has to fit to its specific function. Thus, the sizing of itself, the depth it requires, the amount of split levels, the maximum height it can be ....... have to be considered.
For example: When designing cabinet for cloth hanging, it must not exceed 2.1m as human couldn't reach the level higher easily.

2. Example of designing foyer cabinetry for shoes placement. Some might not require large place for shoes. Some of the other compartment you could include together include place for umbrella, compartment for placing your keys, your masks, mirror design etc.

3. Depending on the area you choose, different materials can be used for the cabinetry work. For example: melamine/ chipboard which are cheaper and has more colour variety, however has its own disadvantages such as not water resistant and the gripping force for additional nailing is weaker.
Plywood/ laminate board are synthetic product that imitate the wood appearance. Good strength, lighter, durable and suited in wet kitchen. Depending on your budgets and site suitability, everything is possible.

Hope you enjoy! rclxm9.gif


TSMy Maison
post Nov 24 2021, 06:00 AM

Casual
***
Junior Member
319 posts

Joined: Jun 2018
Project : Green Residence

Topic: Painting as Finishing

user posted image

user posted image

user posted image

user posted image

user posted image

user posted image


TSMy Maison
post Nov 24 2021, 06:00 AM

Casual
***
Junior Member
319 posts

Joined: Jun 2018
user posted image

user posted image

user posted image

user posted image

user posted image
TSMy Maison
post Nov 24 2021, 06:10 AM

Casual
***
Junior Member
319 posts

Joined: Jun 2018
Project : Green Residence

Topic: Painting as Finishing

One of our previous condominium project, using simple colour to define the space. Different colours will have different impacts in the house, and it somehow affect your mood. Some might think that plain wall is too simple and looks unattractive, however painting is somehow flexible and long lasting in terms of trend in design. It gives you more possibility to make changes in your future changes of mood more easily.

Depending on your needs and design style, the colour choice is very important as it is potential in defining a space. For example, Japanese style are likely more peace and simple in decoration. Thus, we would more prefer to have combination of white/ beige as base. One of the trick when painting is using the masking tape. It is cheap but precise. It somehow helps alot when painting one surface without getting paint on an adjacent surface. It helps to protect surfaces and ensure sharp lines and straight edges.

Do you know that interior paint should always contain low or zero VOC. It is essential in maintaining the air quality in your home.

Hope you like our works!.
rclxm9.gif rclxm9.gif
chriskk
post Nov 24 2021, 02:43 PM

New Member
*
Junior Member
21 posts

Joined: May 2007
Hello Sifu, Referring to your post above on painting, may I ask what is the standard practice for primer usage and also number of coatings? Is this something that I should discuss with the contractor prior to start renovation?

I also have a second question regarding ceiling - I know plaster ceiling is very popular in Malaysia, but I personally prefer ceiling that are as high as possible to increase air circulation and reduce indoor temperature. Are there any good options for this (e.g. vaulted ceiling; exposed beams) in a 1-storey terrace house?
FeelSoGood P
post Nov 24 2021, 04:22 PM

New Member
*
Probation
16 posts

Joined: Sep 2021
Hello Sifu, may advise estimate cost to
(1)hack and demolition 2 corners wall ( one from ground floor and one from 1st floor) at the same place and
(2) to build with corner's windows.

Thank you in advance for your advise and comment.
TSMy Maison
post Nov 27 2021, 11:38 PM

Casual
***
Junior Member
319 posts

Joined: Jun 2018
Project: Green Residence

Topic : Protection, Hacking & Formwork

user posted image

user posted image

user posted image

user posted image

user posted image

user posted image

user posted image

user posted image
TSMy Maison
post Nov 27 2021, 11:50 PM

Casual
***
Junior Member
319 posts

Joined: Jun 2018
Project: Green Residence

Topic : Protection, Hacking & Formwork

As usual, we start off every new project with proper protection work before any demolition works start. For this project, the owner requested to remove the wall that eventually split the original layout into two, splitting the kitchen with the yard. The intention to maximise the unit has been translated by relocating the kitchen countertop in new position, with large sink at the side.

Starting off by laying bricks as supporting elements, and start off the formwork construction to get into the shape making. Don't forget to leave the voids for the placement of your sink design. Last but not the least, cast the concrete before any finishing material applied on countertop. Countertops made of concrete really have no limitations in size, depending on the materials and casting techniques used. There are ways to minimize the weight, adding the thickness without increasing the mass it carried.

rclxm9.gif rclxm9.gif rclxm9.gif
TSMy Maison
post Nov 28 2021, 12:20 AM

Casual
***
Junior Member
319 posts

Joined: Jun 2018
QUOTE(chriskk @ Nov 24 2021, 03:43 PM)
Hello Sifu, Referring to your post above on painting, may I ask what is the standard practice for primer usage and also number of coatings? Is this something that I should discuss with the contractor prior to start renovation?

I also have a second question regarding ceiling - I know plaster ceiling is very popular in Malaysia, but I personally prefer ceiling that are as high as possible to increase air circulation and reduce indoor temperature. Are there any good options for this (e.g. vaulted ceiling; exposed beams) in a 1-storey terrace house?
*
Hi, normally 1 layer of primer+ 3 coats of emulsion paint. And for the ceiling, at least we need to drop for 4 inches. however, if you dont prefer ceiling, your wiring route can be embedded in pvc pipe / hacking parts of soffit / slab
TSMy Maison
post Nov 30 2021, 11:54 PM

Casual
***
Junior Member
319 posts

Joined: Jun 2018
Project: Green Residence

Topic : Casting & Tiling

user posted image

user posted image

user posted image

user posted image

user posted image

user posted image

user posted image
TSMy Maison
post Dec 1 2021, 12:06 AM

Casual
***
Junior Member
319 posts

Joined: Jun 2018
Project: Green Residence

Topic : Casting & Tiling

Some of the simple example of the work over the wet kitchen countertop. For today's let talk about the material consideration and sharing about the properties of stone-type material.
As usual, there is always natural & man-made stone. Some example of natural stone would be granite & marble while man-made stone would be solid surface and quartz type.

For your information, both marble and granite are heat and scratch resistant. They have natural surfaces which can never be replaced. However, marble could be more easily stained as compared to granite. On the other hand, granite colour choice of selection would be lesser.

In terms of man-made stone, solid surface stone has higher flexibility as compared to quartz. It can be formed into curved/flat surface. There is also no gaps for solid surface man-made stone, which eventually brings out its advantages in wet kitchen. However, it is not so resistant to stain, cut, heat as compared to quartz which is vice versa. Normally, people will go for quartz for wet kitchen while solid surface is normally suit to dry kitchen.

Hope u guys can get some idea on the selection of material while doing for your own house. !! rclxm9.gif flex.gif
jex-koi
post Dec 1 2021, 09:17 PM

Getting Started
**
Junior Member
273 posts

Joined: Feb 2007
what's the tile-size of the table-top ?
TSMy Maison
post Dec 4 2021, 12:28 AM

Casual
***
Junior Member
319 posts

Joined: Jun 2018
Project: Green Residence

Topic : Ceiling Installation

user posted image

user posted image

user posted image

user posted image

user posted image

user posted image

user posted image
TSMy Maison
post Dec 4 2021, 12:39 AM

Casual
***
Junior Member
319 posts

Joined: Jun 2018
Project: Green Residence

Topic : Ceiling Installation

Typical height in a unit is 3m, and some units come without plaster ceiling on the selling. So, for those who are intended to install your own ceiling, you could definitely do this as long as the head room space is sufficient for you. Lower down the height in the area could make changes to your room.

Plaster ceiling requires minimum spacing of 1200mm in order to store those looping of lighting ,etc. Some dislike the appearance of beams would prefer installation of ceiling in order to treat the view better. When there is air-cond, yes you may need to consider about the ducting as well, and it definitely affecting your ceiling height.

Above are some of our previous works, from structures to finishing, hope it gives you some ideas and imagination on how it may looks like in your own units!!!! rclxms.gif rclxms.gif
TSMy Maison
post Dec 5 2021, 09:53 PM

Casual
***
Junior Member
319 posts

Joined: Jun 2018
Project: Green Residence

Topic : Painting & Final Works

user posted image

user posted image

user posted image

user posted image

user posted image

user posted image


TSMy Maison
post Dec 5 2021, 09:54 PM

Casual
***
Junior Member
319 posts

Joined: Jun 2018
Project: Green Residence

Topic : Painting & Final Works

user posted image

user posted image

user posted image

user posted image

user posted image

user posted image
TSMy Maison
post Dec 5 2021, 10:17 PM

Casual
***
Junior Member
319 posts

Joined: Jun 2018
Project: Green Residence

Topic : Painting & Final Works

Let's talk about some concept & design while selecting colour / paint for your room area. Below are just some scheme of colours for references. However, they are always subjected to change according to the entire mood.

First of all, we should always go for lower saturation colours (10% to 60%). Fully saturated colour will be too over and pure. Higher temperature (warmer) colour will somehow make the entire space looks smaller while lower temperature colours (cooler) work in another way round, not overpowering and recede in space.

When your room area is smaller, we tend to use brighter colour as darker scheme somehow pressurize the entire area, making the space look smaller. Actually, different colours actually have their own function while being applied in the area, for example : purple red in this scenario tend to make the space more vivid, picturesque with slightly striking colours in between as embellishment. We might share the other colours scheme in future. Stay tuned. icon_idea.gif icon_idea.gif
daniel2006
post Dec 7 2021, 11:41 PM

Getting Started
**
Junior Member
173 posts

Joined: Feb 2013
» Click to show Spoiler - click again to hide... «


may i know price for the mirror
TSMy Maison
post Dec 7 2021, 11:49 PM

Casual
***
Junior Member
319 posts

Joined: Jun 2018
QUOTE(daniel2006 @ Dec 8 2021, 12:41 AM)
» Click to show Spoiler - click again to hide... «


may i know price for the mirror
*
Hi, Im sorry but I couldn't give u an exact number due to the project was quite long ago. However, I guess the pricing for pieces of mirror is about the same, depending on the supplier. Hope you understand. notworthy.gif
TSMy Maison
post Dec 8 2021, 12:10 AM

Casual
***
Junior Member
319 posts

Joined: Jun 2018
Project: Puncak Alam Housing Project

Topic : Works Sharing & Hot Tips

user posted image

user posted image

user posted image

user posted image

user posted image

user posted image

user posted image

user posted image

user posted image
TSMy Maison
post Dec 8 2021, 12:38 AM

Casual
***
Junior Member
319 posts

Joined: Jun 2018
Project: Puncak Alam Housing Project

Topic : Works Sharing & Hot Tips

Hello everyone, we would like to share with you some hot tips based on our previous experience, giving you more options to consider, comparing the pros and cons, while allowing you to cinterprete your own thoughts while making decision.

As we always mentioned before, you can do in whatever way as long as it really satisfy your needs. However, what if sometimes things doesn't go as planned, and you had spent alot of money in doing this, what should you do? This is why we are here to share the tips with you.

1. Is L-box ceiling design really good? Yes, it looks classy, the installation work is not difficult. It creates more options in displaying lights, breaking the conventional way of only using LED downlight. However, there will be more dust taking place in that area, making housekeeping work has to be done more frequently. Why not just doing a simple flat plaster ceiling with pelmet ceiling at side, concealing the curtain track.

2. Not sticker wallpaper but apply simple emulsion paint ( playing with tones of colour) - Cheaper, modern, different moods available, easy transformation in future.

3. Not using heavy bedhead set - Heavy, Takes up alot of space, expensive. Replacing it with simple wood veneer design.

4. Sliding door cabinet can be good or vice versa depending on your needs. We thought that it can somehow save space as it only moves left/ right, however, the track can actually takes up almost 100mm which bigly reduce your storage. Sometimes, the door might not closed up completely due to the track. Using side-hung door can be sometimes much better, however, all of this subjective to person.

5. Not doing too much of split level in your cabinet, try to customised more spaces for hanging clothes, looks more neat. Instead of doing split level, making the operable big drawer to store your clothes can be so much neater as it wont make your whole cabinets clumsy.

6. LED strip lighting can somehow bring your kitchen area to a higher level, giving more ambient feel.


TSMy Maison
post Dec 12 2021, 01:52 PM

Casual
***
Junior Member
319 posts

Joined: Jun 2018
Project: Puncak Alam Housing Project

Topic : Hot Tips on How You Should Design Your Kitchen Cabinet

user posted image

user posted image

user posted image

user posted image

user posted image

user posted image

user posted image

user posted image

user posted image
TSMy Maison
post Dec 12 2021, 01:52 PM

Casual
***
Junior Member
319 posts

Joined: Jun 2018
Project: Puncak Alam Housing Project

Topic : Hot Tips on How You Should Design Your Kitchen Cabinet

Before moving into today's sharing, lets talk about what is Ergonomics Design. An ergonomic design is specially designed to the user's needs, and it helps to achieve comfort and increase usage efficiency. After discussing with your designer on what types / quantities of storage you need in your kitchen, lets start designing your own customized cabinets.

Firstly, there is always a standard formula to go with, in order to achieve ergonomics.
1. The bottom cabinet would normally go around 800mm height. The height of washing basin/tray, and the countertop always suit to the height of users ( Taking height of users divide by 2 with extra 5 to 10 cm added)
2. For the top hung cabinet, the depth would go around 350 to 400mm. This is the suitable size to place all your stuff, and at the same time prevent your head from knocking to it.
3. For the bottom cabinet, we would go around 550mm while the countertop is slightly larger than the cabinet (600mm) in order to cover the whole area. At the same time 600mm is the standard measurement as if you apply tiling on top, there is no wastage of it as standard tiling size is either 1 by 2 or 2 by 2.
4. The overall height of the top hung cabinet is around 700 to 800mm , and is set around 650 to 700mm above the countertop. However, we would normally make box-up all the way up to the ceiling, looks more neat and reduce dust accumulation.
5. For the washing tray, if your countertop is large enough (more than 4m), can choose one big single tray / double tray. If small, just go for one big single tray is more than enough as long as it can fit the big wok and other kitchen appliances.

ahchun
post Dec 12 2021, 02:13 PM

MiddleAge
******
Senior Member
1,146 posts

Joined: Jan 2003
From: HeRe
hi
if new house want to add on alot of electrical power point and light point.
is it possible without plaster ceiling ?

or must have plaster celling to hide all the wires?
IshyKaur P
post Dec 14 2021, 02:53 PM

New Member
*
Probation
30 posts

Joined: Oct 2021
hi Sifu!

can you share about marble flooring installation?
Roughly how much per square foot?

also, have you heard of marble from gua Musang, Kelantan? I think it's called pallandro grey.

It's a lot cheaper than imported marble but im not sure of the quality.

TIA.
vicky.max
post Dec 15 2021, 10:37 PM

Getting Started
**
Junior Member
167 posts

Joined: Aug 2021


Hi,

This is my undercon house that I've just bought (corner cluster semi-d). My idea is as following:

RED = plan to extend the dining area about 9 feet towards the land and surround it with glass / windows / sliding door. At the top, plan to do a balcony (entry from family hall)
BLUE = plan to extend the wet kitchen area but as you can see, I left some gap at the bathroom window in order not to disturb the ventilation of the toilet

Do you think such idea is feasible?
vicky.max
post Dec 15 2021, 10:38 PM

Getting Started
**
Junior Member
167 posts

Joined: Aug 2021


QUOTE(vicky.max @ Dec 15 2021, 10:37 PM)
Hi,

This is my undercon house that I've just bought (corner cluster semi-d). My idea is as following:

RED = plan to extend the dining area about 9 feet towards the land and surround it with glass / windows / sliding door. At the top, plan to do a balcony (entry from family hall)
BLUE = plan to extend the wet kitchen area but as you can see, I left some gap at the bathroom window in order not to disturb the ventilation of the toilet

Do you think such idea is feasible?
*
Sorry, I can't attach or link any images in my post. Here's the floor plan:

hxxps://pictr.com/images/2021/12/15/BYrZvO.jpg (Replace xx with tt)
TSMy Maison
post Dec 18 2021, 12:41 PM

Casual
***
Junior Member
319 posts

Joined: Jun 2018
QUOTE(ahchun @ Dec 12 2021, 03:13 PM)
hi
if new house want to add on alot of electrical power point and light point.
is it possible without plaster ceiling ?

or must have plaster celling to hide all the wires?
*
Hi, for your information, with or without plaster ceiling design is depending on your own selection. If there is no plaster ceiling, your lighting conduits will be exposing, and it will more to industrial feel like what you see in cafe, for example. ( If this is your intention). However, it is not recommended if you are looking for a clean and sleek design in home (typical design), and with plaster ceiling, it minimizes alot of work. However, if you go for industrial mood, yes it is definitely possible

This post has been edited by My Maison: Dec 19 2021, 08:59 PM
TSMy Maison
post Dec 18 2021, 12:48 PM

Casual
***
Junior Member
319 posts

Joined: Jun 2018
QUOTE(vicky.max @ Dec 15 2021, 11:38 PM)
Sorry, I can't attach or link any images in my post. Here's the floor plan:

hxxps://pictr.com/images/2021/12/15/BYrZvO.jpg (Replace xx with tt)
*
Yes. Definitely possible, and with further developed on space integration, things work better. flex.gif
TSMy Maison
post Dec 18 2021, 01:18 PM

Casual
***
Junior Member
319 posts

Joined: Jun 2018
Project: Midfield Condominum

Topic :Preparation Work + Lighting Installation

user posted image

user posted image

user posted image

user posted image

user posted image

user posted image

user posted image

user posted image

user posted image

user posted image

TSMy Maison
post Dec 18 2021, 01:47 PM

Casual
***
Junior Member
319 posts

Joined: Jun 2018
Project: Midfield Condominum

Topic :Preparation Work + Lighting Installation

As usual, when starting off with any project, ensure a clean and neat working place, to protect the property as well as for ease while working, reduce risk of accident!! notworthy.gif

Yeap. For this project, we start off with installing lighting conduits below soffit, with designed/required amount of points after discussion with designer/ lighting specialist. In this scenario, we are going to install plaster ceiling in future, to hide all the conduits. Yes, some of your might curious, is it a must to do plaster ceiling, will it cost me alot? Actually it all depends on you, if you dont prefer ceiling as you wanna a higher floor to ceiling height, more sense of space, yes, you may hack slightly a little on your slab, place the electrical wirings inside the gap and plaster it back. It would not spoilt your building structure. However, there will be more works for your worker for sure. And Skills is important!!!!!

Maybe in future, we can talk about how the types of lighting can performed in your house!! Stay tuned.


TSMy Maison
post Dec 19 2021, 08:40 PM

Casual
***
Junior Member
319 posts

Joined: Jun 2018
QUOTE(IshyKaur @ Dec 14 2021, 03:53 PM)
hi Sifu!

can you share about marble flooring installation?
Roughly how much per square foot?

also, have you heard of marble from gua Musang, Kelantan? I think it's called pallandro grey.

It's a lot cheaper than imported marble but im not sure of the quality.

TIA.
*
Hi, for marble, it is estimated around around RM100-130 per sqft for supply and installation work
TSMy Maison
post Dec 19 2021, 09:36 PM

Casual
***
Junior Member
319 posts

Joined: Jun 2018
Project: Midfield Condominum

Topic : Ceiling Installation & Design Possibilities

user posted image

user posted image

user posted image

user posted image

user posted image

user posted image

user posted image
TSMy Maison
post Dec 19 2021, 09:38 PM

Casual
***
Junior Member
319 posts

Joined: Jun 2018
Project: Midfield Condominum

Topic : Ceiling Installation & Design Possibilities

a. user posted image

b. user posted image

c. user posted image

d. user posted image

Disclaimer: Photos Source is taken online for learning purpose
TSMy Maison
post Dec 19 2021, 09:57 PM

Casual
***
Junior Member
319 posts

Joined: Jun 2018
Project: Midfield Condominum

Topic : Ceiling Installation & Design Possibilities

Hi, i believe that from the photos above, you guys would have better understanding on how we actually ceiling for you. Beside from the flat ceiling which is quite common used and highly accepted by most users, there are actually a few design possibilities that can bring your house to another levels or mood.
As usual, we install the metal studs as our framework, with proper spanning and depth as required to secure the plasterboard later. Screw the plasterboard below it and give it a smooth covering to seal up the gaps in between.

Remember that we do need to cut off some locations for the purpose of lighting fixture installation, either downlight/eyeballs selection. In this scenario, we provide circular shape downlight. Hope you enjoy our work on the construction of flat ceiling in this scenario. However, there are actually alot more possibilities that can be explored, please look at the photos i shared above ( Photos credited to online source)

Yes, beside from flat ceiling, there are options such as
(a) Partially constructed plaster ceiling (ๅฑ€้ƒจๅŠ้กถ๏ผ‰ Option 1 - (ๆญฃ้ข็ฏๅธฆๆ•ˆๆžœ๏ผ‰- constructed directly next to both sides of the wall, and allow the L-shape pattern as finishing. The lights can be placed on that location, creating lighting effect

(b) Partially constructed plaster ceiling (ๅฑ€้ƒจๅŠ้กถ) Option 2 - (ๅ้ข็ฏๅธฆๆ•ˆๆžœ๏ผ‰- Around the same as flat ceiling, but we leave the L-shape finishing pattern next to the walls. The lights are reflected to the wall, passive lighting

© Partially constructed plaster ceiling (ๅฑ€้ƒจๅŠ้กถ๏ผ‰Option 3 - (ๅˆ†ๅฑ‚) - Emphasize box-up ceiling on four corners of the wall, creating layers of ceiling. You may consider to locate your lights to emphasize the are as well.

(d) Flat ceiling with gaps (้˜ด้š็ผ๏ผ‰- Basically leaving a 20mm gap on the finishing edges between ceiling and the wall, creating more effects with lowest cost. In advance, if there is a big beam protruding, this is a good way to blend the design with big beam.

ahchun
post Dec 20 2021, 08:24 AM

MiddleAge
******
Senior Member
1,146 posts

Joined: Jan 2003
From: HeRe
QUOTE(My Maison @ Dec 18 2021, 12:41 PM)
Hi, for your information, with or without plaster ceiling design is depending on your own selection. If there is no plaster ceiling, your lighting conduits will be exposing, and it will more to industrial feel like what you see in cafe, for example. ( If this is your intention).  However, it is not recommended if you are looking for a clean and sleek design in home (typical design), and with plaster ceiling, it minimizes alot of work. However, if you go for industrial mood, yes it is definitely possible
*
Thanks for reply. Appreciate it
TSMy Maison
post Dec 21 2021, 10:53 PM

Casual
***
Junior Member
319 posts

Joined: Jun 2018
Project: Midfield Condominum

Topic : Light Types & Possibilities

user posted image

user posted image

user posted image

user posted image

user posted image

user posted image

user posted image
TSMy Maison
post Dec 21 2021, 11:07 PM

Casual
***
Junior Member
319 posts

Joined: Jun 2018
Project: Midfield Condominium

Topic : Light Types & Possibilities

With all of the plaster ceiling getting ready, its time to cut out the holes for your placement of lighting. SO, some of you might curious about the amount of lighting we should be putting in each area. Dont worry, actually you may consult your designer or even the lighting shop owner. They are experienced in this and with only plans provided, they can actually calculate for you.

In this scenario, i would roughly share with you the typical downlight features. It is very durable, easy to install, cheaper compared to eyeball, bright and clear. However, it can only penetrate in one direction, which is downward. Types of installation includes recessed type- using compression clips/ spring clips to hold the lights in the ceiling hole by pushing the springs vertically. For the surface mounted one, it is specially for concrete ceiling, and it can only fixed by supplied bracket. The third types of downlight is called suspended downlight, also specially designed for concrete ceiling, providing a soft, non glaring yet classy lighting.

As a comparison between typical downlight and eyeball, i would say downlight can penetrate up to 4.5 till 5 feet, while eyeball can go up to 3.5 to 4 feet. However, Eyeball is smaller in size, and it can be installed in larger quantity as it looks tiny and not as obvious as compared to downlight. One typical downlight is around RM 17++ while eyeball can go up to RM 25++. However, please refer to your seller, and ID to receive the latest pricing information. Both of them have their own good / bad. And all of this is depending on you. Hope you enjoy our works today. We will share more in future.!!
rclxms.gif rclxms.gif
iamsobloodysick
post Dec 22 2021, 09:44 PM

Look at all my stars!!
*******
Senior Member
2,006 posts

Joined: Mar 2005
From: Truly Malaise
Hi Maison, will a 3-strip timber flooring look better for a small house?
TSMy Maison
post Dec 24 2021, 12:00 AM

Casual
***
Junior Member
319 posts

Joined: Jun 2018
QUOTE(iamsobloodysick @ Dec 22 2021, 10:44 PM)
Hi Maison, will a 3-strip timber flooring look better for a small house?
*
Hi, it depends. You may need to consider its advantage and disadvantage. What kind of mood you would like to create in your house, While you know what you intent to create, there comes the time you choose your material.
TSMy Maison
post Dec 26 2021, 01:12 AM

Casual
***
Junior Member
319 posts

Joined: Jun 2018

Project: Midfield Condominium

Topic : Wall Finish

user posted image

user posted image

user posted image

user posted image

user posted image

user posted image
TSMy Maison
post Dec 26 2021, 01:13 AM

Casual
***
Junior Member
319 posts

Joined: Jun 2018
Project: Midfield Condominium

Topic : Wall Finish

There are various of wall finish for you to choose from, from various of paints effect to the usage of wallpaper. I will share with you some of the example, so that you can have better idea when you decide to renovate your home.

When you first received your key from developer, the house will mainly used water-based paint, so called latex paint as the wall finish. This kind of paint will be more easily to peeled off as compared to oil-based paint. No right or wrong, you have to consider which types of paint to use for your home, both has their own advantages. Normally, we will go for easy wash paint which has no added lead and mercury, as they release less VOC in your house.

Talking about types of paint, firstly, you can go for texture paint as shown in our example, and for sure, there will be more pattern and color for you to choose from. Usage of wainscoting is also one of the wall finish that make your wall more textured. Besides, you may also go for simple plain colour emulsion paint, which is simple and clean. Sometimes, simple design can be very popular with just the representation of colour to pop out the mood. There is also paint known as Magnet Paint. This paint is added with tiny particle of iron dust, and it allows your wall to be magnetic.

Besides from the paint, you may also consider wallpaper as your wall finishing, There are various of wallpaper types, from paper base, pvc base to the foam based. Some of them can be glued, some are self adhesive sticker. Easy to applied, and can be even self DIY by you. Hope you enjoy our sharing today, and thanks for your views towards our works and post. Hope we answer your question.

TSMy Maison
post Dec 28 2021, 11:55 PM

Casual
***
Junior Member
319 posts

Joined: Jun 2018
Project: Midfield Condominium

Topic : Material Selection for Carpentry

user posted image

user posted image

user posted image

user posted image

user posted image

user posted image

user posted image

user posted image

TSMy Maison
post Dec 28 2021, 11:55 PM

Casual
***
Junior Member
319 posts

Joined: Jun 2018
Project: Midfield Condominium

Topic : Material Selection for Carpentry

Carpentry is something very important while designing your home, as a good carpentry work determine the overall sense, looking of your house, and it really takes up a big part of your house. Not only in design, in terms of functionality, we as a users are looking for quality, long lasting material while at the same time, using the lowest budget searching for the best among the best material. Today, Im going to make comparison between two kinds of material that is very common in terms of materials, which is wood & aluminium.

For the wood type kitchen cabinet, it has more colours, patterns and design. At the same time, it costs lesser. The disadvantages would be not resistant to water, thermites and insects, thus if your house area would flood easily, this might be an issue you need to consider with. In terms of aluminium cabinet, it would go in another way round. Aluminium material can withstand with water, dampness. It is also not affected by insects or even thermite, durable and not easily warped. As compared to wood, aluminium will be more expensive, more heavy and might create a little noise.

Some of the aluminium can have imitate wood grain on its surface. However, some supplier doesn't have, which make the choices of selection lesser as compared to wood kitchen cabinet. For designer, with wood texture, they would be more easily to create design for your house.

In details, there are still two kinds of wood for your selection, which is melamine and plywood. We might share more about this in future. Stay tuned.
console.gif console.gif
TSMy Maison
post Jan 1 2022, 10:42 PM

Casual
***
Junior Member
319 posts

Joined: Jun 2018
Project : Riverville Residence

Topic: 10 Major Steps on Renovation Work (Part 1)

user posted image

user posted image

user posted image

user posted image

user posted image

user posted image

user posted image

user posted image

user posted image

user posted image
TSMy Maison
post Jan 1 2022, 10:42 PM

Casual
***
Junior Member
319 posts

Joined: Jun 2018
Project : Riverville Residence

Topic: 10 Major Steps on Renovation Work (Part 1)

Hi, Happy New Year everyone! Hope that all of you are fine.
Let's keep on learning and continue equip yourself with some ideas on how to renovate your house. Today, I will be sharing some of the major steps ,which should be started first and followed by which steps next. Begin the process with Part 1: Wetwork, wiring & piping work.

Wetwork is all about the structure work, like extension, brickworks, destruction of old walls etc. This is the primary step among the entire process, and the work includes some piping work in between, to conceal from eyesight. This is also due to when you destruct your old walls, you might need to design your piping route again, to suit your new house layout and kitchen sink.

Next, after all the layout done, we move on to the wiring work. This include all of the lighting point, power point and air cond point installation. Before all of this work, we must confirm all of the points location, how many units, what is their height, what is the purpose, so that no mistake happen, and also easier for wireman to work on this. We should also confirm with the designer about the number of lights we proposed, so that the wire circuit can be pulled more accurately.

Above are the two steps all the entire work. We will move to ceiling work etc....... in next sharing. Thanks for your time and enjoy our great works ya!

Michaelbyz23
post Jan 1 2022, 11:19 PM

Sarawak Maju Makmur
*******
Senior Member
4,546 posts

Joined: Jun 2009
From: Selangor / Sarawak / New York


Very nice works!!
TSMy Maison
post Jan 3 2022, 12:12 AM

Casual
***
Junior Member
319 posts

Joined: Jun 2018
Project : Riverville Residence

Topic: 10 Major Steps on Renovation Work (Part 2)

user posted image

user posted image

user posted image

user posted image

user posted image

user posted image

user posted image

This post has been edited by My Maison: Jan 3 2022, 12:14 AM
TSMy Maison
post Jan 3 2022, 12:14 AM

Casual
***
Junior Member
319 posts

Joined: Jun 2018
Project : Riverville Residence

Topic: 10 Major Steps on Renovation Work (Part 2)

After all of this wiring and points done, its time for us to construct the ceiling in order to hide all of the wiring from exposing. But before this, we have to know what is our ceiling design, whether we need to includes light trough inside, L-box, curtain pelmet etc. or not. These are the things we need to consider with, and of course, we need to know how height our ceiling should be, whether it is comfortable to be designed in this way. You may decide yourself or discuss with your designer and your contractor.

With all of the consideration made, the ceiling works can now proceed.
Please enjoy our works in progress. Hope you learn something here. flex.gif

In coming post, we will be talking about how plasterboard can be used furthermore other from ceiling, and what should you do next thumbup.gif
TSMy Maison
post Jan 3 2022, 11:50 PM

Casual
***
Junior Member
319 posts

Joined: Jun 2018
Project : Riverville Residence

Topic: 10 Major Steps on Renovation Work (Part 3)

user posted image

user posted image

user posted image

user posted image

user posted image

user posted image

user posted image

user posted image

user posted image

user posted image
TSMy Maison
post Jan 3 2022, 11:52 PM

Casual
***
Junior Member
319 posts

Joined: Jun 2018
Project : Riverville Residence

Topic: 10 Major Steps on Renovation Work (Part 3)

Getting done with all of the ceiling work & wiring, we move on to the finishing work of the ceiling to give a smooth, neat and pleasant surface. By using suitable grade joint compound and mixed with water, we applied layers and layers of joint compound with paper or fiber joint tape to seal joints between sheets of plasterboard to create a seamless base for paint. Remember to let the compound to dry completely before applying the second coat on it. Some of the joint compound can dry very quickly, and you have to ensure that this kind of dry joint compound (leftover) should be "cleaned" immediately before dried out in the container, as it may forms lot of small hardened particles when being used again.

Do remember that some of the joint compound are sandable while some are not. We prefer sandable joint compound as non-sandable joint compound cannot be smoothen easily later by sander machine if the workmanship is poor. Apply your second coat of finishing coat after all works are done. You may also consider to construct partition wall if your intention is to split up the area into more spaces. The concept of construction remain the same as ceiling.

In today's part 3, we focus on repairing the holes, gaps to give a better finishing looks before any installation of lighting/ furniture start.

Hope you enjoy our works. Thanks.


TSMy Maison
post Jan 7 2022, 01:42 AM

Casual
***
Junior Member
319 posts

Joined: Jun 2018
Project : Riverville Residence

Topic: 10 Major Steps on Renovation Work (Part 4)

user posted image

user posted image

user posted image

user posted image

user posted image

user posted image

user posted image

user posted image

This post has been edited by My Maison: Jan 7 2022, 01:43 AM
TSMy Maison
post Jan 7 2022, 01:45 AM

Casual
***
Junior Member
319 posts

Joined: Jun 2018
Project : Riverville Residence

Topic: 10 Major Steps on Renovation Work (Part 4)

With all of the primary items done as mentioned before, we can now install our lights, fans, aircond in site. You might be curious how about the flooring?
Yes don't worry, the next step is dealing with flooring. The trend are getting used with flooring materials such as vinyl, laminate and spc flooring. Each of them has their own goods and bads, and some of them are glued on floor, which is quite irreversible while some are fixed by interlocking method. Normally for this kind of flooring, we would recommend you to proceed with this steps after all of the wetwork and installation of light etc. were completely done. This is because it reduces the risk of damage from happening, more tidy and more clean. However, if you choose to have floor tiles at your floor finishes, yes you may do it at the beginning of the entire process, which is during the wetwork, as it is not easily damaged and dirtied.

In the next sharing, we will then move on to the carpentry work, and I will share about some of our great works for your reference. Stay tuned.

sleyer
post Jan 7 2022, 09:52 PM

Enthusiast
*****
Senior Member
829 posts

Joined: Apr 2007
Hai ts. For terres house for network point how much u caj per point? If cable owner provide
iamsobloodysick
post Jan 7 2022, 10:49 PM

Look at all my stars!!
*******
Senior Member
2,006 posts

Joined: Mar 2005
From: Truly Malaise
Maison, have you heard of this practice where the gaps of the service hole in plaster ceiling is fully sealed up for better aesthetic and only cut away and resealed again after use. The guy I talked to is from China and he said thereโ€™s a plaster cream or something to seal up the gaps.

This post has been edited by iamsobloodysick: Jan 7 2022, 10:52 PM
TSMy Maison
post Jan 10 2022, 10:58 PM

Casual
***
Junior Member
319 posts

Joined: Jun 2018
QUOTE(sleyer @ Jan 7 2022, 10:52 PM)
Hai ts. For terres house for network point how much u caj per point? If cable owner provide
*
Hi, normally we cost around RM 300 per point, but if only labour hack and lay, its RM 180 per point

TSMy Maison
post Jan 10 2022, 10:59 PM

Casual
***
Junior Member
319 posts

Joined: Jun 2018
QUOTE(iamsobloodysick @ Jan 7 2022, 11:49 PM)
Maison, have you heard of this practice where the gaps of the service hole in plaster ceiling is fully sealed up for better aesthetic and only cut away and resealed again after use. The guy I talked to is from China and he said thereโ€™s a plaster cream or something to seal up the gaps.
*
This might be quite new for us as we didnt use this for our practise recently. Sorry about that.
TSMy Maison
post Jan 10 2022, 11:05 PM

Casual
***
Junior Member
319 posts

Joined: Jun 2018
Project : Riverville Residence

Topic: 10 Major Steps on Renovation Work (Part 5)


user posted image

user posted image

user posted image

user posted image

user posted image

user posted image

user posted image

user posted image

This post has been edited by My Maison: Jan 10 2022, 11:06 PM
TSMy Maison
post Jan 10 2022, 11:13 PM

Casual
***
Junior Member
319 posts

Joined: Jun 2018
Project : Riverville Residence

Topic: 10 Major Steps on Renovation Work (Part 5)

Welcome back to the part 5. After you have done with your flooring installation, either wood or tiles finishing, u may now proceed to the carpentry work. For your information, we would always seek for confirmation with carpentry from time to time, right after the ceiling is installed, the workers can now measure the height for the carpentry design purpose. This save alot of time and mistake from happening.
Normally , we wouldn't leave any gap in between the carpentry work with the upper leftover void, as these may leave alot of dust from accumulating. You might need to spend more money for box-up as well if measurement is not taken properly.

Normally, to ensure efficiency, we would immediately ask for carpentry work to enter as this stage takes lots of time. It would need roughly one to 1.5 month for a typical house to be fitted with carpentry work.
As some of them may need to be produced from the factory. So by following the steps as i shared earlier, u can exactly know in which stage, we should go for imeediately.
Hope you enjoy, thanks!
Thrust
post Jan 11 2022, 07:25 AM

Power To The People!!!
*******
Senior Member
3,760 posts

Joined: Oct 2005


If we want to renovate a new terrace house before moving in, is the budget of RM100k enough?

This post has been edited by Thrust: Jan 11 2022, 07:26 AM
TSMy Maison
post Jan 14 2022, 12:21 AM

Casual
***
Junior Member
319 posts

Joined: Jun 2018
QUOTE(Thrust @ Jan 11 2022, 08:25 AM)
If we want to renovate a new terrace house before moving in, is the budget of RM100k enough?
*
Hi, for your information, this is all depends on the scale of work you wish to do, please contact me via whatsapp (check your pm) just in case you wanna share with me your requirement, and we can go for your budget parameter and provide you with cost saving yet practical design.

This post has been edited by My Maison: Jan 14 2022, 12:25 AM
TSMy Maison
post Jan 14 2022, 01:23 AM

Casual
***
Junior Member
319 posts

Joined: Jun 2018
Project : Riverville Residence

Topic: 10 Major Steps on Renovation Work (Part 6)

user posted image

user posted image

user posted image

user posted image

user posted image

user posted image


TSMy Maison
post Jan 14 2022, 01:23 AM

Casual
***
Junior Member
319 posts

Joined: Jun 2018
user posted image


user posted image

user posted image

user posted image

user posted image


Project : Riverville Residence

Topic: 10 Major Steps on Renovation Work (Part 6)

With all of the carpentry work being done, its time for painting work to start. At this time, we can somehow save some money as some of the built-in cabinets have block the area which are not seen, and they are not painted at all. There are so many colour for your selection, and they somehow very important in creating the mood for the entire space.

After the painting is done, we can start hanging the curtain over the hanger. Eg: full height curtain or roller blind. With nowadays trend, we dont use the curtain rod anymore to hang the curtain, we normally create a curtain pelmet box as ceiling design and allow the track to be installed inside, it somehow help to conceal the ugly-looking track and curtain rod.

After all of this work being done, its time for final touch up of contractor. We should know that when the work is doing, there will always be alot of people walking around/ hitting the area. So, the contractor should allow the final touch up to be done first before moving in any other furnitures, (่ฝฏ่ฃ…) to that area.

Hope you enjoy our works.Thanks!!!! rclxms.gif rclxms.gif
TSMy Maison
post Jan 18 2022, 02:51 AM

Casual
***
Junior Member
319 posts

Joined: Jun 2018
Project : Bukit Jalil Housing Landcape

Topic: Landscape Design & Planting that helps to create better atmosphere

user posted image

user posted image

user posted image

user posted image

user posted image

user posted image

user posted image

This post has been edited by My Maison: Jan 18 2022, 10:08 PM
TSMy Maison
post Jan 18 2022, 10:08 PM

Casual
***
Junior Member
319 posts

Joined: Jun 2018
Project : Bukit Jalil Housing Landcape

Topic: Landscape Design & Planting that helps to create better atmosphere

Many of us would actually ignore the uses of greens in creating better atmosphere in your home. You might invest alot in your electrical devices, furniture and more but how about greens? Today, we will talk about how green landscape and interior plantings help in changing the living qualities.

When there is no greens, the entire atmosphere will look bleak and demotivated. Firstly, we need to understand the space properties. The first type is the space with the presence of direct light/sunlight. For example, balcony or any area with direct sunlight exposure of 5 hours and more. For this area, we normally choose plants like ๆตท่‘ก่„๏ผŒ ็™ฝๆฐดๆœจ as they are easy to be taken care, suitable to those tenants whoare very busy and not enough time to take care of plants.

The second types are place with medium light (near window). This area normally suitable to read or work. So, we normally pick plants like ๅคฉๅ ‚้ธŸ ๏ผŒ็ดๅถๆฆ• as they require space which are wide, and naturally ventilated. We normally place them in bedroom, foyer or living room. So, the selection of green in our home is also quit technical as they can really boost up the house atmosphere.

We might share more about interior planting in future. However, do visit our photos shared above regarding to our previous landscaping project done in residential housing. It was our hardworks and hope you really like and enjoy our services!! notworthy.gif notworthy.gif notworthy.gif
Ichighost
post Jan 20 2022, 03:07 PM

Casual
***
Junior Member
358 posts

Joined: Aug 2008
From: Oxpod


QUOTE(My Maison @ Jan 18 2022, 03:51 AM)
user posted image

user posted image
*
Hi,

first photo;

I would love to extend like a platform going out form the side sliding door? come with the house or extended? if extended can give rough cost? 10ft x 10 ft with either timber or rc slab.

second photo;

My end lot with 10ft land have a drain on the side.. if let say I want to cover it so that I have more usable space, possible?


dontdenyplz P
post Jan 20 2022, 04:42 PM

New Member
*
Probation
13 posts

Joined: Dec 2021
user posted image

anyone have design for this kind of floor? I want to reno my living room but can't find design for this floor online, due to budget constraint cant hire ID.

Beside of that, is it weird to just add SPC to my bedroom? other room and hallway in 2nd floor all white square tiles? stair also white tiles

TSMy Maison
post Jan 22 2022, 01:02 PM

Casual
***
Junior Member
319 posts

Joined: Jun 2018
Project: Carpeting Work

Topic: Benefit of Using Carpets as Flooring Material


user posted image

user posted image

user posted image

user posted image

user posted image

user posted image

user posted image

user posted image
TSMy Maison
post Jan 22 2022, 01:03 PM

Casual
***
Junior Member
319 posts

Joined: Jun 2018
Project: Carpeting Work

Topic: Benefit of Using Carpets as Flooring Material

Hello everyone, today we are going to share something really different as compared to usual, the carpet as flooring materials. There will be less often for someone to choose carpet as flooring in a home, however it would be very common for someone to make it in the office.

So why is this happen, what is its advantages?
Firstly, the reason of choosing carpet is that it suits perfectly in high traffic area, especially when they will be many people walking around. Carpet helps alot in reducing the noise and scratching towards the floor below. Office would normally have lots of chair and wheels and carpet is suitable for heavy office furniture and equipment. They absorb noise and harmful pollutants like no other type of flooring. Carpet is also eco-friendly as the products are easy to afford. They make your office/store look exceptionally beautiful also. This are some of the reasons why carpets are so useful in the office. If you have a chance to try, why not ?


TSMy Maison
post Jan 22 2022, 01:11 PM

Casual
***
Junior Member
319 posts

Joined: Jun 2018
QUOTE(Ichighost @ Jan 20 2022, 04:07 PM)
Hi,

first photo;

I would love to extend like a platform going out form the side sliding door? come with the house or extended? if extended can give rough cost? 10ft x 10 ft with either timber or rc slab.

second photo;

My end lot with 10ft land have a drain on the side.. if let say I want to cover it so that I have more usable space, possible?
*
Hi, is it you would like to have a rc slab flooring / timber decking outside, right after your sliding door with 10ft x10ft sizing?
You may cover it with pc flat slab if you would like to use that space, but not recommend to fill up the drain gap.


TSMy Maison
post Jan 22 2022, 01:13 PM

Casual
***
Junior Member
319 posts

Joined: Jun 2018
QUOTE(dontdenyplz @ Jan 20 2022, 05:42 PM)
user posted image

anyone have design for this kind of floor? I want to reno my living room but can't find design for this floor online, due to budget constraint cant hire ID.

Beside of that, is it weird to just add SPC to my bedroom? other room and hallway in 2nd floor all white square tiles? stair also white tiles
*
It wouldnt be weird if you add spc flooring to your room, and it i also quite common nowadays with this design. This is due to the spaces are actually segregated by doors, and it wouldn't be any problem with two different flooring materials. As i said before, if you like the design, yes we can make it for you.
wawasan2200
post Jan 23 2022, 05:51 PM

Getting Started
**
Junior Member
189 posts

Joined: Sep 2019
parking
TSMy Maison
post Jan 27 2022, 07:49 AM

Casual
***
Junior Member
319 posts

Joined: Jun 2018
Title : Too many tiles to choose from! How ?

Topic: Tiling Types

user posted image

user posted image

user posted image

user posted image

user posted image

user posted image

user posted image

user posted image
TSMy Maison
post Jan 27 2022, 07:49 AM

Casual
***
Junior Member
319 posts

Joined: Jun 2018
Title : Too many tiles to choose from! How ?

Topic: Tiling Types

There are too many types of tiles in the industry. The first one i would like to introduce is ceramic tiles. For your information, ceramic tiles are made of clay as component materials. Thus it is more easy to "break" as compared to other tiles type. We normally wont use it as flooring material, but it is more suitable to be used on wall. However, there are many patterns and designs on ceramic tiles to choose from.

Next, porcelain tiles. Yes, we normally apply porcelain tiles on floor, for sure you may also use it on walls. There is actually one type of porcelain, known as glaze porcelain tiles. This type of tile has printed pattern or design on porcelain tiles. It gives more variation, however the pattern might fade out when the time goes by.

There are many tiles surface too choose from, such as raw material surface, terracota tiles. They are used normally in car porch area. Surface such as matte are used normally in kitchen, while glossy surface tiles are smooth, normally used in indoor area.

Hope you enjoy. Thankssss ya!

TSMy Maison
post Jan 29 2022, 11:34 PM

Casual
***
Junior Member
319 posts

Joined: Jun 2018
Topic: Kitchen Countertop

Title : How to define your grades for Quartz material

user posted image

user posted image

user posted image

user posted image

user posted image

user posted image

user posted image

user posted image
TSMy Maison
post Jan 29 2022, 11:52 PM

Casual
***
Junior Member
319 posts

Joined: Jun 2018
Topic: Kitchen Countertop

Title : How to define your grades for Quartz material

I used to share with you about our steps by steps on how to build your countertop from zero to completion. There are also a lot of types of material for your selection, either simple design or with specific materials such as concrete, natural / man-made stone.

Today, Im going to share with you how to define a Grade A quartz stone or low grade quartz. Have you ever experienced before, the stains remain at one spot to another on your quartz countertop. If this happen to you, yes you might select a low-grade quartz. Low grade quartz only consists of only 50 percent of quartz itself, but the another half would be made of other components. However, a grade A quartz which is standard mostly consists of 80-90 percent of quartz with resin powder mixed together. Then, they were compressed into the shape of a flat slab before placing on your countertop. So, you may realise the differ in percentage can actually define alot of difference.

You may try on your quartz while making selection. If it is a low graded one, it will cause scratch sign to appear on surface when using a cutter to cut on it, while a grade A quartz will never happen something like this. Besides, a low grade quartz also with cause stain to stick on it, and they are not that easy to cleaned up, vice versa to the Grade A quartz.

So, as usual, there is no right or wrong in this case, its all depends on your budget and how much you would like to spend for your house. Hope you like our works as well, and spend more time on looking into our shared photo ya for your reference.


TSMy Maison
post Jan 31 2022, 12:54 AM

Casual
***
Junior Member
319 posts

Joined: Jun 2018
Topic: Toilet Design

Title: How can a bathroom being designed to fulfill your needs?

user posted image

user posted image

user posted image

user posted image

user posted image

user posted image

user posted image

This post has been edited by My Maison: Jan 31 2022, 01:01 AM
TSMy Maison
post Jan 31 2022, 01:28 AM

Casual
***
Junior Member
319 posts

Joined: Jun 2018
Topic: Toilet Design

Title: How can a bathroom being designed to fulfill your needs?

Have you ever think of, how can a bathroom being designed in order to achieve both aesthetic and functional purpose?
Actually, bathroom has many potential in creating something really different from what conventional way of bathroom look like. Belows are one of our previous project done before, and i would like to share with you some of the other options we may do other from this.
Yes, we do apply the storage behind the mirror in order to store your bottles etc. However, some of them might feel it a little massive and not elegant enough. So how can i achieve both storage purpose and elegant at the same time? Toilet niche is one of the solution. It is so called cost efficient and elegant as it can be further enhanced by using metals as material. Bottles and bottles of shampoo can be placed securely on the customized shape and size according to your needs. If there are more budget, led strip lights may be placed at corner as ambient lighting.

There are many forms that appear before, it can be high, it can be set at low wall. Furthermore, if you dont prefer low wall, you may consider a low sliding cabinet in between your wash hand area and wc area. The sliding compartment can be opened or closed when needed. You may also make an open platform on top of this cabinet, for the placement of your toilet paper, handphone etc. This small design approach can somehow related to your using habits, and customized according to needs.

Hanging cabinet washing area, one of the best way to design your wash area. With hanging properties, cleaning works can be done more easily as there is no blockage / cabinet at bottom. This area can be mopped easily. We prefer to have one floor trap at this area to allow any spilled water flowing into it.

One of the most important feature in your toilet would be tiles as well. Please get yourself away from conventional tiling types. There are actually more and more patterns available. Not only 1 by 2 or 2 by 2, some tiles can be designed as vertical stack bond tiles pattern, which somehow bring up the character into the area as well. I will show you some of the sample photos, if you like it. Why don't you try something new, if you really about it.
These are some of the tips and things to further develop to suit the most to your house toilet layout and design. Enjoy. Thanks!!!


user posted image

user posted image

Photos as references. Taken online.
TSMy Maison
post Feb 3 2022, 11:57 PM

Casual
***
Junior Member
319 posts

Joined: Jun 2018
Topic: Flooring

Title: How to install your spc flooring/ laminate flooring steps by steps?

user posted image

user posted image

user posted image

user posted image

user posted image

user posted image

user posted image
TSMy Maison
post Feb 3 2022, 11:57 PM

Casual
***
Junior Member
319 posts

Joined: Jun 2018
Topic: Flooring

Title: How to install your spc flooring/ laminate flooring steps by steps?

Hi everyone, Happy Chinese New Year. Today, lets talk about some flooring work you might love to do in your house, either spc/ laminate flooring which is one of the most common topic some of you love to ask me personally.

I will share with you some of our previous work done before, and also how we actually done our installation with guidance. Firstly, pre installation work. The sub floor must be smooth, clean and dry. Dun forget to lay the PE Mat underlayment, a thin foam pad material acting as a vapor barrier to provide moisture from penetrating into your laminate installation. Measure and cut your first piece of flooring with the help of cutter knife. It might be a little challenging while dealing with the corners or door frame as you need to cut the floorboard into desired shape. While laying, dun forget to leave some gap on the first row next to the wall, to allow expansion.

Install the second floorboard and lock it together by clicking them in place. Tap it with a hammer while protect it with a block to secure the installation. Do it steps by steps, slowly but steadily. Lastly, install the skirting by measuring the required length of the edges accordingly, and you are done.

Hope you like our sharing, dun forget to follow our posts and share your experience with us. We will share more in future. Stay tuned. rclxms.gif rclxms.gif rclxms.gif
Ichighost
post Feb 4 2022, 11:20 AM

Casual
***
Junior Member
358 posts

Joined: Aug 2008
From: Oxpod


QUOTE(My Maison @ Jan 22 2022, 02:11 PM)
Hi, is it you would like to have a rc slab flooring / timber decking outside, right after your sliding door with 10ft x10ft sizing?
You may cover it with pc flat slab if you would like to use that space, but not recommend to fill up the drain gap.
*
timber decking..well actually which ever is cheaper. laugh.gif

the drain cover like this?

QUOTE
user posted image

-kytz-
post Feb 4 2022, 03:29 PM

10k Club
********
All Stars
12,573 posts

Joined: Nov 2008
Anyone knows what material is this on the cabinets?

The lines are all ridges so the surface is not flat.

I actually want to spray paint then white but my contractor said it will peel off??
Attached Image Attached Image
TSMy Maison
post Feb 6 2022, 09:56 PM

Casual
***
Junior Member
319 posts

Joined: Jun 2018
QUOTE(Ichighost @ Feb 4 2022, 12:20 PM)
timber decking..well actually which ever is cheaper.  laugh.gif 

the drain cover like this?
*
Yes, it may be something like this. So do pm me in inbox if you would like to know more about our works on this matter. We can discuss further on this if you want ya!

TSMy Maison
post Feb 6 2022, 10:24 PM

Casual
***
Junior Member
319 posts

Joined: Jun 2018
Topic: Painting

Title: What are the types of paint we have?

user posted image

user posted image

user posted image

user posted image

user posted image

user posted image

user posted image

user posted image
TSMy Maison
post Feb 6 2022, 10:38 PM

Casual
***
Junior Member
319 posts

Joined: Jun 2018
Topic: Painting

Title: What are the types of paint we have?

Hi everyone, let's talk about painting for today's sharing. Hope you all enjoy ya!

Firstly, have you ever wonder whenever you received your house key, what kind of grade and quality is the paint your developer using? Normally, developer would provide the cheaper paint, emulsion paint. This kind of paint is cheaper and more easy to get stain, irreversible.

So, when we go for renovation, it is a norm that we do apply latex paint ไนณ่ƒถๆผ†/ acrylic emulsion paint. This kind of paint contains resin inside and it makes the properties of the paint to be more water resistant, lightfast, so called resistant to fading. It has low odor and VOC. When the wall is dirtied by stain, it can be wiped off and removed.
In industry, you may search for some of the brands from Nippon Paint, Jotun, Dulux etc. They will be some description like Easy Wash, Easy Clean etc. They are some of the examples of acrylic paints.

If you have higher budget, you may also consider paint with mid sheen finish. This kind of paint is more thicker, and more shiny in colour. It helps to reduce bumpiness on wall surfaces.

That's all for our sharing today. Hope you like it and stay tuned on our next sharing ya!!
Calvin Seak
post Feb 7 2022, 08:24 AM

Hiring, TTDI, KL only
*******
Senior Member
2,446 posts

Joined: Oct 2008

QUOTE(My Maison @ Jul 14 2021, 04:35 PM)
user posted image
user posted image
user posted image
user posted image
PROJECT A-
Topic: Hacking & Demolition Works rclxms.gif

We hack the unwanted brick walls and floors which are not going to be used in future design. At the same time, we indicate the new column locations with labels before starting to dig the hole for the foundation of your house.

Portable hacking machine is very important in this step!! thumbsup.gif

We dig the hole right to the ground below. A square base is formed. You will definitely create a lot of mess as a lot of construction waste, ground mud etc are scattered around. However, all of these are normal! So, don't forget to clean up the working area and accumulate the waste in your construction bin outside. icon_idea.gif

Next, we also dismantle the plaster ceilings for the entire house. You could see clearly all of the supporting structures and piping concealed above your house now. Similarly, we dispose of all of the waste into the bin. Get rid of them by lorry once it is full.

Remember that the dismantling job can take up some cost on you as well when doing renovation. Thus, do remember to include this step while considering your budget.
rolleyes.gif
*
Hi My Maison,

This looks massive!

May I know how much does it cost for the entire of Project A and the timeline? Roughly how many Sq Ft is this house?

Thanks alot!
TSMy Maison
post Feb 12 2022, 01:01 AM

Casual
***
Junior Member
319 posts

Joined: Jun 2018
Topic: Feature Wall

Title: What are the ways to design your wall?

Hi everyone. Welcome back to our sharing session. Let's talk about some design solutions towards your house wall design. Firstly, we can design our walls with the help of paint. With some painting technique, you can achieve different mood of design by using colours. Three ways of painting your wall includes :
a.) Area Splitting Technique. You may divide your wall portion into two, either up and down with two different colours present at both sides.
b.) Gradient Technique. Try to paint your wall from darker colour on one side and fade off to lighter colour on another side. This can create different mood to the area. Easy and interesting in looking.
c) Using shapes. Apply colours on shapes drawn on your wall. This create a focal point on your wall, one of the features on your wall, so that it wont be bleak and plain as if nothing.

Besides of the paint, the second method of creating your featured wall is by using the wooden strips + paint combination as decoration. The wooden strip can be simple, but the repetition of wooden strips aligned along the wall can somehow make the entire looks more pop out, 3d in feel. If you don't prefer wooden strips design, you may also consider wainscoting with your selection of sizes. There are many selection for you to choose from. This can help in your wall design as well. Most importantly, it wont be too expensive and not achievable.

Last method of applying your house feature wall is with hanging pictures. There are a lot of ways to decorate your wall. One of the method is applying large scale picture on your wall. This is an extreme way which definitely can create a focus towards your wall. In view of that, it somehow create a sense of luxurious. Besides of this arrangement method, you may also apply irregular arrangement of hanging pictures. Sometimes, it may look simple in arranging, but there is always a way to arrange in a nice, proper view.

These are some of the solutions for you to study, the way you can create you wall design with some simple tricks and colour only. Thanks for you time on reading on sharing as well. Gudbyee. rclxm9.gif rclxm9.gif

user posted image

user posted image

user posted image

user posted image

user posted image

user posted image

user posted image

user posted image

user posted image

This post has been edited by My Maison: Feb 12 2022, 01:29 AM
TSMy Maison
post Feb 12 2022, 01:27 AM

Casual
***
Junior Member
319 posts

Joined: Jun 2018
QUOTE(-kytz- @ Feb 4 2022, 04:29 PM)
Anyone knows what material is this on the cabinets?

The lines are all ridges so the surface is not flat.

I actually want to spray paint then white but my contractor said it will peel off??
Attached Image Attached Image
*
It may be a laminate finishing.
-kytz-
post Feb 12 2022, 01:30 AM

10k Club
********
All Stars
12,573 posts

Joined: Nov 2008
QUOTE(My Maison @ Feb 12 2022, 01:27 AM)
It may be a laminate finishing.
*
Thanks. How do I paint it white?

Or is it possible to replace the laminate?
TSMy Maison
post Feb 13 2022, 01:28 AM

Casual
***
Junior Member
319 posts

Joined: Jun 2018
Topic: Plaster ceiling

Title: Back to basic- Knowing more about your plaster ceiling.

user posted image

user posted image

user posted image

user posted image

user posted image

user posted image

user posted image

user posted image
TSMy Maison
post Feb 13 2022, 01:28 AM

Casual
***
Junior Member
319 posts

Joined: Jun 2018
Topic: Plaster ceiling

Title: Back to basic- Knowing more about your plaster ceiling.

Hi everyone, lets talking back to the basic again, knowing more about the plaster ceiling. Quick recap on why you want to install ceiling-
a) Wanna install air-conditioning, how to conceal your running ducting?
b) Add more lighting points for design enhancement? Where should my wire goes? Exposed? rclxub.gif rclxub.gif
c) Plumbing pipes

Yes, normally ceiling board come in specific standard size, may be 4ft to 6ft. East to cut into specific smaller size to meet the wall. As you can seen in my photos shared with you, we need ceiling frame with required spanning so that the light ceiling board can directly screwed on it. The spaces in between two meeting plasterboard will then be taped with scrim or plastic tape before being plastered and complete with painting.

So if I wan to maintain floor to soffit height as maximum as possible, but I do wan to have air conditioning inside, what should I do? Don't worry, installing plaster ceiling wont consume many spaces actually. 4 Inches of spacing are required only for basic ceiling. What if the design area would need a cassette AC, yes you need at least 320mm of spacing to fit all those requirement. Please do not overload ceiling as they are not meant to hold heavy things, only lighter LED downlight, light strip can be installed. Those ceiling fan has to be installed directly to structure above.

Sometimes, plaster ceiling is so important as well as it conceal the gap between cabinet as well. Do not worry so much as well as ceiling can be plastered and repaired all the time. Other advantages of using ceiling are also making changing lights work more easier, sound absorption etc. The one bads part of ceiling is that they are not water resistant. If water leaks from above, yellow patch can formed. However, you can repaint its original appearance. Lastly, what is the common pricing, the cost start around a few ringgit per sqft and can increase up to RM 15 or RM 20 for more complex pattern.

Hope you enjoy!!

This post has been edited by My Maison: Feb 13 2022, 01:28 AM
TSMy Maison
post Feb 13 2022, 01:13 PM

Casual
***
Junior Member
319 posts

Joined: Jun 2018
QUOTE(Calvin Seak @ Feb 7 2022, 09:24 AM)
Hi My Maison,

This looks massive!

May I know how much does it cost for the entire of Project A and the timeline? Roughly how many Sq Ft is this house?

Thanks alot!
*
For your information, this is a project of renovation from single storey to 2.5 storey landed housing. The entire structure work costs around RM 2xx k.
Calvin Seak
post Feb 14 2022, 09:10 AM

Hiring, TTDI, KL only
*******
Senior Member
2,446 posts

Joined: Oct 2008

QUOTE(My Maison @ Feb 13 2022, 01:13 PM)
For your information, this is a project of renovation from single storey to 2.5 storey landed housing. The entire structure work costs around RM 2xx k.
*
Thank you very much for your kind reply, I find your posts really informative..

I've browse through the pages but didn't managed to find the finishing of project A, but the rest of the projects looks really good! Keep up the great work and stay safe!


TSMy Maison
post Feb 16 2022, 12:09 AM

Casual
***
Junior Member
319 posts

Joined: Jun 2018
QUOTE(Calvin Seak @ Feb 14 2022, 10:10 AM)
Thank you very much for your kind reply, I find your posts really informative..

I've browse through the pages but didn't managed to find the finishing of project A, but the rest of the projects looks really good! Keep up the great work and stay safe!
*
Thanks for your attention towards our sharing. We hope you enjoy and have more "site experiences" through photos. biggrin.gif biggrin.gif
TSMy Maison
post Feb 16 2022, 01:03 AM

Casual
***
Junior Member
319 posts

Joined: Jun 2018
Topic: Kitchen

Title: Useful Tips to Consider for Better Kitchen Usage

user posted image

user posted image

user posted image

user posted image

user posted image

user posted image
TSMy Maison
post Feb 16 2022, 01:04 AM

Casual
***
Junior Member
319 posts

Joined: Jun 2018
Topic: Kitchen

Title: Useful Tips to Consider for Better Kitchen Usage

Hi everyone, today we are going to talk about some tips on how to design your kitchen layout, creating more opportunities and ease for you while preparing food in kitchen.
1. To get yourself a kitchen on trending, we propose to have floor tiles laid over the entire area from dining/living till the kitchen without the installation of โ€่ฟ‡้—จ็Ÿณโ€œ.This intend to make the entire spaces connected, open, grand and classy.
2. Normally, the built-in cabinets are connected all the way up to soffit, reduce dust accumulation. The size can be vary, the upper enclosed cabinet can be used to store rarely used kitchen appliances. Try to have a small storage cabinet below the cabinets for daily usage purpose, or even an open rack installed below the cabinets, for seasoning bottle placement.
3. If you are not wine lovers, I suggest not to have a rack for wine collection purpose. It is kinda a waste, it can somehow transformed into cabinet for storage purpose.
4. It is not a typical scenario anymore, whereby we hacks the non-loading bearing wall away, replace the original location with island cum seating area. The upper of the island can install the operable windows for oily/smoke to remain in kitchen when closed, while open while island is being used. Besides, you might also install a sliding/folding glass door without tracks below that intend to block the smoke when using kitchen, while can be folded to allow open plan concept.
5. Not using perpendicular L-shape kitchen countertop but replace the corner parts with 45 degree diagonal countertop. This allow appliances to be stored more easily below, and also allow more spaces to work with on above for food preparation.
6. Not using double sided washing trays but replace the entire area with large, single washing tray. Two small one might not able to place big wok, but one large yet single tray can definitely do so.

Some of the tips for you to refer. Thanks and hope you enjoy our works as shown in photos as well. Yes, we discuss and use minimum budget to create something useful for our clients according to their budget parameter. Please note that the design can be very fun and alot of things can be considered to allow a smooth and comfortable workflow in kitchen .
TSMy Maison
post Feb 19 2022, 11:04 AM

Casual
***
Junior Member
319 posts

Joined: Jun 2018
Topic: Midfield Condominium

Title: Selection of Light Colour

user posted image

user posted image

user posted image

user posted image

user posted image
TSMy Maison
post Feb 19 2022, 11:23 AM

Casual
***
Junior Member
319 posts

Joined: Jun 2018
Topic: Midfield Condominium

Title: Selection of Light Colour

Hi everyone, welcome back to our sharing platform again. After the sharing about the kitchen cabinet installation few days ago, lets talk about the lights installation today.
Wasting no time, let me give you a short and brief conclusion first.
1. The colour temperature for a house normally drops around 3k (warm white).
2. 4k (natural white) colour temperature allows user to stay focus in that environment, suitable to be used in area like study room / office.
3. In same area, we suggest you to use same brand of lights, as it may causes light differ.
4. We don't encourage you to use two distinct colour temperature ( cool white & warm light ) in the same area, as without proper sense and skill, you can see the lights differ in a very contradict way.

So, why we choose to have 3k lights temperature normally? 3k lights temperature give us the feel of warm, calm and relaxing (ๆš–ๅ…‰). When you enter the room, it somehow bring u to experience sunset warm. This can be proven when you realize that in the office, we feel the urge to work as cool white lights give you the motivation to work, and after a whole day long of working, you feel something different when you reach home. Try to imagine and you will know what I mean. rclxm9.gif rclxm9.gif

One more tips for you all, when we choose to have warm lights (3k), we need to pay more attention to its brightness as well, as when its too bright, you gives too much of exposure, you feel "hot". But when you lower down the brightness, you can feel something different. So, choose wisely depending on your area.

So, feel free to enjoy our works in the post above. We talked about light colour, and how about the light types. It can be another story as well. How you choose the lights, downlight, eyeball, strip lights, concealed light, magnetic track light etc. Hope you like the ways we shared. rclxms.gif rclxms.gif rclxms.gif


dickybird
post Feb 19 2022, 11:32 AM

Look at all my stars!!
*******
Senior Member
2,093 posts

Joined: Apr 2005
Yes 3k lights for the win
TSMy Maison
post Feb 20 2022, 07:04 PM

Casual
***
Junior Member
319 posts

Joined: Jun 2018
Topic: Toilet Renovation

Title: Dismantling, Hacking, Cleaning

user posted image

user posted image

user posted image

user posted image

user posted image

user posted image

user posted image

user posted image

user posted image


This post has been edited by My Maison: Feb 20 2022, 08:09 PM
TSMy Maison
post Feb 20 2022, 07:05 PM

Casual
***
Junior Member
319 posts

Joined: Jun 2018
Topic: Toilet Renovation

Title: Dismantling, Hacking, Cleaning

Hi everyone, let's talk about toilet work for today sharing. When we move into a new house, what is the most critical issue that might happen? One of it will be the water issue. Whenever we go for home defect checking, we will definitely put more attention in our toilet, as if water leaks happen, it can cause a lot of trouble to you, and even to your neighbors below your unit.

So, water leaks usually happen when waterproofing work in not done properly. So, ensure that waterproofing work is done perfectly before any finishing/ tiling work is fixed on it. Let's scroll back to the beginning of the renovation work in your toilet, if you would like to have yourself a better toilet design.

First and foremost, remove all your existing toilet fixtures, such as toilet bowl, basin, shower screen, shower head, water heater etc.
Next, hacking work is done to remove all your tiles. With all the unwanted tiles being removed, its time to clean up the area, remove all your debris completely. pack them into bags and bags. Ensure that all the debris are completely thrown away before your renew work start. Let's see and enjoy our photos shared with you, to know how is our work being done. Hope you really enjoy and learn something new today!! rclxm9.gif rclxm9.gif rclxm9.gif


miyakochan89
post Feb 21 2022, 08:27 AM

Wut?
*******
Senior Member
6,724 posts

Joined: Aug 2008


Hi, do you suggest painting or wallpaper to refresh a room? However the house is not empty/new. So the renovation has to go on while people are still living inside. Which one would be more convenient?
TSMy Maison
post Feb 22 2022, 12:41 AM

Casual
***
Junior Member
319 posts

Joined: Jun 2018
QUOTE(miyakochan89 @ Feb 21 2022, 09:27 AM)
Hi, do you suggest painting or wallpaper to refresh a room? However the house is not empty/new. So the renovation has to go on while people are still living inside. Which one would be more convenient?
*
For me, i will go for painting work. Few reasons here to consider,
1. Not easily out of trend, can always repainted with new colour whenever you want
2. Many styles to play with paint, eg:
a. one plain wall with selected colour, simple and nice
b. play with two different tones of colour, dark and light colour
c. play with gradient
d. split the ratio to one third/ two third/ half, can using two choices of colour to design
e. paint with geometry pattern
f. paint with shapes/ lines

3. everyone can make it easily.

There is no right or wrong in this scenario. But for me, i will go for paints. Its my own preference anyway, still subjected to your choices anyway.

TSMy Maison
post Feb 23 2022, 12:50 AM

Casual
***
Junior Member
319 posts

Joined: Jun 2018
Topic: Toilet Renovation

Title: Cementing & Waterproofing

user posted image

user posted image

user posted image

user posted image

user posted image

user posted image

user posted image

user posted image

user posted image

user posted image
TSMy Maison
post Feb 23 2022, 12:50 AM

Casual
***
Junior Member
319 posts

Joined: Jun 2018
Topic: Toilet Renovation

Title: Cementing & Waterproofing

After all of the debris being cleared up, you may now proceed with the next steps, make your plumbing work done and cementing your floor. While the works before this might cause a lot of holes here and there, you have to fill up all of the gaps first with cement. Ensure all of your pipeline is done correctly before any concrete casting work is done.

Start to cement your floor slab for the first layer. After the flooring plastering is dried for the 24 hours and it is done, apply your first coat of waterproofing. This is very important as without a proper waterproofing, when leaks happen, it can cause you even more as you have to hack all your tiles up again to find the water source. Apply your second screed layer and waterproofing again for double protection. Let them dry for few hours again.

Before proceed to the final steps which is to install your tiles, you have to make a small test first, know as water-pond test.
This practice is done by filling up the bathroom area with water left overnight above the waterproofing. After the test, you will know whether there is any leakage happen or not. If yes, your waterproofing has to be redo again.

After all the inspection works being done, you can now install the bathroom tiles. Hope you enjoy our sharing today. Appreciate your support towards our effort in our work!! rclxm9.gif rclxm9.gif rclxm9.gif
TSMy Maison
post Feb 26 2022, 01:55 PM

Casual
***
Junior Member
319 posts

Joined: Jun 2018
Topic: Toilet Renovation

Title: Tiling

user posted image

user posted image

user posted image

user posted image

user posted image

user posted image

user posted image
TSMy Maison
post Feb 26 2022, 01:55 PM

Casual
***
Junior Member
319 posts

Joined: Jun 2018
Topic: Toilet Renovation

Title: Tiling

As we completed all of the protection works, we can now lay our tiles on it. Tiling work is also significant as it determines the entire workmanship and appearance. Even the pattern, sizes of tiles can decide how many cutting waste will be produced, which somehow affect your overall cost. We always make assumption of additional 10 percent of the overall square footage for cutting waste.

Ensure that the adhesives or thin-set mortar used as the bonding agents for the tiles are proportionately mixed. Place the first tile and press on it gently. Use a spacer in between while you lay your next tile side by side. Going step by step until we reach to the completion. You may refer to our previous work in the post shared before on how we lay our tiles. However something to take care in the bathroom will be the floor gradient. We know that water is always the most critical things in the bathroom. Without a proper gradient, your water will never flow effectively to the floor traps. Thus, we need a proper workmanship from the workers.

Yes, back to the tiling works, we apply the grout to seal up the gaps between tiles. Wipe off any extra sealant after some time. Some precautionary steps to be taken as well, do not lay your tiles too near to each other in which this can cause popping out of tiles to happen. Use a hammer to tap the tiles slightly, be careful to prevent breakage. Lastly, dun stand on the tiles which has not set or harden with the mortar together.

Hope you likes our works. Enjoy rclxm9.gif rclxm9.gif

TSMy Maison
post Feb 27 2022, 05:01 PM

Casual
***
Junior Member
319 posts

Joined: Jun 2018
Topic: Toilet Renovation

Title: Ceiling Installation & Completion of Work

user posted image

user posted image

user posted image

user posted image

user posted image

user posted image

user posted image

user posted image

user posted image

This post has been edited by My Maison: Feb 27 2022, 05:04 PM
TSMy Maison
post Feb 27 2022, 05:04 PM

Casual
***
Junior Member
319 posts

Joined: Jun 2018
Topic: Toilet Renovation

Title: Ceiling Installation & Completion of Work

With all of the tiles setting out completed, you may now proceed with the next steps, installation of ceiling board, doors etc. As usual, according to your bathroom layout, we set the grids first, before putting up the work frame for plaster ceiling. Some of you might be curious is there any specific plaster ceiling needed for wet areas like bathroom, however normal gypsum ceiling is good enough for bathroom.

Let me introduce to you some of the other ceiling material if you would like to know more about it. Firstly, gypsum ceiling is a readymade sheet made of "plaster of Paris" - a quick-setting gypsum plaster made of fine white powder. It is hardened when moistured and is allowed to dry. It comes with many sizes , is not expensive, and it keeps away the moisture, mold etc, which is a common and useful material suit to bathroom.

Secondly, going into advance, you may also consider aluminium composite panel (ACP) as your ceiling material. It has two aluminium sheets holding a thermoplastic core in between. It can give nice appearance, which is quite advance. Sometimes, even external building metal roofing used this kind of material as well. Metallic and rigd appearance, good to use and consider!!!

Next one, the acrylic material. It is a fiber material made from resin. It comes with variety of design, thickness and size. It can be transparent, solid colours, or even with patterns. It is supported with L-shape aluminium strips. It is quite interesting and advanced as compared to normal plaster ceiling.
You may also consider as well!!

Hope you like some of our sharing today. Thanks and enjoy our site photos shared with you ya! rclxm9.gif rclxm9.gif
TSMy Maison
post Mar 3 2022, 01:24 AM

Casual
***
Junior Member
319 posts

Joined: Jun 2018
Topic: Defect Checking

Title: Site Preparation

user posted image

user posted image

user posted image

user posted image

user posted image

user posted image
TSMy Maison
post Mar 3 2022, 01:24 AM

Casual
***
Junior Member
319 posts

Joined: Jun 2018
Topic: Defect Checking

Title: Site Preparation

Hi everyone, welcome back to today's sharing session. We are going to share about some of the tips while you are doing home defect checking for your first ever house you bought. Do you know that defect checking is very important as you can request for a new one if there is any breaks / works which are not properly done by your developer.

This is also very important for us, as before every project started, we have to ensure that all things are in good condition, or if there is any defect present since beginning, the fault will not imposed to the contractor etc. Today, let's talk about some of the things you might need to check once you receive your house key, and ensure that everything are okay before awarding the work to the contractor.

Firstly, get yourself a charger, check every single electrical point and make sure that all of them are functioning. Next, check all the water pressure in your house, whether everything is in good condition etc, example your water closet, tap, shower and more.

Besides, take a look to your door hinges, door frame, door handle etc. Check for the alignment of your door, whether it is professionally done or not. If not, you may request for a new one. Furthermore, bring yourself a checklist as well, check whether the finishing provided for you is exactly the same as what stated. For example, if it is stated as laminate flooring, then it should be laminate finishing but not other material. If it is written full height tiles, then it should not be only half. Be cautious about this.

Check whether there is any hollowness in your floors, tiles, wall and more. If yes, please raise up the issue. Do check also the evenness of the wall. Something I would like to mentioned here is that if you are going to renovate that particular place, and you plan to dismantle it, you should not waste your time in requesting renewal of that particular area, since you already planned to dismantle everything right. Be cautious with what you plan to do, and don't waste your time and resource on something not beneficial for you. Check for the switches, whether it is loose or not even with the wall. Check whether there is any leakage, check for floor gradient in toilet, check for stains, check for aircond hood and hob, and many many more.

Hope you learn something from today's sharing. There are actually many many more defects to be checked. Hope to share with you again in future

With all of the defect checking being made, you may now pass your house to your contractor for further renovation work. Take a picture and if there is anything happen , you know who can you find for. With this, contractor can now making site protection and prevention before any extension or renovation start.

This post has been edited by My Maison: Mar 6 2022, 10:41 PM
TSMy Maison
post Mar 6 2022, 10:39 PM

Casual
***
Junior Member
319 posts

Joined: Jun 2018
Topic: House Wiring Work

Title: Conceal Wiring

user posted image

user posted image

user posted image

user posted image

user posted image

user posted image

user posted image

user posted image

user posted image

This post has been edited by My Maison: Mar 6 2022, 10:40 PM
TSMy Maison
post Mar 6 2022, 10:39 PM

Casual
***
Junior Member
319 posts

Joined: Jun 2018
Topic: House Wiring Work

Title: Conceal Wiring

Hi everyone, today, lets talk about wiring again. Do you know that sometimes, too much of wiring trunking can actually affect the aesthetic of your house design. So, i suggest most of you to consider the usage of conceal wiring. To me, if the points are like hidden in some cabinets, its okay. I realized that a lot of houses' living room or somewhere in the middle, there are a lot of switches/ socket overcrowding in these areas. Try to make this area as simple as possible.

Try to make the numbers of switches an even number, be consistent. The colour of switches should also matches the colour of the walls. If your wall is dark in colour, choose a darker switches/ sockets, and it looks literally hidden .

As usual, count the amount of sockets and switches according to your needs. Don't over allocate it, and don't underestimate it as well.

Hope you enjoy our sharing today. Please have a look to our photos shared with you. Thanks!

notworthy.gif notworthy.gif

This post has been edited by My Maison: Mar 6 2022, 10:40 PM
TSMy Maison
post Mar 8 2022, 11:43 PM

Casual
***
Junior Member
319 posts

Joined: Jun 2018
Topic: Eco Majestic Condominium

Title: How to make your ceiling looks higher?

user posted image

user posted image

user posted image

user posted image

user posted image

user posted image

user posted image
TSMy Maison
post Mar 8 2022, 11:43 PM

Casual
***
Junior Member
319 posts

Joined: Jun 2018
Topic: Eco Majestic Condominium

Title: How to make your ceiling looks higher?

Hi everyone, I am here again. Today, sine we are sharing some of our works regarding to the ceiling, why don't we share about the problems of having a low ceiling, and how we are going to solve this issue?

Firstly, we choose to paint the ceiling with high-gloss paint. By doing so, when lights strikes and bounces in the area, they somehow makes the space bigger. The next tips are some illusion technique to be used, such as the usage of flush-mounted chandelier / light, low furnitures etc. When you leave ample space in between top and bottom,
this can somehow extend the space, making your ceiling higher when you see more walls in between.

Next, try to extend. Extend your cabinet up to the ceiling. Emphasize also long horizontal planes such as installing long displayed shelves. This can distract someone's eye from focusing the low ceiling. One of the tips is also apply wainscoting on your wall. With those framing, it somehow framed your wall. Try to catch the proportion so that it creates better views.

Last but not the least, use more white. Try to apply same colour tones for both ceiling and wall. With generous amount of white space between the top shelf and the ceiling, it looks more neat and clean in overall. Opt for a single colour, from floor to ceiling, when your ceiling is too low. Installing yourself a long drape also helps in creating the illusion of tall walls. Conceal the top of drape with ceiling pelmet, and the entire space will looks better.

These are some of the tips for you to read. Hope you enjoy. Please spend some time in viewing our works as well. Thankss!!! flex.gif flex.gif rclxm9.gif rclxm9.gif
TSMy Maison
post Mar 13 2022, 06:11 AM

Casual
***
Junior Member
319 posts

Joined: Jun 2018
Topic: Eco Majestic Condominium

Title: Usage of Lights in A Space

user posted image

user posted image

user posted image

user posted image

user posted image

user posted image
TSMy Maison
post Mar 13 2022, 06:12 AM

Casual
***
Junior Member
319 posts

Joined: Jun 2018
Topic: Eco Majestic Condominium

Title: Usage of Lights in A Space

Hi everyone, welcome back to the sharing session today. Let's talk about the usage of different lighting in creating different mood for the space. Firstly, why is light source so important? It makes a space more lively, and with the combination between lights and carpentry work, it makes the carpentry work even more "pop out".

So, what are the usage of lighting? The lighting source helps in brightening up the dark/blind spot. For example in your kitchen, we normally only install downlight on your ceiling. Sometimes, you will actually block the direct lights from top while you are preparing/cutting your ingredients. So, this is how your light strip designed around the cabinet works. This LED light strip can lighten up your preparation area in another way, while preventing you from cutting your fingers etc.

Even your cupboard/your cabinet can have LED strip light placed inside. They can work with sensory system. When you open it or move your hand over the sensory area, the light will lights up, and after you are done, the light turns off again as they detect no more hands around. It works when you need them while off when you are not using it. The softlight can actually making the carpentry work even more good looking.

Lights can be present in alot of form. It can be a decorative wall light/ hanging light. It makes the space more classy with the lights striking out and target to specific area.
Nowadays, we also use alot of track lighting / non-main light while designing. It looks more classy and can be easily turn on/off easily.

However, with different types of lighting, the most important thing you have to really consider is selecting the most suitable/convenient lighting temperature for that area. Try to be more consistent with the temperature, as without a proper combination, the entire space can looks very weird..

That's all for today's sharing, hope you enjoy our works shared with you.!
TSMy Maison
post Mar 18 2022, 12:27 AM

Casual
***
Junior Member
319 posts

Joined: Jun 2018
Topic: Kuchai Avenue A

Title: Think Before Renovate

user posted image

user posted image

user posted image

user posted image

user posted image

user posted image

user posted image

user posted image

user posted image

user posted image
TSMy Maison
post Mar 18 2022, 12:27 AM

Casual
***
Junior Member
319 posts

Joined: Jun 2018
Topic: Kuchai Avenue A

Title: Think Before Renovate

Hi, everyone, welcome back to our sharing platform again. Lets talk about some tips for you to consider while you start renovate your houses etc. Please enjoy our works shared with you while listening to all of these tips.

First, what should you do before anything started? You should really know well on your budget parameter. Try to control your budget within limits, and even you exceed the limit, try not to over too much. This is because the money you spent on your house can actually affect how happy you will be, how worth you think you had spent.
Since we are talking about plaster ceiling. I will talk more about ceiling and lighting. I believe that some of you might think that is it I can save more money by not installing ceiling. So, is it really true? When you have no ceiling, your choices of lighting might be limited. However, when you buy a new house, the way the lighting point is designed is good enough to be use. You can just buy yourself some surface mounted lights, and directly installed. Without fancy treatment, your lighting system in your house atmosphere are still presentable, as there is actually a lot of design input given by the ID with the minimum expenses provided.

However, when there is no plaster ceiling, the fixed points have no room for design. It is not moveable, and it really depends on the workmanship if you would like to treat with the points without plaster ceiling. However, it really depends on what you really want it to be. Sometimes, plaster ceiling will not cost you a lot. You can actually consult your designer, contractor etc. A great discussion is needed to achieve mutual agreement, and better understanding on how the costing is made, is it by one lumpsum, or be item. With plaster ceiling also, you can have many different lighting to choose from, such as eyeball acting as small spotlight, downlight that actually wont reduce too much of your space headroom, and even hanging lights on top of kitchen island that can be one of the embellishment.

When there is plaster ceiling installed, it sometimes can be soundproof. For example when you are living in a condo, you might heard some noise from units above, as your distance is just a piece of slab in between. So, do you think plaster ceiling is worth, functional while at the same time can be aesthetic?

Conclusion:
1. Budget allocation
2. Practicality & efficiency,
3. Cost allocation for items
4. Design pattern
5. Listen to professionalism

TSMy Maison
post Mar 21 2022, 12:25 AM

Casual
***
Junior Member
319 posts

Joined: Jun 2018
Topic: Kuchai Avenue A

Title: Tips to Consider If Not Doing Ceiling

user posted image

user posted image

user posted image

user posted image

user posted image

user posted image

user posted image

user posted image
TSMy Maison
post Mar 21 2022, 12:25 AM

Casual
***
Junior Member
319 posts

Joined: Jun 2018
Topic: Kuchai Avenue A

Title: Tips to Consider If Not Doing Ceiling


Hi everyone, following the sharing last few days ago, today, Im going to talk more about ways to do if you really don't consider plaster ceiling in your house design. What can you do actually?

For your information, the pricing of plaster ceiling can be varied according to the ceiling design, painting, and the amount of holes you decide to open for electrical points.
So, if you really not consider on plaster ceiling, it's time for you to present your design idea.

1. You definitely will seeing a a lot of exposed piping along the route above. So, the way the route running through the space above has to be planned wisely. You may need to design some small casing that "wrap" along the piping route. It is somehow a technique and design that helps you to enclose partially your piping route above.

user posted image - Sample photo taken online

2. Using the same colour for your ceiling and piping. It applied to every condition, no matter it is white/ grey/ black. However, ensure that the routing is neat, clean and in order arrangement. This create sense of unity, and beauty of "inside-out" ,i n terms of architectural language.

3. Since we are not concealing anything from eyesight, we have to expose everything we have. Try to imitate the mood of design - The industrial design in your house which emphasize on the beauty of exposure.

4. Using aesthetic lighting fixture. Try to consider track lighting, wall mounted light or even hanging light if you don't consider plaster ceiling. Track lighting can be very stylish and modern.
TSMy Maison
post Mar 26 2022, 10:48 AM

Casual
***
Junior Member
319 posts

Joined: Jun 2018
Topic: Kuchai Avenue A

Title: Wall Painting

user posted image

user posted image

user posted image

user posted image

user posted image

user posted image
TSMy Maison
post Mar 26 2022, 10:49 AM

Casual
***
Junior Member
319 posts

Joined: Jun 2018
Topic: Kuchai Avenue A

Title: Painting

Do you know that color selection for your house is somehow relatable to the mood in terms of psychology. There are so many color categories , from warm to cool even to grey tones color system.

Since there are so many choices an you have no idea on how to choose from it, why don't you start from your design style of your house. For example, let's start from the MUJI style. We all know that this style focuses more on simplicity, natural and texture. So, normally, the space will prefer white as the main color, followed by natural wood brown, earthcolor to bring out the feel of MUJI.

Next, Scandinavian style. Normally, this style will focus on less vibrant color to create the sense of humble and simplicity. However, what makes it unique is that you will realise the usage of bright, sharp, high saturation color in some small area/ focal point to quickly capture the eyes of users. The colour can be any colour you want, either blue, yellow, red etc. But, dun make it too over for sure.

Furthermore, let's talk about the industrial style which is preferred by lots of male. This kind of style normally use black, white, grey which don't create any emotion. TO make it more pop out, you will need some gold orange color to make the entire space more mature and sharp.

However if you are not so confident with your selection of color, you can actually try to choose color belongs to same scheme as your base. This can prevent you from choosing color that are too contradicting. This can somehow make the entire space more natural and unity.

Hope you enjoy our sharing today. We will definitely share more about the color combination in future. Stay tuned.


TSMy Maison
post Mar 27 2022, 09:43 PM

Casual
***
Junior Member
319 posts

Joined: Jun 2018
Topic: Kuchai Avenue A

Title: Flooring System

user posted image

user posted image

user posted image

user posted image

user posted image

user posted image

TSMy Maison
post Mar 27 2022, 09:43 PM

Casual
***
Junior Member
319 posts

Joined: Jun 2018
Topic: Kuchai Avenue A

Title: Flooring System

Hi everyone. Welcome to our sharing session again. Please have a look on our photos shared with you today. Its all about flooring. For your information, there are a total of 4 types of "wood flooring" commonly used by all of us.

Let's talk about the first one - vinyl flooring. Vinyl flooring is actually a kind of flooring made of plastic. It can somehow divided into 3 more types - "sticker" , "glued" and "click" form. What are their differences actually? For sticker, it is beneficial for those DIY pro. It is easy and cheaper compared to others. You just have to tear off the sticker and paste it on your floor. Secondly, the glued one. You need to apply glue on your existing flooring before pasting your vinyl flooring on top of it. Lastly, the "click" form. This is a better version of vinyl for me as it doesn't spoilt your existing flooring. If one day you would like to use back your existing flooring, just remove it, and it definitely won't spoilt your floor as compared to the one glued onto it.

Next, lets talk about the second type of "wood flooring" - Laminate Floor. Laminate floor is made of a lot of wood fibre, being compressed together using machine. It is resistant to water, heat and scratch, which are quite commonly used by most of the users.

The next flooring would be engineered wood. This kind of wood flooring will be more expensive as compared to the first two i shared with you as they are using the real wood. The engineered wood is made of layers and layers of solid wood being stacked and compressed together, with veneer wood as finishing layer on top, which give you a real wood texture on it.

Lastly, the solid wood texture such as nyatoh, oak, walnut etc. It will be more natural as compared to all of the above. However, it will not as resistant to thermite as compared with others. So, just choose whatever flooring you like based on your preference, budget, usage etc. Remember, there is no right or wrong. rclxm9.gif rclxm9.gif rclxm9.gif
TSMy Maison
post Mar 31 2022, 01:32 AM

Casual
***
Junior Member
319 posts

Joined: Jun 2018
Topic: Kuchai Avenue A

Title: Carpentry Work

user posted image

user posted image

user posted image

user posted image

user posted image

user posted image

user posted image

user posted image
TSMy Maison
post Mar 31 2022, 01:33 AM

Casual
***
Junior Member
319 posts

Joined: Jun 2018
Topic: Kuchai Avenue A

Title: Carpentry Work

Hi everyone, welcome back to our sharing session once again. Today, we will be talking out carpentry work, some tips of do's and dont's for you ease of understanding. When we do carpentry work, there is actually some rules to follow. For a typical kitchen countertop with sink area, normally the height we set is around 850mm to 900mm from ground. This is the most ergonomics height which fit to the users. However, it is still subject to change, as we always consider the user overall height before we design and conclude the final design. We serve the usage including the aesthetic purpose.

Do you also know why is it the depth of your cabinet/ countertop is nearly 600mm? Yes, for your information, we always go in the multiple of 15, example 450mm/ 600mm as we always use standard sizing of tiles ( 1 by 1 / 1 by 2 ), and with the combination between tiles and countertop, we have to ensure that the dimension of both integrated well. It would be more aesthetic by having a standard dimension.

Next, from your kitchen countertop to the hanging shelf on top, we would need a gap of around 700 to 800mm. This height is needed in order to prevent your cabinet/ shelf from blocking the eyesight or view of yourself while preparing your food on top of it. Besides, you will also reduce the risk of knocking your head on the shelf, which might occur when your shelf is too low. Of course, it would be better if your hanging shelf/ cabinet is slightly offset inside as compared to the 600mm cabinet below.

If you are having an island also, please consider also the height of your sitting stool as compared to your island. Your stool will be around 800mm tall which is slightly higher than the typical seating. Don't forget to leave some gap for your leg to have restroom below the platform. This is something critical as if you missed out this, your leg might not have sufficient space to place. Your leg will be collapsing with the cabinet below, which is so uncomfortable. Furthermore, if there is any pendant lighting above your island, be sure that the lighting should placed around 800mm above, which is an ideal lighting position.

Talking back to the cabinet, actually sometime you can consider yourself with some IKEA items, which can be easily installed on wall, and customized accordingly to needs. However, last reminder for you is that, try to calculate your budget and consider how much you can really spend for carpentry work in your house. The more you willing to spend on this aspect, the better selection on material, design etc can be considered.

Hope you enjoy our sharing today, dun forget to look into our works shard with you in photos. Thanks and enjoy your day. rclxms.gif rclxms.gif rclxms.gif
TSMy Maison
post Jul 17 2022, 09:18 PM

Casual
***
Junior Member
319 posts

Joined: Jun 2018
#officerenovation #WFH

Ever since this pandemic, times & times of lockdown, did you realize what is the biggest changes throughout the year? Many of us seem to get used with WFH living style. This same goes to a lot of youngster nowadays, who really love to create their own workplace, so called home studio. It don't need to be big, but whenever you look at it, the space must be literally designed before ๐Ÿ˜„๐Ÿ˜„ . Working is part of the living, when you start to include them in your lifestyle, it can make you even more effective when the space designed makes you even have for a better mode. ๐Ÿคญ๐Ÿคญ

When you need a focus space owned by you, you need a proper working station, without much interruption from others. When you need a space to find inspiration, you could simply add in some greenery, a few small furniture, beanbag etc. Don't forget to utilise lighting, its natural & free!!! Incorporating the space with additional downlight, hanging light, choosing the suitable lighting temperature can definitely make the space looks better.

Hope you enjoy!

user posted image

user posted image

user posted image

user posted image

user posted image

This post has been edited by My Maison: Jul 17 2022, 09:23 PM
TSMy Maison
post Jul 17 2022, 09:20 PM

Casual
***
Junior Member
319 posts

Joined: Jun 2018
user posted image

user posted image

user posted image

user posted image

user posted image

user posted image
TSMy Maison
post Jul 24 2022, 12:15 AM

Casual
***
Junior Member
319 posts

Joined: Jun 2018
#shoprenovation #constraintstofollow

Welcome back to the new sharing today! Lets talk about something different today.

Do you think that renting yourself an empty lot inside a shopping complex, spending some money to do your own renovation, doing your dream business is something easy to accomplish? How much money and energy you need to spend, and will there be any others challenges to face?

It might not be that easy as you think. I do think that communication & cooperation from each parties which include you as the owner, contractor, the management team & the in-house consultant team from shopping complex are indeed important. You as the owner has to liaise with all the teams, ensuring that all rules and regulations are followed to ensure that the renovation works go on smoothly. ๐Ÿค”๐Ÿค”๐Ÿค”

When it involves shopping mall, this means that you have to follow their arrangement on your allowable working time, your logistic plan to move up and down during the entire construction period. You and your contractor have to ensure that things go as planned in terms of services, plumbing, electricity, fire alarm system etc.....

All of the preparation works require collective ideas from you and your contractor team! So, how do you think about this, share your thoughts with me ๐Ÿค˜๐Ÿค˜

user posted image

user posted image

user posted image

user posted image

user posted image

user posted image

user posted image

This post has been edited by My Maison: Jul 24 2022, 12:17 AM
Michaelbyz23
post Jul 28 2022, 09:26 PM

Sarawak Maju Makmur
*******
Senior Member
4,546 posts

Joined: Jun 2009
From: Selangor / Sarawak / New York


Hi reno experts,

Would like to ask, isit legal or allowed to do side openings on extended portion like this, for an intermediate terrace? Use ventilation blocks to cover the openings, still can allow air and light into the living space. This is on the 1st floor.

user posted image
user posted image
yayayaya
post Aug 1 2022, 01:54 PM

New Member
*
Junior Member
21 posts

Joined: Jul 2022
QUOTE(Michaelbyz23 @ Jul 28 2022, 09:26 PM)
Hi reno experts,

Would like to ask, isit legal or allowed to do side openings on extended portion like this, for an intermediate terrace? Use ventilation blocks to cover the openings, still can allow air and light into the living space. This is on the 1st floor.

user posted image
user posted image
*
Anyone has any recommendation for 3 storey landed house ID & Renovation.

Not looking at fancy reno or ID just to make the house looks warm and cozy.

If any please put their websites or names for me.

Thank you!


TSMy Maison
post Aug 1 2022, 11:13 PM

Casual
***
Junior Member
319 posts

Joined: Jun 2018
QUOTE(Michaelbyz23 @ Jul 28 2022, 10:26 PM)
Hi reno experts,

Would like to ask, isit legal or allowed to do side openings on extended portion like this, for an intermediate terrace? Use ventilation blocks to cover the openings, still can allow air and light into the living space. This is on the 1st floor.

user posted image
user posted image
*
Hi Sir, yes for your information, it is legal to provide ventilation blocks design in your property. It is a great design as well.
What you have to do is submit the building plan approval to authorities to get confirmed before proceeding with the construction stage, as every work has to be approved by local authorities before any commencement of work ya. Hope this clarifies.
TSMy Maison
post Aug 1 2022, 11:14 PM

Casual
***
Junior Member
319 posts

Joined: Jun 2018
QUOTE(yayayaya @ Aug 1 2022, 02:54 PM)
Anyone has any recommendation for 3 storey landed house ID & Renovation.

Not looking at fancy reno or ID just to make the house looks warm and cozy.

If any please put their websites or names for me.

Thank you!
*
Hi sir, please check your inbox as well. rclxm9.gif flex.gif
TSMy Maison
post Aug 2 2022, 12:21 AM

Casual
***
Junior Member
319 posts

Joined: Jun 2018
#KitchenDesign #MyMaison

To those superwoman in every family!!! I believe that having a great workplace - kitchen can be one of the best gift for them. To those who love to cook, intend to spend some time cooking some good food during weekend but seem to be a bit lazy as there is no motivation at all? But what if the kitchen design is something u like, with proper layout, ingredients placed in a proper manner, will you somehow feel more motivated? ๐Ÿ˜Š๐Ÿ˜Š

Yes, today we are going to talk about some tricks to design in your kitchen, which might not be aware by you! ๐Ÿ™ˆ๐Ÿ™ˆ

First of all, we do think that a good design is not solely good in looking, but is has to be practical, convenient and suit to your living lifestyle. It just like one of the rendered done by us.

1. Water Retaining strips ๆŒกๆฐดๆก - It looks tiny but it has its own uses. It prevents water from flowing into the wall surface / floor. This helps to hinder the water from seeping into some area which might harm the kitchen cabinet, etc.

2. Big Downsink rather than two small sink. You need to consider the equipments, utensil and so on you use to cook. It the sink designed big enough to cater our needs. Is it really practical ? I believe that you know the message i brought here.

3. Different height of countertop. A higher one would help you to reduce the risk of having backache as you would no longer need to bow your back just to use the lower sink area. We design according to human ergonomic, the lower countertop will be more suitable to those preparation work in the kitchen, such as cutting etc...

I guess thats all for our sharing today. Let me introduce you the classic combination of grey and wood colour, it somehow bring up some modern style, but at the same time looks more young and peaceful.

Disclaimer: Images 1 & 2 belongs to My Maison while Image 3 is taken online, for sharing purpose only. Hope this clarify!

user posted image

user posted image

user posted image

This post has been edited by My Maison: Aug 2 2022, 12:22 AM
RadenMasIV
post Aug 2 2022, 01:17 PM

Getting Started
**
Junior Member
52 posts

Joined: Sep 2019


Hello Sir, need some advice. I am staying in double storey corner lot. I plan to extend my top floor back ( my kids room) to the back longkang. 6 years ago I extended the ground floor kitchen until the longkang.

Now if I want to extend the top floor what would happen to my kitchen floor. I didnt know prev contractor put enough pillars to cater for top floor extension. Also I already have the complete kitchen cabinet will it be damaged.

Any idea what would be the cost roughly. Attach the photo view from back.

Now I am thinking if renovation cannot be done or difficult I would consider selling the house and buy new house.

user posted image
RadenMasIV
post Aug 2 2022, 01:18 PM

Getting Started
**
Junior Member
52 posts

Joined: Sep 2019


Hello Sir, need some advice. I am staying in double storey corner lot. I plan to extend my top floor back ( my kids room) to the back longkang. 6 years ago I extended the ground floor kitchen until the longkang.

Now if I want to extend the top floor what would happen to my kitchen floor. I didnt know prev contractor put enough pillars to cater for top floor extension. Also I already have the complete kitchen cabinet will it be damaged.

Any idea what would be the cost roughly. Attach the photo view from back.

Now I am thinking if renovation cannot be done or difficult I would consider selling the house and buy new house.

user posted image
TSMy Maison
post Aug 10 2022, 01:51 AM

Casual
***
Junior Member
319 posts

Joined: Jun 2018
QUOTE(RadenMasIV @ Aug 2 2022, 02:18 PM)
Hello Sir, need some advice. I am staying in double storey corner lot. I plan to extend my top floor back ( my kids room) to the back longkang. 6 years ago I extended the ground floor kitchen until the longkang.

Now if I want to extend the top floor what would happen to my kitchen floor. I didnt know prev contractor put enough pillars to cater for top floor extension. Also I already have the complete kitchen cabinet will it be damaged.

Any idea what would be the cost roughly. Attach the photo view from back.

Now I am thinking if renovation cannot be done or difficult I would consider selling the house and buy new house.

user posted image
*
Hi sir, this condition really depends on the previous construction done by your contractor. It would be better if you could find back the details drawing from your contractor in order to let engineers to advise. The biggest risk at this situation is the entire building is quite near to the drain, which can make the subsoil around to be quite loose, possible to occur settlement. Hope this clarify question!
TSMy Maison
post Aug 10 2022, 07:45 AM

Casual
***
Junior Member
319 posts

Joined: Jun 2018
#RealProject #KitchenDesign #MyMaison

Hi everyone, welcome back !
After the sharing session last week, do you have a better understanding towards the detail? By today, we are going to share with you some of our works done, please be mindful with all those details we had done.๐Ÿ™ˆ๐Ÿคช๐Ÿคช๐Ÿ˜ƒ

Bar island - With the suitable height around 1m, it needs to be designed together with suitable stool height to achieve comfort. Ensure that your knee still have enough space ,250mm distance from your countertop. Your countertop has to be wide enough to allow your leg placed below without blocking the way. How about the pendant light? Normally, we would hang it around 700,800mm away from your countertop, in order to achieve optimum lighting.

Talking about the kitchen upper cabinet, have you considered why must the cabinet set around 300mm depth? This is because the depth provided is sufficient enough for you to place your item, even yourself cant reach the items when the depth it too large. When designing, you have to consider your kitchen equipment sizing which include refrigerator, microwave etc. By making early thought preparation it allows more flexibility to your designer and even a better , neater design layout.๐Ÿค”๐Ÿค”

Lastly, lets talk about the socket. You have to consider how much socket to use in order to fulfill your requirement. Remember that more is always better. You cant really predict and make assumption but have to really propose the number based on the living lifestyle. And of course, the movable socket is definitely more flexible than others, why dont you consider it also !!๐Ÿค˜๐Ÿค˜๐Ÿ˜ƒ๐Ÿ˜ƒ

user posted image

user posted image

user posted image

user posted image

user posted image

user posted image

user posted image

user posted image

user posted image
learningvege P
post Aug 10 2022, 10:16 AM

New Member
*
Probation
4 posts

Joined: Aug 2022
QUOTE(My Maison @ Feb 20 2022, 07:05 PM)
Topic: Toilet Renovation

Title: Dismantling, Hacking, Cleaning

Hi everyone, let's talk about toilet work for today sharing. When we move into a new house, what is the most critical issue that might happen? One of it will be the water issue. Whenever we go for home defect checking, we will definitely put more attention in our toilet, as if water leaks happen, it can cause a lot of trouble to you, and even to your neighbors below your unit.

So, water leaks usually happen when waterproofing work in not done properly. So, ensure that waterproofing work is done perfectly before any finishing/ tiling work is fixed on it. Let's scroll back to the beginning of the renovation work in your toilet, if you would like to have yourself a better toilet design.

First and foremost, remove all your existing toilet fixtures, such as toilet bowl, basin, shower screen, shower head, water heater etc.
Next, hacking work is done to remove all your tiles. With all the unwanted tiles being removed, its time to clean up the area, remove all your debris completely. pack them into bags and bags. Ensure that all the debris are completely thrown away before your renew work start. Let's see and enjoy our photos shared with you, to know how is our work being done. Hope you really enjoy and learn something new today!! rclxm9.gif  rclxm9.gif  rclxm9.gif
*
Hi MyMaison,
Can help provide your views on Floor Grating/Floor Traps? What sizes would you reommend and what materials? Many materials ranging from Stainless steel/ Brass/ etc. And also what features to look out for? Some i see also have Anti-Insect/Rodents, others have Anti-Odour. DO they compromise water flow? Thanks a lot for your informative thread.
TSMy Maison
post Aug 19 2022, 05:53 AM

Casual
***
Junior Member
319 posts

Joined: Jun 2018
#Workmanship #MyMaison

A good interior designer is indeed important for you, but a contractor with good workmanship is a must. With proper communication and being detailed enough can definitely affect the beauty of the design. Today, we shall share with you one of the project in Kajang. Simple yet basic renovation up to the budget parameter, we extend parts of the area up to their needs.

People might not aware with some of the construction materials, but what affect the pricing the most is definitely the materials. You need to understand what kind of choice u can make to achieve balance. So, what kind of flooring can we provide? Timber flooring can be divided into few types and what are their differences actually?

็Ÿณๅก‘ๅœฐๆฟ SPC- Stone-plastic composite. One of the most common material in this industry in order to imitate the use of timber flooring. It is easy to be cut, and it provides "click" over the groove. It is resistance to waterproof and scratch, and it would never affect the original tiles flooring you have as they can be directly installed on it.

Laminate Flooring made of a lot timber fibers, being compressed together into one plank. It is very resistance to scratch as well but not recommend to be use in wet area. It is still one of the hot choices for most of the users. Engineered Wood, not easily to warped but the pricing is definitely higher. It is made out of solid woods, thus once it is being scratched, it cannot be skimmed to its original looks.

Skirting, people might not aware what are the uses of it? For your information, skirting is normally used to conceal some of the unevenness happen between your wall and your flooring. This is one of the trick in order to resolve the termination between tow different materials.

Hope u guys learn something today!!!

MyMaison :https://mymaison.com.my

user posted image

user posted image

user posted image

user posted image

user posted image

user posted image

user posted image

user posted image

user posted image
TSMy Maison
post Aug 25 2022, 01:14 AM

Casual
***
Junior Member
319 posts

Joined: Jun 2018
#MaterialTips #MyMaison


Design Tips๏ผ

Its the sharing session again. Let me ask you a question. How do you choose the best countertop material? There are so many choices for you to consider, and the most common and widely accepted by users include quartz, granite, solid surface corian, marble, & laminate. Let me introduce to you in brief, to give you a general idea.

Quartz- Being a manmade stone, its biggest advantage will be its variety of colours to choose from. Despite not the natural stone, the improvement in this industry has succesfully discover a way to imitate the surface and patterns of the natural stone. Quartz is even more durable and water resistance due to its manmade properties. Having a quartz countertop, it allows the cleaning work to be done so easily, as it is non-porous at all. ๐Ÿ˜๐Ÿ˜ƒ

Corian Solid Surface- It does have a lot of colours to choose from. In overall, it give a very neat looking in design as corian can normally be used to make basin and even the countertop backboard. It is non-porous, thus it does not require to be sealed. Quite resistant to the dirt and not easily being destroyed and affected by acidic materials/detergents. However, even it can withstand with heat, but it is not recommended to contact at long period. ๐Ÿ˜‰

Granite- The hardest natural stone. Its toughness is even higher than the knife. It is resistant to heat, scratch and usage. However, due to its natural properties, it is porous, thus we need to sealed their surface every 10 years in order to maintain their quality. With the sealed up granite, it looks more shiny.

Marble โ€“ The one and the only one. Same goes to other natural stone. marble is porous and it is more softer as compared to other. It needs to be extra taken care. Remember not to allow its surface to in contact with the dirt, acidic materials too long as they might interact with the surface and destroy the surface.

Laminate - This material is the most suitable to buy when it comes to your tight budget. No matter the baseprice, installation price or even the maintenance fees, laminate is always the most suitable one.
Lastly let's compare the pricing in Malaysia. For quartz, the price can be vary from low to high. It can go even up to RM 600 for the better quality and design. Solid surface, around RM 200. Granite is around RM 100 to RM 500. Marble, the price is differ in accordance with the design and quality. Lastly, the laminate can be around RM100.

Hope you learn something today !!!

Disclaimer: Pictures are downloaded from the Internet, It is shared for reference purpose only.

๐Ÿ“ž : +60 11-1665 0288
MyMaison ๅฎ˜็ฝ‘ ๐Ÿ’ป๏ผšhttps://mymaison.com.my
๐Ÿ“ฉ: mymaison.design@gmail.com

user posted image

user posted image

user posted image

user posted image

This post has been edited by My Maison: Aug 25 2022, 01:20 AM
TSMy Maison
post Aug 26 2022, 12:18 AM

Casual
***
Junior Member
319 posts

Joined: Jun 2018
QUOTE(learningvege @ Aug 10 2022, 11:16 AM)
Hi MyMaison,
Can help provide your views on Floor Grating/Floor Traps? What sizes would you reommend and what materials? Many materials ranging from Stainless steel/ Brass/ etc. And also what features to look out for? Some i see also have Anti-Insect/Rodents, others have Anti-Odour. DO they compromise water flow? Thanks a lot for your informative thread.
*
Hi sir, sorry for the late reply ya. Missed out your comment previously haha.

There is definitely many types of floor traps, grating in the market and the price can range slightly different. Normally, we would consult the supplier and ask for their catalog cut sheet and do some study. Yes you are right, material can range from plastic to even stainless steel and even more. There are always alot of new products specialised by each company. Normally we would go for what is your needs towards the area, and understand what kind of floor trap you need, and we would propose the most suitable one for you.
Feel free to google some company like SANSICO, JOHNSONSUISSE, PAZTEE Malaysia etc, and there is always surprise for you to compare.
TSMy Maison
post Sep 4 2022, 02:00 AM

Casual
***
Junior Member
319 posts

Joined: Jun 2018
#DesignTips #MyMaison

Furnishing, is it worth to spend more money on it? It is actually something which is not permanent, something that can be moved and replaced from time to time. In terms of selection, what are their possibilities and what are the tips that need to be take note of?

1. Colour -
It is advised that you consider the wall design when selecting your furniture/softcover. What is your mode of design? When the design is more to Modern Cool Grey, it is more suggestable to choose darker colour scheme โ€“ Eg: grey/black/white. When the mode is more towards warm, choose the softcover which is more comfortable and welcoming in colour.

2. Quality & Texture-
When selecting the most suitable furniture, we focus on the quality and texture as they are quite important as well. For example, donโ€™t you feel that something that looks light and comfy is more suitable in a Muji design rather than choosing furniture that is elegant, sleek in design.

3. Lighting-
When selecting the lighting fixture, we focus on the colour temperature rather than its brightness solely. Colour temperature is important in creating the atmosphere and mood. They wonโ€™t cost you a lot of money. The value it brought is definitely worth than its pricing. A suitable floor lamp can even be the focus point in one space with its ambient lighting.

4. Plants/Carpet/Simple Accessories/Picture Sets
Other than furniture, we can also decorate our lovely home with small plants/simple accessories, suitable picture sets on wall, carpet etc. Please donโ€™t think that carpet is extra as it somehow soften your floor and create a better touch of your feet on floor. If you worry of the dust accumulation, choose short shaggy carpet and vacuum it from time to time.

Hope you like our sharing today!

Disclaimer: Pic 1 belongs to MyMasion Design ; Pic 2-5 are downloaded from Internet for reference purpose only

user posted image

user posted image

user posted image

user posted image

user posted image

This post has been edited by My Maison: Sep 4 2022, 02:02 AM
TSMy Maison
post Sep 17 2022, 12:55 AM

Casual
***
Junior Member
319 posts

Joined: Jun 2018
#renovationproject #CommercialProject #MyMaison

Commercial Renovation Project

We used to share a lot of housing renovation project with some design tips! Let's talk about one of the project we had recently done in IOI City Mall, a shop renovation known as Memories Cafe. We are going to complete the jobs on Mid of September, and passing the two months baby back to the owner! Stay tuned on our completed project photos soon and let's make a comparison between before and after! Let me what you think about it that time.

Shop renovation needs a lot of manpower as compared to small renovation. Just look at how hard our team works! Starting from scratch, we lay bricks by bricks, from nothing to something. We look into details, to ensure that no silly mistake, no leakage, no cracks, no collapse from happening. We follow the rules and regulations set by the management, we follow the SOP and getting approval of start work from the authorities. Starting from site clearance, moving out unused items, hacking, disposing and more, steps by steps, slowly but surely!! rclxm9.gif rclxm9.gif

We arrange proper work program, ensure the timeline is followed all the time. A good discussion with the client, consultant team, site supervisor, inspector of works, management. We work together and ensure that work flows smoothly. We do provide a proper storage area for our materials to be placed, with pallets below. After complete with site survey and clearance, we do markings to ensure that everything built as per approved shop drawings. We provide sufficient render mix, and lay bricks with well-mixed mortar.

Let's call it a day for our sharing today! Let me share with you a more detailed work progress in my next sharing session. Enjoy our photos shared with you to see how we work as a team!!๐Ÿ˜„๐Ÿ˜‰

Hope you learn something today!!!

Website๐Ÿ’ป๏ผšhttps://mymaison.com.my


user posted image

user posted image

user posted image

user posted image

user posted image

user posted image

user posted image

user posted image

user posted image

This post has been edited by My Maison: Sep 21 2022, 03:46 PM
TSMy Maison
post Sep 18 2022, 11:19 PM

Casual
***
Junior Member
319 posts

Joined: Jun 2018
#DefectTips #MyMaison

ๆ–ฐๅฑ‹็ผบ้™ท House Defect

Hi everyone. Welcome back to My Maison sharing session again. Let's talk about house defect checking for today's topic.
Many of us would think of how am I going to design and renovate my new house after getting my key once vacant possession is allowed. We are so excited about it but do you ever know that before doing this, there is something more important we need to know, which is checking whether there is any house defect in property before we start any renovation works again. Do you know that you are entitled with 30 months of defect liability period, whereby if there are any defects, which are unacceptable, you may request your developer to refine the final works for you.๐Ÿ˜…

Below are some of the tips for you to have a brief understanding and simple checklist as a guideline.
1. Take as many photos as you can for those defects found in your house. This is for you to attach the so called "evidence" when you submit the house defect inspection report to the developers. You can also make a comparison between before and after.
2. The most obvious thing in your house is definitely the large area wall and floor. You can easily seen if there is any patchy and uneven surface, wall cracks and even water seepage.
3. Is the floor and wall interface good enough? Is the skirting proper installed? Is there any cracks on the door architrave?
4. If there is cracks on floor tiles, or any uneven or deformation of timber floor, you may request for rectification works to be done.
5. Check if there is any water seepage on your ceiling, as water issue might be one of the most critical issue.
6. Check all your doors & windows. Can they operate smoothly? Are they properly sealed up?
7. Check the amount of power sockets, switches. Ensure all of the lights can function well also. No exposed wire can be seen.
8. Check all the water plumbing. Ensure the water pressure is good enough to be used.
9. Ensure that the toilet bowl can be flushed properly. Floor traps are proper installed and water gradients are done perfectly.
10. If there is any cabinet works, ensure the designs are exactly same. Check if there is any missing ironmongeries, accessories. By doing comparison with SPA, you can easily notify if there is any missing. Furthermore, check whether the workmanship are okay. Request for rectification if the gaps between each operable doors are not equal, or if the doors could not function properly.
11. Check if your gate are in good condition, no rusty edges. Check your mailbox condition, is it safe and no sharp edges?
12. Lastly, fill up the inspection from checklist, with the forms to be returned to the developers for their rectification works!

However, my advice to all, we need to know that there is no perfect items in this world. As long as the work is acceptable with no big issue, please don't try to be nitpicky. ๐Ÿ˜„
Hope you learn something today๏ผ๐Ÿ˜‰

Disclaimer: Parts of the photos shared here are from online sources. It's for learning and sharing purpose only!

user posted image

user posted image

user posted image

user posted image

user posted image
BboyDora
post Sep 19 2022, 03:23 PM

Look at all my stars!!
*******
Senior Member
2,361 posts

Joined: Feb 2008
i had PM-ed you
TSMy Maison
post Sep 25 2022, 08:00 PM

Casual
***
Junior Member
319 posts

Joined: Jun 2018
#Materials Handling #Renovation Works #CommercialProject #MyMaison

Brickwork
Welcome back to our โ€œMaterial Handlingโ€ topic sharing session. Previously, I used to share in general about how we arrange our manpower and ensuring our project timeline run within timeframe. For today, let us back to some basic, how do you lay a proper brickwork. rclxm9.gif

During the transportation of bricks at site, we unload the palleted bricks with electric pallet machine. After getting the materials, we inspect if there are any cracks on the received items. Just then, we pack, deliver and store them in a protected storage area to prevent any cracks, breakage and damages. We always ensure that our workers are proper trained before any commencement of work. rclxms.gif

Upon getting the construction drawing, as mentioned before, we set out the locations and positions for brickworks according to the gridline. As our preparatory work, we will discuss with other sub-contractor if there are any openings. We plan and locate if there are any service pipe sleeves. As preparation, we equip ourselves with wheelbarrows, spirit levels, measuring tapes, spatulas, tongs and more. mega_shok.gif

Firstly, mix the mortar to the proportion as required. We then transport the mixed mortar using wheelbarrows to the required area. We ensure that the bricks are all soaked in water before laying. You might be curious why we do so? This is because when the bricks are wet, they will not absorb any water from mortar mix anymore later on. If not, the mortar will not gain enough strength to create a strong bond between itself with the bricks. Soaking also helps to remove unnecessary dust from the bricks. For your information, if we are to construct a full height wall, we will provide RC stiffener for every 3m in vertical and horizontal direction. notworthy.gif

In this case, we place the mortar onto the bricks using the spatula, then lay the bricks over the mortar. Laying work is done layer by layer, slowly but surely to the correct thickness and with suitable type of bond. We also provide expanded metal mesh for every 4 course of bricks, laid embedded in the mortar jointing. We ensure that joints are maintained at 10mm gap evenly during the laying of bricks until the entire work is completed. With proper equipment, we check the verticality of brick wall all the time. Lastly, out site supervisor will carry out inspection to ensure that all the works done are quality and acceptable!

Just when everything is done, we proceed with our waterproofing works, which will be shared with you in next post. Stay tuned! Letโ€™s talk more in future and I hope you learn something new today.
notworthy.gif notworthy.gif

MyMaison Website ๐Ÿ’ป๏ผšhttps://mymaison.com.my

user posted image

user posted image

user posted image

user posted image

user posted image

user posted image


TSMy Maison
post Sep 25 2022, 08:01 PM

Casual
***
Junior Member
319 posts

Joined: Jun 2018
user posted image

user posted image

user posted image

user posted image

user posted image
TSMy Maison
post Sep 27 2022, 11:31 PM

Casual
***
Junior Member
319 posts

Joined: Jun 2018
#Materials Handling #Renovation Works #CommercialProject #MyMaison

Bituminous Membrane Coating and Torch on Membrane

Welcome back to โ€œMaterial Handlingโ€ sharing session again. Let us continue with the previous topic about commercial renovation project. For today, we will move into a more detailed work program and share with you topic related to waterproofing!

In this project, beside on using typical sand brick, we also introduce the usage of block wall, so called CMU- concrete masonry unit. This precast unit is larger in size and it eventually speeds up our construction work. The CMU walls are having a good resistance over fire, which are suitable to be used in restaurant. The improvement in material properties definitely provides us the opportunity to do better work.

However, our main focus today for todayโ€™s topic is actually the application of bituminous waterproofing coating with additional torch on applied waterproofing membrane, which is known as Atactic Polypropylene Plastic modified asphalt (APP). The bituminous membrane coating is in liquid form which include Polyurethane to strengthen the durability and flexibility. With this, it helps a lot in protecting the structure from moisture. There is always a must to do surface preparation. Ensure that the target area is free from loose particles before any the application of bituminous membrane coating. Some equipment we need here include brush or trowel, and we would apply at least two coats of coating over the substrate.

After the primer coat application, we can now apply the torch on membrane. We need to melt the layer onto the surface by using a heated blowtorch. For your information, if the substrate used is wood, then this torch on membrane is not the suitable one to be used, but in our case, we applied it onto a concrete surface. With this membrane, the area will be water-tight, no water seepage will happen and hence no mould, no damage to the carpentry installed later.

You definitely still need some skilled workers to serve the best quality of work. When torching, there are some details we need to take note. For example, the way the membrane overlapped with each other; the speed we roll out the membrane; the amount of heat we torch on the surface and more. Will there be any seam failure occurs? What will be the precautionary steps to handle the blowtorch? How are we going to rectify if there is any damage? These are the reasons why we need to hire a skilled contractor! As I mentioned before, you may not need to know the exact steps for the works, but when you have a concept on how the works being done, it would be an advantage to you.

I hope you learn something new today. Letโ€™s talk more in future.

user posted image

user posted image

user posted image

user posted image

user posted image

user posted image

user posted image

user posted image
TSMy Maison
post Oct 3 2022, 11:02 PM

Casual
***
Junior Member
319 posts

Joined: Jun 2018
Screeding Work

We had talked about how the waterproofing work was done during the last session. For today, let us continue with floor screeding works, what is screeding and why is this necessary?

For your information, the reason of screeding the floor is to create a smooth & flat layer. Screeding work is actually a preparatory work before we can actually lay the floor tiles on it as the final finishing surface. In this case, we would need a screeding bar, a long aluminium bar to work with.

Getting ready with the cement mix, which is cement and sand with ratio of 1:3. Just then, we placed the screed mortar into the bays. Use a level peg to monitor the thickness of screed. Scraping motion is continuously done over the wet surface with the aluminium bar, to fill up the gaps by pushing the excess concrete into the hollows in between. We would also need a hand trowel to tamp the surface, until achieving 20 to 30mm thick of screeding. This is what we called compaction.

For wet area that require a gradient fall to the floor trap, donโ€™t forget that the screeding work has to be done with minimum 1:100 gradient for the water to flow. Some additional tips for you; ensure that the surfaces are cured properly, no visible trowel marks, no ponding should occur upon completion of work. If there is crack, rectify it!

Some protection works that we always monitor:
1. Site traffic is regulated, light foot traffic is only allowed after 48 hours.
2. Protect the screed with plastic sheet / cardboard until it is fully dried and ready for final floor finish.

In our next posting, we will share with you with the design elements we use as our finishing material throughout the project. We move on to design, something aesthetic, and we care the most! Stay tuned and hope you learn something today!

user posted image

user posted image

user posted image

user posted image

user posted image

user posted image
TSMy Maison
post Oct 5 2022, 06:23 AM

Casual
***
Junior Member
319 posts

Joined: Jun 2018
#DesignMaterialSharing #Renovation Works #CommercialProject #MyMaison
ๅปบ็ญ‘ๆๆ–™ๅˆ†ไบซ Architectural Design Material Sharing

็œ‹ไบ†้‚ฃไนˆๅคšๆฐดๆณฅๅทฅ๏ผŒๅคงๅฎถๅพ€ๅพ€ๆœ€ๅฅฝๅฅ‡็š„ๅฐฑๆ˜ฏFinishing Material ๅ•ฆ๏ผ็ฉถ็ซŸๅœจ้€‰ๆ‹ฉ่ฟ™ไบ›ๆๆ–™ๆ—ถ๏ผŒๅ…ทๅค‡ไบ†ไป€ไนˆๆ ท็š„ไปทๅ€ผ๏ผŒๅ€ผๅพ—ๆˆ‘ไปฌๅŽปๆŽข่ฎจๅ‘ข๏ผŸ

1. ้ฆ–ๅ…ˆๅ‘ไธบๅคงๅฎถไป‹็ป็š„่ฟ™ไธ€ๆฌพ็ฝ‘็บขๆๆ–™ๆ˜ฏ้•‚็ฉบ่Šฑ็ –๏ผๅฎƒๆ˜ฏไธ€็ง่ฝปๆ€ง็ Œๅ—๏ผŒๆ€ง่ดจไธŽ็ –ๅ—็›ธไผผใ€‚ๅ…ถๅฎž๏ผŒไป–้žๅธธ้€‚็”จไบŽๅฎคๅ†…ๅ’Œๅฎคๅค–๏ผŒๅœจๅปบ็ญ‘ๅญฆ้‡Œ๏ผŒๆˆ‘ไปฌ็ปๅธธๅบ”็”จๅฎƒๆฅ่งฃๅ†ณ้€š้ฃŽๅ’Œ้˜ปๆŒกๅ…‰็บฟ็š„้—ฎ้ข˜ใ€‚ๅฎƒๅฏไธบๅปบ็ญ‘ๅค–ๅฝขๆทปๅŠ ไธ€ไปฝ่‡ช็„ถ็š„็พŽๆ„Ÿใ€‚่€Œๅ›žๅˆฐๅฎคๅ†…๏ผŒๅฎƒๅธธ่ขซๅบ”็”จๆฅๅš้š”ๆ–ญ๏ผŒไนŸๅฏไธบๅข™ไฝ“ๆทปๅŠ ไธ€ไปฝ้š”่€Œไธๆ–ญ็š„ๆ„Ÿ่ง‰๏ผŒ่ฃ…้ฅฐๆ€งๆžๅผบ๏ผŒ้žๅธธๆœ‰้ขœๅ€ผ๏ผๅˆซๆ‹…ๅฟƒ๏ผŒๅฎƒๅ…ถๅฎžๆ‹ฅๆœ‰ๅพˆๅคšๅ›พๆกˆๅ’Œ้ขœ่‰ฒไพ›ไฝ ้€‰ๆ‹ฉ๏ผŒ

2. ๆ ผๅญ็ –ใ€‚ๅœจ่ฟ™ไธ€ๆฌก็š„้กน็›ฎไธญ๏ผŒๆˆ‘ไปฌๅคง้‡ไฝฟ็”จไบ†ไธๅŒ็ง็ฑป็š„ๆ ผๅญ็ –๏ผŒ่ฟ™ๅŒ…ๆ‹ฌไบ†้•ฟๅฝขๅ’Œๆ–นๅฝข็š„ๆ ผๅญ็ –ใ€‚ๅฎƒ็š„ๅญ˜ๅœจ่ฎฉๆ•ดไฝ“็š„ๆฌงไบš่ฎพ่ฎกๆ›ดไธบไธฐๅฏŒๅ’Œๅคšๅ…ƒๆ€งใ€‚ๅ…ถ่กจ้ขๆœ‰ๅ“‘ๅ…‰ๅนณๆป‘๏ผŒไนŸๆœ‰็ฒ—็ณ™้ขไพ›ไฝ ้€‰ๆ‹ฉไฝ ่ฆ็š„้ฃŽๆ ผ๏ผๅฝฉ่‰ฒ็š„ๆ–น็ –ไนŸๅœจ่ง†่ง‰ไธŠๆๅ‡บไบ†ๆดปๆณผ็š„ๆ„Ÿ่ง‰๏ผŒ้žๅธธๆœ‰ไธชๆ€งใ€‚

3. ่Šฑ็ –ใ€‚ไธ€ไธช้žๅธธๅ…ทๆœ‰็‰น่‰ฒ็š„่ฎพ่ฎกใ€‚ๆฏ”่ตทๅคง้ข็งฏๅŒ้“บ็“ท็ –๏ผŒๅฐ่Šฑ็ –็š„ๅ‡บ็Žฐ็ปˆไบŽยทๆ‰“็ ดไบ†ๆฒ‰้—ท็š„ๆ„Ÿ่ง‰ใ€‚็ปŸไธ€็š„้€‰ๆ‹ฉ้žๅธธ็š„้‡่ฆใ€‚ไฝ ๅฏไปฅๅœจ่ฟ™ๆฌก็š„้กน็›ฎไธญ๏ผŒ็œ‹่งๅœฐ้ขๅ’Œๅข™้ข้ขœ่‰ฒ็ปŸไธ€๏ผŒ่“่‰ฒๆญ้…่“่‰ฒใ€็™ฝ่‰ฒๆญ้…็™ฝ่‰ฒ,่ฟ™ๆ ทๅฏ้ฟๅ…ๆททไนฑ่ง†่ง‰.

ๅฅฝๅ•ฆ๏ผŒ่ฟ™ไธ€็ณปๅˆ—็š„็ฝ‘็บขๆๆ–™ไป‹็ป็ฏ‡๏ผŒๅธŒๆœ›ไฝ ไปฌไผšๅ–œๆฌขใ€‚ๅœจ่ฟ™้‡Œๆƒณ้žๅธธ่ฐข่ฐข้กพๅฎขๅฏนๆˆ‘ไปฌ็š„ไฟกไปป๏ผŒไธ€ๆฌกๆฌก็š„ๆŠŠไธๅŒๅˆ†่กŒ็š„ๅทฅ็จ‹ๅ‘ˆไบค็ป™ๆˆ‘ไปฌใ€‚ๅคงๅฎถๆœ‰็ฉบ๏ผŒๅฏๅƒไธ‡่ฆๅคšๅคšๆ‹œ่ฎฟ ไฝไบŽ Sunway Pyramid, Sunway Velocity, IOI City Mall ็š„ Memorie Cafe ๅˆ†่กŒๅ“ฆ๏ผๅทๅทๅ‘Š่ฏ‰ๅคงๅฎถ๏ผŒ1 Utama Shopping Centre็š„ๅทฅ็จ‹ไนŸๅฐ†ๅœจ10 ๆœˆไปฝๅผ€ๅง‹ๅŠจๅทฅ๏ผŒๅคงๅฎถๅฏไปฅๆ•ฌ่ฏทๆœŸๅพ…ๆœชๆฅ็š„ๅŠจๆ€ๅ“ฆ๏ผ

Thatโ€™s all for the sharing of the day! I would like to take this opportunity to thank our client for trusting our workmanship and professionalism. We are glad to be able to serve the best quality of works to you, Mr. Owner of Memorie Cafรฉ. And to all of you who are reading this post, I hope you guys enjoy our sharing, please have a visit on any branches of Memorie Cafรฉ located in Sunway Pyramid, Sunway Velocity, IOI City Mall to have a look on our works! Letโ€™s look forward on our sharing in future, and that will be the new branch in 1 Utama Shopping Centre. Stay Tuned!

ๅคงๅฎถ๏ผŒๆˆ‘ไปฌไธ‹ๆœŸๅ†่ง๏ผ

user posted image

user posted image

user posted image

user posted image

user posted image

user posted image

user posted image

user posted image

user posted image
TSMy Maison
post Oct 5 2022, 06:24 AM

Casual
***
Junior Member
319 posts

Joined: Jun 2018
user posted image

user posted image

user posted image

user posted image

user posted image

user posted image

user posted image

user posted image

user posted image
TSMy Maison
post Oct 13 2022, 09:49 PM

Casual
***
Junior Member
319 posts

Joined: Jun 2018
#NewProject #Renovation Works #CommercialProject #MyMaison

ๅœบๅœฐ่€ƒๅฏŸ Site Recce

Tadaa!! ๅˆๆ˜ฏไธ€ๅœบๆ–ฐProject ๅ•ฆ๏ผ่ฟ™ไธ€ๆฌก๏ผŒๆˆ‘ไปฌ้š็€ๅ›ข้˜Ÿๆฅๅˆฐไบ†1 Utama Shopping Centre Old Wing ๆฅๅš่€ƒๅฏŸๅ•ฆ๏ผ้™คไบ†่ฏฆ็ป†ไบ†่งฃๅœบๅœฐไน‹ๅค–๏ผŒๆˆ‘ไปฌไนŸ่ฆๅ’Œ่ดŸ่ดฃไบบๆŽฅๆดฝ๏ผŒไบ†่งฃ่ง„ๅˆ™ๆ‰่ƒฝๅŠจๅทฅๅ•Š๏ผ็œ‹็œ‹่ฟ™ไบ›็…ง็‰‡๏ผŒๆ˜ฏไธๆ˜ฏๅพˆ้˜ดๆฃฎๅ‘ข๏ผŸๅคงๅฎถๅฏๅˆซๅคชๆ‹…ๅฟƒ๏ผŒๅฐ็ผ–็›ธไฟกๆˆ‘ไปฌ็š„ๅ›ข้˜Ÿ๏ผŒ็ปๅฏนๅฏไปฅๆŠŠ่ฟ™ไธ€ๆฌก็š„้šพ้ข˜่ƒœไปปๅนถๅฎŒๆˆ๏ผŒ็›ธไฟก่ฎพ่ฎก็š„ๅŠ›้‡๏ผ๏ผ

ๆฏไธ€ๆฌก็š„ๅผ€ๅง‹้ƒฝๆ˜ฏไธ€ไธชๅฐ่ฏ•๏ผŒ็ฉถ็ซŸ่ฟ˜ๆœ‰ไป€ไนˆๆœช็Ÿฅ็š„ๅฏ่ƒฝๆ€ง็ญ‰ๅพ…ๆˆ‘ไปฌ๏ผŒๅ…ณๆณจๆˆ‘ไปฌ๏ผŒไธ€่ตท็œ‹ไธ‹ๅŽปๅง๏ผ

Tadaa!! Here comes our new project! This time, we followed the crew to 1 Utama Shopping Centre Old Wing to do a thorough Site Recce. Beside on knowing the client requirement, the site condition, we also met the management officer to discuss in details! Look at all these photos, it might look dull and bare, but donโ€™t worry! We would definitely convert this into something incredible in future, lets believe the power of designing!

Every time we start a new project, there is always a new chance for us to explore the possibilities. Follow us and continue to explore in this journey of renovation!


user posted image

user posted image

user posted image

user posted image

user posted image

user posted image

This post has been edited by My Maison: Oct 13 2022, 09:50 PM
TSMy Maison
post Oct 16 2022, 11:59 PM

Casual
***
Junior Member
319 posts

Joined: Jun 2018
#MaterialTips #MyMaison

ไบšๅ…‹ๅŠ›็ฏ็ฎฑ Acrylic Lightbox

ๅคงๅฎถๅฅฝ๏ผŒไปŠๅคฉๅฐ็ผ–ๆƒณๅ’Œๅคงๅฎถ็ปง็ปญๅˆ†ไบซๆๆ–™็š„ๅฐ็Ÿฅ่ฏ†๏ผŒๅธ‚้ขไธŠ็š„ไบšๅ…‹ๅŠ›็ฏ็ฎฑ็ฉถ็ซŸๆœ‰ไป€ไนˆๅฅฝๅค„๏ผŸ
ๅฏนไบŽๅพˆๅคš็š„ไธš่€…่€Œ่จ€๏ผŒ็”š่‡ณๆ˜ฏ่ฎธๅคš่ฟž้”ๅบ—้ข๏ผŒไฝ ้ƒฝไธ้šพๅ‘็Žฐไป–ไปฌ้ƒฝๅบ”็”จไบ†็ฏ็ฎฑๆฅๆ‰“้€ ๅ…‰้ฒœไบฎไธฝ็š„้—จ้ขใ€‚็ฏ็ฎฑไธไป…ไป…ๅฏไฝœไธบไฝ ็š„ๅ“็‰Œๆ ‡่ฏ†๏ผŒไธฐๅฏŒๅŒ–logo็š„ ่ฎพ่ฎก๏ผŒ็ฏ็ฎฑๆ›ด่ฎฉๆ•ดไฝ“ๅบ—้ข็š„่ฎพ่ฎกๆ›ดๅฆ‚็”ป้พ™็‚น็›ใ€‚ๅœจๅนฟๅ‘Š็‰Œๅฎฃไผ ๅ’Œ่ฃ…้ฅฐไธŠ๏ผŒ็ฏ็ฎฑ็š„ๅญ˜ๅœจๅธๅผ•ไบ†ๆถˆ่ดน่€…็š„็œผ็ƒ๏ผŒๆ— ่ฎบ็™ฝๅคฉๆˆ–ๅคœๆ™š้ƒฝ่ƒฝๅธฆๆฅๅ…‰็บฟไบฎไธฝ็š„ๆ•ˆๆžœใ€‚็ฏๅ…‰็š„่ฅ้€ ๏ผŒไนŸ่ฎฉๅบ—้“บๆ›ดๅŠ ็พŽ่ง‚ใ€‚
ๅฎƒไน‹ๆ‰€ไปฅไผ˜ๅŠฟๅพˆๅคง๏ผŒๆ˜ฏๅ› ไธบๆ€งไปทๆฏ”ๆž้ซ˜๏ผŒไฝฟ็”จๅ‘จๆœŸๅพˆ้•ฟ๏ผŒ็ปดๆŠคๆˆๆœฌไฝŽ๏ผŒๅฎ‰่ฃ…่ดนไนŸไธ้ซ˜ใ€‚ๆŠŠไฝ ๆƒณ่ฆ็š„่ฎพ่ฎกๅ’Œๆƒณๆณ•ๆไบค็ป™ไธ“ไธš็š„ๆŠ€ๆœฏไบบๅ‘˜๏ผŒๆ— ่ฎบๆ˜ฏๅญ—ไฝ“็š„้€‰ๆ‹ฉใ€ๅ›พๆกˆใ€้ขœ่‰ฒใ€ไฝ ้ƒฝๅฏไปฅๅพ—ๅˆฐไฝ ๅƒ่ฆ็š„ๆ•ˆๆžœใ€‚๐Ÿ˜ƒ๐Ÿ˜ƒ
ๅœจๆฟๆ็š„้€‰ๆ‹ฉไธŠ๏ผŒ่‹ฅๆ˜ฏไฝฟ็”จๅœจๆˆทๅค–็š„็ฏ็ฎฑ๏ผŒๅปบ่ฎฎ้€‰ๆ‹ฉ่พƒๅŽšๅ’Œ็ป“ๅฎž็š„ไบšๅ…‹ๅŠ›ๆฟใ€‚ๅฎƒไน‹ๆ‰€ไปฅ็งฐไน‹ไธบๅธๅก‘็ฏ็ฎฑ๏ผŒไธป่ฆๅŽŸๅ› ๅณๆ˜ฏๅฐ†ๅก‘ๆ–™็‰‡ๅŠ ็ƒญไฝฟๅ˜่ฝฏ๏ผŒๅ†้‡‡็”จ็œŸ็ฉบๅฐ†ๅก‘ๆ–™ๅธ้™„ๅœจๆจกๅ…ท็š„่กจ้ข๏ผŒๆ‰€ไปฅๆจกๅ…ท็š„ๅˆถไฝœ่ฟ‡็จ‹ๆ˜ฏ้žๅธธ็š„้‡่ฆ๏ผŒๅฎƒ็š„็ฒพๅ‡†ๅบฆๅพ€ๅพ€ๅ†ณๅฎšไบ†ๆˆๅ“็š„็พŽ่ง‚ใ€‚่‡ณไบŽๅ›พๆกˆ็š„ๅ‘ˆ็Žฐๅฐฑๆ˜ฏๅฐ†ๅฎƒๆ‰“ๅฐๅœจไบšๅ…‹ๅŠ›ๆฟไธŠ๏ผŒไพฟๅฏไปฅๅ‘ˆ็Žฐๅ‡บ็”ป้ขใ€‚ๆœ€ๅŽ๏ผŒ้€‰ๆ‹ฉ้€‚ๅˆ็š„็ฏๆกๆ€ง่ดจๅ’Œ็ฏๅ…‰ๆ•ˆๆžœๅณๅฏๅฎŒๆˆ๏ผ๐Ÿค˜๐Ÿค˜
ๅธŒๆœ›ๅคงๅฎถ่ฟ˜ๅ–œๆฌข่ฟ™ๆฌก็š„ไป‹็ป๏ผŒๅฐ็ผ–่ฎคไธบไบšๅ…‹ๅŠ›็ฏ็ฎฑๆ˜ฏไธ€ไธชๅพˆไธ้”™็š„้€‰ๆ‹ฉ๏ผŒไฝ†ๅƒไธ‡่ฎฐไฝ่ฆ้€‰ๆ‹ฉไธ“ไธš็š„ๅธˆๅ‚…ๅˆถไฝœ๏ผŒไปฅ้ฟๅ…่ธฉ้›ทๅ–๏ผ๐Ÿค˜๐Ÿค˜๐Ÿ˜ƒ๐Ÿ˜ƒ ๐Ÿ™ˆ๐Ÿคช๐Ÿคช๐Ÿ˜ƒ

Disclaimer๏ผšๅ›พ1- 4 ไธบMy Maison ๆ‰€ๅฑž๏ผ›ๅ›พ5-7ไธบ็ฝ‘็ปœๆ‘„ๅ–๏ผŒไป…ไฝœไธบๅ‚่€ƒ็”จ้€”


user posted image

user posted image

user posted image

user posted image

user posted image

user posted image

user posted image

TSMy Maison
post Oct 19 2022, 11:48 PM

Casual
***
Junior Member
319 posts

Joined: Jun 2018
#MaterialTips #MyMaison

ๆ— ๆŠŠๆ‰‹่ฎพ่ฎก Non-Handle Profile Design[/B]

่ฏดๅˆฐๅฎถ้‡Œ็š„ๆ”ถ็บณ็ฉบ้—ด๏ผŒ่‚ฏๅฎšๅฐ‘ไธไบ†ๆœจๅทฅๅทฅ่‰บใ€‚ไป€ไนˆ๏ผŸไธๆƒณ่ฆ็œ‹่งๆŠŠๆ‰‹ๅœจๆŸœๅญไธŠ๏ผŒ่ง‰ๅพ—็ข็œผ๏ผŒ้‚ฃๅฐฑ่ฎฉๅฐ็ผ–ๆฅไป‹็ปไฝ ไธ€ไบ›ๆ— ๆ‹‰ๆ‰‹่ฎพ่ฎก๏ผŒๅ–œๆฌข็š„่ฎฐๅพ—็‚น่ตžๆ”ถ่—๏ผŒไนŸ่ฎธไธ‹ๆฌก่ฃ…ไฟฎๆ—ถ๏ผŒๅฏไปฅๆดพไธŠ็”จๅœบๅ“ฆ๏ผ๐Ÿ‘๐Ÿป๐Ÿ˜†๐Ÿ˜

1. ้—จๆฟไธ‹ๅปถ1cm - Extend the door panel downward for 1cm
่ฟ™ไนŸ่ฎธๆ˜ฏๆœ€ๆ™ฎ้ใ€ๆœ€็ฎ€ๅ•ใ€ๆœ€ๆ˜“ๆ˜Ž็™ฝใ€ไนŸๆ˜ฏๆœ€็›ดๆŽฅ็š„ๆ–นๅผๆฅๆ‰“้€ ไฝ ็š„ๆ— ๆŠŠๆ‰‹่ฎพ่ฎกใ€‚็„ถ่€Œ่ฟ™็ฑปๅž‹็š„่ฎพ่ฎกๆ›ด้€‚็”จไบŽๅŠๆŸœใ€‚่ฎฉไฝ ็š„ๅŠๆŸœ้—จๆฟๅ‘ไธ‹ๅปถไผธ1cm, ่ฎฉๆ‰‹ๆŒ‡ๆœ‰่ถณๅคŸ็š„็ฉบ้—ดๆ‹‰้’ฉ้—จๆฟๅณๅฏใ€‚็›ธ่พƒไบŽ็ชๅ…€็š„ๆŠŠๆ‰‹๏ผŒ่ฟ™็ปๅฏนๆ˜ฏๆ›ดๅฅฝ็š„้€‰ๆ‹ฉ๏ผ

2. 2็‰‡L ๅฝขๆŒกๆฟ - 2 pieces of backboard
่ฟ™็ง็›ดๆŽฅ็š„ๅˆถไฝœๆ–นๅผไธ้œ€่ฆ็‰นๅˆซ็š„ๆŠ€ๆœฏๆฅๅˆถไฝœใ€‚ๆœจๅทฅๅธˆๅ‚…ๅช้œ€่ฆๅขžๅŠ 2็‰‡ๆŒกๆฟๅœจๅŽๆ–น๏ผŒๅ†ๆญ้…ไธŠๅปถ็š„้—จๆฟๅณๅฏใ€‚้€่ฟ‡่ฟ™็ฎ€ๅ•็š„ๆญ้…๏ผŒไพฟๅฏๅฝขๆˆๅฐ็ฉบ้—ดไปฅ่ฎฉๆ‰‹ๆŒ‡ๆ‹‰้’ฉ้—จๆฟ๏ผๆŒกๆฟ็š„้ขœ่‰ฒๅฏ้€‰ๆ‹ฉไธŽ้—จๆฟไธๅŒ๏ผŒ่ฎฉๅœฐๆŸœ็š„้ขœ่‰ฒๆญ้…ๆ›ดๆœ‰ๅฑ‚ๆฌกๆ„Ÿใ€‚

3. 45ยฐๆ–œๅˆ‡่ง’้—จๆฟ - 45ยฐ Cut-off shape door panel
ๅธธ็”จไบŽๆŠฝๅฑ‰ๆˆ–้ค่พนๆŸœ๏ผŒ45ยฐๆ–œๅˆ‡่ง’้—จๆฟ่ฎฉไฝ ็š„ๆŸœๅญๆ›ดๅ…ทๆœ‰็‰น่‰ฒใ€‚ๅœจ้—จๆฟไธŠๅˆ‡ๅ‡บไธ€ไธช45ยฐๆ–œ่ง’๏ผŒๆ‰‹ๆŒ‡ๅœจๆ‹จๅŠจ้—จๆฟๆ—ถไนŸๅฏไปฅๆ‘†ๆ”พๅพ—ๆ›ดๅŠ ่ˆ’้€‚ใ€‚

4. ๅ‡น็ณŸ้—จๆฟ /ๅ†…ๅดๅผๅž‹ๆ - Extrusion inserted
ๅ‡นๆงฝ้—จๆฟ็š„้€ ๅž‹ๆ›ดไธบๅคšๆ ทๅŒ–ใ€‚ไฝ ๅฏไปฅๅ’Œๆœจๅทฅๅธˆๅ‚…่ฎจ่ฎบไฝ ็š„ๆƒณๆณ•๏ผŒ่ฎฉๅธˆๅ‚…่ฎพ่ฎกๅ‡บ้€‚ๅˆไฝ ็š„ๅ‡นๆงฝ้—จๆฟใ€‚้€šๅธธ้€‚็”จไบŽ้ซ˜ๆŸœ๏ผŒ่กฃๆŸœใ€ๅฃๆŸœ็ญ‰ใ€‚ไธๅ•ๅ•ๆ˜ฏ่ฎพ่ฎกๅœจ้—จๆฟไธŠๆ–น๏ผŒไฝ ไนŸๅฏไปฅๆŠŠๅ‡นๆงฝ่ฎพ่ฎกๅœจ้—จๆฟไพง่พน๏ผŒไธ€ๅˆ‡ๆ นๆฎ้œ€ๆฑ‚ๆ‰€ๅฎš๏ผๅ†…ๅดๅผๅž‹ๆไนŸๅฏไปฅๆ˜ฏ้‡‘ๅฑž/ไธๅŒ้ขœ่‰ฒ็š„ๅก‘ๆ–™ๅž‹ๆ๏ผŒไปฅ่พพๅˆฐไธไธ€ๆ ท็š„ๅฑ‚ๆฌกๆ„Ÿ๏ผ

5. ๅๅผนๅ™จ Door panel damper
ๅๅผนๅ™จ็š„ไฝฟ็”จ้œ€่ฆไธ€ไธชๅ›žๆŒ‰็š„ๅŠจไฝœ๏ผŒๆ‰ๅฏไปฅๆŠŠ้—จๆฟๅ…ณ็ดงใ€‚ๆ‰€ไปฅ๏ผŒๅœจไฝ ้กบๆ‰‹็š„ๅœฐๆ–น่ฃ…ไธ‹็„ถ่€Œๅๅผนๅ™จไธ้€‚็”จไบŽๆ”ถ็บณๅคช้‡็‰ฉๅ“็š„ๆŠฝๅฑ‰๏ผŒ่ฟ™ไนŸ่ฎธไผšๅฏผ่‡ดๅๅผนๅ™จๅคฑๆ•ˆใ€‚๐Ÿง๐Ÿคช

user posted image

user posted image

user posted image
TSMy Maison
post Oct 22 2022, 08:51 PM

Casual
***
Junior Member
319 posts

Joined: Jun 2018
#LightingMaterial #DesignTips #MyMaison

็บฟๆ€ง็ฏ Strip Lights


ๅˆๆ˜ฏ้‚ฃไธ€ๅฑ‚ไธๅ˜็š„ไธป็ฏ่ฎพ่ฎก๏ผŒไฝ ๆ˜ฏไธๆ˜ฏไธ€ๆ ท็œ‹่…ปไบ†้‚ฃๅœ†ๅœ†ๆˆ–ๆ–นๅฝข็š„ๅฐ„็ฏไบ†ๅ‘ข๏ผŸๆˆ‘ๆƒณ่ฆๅฎถ้‡Œๆœ‰ไธชๅ‡บๅฝฉ็š„ๅœฐๆ–น๏ผŒๅˆฐๅบ•่ฏฅ่ฆ่ฟ™ไนˆๅšๅ•Š ๐Ÿ‘€๐Ÿ‘€๏ผŸๅˆซๆ‹…ๅฟƒ๏ผŒไฝ ็ปๅฏนๅฏไปฅๅ’Œๅˆซไบบไธไธ€ๆ ท๏ผไปŠๅคฉๅฐ็ผ–ๆƒณๅ’Œๅคงๅฎถไป‹็ปๅ‡ ๆฌพ็บฟๆ€ง็ฏใ€‚ไธ็ž’ไฝ ่ฏด๏ผŒ่ฟ™ๆ˜ฏๅฐ็ผ–้žๅธธๅ–œ็ˆฑ็š„ไธ€ๆฌพ่ฎพ่ฎกๅ“ฆ๏ผ็บฟๆ€ง็ฏ็š„็Žฉๆณ•ๅƒๅ˜ไธ‡ๅŒ–๏ผŒๅ…ถไธญๅŒ…ๆ‹ฌ้˜ณ่ง’็บฟๆ€ง็ฏใ€้˜ด่ง’็บฟๆ€งใ€ๅนณ้ข็บฟๆ€ง็ฏใ€ๅ›žๅ…‰็ฏๆงฝ็บฟๆ€ง็ฏใ€ไธ‹ๆด—ๅข™็บฟๆ€ง็ฏ็ญ‰็ญ‰๏ผ๐Ÿ‘๐Ÿป ๐Ÿง๐Ÿคจ

1. ้˜ณ่ง’็บฟๆ€ง็ฏ
ๆ‰€่ฐ“็š„้˜ณ่ง’ๅค„๏ผŒไพฟๆ˜ฏไธค้ขๅข™็š„ๅ‡ธ้ขไบค็•Œๅค„ใ€‚ๅœจๅข™่ง’ๅค„ๅผ€ๆงฝ๏ผŒๆŠŠ็บฟๆ€ง็ฏ็š„ๅž‹ๆๆ”พๅ…ฅๆงฝไธญ๏ผŒๅˆฉ็”จ่žบไธๆŠŠๅฎƒๅ›บๅฎšๅœจๅข™ไธŠ๏ผŒๅ†ๅˆฉ็”จ่…ปๅญๆŠŠๅž‹ๆ้ฎ็›–ๅˆฐๅนณๆ•ดๅณๅฏ๏ผŒๆœ€ๅŽๅœจๆงฝ้‡Œ่ดดไธŠ็ฏๅธฆไพฟๅฎŒๆˆๅ•ฆ๏ผ่ฃ…ไธŠๅŽ็š„ๆ•ˆๆžœ็ปๅฏนๅฏไปฅ่ฎฉไฝ ๅคงๅƒไธ€ๆƒŠ๏ผ

2. ้˜ด่ง’็บฟๆ€ง็ฏ
ไธค้ขๅข™ๅ‡น้ขไบค็•Œๅค„๏ผŒไพฟๆ˜ฏๆ‰€่ฐ“็š„้˜ด่ง’ใ€‚ไธ€ๆ ทๆ˜ฏๅœจ้˜ด่ง’ๅค„ๅผ€ๆงฝ๏ผŒๅ†ไปฅๅŒๆ ท็š„ๆญฅ้ชคๆฅๅฎ‰่ฃ…ๅณๅฏ๏ผ้˜ด่ง’่ขซ็‚นไบฎๅŽ๏ผŒๅฎถ้‡Œๆ•ดไฝ“่ง†่ง‰ไผšๆ›ดๅฅฝๅ“ฆ๏ผ

3. ๅนณ้ข็บฟๆ€ง็ฏ
่ฟ™ๆฌพ็บฟๆ€ง็ฏ้žๅธธ็š„ๅฅฝ็”จ๏ผŒไธไป…ๅฏไปฅๅ›บๅฎšๅœจๅข™้ข๏ผŒไนŸๅฏไปฅ็ฝฎๆ”พๅœจๅคฉ่ŠฑๆฟไธŠใ€‚่ฎพ่ฎกๅธˆๆœ‰ๆ—ถไนŸไผšไธ€่ฟžๆŠŠๅคฉ่Šฑๆฟ็š„็บฟๆ€ง็ฏไธ€ๆŠŠๅธฆๅˆฐๅข™่บซ๏ผŒๆ ผๅค–ๆœ‰็‰น่‰ฒ๏ผŒ้ซ˜็บงๆ„Ÿๆปกๆปก๏ผ

4. ๅ›žๅ…‰็ฏๆงฝ็บฟๆ€ง็ฏ
ๅœจๅŠ้กถๅ’Œๅข™่บซไบค็•Œๅค„ๅฎ‰่ฃ…่ฟ™ๆฌพๅ›žๅ…‰็ฏๆงฝ๏ผŒ่ฎฉ็ฏๅ…‰ๅๅฐ„๏ผŒๅ‘ˆ็Žฐๅ‡บๆฅ็š„็ฏๅ…‰ไนŸๆ›ดๆŸ”ๅ’Œ๏ผŒ้žๅธธๆœ‰ๆฐ›ๅ›ดๆ„Ÿ๏ผŒ้€‚ๅˆ็”จๅœจๅฎขๅŽ…๏ผ

5. ไธ‹ๆด—ๅข™็บฟๆ€ง็ฏ
ๆญฃๅฆ‚ๅๅญ—ไธ€ๆ ท๏ผŒ่ฟ™ๆฌพ็บฟๆ€ง็ฏ็›ดๆŽฅๆŠŠ็ฏๆด—ๅข™๏ผŒๆ˜Žไบฎ่ตทๆฅไฝ†ๅˆไธๅˆบ็œผ๏ผ
ๆ€ป็š„ๆฅ่ฏด๏ผŒ็บฟๆ€ง็ฏ็ปๅฏนๅฏไปฅๅธฎไฝ ๆŠŠๅฎถ้‡Œ็š„ๆฐ›ๅ›ดๆ„Ÿๆ‹‰ๆปกใ€‚็„ถ่€Œ๏ผŒ้€‚ๅฝ“ๅœฐไธŽๅฐ„็ฏๅšๆญ้…๏ผŒ้™คไบ†่งฃๅ†ณไบ†็…งๆ˜ŽๅŠŸ็”จ๏ผŒไธ€้—ดๅฅฝ็œ‹ๅˆ่ˆ’้€‚็š„ๅฎถไนŸๅฏไปฅ่ฝปๆพๅœฐๆ‰“้€ ๅ‡บๆฅ๏ผ

Boring with the typical lighting design, round, rectangular downlight.......๐Ÿง. What if I want to have some special design with lighting, what can i do? Don't worry, u can definitely create something different. Let us introduce with some strip lighting design, which we are also in fond with. We can play alot of design with strips lighting. There is much more flexibility and changes you can made based on your preferences and design mood.

1. Strip lights installed at exposed corner of two walls.
Just imagine you are having a protruding wall surface, it might look massive. One of the trick to treat the wall corner is by installing the strip lights at the corner. Leaving a small gap for the placement of light extrusion. We lock the extrusion on wall with screws. Skim coat or plaster the extrusion to conceal it from eyesight. Lastly, place your strip light into the extrusion. Its simple and nice. The outcome would be awesome with the line of lights running through the wall surface, so call creating a movement in your house.

2. Strip lights installed at embedded corner of two walls.
Not only on exposed corner, we can also light up the embedded corner with strip lights. With same method to install, the dark edges of wall can be lighten up and become the focal point. All of this design depend on how you play with it.

3. Mounted on flat surface
Flat strip light has more flexibility when it comes to design. It can be mounted on flat ceiling, even on flat wall as well. The ambient lights created are not eye-striking, suitable to be used in many areas.

I would say strip lightings has a lot of potential. You may consider it as it is more sleek in design. Dun worry, it can definitely used and designed together with your main light as well. Hope you like our sharing today.

Disclaimer๏ผš ๅ›พ1 ไธบMy Maison ๆ‰€ๅฑž๏ผŒๅ›พ2-4ไธบ็ฝ‘็ปœๆ‘„ๅ–๏ผŒไป…ไฝœไธบๅ‚่€ƒ็”จ้€”๏ผPic 1 belongs to My Maison, while Pic 2-4 were taken online for learning purpose only.

๐Ÿ“ž : +60 11-1665 0288
MyMaison ๅฎ˜็ฝ‘ ๐Ÿ’ป๏ผšhttps://mymaison.com.my
๐Ÿ“ฉ: mymaison.design@gmail.com

user posted image

user posted image

user posted image

user posted image

user posted image


TSMy Maison
post Oct 30 2022, 05:23 PM

Casual
***
Junior Member
319 posts

Joined: Jun 2018
#Construction #Architecture #MaterialTips #MyMaison #lightingmaterial

้“ๆ‰ฃๆฟ Aluminium Composite Panel Sheets

Hi everyone, welcome back to our new sharing session again! Today, let us share with you some of the basic construction material, which is abundantly used in this industry, the aluminium composite panel sheet!๐Ÿคช๐Ÿ˜ƒ

Just have a look on your living surrounding, the usage of aluminium composite panel can be seen everywhere. For example, the MRT stations, your condominium building faรงade design / guard house ceiling, residential housing fascia / false ceiling, building wall panelling, internal office partition and more.

So, what is actually ACP panel? It is a lightweight cladding panel, which is so good in enhance the visual appeal and also function as weather resistance of buildings. Made up of two thin sheets of aluminium sheets sandwiching a Polyethylene Plastic (PE) core in the middle, the 4mm thick ACP can withstand more than 10 years after installation. Not only durable, it is light, having high strength, perfect flatness, rigid, bendable for many shapes and weather resistance. Thus, it is always known as a perfect material, to form decorative motive for your building. Donโ€™t you feel that it gives a very classy and satisfying look after installation? ๐Ÿ™ˆ๐Ÿ™ˆ

There are a lot of colours to choose from in the market. Normally, we would give the ACP long lasting finishes. You may decide a powder coated finish or even a pvdf finish. From there, choose the best colour from the available colour chart. I would say it is very versatile and many possibilities of design can be made. For me, workmanship and handling of material is important, especially when we look into the connection of two panel. The joint has to be carefully sealed up and adequate waterproofing as to be done so that no water can seep through the area. For this, it has to be linked to what kind of sealant used. What are each of the types mainly used for? What are the colour we can choose from? Will it be strong enough to hold two pieces of panels together? Will the colour of sealant affect the aesthetic of design? One of our previous project done, hopefully you learn and enjoy something new from us today!!๐Ÿค˜๐Ÿค˜

ๅ“ˆๅ’ฏๅคงๅฎถ๏ผŒๅˆๆ˜ฏๆˆ‘ไปฌๅ•ฆ๏ผๆฌข่ฟŽๅ›žๅˆฐๆ–ฐไธ€ๆœŸ็š„ๅˆ†ไบซๅ“ฆ๏ผไปŠๅคฉๆƒณๅ’ŒๅคงๅฎถๆŽข่ฎจ็š„่ฏ้ข˜ๆ˜ฏไป€ไนˆๅ‘ข๏ผŸ้“ๆ‰ฃๆฟ๏ผŒไธ€ไธชๅปบ็ญ‘ไธšไน ไปฅไธบๅธธๅŠๆ™ฎๅŠๅดไปคๅคงไผ—้ƒฝ่ƒฝๆŽฅๅ—ๅ’Œๅ–œ็ˆฑ็š„ๆๆ–™ใ€‚๐Ÿคช๐Ÿ˜ƒ
็Žฏ้กพๅ››ๅ‘จ๏ผŒ ้“ๆ‰ฃๆฟ็š„ไฝฟ็”จ็އๅพˆ้ซ˜๏ผŒๅฐฑๅฆ‚้ฉฌๆฅ่ฅฟไบš็š„ๅœฐ้“็ซ™๏ผŒๅ…ฌๅฏ“ๅปบ็ญ‘่ฎพ่ฎก็š„ๅปบ็ญ‘ๆๆ–™๏ผŒ ไฟๅฎ‰ไบญ่ฎพ่ฎก๏ผŒๆˆฟๅญ็š„ๅฎคๅค–ๅคฉ่Šฑ๏ผŒ ๅŠžๅ…ฌๅฎค็š„้š”ๆ–ญ๏ผŒ่ฟ˜ๆœ‰ๅพˆๅคšๅพˆๅคš๏ผ้‚ฃ้“ๆ‰ฃๆฟๅˆฐๅบ•ๆ˜ฏไป€ไนˆ๏ผŸๅฎƒๆ˜ฏไธ€ๆฌพ่ฝป็›ˆ็š„่ฃ…้ฅฐ้€ ๅž‹้‡‘ๅฑžๆๆ–™๏ผŒๅขžๅŠ ่ฎพ่ฎก็š„็พŽๆ„Ÿๅบฆใ€‚ๅŽšๅบฆไป…ไป…4mm, ไฝ†ๅดๅๅˆ†็š„่€็”จ๏ผŒๅฏ้•ฟ่พพ10ๅนดไปฅไธŠ็š„ๅฏฟๅ‘ฝใ€‚ๅฎƒไธไป…ไป…่ฝป็›ˆๅšๅ›บ๏ผŒๆ›ดๆ‹ฅๆœ‰ๅนณๆป‘็š„ๆๆ–™่กจ้ข๏ผŒไนŸๅฏไปฅ่ขซๆŠ˜ๆˆๆƒณ่ฆ็š„ๅฝข็Šถใ€‚ไธไป…ๅฆ‚ๆญค๏ผŒ้€‚็”จไบŽๆˆทๅค–็š„ๅฎƒ๏ผŒๅฏนไธ‹้›จไนŸๆ— ไผคๅคง้›…ใ€‚ไบฎไธฝ็š„ๆๆ–™ๅฏไธบๅปบ็ญ‘ๅค–ๅฑ‚ๅšๅ‡บ่ฎพ่ฎกๆปกๆปก็š„่ฃ…้ฅฐ๏ผŒไนŸๆไพ›ไบ†้žๅธธClassy ็š„ๆ„Ÿ่ง‰ใ€‚๐Ÿ™ˆ๐Ÿ™ˆ

้€šๅธธๅ‘ข๏ผŒ้€‰ๆ‹ฉ็š„ๆ่ดจๅค–ๅฑ‚๏ผŒ้ƒฝไผš้€‰ๆ‹ฉๆไพ›ไธ€ๅฑ‚ไฟๆŠคๅฑ‚๏ผŒๅณๅบ”็”จ็ฒ‰ๆœซๅ–ทๆถ‚ (Powder Coating Surface Finish) ๆˆ–ๆ˜ฏPVDF Finish ไฝœไธบ่กจๅฑ‚ใ€‚ๅฎƒๆœ‰ไธ€็ณปๅˆ—็š„้ขœ่‰ฒไพ›ไฝ ้€‰ๆ‹ฉ๏ผŒๅ–ๅ†ณไบŽไพ›ๅบ”ๅ•†๏ผŒๆ‰€ไปฅไฝ ๅฏไธ็”จๅคชๆ‹…ๅฟƒ้ขœ่‰ฒ็š„ๅคšๅ…ƒๆ€ง้€‰ๆ‹ฉ๏ผๅฏนๆˆ‘ๆฅ่ฏด๏ผŒๆˆ‘ไปฌๆ›ด่ฎฒๆฑ‚้“ๆ‰ฃๆฟ็š„ๅฎ‰่ฃ…็ป†่Š‚ใ€‚ไธค่พนๆ่ดจ็š„ไบค็•Œๅค„ๅฟ…้กปๅค„็†ๅฅฝ๏ผŒ้ฟๅ…ๆฐดๆธ—้€ๅ…ถไธญใ€‚่ฟ™ๆ˜ฏ๏ผŒ้€‚ๅฝ“็š„ๅฐๅฏ†่ƒถๅฐฑๆ˜ฏ้žๅธธ็š„้‡่ฆไบ†ใ€‚ไธไป…ไป…ๅฆ‚ๆญค๏ผŒๆˆ‘ไปฌๅฟ…้กป็กฎไฟๅฐๅฏ†่ƒถ่ถณไปฅๆ‰ฟๆ‹…ไธค็‰‡้“ๆ‰ฃๆฟ็š„้‡้‡๏ผŒ่ฟ˜ๆœ‰่พพๅˆฐๅฎŒ็พŽ็š„ๅฐๅฏ†ๆ€งใ€‚ๅŒๆ ท็š„๏ผŒๅฐๅฏ†ๅ‰‚็š„้ขœ่‰ฒ้€‰ๆ‹ฉไนŸไธๅฎนๅฐ็œ‹๏ผŒ้€ๆ˜Ž๏ผŸ็™ฝ่‰ฒ๏ผŸ็ฐ่‰ฒ๏ผŸ้ป‘่‰ฒ๏ผŸ๐Ÿค˜๐Ÿค˜

ไปฅไธ‹ๆ˜ฏๆˆ‘ไปฌ็š„ไฝœๅ“๏ผŒๅธŒๆœ›ไฝ ๅ–œๆฌขไปŠๅคฉ็š„ๅˆ†ไบซๅ“ฆ๏ผ
MyMaison ๅฎ˜็ฝ‘ ๐Ÿ’ป๏ผšhttps://mymaison.com.my

user posted image

user posted image

user posted image

user posted image
TSMy Maison
post Nov 1 2022, 12:01 AM

Casual
***
Junior Member
319 posts

Joined: Jun 2018
#CoatingSurface #MaterialTips #MyMaison

็ฒ‰ๆœซๅ›พๅ–ท Powder Coating / PVDF Finish Coating Better?

We talked about the aluminium panel in our last topic, so do you know that what are the treatments did to them before the entire product can be now installed by us? ๐Ÿคช๐Ÿ˜ƒ

Definitely, they are treated with final protective and decorative layer so that they are more long lasting and even looks better in appearance. The process is called powder coating treatment or either giving them a PVDF finish. Which on to choose from, it depends on the material suitability and where are they going to be used.

As compared to normal paint, these two treatments are definitely better in quality, and of course more expensive. Powder coating treatment is applying a layer of protective coating with โ€œpowderโ€, let the particles to cure and solidify in factory while PVDF is in liquid form. Powder coating is thicker as compared to PVDF finish, but it doesnโ€™t mean that it is better. ๐Ÿ™ˆ๐Ÿ™ˆ

Both of these surface finishing treatments give the properties of material to withstand better with impact, scratches, chips and higher traffic. They are suitable to be used at outdoor area, like applying on the aluminium windows, aluminium strips etc. However, one of the advantages of PVDF finish material is it is UV resistant, which means adhere better in direct sunlight. They are not easy to fade as compared to powder coating finish, so in long term wise, I would say PVDF finish is a better choice for you.
This also proves that PVDF finish will be more expensive as compared to powder coating finish. In terms of colour choices, powder coatings are available in many colours, whereas PVDF is quite limited. In terms of design, they are so important for decorative purposes and hiding all those surface imperfections of the material. Just like us, bare material would also like to have โ€œdressingโ€ as well.

So, thatโ€™s all for our sharing today, and I hope you have a little idea on these, when you are choosing the construction material for your house in future!! ๐Ÿค˜๐Ÿค˜

Disclaimer: Photos are taken online for sharing purpose only.

user posted image

user posted image

user posted image

user posted image


This post has been edited by My Maison: Nov 1 2022, 12:02 AM
TSMy Maison
post Nov 9 2022, 07:39 AM

Casual
***
Junior Member
319 posts

Joined: Jun 2018
#Construction # Interior #DesignTips #MyMaison

็”ตๆบๅผ€ๅ…ณๆ’ๅบง่ฎพ่ฎกElectrical Setting Out

Hey itโ€™s me again! Let us back to some interior design tips again for this session. One of the most important aspects during renovation will be electrical point setting out as this is what affecting the loops of wiring system. Please look into some of the plans we shared below to have a better understanding. ๐Ÿง๐Ÿง
Firstly, for the lighting and fan point, as long as the number is sufficient, it shouldnโ€™t be any big issue to the users. For further lighting design, it can be varied from person and budget. The next one would be socket points. Normally, we would set their height based on the purpose of usage. For example, it can be 300mm above floor, 600mm, 1050mm, 1200mm or even 2300mm and 2700mm above floor. ๐Ÿ˜๐Ÿ˜
300mm switch socket are normally the one we used in living room, bedrooms. They are like the typical socket used for phone charging, extension, vacuum usage, TV and more. Sound logic right! However, sometimes all of these 300mm socket outlet will designed as 600mm above floor when the unit is specially designed for OKU users. There is occasion whereby there is unit specially designed for OKU in an apartment. This height is definitely serves better ergonomic to them. 600mm height socket will also be used for oven in kitchen, whereby they are placed in the kitchen cabinet compartment, and the position can be different based on your kitchen cabinet design. โ˜บ๏ธ๐Ÿ˜Š
1050mm height sockets are special designed for appliances placed on countertop such as bread toaster, some baking machines and more. Light switches in pantry are also specially designed to be 1050mm height as we would not want the plug wiring to be suspended for too long. It looks messy and not user-friendly enough. Next, 1200mm socket will be used for appliances such as refrigerator and also washing machine in your yard. This would be a standard setting out suitable to all brands. Lastly, 2300mm height would normally use for hood point in your kitchen, while 2700mm height socket switch socket would be used for air-conditioning and even heater point in bathroom.
For the switches such as lighting, fan, air-conditioning and heater, we would normally set it to around 885mm to 1100mm above floor. Try to take a ruler and measure, this statement sound logical right! Haha! As a conclusion, this is why we say you have to plan well on how you are going to arrange your appliances, furniture layout in before wiring work is completed. Understand what is the purpose of the space, and leave a sufficient number of sockets outlets before everything is too late! Learn something today? Give us a like and share your comment below if you think the sharing today is helpful! ๐Ÿ˜๐Ÿ˜

user posted image

user posted image
TSMy Maison
post Nov 11 2022, 10:55 PM

Casual
***
Junior Member
319 posts

Joined: Jun 2018
#Construction # Interior #DesignTips #MyMaison

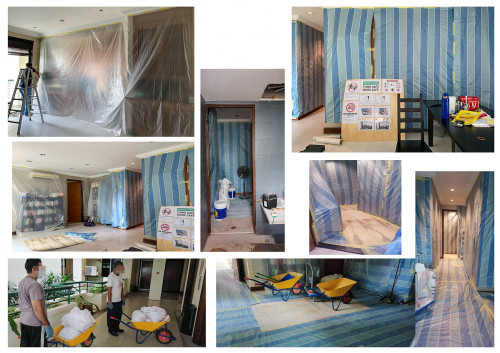
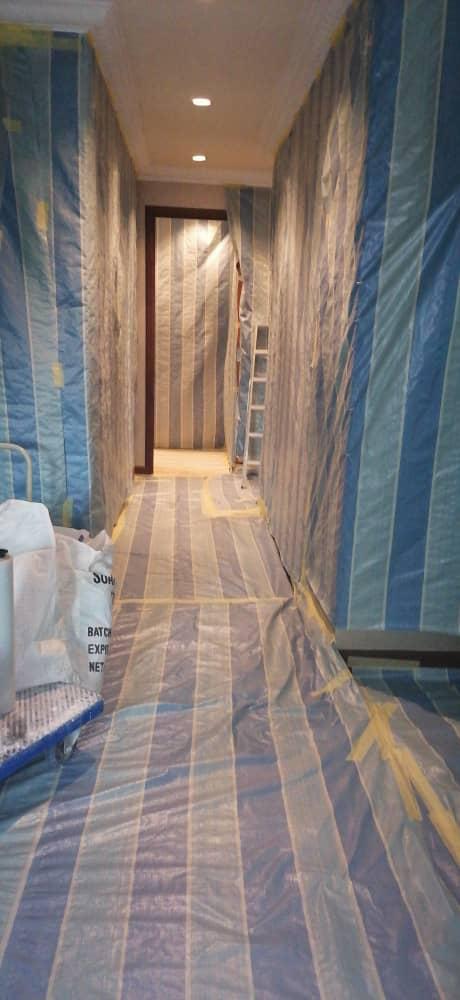
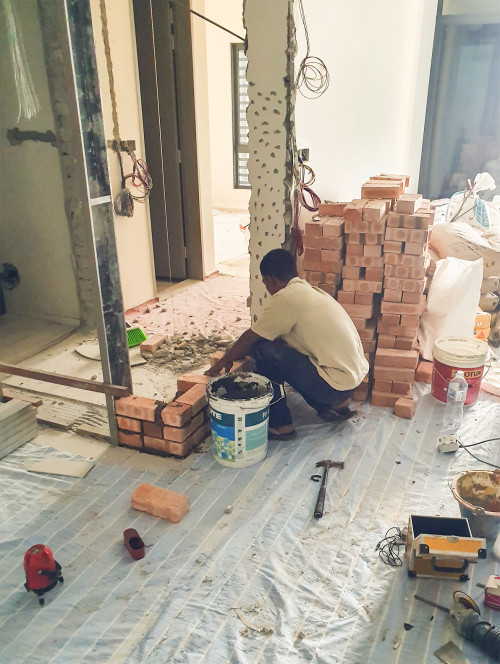
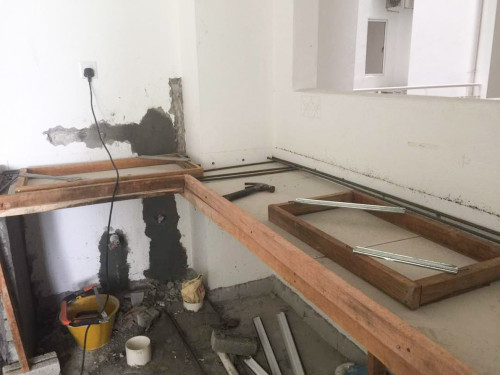
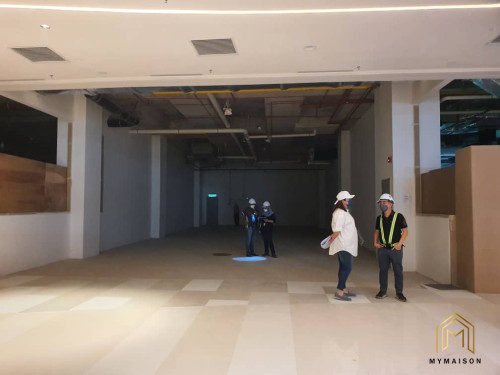
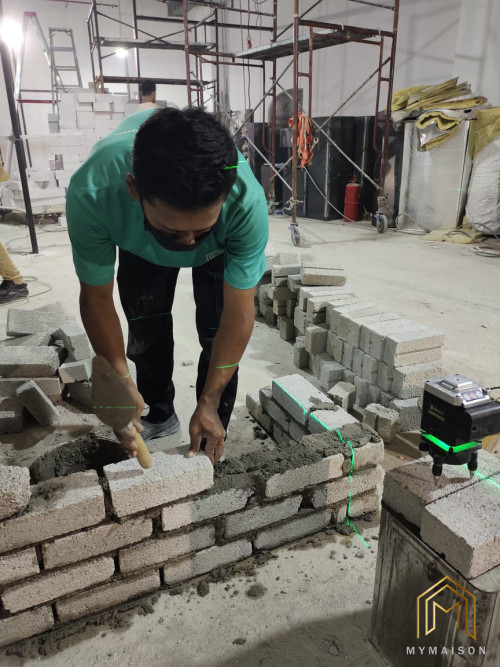
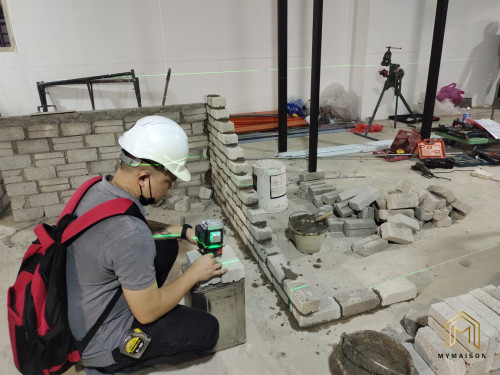
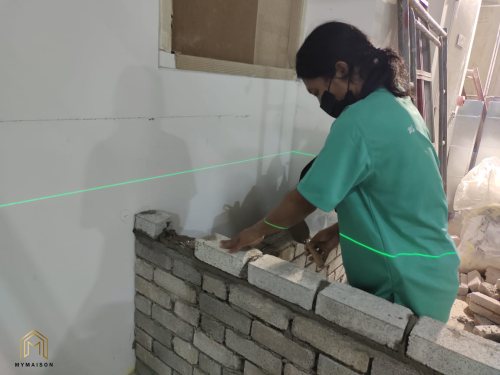
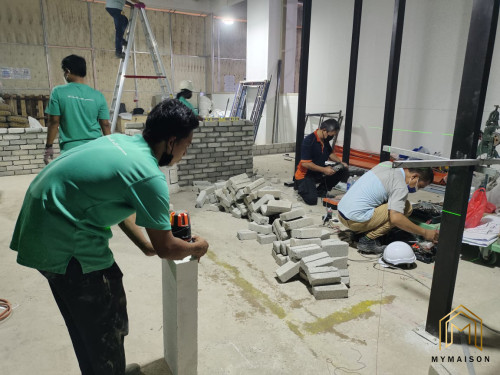
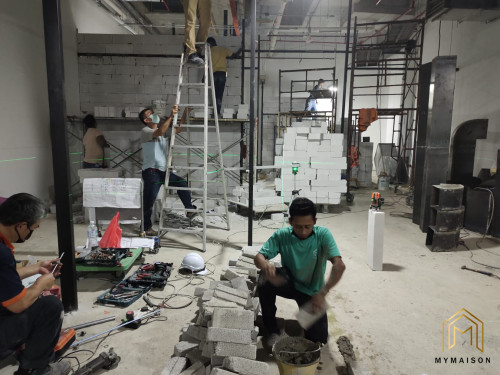
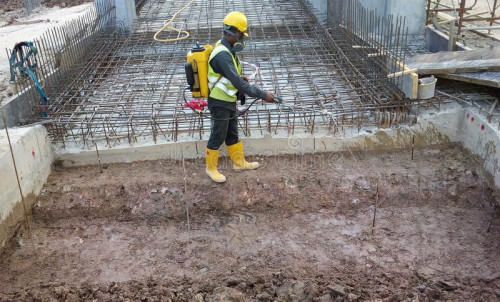
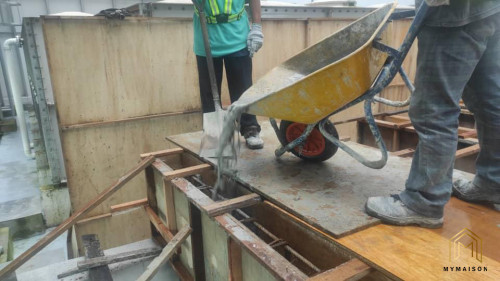
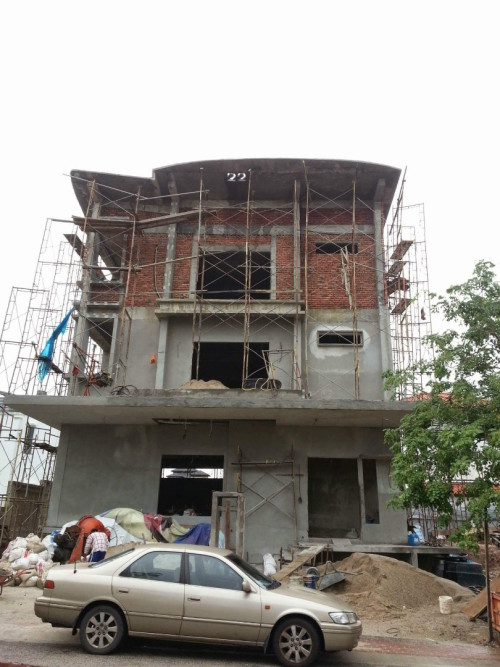
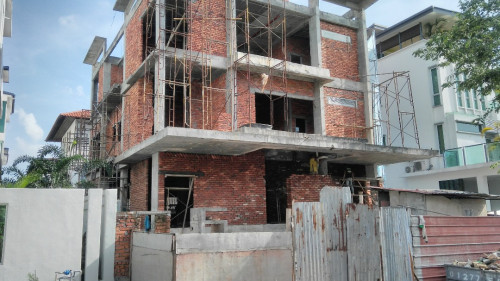
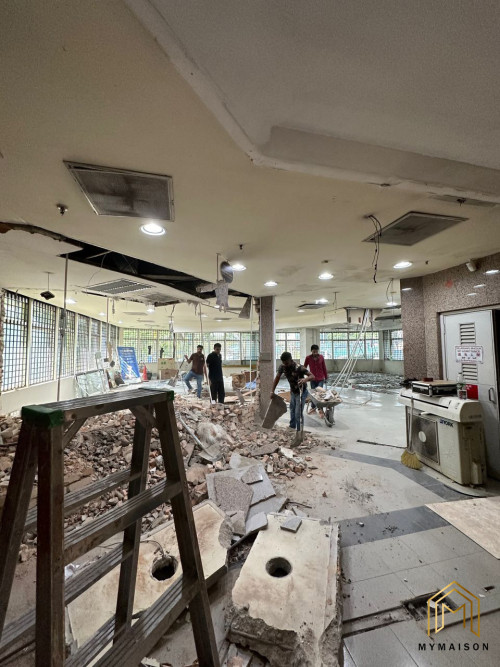
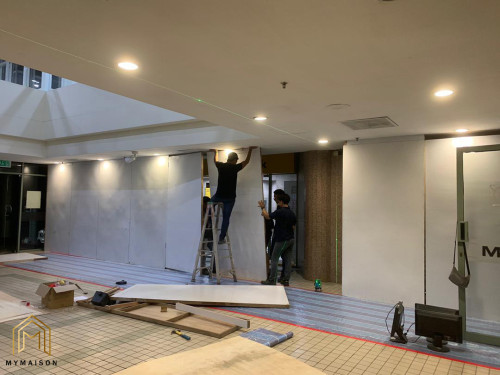
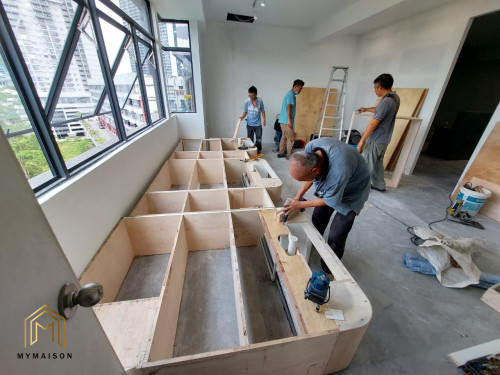
Concept of Setting Out Point

Every design serves its own purpose, and most of the thing start off with a setting out point. Setting out point refer to a reference point, whereby when you start constructing something, it is the place where you begin.
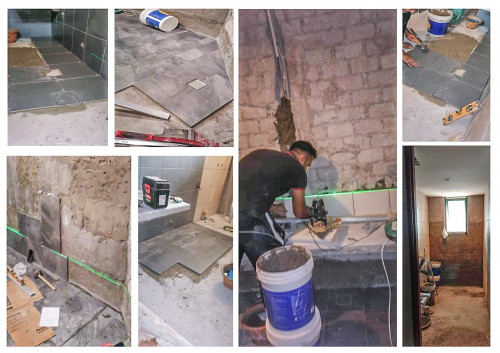
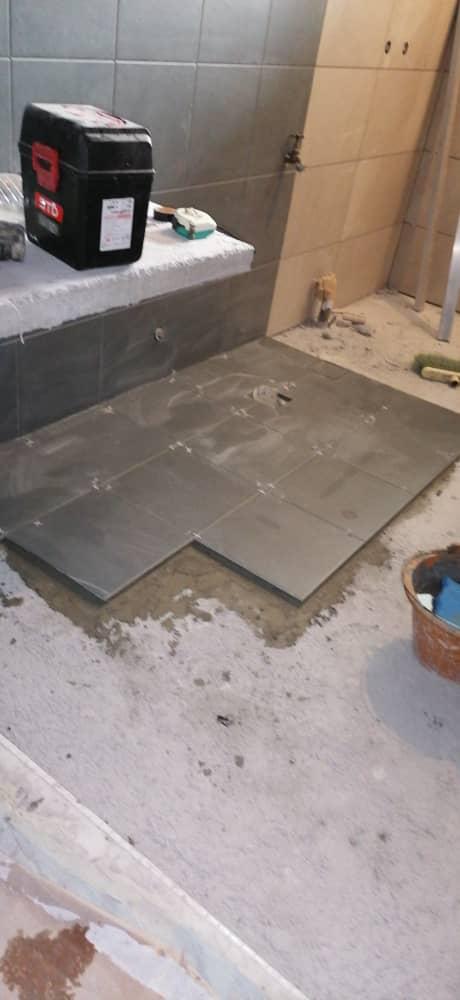
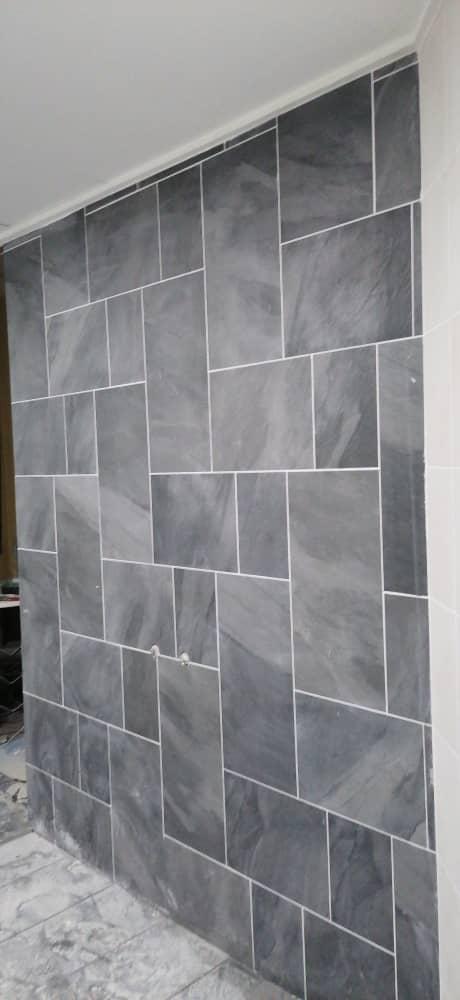
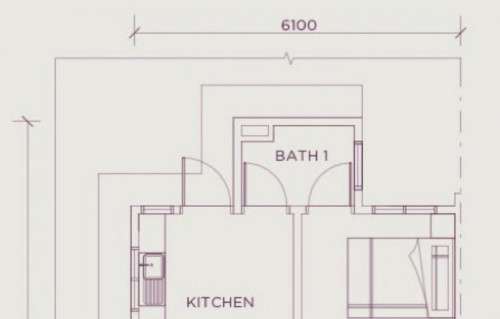
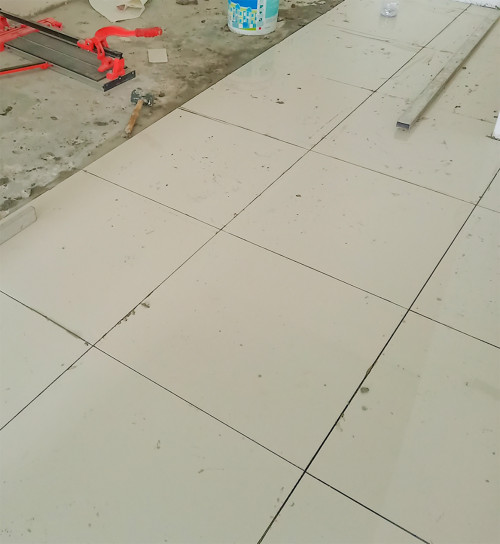
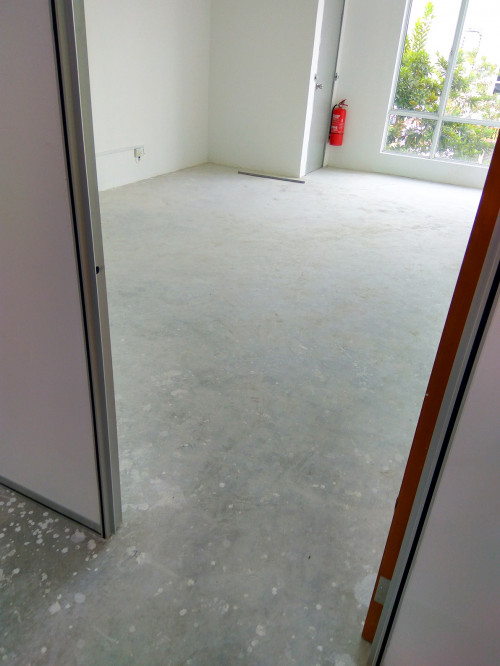
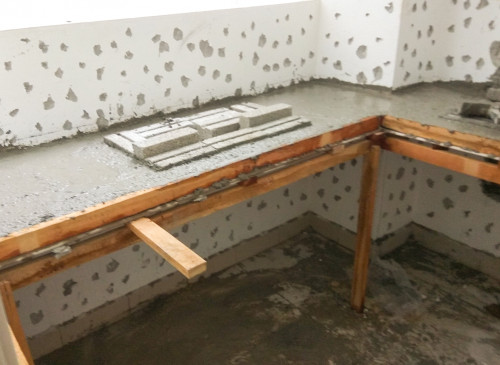
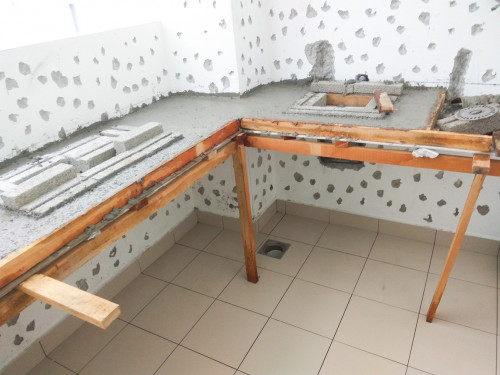
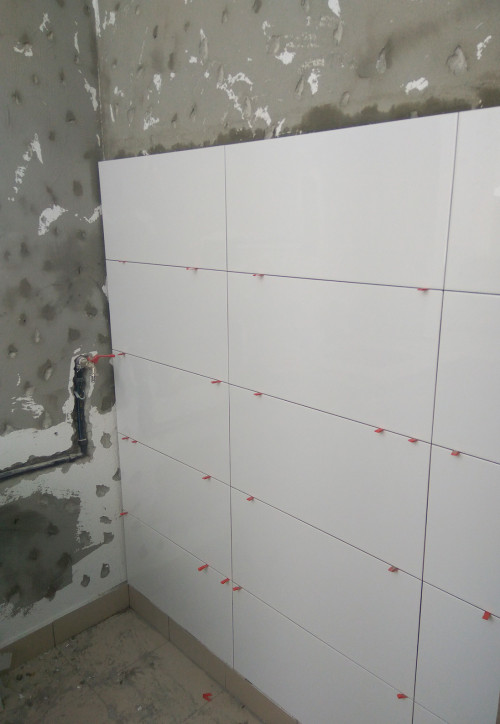
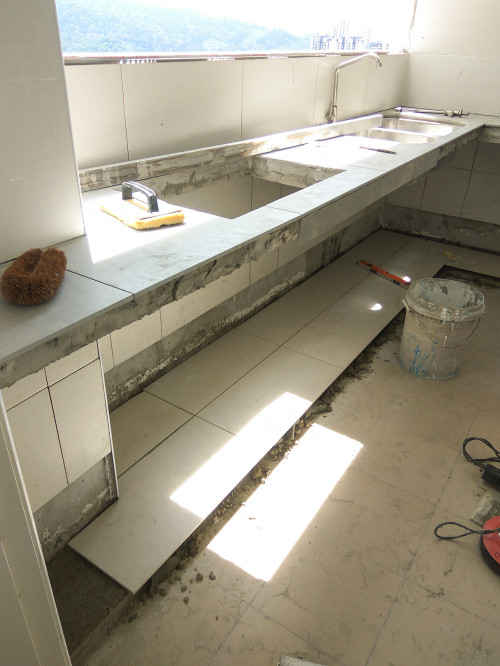
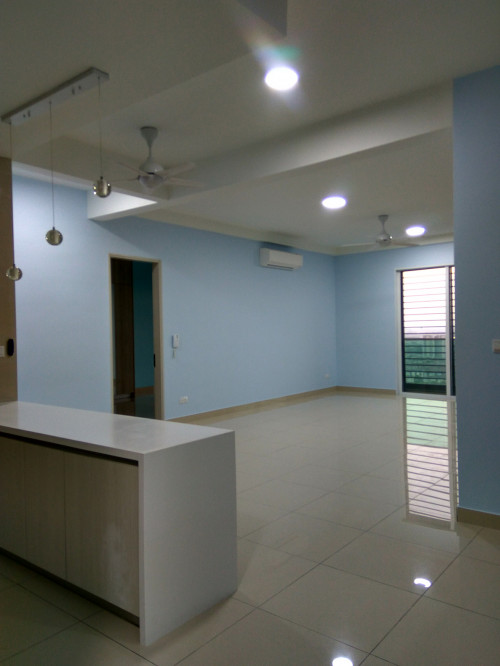
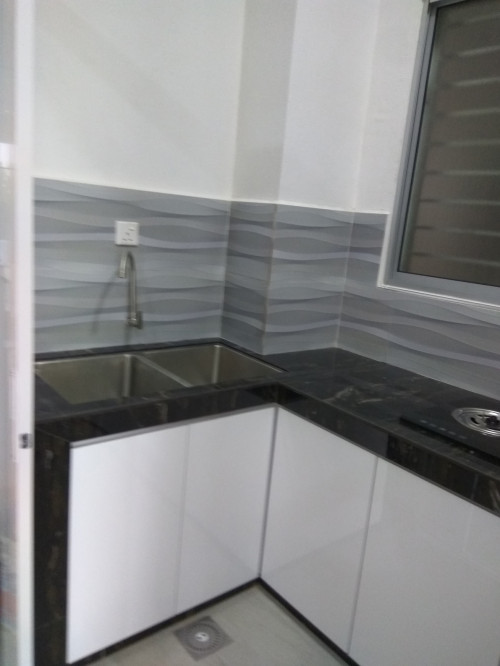
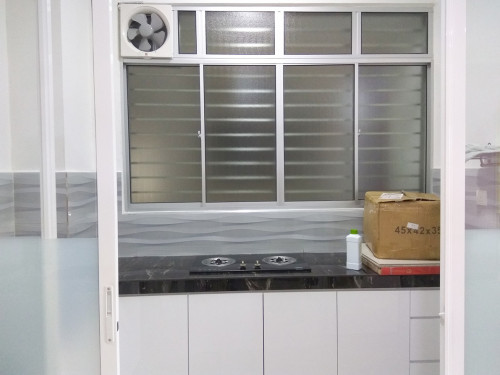
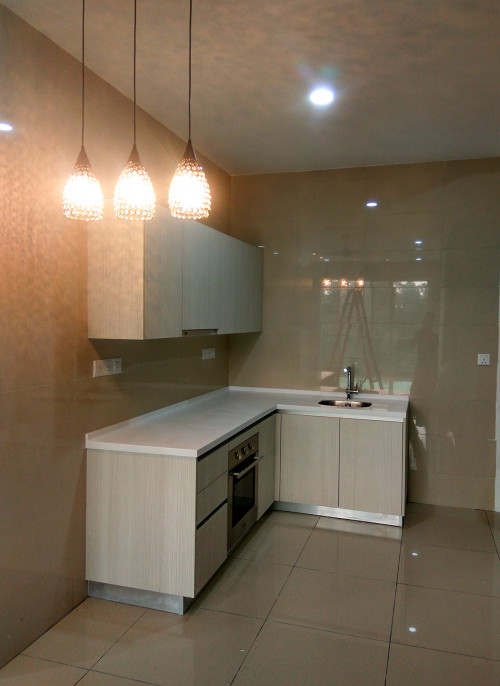
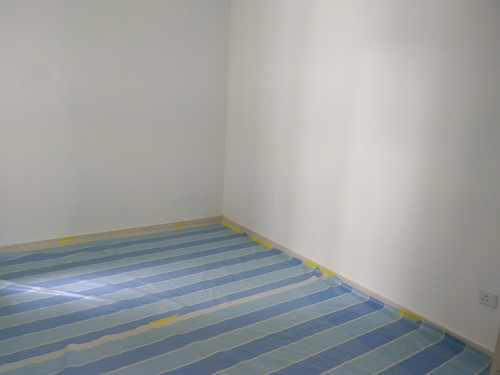
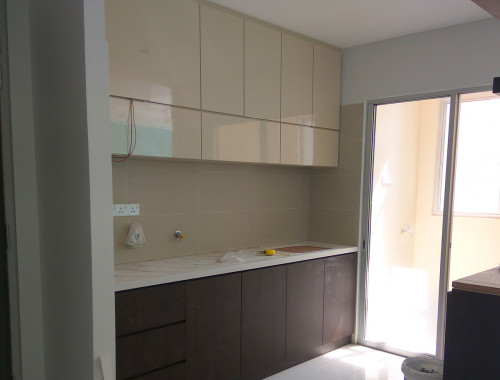
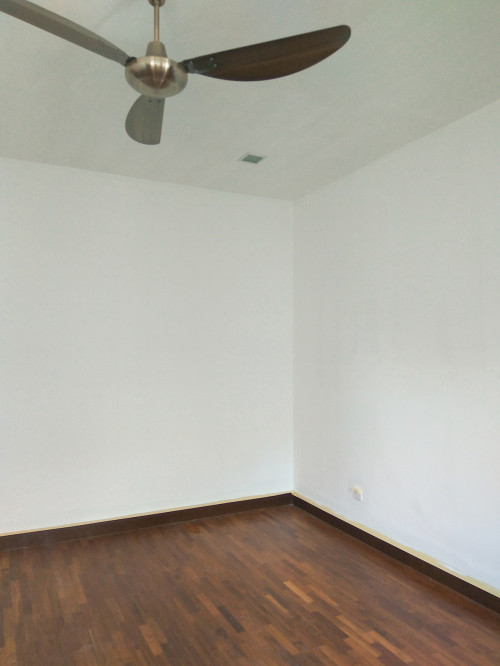
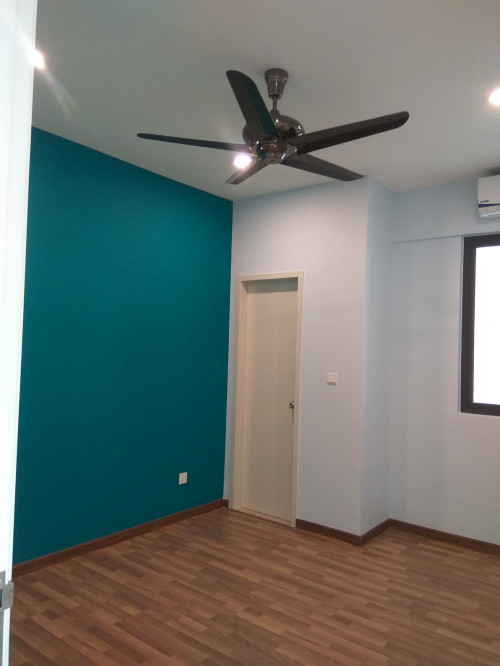
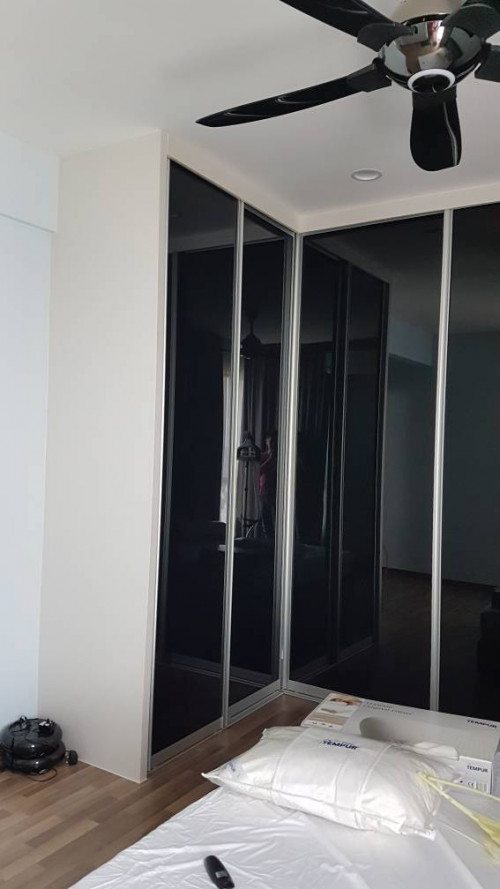
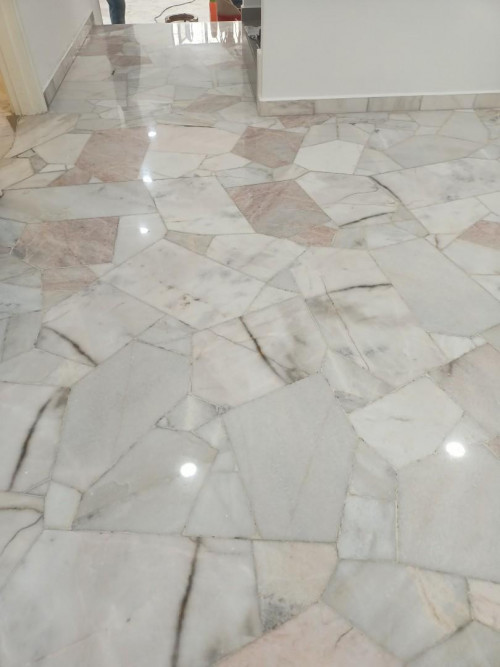
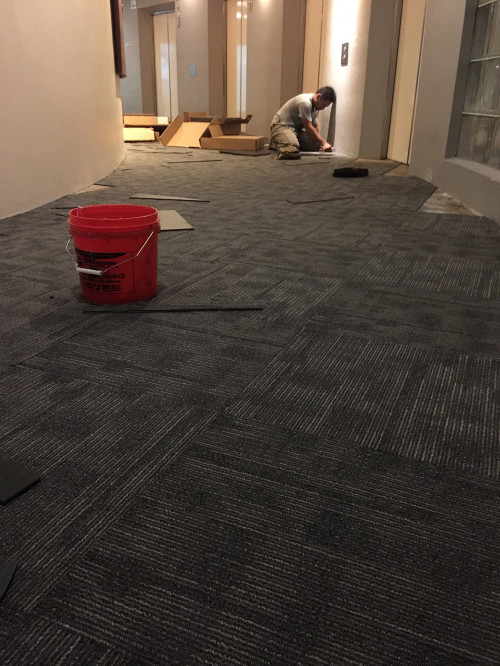
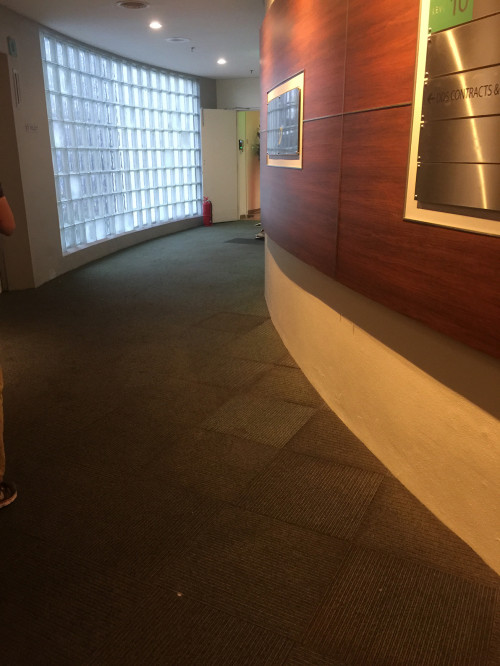
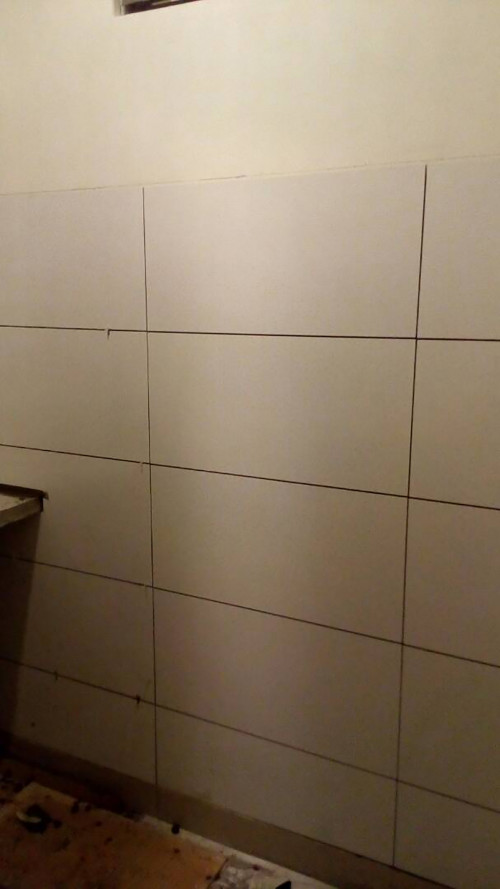
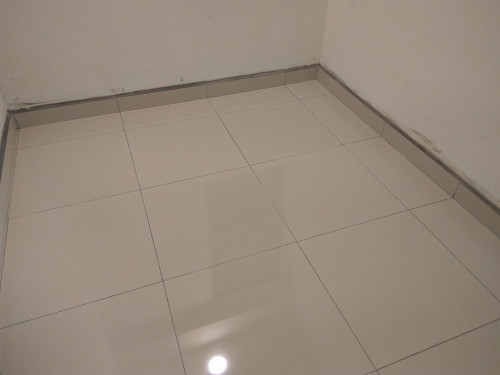
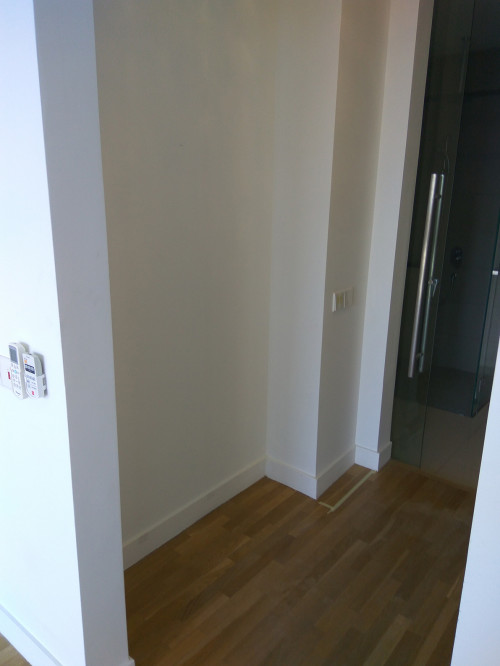
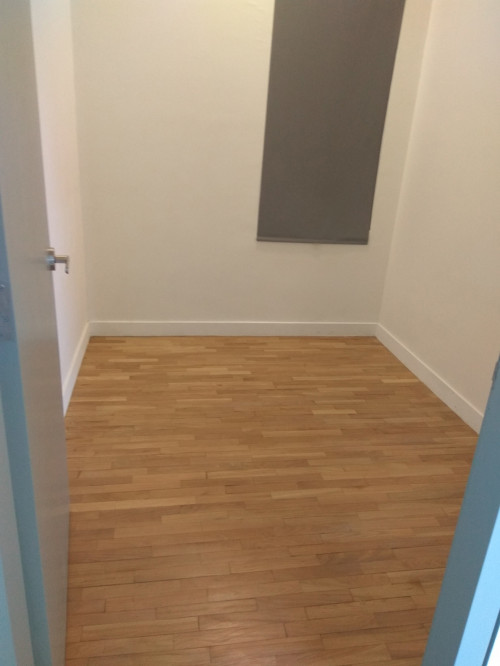
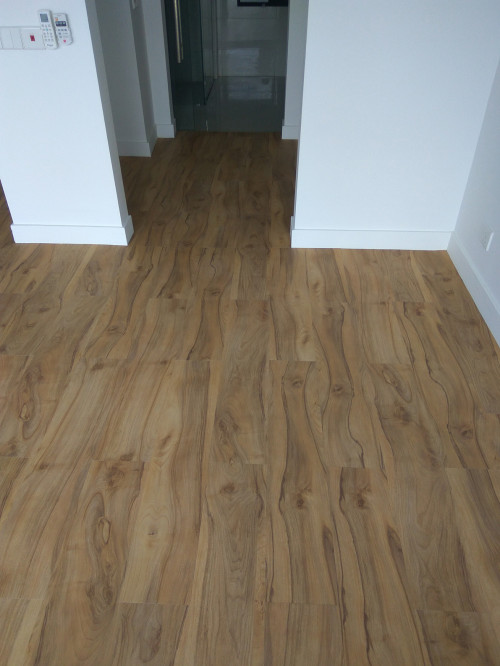
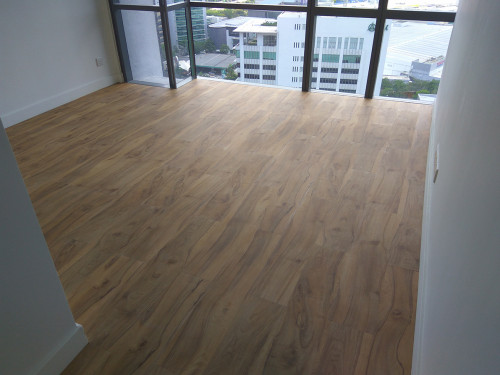
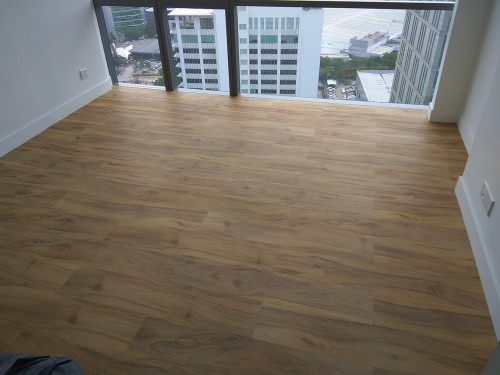
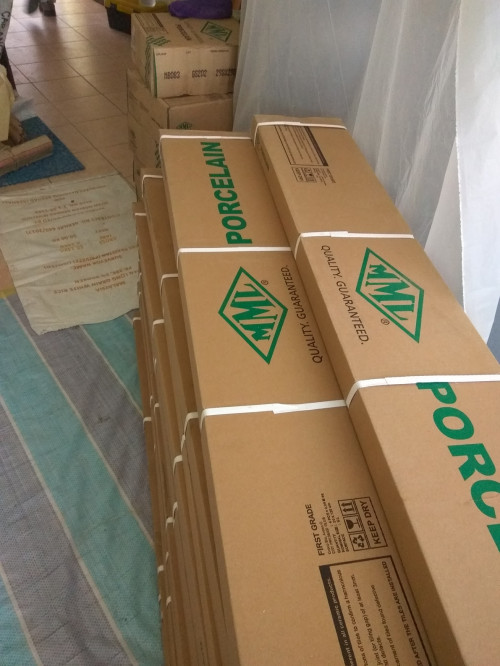
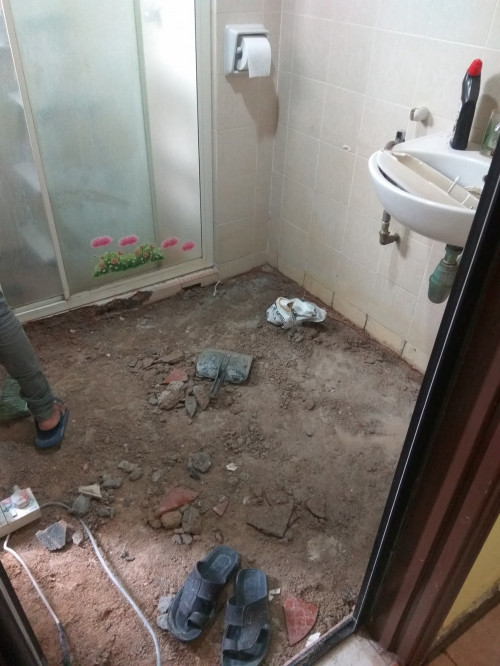
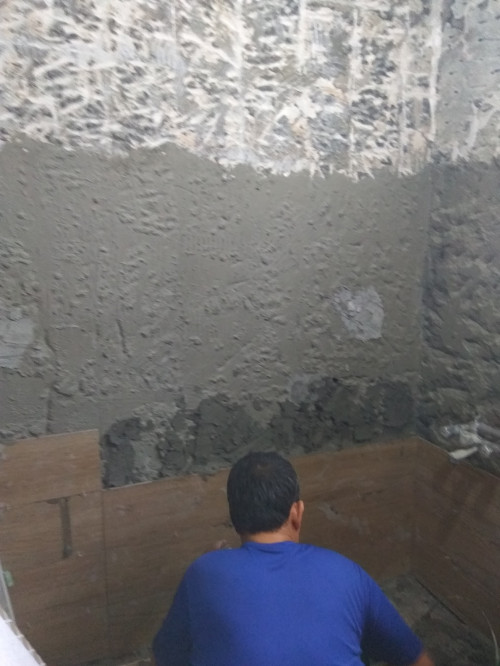
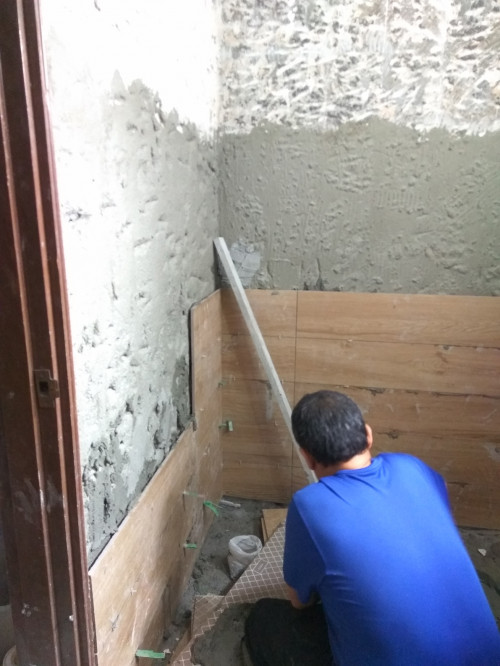
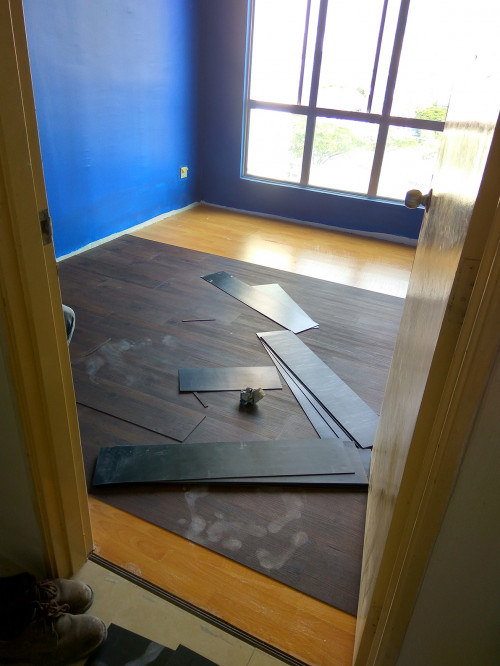
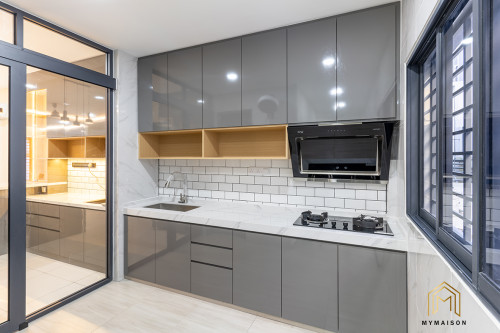
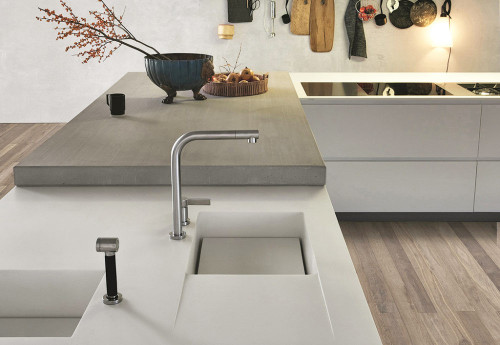
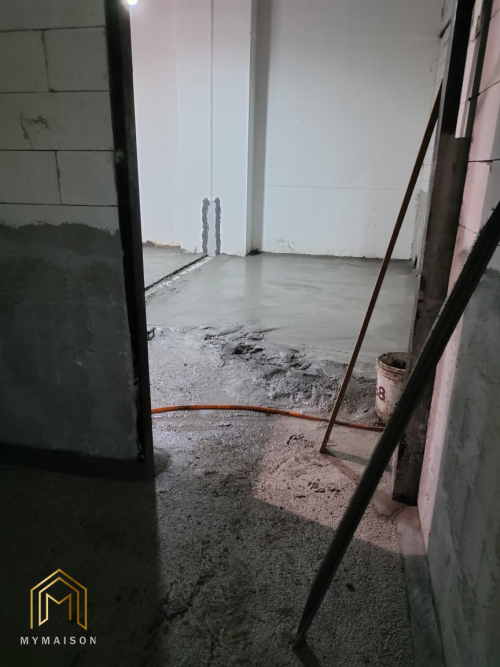
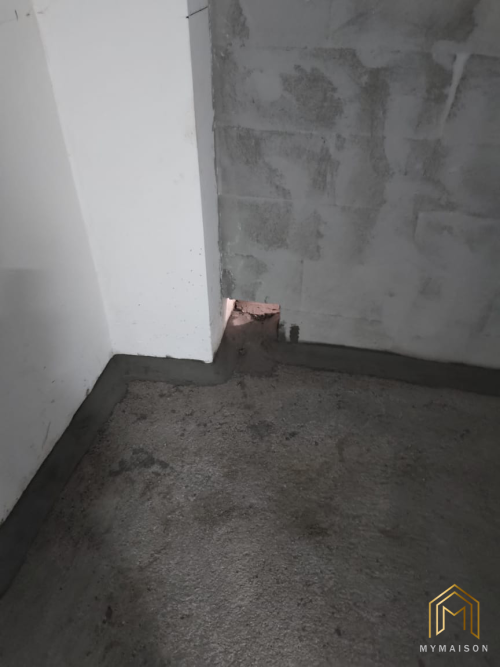
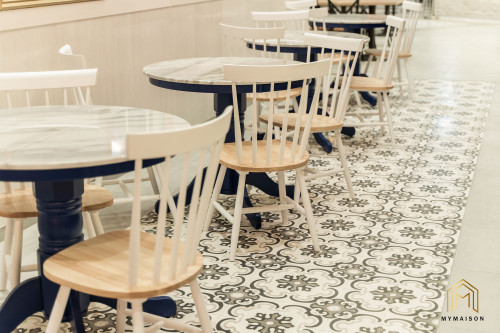
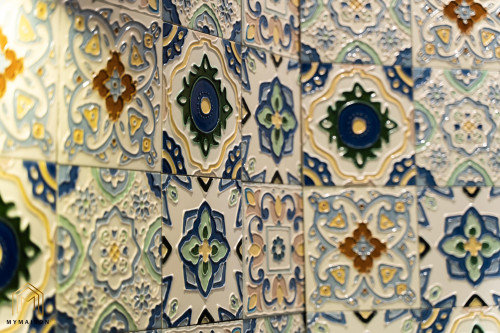
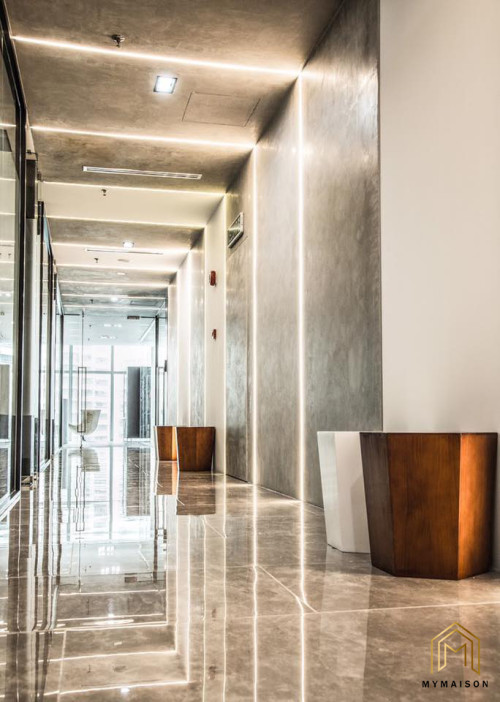
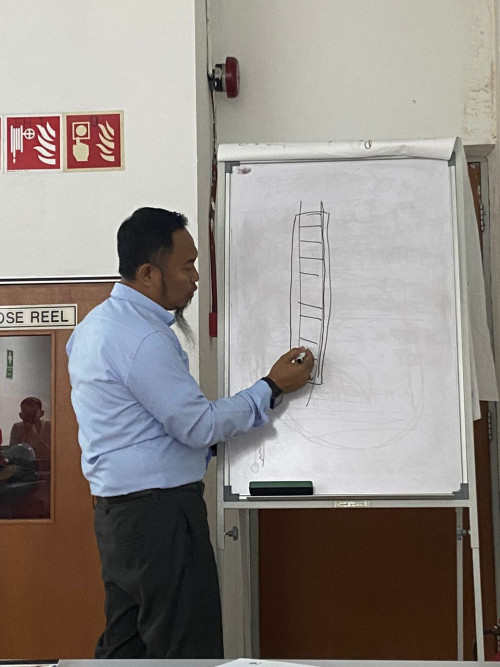
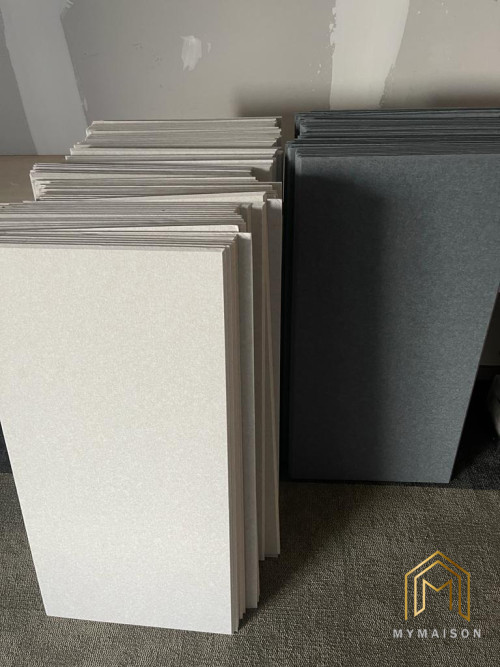
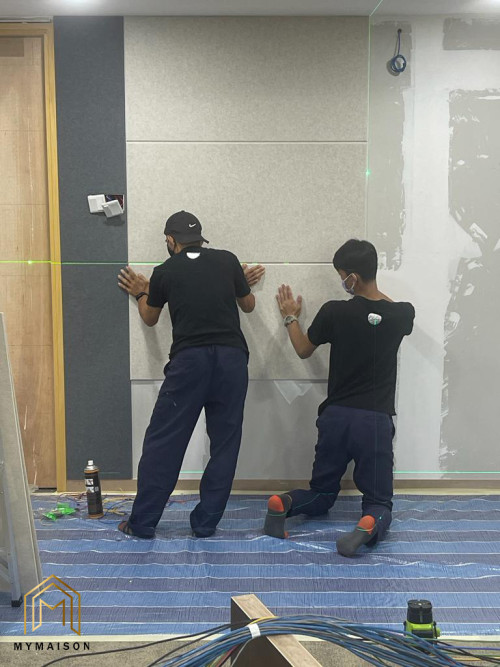
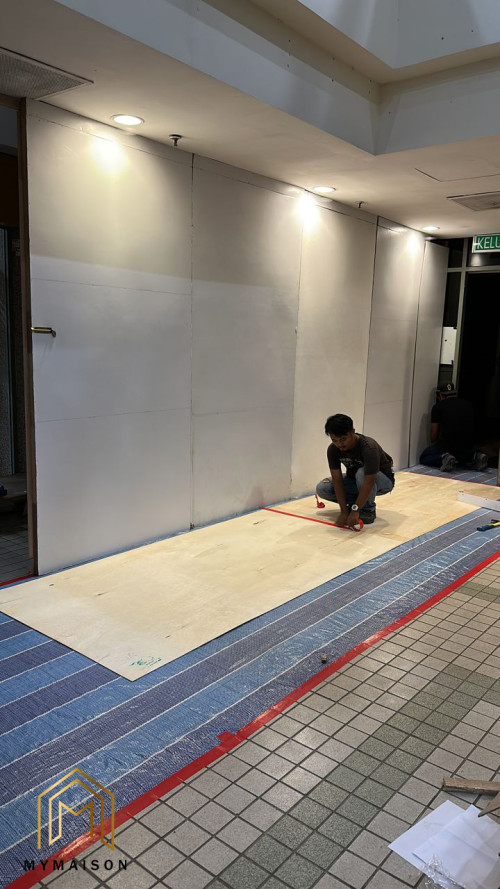
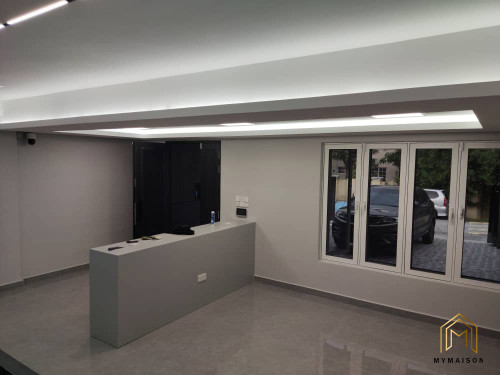
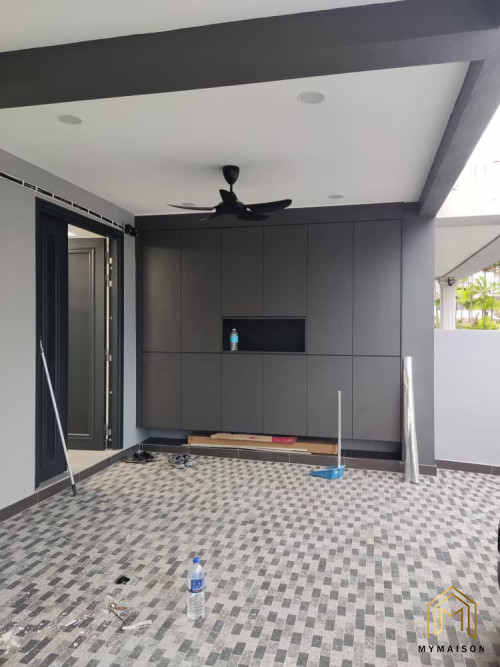
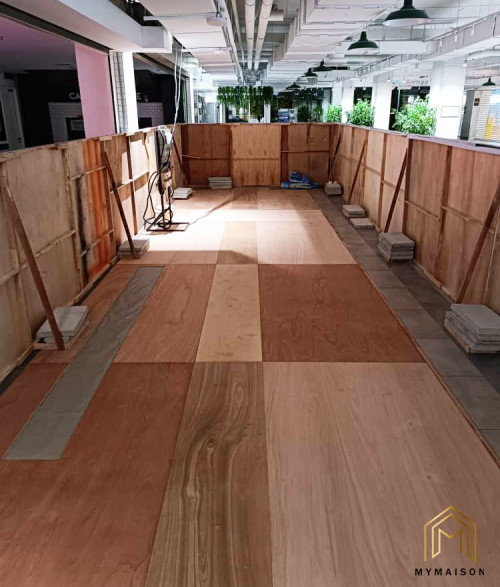
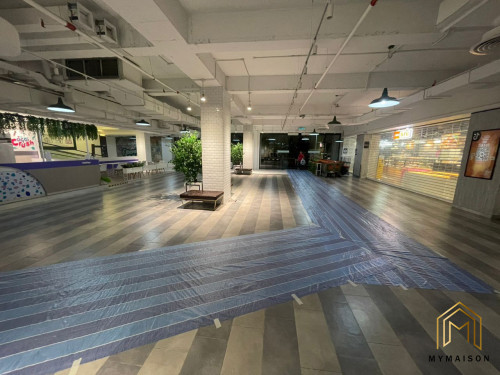
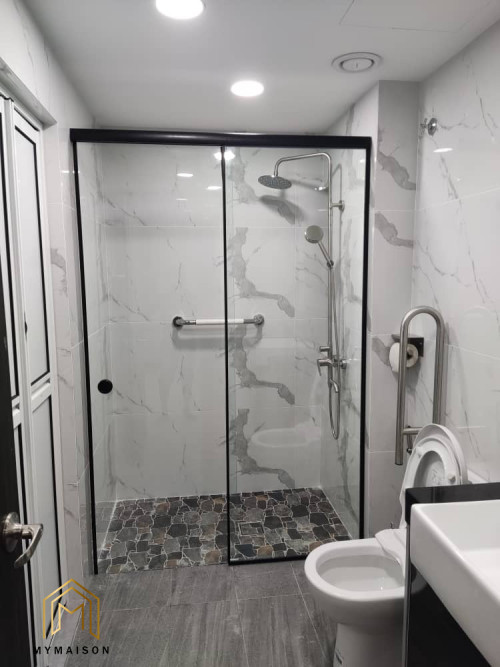
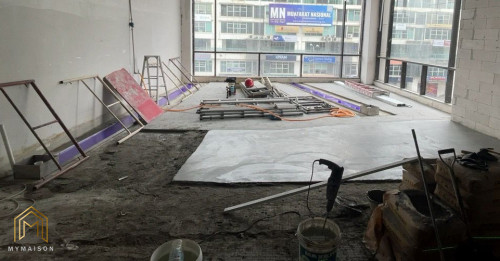
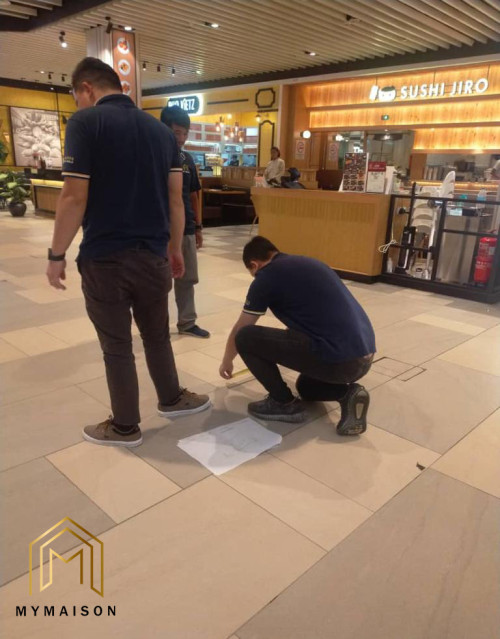
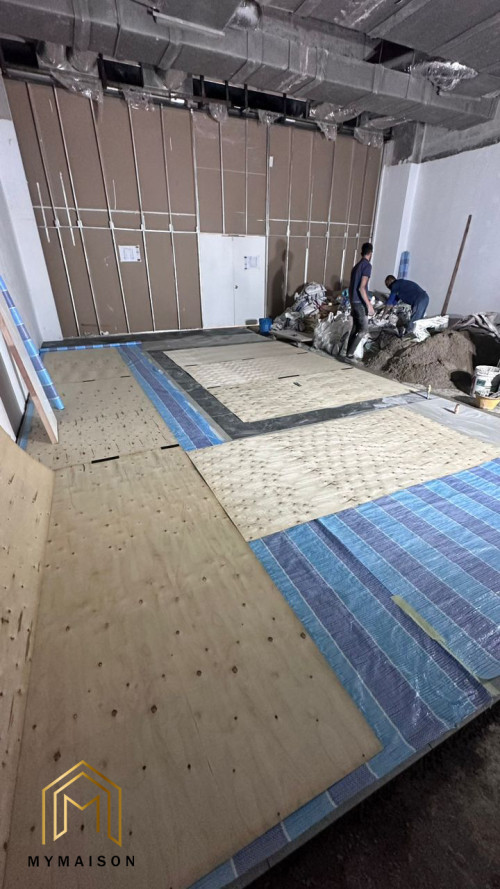
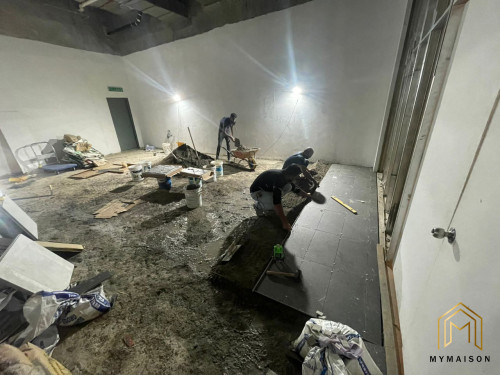
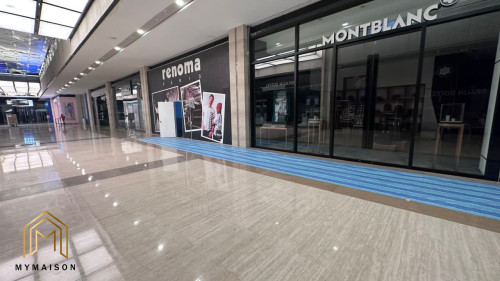
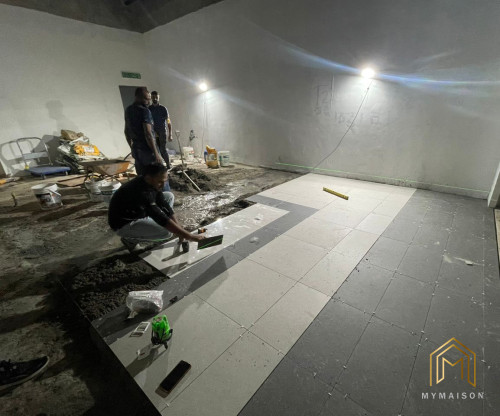
The first setting out point that I would like to highlight here will be tile setting out point. This is very important as it covers the entire area of your unit flooring. A typical tile size can be 300x300mm, 300x600mm,600x600mm etc. A good setting out point can reduce the wastage of tile as it avoids a lot of cutting work on tile at the end of the area. If you simply lay your tiles, you might meet the problem such as having a weird sizing of tile at the end. Just imagine what will the tiles look like if you lay in this way, explore more possibilities and consider if the option can allow the tile line to meet the tile line of another area, just like the interface between bedroom to bathroom. Have a look on the sketch shared below to have a better understanding! ๐Ÿง๐Ÿง

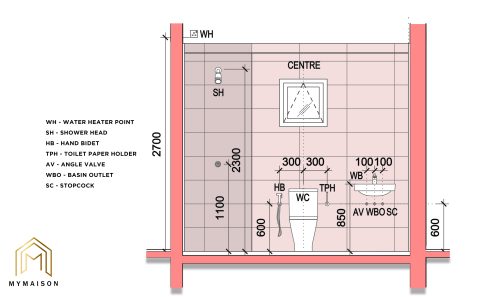
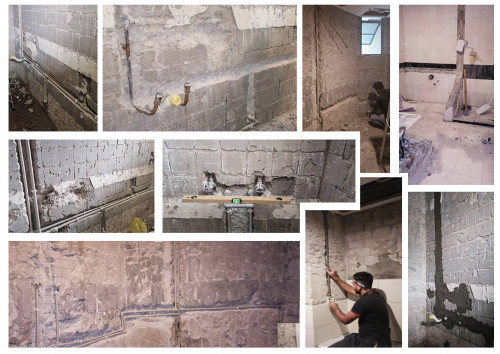
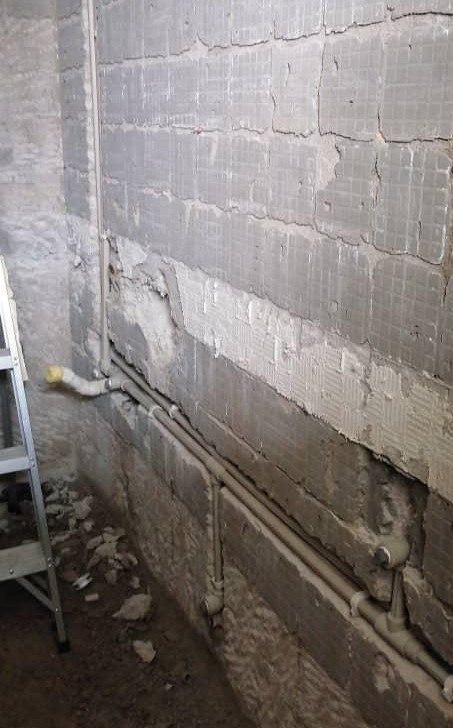
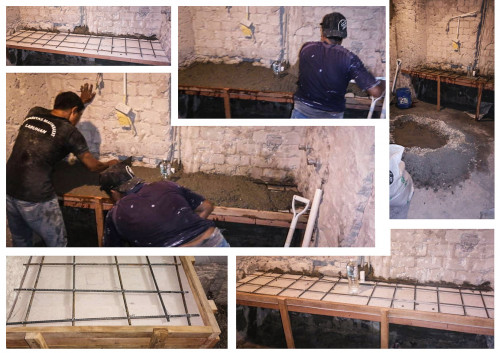
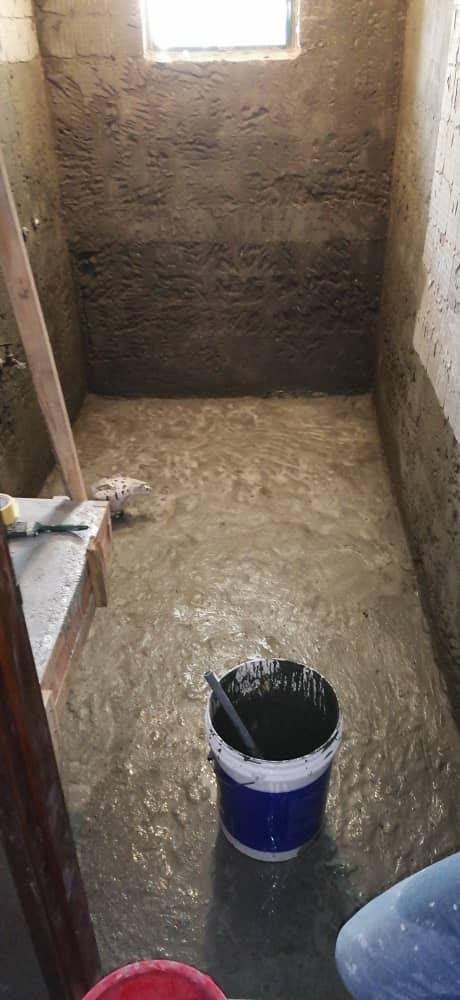
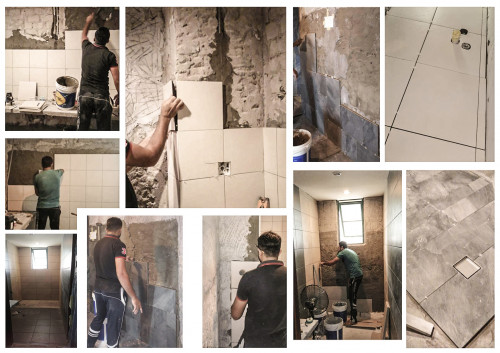
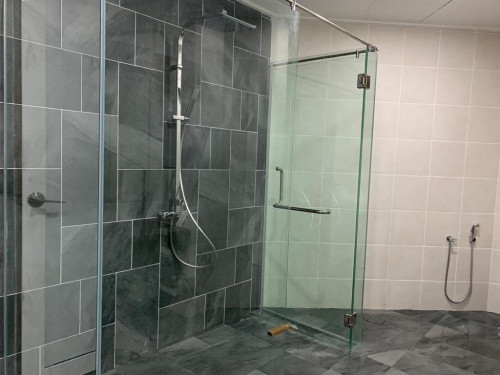
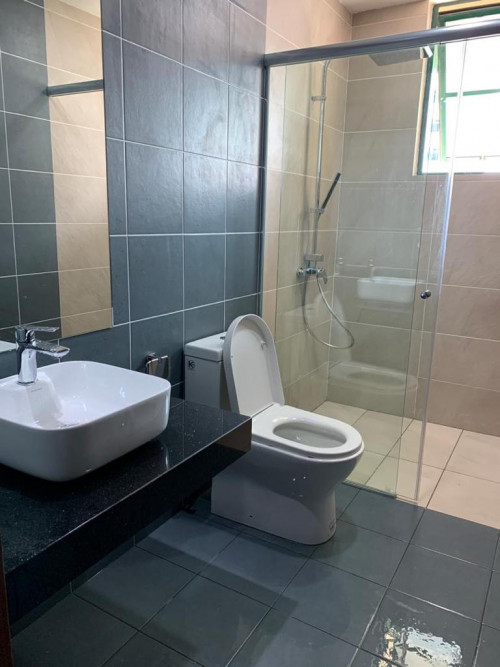
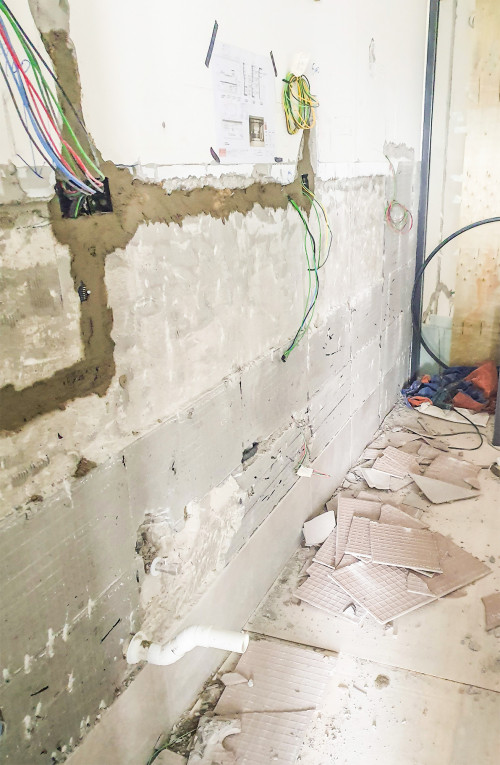
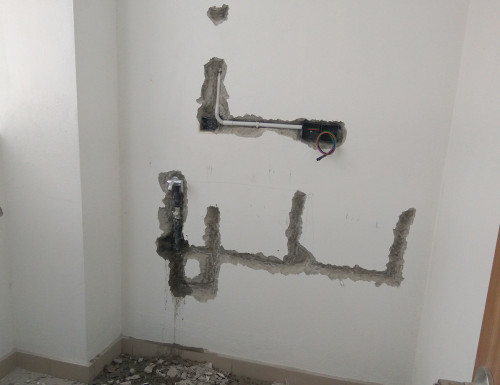
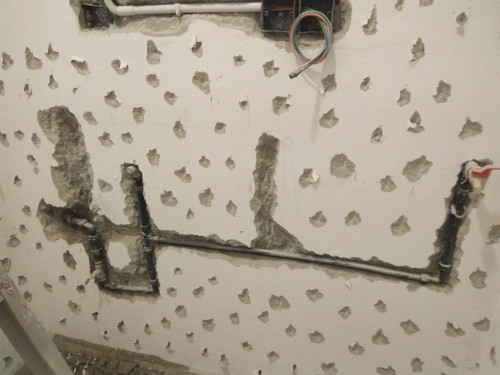
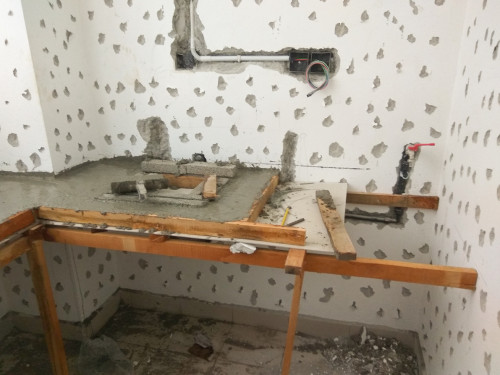
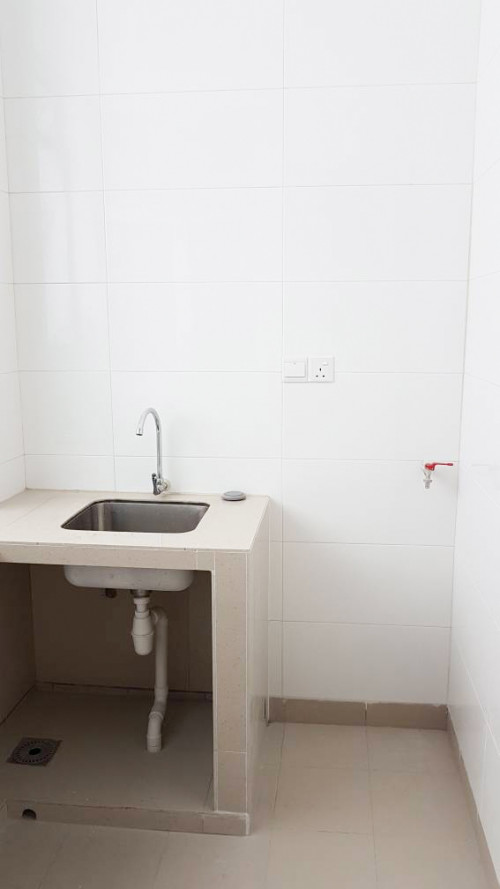
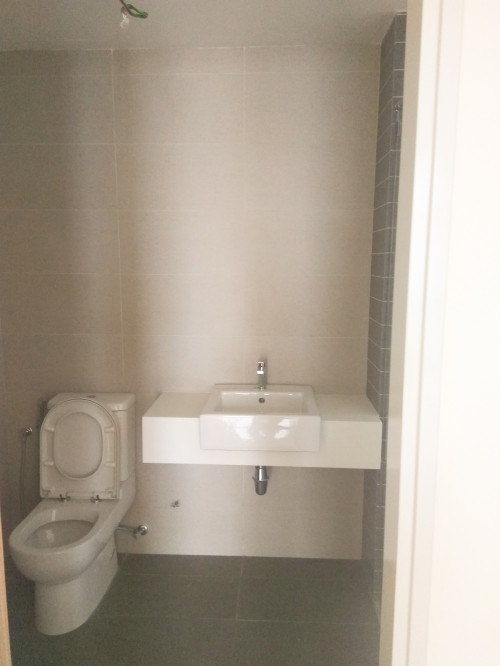
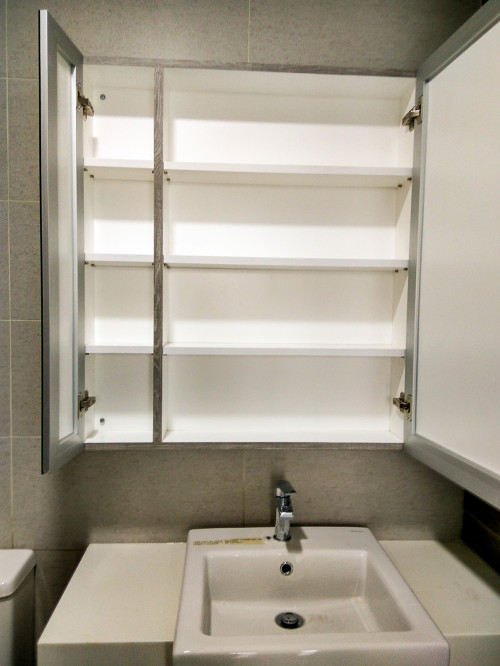
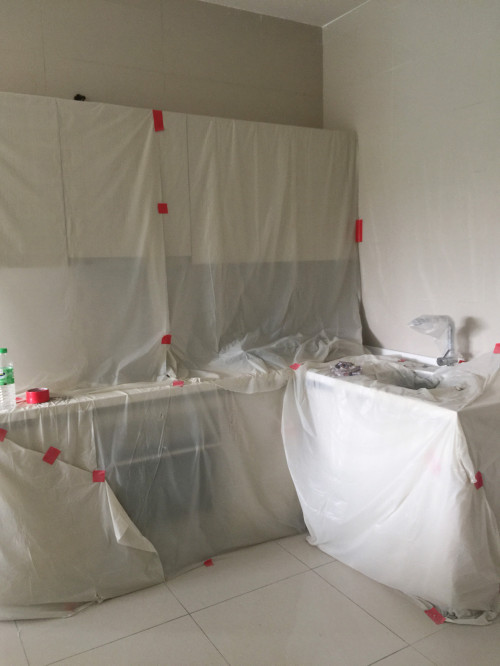
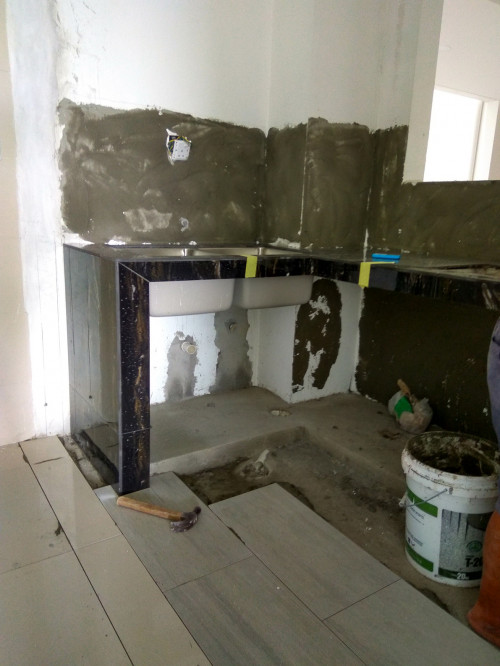
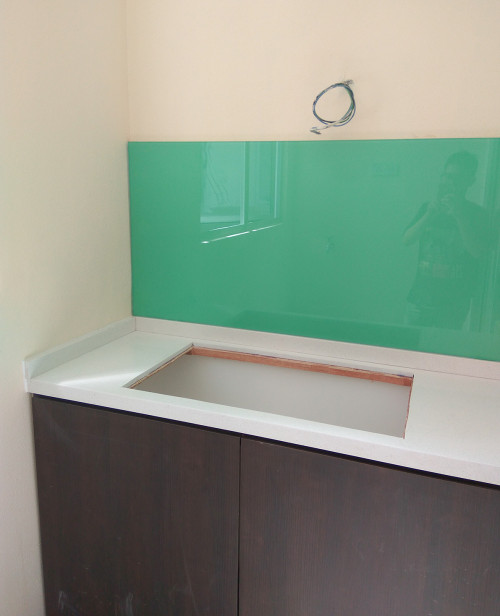
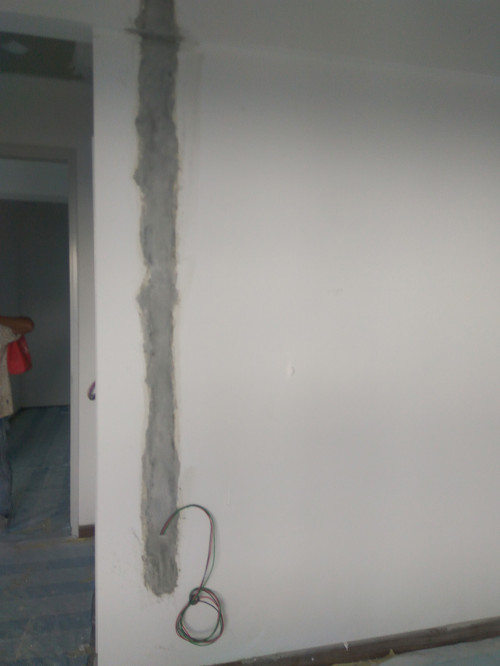
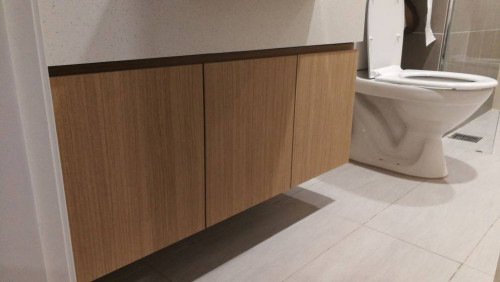
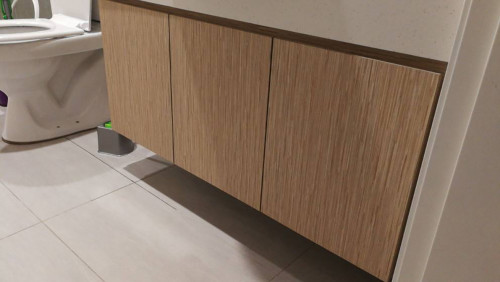
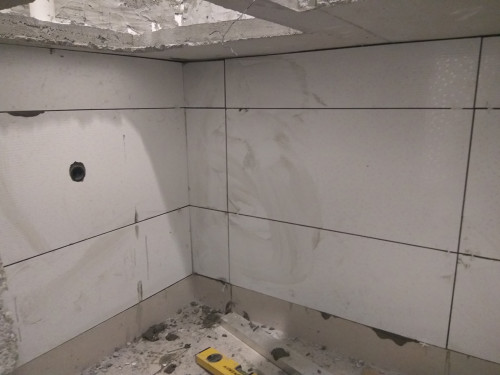
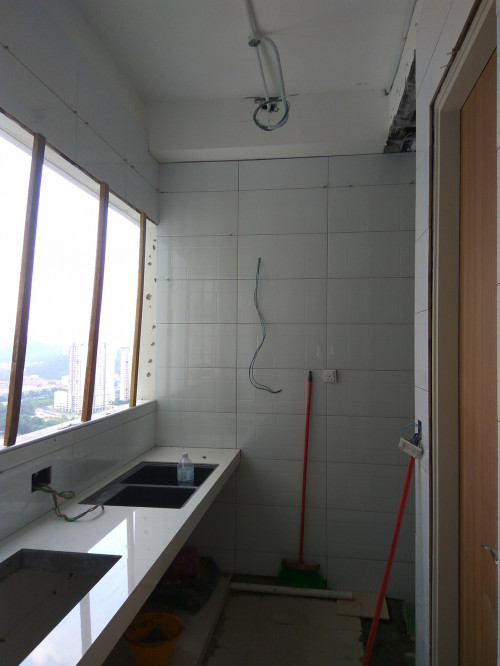
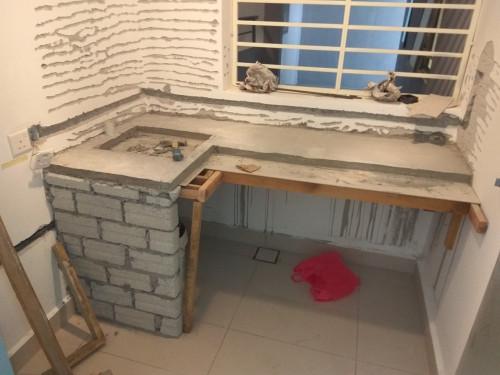
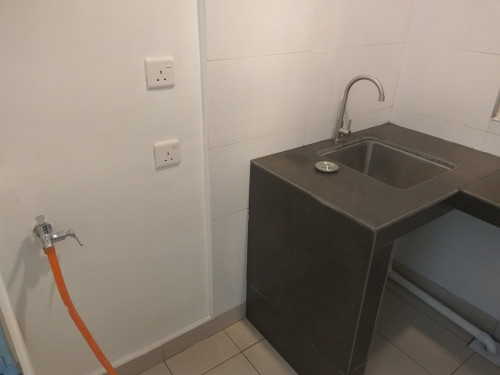
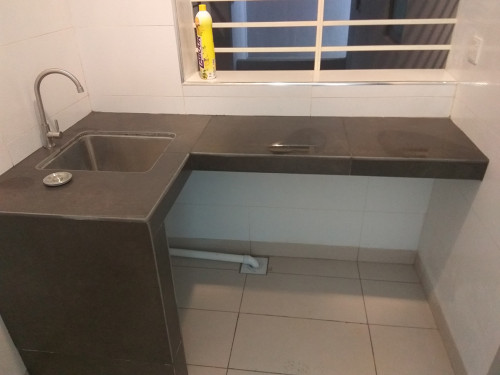
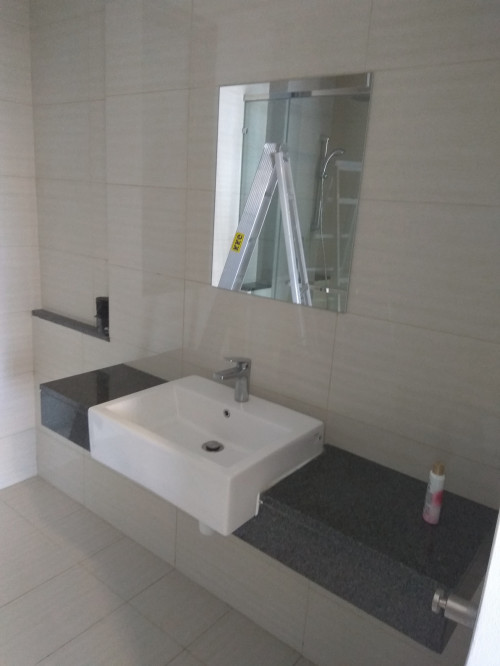
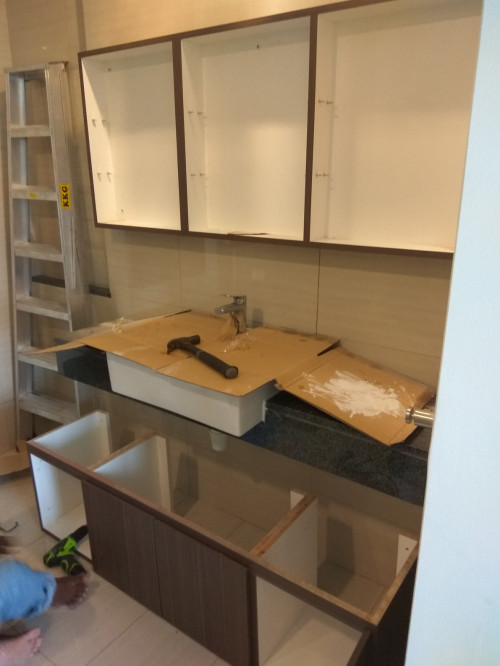
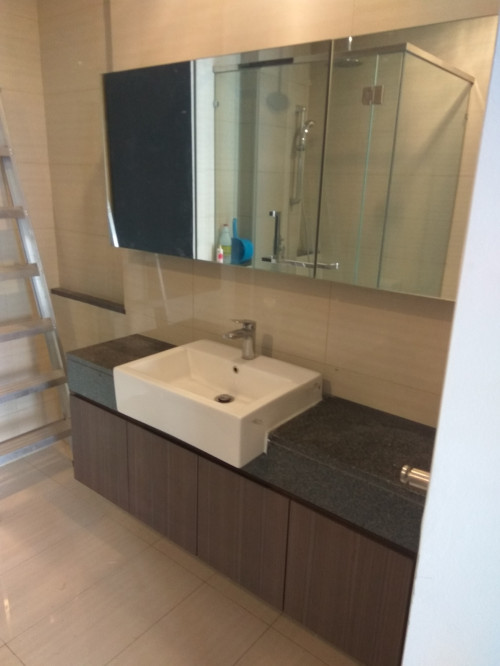
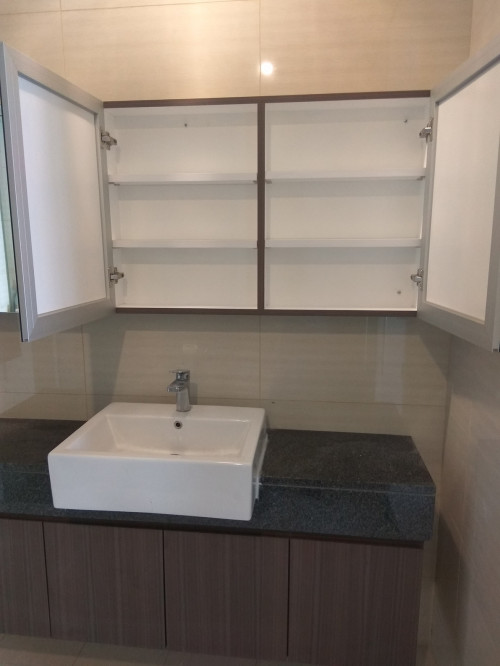
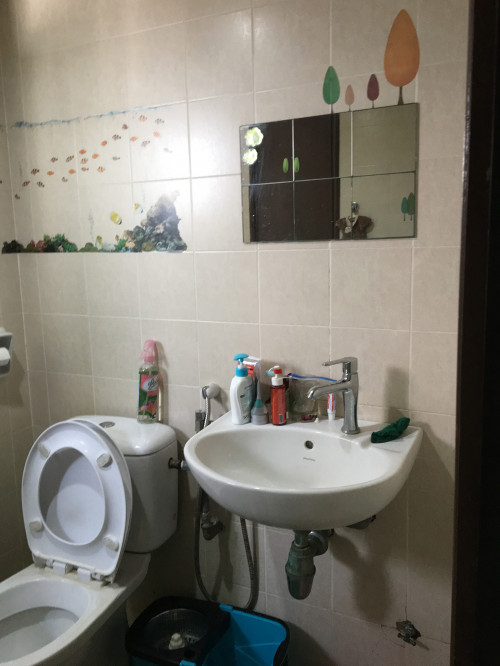
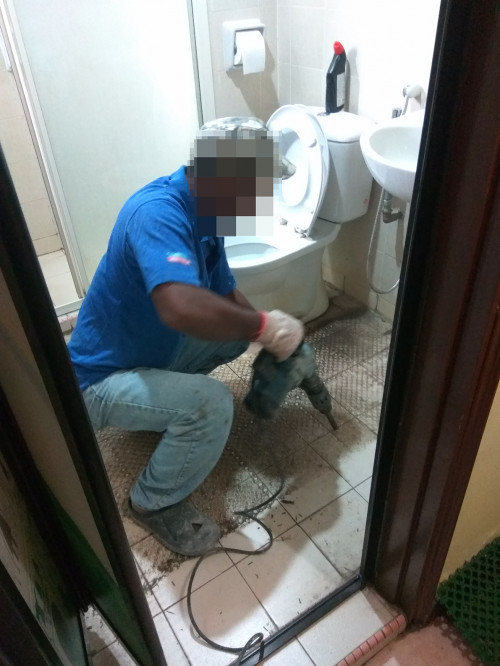
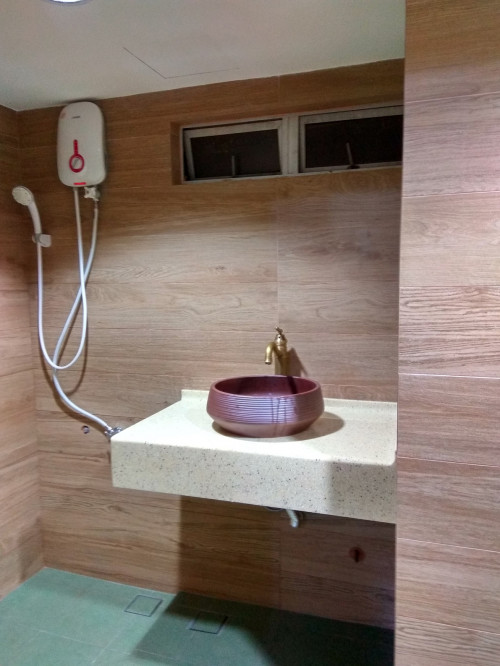
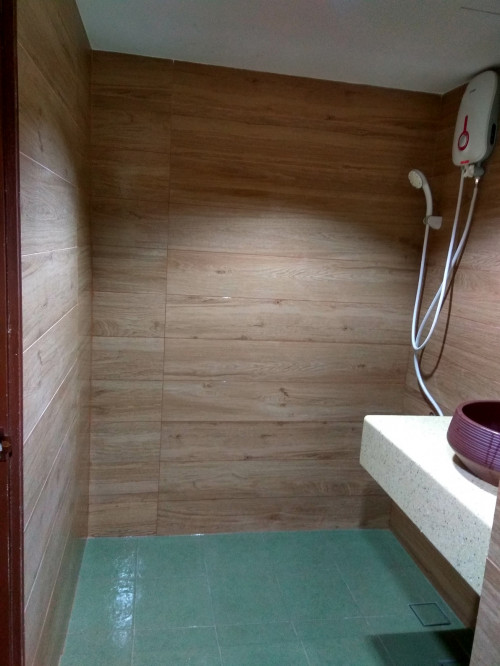
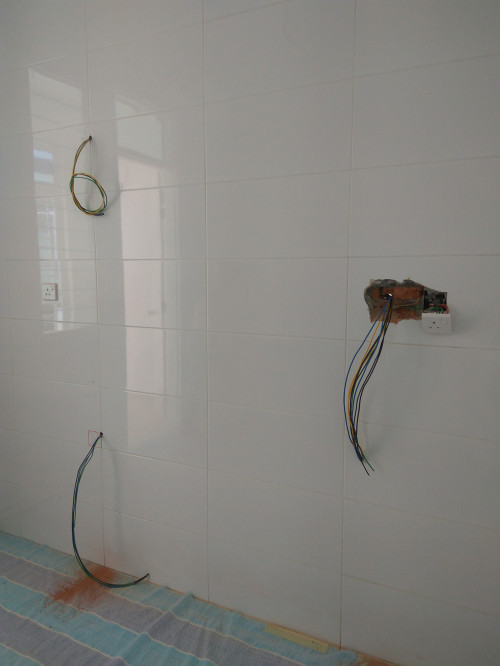
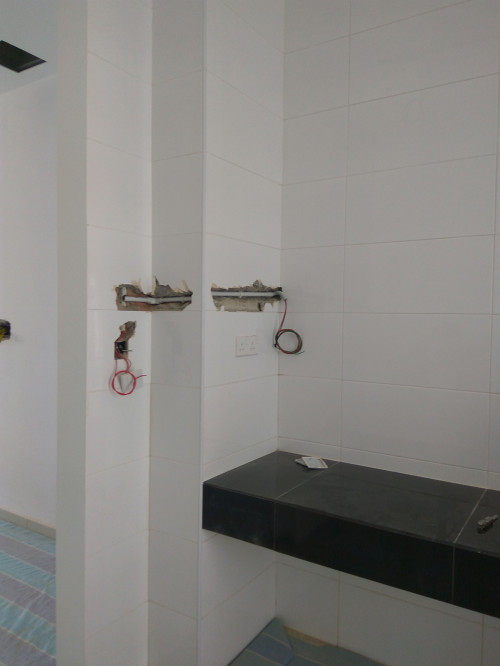
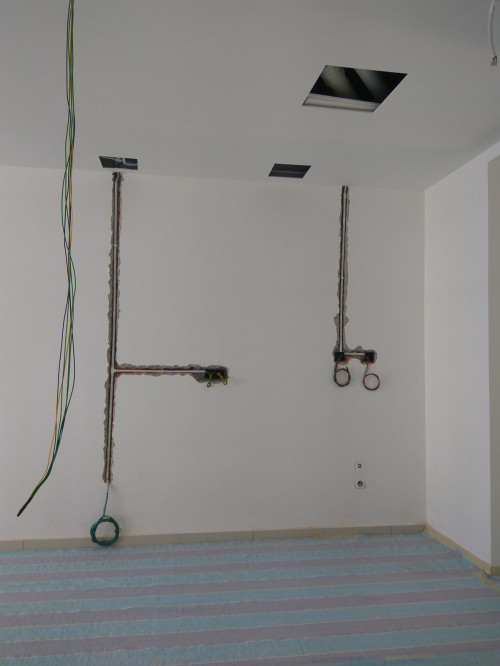
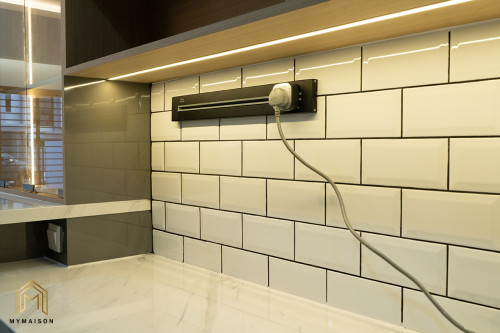
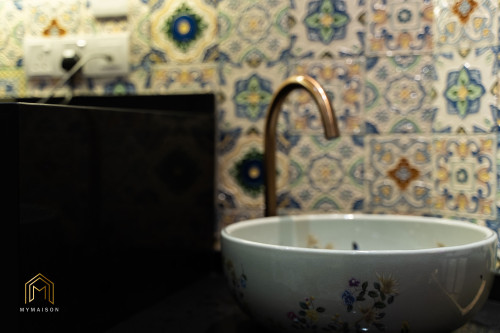
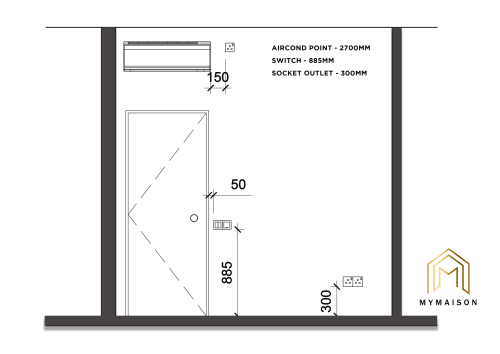
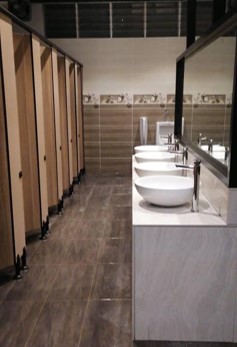
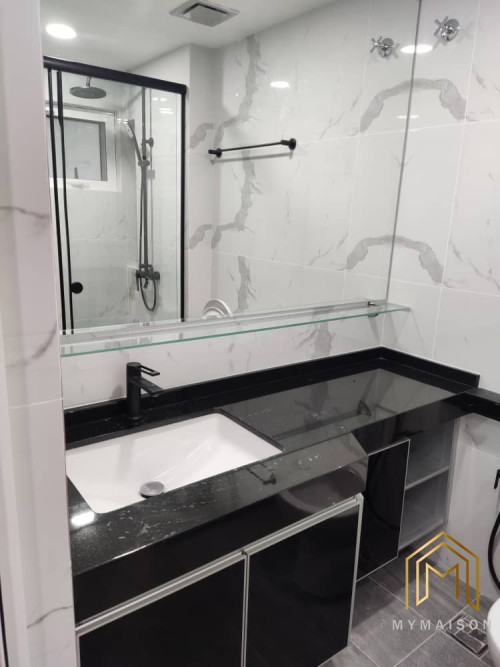
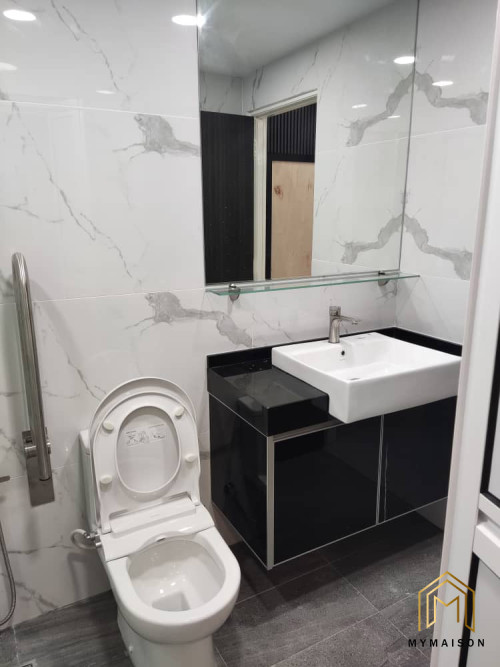
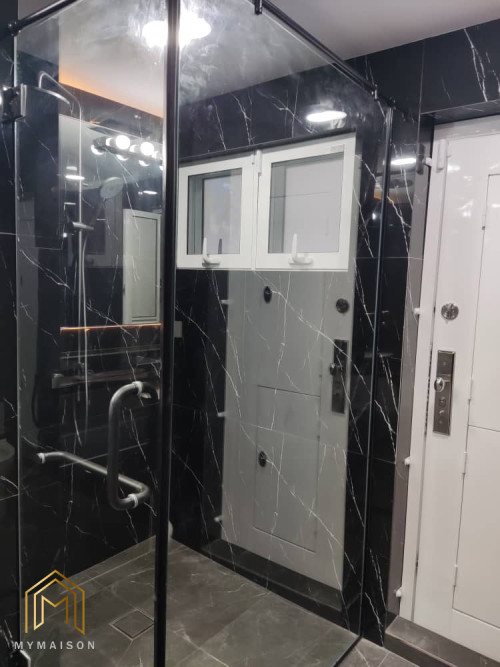
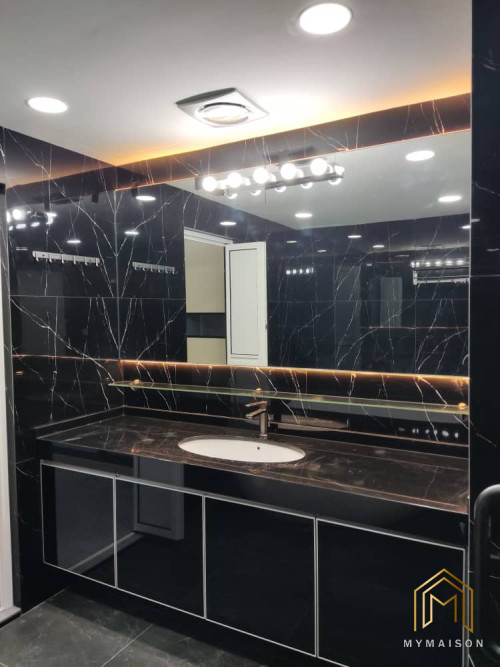
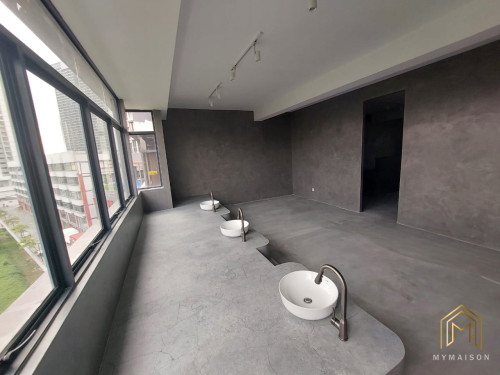
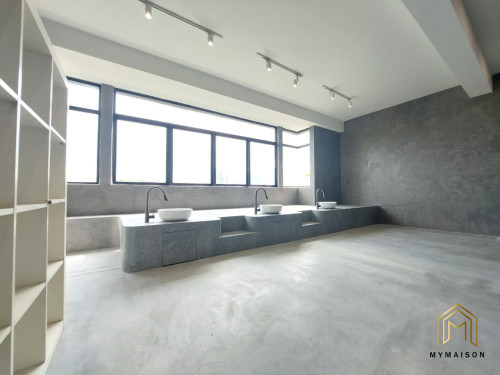
Secondly, setting out point of sanitary fitting in the toilet. We talked about the importance of ergonomic in this case, just like the electrical point height shared with you previously. A wash basin in the toilet is normally 850mm high from floor finish level. This is what we usually set for while designing. Dimensioning is so important during construction as everything is about coordination. You need to consider is the basin is aligned to basin inlet and outlet point. Where can I install the stopcock or angle valve? Normally, this stopcock and water outlet point is placed 550mm to 600mm above floor. How should I set the offset distance so that all the fittings look nice? ๐Ÿ˜€๐Ÿ˜€

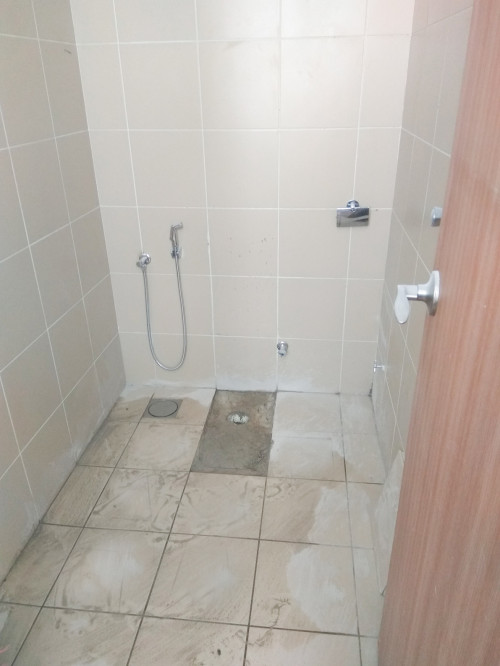
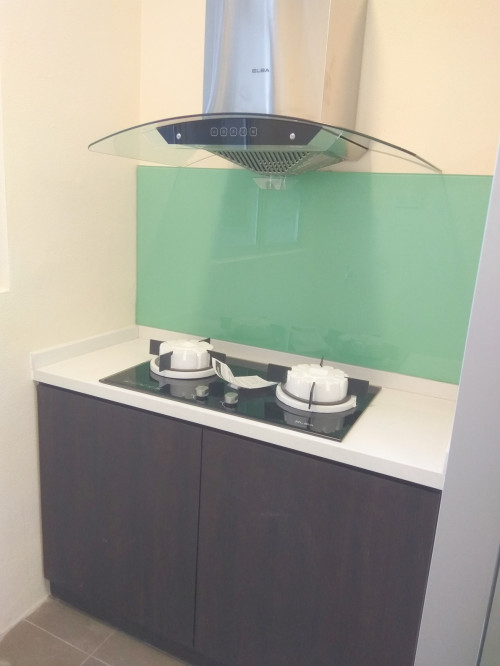
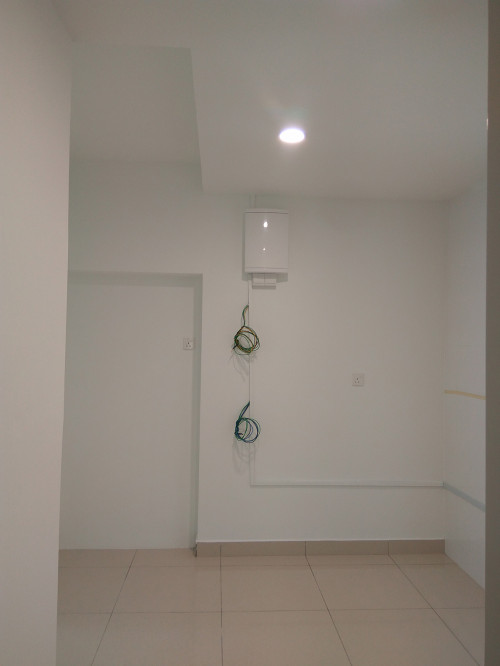
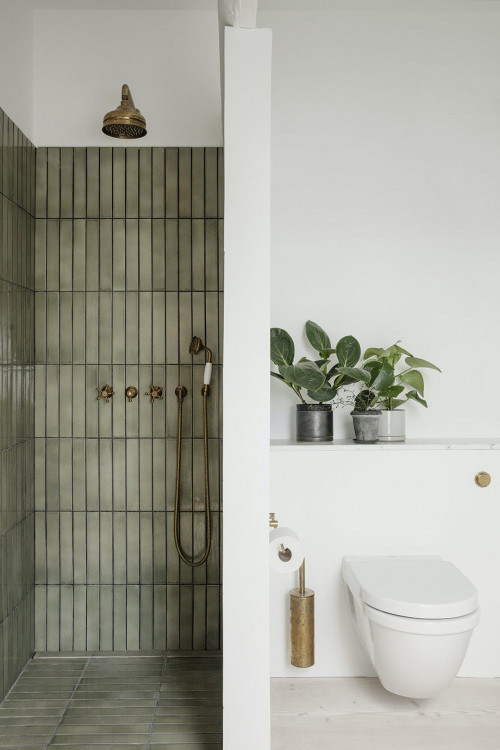
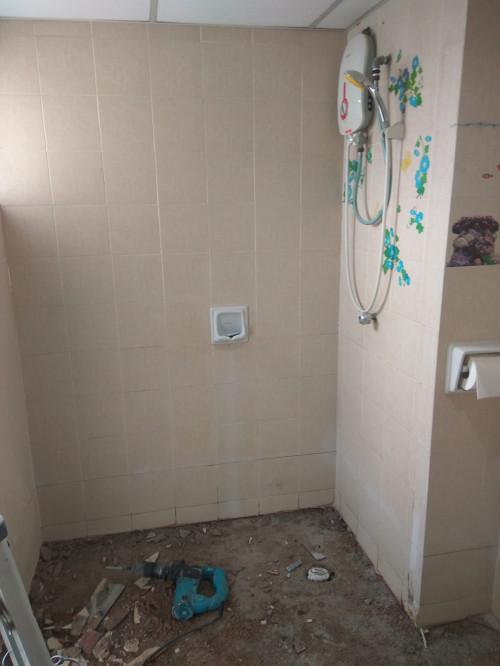
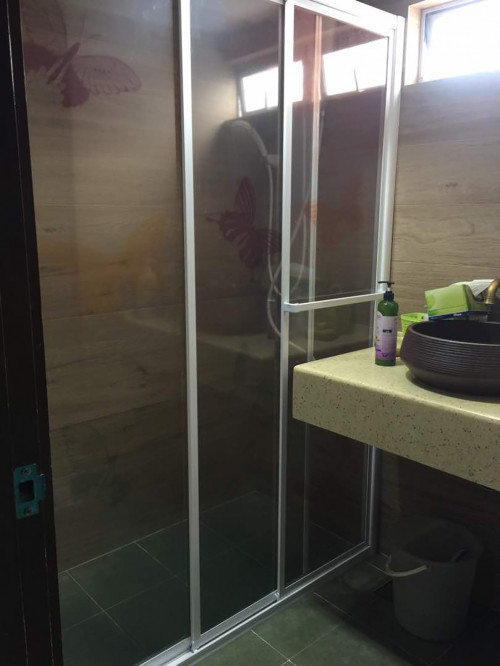
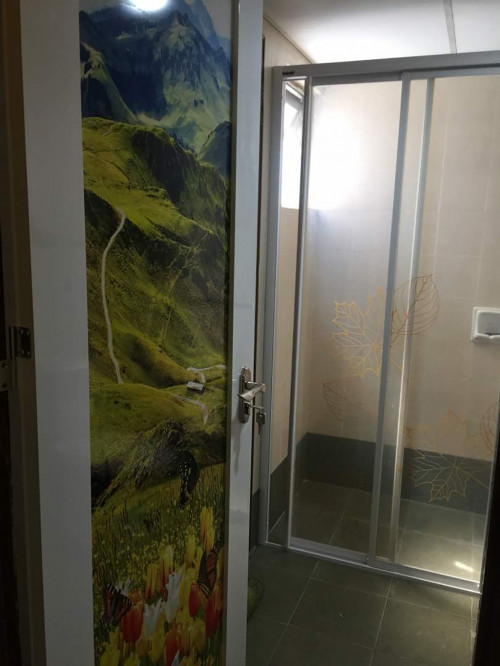
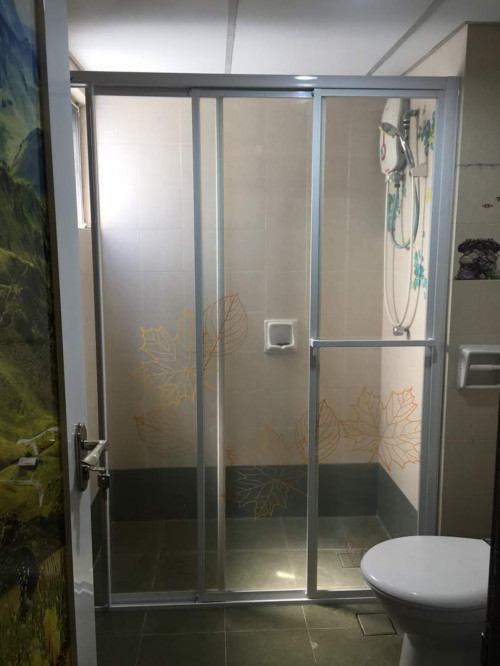
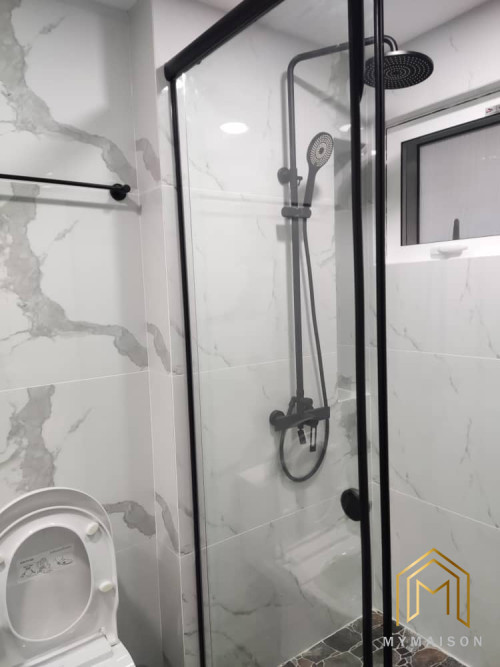
Normally, for a head shower, we would set it around 2100mm to 2300mm high while the shower diverter can be 1100mm high. Now, you have to consider if there is any heater, what will be the chosen model? What is the sizing and how can I design it with the inlet? In that case, where will be my heater point, and can the shower head still aligned at the center of the wall? ๐Ÿ˜Š

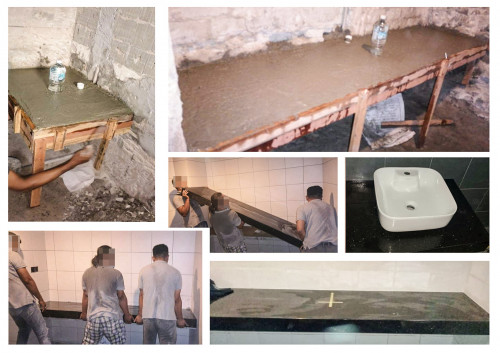
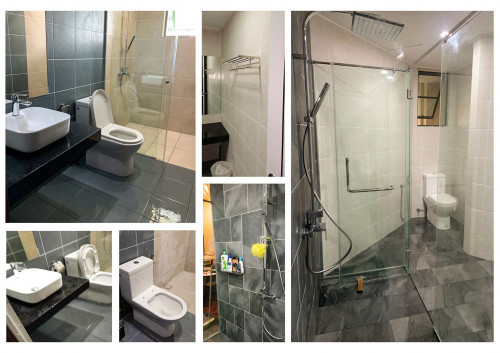
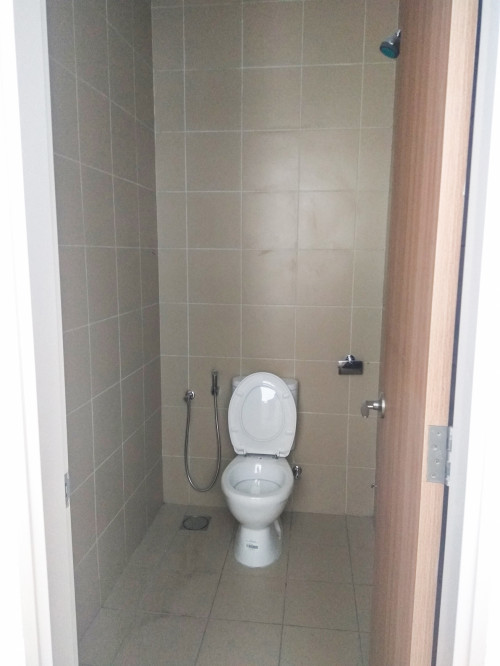
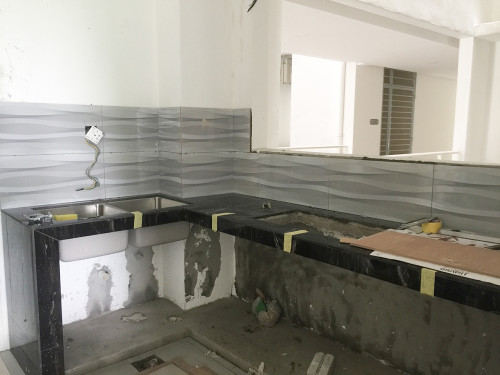
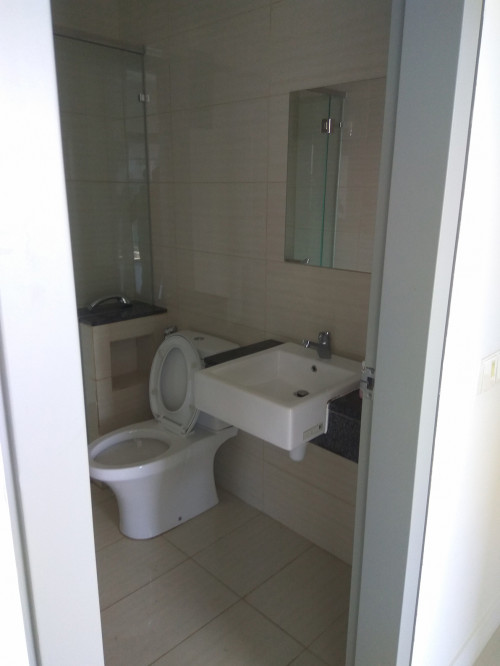
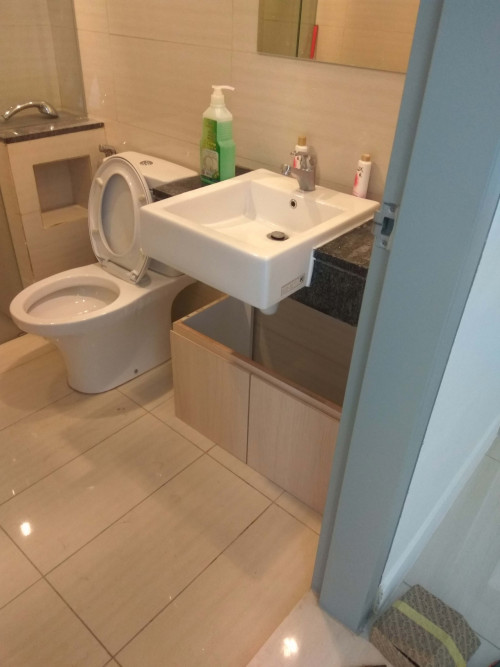
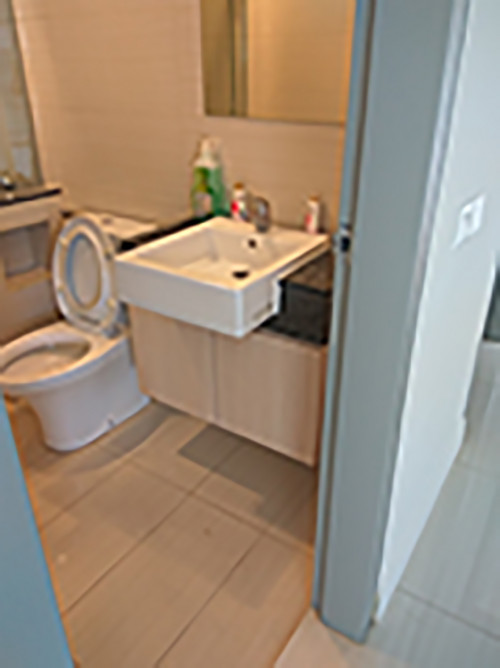
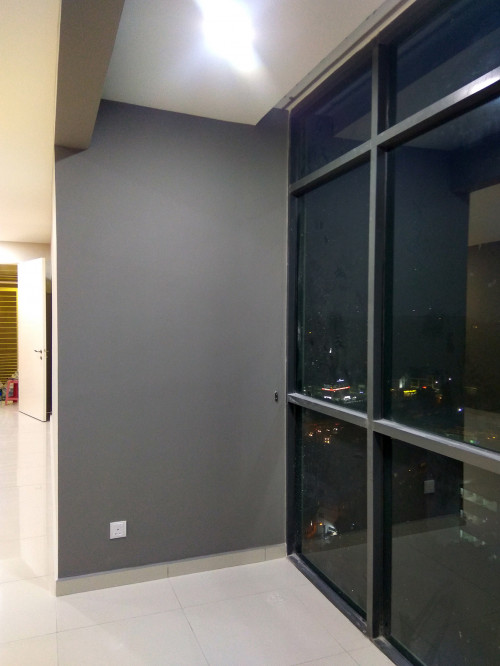
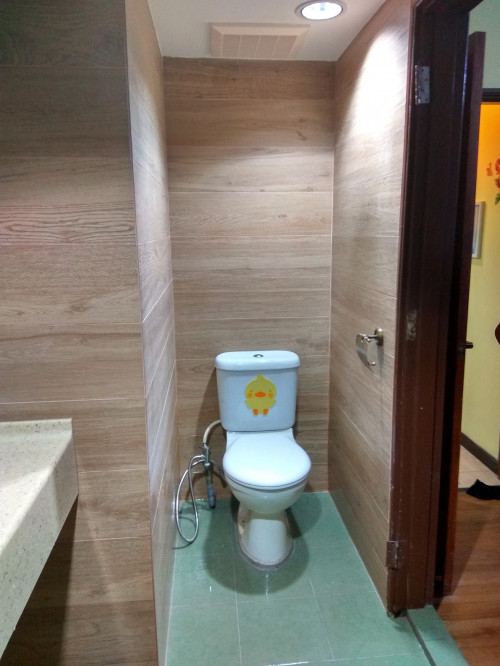
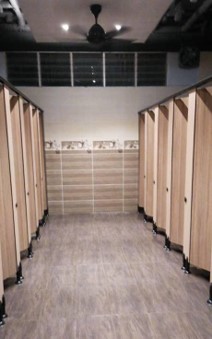
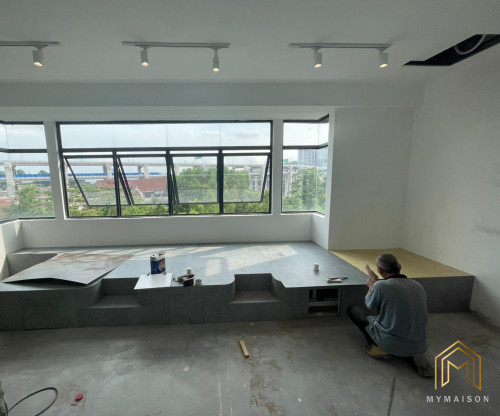
Next, ask yourself, should the toilet water closet aligned to the window, and will it looks better? Definitely, there is no right or wrong and it can be varied based on the bathroom layout. So, after setting out the WC position, what should be on my right or left? Normally, there will be a tap set at 600mm high on your right of WC, or even a hand bidet depending on design. There can also be a toilet paper with holder set at 750mm above floor on your left. Its all about design. Will there be any other possibilities, such as constructing a low wall with niche to place all the toilet paper, washing detergent etc. ๐Ÿ˜๐Ÿ˜
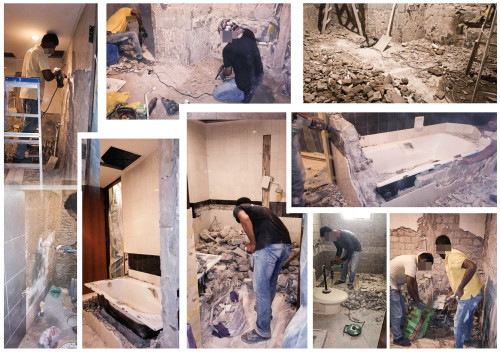
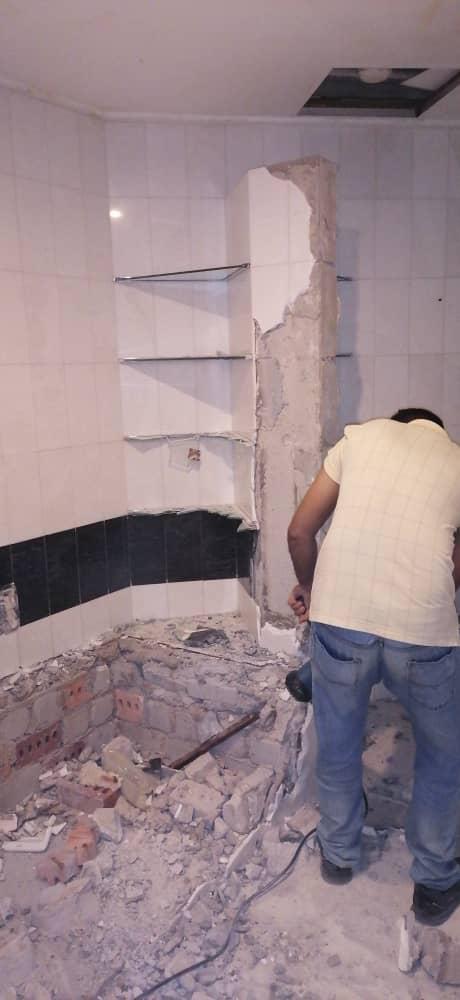
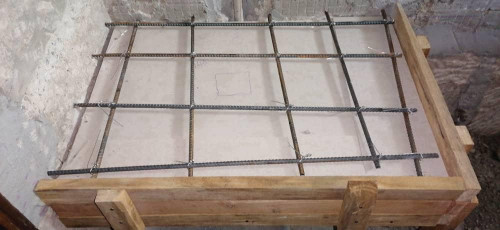
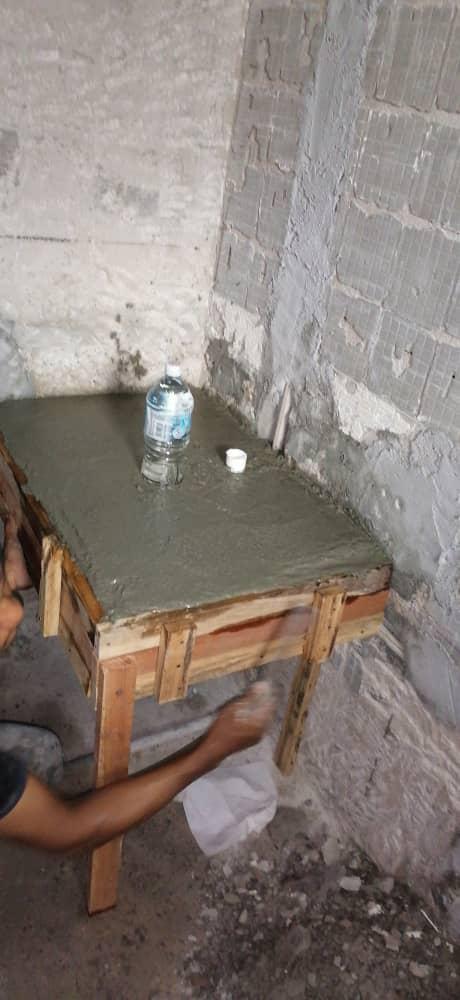
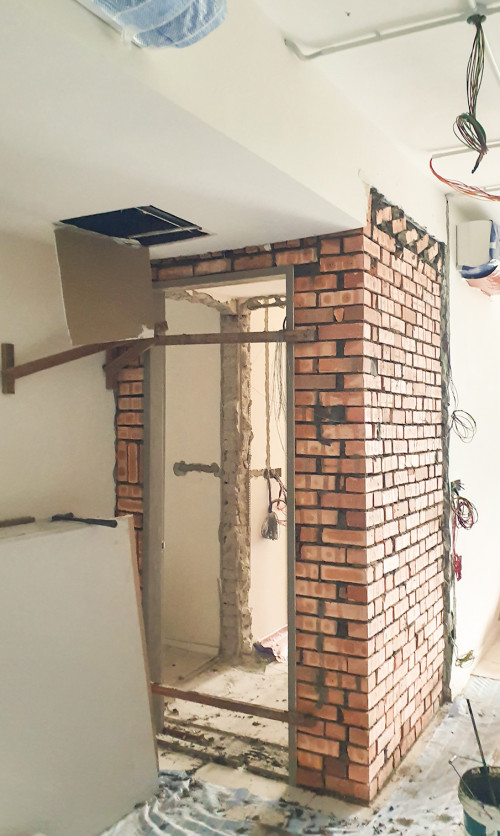
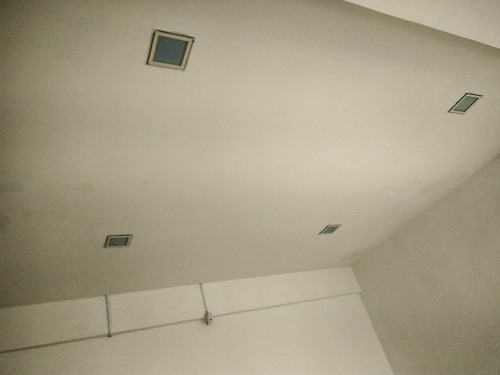
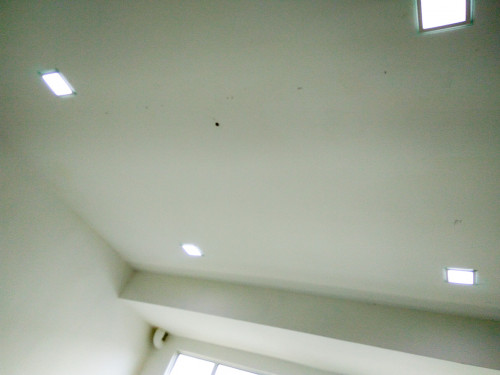
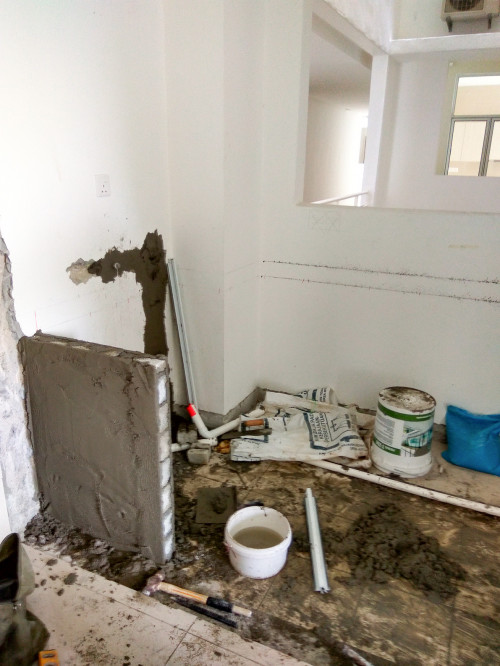
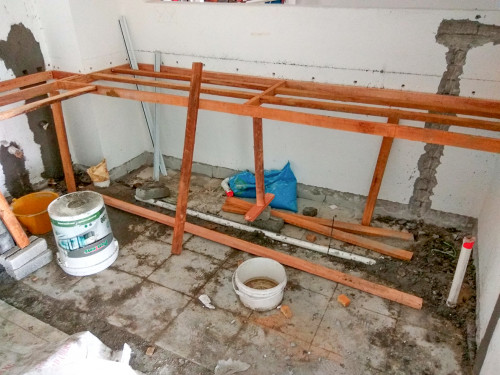
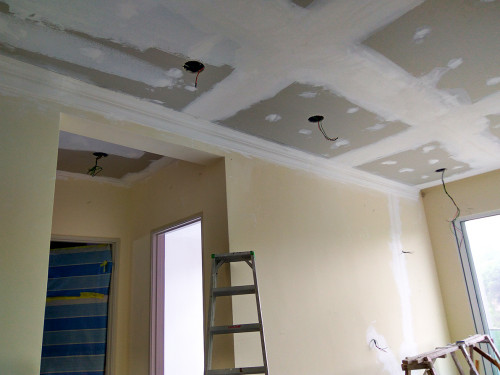
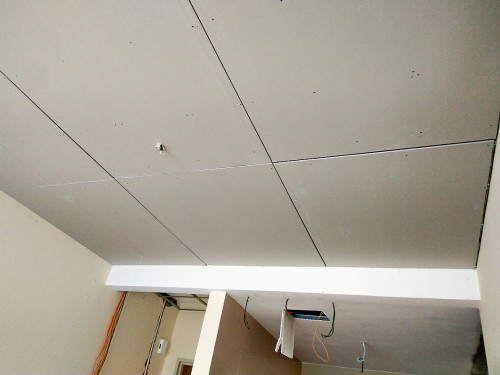
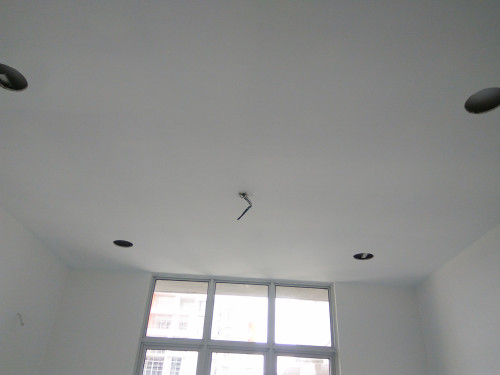
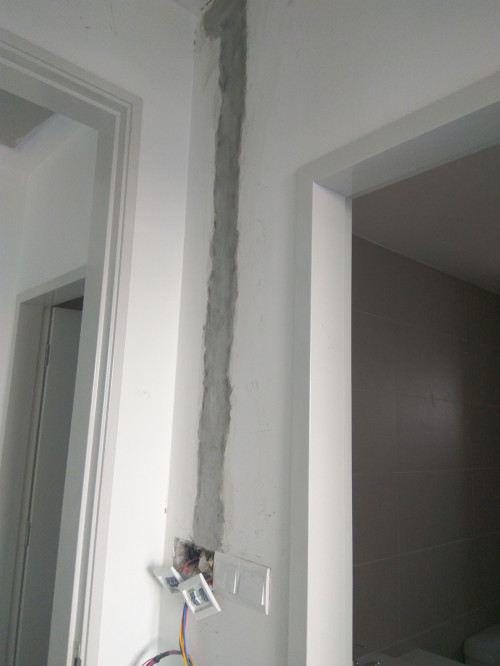
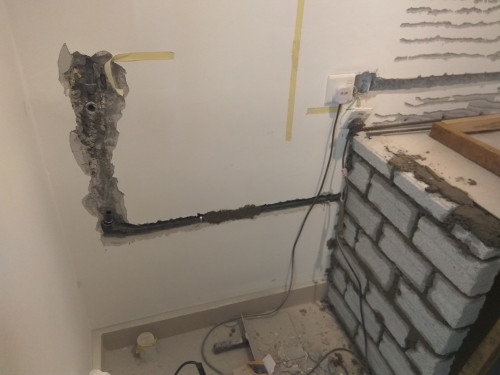
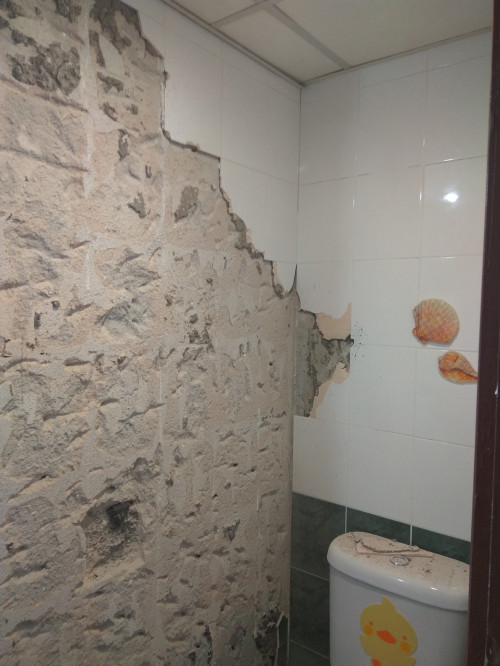
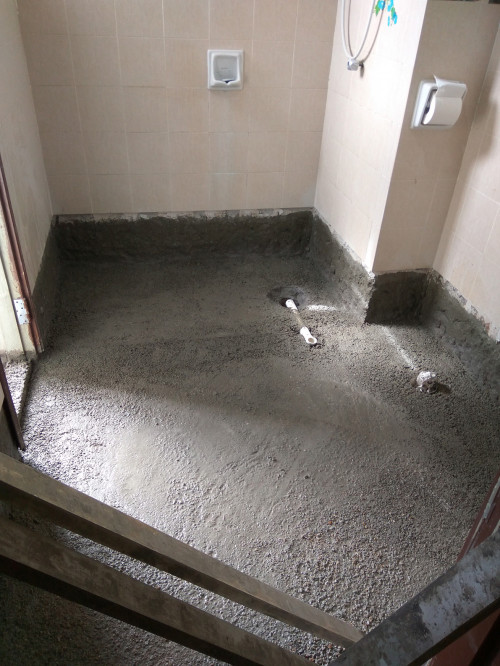
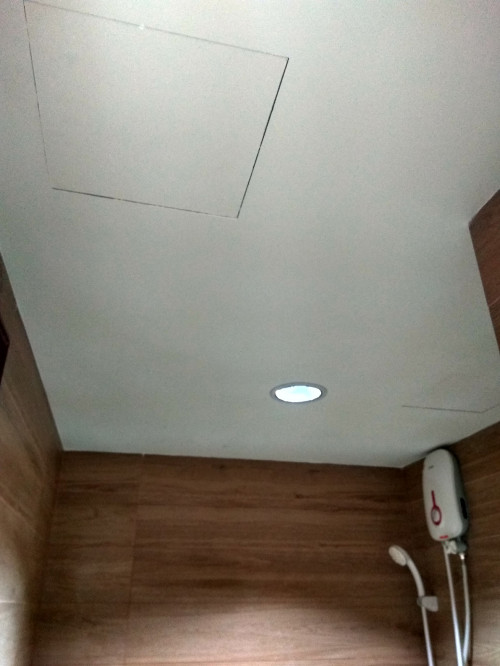
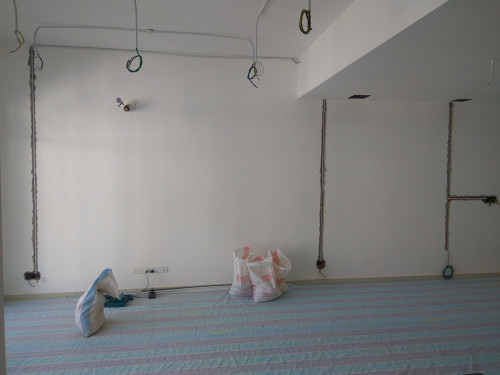
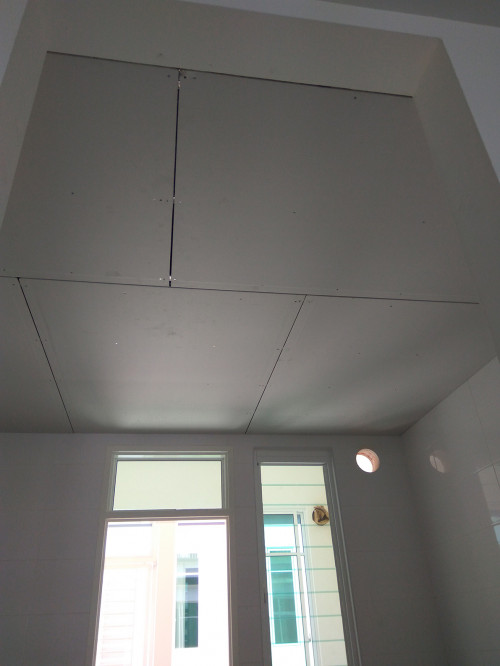
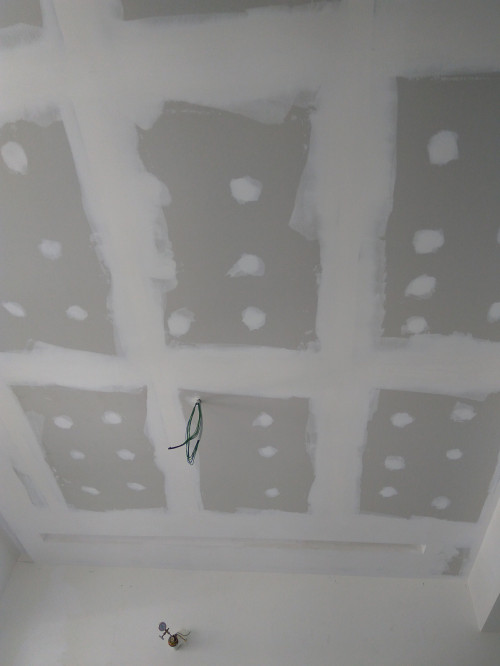
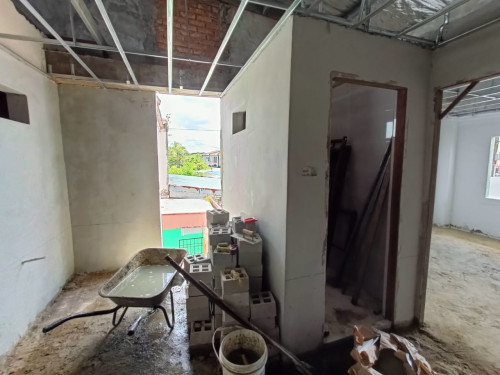
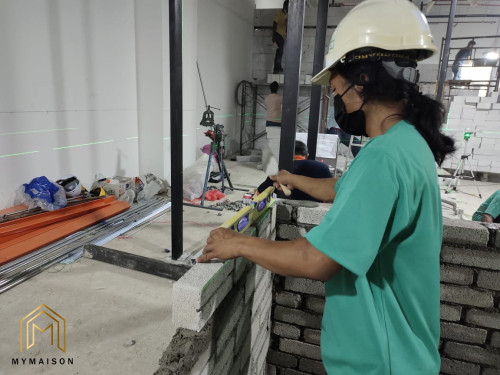
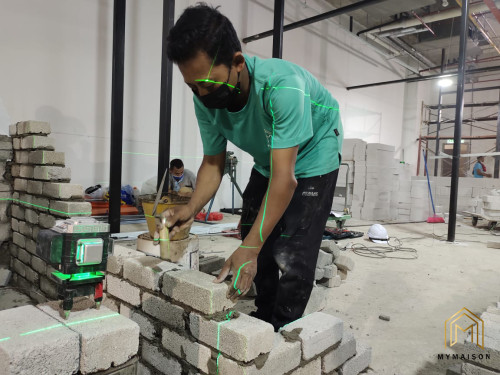
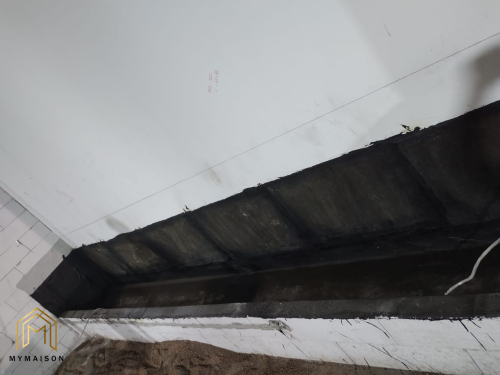
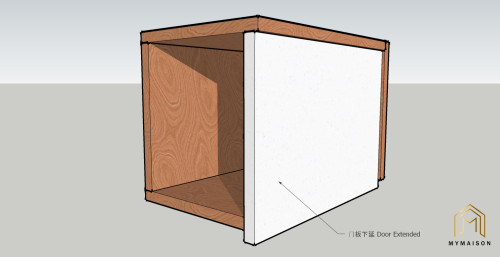
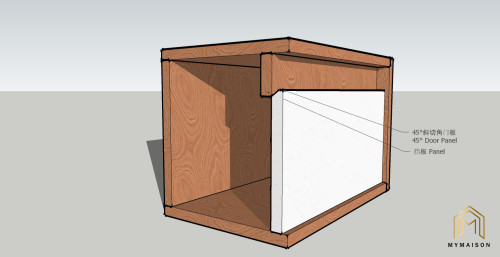
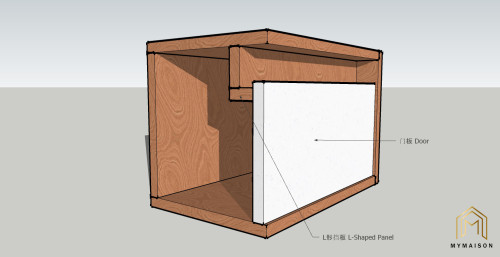
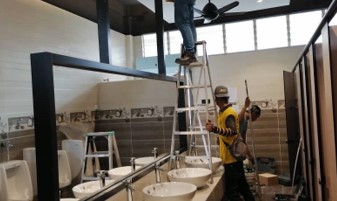
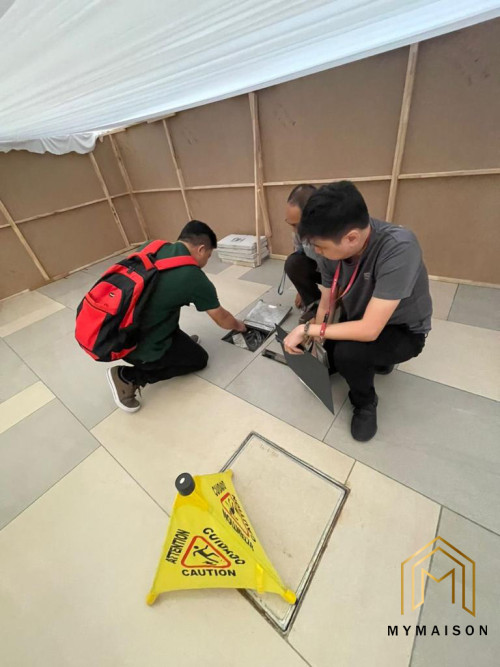
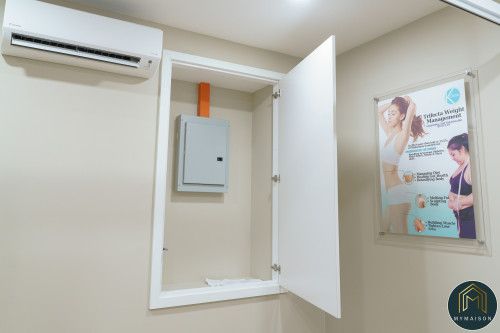
For additional information, normally bathroom or toilet of different floors are stacked from each other. This is because they would need to divert all the wastewater away directly from top to bottom. So, we would need access panel in order to service the floor trap or WC above, just in case there is anything happen. Access panel is also needed for you to service if there is any storage water heater tank above. Talking back to the setting out, yes access panel setting out is also important as you would not want something not aligned in your bathroom also right! Haha!!

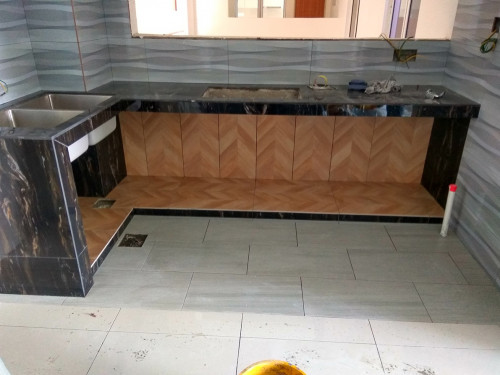
Remember, planning is important, design is important and construction work with site adjustment are all important. Hope you learn something today!!

ๆ‰€ๆœ‰็š„่ฎพ่ฎก้ƒฝๆœ‰ๅฎƒ็š„็›ฎ็š„, ่€Œๅพˆๅคš็š„ๆ–ฝๅทฅๅทฅ็จ‹้ƒฝไปŽไธ€ไธชSetting Out Point ๅผ€ๅง‹ใ€‚ๆ‰€่ฐ“็š„Setting Out Point ๆŒ‡็š„ๆ˜ฏไธ€ไธช่ตท็‚น๏ผŒๅฐฑๅฆ‚้“บๅœฐ็ –๏ผŒๆ€ป้œ€่ฆไธ€ไธช่ฎพ็ซ‹ไธ€ไธช่ตท็‚นๅผ€ๅง‹้“บใ€‚
ๅŸบๆœฌ็š„็“ท็ –็š„ๅคงๅฐๆœ‰300x300mm, 300x600mm,600x600mm ็ญ‰็ญ‰ใ€‚ไธ€ไธชๅฅฝ็š„่ตทๅง‹็‚นๅฏไปฅๅ‡ๅฐ‘้“บ็“ท็ –ๆ—ถๆ‰€้€ ๆˆ็š„ๆตช่ดนใ€‚ๅฆ‚ๆžœๆฒกๆœ‰ไบ‹ๅ…ˆๆƒณๅฅฝ่ฏฅๆ€Žไนˆ้“บ๏ผŒๆœ€ๅŽไฝ ๅฏ่ƒฝไผšๅ‘็Žฐ่ง’่ฝ่พน็š„่ก”ๆŽฅๅค„ๅพˆๆ€ช๏ผŒ็”š่‡ณๅพˆ้šพๅŽปๆŠŠๅฎƒๅกซ็พŽใ€‚ไฝ ้œ€่ฆๅœจ้“บๅžซๅ‰ไบ‹ๅ…ˆๅšๅฅฝๅ‡ ็งๅฏ่ƒฝๆ€ง๏ผŒไปฅ่พพๅˆฐๆœ€ๅฅฝ็š„ๆ•ˆๆžœไปฅๅŠ่ฎฉไธๅŒ็ฉบ้—ด็š„็“ท็ –็ผๅฏไปฅๅฎŒ็พŽ่ก”ๆŽฅ่ตทๆฅใ€‚

็ฌฌไบŒ๏ผŒๆตดๅฎคๅ†…็š„ๅซ็”Ÿ่ฎพๅค‡ๅŒๆ ทไนŸ้œ€่ฆSetting Out Pointใ€‚ๆด—ๆ‰‹็›†่ขซๅฎ‰็ฝฎๅœจๅคง็บฆ850mm ็š„้ซ˜ๅบฆใ€‚ๅฐบๅฏธ็š„ๆต‹้‡ๆ˜ฏ้žๅธธ็š„ๅพˆ้‡่ฆ็š„ใ€‚ไฝ ้œ€็กฎไฟๆด—ๆ‰‹็›†็š„ๅฎ‰่ฃ…ๅฏไปฅไธŽWater Inlet Point & Outlet Point ๆญ้…ใ€‚้‚ฃๆตดๅฎค้‡Œ็š„ๆ—‹ๅกž้˜€่ฏฅ็ฝฎๆ”พๅœจๅ“ช้‡Œๆ‰ๅฅฝ็œ‹ๅ‘ข๏ผŸๆœ‰ๆ—ถ๏ผŒๆˆ‘ไปฌไผš็ฝฎๆ”พๅœจๆด—ๆ‰‹็›†ไธ‹๏ผŒๅˆๆˆ–่€…ๆ˜ฏๅœจๆฃ€ไฟฎๅฃๆ—ใ€‚่‹ฅๅœจๆด—ๆ‰‹็›†ไธ‹๏ผŒ็ฝฎๆ”พ็š„ไฝ็ฝฎๅคง็บฆๅœจ550mm ่‡ณ600mm ็š„้ซ˜ๅบฆใ€‚่‡ณไบŽ่Šฑๆด’๏ผŒๆˆ‘ไปฌไผš่ฎพ็ฝฎๅœจๅคง็บฆ2100mm่‡ณ2300mm็š„้ซ˜ๅบฆ๏ผŒ่€Œๅผ€ๅ…ณๅฃๅˆ™ๅœจ1100mm็š„ไฝ็ฝฎใ€‚ไธค่€…ๅฟ…้กปๅนณ่กŒๆ‘†ๆ”พๆ‰็พŽๅ“ฆ๏ผๅฆ‚ๆžœๆœ‰็ƒญๆฐดๅ™จ๏ผŒๆˆ‘ไปฌๅˆ™้œ€่ฆๆ€่€ƒ็ƒญๆฐดๅ™จ็š„็‰Œๅญใ€ๅคงๅฐใ€ๆ‘†ๆ”พไฝ็ฝฎใ€็ƒญๆฐดๅ™จๆ’ๅบง็š„่ฎพ่ฎก่ฏฅๅฆ‚ไฝ•็ญ‰็ญ‰๏ผๅ†ๆฅ๏ผŒ้ฉฌๆกถ็š„ๆ‘†ๆ”พไนŸไผšๅ› ๅŽ•ๆ‰€็š„่ฎพ่ฎก่€Œๅ†ณๅฎšใ€‚ๅœจ้ฉฌๆกถ็š„ๅทฆๅณไธคไพง๏ผŒๅณไพงไผšๆœ‰600mm้ซ˜็š„ๆฐด้พ™ๅคด๏ผŒๅˆๆˆ–่€…ๆ˜ฏHand Bidet๏ผŒ่€Œๅทฆไพงๅˆ™ไผšๆœ‰750mm้ซ˜็š„ๅŽ•็บธๆžถใ€‚่ฟ™ไธ€็ณปๅˆ—็š„่ฎพ่ฎก้ƒฝๆ˜ฏๆ–นไพฟ็”จๆˆท็š„ไฝฟ็”จใ€‚ๆˆ‘ไปฌไนŸๅฏไปฅ่€ƒ่™‘ๅฃ้พ›็š„่ฎพ่ฎกๆฅ็ฝฎๆ”พ่ฟ™ไบ›็”จๅ…ท็ญ‰็ญ‰๏ผ

ไบ‹ๅ…ˆ็š„่ฎพ่ฎกๅ†ๆ นๆฎๅฎžๅ†ตๅšๅ‡บๅพฎ่ฐƒๆ•ดไปฅ่พพๅˆฐไฝ ่ฆ็š„ๆ•ˆๆžœใ€‚ๅธŒๆœ›ไปŠๅคฉๅคงๅฎถ้ƒฝๆœ‰ๆ‰€ๆ”ถ่Žท๏ผŒไบ†่งฃๅฐบๅฏธไปฅๅŠๆต‹้‡็š„ๅ‡†็กฎๆ€งๅœจๆตดๅฎค้‡Œๆ˜ฏๆ ผๅค–้‡่ฆ็š„๏ผ

MyMaison ๅฎ˜็ฝ‘ ๐Ÿ’ป๏ผšhttps://mymaison.com.my

user posted image

user posted image
TSMy Maison
post Nov 18 2022, 07:39 PM

Casual
***
Junior Member
319 posts

Joined: Jun 2018
#construction #BasicDesignTips #MyMaison

ๆฅผๆขฏ่ฎพ่ฎก็ป†่Š‚ Staircase Design Tips[/B]

ๅฎถ้‡Œ็š„ๆฅผๆขฏ่ฎพ่ฎก๏ผŒๆœ‰ไป€ไนˆๅŸบๆœฌ็š„็ป†่Š‚่ฆ้ข†้กป็Ÿฅๅ‘ข๏ผŸ่ฏดๅˆฐๅบ•๏ผŒไธ€ไธชๅˆๆ ผ็š„ๆฅผๆขฏไธ€ๅฎš่ฆ็ฌฆๅˆไบบไฝ“ๅทฅๅญฆใ€‚ๅœจๆŠฌ่ตท่…ฟๆ—ถๆ˜ฏๅฆๆ–นไพฟๅ†ณๅฎšไบ†่ธๆญฅ้ซ˜ๅบฆ๏ผŒ่€Œๆฅผๆขฏๆ ผ็š„ๆทฑๅบฆๅˆ™ๅฟ…้กป่ฆๅฎน็บณ่„šๆŽŒ็š„ๅคงๅฐใ€‚
ๅฝ“็„ถ๏ผŒๅœจ่ฎพ่ฎกๅญฆ้‡ŒไนŸๆœ‰ไธ€ๅฎš็š„่ง„ๅˆ™๏ผŒ่ธๆญฅๆทฑๅบฆไธŽ้ซ˜ๅบฆๅพ€ๅพ€ๆ˜ฏๆœ‰ๅŸบๆœฌ็š„ๅฐบๅฏธๆ นๆฎใ€‚ไธ€ไธชๅˆๆ ผ็š„ๆฅผๆขฏๆทฑๅบฆ่‡ณๅฐ‘ๆ˜ฏ255mm, ้ซ˜ๅบฆๅˆ™ไธบ160mm ๅˆฐ180mm ไน‹้—ดใ€‚ๆฅผๆขฏ็š„ๅฎฝๅบฆ้€šๅธธไผš่ฎพ็ซ‹ๅœจ1000mm ๅˆฐ1200mm, ไปฅๆ–นไพฟไธคไธชไบบๅŒๆ—ถไฝฟ็”จใ€‚

้™คไบ†ๅŸบๆœฌ็š„่ธๆญฅ๏ผŒๆฏไธช้˜ถๆขฏไน‹้—ดๆ€ปไผšๆœ‰ๆ‰€่ฐ“็š„Landingใ€‚่ฟ™ไธชlanding ๆ˜ฏ่ฎฉไฝ ๆœ‰ไธ€ไธชโ€œๅ–˜ๆฏโ€็š„็ฉบ้—ด๏ผŒไนŸ่ฎธไธๆ˜ฏๆฏไธชไบบ้ƒฝ่ƒฝไธ€ๆฌกๆ€งไธŠๅฎŒไธ€ๅฑ‚ๆฅผ้ซ˜ๅฏนๅง๏ผŒๆฏ•็ซŸ่ฎพ่ฎก่ฟ˜ๆ˜ฏ้œ€่ฆ่€ƒ่™‘ๅˆฐๆ‰€ๆœ‰็”จๆˆท็š„ไฝฟ็”จๆ€งใ€‚ๅฝ“็„ถ่ฟ™ไธชlanding ็š„ๅคงๅฐไนŸๅฟ…้กปๅ’Œๆฅผๆขฏ็š„ๅฎฝๅบฆ็›ธๅŒๅณๅฏใ€‚

ๆฅผๆขฏ็š„่ฎพ่ฎก้€‰ๆ‹ฉๅคšๆ ทๅŒ–๏ผŒๆœ‰ไบ›ๅ–œๆฌขๅŸบๆœฌ็š„ๆททๅ‡ๅœŸ้˜ถๆขฏ๏ผŒ้“บไธŠ็“ท็ –ๅ†ๆญ้…็ฎ€ๅ•็š„ๆŠŠๆ‰‹ๅณๅฏใ€‚ๆœ‰ไบ›ๅˆ™ๅ–œๆฌขๆ‚ฌ็ฉบ็š„ๆ„Ÿ่ง‰๏ผŒๅˆฉ็”จ้’ขๆไฝœไธบไธปๆข๏ผŒ้’ข้“็ป“ๆž„ๆ˜พๅพ—ๆ›ดไธบ่ฝป็›ˆ๏ผŒ็„ถๅŽๅ†ๆไพ›ๆฅผๆขฏไธ‹ๆ–นไธ€ไธช็ฉบ้—ดๅŽปๅšไบ›่ฃ…้ฅฐๅ’Œๆ‘†่ฎพใ€‚่‹ฅๆœ‰้ข„็ฎ—๏ผŒๅ…ถๅฎžๆฅผๆขฏๅข™ไธŠ๏ผŒๆˆ‘ไปฌๅฏไปฅๅฎ‰่ฃ…ไธ€ไบ›ๆ‘†่ฎพ็ฏ็‚น็ผ€ไธ€็•ช๏ผŒๆˆ–ๆ˜ฏๅœจ่ธๆฟๅบ•ไธ‹ๅฎ‰่ฃ…ไธ€ไบ›้š่—็ฏ๏ผŒ่ฎฉ็ฉบ้—ดๆฐ›ๅ›ดๆ„Ÿๆๅ‡๏ผ

่ฏดๅˆฐๆ‰ถๆ‰‹๏ผŒๅ…ถๅฎžๆ‰ถๆ‰‹็š„้ซ˜ๅบฆไนŸๆœ‰็›ธๅบ”็š„่ฆๆฑ‚๏ผŒ้€šๅธธ่ฎพ็ฝฎๅœจ1000mm ็š„้ซ˜ๅบฆ๏ผŒไปฅ้˜ฒๆญขๆ‘”ๅ€’็š„ไบ‹ไปถๅ‘็”Ÿใ€‚ๆ‰ถๆ‰‹็š„่ฎพ่ฎกๅฏๅคšๆ ทๅŒ–ไบ†๏ผŒ ๆœ‰ไฝฟ็”จๅŸบๆœฌ็š„้’ขๅˆถๆ‰ถๆ‰‹๏ผŒไนŸๆœ‰็ฒพ็พŽ็š„้’ขๅŒ–็Žป็’ƒ่ฎพ่ฎก๏ผ่ฟ™ไธ€ๅˆ‡ๅ–ๅ†ณไบŽไฝ ็š„้ข„็ฎ—ๅ’Œๆƒณ่ฆ็š„่ฎพ่ฎกใ€‚ไธ‹ๆœŸ็š„ๅˆ†ไบซ๏ผŒๆˆ‘ไปฌไนŸไผšๅ’Œๅคงๅฎถ่ฏด่ฏดๆ‰ถๆ‰‹็š„ๅฎ‰่ฃ…ๆ–นๅผ๏ผŒ่ฎฉไฝ ๅฏนๆ–ฝๅทฅๆœ‰ไธ€ไบ›่ฎค่ฏ†๏ผ
ๅฆ‚ๆžœๅ–œๆฌข่ฟ™ไธ€ๆฌก็š„ๅˆ†ไบซ๏ผŒ่ฎฐๅพ—็‚น่ตžๅนถไธ”ๆ”ถ่—ๅ“ฆ๏ผ thumbsup.gif thumbsup.gif

To design a staircase with its railing, what are the design tips that need to be considered? A staircase must be able to serve its initial purpose, and with a good ergonomic. When we lift our feet, the riser height should be in a standard height to allow users to get a smooth movement. In terms of depth of tread, it should be able to cater the size of human feet.

There are rules and regulation to follow while designing as it involves the safety of users. Normally, the minimum depth of the tread is 255mm as per uniform building by-laws while the riser height should be in between 160mm to 180mm. The width of the entire staircase should set in between 1000mm to 1200mm to allow two users to use at one time. cool2.gif cool2.gif

Furthermore, there is also landing in each flight of staircase. This landing allows you to stop or rest in between two flights of stairs. Design should be relevant and suit to the user usage right. It is impossible to let the user to run through 20 steps continuously without a proper intermediate landing, and of course, the landing width must be same with the width of your staircase. This is what we know as the turning radius.

The design of staircase can be varied. Some might like simple concrete steps with final tiling as floor finishes and suited with simple metal railing. Some would prefer to have steel structure serves as the main support, which makes the entire staircase looks lighter. With the extra space below, you can create a space with some planting decoration. If you have more budget, you can consider installing some wall lights at the staircase or even strips lighting below each step of staircase to serve as an ambient lighting.

Talking about the railing, each of the railing has a minimum height to follow as well. Normally we would set it at around 900mm for safety purposes. You can choose to have simple metal railing, stainless steel, glass railing with metal support or even frameless glass railing. All these designs depend on your budgetary parameter. In our next sharing, we might share with you some of the installation method for railing, not only for staircase but can be used as a railing for your balcony as well. Hope you learn something today! rclxm9.gif rclxm9.gif

Disclaimer: Please note that all the photos are taken online for learning and sharing purpose only.

MyMaison ๅฎ˜็ฝ‘ ๏ผšhttps://mymaison.com.my

user posted image

user posted image

user posted image

This post has been edited by My Maison: Nov 19 2022, 02:14 PM
TSMy Maison
post Nov 19 2022, 02:16 PM

Casual
***
Junior Member
319 posts

Joined: Jun 2018
Installation of Metal Railing and Glass Railing

We talked about the staircase and railing topic in our previous discussion, letโ€™s talk in detail on how to proceed with the installation of metal railing & glass railing.
Some of the tools and equipment needed here would be measuring tapes, markers that can be used to mark on site, welding machine, laser, drill and coring machine, hammer etc. I would say the installation of railing require skilled worker as this can involve a lot of measuring, cutting and welding work. The more precise you are, the better the workmanship, the better the quality it can be.

We would need a prelim design on how the railing should looks like. After deciding on the sizing of the baluster, top and intermediate rail, we should proceed with the cutting work of the steel based on the shop drawing. Based on the approved design and installation method, one of the way is to core on the flooring (eg: on tile) to space out an empty space for you to insert the baluster post. I would say the spacing of each baluster should be very consistent. The maximum distance between two balusters is around 1200mm. So, between three to four steps, there will be one baluster post.

In terms of design wise, each of the baluster should be placed at the center of the steps. Just then, you can start to weld the top rail and infill steel members together and scrub the welded portion by using grinder or sandpaper. Full weld on joint is necessary to assembly each parts securely. There are actually a few ways to install railing, and it depends on what area you are using for. For typical flight of staircase outside whereby the floor finish material is cement screeding. The installation work is firstly done by anchoring the baseplate directly to the base concrete steps, followed by welding the baluster to the baseplate. Sometimes, the railing can be prefabricated in factory and after each flight of railing is done, they are sent for painting work or galvanizing work before installation on site. The final welding work for the connection elbow must be done on site. However, prefabrication work is not a must, and the welding work can still be done on site directly. Please take note that the installation of railing should not be restricted to staircase only, you can apply the same method as well to your balcony railing as well.

For the glass railing, they would need a bottom capping and a setting block to secure the glass. Finishing up with silicone sealant and top capping, the glass railing is done. We would need to look into the glass properties and color when selecting the glass as it can create different effect to the design. Letโ€™s talk about how different types of glass can be chosen in our next sharing. Stay tuned.

MyMaison ๅฎ˜็ฝ‘ ๏ผšhttps://mymaison.com.my

user posted image

user posted image

user posted image

This post has been edited by My Maison: Nov 19 2022, 02:17 PM
TSMy Maison
post Nov 28 2022, 09:59 PM

Casual
***
Junior Member
319 posts

Joined: Jun 2018
#construction #1utamashoppingcentre #workinprogress

Wah!! Wahh!!
ไธๆ™“ๅพ—ๅคงๅฎถ่ฟ˜่ฎฐไธ่ฎฐๅพ—ๅฐ็ผ–ๅˆ†ไบซ่ฟ‡็š„Memorie Cafe ๅ‘ข๏ผŸ่ฟ™ๆ‰€ไฝไบŽ1 Utama Shopping Centre ็š„ๅˆ†่กŒ๏ผŒ่ฃ…ไฟฎๅทฅ็จ‹่‡ช10 ๆœˆ28 ๅท่ตทไพฟ้ฉฌไธๅœ่น„ๅœฐ่ฟ›่กŒใ€‚ๅ›ข้˜Ÿไปฌ้ƒฝๆ‰“่ตทๅไบŒๅˆ†็ฒพ็ฅž๏ผŒๅชไธบไบ†ๆŠŠๆœ€ๅฅฝ็š„ไฝœๅ“ๅ‘ˆ็Žฐ็ป™้›‡ไธปใ€‚็ปˆไบŽๅ•Šๅ•Š๏ผŒ ๆˆ‘ไปฌๅœจ 26 Nov ๆญฃๅผๅฎŒๆˆๅ•ฆใ€‚๐Ÿ’“๐Ÿ’“
ๅคงๅฎถๆ˜ฏไธๆ˜ฏไนŸๅ’Œๅฐ็ผ–ไธ€ๆ ทๅพˆๆœŸๅพ…ๅ‘ข๏ผŒ้‚ฃๅฐฑไธ่ฆ้”™่ฟ‡ๆŽฅไธ‹ๆฅ็š„ไฝœๅ“ๅฝฑ้›†ๅ“ฆ๏ผ๐Ÿ‘๐Ÿป๐Ÿ’ช๐Ÿป

Wahh!!
Do you still remember the Memorie Cafe shared earlier? Yes!!! The branch located in One Utama Shopping Centre has been completed. My Maison Design & Build Sdn Bhd and the team have been working hard since 28 Oct for the exciting renovation project, just to serve the best quality for out client! Finally, we are proudly to announce that the entire project is done on 26 Nov. ๐Ÿ’“๐Ÿ’“
Are you guys excited with the outcome? Dun miss out our project photos and videos soon. ๐Ÿ‘๐Ÿป

user posted image

user posted image

user posted image

user posted image

MyMaison ๅฎ˜็ฝ‘ ๏ผšhttps://mymaison.com.my

This post has been edited by My Maison: Nov 28 2022, 10:00 PM
TSMy Maison
post Dec 13 2022, 03:38 PM

Casual
***
Junior Member
319 posts

Joined: Jun 2018
#RealProject #construction #renovationproject #1utama

ๅ“’ๅ“’๏ผไธ‡ไผ—ๆœŸๅพ…็š„Project Photo ็ปˆไบŽๆฅๅ•ฆ๏ผ
ไฝไบŽ 1 Utama Shopping Centre, My Maison Design & Build Sdn Bhd ่€—ๆ—ถๅฐ†่ฟ‘ไธ€ไธชๆœˆ็š„ๆ—ถ้—ด๏ผŒ็ปˆไบŽๆŠŠๆœ€ๅฅฝ็š„ไฝœๅ“ๆไบค็ป™้กพๅฎขๅ•ฆ๏ผ
ๅŒๆ ท็š„่ฎพ่ฎก้ฃŽๆ ผ๏ผŒๅดๅฏไปฅ่ฎฉๆฏ้—ดๅˆ†่กŒๅ‘ˆ็Žฐๅ‡บ็‹ฌ็‰น็š„้ฃŽๅ‘ณ๏ผŒMemorie Cafe ๅœจ่ฎพ่ฎก่ฟ™็‚น็ปๅฏนๆ˜ฏๅ€ผๅพ—่ตžๅน๏ผๆฏไธช็ฉบ้—ด็š„่ฎพ่ฎก้ƒฝๅšๅฅฝไบ†่ง„ๅˆ’ไธŽไธป้ข˜ๆญ้…๏ผŒๅ†ๅŠ ไธŠ My Maison ๅ›ข้˜Ÿ็š„ๆ‰‹ๅทฅ๏ผŒ่ฟ™ๅœบๅทฅ็จ‹็ปๅฏนๆ˜ฏๅฐ็ผ–ๅผ•ไปฅไธบๅ‚ฒ็š„ไธ€้กนไฝœๅ“๏ผ๐Ÿ”ฅ๐Ÿ”ฅ๐Ÿ”ฅ
ๆƒณ่ฆๅฏปๆ‰พไธ“ไธš็š„่ฃ…ไฟฎๅ›ข้˜Ÿ๏ผŒไธๅฆจ็ง่ฎฏๆˆ‘ไปฌไธ€ไบ†่งฃๆ›ดๅคš่ฏฆๆƒ…๏ผ

Tadaa!! One of the most exciting project is finally here!
Located in One Utama Shopping Centre, My Maison Design & Build Sdn Bhd managed to complete the renovation project within one month time, and successfully hand over to our beloved client on time!
Same design concept and elements but somehow being able to create different specialty for every outlets, it is definitely a must to provide thumbs up for Memorie Cafe! With their own zone planning, every spaces are well integrated. Thanks to the effort from the team, this is definitely one of the great project for us! ๐Ÿ”ฅ๐Ÿ”ฅ๐Ÿ”ฅ

MyMaison ๅฎ˜็ฝ‘ ๏ผšhttps://mymaison.com.my

user posted image

user posted image

user posted image

user posted image

user posted image

user posted image

user posted image

user posted image

user posted image


TSMy Maison
post Dec 13 2022, 03:38 PM

Casual
***
Junior Member
319 posts

Joined: Jun 2018
user posted image

user posted image

user posted image

user posted image

user posted image

user posted image

user posted image
TSMy Maison
post Dec 18 2022, 01:03 AM

Casual
***
Junior Member
319 posts

Joined: Jun 2018
#construction #substructure #antitermitetreatment #DPM

Anti-Termite Treatment & Damp Proof Membrane Work

I am pretty sure that most of you had heard about anti-termite treatment, but do you know how they are done during the construction stage? The way of applying anti-termite treatment is providing approved chemical barrier to the soil in contact with the building. This is one of the critical works need to be done to the substructure work.

Normally, the anti-termite chemical is applied to soil next to the column stump, ground beam, soil below slab, apron etc. The soil to be treated need to be levelled and compacted firstly, and the application should be done on hard surface of hard core or sand binding before the casting of concrete. The anti-termite treatment will not be conducted before or after the rain. Power spray method is used to drench the entire soil surfaces. Once being treated, the soil will be covered with polyethylene sheet to avoid sun heated and rain wash. Casting of concrete should be done within one day after the treatment. Professionalism needed in the treatment work as this involve the usage of chemical. Thus, licensed is needed.

Next, we would share about damp proof membrane work, which is also important to prevent the rise of moisture or damp through the structure flooring into the internal. DPM is installed below the ground concrete floor to stop the moisture which originate from the underground. According to JKR, there is actually a requirement of thickness, weight and tensile strength to follow. While laying two membranes, two pieces of DPM shall overlap over each other at both ends. Lastly, cover the DPM with protective layer of screed as soon as possible. Care must be taken to avoid the DPM from damage.

I would say a lot of small details need to be taken care even though they might look nothing. However, they are so important as they prevent unnecessary issues from arising in future. Save this post and consult your contractor in future. You might need it for your bungalow or any small-scaled project. Stay tuned for our next sharing!

Disclaimer: Photos are taken online for sharing purpose only!

MyMaison ๅฎ˜็ฝ‘ ๏ผšhttps://mymaison.com.my

user posted image

user posted image
TSMy Maison
post Dec 25 2022, 12:15 AM

Casual
***
Junior Member
319 posts

Joined: Jun 2018
#construction #structural #stiffener

Door Frame Installation Work Within Provided Structural Opening (Part 1)

You might think that the installation of door is easy, but is it as easy as you think? However, there are still many details you might not know, starting from the selection of the door frame & door quality to the on-site provision of the structural opening and further related to the reinforced concrete wall or brickworks done on site.

Let us narrow down our topic today, starting from the wall where the openings are provided. Have a look on the photos shared with you today, the โ€œvoidsโ€ you see are where the openings located. In this project, the walls are mainly erected with brickworks. In terms of stability of the wall, a reliable contractor will provide stiffener in between the brick wall every 3m apart for both horizontal and vertical direction. Simple way to say, brick wall can never be strong and stable if they are extending all the way from end to end without something in between to hold on.

Structural opening is the provision of extra space for the door / window before to be installed on site. The extra tolerance is to provide more flexibility while installing. Finally, the gap will be filled up with mass concrete to give a neat interface. Next, do you realize that there is also rc placed on top of the opening? Yes, it is known as lintel, a supporting structure for the door / window to withstand the force coming from top. They are so important in diverging the load away. All of the information shared with you are some of the basic to know and finding yourself a reliable contractor is so important!

With this, we can now proceed to the installation of door / windows. Do not worry about whether you are using metal frame or wooden frame for your door, or even worry that will it be very troublesome for the installation of aluminum extrusion. You just need to know that everything can be done! In our next part of sharing, we will talk more about the details in door frame, door panel and their installation method. Stay tuned!

MyMaison ๅฎ˜็ฝ‘ ๏ผšhttps://mymaison.com.my

user posted image

user posted image
TSMy Maison
post Jan 20 2023, 12:00 AM

Casual
***
Junior Member
319 posts

Joined: Jun 2018
Data Centre Kuala Lumpur โ€“ Concreting Work

Date Centre @ Kuala Lumpur, one of the most recent commercial projects out team had done in 2022. Let me introduce to you some of the fundamental works in this project. ๐Ÿ˜‡ ๐Ÿ˜‡

In a basic construction project, RC or concreting work is a typical practice for us. Traditional formwork is used to cast any RC elements. From the site photos shared, you can clearly see how we use the abundance of timber and plywood to form the shape we want it to be. To achieve a great outcome, we set out the locations, center line and levels for formwork along with the reference line. Just then, we coat the formwork surface with form oil to prevent the concrete from sticking to the timber plank. Once all the formwork panel is done, we erect the formwork with sufficient props and struts, bracing and support and ensure that it can withstand the pressure resulting from placing the concrete later on. Sealing of the formwork gap is important to prevent leakage of cement grout.

Before inserting any reinforcement, bar and start concreting, verticality check and squareness of formwork must be checked. Based on the approved schedule, reinforcement bar is cut to the required size and bend to the shape required. The steel bars are arranged with spacing and tied with wire strands before placing them into the formwork. ๐Ÿ˜๐Ÿ˜ƒ All rubbish, chippings shall be removed from the interior of the formwork before concrete is placed.

We can finally start concreting with the approved design mix. Start concreting from a fresh location or a construction joint and continue up to the next construction joint / to completion. Compact the concrete with mechanical vibrator to ensure that the concrete is placed into the corners of structural members. After the concrete is set, apply curing compound which helps to reduce the water or heat loss in concrete to create an ideal condition for concrete to set.

Looking into the site photos, these will be their outcome after the formwork is strike off once the concrete has developed sufficient strength to support itself and resist surface damage. A great looking RC are finally formed. Hope you enjoy our sharing today!! Leave us a ๐Ÿ‘๐Ÿป if you love our workmanship. ๐Ÿ‘๐Ÿป ๐Ÿ‘๐Ÿป

๐Ÿ“ž : +60 11-1665 0288
MyMaison ๅฎ˜็ฝ‘ ๏ผšhttps://mymaison.com.my
๐Ÿ“ฉ : mymaison.design@gmail.com


user posted image

user posted image

user posted image

user posted image

user posted image

user posted image

user posted image

user posted image
TSMy Maison
post Jan 23 2023, 11:31 PM

Casual
***
Junior Member
319 posts

Joined: Jun 2018
Toilet Cubicle Installation

Have you ever heard about phenolic panel before? One of the simple examples of it will be the application of toilet cubicle in shopping mall complex. Phenolic board is also known as High-Pressure Laminate (HPL), which is a highly resistant architectural panel made of natural core material layers (Kraft paper layers) and impregnated with phenolic and melamine resin which are then compressed under high pressure and heat.

Today, we will share about the installation of toilet cubicle with you. Attached photos are taken from one of the completed projects done by My Maison Team We completed the phenolic panels installation, vanity top, sanitary wares and more. However, we will be more focusing on the phenolic board application for todayโ€™s topic.

Let me share with you some of the features of phenolic panel. Suitable to be used at wet area, phenolic board is free from rot, mold, and corrosion. It is tough and has a high degree of resistance to scratches. As the phenolic panels are all readily supplied from factory, it allows a quick construction system to happen, and with great flexibility as well. As they are non-porous, HPL phenolic panels are moisture resistance. ๐Ÿ‘๐Ÿป ๐Ÿ‘๐Ÿป

For this project, once all the Tiling works are in order, site measurement of each door and panel can be taken. Fabrication of panel is then done according to the site provision/condition. Pieces of phenolic panel are then transferred to the site for our team to start installing. As the phenolic partition and doors installation are the last trade for the entire works in the toilet, we always ensure that ceiling, tiling, sanitary wares, vanity top installation are all completed first before phenolic board work can start. ๐Ÿ˜๐Ÿ˜ƒ

It is a very direct process by securing the door panels aluminum door frame with hinges, door lockset, coat hooks. Clear all the debris that left over the area after the installation. We checked the condition of phenolic boards as usual to ensure that no chipping / dents occur. Observe the condition and rectify any defects if there is any. Visually, we observe the panel colour to ensure that they are consistent, followed by ensuring a smooth door opening and lockset opening.

I hope you get to know more about this material after todayโ€™s sharing as phenolic board has such a broad range of application in various industries nowadays. Donโ€™t forget to save this tread if you think that this can beneficial you in future.๐Ÿ˜‡ ๐Ÿ˜‡


user posted image

user posted image

user posted image
TSMy Maison
post Feb 12 2023, 04:57 PM

Casual
***
Junior Member
319 posts

Joined: Jun 2018
#RealProject #construction #metalroof

๐Œ๐ž๐ญ๐š๐ฅ ๐‘๐จ๐จ๐Ÿ๐ข๐ง๐  ๐ƒ๐ข๐ฌ๐ฆ๐š๐ง๐ญ๐ฅ๐ข๐ง๐  & ๐ˆ๐ง๐ฌ๐ญ๐š๐ฅ๐ฅ๐ข๐ง๐ 

Metal roofing dismantling and installing work require workers' attention towards the detailing. Dealing with roof detailing are important as to prevent leakage/unwanted collapse from happening due to insufficient support. We always ready to consult the roofing specialist/ supplier on their product's pros and cons, types of roof profile availability, their colours and more. So in today's topic, we are going to share with you one of the past project we had just completed in 2022.๐Ÿ‘๐Ÿป ๐Ÿ‘๐Ÿป

Although it is a simple two-sided pitched roof, it is also quite challenging due to its large coverage area. We have to ensure that the roofing is able to withstand with the wind forces and its ability to drain all the rainwater efficiently to both end's gutter using suitable roof gradient. So if u as a client, try a have a great discussion session with your contractor. See whether they provide insulation, any aluminium foil etc. How do they minimise the heat from passing through the roof to internal space? How do they ensure noise reduction? How big is the gutter drain provision? Is the size given enough to cater the rainwater during heavy downpour? How to deal with connection details? These are some of the items to take note.๐Ÿ˜‡ ๐Ÿ˜‡

Besides, it is very important that the roof battens are sufficiently fixed to the rafters before any roofing panels can be directly installed to it. The spacing between each roof trusses has a certain standards to follow as well. When installing the metal roofing panels, what kind of roof sealants are used at each junction to properly seal the roof?

We all knows that is it impossible to install roof at only one big piece. Every sheets are cut to length in the factory and directly installed on site. This minimise the site-work. While installing, how we walk on the roof to avoid damage to roofing itself is also one of the skill to take note. Experience is the key! It is definitely not an easy job.

Website๏ผšhttps://mymaison.com.my

user posted image

user posted image

user posted image

user posted image

user posted image

user posted image

user posted image

user posted image
TSMy Maison
post Feb 15 2023, 11:41 PM

Casual
***
Junior Member
319 posts

Joined: Jun 2018
#RealProject #commercial #retailshop

๐‘๐ž๐ญ๐š๐ข๐ฅ ๐’๐ก๐จ๐ฉ ๐‘๐ž๐ง๐จ๐ฏ๐š๐ญ๐ข๐จ๐ง ๐๐ซ๐จ๐ฃ๐ž๐œ๐ญ

Welcome to our real project sharing session once again. Today will be a very special case for My Maison as our Mr. Owner requested industrial concept as his design intention for this shop renovation project. Industrialise design concept is all about raw and unfinished look to design material. High workmanship from the builder is required as the raw bricks with mortar itself will be the final finish/ appearance. There will no touch-up using render/skim coat to give a smooth plane of finishes. ๐Ÿ˜‡ ๐Ÿ˜‡

This warehouse look design emphasize a lot on "raw" and "natural". Exposed pipes and ducts is one of the signature element whereby people always try to conceal them under ceiling. It is a different beauty as compared to other concept of designing. There is no need to provide ceiling as we appreciate the beauty of exposed beams, ducting and pipes under the concept of "inside-out". By using simple cable trays support, the electrical cables can placed on it more neatly, with magnetic track light to lighten up the space. ๐Ÿ˜๐Ÿ˜ƒ

Aluminium fixed glass and swing door allow more natural lighting into the area. I believe that most of you would be curious about what are the items that need to take note on this topic. How do we actually conduct the works and what are the items that we can actually play with in terms of design. Stay tuned on our next sharing which I will share more on aluminium glazing topic!! ๐Ÿ‘๐Ÿป ๐Ÿ‘๐Ÿป

user posted image

user posted image

user posted image

user posted image

user posted image
JL95 P
post Feb 17 2023, 12:06 AM

New Member
*
Probation
3 posts

Joined: Feb 2023
Hi, looking for ideas on masterbedroom layout and open for suggestion.
Attached is my current layout and wanted to seek for any idea on better positioning the furniture.
Terrace house master bedroom (size: 22 x 21).

View from door:
Attached Image

View from PC table:
Attached Image

View from balcony door:
Attached Image
Cavatzu
post Feb 17 2023, 06:04 AM

Look at all my stars!!
*******
Senior Member
2,832 posts

Joined: Dec 2020


QUOTE(JL95 @ Feb 17 2023, 12:06 AM)
Hi, looking for ideas on masterbedroom layout and open for suggestion.
Attached is my current layout and wanted to seek for any idea on better positioning the furniture.
Terrace house master bedroom (size: 22 x 21).

View from door:
Attached Image

View from PC table:
Attached Image

View from balcony door:
Attached Image
*
Iโ€™d rather have a smaller bedroom than work in the bedroom. Many ID and feng shui masters have come out to say that working in the bedroom is not ideal and brings about a different energy to your resting space. If you work from home often enough then it really is discouraged. If you have no choice, Iโ€™d try to partition or silo off the work area.

This post has been edited by Cavatzu: Feb 17 2023, 06:05 AM
JL95 P
post Feb 23 2023, 04:48 PM

New Member
*
Probation
3 posts

Joined: Feb 2023
QUOTE(Cavatzu @ Feb 17 2023, 06:04 AM)
Iโ€™d rather have a smaller bedroom than work in the bedroom. Many ID and feng shui masters have come out to say that working in the bedroom is not ideal and brings about a different energy to your resting space. If you work from home often enough then it really is discouraged. If you have no choice, Iโ€™d try to partition or silo off the work area.
*
My parent will stay with me hence no other quiet place to work. Partition will block my window view and makes the room very small. I guess will just go with this for now and move in first to experience for a while first.
TSMy Maison
post Mar 4 2023, 05:53 PM

Casual
***
Junior Member
319 posts

Joined: Jun 2018
QUOTE(JL95 @ Feb 17 2023, 01:06 AM)
Hi, looking for ideas on masterbedroom layout and open for suggestion.
Attached is my current layout and wanted to seek for any idea on better positioning the furniture.
Terrace house master bedroom (size: 22 x 21).

View from door:
Attached Image

View from PC table:
Attached Image

View from balcony door:
Attached Image
*
U might need to consider the placement of your aircond. What is the mounting height of your ac and does it looks good with a slightly lower ceiling in your working area?
Same goes to your tv position. Is there any better way to place your tv as your bed is not directly infront of your tv.
TSMy Maison
post Mar 4 2023, 05:55 PM

Casual
***
Junior Member
319 posts

Joined: Jun 2018
๐ˆ๐ง๐ญ๐ž๐ซ๐ง๐š๐ฅ ๐ƒ๐จ๐จ๐ซ ๐“๐ฒ๐ฉ๐ž๐ฌ

If you have never purchased a wooden door before, you likely have no idea on how many different options can it be? So, in todayโ€™s topic, we are going to share with you the different types of doors you can select from, in order to choose the best within your budget parameter by comparing on their pros and cons.

Solid-core timber door is a wooden door that are filled with wood or wood composite materials /engineered wood filler inside. It is different as compared to hollow-core timber door whereby it is infilled with honeycomb of cardboard in between the frame. Both of the door type are finished with a thin layer of veneer to give a beautiful wood appearance.

Solid-core timber door can provide better sound and heat insulation as compared to hollow-core as the core are more โ€œpackedโ€. It is much heavier and give better security than a hollow door. It is also more damage resistant. It is also more expensive as compared to hollow door.

However, this doesnโ€™t mean that hollow-core door is worse. It is more economic to use hollow-core door when the areas do not need to sustain any heat or even require sound suppression. Furthermore, due to its lightweight properties, it is much easier to install. I would say it depends on your need, and this determines which kind of door to use.

After deciding on the โ€œcoreโ€, we have to decide on the finishing layer of the timber door. Both sides of the door can come with plywood finish or any other particle board/ fiberboard. Plywood is actually made by gluing together a few layers of wood veneers to form a strong, not easily warped wood panel. Normally for the interior door that are in painted finish, wood appearance is not important as they will be covered up with paint at the end. Plywood is a good choice of selection for use.

However, if you intend to have wood finishes on the surface of your door, veneer (a thin slice of wood) with thickness around 3mm is needed. They are glued together with wood panel such as particle board/ MDF/ HDF to give a natural and decorative edging to your wooden door.

I hope you have a better idea on how a timber door is produced after our sharing today. You might be curious about whether is it suitable to use plywood at wet areas such as bathroom or door for exterior use? We might share with you more in future.

user posted image

user posted image

user posted image
TSMy Maison
post Mar 6 2023, 12:20 AM

Casual
***
Junior Member
319 posts

Joined: Jun 2018
๐ˆ๐ซ๐จ๐ง๐ฆ๐จ๐ง๐ ๐ž๐ซ๐ฒ

Hi everyone, welcome back to the sharing session again! Do you know what is ironmongery all about? Do you know that each of the ironmongery has their own specific function and without them, the function of a door can never be complete.

So, what is included in the family of ironmongery? The most basic one is definitely the door hinge. I will not go into too detail on their sizing as it is quite standard. However, some tips to take note is to ensure that the number of hinges being used are sufficient to cater the weight of the door. Normally, 3 nos of stainless steel door hinge would be good enough for a 2100mm high door. Anything more than that might need 4 nos per door leaf.

Secondly, letโ€™s talk about what kind of mortise lock is available in the market? For your information, each of the mortise lock has their specific function, suitable to be used at different scenario. Firstly, the mortise sash lock that comes with key and thumbturn cylinder. Sash lock is a lock that has a latch and bolt to open and close the lock. They can be locked with a key from both sides. The latch is operated by a door handle with the key hole covered by an Escutcheon.
Secondly, a mortise deadlock. A deadlock is a lock that is permanently shut after you locked it. It does not have any latch. Unless you open it with a key, or else it will remain shut all the time. There is also another kind of latch known as mortise passage latch. This is normally used at common area where there is no need of locks at all. For example, in your big office corridor or fire staircase whereby you want to have a door to split the two spaces but you do not want it to be locked.

Last but not the least, instead of having a mortise lock that can be opened from both inside and outside, what can we do if we are using it for bathroom area? Isnโ€™t it weird if it can be opened with a key from the outside? Thus, the lever handle used for bathroom door is different from other areas. The tubular lever privacy for bathroom can be locked or unlocked by thumbturn cylinder from inside only, or if there is any emergency happen, emergency key can be used from the outside. In the contrary, a typical lever handle can be locked and unlocked by key outside or thumbturn inside.

As a designer/user, instead of only looking of their functionalism, their door handle profile is also important as it affect the looking. Thus, always look for more alternative supplier and compared their features. Choose the one you think is the best.

user posted image

user posted image

user posted image
EdEd
post Mar 7 2023, 03:50 PM

Casual
***
Junior Member
356 posts

Joined: Oct 2011
hi bro.

looking for contractor to do some wetwork including wiring/plumbing/minor brickwork/touch up & painting/plaster ceiling modification

my unit is a subsale terrace, can i ask about relocating lighting and adding pelmet to the existing plaster ceiling? is possible right, i dont want to take down the ceiling


eclectice
post Mar 9 2023, 10:57 AM

Look at all my stars!!
*******
Senior Member
2,734 posts

Joined: Mar 2008
QUOTE(My Maison @ Aug 15 2021, 02:21 AM)
PROJECT B - Renovation of Toilet Areas

Topic: Hacking and Plumbing

user posted image
user posted image
user posted image
user posted image
*
I'm always curious about how the water pipes for drains and inlets are laid out inside the floor base... Do you have any pictures or a typical water piping layout for the ground floor and upper floors?

This post has been edited by eclectice: Mar 9 2023, 10:58 AM
TSMy Maison
post Mar 10 2023, 12:09 AM

Casual
***
Junior Member
319 posts

Joined: Jun 2018
#InteriorPaint # ExteriorPaint #Weathershield

Normal Interior Paint & Weathershield paint

Do you think that painting work is easy? There are actually a lot of facts in which you as a client should understand in order for you to monitor the work progress at site. In todayโ€™s topic, I will share with you some basic ideas on Normal interior paint & Weathershield paint.
As a basic, paint is made of pigments, binders (resin), solvent (thinner)and additives. Pigments gives the paint the colour and opacity. Binders are the โ€œglueโ€ that allow the pigment to adhere to the wall surface. They can be separated into alkyd/oil-based and water-based (acrylic and latex). It is important as it determines the performance of paint. High quality paint has high concentration of binder. It improves adhesion, more resistant to cracking, UV light and abrasion.

Solvent, reduces the viscosity of the paint and evaporates after the paint is dried, leaving the pigment on the surface. Additives, chemical that provide the properties of the paint. They improve the appearance, increase resistance to UV, abrasion, temperature changes and more.

So, we know that exterior paint should be able to overcome mildew and fading of colour as the paint is exposed to weather at all times. Interior paint is made to resist staining from occurring. So, it is a must to consult your painter on the suitability of the paint chosen. Do not use a wrong type of paint as interior and exterior paint can be different in their resin flexibility and additives.

However, having a basic understanding of paint is insufficient. How many layers of paints should we apply? With this, we have to go through the technical cut sheet from the paint supplier. Just follow the recommended coating system as your guideline.

As a general steps, repair all the possible cracks, remove dirt & grease as surface preparation. Start by applying 1 coat of sealer/primer, followed by 2 layers of weathershield paint (for exterior) or 2 layers of interior paint (Eg: Dulux Interior Matt Series / Nippon Matex Pro). With this, the works are done! There are always a lot of colour choices for you to choose from. So, consult your reliable contractor/ painter and get the best advices!

I hope you learn something today! It might be a little technical but the more you know about the facts, I believe it can help you a lot in future.

Notes: Technical cut sheet downloaded from online sources for reference and learning purpose!

user posted image

user posted image

user posted image

user posted image

user posted image

This post has been edited by My Maison: Mar 10 2023, 12:15 AM
TSMy Maison
post Mar 10 2023, 12:25 AM

Casual
***
Junior Member
319 posts

Joined: Jun 2018
QUOTE(eclectice @ Mar 9 2023, 11:57 AM)
I'm always curious about how the water pipes for drains and inlets are laid out inside the floor base... Do you have any pictures or a typical water piping layout for the ground floor and upper floors?
*
Normally, while casting the floor slab, we would have pipe sleeve together to allow pipe penetration through the slab to happen. With this, the piping can be connected from floor above/above ground to underground and waste can be discharged to respective areas.
eclectice
post Mar 10 2023, 09:05 AM

Look at all my stars!!
*******
Senior Member
2,734 posts

Joined: Mar 2008
QUOTE(My Maison @ Mar 10 2023, 12:25 AM)
Normally, while casting the floor slab, we would have pipe sleeve together to allow pipe penetration through the slab to happen. With this, the piping can be connected from floor above/above ground to underground and waste can be discharged to respective areas.
*
Do the concealed floor pipes run along the bottom edge of the walls, or can they be spanned diagonally to save pipe joints and fittings? I have a worry that if I drill holes in the floor to place a shower tray, enclosure, or screen, I might accidentally drill through these pipes. How deep are they from the floor surface especially for the ground floor?

This post has been edited by eclectice: Mar 10 2023, 09:11 AM
JL95 P
post Mar 11 2023, 07:44 PM

New Member
*
Probation
3 posts

Joined: Feb 2023
QUOTE(My Maison @ Mar 4 2023, 05:53 PM)
U might need to consider the placement of your aircond. What is the mounting height of your ac and does it looks good with a slightly lower ceiling in your working area?
Same goes to your tv position. Is there any better way to place your tv as your bed is not directly infront of your tv.
*
Thanks a lot for your advise. It's an old building hence a lot of limitation such as the ceiling height. I may just remove the TV entirely. Will decide after move in.๐Ÿ‘

akutaksempurna
post Mar 13 2023, 01:11 PM

New Member
*
Junior Member
47 posts

Joined: Aug 2008


Hello bosses,

I am looking to buy a old 30yo property. Just wondering if I can get a rough quotation for below work..

a) re-wiring whole house
b) change plumbing + change design to new toilet

Its an old piece of house 3 stories around 1100sqft total. 3 rooms + 2 bathroom

Sorry if this is no proper thread to ask ๐Ÿ™ and thank you

This post has been edited by akutaksempurna: Mar 16 2023, 09:25 PM
TSMy Maison
post Apr 13 2023, 12:16 AM

Casual
***
Junior Member
319 posts

Joined: Jun 2018
#๐’๐š๐Ÿ๐ž๐ญ๐ฒ๐†๐ฅ๐š๐ฌ๐ฌ #๐‹๐š๐ฆ๐ข๐ง๐š๐ญ๐ž๐๐†๐ฅ๐š๐ฌ๐ฌ #๐ญ๐ž๐ฆ๐ฉ๐ž๐ซ๐ž๐๐ ๐ฅ๐š๐ฌ๐ฌ

Welcome back to the sharing session today! We will talk about safety glass usage in building design. The usage of safety glass can be very impactful. It is also widely applicable in different scenarios. ๐Ÿค“๐Ÿง

There are different types of glass but only some of them can be classified as safety glass. Annealed/ Float glass is not a safety glass as it will break into small dangerous pieces that can hurt you. It is not suitable to be used at area where human contact is high. To be classified as safety glass, there is a safety requirement to pass. BS EN 12600 (British Standard incorporating with European Standard) is the safety standard test to define the level at which the glass will break safely. The performance of the glass is then classified into a few levels. In short, safety glass (Tempered glass / Laminated glass) will be achieving this standard.๐Ÿ˜Ž

Tempered glass is made of traditional / annealed glass which being heated and cooled rapidly to give safety glass properties. Quickly cooling the heated glass causes outside surface to harden faster than center, making center portion โ€œin tensionโ€, thus more durable and stronger than non-tempered glass. On the other hand, laminated glass is 2 or more pieces of tempered glass or ordinary glass bonded with 1 plastic film interlayer in between.๐Ÿ˜†

Tempered glass is stronger than laminated glass while laminated glass itself is 5 times stronger than annealed glass. Tempered glass breaks and sometime shattering but the small pieces have rounded edges that wonโ€™t cut anyone. As compared to laminated glass, it has PVB/SGP interlayer will hold the glass layers together. When one side of the glass experiences impact, only that side will shatter, but not the entire. Laminated glass is more expensive as compared to tempered glass due to its manufacturing process more complicated. Laminated glass is also soundproofing and reduce UV radiation more compared to others.๐Ÿ˜

Hope this summary gives you better understanding. We can talk more about PVB/SGP interlayer and even other treatment towards glass in order to improve their properties in future. Looking for professional design and build team in Klang Valley, drop us a message via contacts below!๐Ÿ˜„

user posted image

user posted image

user posted image

user posted image

user posted image

user posted image
johorian
post Apr 17 2023, 04:02 PM

Getting Started
**
Junior Member
159 posts

Joined: Sep 2009


Hi, can share contemporary staircase lighting design (led)?

Is it more appropriate to be installed at handle or wall (concealed or exposed type).
hihihehe
post Apr 17 2023, 04:08 PM

10k Club
********
All Stars
13,781 posts

Joined: Jan 2006
From: stress & confuse world


is it normal for shallow or short depth drawer slide wobbles when opened?

my carpenter said it's normal because of shorter depth but i skeptical about this.
TSMy Maison
post Apr 21 2023, 04:23 PM

Casual
***
Junior Member
319 posts

Joined: Jun 2018
#Construction #Brickwork

Welcome back to the sharing session today! We will talk about the basic brickwork construction in this industry. We are glad that we are able to guide you steps by steps on how we work from start to end. As mentioned earlier, the more you know, the easier for you to monitor the entire working process to assure quality!
The method statement below simplified all of the important steps, and I hope you learn something today:
1. Firstly, fix the location and position of the brickwork by setting out the reference line.
2. Confirm the allowance of openings with other trade contractors such as aluminium & glazing contractor, plumber etc. Initial planning and locate the service pipe sleeves / provision of openings are needed.
3. Inspection of bricks are conducted to ensure all of the materials are in good condition. Damaged masonry units are not allowed to be used.
4. Mix mortar to the proportion.
5. Transport the mixed mortar to brick laying area with wheelbarrow.
6. Bricks are firstly soaked in water for at least half an hour to gain moisture.
7. Clean the supporting surfaces and remove loose mortar before start laying.
8. Stiffener shall be provided at every 3m in both horizontal and vertical directions as long span of brickworks are unable to retain its strength. The bricks should be tied back to the RC structure.
9. Place the mortar onto the bricks with spatula.
10. Lay the bricks layer by layer with 10mm gap of joints.
11. Use a plumb and spirit level to control the verticality.
12. Place expanded metal reinforcement mesh every 4th course of bricks to increase the reinforcement strength.
13. Starter bar / Brick ties secured to the stiffener / column shall be provided every 4th course of brickwork. Both expanded metal reinforcement & brick ties shall be embedded completely in mortar.
14. Supervisor shall inspect the quality of works upon completion, sign off or rectify the non-quality works.

Protective measures:
1. Material shall be kept as cool as possible to avoid the masonry units from absorbing the water from mortar, which result in cracking.
2. Masonry unit shall be placed on top of mortar during laying.
3. Use fog spray / wall covering to ensure sufficient moisture retain on the brickwork during curing.
4. Cover the wall after construction to slow down the rate of water loss from masonry.

Additional tips:
1. SIRIM certificate with test report are always requested from during approval of material to ensure the building materials submitted are qualified to be use.
2. Certain Malaysian Standard requirement test are introduced to monitor the compressive strength, initial rate of water absorption, dimension and tolerance of brick units.
3. It shall always comply to fire test requirement โ€“ โ€œSijil Pepasangan Keselamatan Kebakaranโ€ in order to prove the material properties.

user posted image

user posted image

user posted image

user posted image

user posted image
TSMy Maison
post Apr 22 2023, 11:46 PM

Casual
***
Junior Member
319 posts

Joined: Jun 2018
#๐‚๐จ๐ง๐ฌ๐ญ๐ซ๐ฎ๐œ๐ญ๐ข๐จ๐ง #๐๐ฅ๐š๐ฌ๐ญ๐ž๐ซ๐ข๐ง๐ ๐–๐จ๐ซ๐ค

A brickwork itself isnโ€™t complete without a proper finishing coat. Depending on the substrate, whether it is a brick wall, rc wall or even concrete block wall, different manufacturer will have their own products that are designed to adhere proper base and finishing skim coat / render to the substrate. We will share with you about the work methodology of plastering work for todayโ€™s presentation.

Storage:
1. Store cement in covered, dry store area. Cement bags are stacked off the floor with pallet.
Preparatory work:
1. Ensure all joinery items like window frames are completed.
2. Substrate should free from mould oil, grease& contaminated of foreign materials.
3. Surface treatment is needed to remove loose particle. Rectification of wall defects shall be done before plastering.
4. Levelling peg should be installed prior to plastering work to assure evenness.
5. Corner bead / groove line shall be installed for all column and wall by referring to level peg thickness.
6. Weld mesh / Fibre mesh is used between two different substrate as a reinforcing layer for external plaster, preventing appearance of cracks.

Working methodology:
1. Mix gypsum/cement plaster with mixer as per manufacturerโ€™s mix recommendation.
2. Dampen the substrate surface that will receive plaster.
3. Apply undercoat mix by laying on with a trowel.
4. Press the mortar well and enclose the mesh.
5. Plaster finish shall be plumb level without trowel marks.
6. Ensure the thickness and accuracy of plastering coating
applied.
7. When coat hardens, proceed to apply next coating until final coating to
8. Do consult your manufacturerโ€™s working guideline before commencement of work.

Inspection:
1. Check the surface level evenness
2. Check the application of bonding agent based on recommendation.
3. Check the straightness and squareness of wall corner
4. Quality of termination line
5. Ensure surface defect, cracks and hollowness are rectified.

Tips: Visit more manufacturerโ€™s website for their product info and application method.

user posted image
TSMy Maison
post May 1 2023, 10:28 PM

Casual
***
Junior Member
319 posts

Joined: Jun 2018
QUOTE(hihihehe @ Apr 17 2023, 05:08 PM)
is it normal for shallow or short depth drawer slide wobbles when opened?

my carpenter said it's normal because of shorter depth but i skeptical about this.
*
I dun think that a shorter depth drawer can create unpleasant usage experience. How short the depth can it be as i guess the carpentry items is quite standard in terms of dimension and functions. Just promise that the final outcome is accepted by you as a client before sign off the works.
TSMy Maison
post May 1 2023, 10:32 PM

Casual
***
Junior Member
319 posts

Joined: Jun 2018
#๐‚๐จ๐ง๐ฌ๐ญ๐ซ๐ฎ๐œ๐ญ๐ข๐จ๐ง #๐’๐ค๐ข๐ฆ๐‚๐จ๐š๐ญ

How much do you know about skim coat. It is normally applied to provide thin and smooth coating onto rc surface. It is a polymer modified cementitious building material, ideally used for general filling and patch up. Letโ€™s discuss in detail in todayโ€™s session.

Preparatory work:
1. As usual, clean the surface by removing all the loose particle, unhardened cement residue.
2. To patch on the concrete joints with more than 3mm tolerance.
3. Substrate should be free from oil and other particle to provide strong adhering bond to skim coat.
4. Dampen the dry concrete / rendered surfaces prior to skim coat application.

Working methodology:
1. As per manufacturerโ€™s recommendation, mix the base coat material with clean water by using mechanical mixer until homogenously mixed.
2. If the material is unused for more than 30 minutes, they have to remix with mixer before use again.
3. Around 2 to 4mm of base coat are applied to the substrate using steel trowel. Natural air curing is sufficient.
4. Finish coat mix is prepared as well. Thickness range 1 to 2 mm per coat is applied onto the touch dried base coat surface. Minimum 2 coats of finish coat is needed to achieve required thickness.
5. Sand paper polishing is needed followed by the application of painting. However, subject to specialistโ€™s recommendation, it depends on the curing duration of the skim coated surface before painting work is conducted.
Same goes with other building material, skim coat material has to comply with certain standard in order to pass the technical properties, such as their adhesive strength, compressive strength, water retentivity and its alkaline resistance.

Adhesive strength โ€“ How well skim coat is adheres to the surface
Compressive strength โ€“ Ability to resist the direct pressure of compression force
Water retentivity โ€“ Ability to resist lost of water from masonry unit
Alkalinity resistance โ€“ Ability to resist fading, discolouring when exposed to alkaline
For your information, hairline crack on skim coat happens when it dried too quickly due to changes in temperature and surface. The poor adhesiveness of skim coat and hot condition can cause the skim coat to crack as well.
In short, it is a simple coating applied to the substrate for smooth and even surface prior to painting application. Hope this summary gives you a better understanding on skim coating process.

user posted image

user posted image

user posted image

hihihehe
post May 1 2023, 10:45 PM

10k Club
********
All Stars
13,781 posts

Joined: Jan 2006
From: stress & confuse world


QUOTE(My Maison @ May 1 2023, 10:28 PM)
I dun think that a shorter depth drawer can create unpleasant usage experience. How short the depth can it be as i guess the carpentry items is quite standard in terms of dimension and functions. Just promise that the final outcome is accepted by you as a client before sign off the works.
*
the depth is about 28cm. i have been arguing with the carpenter and they changed the drawer slide/runner but still wobble.

other drawers with deeper depth and undermount slide got no issue though

This post has been edited by hihihehe: May 1 2023, 10:57 PM
amduser
post May 2 2023, 04:47 PM

Look at all my stars!!
*******
Senior Member
5,542 posts

Joined: Dec 2006


EDITED: will open new thread instead

This post has been edited by amduser: May 3 2023, 08:29 PM
TSMy Maison
post May 24 2023, 11:35 PM

Casual
***
Junior Member
319 posts

Joined: Jun 2018
#Construction #WorkingAtHeight #On-JobTraining

Department of Occupational Safety and Health (DOSH) also known as JKKP in Bahasa Malaysia is a department that is responsible for ensuring the safety, health and welfare of people at work in order to prevent safety and health hazard arising in construction.

Complying to the standard, all of our workers are trained before the commencement of work. Conducted in our JB site, this training program is all about โ€œWorking at Heightโ€. It is a norm for workers to work at elevated place, whereby in the vicinity of an opening or edge, there is a potential of fall to happen. In order to prevent this, basic usage on the fall arrest system is briefed to the workers.

The workers are trained with how to inspect the wear and tears that might appear on the harness, any cuts or frayed areas on lanyard, lifeline and so on. How do we provide maintenance to the system from time to time? How do we access the incoming risk? What are the basic operation skills of the systems? All of the information is taught in this training.

Besides, site safety officer has the responsibility to monitor the workers and works. They are the lead in the team. Workers should be trained with sufficient skills before work. As a lead, plan well and take account of everything, eg: weathers, safety of location, plan for emergencies and so on. Lastly, the training programme adjourn with a group photo. It was a fruitful session for all the participants.


user posted image

user posted image

user posted image

user posted image

user posted image

user posted image
TSMy Maison
post May 28 2023, 04:22 PM

Casual
***
Junior Member
319 posts

Joined: Jun 2018
Can you imagine what will this empty site going to be in the next few months? For your information, a new commercial project located in Sri Petaling is going to pop out soon. Sri Petaling has always been a hotspot for lots of youngster as there are lots of foods and activities around. Once taking over the empty site from the owner, we start off the work immediately. We really take this project seriously as this proposal is going to be fun. We initiate the work by conducting the coordination meeting and site discussion with the appointed Interior Designer. We perform necessary site measurement in order to capture the ID design concept.

Can you guess on the purpose of all these red lines sprayed on the floor slab? I am pretty sure that you are unable to guess what are all these curvy shapes and irregular forms going to be? Feeling excited with the final outcome? Then, donโ€™t forget to follow the updates.

user posted image

user posted image

user posted image

user posted image

This post has been edited by My Maison: May 28 2023, 04:22 PM
TSMy Maison
post Jun 5 2023, 11:15 AM

Casual
***
Junior Member
319 posts

Joined: Jun 2018
#constructionsite #interiordesign #sripetalingๅคงๅŸŽๅ ก #curvydesign

The construction works continue to develop by laying the sand brick around the red marking. Pieces by pieces, we lay the bricks with proportionally mixed mortar as per method statement. The design form starts to appear. Yes, we are creating a formwork for the cast in situ concrete seating. This is a brand-new beverage shops with industrial design concept, which emphasize on the beauty of building material especially the concrete texture / cement paint finishing. To maximise the space, this seating design is definitely worth for all of you to apply in future project. It is highly useable and also great in looking.

After creating the forms for the seating area, we start to place the BRC into the formwork before pouring in the concrete. We always ensure that the BRC being used fulfilling the standard. Any rust steels will never be used for the quality of works.

In this era whereby Instagram, Xiaohongshu (ๅฐ็บขไนฆ), Short videos are in trending, they help to promote the great design to the public rapidly through social media. Thus, most of the owners are willing to spend more on the interior design renovation in order to capture the attention. Anyway, I hope you like our workmanship and stay tuned for our next chapter of sharing!


user posted image

user posted image

user posted image

user posted image

user posted image

TSMy Maison
post Jun 10 2023, 02:53 PM

Casual
***
Junior Member
319 posts

Joined: Jun 2018
#ConstructionSite #InteriorDesign #SriPetalingShoplot #CurvyDesign

Koomi, the brand-new beverage shop in Sri Petaling. The design turns out to be reality when the small built-in steel structures are integrated together with the free seating design. This eliminates the needs of having huge table around. Maximization of seating is achieved. We start to place in some wall decoration / features as part of the design elements.

The M&E items especially AC cassette are set in a tidy orientation. The eyeballs are arranged in a way to create an ambient atmosphere. The site is progressing towards the installation of brand signage with backlit lighting. Each small corners are slowly touched up with detailing. Next, we will start to create the special pavers as flooring and provide cement texture paint as wall painting which gives a very cool yet peaceful atmosphere in overall.
Stay tuned for more updates. Hope you like the design and donโ€™t forget to follow our Facebook page.

MyMaison ๅฎ˜็ฝ‘ ๏ผšhttps://mymaison.com.my

user posted image

user posted image

user posted image

user posted image

user posted image
TSMy Maison
post Jun 12 2023, 01:10 AM

Casual
***
Junior Member
319 posts

Joined: Jun 2018
#constructionjobs #interiordesign#sripetalingๅคงๅŸŽๅ ก #curvydesign

๐‚๐จ๐ฆ๐ฉ๐ฅ๐ž๐ญ๐ข๐จ๐ง ๐จ๐Ÿ ๐–๐จ๐ซ๐ค๐ฌ & ๐‡๐š๐ง๐๐จ๐ฏ๐ž๐ซ ๐๐ซ๐จ๐œ๐ž๐ฌ๐ฌ

Tadaaa!!๐Ÿ‘๐Ÿป๐Ÿ‘๐Ÿป The project has finally come to the end. We managed to complete the renovation project on time and handover to our beloved client. Is the final outcome meeting your expectation? ๐Ÿ˜†

Thanks to the effort from My Maison Team, without their hard works and supervision on the workmanship, this could never be an easy job. Quality check and control is necessary as we always imagine ourself from the perspective of the end users. Thus, it is a great achievement for us!โœŒ๐Ÿป

Hope you like todayโ€™s sharing!

user posted image

user posted image

user posted image

user posted image

user posted image

user posted image

user posted image

user posted image

user posted image


TSMy Maison
post Jun 12 2023, 01:11 AM

Casual
***
Junior Member
319 posts

Joined: Jun 2018
user posted image

user posted image

user posted image

user posted image

user posted image

user posted image


TSMy Maison
post Jun 12 2023, 01:11 AM

Casual
***
Junior Member
319 posts

Joined: Jun 2018
user posted image

user posted image

user posted image

user posted image

user posted image
TSMy Maison
post Jun 12 2023, 09:52 PM

Casual
***
Junior Member
319 posts

Joined: Jun 2018
#plasterboard #workinprogress #renovation #contractors

Hi everyone, are you excited with our new project sharing todayโœŒ๐Ÿป
Throughout these few years, we had successfully built up a good reputation as a reliable contractor or a design & build team. In todayโ€™s sharing, it will be another renovation project for a bank located at Bangsar. Stay with us for more project photos sharing. ๐Ÿ˜œ

After certain demolishment were made to the area, we start off the work by partitioning the space. We are using standard plasterboard system from well-known USG Boral (Knauf) supplier. Following the standard operating procedure, we start installing the bottom track to floor slab following the marking on floor. Top track is then secured to either soffit or ceiling above, followed by placing the stud in between at around 600mm spacing. We then secured the plasterboard to the stud at one side using the plasterboard screws with a spacing of 200mm.

To give more sound insulation, we do insert 50mm rockwool / Knauf soundblock in between the stud. Lastly, we secured the plasterboard on the other side. The board joint is then finished with Knauf paper joint tape and 3 coats of compound joint in order to sealed up the gap. As what shown in the photos, the white coating are applied thoroughly especially at the joint area.

The installation work of plasterboard is rapid and highly recommended all the time. Hope you like our sharing today and donโ€™t forget to stay tuned on our progress updates!๐Ÿคฉ๐Ÿคฉ

MyMaison ๅฎ˜็ฝ‘ ๏ผšhttps://mymaison.com.my

user posted image

user posted image

user posted image

user posted image

user posted image

user posted image

user posted image

This post has been edited by My Maison: Jun 12 2023, 09:53 PM
TSMy Maison
post Jun 16 2023, 12:15 AM

Casual
***
Junior Member
319 posts

Joined: Jun 2018
๐๐ฅ๐š๐ฌ๐ญ๐ž๐ซ๐›๐จ๐š๐ซ๐ ๐ˆ๐ง๐ฌ๐ญ๐š๐ฅ๐ฅ๐š๐ญ๐ข๐จ๐ง

The construction of partition and plasterboard ceiling is nearly the same. It is all about securing the board to the framing system with standard installation manual to be taken care of. In many of commercial renovation project, some of the owner tend not to provide ceiling. In their design concept, they express the beauty of structural beam and exposed ducting. However, this design idea is not applicable to all situation, especially when the M&E ducting system is complicated or you are using typical downlight but not the aesthetic track lighting. ๐Ÿ˜‰

For drop ceiling, there are different thickness of plasterboard with their sizing of structural members vary depending on the area and location. Exposed weather or high drop ceiling area will need a stronger system in order to cater the load. However for todayโ€™s case, the construction of plasterboard ceiling is quite straightforward. Suitable to the typology of business nature which is a bank institution, a simple drop ceiling design incorporated with L-box ceiling at certain area is good enough. Lighting plays an important role in this working environment to form a focusing working environment. ๐Ÿค˜๐Ÿป๐Ÿ‘๐Ÿป

user posted image

user posted image

user posted image

user posted image
TSMy Maison
post Jun 17 2023, 06:38 PM

Casual
***
Junior Member
319 posts

Joined: Jun 2018
#carpentry #workinprogress #renovation #contractors


๐‚๐š๐›๐ข๐ง๐ž๐ญ ๐‚๐š๐ซ๐ฉ๐ž๐ง๐ญ๐ซ๐ฒ

Once all of the basic walls and ceilings are done, most of the wiring work for all the M&E points were also completed. Based on the site photos shared, you could clearly see that all of the basic services are in place before the installation of kitchen carcass start.๐Ÿ˜๐Ÿ˜

The installation works require a great workmanship from skilled workers. The works start-off by doing marking on the walls and floors. Just then, the carcass units that come with standard sizing will be fixed to the wall by using wall plug system. The door panel and the end panel are then fixed into respective carcasses. โœŒ๐ŸปโœŒ๐Ÿป

For the countertop installation, it requires a support underneath. For normal use area where no direct contact with water, plywood support can be used. However, for the sink area, the silicone might get damage sometime and water might seep into the support backing. For this easily damaged area, cement board backing is preferrable for long term maintenance.๐Ÿคฉ๐Ÿคฉ

The quartz countertop will then be placed on top of the support. You might be questioning how will this quartz secured in place. Quartz stone is heavy enough to be placed in position. We would just need to apply a beam of silicone around the edges and it will be strong enough. Do remember to protect the edges of your counter-bases with tape to prevent any silicone overflow to stain on the drawer etc. ๐Ÿ˜œ

One more tip for you, for the upper cabinet design, it would definitely shorter in depth as compared to the lower cabinet. This is to prevent your head from knocking into the cabinet. Hope you learn something today.

user posted image

user posted image

user posted image

user posted image
TSMy Maison
post Jun 18 2023, 04:57 PM

Casual
***
Junior Member
319 posts

Joined: Jun 2018
#CarpetTiles #workingprogress #renovationproject #contractors

๐‚๐š๐ซ๐ฉ๐ž๐ญ ๐“๐ข๐ฅ๐ž & ๐๐•๐‚ ๐•๐ข๐ง๐ฒ๐ฅ ๐…๐ฅ๐จ๐จ๐ซ๐ข๐ง๐ 

Letโ€™s move on to the installation of flooring. In this project, two different floorings were introduced, carpet tiles as main floor covering and vinyl that comes with adhesive backing.

Depending on the product, the arrangement of carpet tile can vary, such as monolithic arrangement, offset arrangement or even with custom arrangement pattern. Adhesive is applied thoroughly all over the subfloor before our workers lay the carpet tile piece by piece all over the area. We always lay the carpet tight to each other with no gap in between. There are also arrow behind each carpet tiles which serve as the guidance during work. Accurate cutting skill is needed for our trained workers in order to treat all the edges perfectly. โœŒ๐ŸปโœŒ๐Ÿป

Same concept is applied to vinyl flooring. For your information, vinyl can come in different nature. In todayโ€™s scenario, we are not using the plank type but we apply the one with sticker at the back. It is more cost effective, to serve the budget. This is a good choice of selection as it imitates the timber floor appearance. However, take note that you should always lay the vinyl floor in offset arrangement so that the overall flooring will not look fake due to the same printed image on the vinyl. ๐Ÿคฉ

Hope you learn something today.

MyMaison ๅฎ˜็ฝ‘ ๏ผšhttps://mymaison.com.my

user posted image

user posted image

user posted image

user posted image

user posted image

user posted image

user posted image

user posted image
TSMy Maison
post Jun 20 2023, 11:16 PM

Casual
***
Junior Member
319 posts

Joined: Jun 2018
#wallpanelling #workinprogress #renovationproject #contractors

๐“๐ซ๐š๐ง๐ฌ๐ฉ๐จ๐ซ๐ญ๐š๐ญ๐ข๐จ๐ง ๐จ๐Ÿ ๐Œ๐š๐ญ๐ž๐ซ๐ข๐š๐ฅ & ๐ˆ๐ง๐ฌ๐ญ๐š๐ฅ๐ฅ๐š๐ญ๐ข๐จ๐ง ๐–๐จ๐ซ๐ค

We love to share the way we work at site with our audience, to let the public knows more about this industry. These are some of the photos taken while we are transporting the materials to site. We inspect the material for damage upon arrival and store them in a flat and unobstructed area. ๐Ÿซก

While installing the wall panel, we take note on the vertical and horizontal alignment. Level ruler and laser level will serve as our guidance along the installation process. As you can see, the entire process is quite straightforward. However, it requires a lot of patience to achieve consistency and great workmanship. The wall panel can be installed directly to the plasterboard panel which serve as the backing. All of the above works will need a lot of manpower. From the selection of nice wall panel design to installation, it is definitely time consuming. However, our team made it! ๐Ÿคฉ

MyMaison ๅฎ˜็ฝ‘ ๏ผšhttps://mymaison.com.my

user posted image

user posted image

user posted image

user posted image

user posted image

user posted image

user posted image

user posted image

user posted image
TSMy Maison
post Jun 24 2023, 11:46 PM

Casual
***
Junior Member
319 posts

Joined: Jun 2018
#workingtable #workinprogress #renovationproject #contractors

Throughout a few weeks of hard work, our team almost completed the entire project. Its time to move in the meeting table carpentry work and other furniture. We customise the table by cutting a hole on the blockboard core that comes with plywood backing. This creates a passageway for electrical wiring to pass through. The table socket will then be locked at this location if there is any needs of electricity in future. ๐Ÿคฉ
You can see that our project is coming to an end soon with LED downlight being fixed in position, covering for AC and wall panelling being installed perfectly. The central air-conditioning system, projector with its system, sockets for wall hanging television are checked and ensure their functionality. Fire-fighting system appliances are also provided in the building. ๐Ÿซก
Hope you like the site progress photos shared with you from Day 1. Stay tuned for our project final completion photos in the next posting. Looking for professional design and build team in Klang Valley, drop us a message via contacts below! โœŒ๐ŸปโœŒ๐Ÿป

MyMaison ๅฎ˜็ฝ‘ ๏ผšhttps://mymaison.com.my

user posted image

user posted image

user posted image

user posted image

user posted image

user posted image

user posted image


TSMy Maison
post Jul 1 2023, 11:51 PM

Casual
***
Junior Member
319 posts

Joined: Jun 2018
#Sitephoto #Renovation #Contractor

Completion of Works & Handover Process

Here we go!! With the final completion of this renovation project, it marks another achievement for My Maison. From the meeting room to the common corridor and even the pantry, the design and construction work really represent the efficiency and practicality of design.

Let me give you a brief recap on this project. Detailing such as round edges at meeting table are more user friendly. Application of carpet tile also enhance the functionality and cost efficiency. Provision of M&E items such as sprinkler, smoke detector also shows the complexity of design. Simple yet elegant ceiling works with sufficient lighting system. Good workmanship quality for the pantry with the usage of glass **** wall as back panel. Neat and tidy cutting edges for quartz stone installation. All of these works definitely require a great team effort!!

Hope you like the design and donโ€™t forget to give us a like if you like our works!

user posted image

user posted image

user posted image

user posted image

user posted image

user posted image

user posted image

user posted image

TSMy Maison
post Jul 1 2023, 11:51 PM

Casual
***
Junior Member
319 posts

Joined: Jun 2018

user posted image

user posted image

user posted image

user posted image

user posted image

user posted image
TSMy Maison
post Jul 9 2023, 11:33 PM

Casual
***
Junior Member
319 posts

Joined: Jun 2018
#Sitephoto #Scaffolding #Contractor

Work In Progress - Scaffolding

Building construction is not as easy as what we thought of. Every trade of works that we done has to come along with a lot of preparation works starting from building materials delivery, storage, site logistic, site safety, resources planning and management. ๐Ÿคฉ๐Ÿคฉ

Scaffolding work is so important in creating a stable working platform for our workers to work at height. For your information, there is a need to get an approval for scaffolding design. The assembly of basic part of scaffolding requires time and skills. You are not only paying for the design services, but also the labour services and our professionalism.
We always appreciate the effort from our team, and I hope you too! ๐Ÿซก๐Ÿซก


user posted image

user posted image

user posted image

user posted image

user posted image

user posted image

user posted image

LDP
post Jul 10 2023, 02:19 PM

On my way
****
Junior Member
622 posts

Joined: Sep 2011
Hi, Can someone share how ID normally charged for home renovation ? Do they charged a fee for coming up with the design or do they apply some fancy calculation ? I am planning to renovate a DSL house.

This post has been edited by LDP: Jul 10 2023, 02:20 PM
TSMy Maison
post Jul 15 2023, 10:44 PM

Casual
***
Junior Member
319 posts

Joined: Jun 2018
QUOTE(LDP @ Jul 10 2023, 03:19 PM)
Hi, Can someone share how ID normally charged for home renovation ? Do they charged a fee for coming up with the design or do they apply some fancy calculation ? I am planning to renovate a DSL house.
*
Hi there. The charges vary depending on whether you are only paying for their ''3D design services'' only or you pay for "design and build service", whereby they will monitor the entire renovation progress and ensure that the contractors work and build based on their design proposal. If you are hiring ID, they have their own contractors. Same goes to if you are looking for a design & build company, they might have their own in-house designer, or outsource to other ID as well.

Hope this answer ur question!
thumbup.gif thumbup.gif
TSMy Maison
post Jul 15 2023, 10:45 PM

Casual
***
Junior Member
319 posts

Joined: Jun 2018
#SitePhoto #steelroofing #contractor

๐–๐ก๐š๐ญ ๐ฒ๐จ๐ฎ ๐ง๐ž๐ž๐ ๐ญ๐จ ๐ค๐ง๐จ๐ฐ ๐š๐›๐จ๐ฎ๐ญ ๐ฒ๐จ๐ฎ๐ซ ๐จ๐ฐ๐ง ๐ซ๐จ๐จ๐Ÿ๐ข๐ง๐  ๐ฌ๐ฒ๐ฌ๐ญ๐ž๐ฆ?

My Maison Team is not only specializing in interior building renovation but we also provide services for building exterior. For todayโ€™s session, I believe that this is a great topic to share as not all of you have the opportunity to see what is inside your roofing system. What are the important elements in a new roofing system and what are the detailing we need to pay extra attention.๐Ÿคฉ๐Ÿคฉ

Metal roofing system must pass a series of performance test such as great wind uplifting resistance, rainwater runoff capacity and achieve good spanning capacity. In terms of material, it should have superior corrosion resistance as it exposed to hot weather. The colour-layered on steel roofing should be able to give long terms warranty and with high colour fading resistance. Thus, always check with your supplier.

As you can see in the progress photo, there are a few elements which must be integrated together in the system. Firstly, with all of the structural support system being weld and bolted in place, we can then fix in the purlin with standard spacing requirement. Next, fix the wire mesh to the structure before applying the double-sided aluminium foil over the wire mesh. This is important as it reflects and reduce the solar heat from sun. Rockwool insulation is then inserted. It furthers eliminate the heat to the building interior. It could also perform noise reduction caused by rain or wind action. This is why you feel cool and comfortable inside.

Gutter size is important as it somehow affect the ability of rainwater runoff. Specialist shall be able to advise on the efficiency of entire roofing system. This involves the gutter size, the rainfall intensity, the roof dimension, the catchment area with slope, the catchment area per downpipe, the number and location of downpipe, the size etc. Contractor has to work together with specialist in order to get the most suitable product for client.

As a reliable builder, we also need to take note on the roofing overlapped parts, roof ridge and end whereby there are possibilities of water seepage. Proper installation of roof flashing, waterproof at joint area, weatherseal silicone sealant are all the important factors to take note during installation.๐Ÿซก๐Ÿซก

Hope you like the sharing today!

MyMaison ๅฎ˜็ฝ‘ ๏ผšhttps://mymaison.com.my

user posted image

user posted image

user posted image

user posted image

user posted image

user posted image

user posted image

user posted image

user posted image
TSMy Maison
post Jul 16 2023, 11:21 PM

Casual
***
Junior Member
319 posts

Joined: Jun 2018
#SiteHoarding #ConstructionDebris #Contractor

Site Preparation

Wohoo!! Welcome back to our sharing session again! Since our last refurbishment project in Bangsar, here comes another reinstatement work for Maybank at Technology Park, Kuala Lumpur.

As usual, before any construction work starts off, demolishment of old and dilapidated design is necessary. The team is transporting the construction debris out of the area. We always concern about the site logistic and preparation work. This is because it can eventually affect the flow of works on site. Furthermore, we always try to minimise the complaints from the neighbourhood. It is always the priority to take care of the cleanliness of the surrounding in order to keep the place safe for our workers.

Thus, hoarding is erected on site. Passageway is protected with canvas sheet and additional plywood sheet on top. We tape the area and also provide signage to notify the outsiders. Site safety officer plays an important role in this scenario as he will be leading the team throughout the entire project! Stay tuned for more updates on this project.

MyMaison ๅฎ˜็ฝ‘ ๏ผšhttps://mymaison.com.my

user posted image

user posted image

user posted image

user posted image

user posted image

user posted image

user posted image

user posted image

user posted image

user posted image
TSMy Maison
post Aug 5 2023, 11:58 PM

Casual
***
Junior Member
319 posts

Joined: Jun 2018
#factory #structuralsteel #constructionlife #contractor

๐‚๐จ๐ง๐ฌ๐ญ๐ซ๐ฎ๐œ๐ญ๐ข๐จ๐ง ๐จ๐Ÿ ๐ˆ๐ง๐ญ๐ž๐ซ๐ฆ๐ž๐๐ข๐š๐ญ๐ž ๐…๐ฅ๐จ๐จ๐ซ

Hey everyone, letโ€™s have a look on our recent project, an interior space planning & construction for a factory at Bukit Serdang. In todayโ€™s sharing, letโ€™s look at how we utilize the high floor to soffit area and design an intermediate floor in between.

After considering what is the intended ceiling height for the ground floor, we have to ensure that the head room space is sufficient for the first floor as well. We proceed the works by constructing the structural mainframe and platform using steel members. For a rapid construction work such as this, steel work is the best choice of material selection. We can easily weld the steel member together or even using bolt and nut method to secure them to floor. Steel can span in metres. It is strong, durable and can speed up the construction work.

Since we are not exposing mild steel hollow section as part of our โ€œdesignโ€, we can just provide a simple paint coating for the steel, preventing them from corrosion. They will then be covered up with plasterboard later on. Donโ€™t worry as we are a professional team, we ensure that all steel works being used will not under or over-designed, to meet the cost but at the same time ensure the stability.
Stay tuned on our next sharing. We will keep you up to date from time to time.

MyMaison ๅฎ˜็ฝ‘ ๏ผšhttps://mymaison.com.my

user posted image

user posted image

user posted image

user posted image

user posted image

user posted image

user posted image

user posted image
TSMy Maison
post Aug 8 2023, 01:19 AM

Casual
***
Junior Member
319 posts

Joined: Jun 2018
#factory #renovationproject #construction #contractor

๐‚๐จ๐ง๐ฌ๐ญ๐ซ๐ฎ๐œ๐ญ๐ข๐จ๐ง ๐จ๐Ÿ ๐’๐ญ๐ž๐ฉ๐ฌ ๐Ÿ๐ซ๐จ๐ฆ ๐†๐ซ๐จ๐ฎ๐ง๐ ๐‹๐ž๐ฏ๐ž๐ฅ ๐ญ๐จ ๐…๐ฅ๐จ๐จ๐ซ ๐€๐›๐จ๐ฏ๐ž

With all the structural framing done, its time to deal with the passageway and connectivity of users around the space. We use plywood, the easiest and the most efficient way to form up the platform. Look at how serious our team is, we measure, mark, cut and nail to plywood so that they can be nicely fit to the steel members.

One thing to share with you about the design requirement. An access way or staircase should have their minimum width to ensure ergonomic, comfortability while using and safety of users during emergency escape. Each of the steps should have a minimum 255mm depth of โ€œtreadโ€ and maximum 180mm of riser steps. There should also a need to have โ€œlandingโ€ in between the flight of staircase.

At the ground floor, you can also see that the lighting conduits are in progress, while the other team member is patching up the โ€œcutโ€ areas on floor with cement. Everyone is working hard to serve the best quality of works to the client. Are you excited with our next sharing, then donโ€™t forget to stay tuned on our next post sharing!

MyMaison ๅฎ˜็ฝ‘ ๏ผšhttps://mymaison.com.my

user posted image

user posted image

user posted image
TSMy Maison
post Aug 20 2023, 06:06 PM

Casual
***
Junior Member
319 posts

Joined: Jun 2018
#factory #lightweightboard #constructionsite #contractor

๐‹๐ข๐ ๐ก๐ญ๐ฐ๐ž๐ข๐ ๐ก๐ญ ๐‚๐จ๐ง๐ฌ๐ญ๐ซ๐ฎ๐œ๐ญ๐ข๐จ๐ง ๐Œ๐š๐ญ๐ž๐ซ๐ข๐š๐ฅ

I believed that for you who followed us since day 1, you had a basic concept on how we work with plasterboard material. We also shared about how we start the work from erecting the frames all the way to finishing work before. I would say that this is a very efficient way to partition the space as it is lightweight, super easy to install, and thus it speeds up the construction process. As compared to erecting a brick wall where the workers would need to prepare the cement mortar, the stiffener and more, using plasterboard allow us to have better working environment.

With all the opening size provided, we can then secure the glass profile section to the partition on all sides. This glass profile section will serve as a catchment area for the glass to be inserted and placed in position. Setting block will be placed below the glass to minimize the uneven surfaces and absorb vibrations. For the installation of frameless glass swing door, we would need to install the floor spring as well to assist in the opening and closing of glass door. For a public space working area like this, it is necessary to provide at least safety glass for the glazing designed. Do not try to cut cost on unnecessary spending as if any accident happens, the loss/insurance you need to pay off can be even more.

I hope you get to learn something today.

MyMaison ๅฎ˜็ฝ‘ ๏ผšhttps://mymaison.com.my

user posted image

user posted image

user posted image

user posted image

user posted image

user posted image

user posted image

user posted image

user posted image
TSMy Maison
post Aug 20 2023, 06:07 PM

Casual
***
Junior Member
319 posts

Joined: Jun 2018
user posted image

user posted image

user posted image

user posted image

user posted image

user posted image

user posted image
TSMy Maison
post Aug 25 2023, 01:36 AM

Casual
***
Junior Member
319 posts

Joined: Jun 2018
#factory #ceilingworks #construction #contractor

๐‚๐ž๐ข๐ฅ๐ข๐ง๐  ๐–๐จ๐ซ๐ค๐ฌ

As usual, we all knows that there are a lot of different systems provided for a ceiling. It can be a concealed frame types or even exposed grid ceiling tee system. Ceiling supporting system can be varies in terms of their strength if the ceiling drop is below or exceed 1.5m. Ceiling board types used can differ from dry area to exposed or even wet area usage.
There are so many brands we can source from the market. As a user, try to select the brand that suit to your budget parameter. Do you know that there is actually a ceiling pull out test performed by the company? This is to check and ensure that the products or services provided by them if safe and can withstand the load.
While setting up the ceiling system, contractor would normally fix the ceiling height measured from floor. Mark the position for fixing the suspension hanger rod and install the wall perimeter trimming. Ensure that the ceiling height is sufficient to enclose the M&E ducting above.
I believe that from the site photos shared with you today, it will benefit for those who are not from construction industry. We provide a platform for you to view something new. We should keep observing and learning from day to day, but the most important is to get yourself aware and search for a reliable service provider.
I hope you get to learn something today. Looking for professional design and build team in Klang Valley, then drop us a message via contacts below! ๐Ÿ˜‰๐Ÿ˜‰


MyMaison ๅฎ˜็ฝ‘ ๏ผšhttps://mymaison.com.my

user posted image

user posted image

user posted image

user posted image

user posted image

user posted image

user posted image

user posted image

user posted image
TSMy Maison
post Aug 27 2023, 08:43 PM

Casual
***
Junior Member
319 posts

Joined: Jun 2018
#DataCentre #RaisedFloorSystem

Apart from typical construction work, My Maison Design & Build Sdn Bhd is also specialised in building data centre for our customer as well. Withing a building itself, there should be a dedicated space to house components and infrastructure for power supply, data communications, fire suppression and various security devices.

We will share with you from time to time on our final works in creating the data centre for our client. As you can see in the photos, raised floor system is introduced in the room. Raised floor is a higher floor constructed above the original concrete slab, to allow an open space in between for wiring and data centre equipment to store. In this area, antistatic floor is necessary to retain sufficient moisture and allow a conducting path to prevent the buildup of static electricity. Normally, the final surface finish of this raised floor tiles will be in high pressure laminate tile or vinyl tile.

Look at our workmanship in installing the perforated raised floor tiles. To cool the equipment, the design has to be properly done. The perforated raised floor tiles have punched air holes and is used to direct airflow to maximise cooling.

Please stay tuned on our next sharing to see what we had done for this data centre!

https://mymaison.com.my

user posted image

user posted image

user posted image

user posted image

user posted image

user posted image

user posted image

user posted image

user posted image

user posted image
ahbenchai
post Aug 28 2023, 11:49 AM

what do you mean you people?
******
Senior Member
1,210 posts

Joined: Jun 2005
From: penang


how do people do additional concealed power socket if condo management dont allow any hacking or chipping of walls
LineBrown
post Sep 1 2023, 09:52 AM

Getting Started
**
Junior Member
52 posts

Joined: Oct 2021
Hi do you still provide renovation and ID design services for double storey landed houses?
TSMy Maison
post Sep 6 2023, 10:19 PM

Casual
***
Junior Member
319 posts

Joined: Jun 2018
QUOTE(ahbenchai @ Aug 28 2023, 12:49 PM)
how do people do additional concealed power socket if condo management dont allow any hacking or chipping of walls
*
You might need to check and confirm whether the wall you are going to hack or chip off is a structural wall / load bearing wall first.
TSMy Maison
post Sep 6 2023, 10:20 PM

Casual
***
Junior Member
319 posts

Joined: Jun 2018
QUOTE(LineBrown @ Sep 1 2023, 10:52 AM)
Hi do you still provide renovation and ID design services for double storey landed houses?
*
Hi there. Please check ur pm . tongue.gif
TSMy Maison
post Sep 10 2023, 09:41 PM

Casual
***
Junior Member
319 posts

Joined: Jun 2018
#reliablecontractor #DataCenter #RaisedFloorSystem

We are truly proud with our workmanship and design layout to house all of the M&E equipment. There are MSB room with Main switchboard which receive and distribute electric energy and protect against overload and short circuit. There are also HT supply equipment, transformers room (TX), power distribution unit (PDU), uninterrupted power supply room (UPS) and more. All of the rooms are properly planned and design as per requirement. ๐Ÿ˜†๐Ÿ˜†

As you can see in the photos shared, we also apply epoxy coating as final finishing to the concrete floor slab. This coating can provide a durable and chemically resistive surface, to suit the area whereby there are so many M&E equipment store inside. Instead of using the vinyl flooring, epoxy coating is an alternative floor finishing whereby this seem to be the requirement from TNB.

user posted image

user posted image

user posted image

user posted image

user posted image

user posted image

user posted image


TSMy Maison
post Sep 10 2023, 09:41 PM

Casual
***
Junior Member
319 posts

Joined: Jun 2018
user posted image

user posted image

user posted image

user posted image

user posted image
TSMy Maison
post Sep 29 2023, 03:52 PM

Casual
***
Junior Member
319 posts

Joined: Jun 2018
#๐‘๐ž๐ฅ๐ข๐š๐›๐ฅ๐ž๐‚๐จ๐ง๐ญ๐ซ๐š๐œ๐ญ๐จ๐ซ #๐…๐ข๐ซ๐ž๐’๐ฒ๐ฌ๐ญ๐ž๐ฆ #๐ƒ๐ž๐ฌ๐ข๐ ๐ง๐’๐ญ๐š๐ง๐๐š๐ซ๐

Fire suppression system is applied to comply with the fire safety requirement. It eliminates the need for human activation and is so needed especially in this large amount of electrical equipment area. We do comply to a lot of fire safety legislation as we provide fire alarm system, dry powder, control panel, break glass all over the rooms. It is important to ensure the safety of building. ๐Ÿ˜๐Ÿ˜

We assure that all of the M&E equipments are properly coordinated and assigned to its required position. By looking at the photos attached, we are sure that our installation workmanship definitely can meet your expectation.

In terms of building design, even all of these areas consider back of house zone whereby not much of people would pass by and access, minimum yet sufficient signage with proper design is necessary, at least to inform outsiders so that no entries allowed. I would say that this proper room signage is at a qualified design standard. In terms of lighting provided, we are satisfied with the final outcome as well. The areas are sufficiently lighten up with all these pendant lights hanging above. Yes, it makes the entire space more presentable! ๐Ÿฅฐ

Please pay attention on these stainless steel wall mounted handrails as well. Clean and sleek design as well. Not only applicable to these M&E areas, you may also apply the same design to your own property with slight modification. ๐Ÿ˜„๐Ÿ˜€

user posted image

user posted image

user posted image

user posted image

user posted image

user posted image

user posted image
TSMy Maison
post Sep 29 2023, 03:53 PM

Casual
***
Junior Member
319 posts

Joined: Jun 2018
user posted image

user posted image

user posted image

user posted image

user posted image

user posted image

user posted image


TSMy Maison
post Oct 10 2023, 11:07 PM

Casual
***
Junior Member
319 posts

Joined: Jun 2018
Hi all, today we are going to check out a refurbishment project for terrace housing done by us, My Maison. Let us talk about some works we had done for the owner, with some of our thoughts with you!๐Ÿ˜„๐Ÿ˜€

As you can see from the exterior, the owner wishes to have some dark grey contemporary colour scheme design. Light grey colour serves as the base colour for wall accompanied by dark grey colour framing along the column and roof beam at the first floor. With the white colour window framing and rc copings wrapping around, I would say that the colour combination is in contrast and looks pretty good! However, I would wish that if the front porch cover could extend a little bit more to cover the users from direct rain and this will be much better. We designed a huge modern cabinetry for the owner by utilising the space in between the wall and column. Definitely a clean and sleek design.

Moving into the interior, unlike modern architecture right now, for older landed properties, the architect tends to create a difference in level between living area with the back of house. I believe that this might be some of trend at that time. Imagine that this is a bare unit, the conventional column and beam is pretty obvious. There is a beam running along the centre of living room. And with this, there is a need to provide a drop ceiling to cover up the structural items. There are actually a few design treatments that can choose from. ๐Ÿ˜๐Ÿคฉ

With the floor level difference, the space configuration is pretty clear and there is no need for us to hack here or there. We provide a huge tv cabinet for the living rooms with both side of storage system. A large tv set can just directly installed to the centre. With the split level, the boundary is enclosed with glass railing same as the staircase, while the empty space below the staircase is maximised, forming more storage area for the owner. Up to this area, the design colour scheme and concept are still intact with ownerโ€™s original intention.
Please stay tuned on our next sharing to see what had we done throughout this refurbishment project!

MyMaison ๅฎ˜็ฝ‘ ๏ผšhttps://mymaison.com.my

user posted image

user posted image

user posted image

user posted image

user posted image

user posted image

user posted image

user posted image

user posted image
TSMy Maison
post Oct 13 2023, 11:26 PM

Casual
***
Junior Member
319 posts

Joined: Jun 2018
#reliablecontractors #memorietart #kiosk

In relation to the completion of kiosk design with Memorie in Jaya One, we are glad to share with you some of our progress photo throughout the three weeks of construction period.
The installation works are conducted during night time to avoid shopping mall operation hour. Site preparation checked โœ…by covering up the existing floor with canvas.๐Ÿ˜๐Ÿ˜
At the same time, our team members are working hard on and off-site. The cabinetry carcass will be done in the factory and it will be transported to site after painting work is completed. This shorten the time on site as installation work can be done rapidly. Minor touch up is then done to finishing up the works. Hope you like the transformation!๐Ÿงก

user posted image

user posted image

user posted image

user posted image

user posted image


This post has been edited by My Maison: Oct 13 2023, 11:28 PM
TSMy Maison
post Oct 13 2023, 11:33 PM

Casual
***
Junior Member
319 posts

Joined: Jun 2018


user posted image

user posted image

user posted image

user posted image

user posted image

user posted image

This post has been edited by My Maison: Oct 13 2023, 11:33 PM
TSMy Maison
post Oct 14 2023, 10:24 PM

Casual
***
Junior Member
319 posts

Joined: Jun 2018
๐“๐ž๐ซ๐ซ๐š๐œ๐ž ๐‡๐จ๐ฎ๐ฌ๐ž ๐‘๐ž๐ง๐จ๐ฏ๐š๐ญ๐ข๐จ๐ง

By using consistent design language, the wet kitchen is then equipped with full height upper and lower cabinet that comes with glossy finish. Black stone countertop and backsplash are installed along the three sides of the wall. The squarish room area is maximised. ๐Ÿ˜œ๐Ÿ˜œ

๐”๐ง๐๐ž๐ซ๐ฆ๐จ๐ฎ๐ง๐ญ ๐ฌ๐ข๐ง๐ค๐ฌ are introduced for easier maintenance in future. Sink tap is classy with matte black surface finishing. Kitchen hob and hood are selected based on userโ€™s preference and is set further away from preparation area. Unlike condominium, the wet kitchen is big enough for the owner to segregate the workspace based on their living lifestyle. To balance up the dark scheme colour, we choose to have white colour powder coated aluminium windows and sufficient socket points on each zone. 600 by 600mm tiles that come in grey beige colour are chosen for floor and wall tiles, which give a very classy wet kitchen.๐Ÿคฉ

On the other hand, the centre area is big enough for cabinetry works to be done. Unlike the other areas, the owner tends to have a European style cabinet with the use of vivid patterns, ๐ž๐ฒ๐ž-๐œ๐š๐ญ๐œ๐ก๐ข๐ง๐  ๐ฆ๐จ๐ญ๐ข๐Ÿ๐ฌ. We left a recessed space in the middle of cabinet for the placement of refrigerator later on. We try to apply magnetic strip lighting design which is unlikely from conventional housing. Magnetic lightings are fairly flexible. It comes with a variety of fittings that can be conveniently changed. You may choose to have spotlight, diffuse light and even pendant lights. These help in elevating the atmosphere.
Hope you like the sharing today.

user posted image

user posted image

user posted image

user posted image

user posted image

user posted image

TSMy Maison
post Oct 15 2023, 11:18 PM

Casual
***
Junior Member
319 posts

Joined: Jun 2018
๐“๐ž๐ซ๐ซ๐š๐œ๐ž ๐‡๐จ๐ฎ๐ฌ๐ž ๐‘๐ž๐ง๐จ๐ฏ๐š๐ญ๐ข๐จ๐ง

Moving into the bedroom, we only completed the basic services for the owner while the furnishing works will then be taken over by the owner. Standard 600 by 600mm floor tiles are properly installed, come along with tiles skirting all around the room. ๐Ÿ˜๐Ÿ˜

We choose to have aluminium composite folding panel door for the bathroom. Aircond unit is then installed directly above the door, centre and symmetrical. The refrigerant pipe can then run above the ceiling area of the bathroom, connected to the outdoor unit. Each of the rooms are painted with selected paint based on usersโ€™ preference and choice of selection. In terms of functionality, sufficient sockets and power points are given to the users after discussing with the owner. They are set at a height which are suit to human ergonomic. ๐Ÿฅฐ ๐Ÿฅฐ Hope you like the sharing today.

user posted image

user posted image

user posted image

user posted image

user posted image

user posted image

user posted image
TSMy Maison
post Oct 21 2023, 11:22 PM

Casual
***
Junior Member
319 posts

Joined: Jun 2018
One of the special features in this project will be the larger bathroom area as compared to small condominium unit where the bathroom size can be quite limited. With this larger space available, the owner tends to have additional features such as bathtub, large vanity top & large mirror provision in the bathroom. Besides, the owner tends to have an elderly friendly bathroom design also by having stainless steel safety grab bar at the shower area. The side of WC area is installed with foldable grab bar as well. All this design detailing will give the elderly extra protection in the wet area. ๐Ÿ‘๐Ÿป
I would say that in terms of material selection, the owner is willing to spend more by having a large shower screen to separate the dry and wet areas, large pieces of wall and floor tiles which create grand and classy design. However, if you would like me to comment more on the design, I would wish that the drop from outside to the internal toilet could be replaced with a gentle ramp design to further increase the mobility of wheelchair users. ๐Ÿคฉ

MyMaison ๅฎ˜็ฝ‘ ๏ผšhttps://mymaison.com.my

user posted image

user posted image

user posted image

user posted image

user posted image

user posted image

user posted image

user posted image

user posted image

user posted image
TSMy Maison
post Nov 28 2023, 01:19 AM

Casual
***
Junior Member
319 posts

Joined: Jun 2018
#reliablecontractor #hairsalon #OneStopSolution

๐‡๐š๐ข๐ซ ๐’๐š๐ฅ๐จ๐ง

Itโ€™s another remarkable milestone for My Maison Team again as we managed to complete an interior fit-out project for a hair salon, located at Taman Midah, Cheras. ๐Ÿ˜๐Ÿ˜
We transform the entire bare shop lot unit to what it is today within short period of time due to continuous support from project team! Started off the work by demolishing the old interior unit, followed by wet works and partitioning the area as per clientโ€™s brief. Thereโ€™s not much on ceiling work except for the localized ceiling area at the middle to cover up the thick beam and to put on the lights.
For lighting, we chose to have magnetic track light on each side by embedding their electrical lines in soffit. Since we are a professional one stop solution service provider, do not worry as we are also expert in ACMV and plumbing scopes as well. For this project, two ceiling cassettes are sufficient to ventilate the entire zones. Refrigerant and drain pipes will then run above the cable tray after considering the most suitable routing. For the hair wash zone, the water supply and discharge are considered and planned properly during the planning stage, followed by the two steel racks installation in between the three hair wash basins, for the purpose of equipment storage.
Lastly, we completed the remaining door works and painting works for the entire shop lot unit and this marks the success of the works. Hope you like our sharing today.

MyMaison ๅฎ˜็ฝ‘ ๏ผšhttps://mymaison.com.my

user posted image

user posted image

user posted image

user posted image

user posted image

user posted image

TSMy Maison
post Nov 30 2023, 11:55 PM

Casual
***
Junior Member
319 posts

Joined: Jun 2018
#reliablecontractors #interiordesigner #ๅฎคๅ†…่ฎพ่ฎก #่ฃ…ไฟฎ่ฎพ่ฎกไธ€็ซ™ๅผๆœๅŠก

๐๐š๐ข๐ฅ ๐’๐š๐ฅ๐จ๐ง
Since our last completion of interior work for a hair salon, here comes another interesting interior fit-out project nail salon, located at Cheras.๐Ÿ˜

Similar to the previous project, we conducted a series of demolition work and dispose all the construction debris out of the site. For a business nature shop like this, it is a norm to separate the usable space into a few zonings by partition. In this project, the carpentry work is so important and we need to create box-up space to allow water pipelines - water inlet and outlet piping to run below. A big thumbs up and salute to our carpenter for his good workmanship. This required a great skill of work. Thus, do find yourself a good designer and contractor!๐Ÿ˜ƒ๐Ÿ˜„

The raised platform is then finished up with laminate sheet to achieve a good tonality of finishing. In this project also, we provide the owner with simple yet elegant ceiling design for magnetic track lights and other LED downlights to perform their function. We do provide aluminium and glass work services for the interior as well, starting from the selection of glass thickness, spec, frame colour and etc. ๐Ÿ’ช๐Ÿป๐Ÿ’ช๐Ÿป

After a several discussions with client, textured pattern paint design is incorporated on the wall. This is applied all over the shoplot unit to achieve a consistent design. Are you satisfied with the outcome? Drop your message below to let us know your thoughts! Hope you like our sharing today. ๐Ÿงก๐Ÿงก

๐Ÿ“ž:011-1665 0288
MyMaison ๅฎ˜็ฝ‘ ๏ผšhttps://mymaison.com.my

user posted image

user posted image

user posted image

user posted image

user posted image
TSMy Maison
post Dec 14 2023, 01:48 PM

Casual
***
Junior Member
319 posts

Joined: Jun 2018
๐Œ๐ž๐ฆ๐จ๐ซ๐ข๐ž ๐Š๐ข๐จ๐ฌ๐ค @ ๐๐š๐ซ๐š๐๐ข๐ ๐ฆ ๐Œ๐š๐ฅ๐ฅ

Just when the shopping centre closes at 10pm, My Maison and the team just started our day! The Memorie Cafรฉ is expanding their kiosk to Paradigm Mall after its first successful launch in Jaya One. This entire installation works will only last for 3 weeks. ๐Ÿ’ช๐Ÿป๐Ÿ‘๐Ÿป
Our teams are working hard and we target to hand over soon. The work scopes are mostly carpentry. Electrical works also play an important role in this scenario. I would say that initial planning and design are so important to allow a smooth workflow during installation on site. The 2D detailed drawings has to be clear and easy to read. ๐Ÿ˜
Not only that, plumbing works, wall and floor finishes selection are also part of the details which have to extra taken care of. The scale of works might not be that big but there are much more miscellaneous items to customise as we have to work within the limited space. ๐Ÿ˜„๐Ÿ˜„
I hope you enjoy the sharing today! Thanks to the team and we shall share with you our final outcome soon!


MyMaison ๅฎ˜็ฝ‘ ๏ผšhttps://mymaison.com.my

user posted image

user posted image

user posted image

user posted image
TSMy Maison
post Dec 15 2023, 09:45 PM

Casual
***
Junior Member
319 posts

Joined: Jun 2018
#่ฃ…ไฟฎ่ฎพ่ฎกไธ€็ซ™ๅผๆœๅŠก #reliablecontractors #restaurantdesign #OneStopSolution

๐๐š๐ค ๐‰๐ž๐ง @ ๐๐š๐ฌ๐š๐ซ ๐’๐ž๐ง๐ข

Pak Jen, the restaurant that features famous Malay Cuisine, is expanding and here comes the upcoming branch opening in Pasar Seni. My Maison Sdn Bhd is the appointed design & build contractor to execute and monitor the entire construction progress. After few weeks of hard works from all teams, this exciting project is targeted to handover soon. ๐Ÿ’ช๐Ÿป๐Ÿ’ช๐Ÿป

As usual, we had conducted a series of preliminaries and demolition works to clear off the existing site. These preliminaries work will cover most of the general items prior to the start of actual works. ๐Ÿ˜€๐Ÿ˜€

There are some of the key elements for you to take note while scrolling through our progress photos. The counter area is zoned with low walls. Sandbrick is then plastered and finished up with nice mosaic tiles surface. Same goes to the floor, setting out of mosaic tiles is done to ensure that tiles laid are in order. We really like the special mosaic tiles design.๐Ÿ˜๐Ÿ˜

We liked the Sage Green and Dark Grey colour combination. The smoke detector, conduit, plumbing pipe that runs at ceiling level are painted with similar colour. This eventually mask off the exposed service. The entire space is aesthetically designed even there is no ceiling covering up the beam. Spotlights are directly installed below the beams and the space is well-lighted! ๐Ÿคฉ๐Ÿคฉ

Another interesting design feature would be the โ€œwarung-styleโ€ metal deck roof above the counter area. This could be the focal point of the interior. I would say that this is a brilliant idea. ๐Ÿงก๐Ÿงก

Lastly, we do provide our services in installing the aluminium and glass work for the main entrance. Do pay a visit to the store to enjoy the good food while at the same time look at our workmanship towards the detailings! We hope to see you there.

MyMaison ๅฎ˜็ฝ‘ ๏ผšhttps://mymaison.com.my

user posted image

user posted image

user posted image

user posted image

user posted image

user posted image

user posted image
TSMy Maison
post Dec 18 2023, 01:47 AM

Casual
***
Junior Member
319 posts

Joined: Jun 2018
๐Š-๐‚๐ฅ๐ข๐ง๐ข๐œ @ ๐‡๐š๐ซ๐ญ๐š๐ฆ๐š๐ฌ ๐’๐ก๐จ๐ฉ๐ฉ๐ข๐ง๐  ๐‚๐ž๐ง๐ญ๐ซ๐ž

Yes, K-Clinic at Hartamas Shopping Centre is coming to town! We always love to try and explore new things and there are always new challenges awaiting us to overcome. For different nature of business types, there are different aspects to take note as each of them would have their own priority. Great thing about design is you should be able to make use of the space for intended activities.๐Ÿ˜Ž๐Ÿ˜Ž
We would share with you from time to time our work in progress. As shown, floor protection is necessary especially in shopping centre. Site logistic has to be planned effectively and ensuring all SOP are followed. Taking care of common area property is part of the responsibility as any damages would cause time and cost implication, which is unnecessary!๐Ÿค—๐Ÿค—
We are in the midst of constructing the ceiling for the project. The ceiling support system is directly hanging from roof truss above. We set up the ceiling grid and getting the lighting points ready. At the same time, we levelled the floor with screed before any final floor finishes set in place. Thus, donโ€™t forget to stay tuned on our project updates! ๐Ÿ’•๐Ÿ’•


MyMaison ๅฎ˜็ฝ‘ ๏ผšhttps://mymaison.com.my


user posted image

user posted image

user posted image

user posted image
TSMy Maison
post Dec 24 2023, 03:01 AM

Casual
***
Junior Member
319 posts

Joined: Jun 2018
๐Œ๐ž๐ฆ๐จ๐ซ๐ข๐ž ๐Š๐ข๐จ๐ฌ๐ค @ ๐’๐ž๐ญ๐ข๐š ๐‚๐ข๐ญ๐ฒ ๐Œ๐š๐ฅ๐ฅ

Our beloved client, Memorie Cafรฉ is moving fast in expanding the kiosk design concept to different locations. By applying the same design concept, the idea is further duplicated to Setia City Mall. What makes a good kiosk design? Simplicity will be the key! You donโ€™t have to make complicated design but a great design should focus on the functionality, workflow, irreplaceable branding and signage, great customer experiencing. ๐Ÿ’ช๐Ÿป
As we mentioned previously, plumbing works, wall and floor finishes selection are important as well. Plumbing work has to be done properly as any disruption to the water supply or waste discharge could severely affect the operations. We always choose right materials for our floor and wall finishes. It should be durable, aesthetic yet functionable! Installation work should be fast and efficient!๐Ÿ‘๐Ÿป๐Ÿ‘๐Ÿป
As usual, our team inspect the incoming electrical supply and make sure everything is in order. Testing and commissioning (T&C) is necessary to ensure everything is in order. Same goes to the work in factory, built-in furniture customization should be accurate to ensure everything fits accordingly on site. ๐Ÿ˜๐Ÿ˜
Stay with us and let us look forward the final outcome soon! ๐Ÿ’•๐Ÿ’•

user posted image

user posted image

user posted image

user posted image

user posted image

MyMaison ๅฎ˜็ฝ‘ ๏ผšhttps://mymaison.com.my

This post has been edited by My Maison: Dec 24 2023, 03:02 AM
TSMy Maison
post Dec 25 2023, 04:13 AM

Casual
***
Junior Member
319 posts

Joined: Jun 2018
๐Œ๐ž๐ฆ๐จ๐ซ๐ข๐ž ๐“๐š๐ซ๐ญ ๐Š๐ข๐จ๐ฌ๐ค @ ๐’๐ž๐ญ๐ข๐š ๐‚๐ข๐ญ๐ฒ ๐Œ๐š๐ฅ๐ฅ

After countless hours of hard work, dedication, and collaboration, we are thrilled to announce the successful completion of Memorie Tart Kiosk at Setia City Mall. ๐Ÿ’ช๐Ÿป

We want to express our heartfelt gratitude to our beloved client for their continuous trust on My Maison and also to our team who contributed their time, expertise, and unwavering support. Your dedication has been the driving force behind this success.๐Ÿ‘ ๐Ÿ‘

MyMaison ๅฎ˜็ฝ‘ ๏ผšhttps://mymaison.com.my

#kioskdesign #ReliableContractors #interiordesigners #OneStopSolution #buildwithpassion

user posted image

user posted image

user posted image

user posted image

user posted image
Chiggah
post Dec 25 2023, 06:31 AM

On my way
****
Junior Member
567 posts

Joined: Oct 2004
How would you remodel this old bungalow in PJ ?

Do you need to hack the whole roof if want to raise the ceiling ? See https://youtu.be/twzS785hvRE?t=109

https://www.youtube.com/watch?v=twzS785hvRE

TSMy Maison
post Dec 26 2023, 10:47 PM

Casual
***
Junior Member
319 posts

Joined: Jun 2018
QUOTE(Chiggah @ Dec 25 2023, 07:31 AM)
How would you remodel this old bungalow in PJ ?

Do you need to hack the whole roof if want to raise the ceiling ? See https://youtu.be/twzS785hvRE?t=109

https://www.youtube.com/watch?v=twzS785hvRE
*
This really depends on how low is the structural member / roof truss of the house is if intend to maximise the ceiling height.
TSMy Maison
post Dec 26 2023, 10:48 PM

Casual
***
Junior Member
319 posts

Joined: Jun 2018
๐‘๐ž๐ง๐จ๐ฆ๐š @ ๐’๐ค๐ฒ ๐€๐ฏ๐ž๐ง๐ฎ๐ž ๐†๐ž๐ง๐ญ๐ข๐ง๐ 

In 2023, we shared a lot of different projects with our followers and we really love the variation of projects done! To complete the projects, it involves a lot of hidden works which you might not aware of. From costing, quantity surveying, material discussion, site discussion, team management, project management and many more, all of these works require skill! ๐Ÿค—๐Ÿค—

The integration of different scope of works will definitely need a good coordination. For example, in Renoma project at Sky Avenue Genting, we need to work within the timeline yet we need to figure out the logistic, material transportation, workers arrangement etc. We keep on improving by reviewing our quality of works. We shall take balance within the cost and material spec used for the project as each of the client have their own budget parameter. We as the service provider shall advise them on what to be done! ๐Ÿ˜Ž๐Ÿ˜Ž

Anyway, for this renovation project, we provide new tiles flooring as per client preference. Work as per usual method statement, we trained the workers as per standard to control the quality. We look into the details, such as tile selection, colour grout selection and application, levelness and control the differential within tolerance. This is our work in progress and stay with us, we shall let you see the completion of work soon. ๐Ÿ’•๐Ÿ’•

MyMaison ๅฎ˜็ฝ‘ ๏ผšhttps://mymaison.com.my

#ReliableContractors #onestopsolution #interiordesigners #buildwithpassion

user posted image

user posted image

user posted image

user posted image

user posted image

user posted image

user posted image
TSMy Maison
post Jan 5 2024, 04:44 AM

Casual
***
Junior Member
319 posts

Joined: Jun 2018
๐‘๐ž๐ง๐จ๐ฆ๐š @ ๐’๐ค๐ฒ ๐€๐ฏ๐ž๐ง๐ฎ๐ž ๐†๐ž๐ง๐ญ๐ข๐ง๐ 

Hey My Maison Design & Build Sdn Bhd community! ๐ŸŽ‰ Exciting News! We are thrilled to announce that our project @ Sky Avenue Genting is officially complete! โœจ

Here's a glimpse of the incredible changes:
๐…๐ซ๐ž๐ฌ๐ก ๐ฉ๐š๐ข๐ง๐ญ & ๐ฆ๐จ๐๐ž๐ซ๐ง-๐ฅ๐จ๐จ๐ค-
- Aesthetic design with enhanced functionality for the business to grow

๐’๐ฉ๐š๐ญ๐ข๐š๐ฅ ๐ˆ๐ฅ๐ฅ๐ฎ๐ฌ๐ข๐จ๐ง-
- Through a clever interplay of reflection, the mirror creates a captivating spatial illusion, giving the impression of a more expansive and open environment.

๐‡๐š๐ซ๐ฆ๐จ๐ง๐ข๐จ๐ฎ๐ฌ ๐‚๐จ๐ฆ๐ฉ๐จ๐ฌ๐ข๐ญ๐ข๐จ๐ง-
-Achieving a balanced and visually satisfying arrangement.

MyMaison ๅฎ˜็ฝ‘ ๏ผšhttps://mymaison.com.my

user posted image

user posted image

user posted image

user posted image

user posted image

user posted image

user posted image

user posted image
TSMy Maison
post Jan 13 2024, 11:30 AM

Casual
***
Junior Member
319 posts

Joined: Jun 2018
๐‘๐ž๐ง๐จ๐ฆ๐š @ ๐‚๐ก๐ž๐ซ๐š๐ฌ ๐‹๐ž๐ข๐ฌ๐ฎ๐ซ๐ž ๐Œ๐š๐ฅ๐ฅ

It was a great experience collaborating with our client โ€“ Renoma and we are grateful to be able to provide our professional services to them once again for their new outlet in Cheras Leisure Mall!โ˜บ๏ธ

These were the photos taken to record the reinstatement work of the location before the actual renovation work start. We document existing condition, noting any modifications that have been done over time, remove the non-structural elements during previous renovations and carefully dismantle any modification without causing damage to original structure. ๐Ÿ’ช๐Ÿป

We conduct the inspections to verify that the site is ready for the next phase of renovation. With all the basic works being done, we are ready to implement the clientโ€™s requirement towards the space planning on site! Stay tuned with us and we shall share with you our progress of work from time to time! ๐Ÿงก๐Ÿ‘๐Ÿป

MyMaison ๅฎ˜็ฝ‘ ๏ผšhttps://mymaison.com.my

user posted image

user posted image

user posted image

user posted image

Sky.Live
post Jan 21 2024, 06:02 PM

Proctected Species
*******
Senior Member
4,390 posts

Joined: Oct 2004
From: Cheras, Malaysia


Wa your project really atas. Those kiosk/mall renovation usually good margin due to super tight schedule
TSMy Maison
post Jan 24 2024, 11:56 PM

Casual
***
Junior Member
319 posts

Joined: Jun 2018
๐Œ๐ž๐ฆ๐จ๐ซ๐ข๐ž ๐Š๐ข๐จ๐ฌ๐ค @ ๐๐š๐ซ๐š๐๐ข๐ ๐ฆ ๐Œ๐š๐ฅ๐ฅ

With the skills, knowledge, and experience gained from previous kiosk projects, all these criteria propel us forward as we continue to strive for excellence outcome for our beloved client - Memorie Tart. in 2024, another remarkable outlet for Memorie Tart is now available in Paradigm Mall. ๐Ÿฅณ๐Ÿฅณ

๐„๐ฑ๐œ๐ž๐ฅ๐ฅ๐ž๐ง๐œ๐ž ๐ข๐ง ๐‚๐จ๐ง๐ญ๐ซ๐š๐œ๐ญ๐จ๐ซ ๐’๐ž๐ซ๐ฏ๐ข๐œ๐ž๐ฌ:๐Ÿ‘๐Ÿป๐Ÿ‘๐Ÿป
We prioritize excellence in every aspect of our work, ensuring a high standard of quality in all our projects.

๐‚๐จ๐ฆ๐ฆ๐ฎ๐ง๐ข๐œ๐š๐ญ๐ข๐จ๐ง:๐Ÿ˜Ž๐Ÿ˜Ž
Open and transparent communication is at the heart of our approach. We believe in keeping our clients and collaborators informed at every step.

Undoubtedly, My Maison's ability to provide the best service has been the cornerstone of lasting collaborations between us and the client.

011-1665 0288
MyMaison ๅฎ˜็ฝ‘ ๏ผšhttps://mymaison.com.my

user posted image

user posted image

user posted image

user posted image
TSMy Maison
post Jan 25 2024, 12:06 AM

Casual
***
Junior Member
319 posts

Joined: Jun 2018
QUOTE(Sky.Live @ Jan 21 2024, 07:02 PM)
Wa your project really atas. Those kiosk/mall renovation usually good margin due to super tight schedule
*
Its really challenging having to rush within the tight schedule. A great communication skills and project management team is indeed paramount. However, from our team feedback to us, they really enjoy the working atmosphere and feeling really excited having to deal with hiccups on site.

We are getting more and more confident especially when we know our client more after the first collaboration. Things can went on more smoothly especially when the client have full trust and confident to us, as he knew that our standard of quality is there. So ya overall its a great experience!!

TSMy Maison
post Jan 26 2024, 01:36 AM

Casual
***
Junior Member
319 posts

Joined: Jun 2018
๐๐š๐ค ๐‰๐ž๐ง @ ๐๐š๐ฌ๐š๐ซ ๐’๐ž๐ง๐ข

Tadaa!! We are thrilled to announce the completion of Pak Jen Restaurant @ Pasar Seni. Here comes with the completion photos as promised earlier!โœจโœจ

Pak Jen is more than just a restaurant but the attention and appreciation towards the cultural concept, design detailing, human connectivity, and relationship. We are excited to share with you some of the interesting features in this project, in order to spark your idea! ๐ŸŽ‰

Enjoy seeing the great workmanship from our team? Share with us your thoughts.

011-1665 0288
MyMaison ๅฎ˜็ฝ‘ ๏ผšhttps://mymaison.com.my

#restaurant #retailshop #ReliableContractors #onestopsolution #buildwithpassion

user posted image

user posted image

user posted image

user posted image

user posted image
TSMy Maison
post Feb 16 2024, 09:18 PM

Casual
***
Junior Member
319 posts

Joined: Jun 2018
Our recent visit to our subcontractor's metal factory was a fruitful experience as our team manage to gain comprehensive insights throughout the visit. We learn about the operation and manufacturing process while allowing us to have better understanding on the quality control measures, and overall efficiency.๐Ÿงก๐Ÿงก

By understanding their processes better, we can customize our offerings to meet our clients' specific needs. This visit not only strengthened our relationship with the supplier but also ensures we can provide higher-quality service to our clients." We believe that a better design and built quality can be achieved by having a great discussion and cooperation from all parties. This can bring to customer's satisfaction and success in the long run."๐Ÿซก๐Ÿซก

https://mymaison.com.my

user posted image

user posted image

user posted image

user posted image

user posted image

user posted image

user posted image

user posted image
deadboy 164
post Feb 18 2024, 05:37 PM

On my way
****
Senior Member
641 posts

Joined: Feb 2009


Usually how people pay for renovation other than cash?
Let say RM100K, Refinance? Mortgage? Withdraw from EPF?

If renovate old house, usually start from outside to inside?
TSMy Maison
post Feb 20 2024, 01:16 AM

Casual
***
Junior Member
319 posts

Joined: Jun 2018
๐Š๐ฅ๐ข๐ง๐ข๐ค ๐ƒ๐ซ ๐€๐ฅ๐ฒ๐ง๐š @ ๐Š๐ฎ๐š๐ง๐ญ๐š๐ง ๐๐š๐ก๐š๐ง๐ 

๐…๐ซ๐จ๐ฆ ๐‚๐ก๐š๐จ๐ฌ ๐ญ๐จ ๐Ž๐ซ๐๐ž๐ซ: ๐…๐ซ๐จ๐ฆ ๐‚๐ก๐š๐จ๐ฌ ๐ญ๐จ ๐‚๐ก๐š๐ซ๐ฆ๐Ÿฅน
We have embarked on a mission to transform a space from chaos into a brand-new clinic that combines both beauty and functionality. Upon taking possession of the site from the owner, we encountered its original dilapidated state. Assessments were conducted to ensure structural integrity, leading to the identification of non-structural elements for removal. To create a space that promises both aesthetic appeal and optimal functionality, it requires the team effort from all of us!๐Ÿ˜„

๐‚๐จ๐ง๐ฌ๐ญ๐ซ๐ฎ๐œ๐ญ๐ข๐จ๐ง ๐ƒ๐ž๐›๐ซ๐ข๐ฌ ๐Œ๐š๐ง๐š๐ ๐ž๐ฆ๐ž๐ง๐ญ:๐Ÿ’ช๐Ÿป
Hacking away these structures is a necessary step in our renovation journey, enabling us to create a fresh and functional space for our clients. The floor tiles have reached a point where they are no longer suitable for use. Managing construction debris responsibly is fundamental. All construction debris is carefully handled and dumped into a RORO bin. These are all the preliminary steps before the emergence of new life โ€“ a transformed, refreshed space for our beloved clients!๐Ÿฅโœจ

Stay tuned for the exciting journey ahead!

#Sharingtheexcitement

https://mymaison.com.my

user posted image

user posted image

user posted image

user posted image

user posted image

user posted image

user posted image

user posted image
TSMy Maison
post Feb 25 2024, 10:14 PM

Casual
***
Junior Member
319 posts

Joined: Jun 2018
๐Š๐ฅ๐ข๐ง๐ข๐ค ๐ƒ๐ซ ๐€๐ฅ๐ฒ๐ง๐š @ ๐Š๐ฎ๐š๐ง๐ญ๐š๐ง ๐๐š๐ก๐š๐ง๐ 

We are delighted to announce the successful completion of our renovation project for Klink Dr Alyna located at Kuantan Pahang after weeks of hardwork! We have transformed original dilapitated state of site into a stunning and functional space. ๐Ÿฅฐ๐Ÿฅฐ

Our team worked tirelessly in creating a clinic space with a primary focus on ๐ž๐Ÿ๐Ÿ๐ข๐œ๐ข๐ž๐ง๐œ๐ฒ ๐จ๐Ÿ ๐ฌ๐ฉ๐š๐œ๐ž, ensuring that each square foot serves a purpose. The design should also able to facilitate smooth operations and enhancing the healthcare services, fulfilling the ๐Ÿ๐ฎ๐ง๐œ๐ญ๐ข๐จ๐ง๐š๐ฅ๐ข๐ญ๐ฒ.๐Ÿง๐Ÿง

While providing our construction services to our client, we also take note on the ๐ž๐š๐ฌ๐ž ๐จ๐Ÿ ๐ฆ๐จ๐›๐ข๐ฅ๐ข๐ญ๐ฒ of a patient in the space planning such as wide, well-lit corridors and strategically located waiting areas. All these strategic approaches are necessary to prioritizes both patients and healthcare providers.

In terms of aesthetic, we introduce ๐ฐ๐š๐ข๐ง๐ฌ๐œ๐จ๐ญ๐ข๐ง๐ , a decorative architectural element to the interior wall. This design feature serve both aesthetic and functional purposes, adding visual interest while also protecting the lower portion of the wall from wear and tear.

The uses of timber ๐ฅ๐š๐ฆ๐ข๐ง๐š๐ญ๐ž๐ ๐ญ๐ข๐ฆ๐›๐ž๐ซ ๐Ÿ๐ฅ๐จ๐จ๐ซ๐ข๐ง๐  not only provides comfortable surface underfoot. It is well-suited for the heavy foot traffic and potential spills common in clinical settings. The interface between wall and floor is covered up with skirting, which also provide a protective barrier that shield the lower part of the wall from impacts and wear.

Not only architectural elements, we also provide M&E service to our client by setting up the ๐“๐• ๐ฆ๐จ๐ง๐ข๐ญ๐จ๐ซ ๐ฌ๐œ๐ซ๐ž๐ž๐ง along the corridor of the waiting areas, which can provide patients with digital health information, displaying waiting list notification, and more.

We would like to express our gratitude for the opportunity to be a part of this transformative journey. Our commitment to excellence, client satisfaction, and attention to detail sets us apart, and we are confident that the completed renovation will bring joy and satisfaction for years to come.๐Ÿ’ช๐Ÿป๐Ÿ’ช๐Ÿป

MyMaison ๅฎ˜็ฝ‘ ๏ผšhttps://mymaison.com.my

user posted image

user posted image

user posted image

user posted image

user posted image

user posted image

user posted image
TSMy Maison
post Mar 4 2024, 12:51 AM

Casual
***
Junior Member
319 posts

Joined: Jun 2018
๐Š-๐‚๐ฅ๐ข๐ง๐ข๐œ @ ๐‡๐š๐ซ๐ญ๐š๐ฆ๐š๐ฌ ๐’๐ก๐จ๐ฉ๐ฉ๐ข๐ง๐  ๐‚๐ž๐ง๐ญ๐ซ๐ž

Tadaa! I'm not sure how many of you really appreciate the ๐’„๐’–๐’“๐’—๐’† ๐’†๐’๐’†๐’Ž๐’†๐’๐’• in design. Don't you feel that it's truly sophisticated and appealing when you consider how smooth the curvature and workmanship can be in your design!

In K-Clinic, both our team and the client aspire to craft a comfortable, tranquil environment for our customers โ€” a space exuding a cozy and laid-back atmosphere, aligning with the current trend. We envision a sandy ๐›๐ž๐ข๐ ๐ž ๐œ๐จ๐ฅ๐จ๐ซ ๐ฌ๐œ๐ก๐ž๐ฆ๐ž to instill a warm, positive, and inviting ambiance overall.

We aspire to integrate the graceful curve element from the frontage, seamlessly extending it to the service reception counter. The counter will be adorned with well-lit backdrop featuring tasteful strip lighting to evoke a sophisticated ambiance. Our objective is to instill a sense of visibility and seamless connection, thereby crafting a cohesive experience when you visit the clinic.


011-1665 0288
MyMaison ๅฎ˜็ฝ‘ ๏ผšhttps://mymaison.com.my


user posted image

user posted image

user posted image

user posted image

user posted image

user posted image

user posted image
TSMy Maison
post Mar 17 2024, 11:55 PM

Casual
***
Junior Member
319 posts

Joined: Jun 2018
๐Š-๐‚๐ฅ๐ข๐ง๐ข๐œ @ ๐‡๐š๐ซ๐ญ๐š๐ฆ๐š๐ฌ ๐’๐ก๐จ๐ฉ๐ฉ๐ข๐ง๐  ๐‚๐ž๐ง๐ญ๐ซ๐ž

With a warm and inviting reception, the comfortable waiting area sits adjacent, boasting furniture that perfectly complements the overall color scheme. The laminated timber flooring enhances the space, offering a pleasantly cushioned foot experience while the PVC skirting showcases a great workmanship. ๐Ÿคฉ๐Ÿคฉ

To meet fire safety regulations, sprinkler system is integrated and adheres securely to the ceiling. Moving along the corridor, each room serves its distinct purpose. The treatment room features cabinets with solid surface countertops and sinks, harmonizing beautifully with the light brown cabinet colour. The space is properly zoned, allowing for efficient circulation.๐Ÿฅฐ๐Ÿฅฐ
Enclosed by aluminium folding doors, the pantry exudes practicality and elegance. It is truly a worthwhile expenditure as every dollar spent by the client has served its purpose, achieving both cost-effectiveness and beauty in the outcome.๐Ÿงก ๐Ÿงก

Don't forget to like, comment and share if you like the sharing today! ๐Ÿคฉ๐Ÿคฉ

MyMaison ๅฎ˜็ฝ‘ ๏ผšhttps://mymaison.com.my

user posted image

user posted image

user posted image

user posted image

user posted image


TSMy Maison
post Mar 17 2024, 11:55 PM

Casual
***
Junior Member
319 posts

Joined: Jun 2018
user posted image

user posted image

user posted image

user posted image

user posted image

user posted image

user posted image

user posted image

user posted image
TSMy Maison
post Mar 28 2024, 01:21 PM

Casual
***
Junior Member
319 posts

Joined: Jun 2018
๐Œ๐ž๐ž๐ญ๐ข๐ง๐  ๐‘๐จ๐จ๐ฆ @ ๐ƒ๐š๐ญ๐š๐ซ๐š๐ง ๐Œ๐š๐ฒ๐›๐š๐ง๐ค
It was an absolute delight to collaborate once again with the esteemed bank institution, as we were appointed as the interior-fit out contractor for their meeting room. Our journey began with the meticulous demolition of the space, paving the way for a complete transformation of a more refined and sophisticated working environment tailored to our client's exacting standards.๐Ÿ’ช๐Ÿป
We approached our work with the utmost dignity, ensuring every cent of the budget was thoughtfully invested. We aim to cultivate a highly productive atmosphere within the workstation, achieved through luminous lighting fixtures designed to enhance focus and productivity. Carpet tiles not only serves for their aesthetic appeal but also for their practicality in ease of maintenance.๐Ÿคฉ
The incorporation of crafted wall panelling adds to the visual allure of the space. Every aspect of the mechanical and electrical components has been attended to, with seamless integration of low-voltage accessories such as CCTV, ACMV systems including air conditioning and exhaust, and strategically positioned electrical points and sockets, complemented by projector setups. The built-in furniture and desks, thoughtfully designed with integrated socket points to ensure efficiency in the meeting room. ๐Ÿ‘๐Ÿป

MyMaison ๅฎ˜็ฝ‘ ๏ผšhttps://mymaison.com.my

user posted image

user posted image

user posted image

user posted image

user posted image

user posted image

user posted image

user posted image

TSMy Maison
post Apr 15 2024, 11:57 PM

Casual
***
Junior Member
319 posts

Joined: Jun 2018
๐Œ๐š๐ฒ๐›๐š๐ง๐ค @ ๐Š๐‹๐ˆ๐€

We are dedicated to serving our customers with unwavering passion, consistently providing effective solutions and exceptional services. This commitment to excellence is exemplified by the growing number of returning clients who entrust us with their reinstatement projects time and again. We extend our gratitude to Maybank for their continued partnership. Currently, our focus is on delivering reinstatement services at Maybank at KLIA.๐Ÿ˜„๐Ÿคฉ

While it's common for construction sites to appear disorderly before completion, we prioritize site safety above all else. We recognize that attention to detail is paramount, as the final finish greatly influences the overall client's perception of our work. The quality of our craftsmanship reflects our professionalism . ๐Ÿ‘๐Ÿป

As a builder, we shall not overlook the significance of thorough surface preparation. A prepared substrate lays the foundation for flawless finishes. Whether it involves wet work or painting, each stepโ€”from curing time to surface cleanliness to primer applicationโ€”must adhere to stringent standards.
In conclusion, ๐†๐ซ๐ž๐š๐ญ ๐–๐จ๐ซ๐ค๐ฆ๐š๐ง๐ฌ๐ก๐ข๐ฉ = ๐†๐ซ๐ž๐š๐ญ ๐Ž๐ฎ๐ญ๐œ๐จ๐ฆ๐ž!
๐Ÿซก๐Ÿซก

MyMaison ๅฎ˜็ฝ‘ ๏ผšhttps://mymaison.com.my

user posted image

user posted image

user posted image

user posted image

user posted image


TSMy Maison
post May 21 2024, 04:06 AM

Casual
***
Junior Member
319 posts

Joined: Jun 2018

๐‘๐ž๐ญ๐š๐ข๐ฅ ๐‘๐ž๐ง๐จ๐ฏ๐š๐ญ๐ข๐จ๐ง @ ๐‰๐š๐ฒ๐š ๐Ž๐ง๐ž ๐Œ๐š๐ฅ๐ฅ
Retail renovation has always been an exhilarating endeavor for us as builders, as we strive to complete projects within tight timelines, recognizing that time is indeed money. As a proficient design and build team, we continuously hone our project management skills, understanding the role we play in monitoring site progress. Any potential hindrance to the schedule demands swift identification and the implementation of optimal remedial solutions.๐Ÿ‘๐Ÿป๐Ÿ‘๐Ÿป
We take immense pride in showcasing our most recent project for the Chinese restaurant, ๅคฉๅคฉๅฐ็ข—่œ. The scope of includes
a. Installation of drywall partitions made up of gypsum boards and metal studs.
b. Incorporated timber supports in specific drywall areas to accommodate signage installations, ensuring structural integrity and aesthetic appeal.
c. Perfecting existing wall surfaces and adorning them with textured paint.
d. Signage work, adding a distinctive flair to the restaurant's ambiance.
We're excited to provide regular updates on our on-site progress, stay tuned with us!!๐Ÿซก๐Ÿซก
Looking for reliable contractor in Klang Valley area, do contact us below!๐Ÿฅฐ๐Ÿฅฐ


MyMaison ๅฎ˜็ฝ‘ ๏ผšhttps://mymaison.com.my

user posted image

user posted image

user posted image

user posted image

user posted image

user posted image

TSMy Maison
post May 31 2024, 11:36 PM

Casual
***
Junior Member
319 posts

Joined: Jun 2018
R๐ž๐ญ๐š๐ข๐ฅ ๐‘๐ž๐ง๐จ๐ฏ๐š๐ญ๐ข๐จ๐ง @ ๐‰๐š๐ฒ๐š ๐Ž๐ง๐ž ๐Œ๐š๐ฅ๐ฅ

Curious about how LED lightbox advertising menus are made and installed? As a business owner, you're likely calculating the costs for this attention-grabbing display. Don't fret; the production and installation process are straightforward. You'll need proper wiring connected to a timer switch for controlling when the lightbox illuminates. This wiring then links to a driver that regulates the voltage for the lightbox, typically available in 12V or 24V variants.

For optimal luminosity, consider the thickness of the frame. Larger lightboxes require frames around 75mm thick, while smaller ones like A4 sizes can suffice with 50mm. The frame thickness also impacts LED arrangement within the lightbox.๐Ÿคฉ๐Ÿคฉ

Ensure seamless integration with your space by coordinating between your lightbox supplier and carpenter. On-site measurements are crucial to fit the lightbox precisely into the carpentry, accounting for manufacturing tolerances.๐Ÿซก

Placement of the driver is key; some install it inside the frame, while others prefer it at the counter. Consult your lightbox specialist, as the distance between the driver and the lightbox can affect signal transmission.

In this project, we applied SUZUKA interior texture paint for our client. Following the manufacturer's recommendations, we enhanced a partition wall with this texture paint. If interested, feel free to explore their product series on their website.๐Ÿ˜ƒ

Today's insights emphasize the value of experimentation and innovative design in your retail space. Embrace these opportunities; they can significantly enhance your business's appeal.

MyMaison ๅฎ˜็ฝ‘ ๏ผšhttps://mymaison.com.my
๐Ÿ“ฉ : mymaison.design@gmail.com

user posted image

user posted image

user posted image

user posted image

user posted image

user posted image

This post has been edited by My Maison: May 31 2024, 11:36 PM
Skylinestar
post Jun 1 2024, 08:41 PM

Mega Duck
********
All Stars
10,472 posts

Joined: Jan 2003
From: Sarawak
QUOTE(My Maison @ Mar 28 2024, 01:21 PM)
user posted image
*
what wall panel is that? how is that panel attached to the wall? bracket?
TSMy Maison
post Jun 26 2024, 05:39 AM

Casual
***
Junior Member
319 posts

Joined: Jun 2018
๐˜๐ข๐๐š๐ง ๐Š๐จ๐ฉ๐ข๐ญ๐ข๐š๐ฆ @ ๐๐š๐ง๐๐š๐ซ ๐๐ฎ๐ค๐ข๐ญ ๐“๐ข๐ง๐ ๐ ๐ข ๐Š๐ฅ๐š๐ง๐ 

We are thrilled to announce the grand opening of YiBan Kopitiam in Klang Town! This project has been an incredible journey, bringing us a profound sense of accomplishment. The most significant challenge was crafting the intricate curvy shape partitions, which required meticulous precision and expert cutting skills. We, as the dedicated contractors, are proud to have successfully mastered this challenge.
We always recommend our clients enhance their homes or offices with the sophistication of curved partitions. These exquisite designs introduce fluidity, break away from rigid lines, and create dynamic, visually captivating spaces.
With the meticulous application of positive and negative lighting, the ambiance of the entire space, which we aimed to capture and present to our client, is now flawlessly set.
I hope you all get inspired by today's sharing.

https://mymaison.com.my

user posted image

user posted image

user posted image

user posted image

user posted image

user posted image
TSMy Maison
post Sep 29 2024, 12:49 AM

Casual
***
Junior Member
319 posts

Joined: Jun 2018
๐๐š๐ฅ๐ฅ๐ซ๐จ๐จ๐ฆ๐ฌ @ ๐“๐ก๐ž ๐Œ๐ข๐ง๐ž๐ฌ ๐Ÿ
Hello Maison Family!
We're excited to share more of our construction techniques and experiences with you as we continue building high-quality projects and fostering a strong construction community. If you're interested in learning more about our work, don't forget to like and share our updates!๐Ÿ˜†
One of our most recent accomplishments is the completion of a stunning ballroom at The Mines 2, with the theme Oscar & Ocean. This project was a great opportunity for the My Maison Team to collaborate with different subcontractors, and together, we made it a success.๐Ÿ˜
The team tackled the challenge of lifting materials to high levels with the use of a mobile crane, while ensuring everything was done with care. It's a reminder of how crucial planning and coordination are in large-scale projects, especially when it comes to logistics.
The quality workmanship and the attention to detail, from the steel structures to the final checks of sculptures and spotlights, speaks volumes about the standards of this project.
Stay with us and look at how the works go on from time to time. โœŒ๐Ÿป


user posted image

user posted image

user posted image

user posted image

user posted image

user posted image

user posted image

user posted image

user posted image
TSMy Maison
post Oct 6 2024, 11:49 PM

Casual
***
Junior Member
319 posts

Joined: Jun 2018
๐๐ฅ๐ฎ๐ฆ๐›๐ข๐ง๐ , ๐–๐š๐ญ๐ž๐ซ๐ฉ๐ซ๐จ๐จ๐Ÿ๐ข๐ง๐ , ๐ƒ๐ซ๐š๐ข๐ง๐š๐ ๐ž & ๐“๐ข๐ฅ๐ข๐ง๐  ๐“๐ข๐ฉ๐ฌ

Hi Maison Family, how much do you know about the tips/details while your appointed contractor are dealing with toilet construction. Most of you will only paying attention to the final finishes which is the tiling quality, workmanship, sanitary wares looking etc but actually there are more than you should know. These elements ensure long-term durability, water resistance, and proper functionality.๐Ÿ˜๐Ÿ˜†
๐–๐š๐ญ๐ž๐ซ๐ฉ๐ซ๐จ๐จ๐Ÿ๐ข๐ง๐ 
-Ensure the contractor applies waterproofing membranes on floors and walls properly with sufficient curing time before tiling starts, as rushing this can cause leaks down the line. Without a proper waterproofing, you might need to hack over the tiles and redo the entire work again which can cause cost and labour wastage in future.
๐๐ฅ๐ฎ๐ฆ๐›๐ข๐ง๐  ๐š๐ง๐ ๐ƒ๐ซ๐š๐ข๐ง๐š๐ ๐ž
-The drainage layout should be designed to allow proper water flow, with a gentle slope towards floor drains to prevent water pooling.
-Check that all pipe joints are properly sealed and tested to avoid leaks. It's crucial that the water supply and drainage lines are installed correctly, especially for concealed piping.
-In our progress of works, all of our piping are checked and embedded properly in the wall.
๐“๐ข๐ฅ๐ž ๐’๐ฎ๐›๐ฌ๐ญ๐ซ๐š๐ญ๐ž ๐š๐ง๐ ๐‹๐ž๐ฏ๐ž๐ฅ๐ข๐ง๐ 
- From the photos shown, you could clearly see our workmanship in tiling. We are pretty confident that the works are done absolutely well from the team as we always check and ensure no lippage, no chipped tile are being used.
๐„๐ฅ๐ž๐œ๐ญ๐ซ๐ข๐œ๐š๐ฅ ๐š๐ง๐ ๐•๐ž๐ง๐ญ๐ข๐ฅ๐š๐ญ๐ข๐จ๐ง
- And of course, we have completed the electrical wiring at the earlier stage before tiling to ensure that all the placement of electrical outlets, switches, and light fixtures are in order.
Hope you like our sharing today!

011-1665 0288
MyMaison ๅฎ˜็ฝ‘ ๏ผšhttps://mymaison.com.my
#designinspiration #sitework #่ฃ…ไฟฎ่ฎพ่ฎก #waterproofing #plumbing #tiling #buildwithpassion

user posted image

user posted image

user posted image

user posted image

user posted image


Change to:
| Lo-Fi Version
0.2510sec    0.88    6 queries    GZIP Disabled
Time is now: 28th November 2025 - 11:31 PM