Welcome Guest ( Log In | Register )

20 Pages « < 14 15 16 17 18 > » Bottom

Outline · [ Standard ] · Linear+

 Seeking ways to design & renovate your house?, Happy Learning Together!

views
     
eclectice
post Mar 9 2023, 10:57 AM

Look at all my stars!!
*******
Senior Member
2,734 posts

Joined: Mar 2008
QUOTE(My Maison @ Aug 15 2021, 02:21 AM)
PROJECT B - Renovation of Toilet Areas

Topic: Hacking and Plumbing

user posted image
user posted image
user posted image
user posted image
*
I'm always curious about how the water pipes for drains and inlets are laid out inside the floor base... Do you have any pictures or a typical water piping layout for the ground floor and upper floors?

This post has been edited by eclectice: Mar 9 2023, 10:58 AM
TSMy Maison
post Mar 10 2023, 12:09 AM

Casual
***
Junior Member
319 posts

Joined: Jun 2018
#InteriorPaint # ExteriorPaint #Weathershield

Normal Interior Paint & Weathershield paint

Do you think that painting work is easy? There are actually a lot of facts in which you as a client should understand in order for you to monitor the work progress at site. In todayโ€™s topic, I will share with you some basic ideas on Normal interior paint & Weathershield paint.
As a basic, paint is made of pigments, binders (resin), solvent (thinner)and additives. Pigments gives the paint the colour and opacity. Binders are the โ€œglueโ€ that allow the pigment to adhere to the wall surface. They can be separated into alkyd/oil-based and water-based (acrylic and latex). It is important as it determines the performance of paint. High quality paint has high concentration of binder. It improves adhesion, more resistant to cracking, UV light and abrasion.

Solvent, reduces the viscosity of the paint and evaporates after the paint is dried, leaving the pigment on the surface. Additives, chemical that provide the properties of the paint. They improve the appearance, increase resistance to UV, abrasion, temperature changes and more.

So, we know that exterior paint should be able to overcome mildew and fading of colour as the paint is exposed to weather at all times. Interior paint is made to resist staining from occurring. So, it is a must to consult your painter on the suitability of the paint chosen. Do not use a wrong type of paint as interior and exterior paint can be different in their resin flexibility and additives.

However, having a basic understanding of paint is insufficient. How many layers of paints should we apply? With this, we have to go through the technical cut sheet from the paint supplier. Just follow the recommended coating system as your guideline.

As a general steps, repair all the possible cracks, remove dirt & grease as surface preparation. Start by applying 1 coat of sealer/primer, followed by 2 layers of weathershield paint (for exterior) or 2 layers of interior paint (Eg: Dulux Interior Matt Series / Nippon Matex Pro). With this, the works are done! There are always a lot of colour choices for you to choose from. So, consult your reliable contractor/ painter and get the best advices!

I hope you learn something today! It might be a little technical but the more you know about the facts, I believe it can help you a lot in future.

Notes: Technical cut sheet downloaded from online sources for reference and learning purpose!

user posted image

user posted image

user posted image

user posted image

user posted image

This post has been edited by My Maison: Mar 10 2023, 12:15 AM
TSMy Maison
post Mar 10 2023, 12:25 AM

Casual
***
Junior Member
319 posts

Joined: Jun 2018
QUOTE(eclectice @ Mar 9 2023, 11:57 AM)
I'm always curious about how the water pipes for drains and inlets are laid out inside the floor base... Do you have any pictures or a typical water piping layout for the ground floor and upper floors?
*
Normally, while casting the floor slab, we would have pipe sleeve together to allow pipe penetration through the slab to happen. With this, the piping can be connected from floor above/above ground to underground and waste can be discharged to respective areas.
eclectice
post Mar 10 2023, 09:05 AM

Look at all my stars!!
*******
Senior Member
2,734 posts

Joined: Mar 2008
QUOTE(My Maison @ Mar 10 2023, 12:25 AM)
Normally, while casting the floor slab, we would have pipe sleeve together to allow pipe penetration through the slab to happen. With this, the piping can be connected from floor above/above ground to underground and waste can be discharged to respective areas.
*
Do the concealed floor pipes run along the bottom edge of the walls, or can they be spanned diagonally to save pipe joints and fittings? I have a worry that if I drill holes in the floor to place a shower tray, enclosure, or screen, I might accidentally drill through these pipes. How deep are they from the floor surface especially for the ground floor?

This post has been edited by eclectice: Mar 10 2023, 09:11 AM
JL95 P
post Mar 11 2023, 07:44 PM

New Member
*
Probation
3 posts

Joined: Feb 2023
QUOTE(My Maison @ Mar 4 2023, 05:53 PM)
U might need to consider the placement of your aircond. What is the mounting height of your ac and does it looks good with a slightly lower ceiling in your working area?
Same goes to your tv position. Is there any better way to place your tv as your bed is not directly infront of your tv.
*
Thanks a lot for your advise. It's an old building hence a lot of limitation such as the ceiling height. I may just remove the TV entirely. Will decide after move in.๐Ÿ‘

akutaksempurna
post Mar 13 2023, 01:11 PM

New Member
*
Junior Member
47 posts

Joined: Aug 2008


Hello bosses,

I am looking to buy a old 30yo property. Just wondering if I can get a rough quotation for below work..

a) re-wiring whole house
b) change plumbing + change design to new toilet

Its an old piece of house 3 stories around 1100sqft total. 3 rooms + 2 bathroom

Sorry if this is no proper thread to ask ๐Ÿ™ and thank you

This post has been edited by akutaksempurna: Mar 16 2023, 09:25 PM
TSMy Maison
post Apr 13 2023, 12:16 AM

Casual
***
Junior Member
319 posts

Joined: Jun 2018
#๐’๐š๐Ÿ๐ž๐ญ๐ฒ๐†๐ฅ๐š๐ฌ๐ฌ #๐‹๐š๐ฆ๐ข๐ง๐š๐ญ๐ž๐๐†๐ฅ๐š๐ฌ๐ฌ #๐ญ๐ž๐ฆ๐ฉ๐ž๐ซ๐ž๐๐ ๐ฅ๐š๐ฌ๐ฌ

Welcome back to the sharing session today! We will talk about safety glass usage in building design. The usage of safety glass can be very impactful. It is also widely applicable in different scenarios. ๐Ÿค“๐Ÿง

There are different types of glass but only some of them can be classified as safety glass. Annealed/ Float glass is not a safety glass as it will break into small dangerous pieces that can hurt you. It is not suitable to be used at area where human contact is high. To be classified as safety glass, there is a safety requirement to pass. BS EN 12600 (British Standard incorporating with European Standard) is the safety standard test to define the level at which the glass will break safely. The performance of the glass is then classified into a few levels. In short, safety glass (Tempered glass / Laminated glass) will be achieving this standard.๐Ÿ˜Ž

Tempered glass is made of traditional / annealed glass which being heated and cooled rapidly to give safety glass properties. Quickly cooling the heated glass causes outside surface to harden faster than center, making center portion โ€œin tensionโ€, thus more durable and stronger than non-tempered glass. On the other hand, laminated glass is 2 or more pieces of tempered glass or ordinary glass bonded with 1 plastic film interlayer in between.๐Ÿ˜†

Tempered glass is stronger than laminated glass while laminated glass itself is 5 times stronger than annealed glass. Tempered glass breaks and sometime shattering but the small pieces have rounded edges that wonโ€™t cut anyone. As compared to laminated glass, it has PVB/SGP interlayer will hold the glass layers together. When one side of the glass experiences impact, only that side will shatter, but not the entire. Laminated glass is more expensive as compared to tempered glass due to its manufacturing process more complicated. Laminated glass is also soundproofing and reduce UV radiation more compared to others.๐Ÿ˜

Hope this summary gives you better understanding. We can talk more about PVB/SGP interlayer and even other treatment towards glass in order to improve their properties in future. Looking for professional design and build team in Klang Valley, drop us a message via contacts below!๐Ÿ˜„

user posted image

user posted image

user posted image

user posted image

user posted image

user posted image
johorian
post Apr 17 2023, 04:02 PM

Getting Started
**
Junior Member
159 posts

Joined: Sep 2009


Hi, can share contemporary staircase lighting design (led)?

Is it more appropriate to be installed at handle or wall (concealed or exposed type).
hihihehe
post Apr 17 2023, 04:08 PM

10k Club
********
All Stars
13,781 posts

Joined: Jan 2006
From: stress & confuse world


is it normal for shallow or short depth drawer slide wobbles when opened?

my carpenter said it's normal because of shorter depth but i skeptical about this.
TSMy Maison
post Apr 21 2023, 04:23 PM

Casual
***
Junior Member
319 posts

Joined: Jun 2018
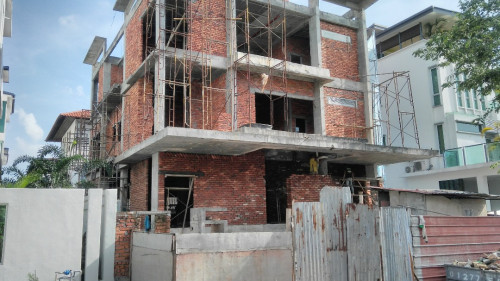
#Construction #Brickwork

Welcome back to the sharing session today! We will talk about the basic brickwork construction in this industry. We are glad that we are able to guide you steps by steps on how we work from start to end. As mentioned earlier, the more you know, the easier for you to monitor the entire working process to assure quality!
The method statement below simplified all of the important steps, and I hope you learn something today:
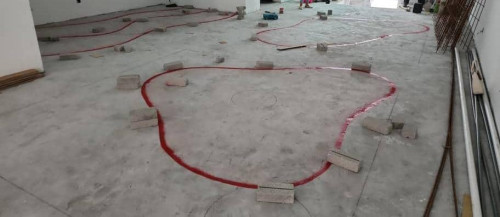
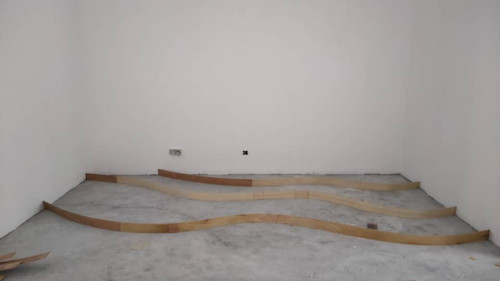
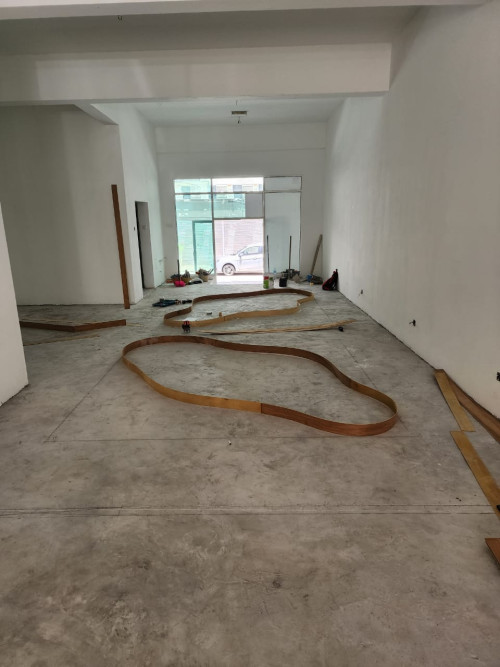
1. Firstly, fix the location and position of the brickwork by setting out the reference line.
2. Confirm the allowance of openings with other trade contractors such as aluminium & glazing contractor, plumber etc. Initial planning and locate the service pipe sleeves / provision of openings are needed.
3. Inspection of bricks are conducted to ensure all of the materials are in good condition. Damaged masonry units are not allowed to be used.
4. Mix mortar to the proportion.
5. Transport the mixed mortar to brick laying area with wheelbarrow.
6. Bricks are firstly soaked in water for at least half an hour to gain moisture.
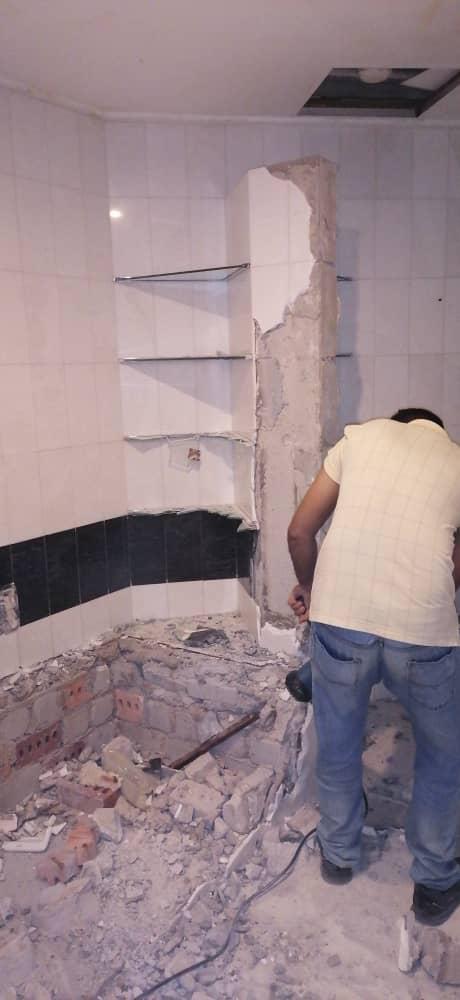
7. Clean the supporting surfaces and remove loose mortar before start laying.
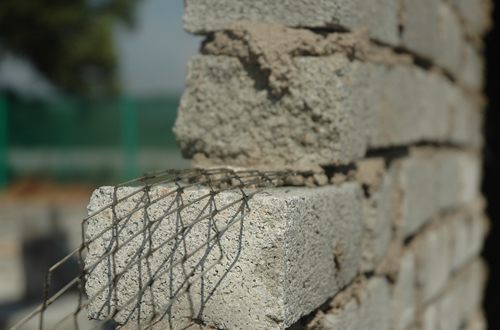
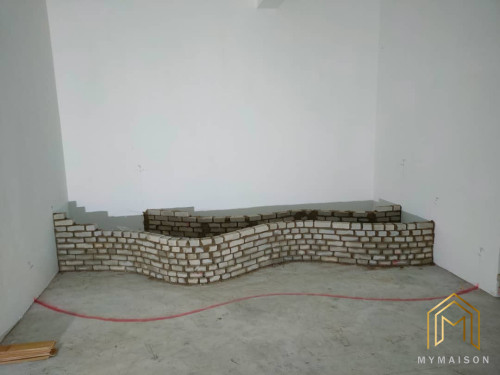
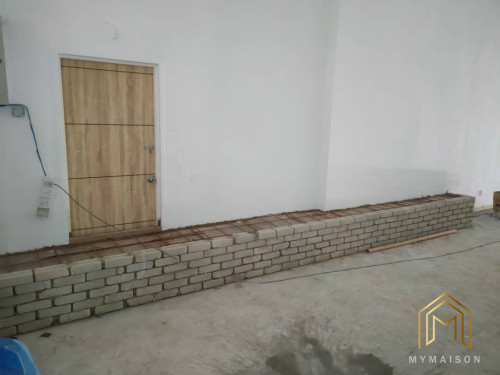
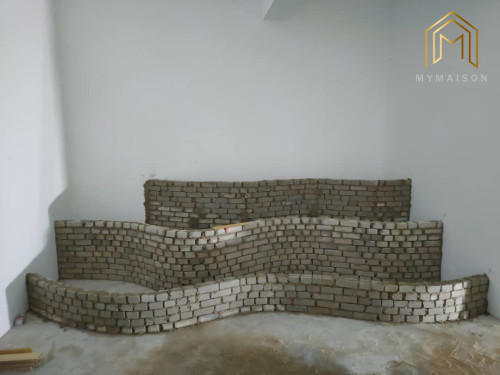
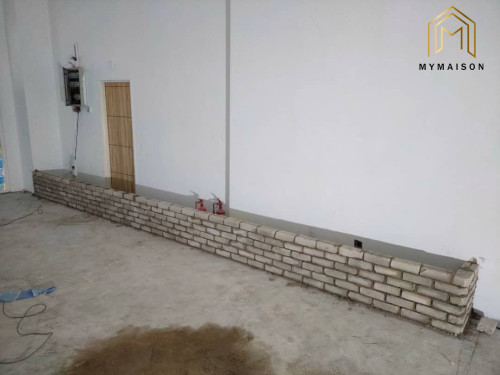
8. Stiffener shall be provided at every 3m in both horizontal and vertical directions as long span of brickworks are unable to retain its strength. The bricks should be tied back to the RC structure.
9. Place the mortar onto the bricks with spatula.
10. Lay the bricks layer by layer with 10mm gap of joints.
11. Use a plumb and spirit level to control the verticality.
12. Place expanded metal reinforcement mesh every 4th course of bricks to increase the reinforcement strength.
13. Starter bar / Brick ties secured to the stiffener / column shall be provided every 4th course of brickwork. Both expanded metal reinforcement & brick ties shall be embedded completely in mortar.
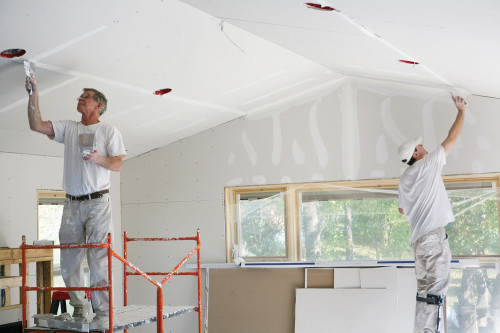
14. Supervisor shall inspect the quality of works upon completion, sign off or rectify the non-quality works.

Protective measures:
1. Material shall be kept as cool as possible to avoid the masonry units from absorbing the water from mortar, which result in cracking.
2. Masonry unit shall be placed on top of mortar during laying.
3. Use fog spray / wall covering to ensure sufficient moisture retain on the brickwork during curing.
4. Cover the wall after construction to slow down the rate of water loss from masonry.

Additional tips:
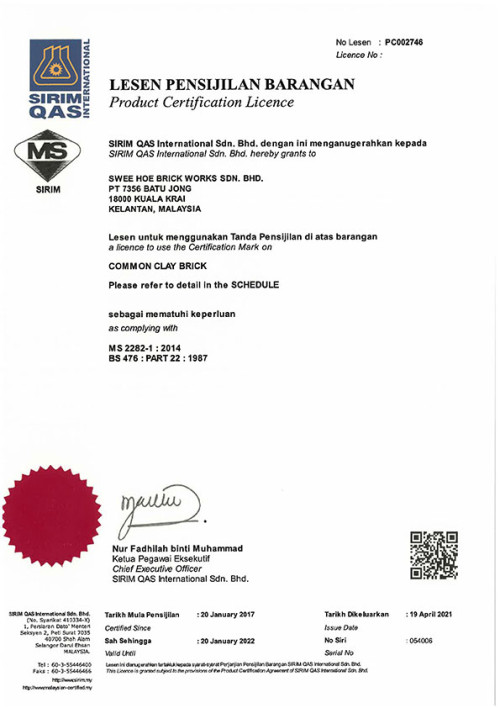
1. SIRIM certificate with test report are always requested from during approval of material to ensure the building materials submitted are qualified to be use.
2. Certain Malaysian Standard requirement test are introduced to monitor the compressive strength, initial rate of water absorption, dimension and tolerance of brick units.
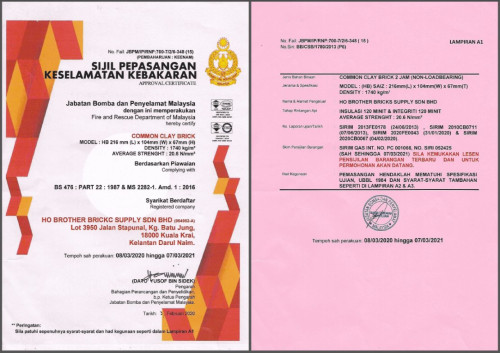
3. It shall always comply to fire test requirement โ€“ โ€œSijil Pepasangan Keselamatan Kebakaranโ€ in order to prove the material properties.

user posted image

user posted image

user posted image

user posted image

user posted image
TSMy Maison
post Apr 22 2023, 11:46 PM

Casual
***
Junior Member
319 posts

Joined: Jun 2018
#๐‚๐จ๐ง๐ฌ๐ญ๐ซ๐ฎ๐œ๐ญ๐ข๐จ๐ง #๐๐ฅ๐š๐ฌ๐ญ๐ž๐ซ๐ข๐ง๐ ๐–๐จ๐ซ๐ค

A brickwork itself isnโ€™t complete without a proper finishing coat. Depending on the substrate, whether it is a brick wall, rc wall or even concrete block wall, different manufacturer will have their own products that are designed to adhere proper base and finishing skim coat / render to the substrate. We will share with you about the work methodology of plastering work for todayโ€™s presentation.

Storage:
1. Store cement in covered, dry store area. Cement bags are stacked off the floor with pallet.
Preparatory work:
1. Ensure all joinery items like window frames are completed.
2. Substrate should free from mould oil, grease& contaminated of foreign materials.
3. Surface treatment is needed to remove loose particle. Rectification of wall defects shall be done before plastering.
4. Levelling peg should be installed prior to plastering work to assure evenness.
5. Corner bead / groove line shall be installed for all column and wall by referring to level peg thickness.
6. Weld mesh / Fibre mesh is used between two different substrate as a reinforcing layer for external plaster, preventing appearance of cracks.

Working methodology:
1. Mix gypsum/cement plaster with mixer as per manufacturerโ€™s mix recommendation.
2. Dampen the substrate surface that will receive plaster.
3. Apply undercoat mix by laying on with a trowel.
4. Press the mortar well and enclose the mesh.
5. Plaster finish shall be plumb level without trowel marks.
6. Ensure the thickness and accuracy of plastering coating
applied.
7. When coat hardens, proceed to apply next coating until final coating to
8. Do consult your manufacturerโ€™s working guideline before commencement of work.

Inspection:
1. Check the surface level evenness
2. Check the application of bonding agent based on recommendation.
3. Check the straightness and squareness of wall corner
4. Quality of termination line
5. Ensure surface defect, cracks and hollowness are rectified.

Tips: Visit more manufacturerโ€™s website for their product info and application method.

user posted image
TSMy Maison
post May 1 2023, 10:28 PM

Casual
***
Junior Member
319 posts

Joined: Jun 2018
QUOTE(hihihehe @ Apr 17 2023, 05:08 PM)
is it normal for shallow or short depth drawer slide wobbles when opened?

my carpenter said it's normal because of shorter depth but i skeptical about this.
*
I dun think that a shorter depth drawer can create unpleasant usage experience. How short the depth can it be as i guess the carpentry items is quite standard in terms of dimension and functions. Just promise that the final outcome is accepted by you as a client before sign off the works.
TSMy Maison
post May 1 2023, 10:32 PM

Casual
***
Junior Member
319 posts

Joined: Jun 2018
#๐‚๐จ๐ง๐ฌ๐ญ๐ซ๐ฎ๐œ๐ญ๐ข๐จ๐ง #๐’๐ค๐ข๐ฆ๐‚๐จ๐š๐ญ

How much do you know about skim coat. It is normally applied to provide thin and smooth coating onto rc surface. It is a polymer modified cementitious building material, ideally used for general filling and patch up. Letโ€™s discuss in detail in todayโ€™s session.

Preparatory work:
1. As usual, clean the surface by removing all the loose particle, unhardened cement residue.
2. To patch on the concrete joints with more than 3mm tolerance.
3. Substrate should be free from oil and other particle to provide strong adhering bond to skim coat.
4. Dampen the dry concrete / rendered surfaces prior to skim coat application.

Working methodology:
1. As per manufacturerโ€™s recommendation, mix the base coat material with clean water by using mechanical mixer until homogenously mixed.
2. If the material is unused for more than 30 minutes, they have to remix with mixer before use again.
3. Around 2 to 4mm of base coat are applied to the substrate using steel trowel. Natural air curing is sufficient.
4. Finish coat mix is prepared as well. Thickness range 1 to 2 mm per coat is applied onto the touch dried base coat surface. Minimum 2 coats of finish coat is needed to achieve required thickness.
5. Sand paper polishing is needed followed by the application of painting. However, subject to specialistโ€™s recommendation, it depends on the curing duration of the skim coated surface before painting work is conducted.
Same goes with other building material, skim coat material has to comply with certain standard in order to pass the technical properties, such as their adhesive strength, compressive strength, water retentivity and its alkaline resistance.

Adhesive strength โ€“ How well skim coat is adheres to the surface
Compressive strength โ€“ Ability to resist the direct pressure of compression force
Water retentivity โ€“ Ability to resist lost of water from masonry unit
Alkalinity resistance โ€“ Ability to resist fading, discolouring when exposed to alkaline
For your information, hairline crack on skim coat happens when it dried too quickly due to changes in temperature and surface. The poor adhesiveness of skim coat and hot condition can cause the skim coat to crack as well.
In short, it is a simple coating applied to the substrate for smooth and even surface prior to painting application. Hope this summary gives you a better understanding on skim coating process.

user posted image

user posted image

user posted image

hihihehe
post May 1 2023, 10:45 PM

10k Club
********
All Stars
13,781 posts

Joined: Jan 2006
From: stress & confuse world


QUOTE(My Maison @ May 1 2023, 10:28 PM)
I dun think that a shorter depth drawer can create unpleasant usage experience. How short the depth can it be as i guess the carpentry items is quite standard in terms of dimension and functions. Just promise that the final outcome is accepted by you as a client before sign off the works.
*
the depth is about 28cm. i have been arguing with the carpenter and they changed the drawer slide/runner but still wobble.

other drawers with deeper depth and undermount slide got no issue though

This post has been edited by hihihehe: May 1 2023, 10:57 PM
amduser
post May 2 2023, 04:47 PM

Look at all my stars!!
*******
Senior Member
5,542 posts

Joined: Dec 2006


EDITED: will open new thread instead

This post has been edited by amduser: May 3 2023, 08:29 PM
TSMy Maison
post May 24 2023, 11:35 PM

Casual
***
Junior Member
319 posts

Joined: Jun 2018
#Construction #WorkingAtHeight #On-JobTraining

Department of Occupational Safety and Health (DOSH) also known as JKKP in Bahasa Malaysia is a department that is responsible for ensuring the safety, health and welfare of people at work in order to prevent safety and health hazard arising in construction.

Complying to the standard, all of our workers are trained before the commencement of work. Conducted in our JB site, this training program is all about โ€œWorking at Heightโ€. It is a norm for workers to work at elevated place, whereby in the vicinity of an opening or edge, there is a potential of fall to happen. In order to prevent this, basic usage on the fall arrest system is briefed to the workers.

The workers are trained with how to inspect the wear and tears that might appear on the harness, any cuts or frayed areas on lanyard, lifeline and so on. How do we provide maintenance to the system from time to time? How do we access the incoming risk? What are the basic operation skills of the systems? All of the information is taught in this training.

Besides, site safety officer has the responsibility to monitor the workers and works. They are the lead in the team. Workers should be trained with sufficient skills before work. As a lead, plan well and take account of everything, eg: weathers, safety of location, plan for emergencies and so on. Lastly, the training programme adjourn with a group photo. It was a fruitful session for all the participants.


user posted image

user posted image

user posted image

user posted image

user posted image

user posted image
TSMy Maison
post May 28 2023, 04:22 PM

Casual
***
Junior Member
319 posts

Joined: Jun 2018
Can you imagine what will this empty site going to be in the next few months? For your information, a new commercial project located in Sri Petaling is going to pop out soon. Sri Petaling has always been a hotspot for lots of youngster as there are lots of foods and activities around. Once taking over the empty site from the owner, we start off the work immediately. We really take this project seriously as this proposal is going to be fun. We initiate the work by conducting the coordination meeting and site discussion with the appointed Interior Designer. We perform necessary site measurement in order to capture the ID design concept.

Can you guess on the purpose of all these red lines sprayed on the floor slab? I am pretty sure that you are unable to guess what are all these curvy shapes and irregular forms going to be? Feeling excited with the final outcome? Then, donโ€™t forget to follow the updates.

user posted image

user posted image

user posted image

user posted image

This post has been edited by My Maison: May 28 2023, 04:22 PM
TSMy Maison
post Jun 5 2023, 11:15 AM

Casual
***
Junior Member
319 posts

Joined: Jun 2018
#constructionsite #interiordesign #sripetalingๅคงๅŸŽๅ ก #curvydesign

The construction works continue to develop by laying the sand brick around the red marking. Pieces by pieces, we lay the bricks with proportionally mixed mortar as per method statement. The design form starts to appear. Yes, we are creating a formwork for the cast in situ concrete seating. This is a brand-new beverage shops with industrial design concept, which emphasize on the beauty of building material especially the concrete texture / cement paint finishing. To maximise the space, this seating design is definitely worth for all of you to apply in future project. It is highly useable and also great in looking.

After creating the forms for the seating area, we start to place the BRC into the formwork before pouring in the concrete. We always ensure that the BRC being used fulfilling the standard. Any rust steels will never be used for the quality of works.

In this era whereby Instagram, Xiaohongshu (ๅฐ็บขไนฆ), Short videos are in trending, they help to promote the great design to the public rapidly through social media. Thus, most of the owners are willing to spend more on the interior design renovation in order to capture the attention. Anyway, I hope you like our workmanship and stay tuned for our next chapter of sharing!


user posted image

user posted image

user posted image

user posted image

user posted image

TSMy Maison
post Jun 10 2023, 02:53 PM

Casual
***
Junior Member
319 posts

Joined: Jun 2018
#ConstructionSite #InteriorDesign #SriPetalingShoplot #CurvyDesign

Koomi, the brand-new beverage shop in Sri Petaling. The design turns out to be reality when the small built-in steel structures are integrated together with the free seating design. This eliminates the needs of having huge table around. Maximization of seating is achieved. We start to place in some wall decoration / features as part of the design elements.

The M&E items especially AC cassette are set in a tidy orientation. The eyeballs are arranged in a way to create an ambient atmosphere. The site is progressing towards the installation of brand signage with backlit lighting. Each small corners are slowly touched up with detailing. Next, we will start to create the special pavers as flooring and provide cement texture paint as wall painting which gives a very cool yet peaceful atmosphere in overall.
Stay tuned for more updates. Hope you like the design and donโ€™t forget to follow our Facebook page.

MyMaison ๅฎ˜็ฝ‘ ๏ผšhttps://mymaison.com.my

user posted image

user posted image

user posted image

user posted image

user posted image
TSMy Maison
post Jun 12 2023, 01:10 AM

Casual
***
Junior Member
319 posts

Joined: Jun 2018
#constructionjobs #interiordesign#sripetalingๅคงๅŸŽๅ ก #curvydesign

๐‚๐จ๐ฆ๐ฉ๐ฅ๐ž๐ญ๐ข๐จ๐ง ๐จ๐Ÿ ๐–๐จ๐ซ๐ค๐ฌ & ๐‡๐š๐ง๐๐จ๐ฏ๐ž๐ซ ๐๐ซ๐จ๐œ๐ž๐ฌ๐ฌ

Tadaaa!!๐Ÿ‘๐Ÿป๐Ÿ‘๐Ÿป The project has finally come to the end. We managed to complete the renovation project on time and handover to our beloved client. Is the final outcome meeting your expectation? ๐Ÿ˜†

Thanks to the effort from My Maison Team, without their hard works and supervision on the workmanship, this could never be an easy job. Quality check and control is necessary as we always imagine ourself from the perspective of the end users. Thus, it is a great achievement for us!โœŒ๐Ÿป

Hope you like todayโ€™s sharing!

user posted image

user posted image

user posted image

user posted image

user posted image

user posted image

user posted image

user posted image

user posted image


20 Pages « < 14 15 16 17 18 > » Top
 

Change to:
| Lo-Fi Version
0.0342sec    0.55    6 queries    GZIP Disabled
Time is now: 28th November 2025 - 09:33 PM