Welcome Guest ( Log In | Register )

20 Pages « < 12 13 14 15 16 > » Bottom

Outline · [ Standard ] · Linear+

 Seeking ways to design & renovate your house?, Happy Learning Together!

views
     
learningvege P
post Aug 10 2022, 10:16 AM

New Member
*
Probation
4 posts

Joined: Aug 2022
QUOTE(My Maison @ Feb 20 2022, 07:05 PM)
Topic: Toilet Renovation

Title: Dismantling, Hacking, Cleaning

Hi everyone, let's talk about toilet work for today sharing. When we move into a new house, what is the most critical issue that might happen? One of it will be the water issue. Whenever we go for home defect checking, we will definitely put more attention in our toilet, as if water leaks happen, it can cause a lot of trouble to you, and even to your neighbors below your unit.

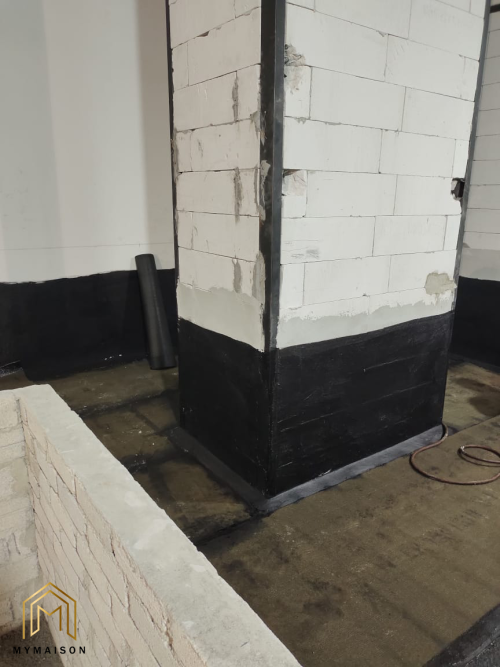
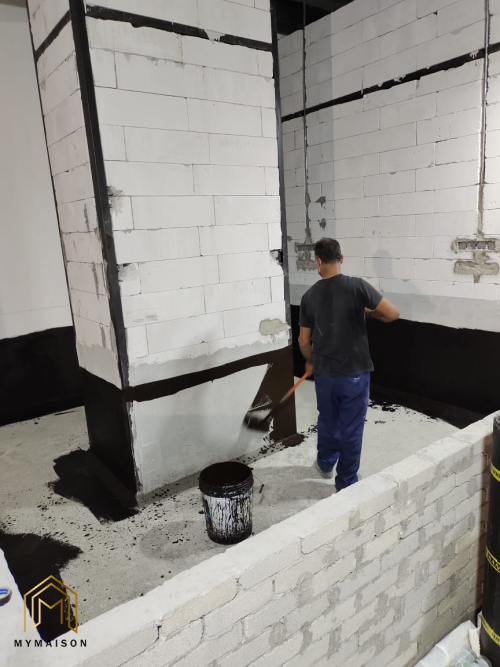
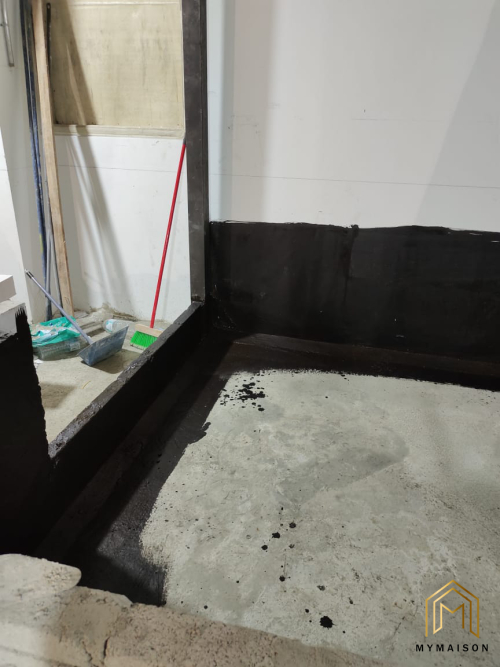
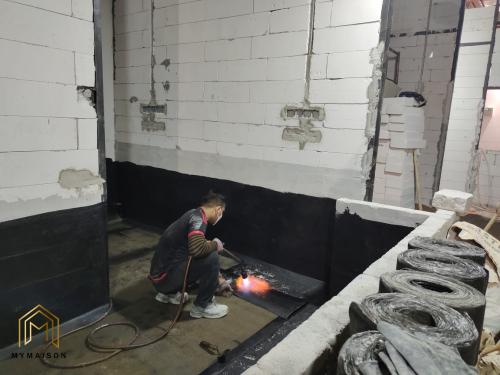
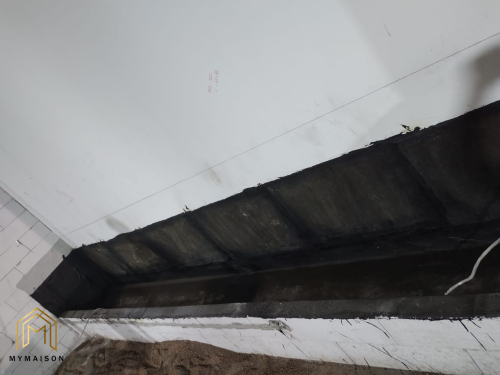
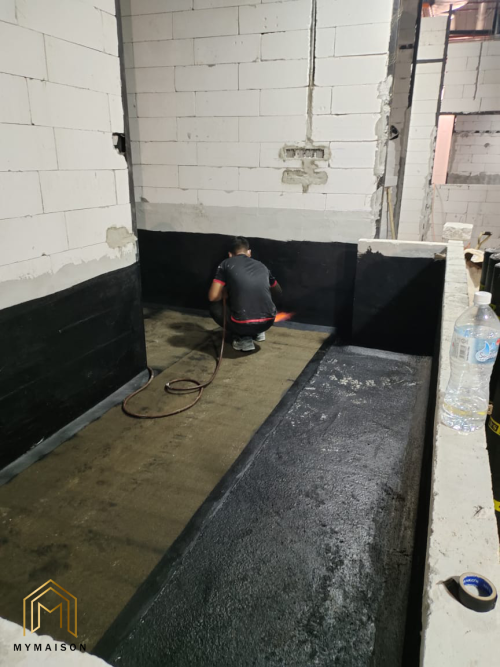
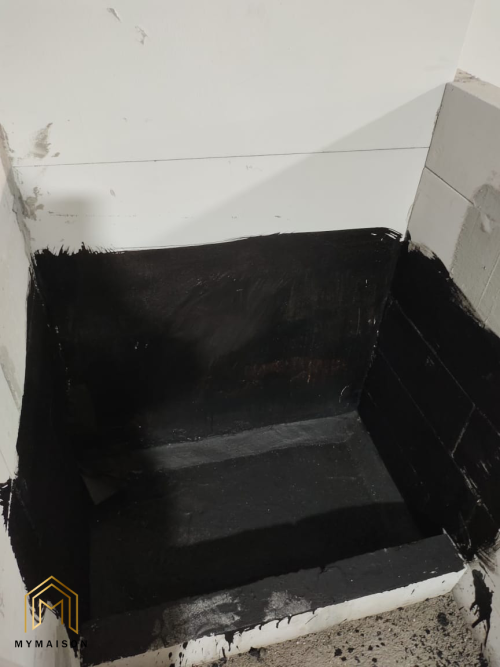
So, water leaks usually happen when waterproofing work in not done properly. So, ensure that waterproofing work is done perfectly before any finishing/ tiling work is fixed on it. Let's scroll back to the beginning of the renovation work in your toilet, if you would like to have yourself a better toilet design.

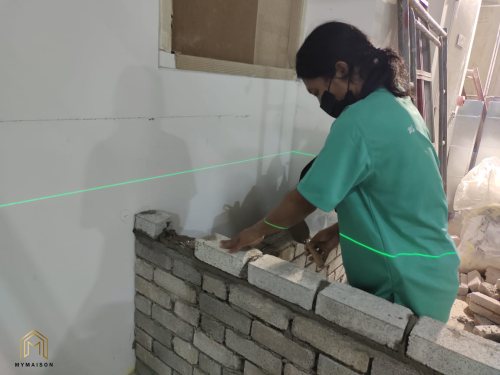
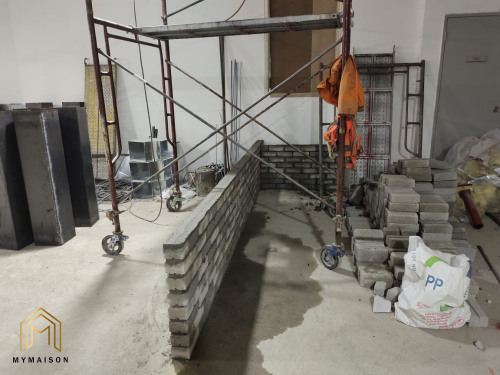
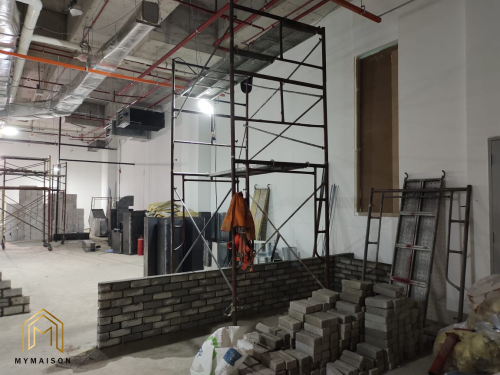
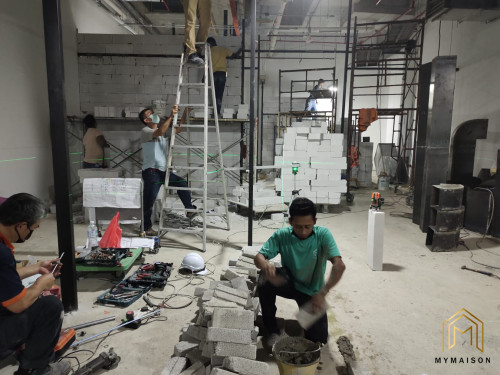
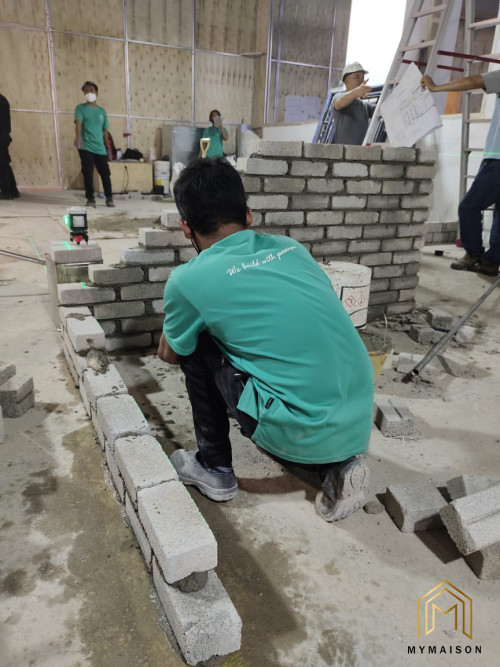
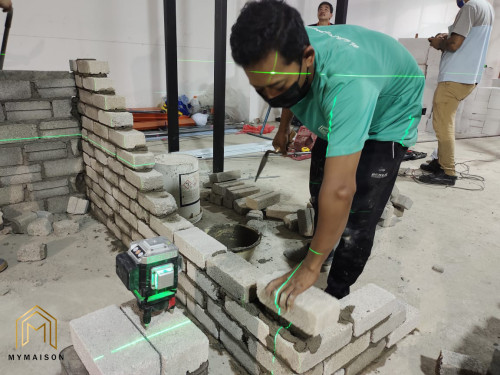
First and foremost, remove all your existing toilet fixtures, such as toilet bowl, basin, shower screen, shower head, water heater etc.
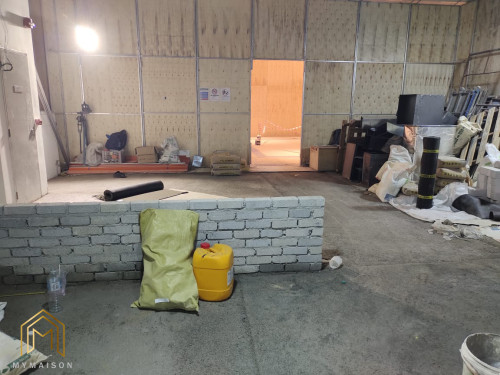
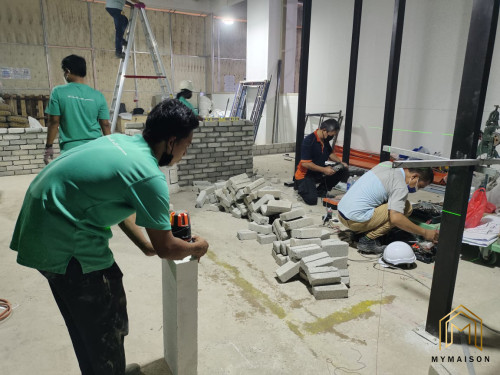
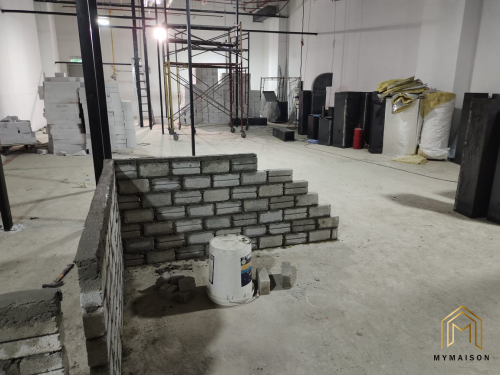
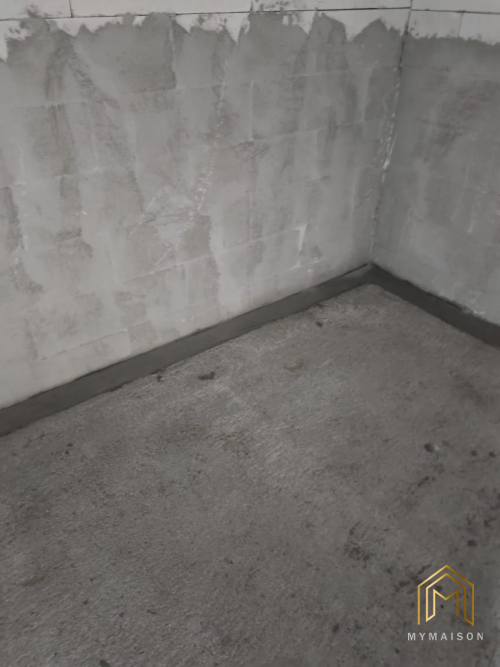
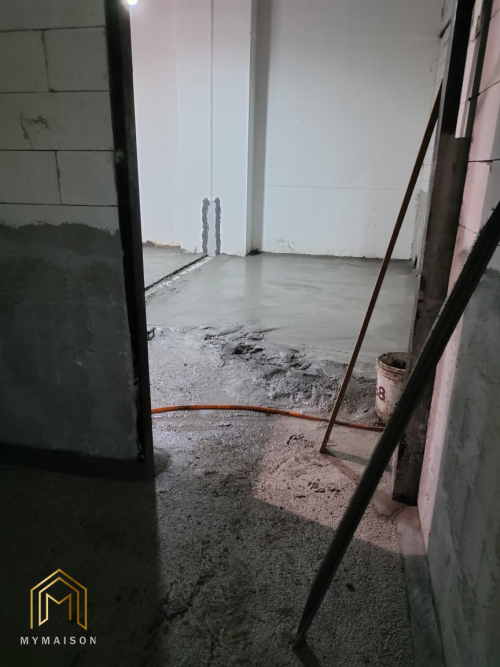
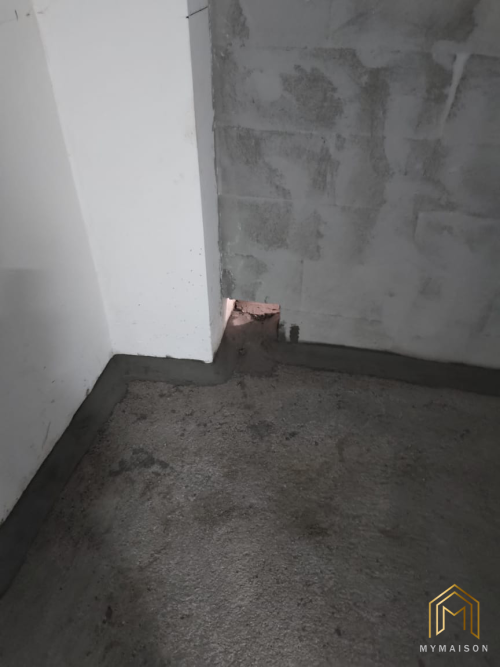
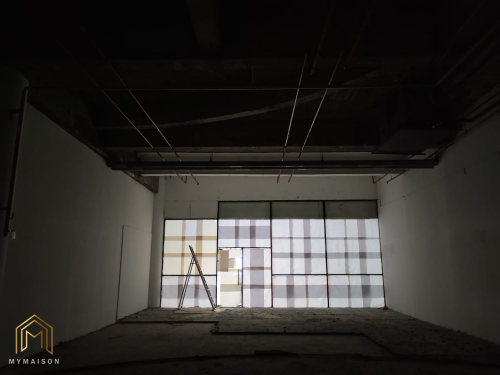
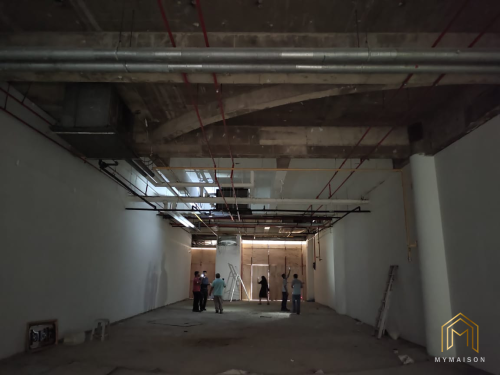
Next, hacking work is done to remove all your tiles. With all the unwanted tiles being removed, its time to clean up the area, remove all your debris completely. pack them into bags and bags. Ensure that all the debris are completely thrown away before your renew work start. Let's see and enjoy our photos shared with you, to know how is our work being done. Hope you really enjoy and learn something new today!! rclxm9.gif  rclxm9.gif  rclxm9.gif
*
Hi MyMaison,
Can help provide your views on Floor Grating/Floor Traps? What sizes would you reommend and what materials? Many materials ranging from Stainless steel/ Brass/ etc. And also what features to look out for? Some i see also have Anti-Insect/Rodents, others have Anti-Odour. DO they compromise water flow? Thanks a lot for your informative thread.
TSMy Maison
post Aug 19 2022, 05:53 AM

Casual
***
Junior Member
319 posts

Joined: Jun 2018
#Workmanship #MyMaison

A good interior designer is indeed important for you, but a contractor with good workmanship is a must. With proper communication and being detailed enough can definitely affect the beauty of the design. Today, we shall share with you one of the project in Kajang. Simple yet basic renovation up to the budget parameter, we extend parts of the area up to their needs.

People might not aware with some of the construction materials, but what affect the pricing the most is definitely the materials. You need to understand what kind of choice u can make to achieve balance. So, what kind of flooring can we provide? Timber flooring can be divided into few types and what are their differences actually?

石塑地板 SPC- Stone-plastic composite. One of the most common material in this industry in order to imitate the use of timber flooring. It is easy to be cut, and it provides "click" over the groove. It is resistance to waterproof and scratch, and it would never affect the original tiles flooring you have as they can be directly installed on it.

Laminate Flooring made of a lot timber fibers, being compressed together into one plank. It is very resistance to scratch as well but not recommend to be use in wet area. It is still one of the hot choices for most of the users. Engineered Wood, not easily to warped but the pricing is definitely higher. It is made out of solid woods, thus once it is being scratched, it cannot be skimmed to its original looks.

Skirting, people might not aware what are the uses of it? For your information, skirting is normally used to conceal some of the unevenness happen between your wall and your flooring. This is one of the trick in order to resolve the termination between tow different materials.

Hope u guys learn something today!!!

MyMaison :https://mymaison.com.my

user posted image

user posted image

user posted image

user posted image

user posted image

user posted image

user posted image

user posted image

user posted image
TSMy Maison
post Aug 25 2022, 01:14 AM

Casual
***
Junior Member
319 posts

Joined: Jun 2018
#MaterialTips #MyMaison


Design Tips!

Its the sharing session again. Let me ask you a question. How do you choose the best countertop material? There are so many choices for you to consider, and the most common and widely accepted by users include quartz, granite, solid surface corian, marble, & laminate. Let me introduce to you in brief, to give you a general idea.

Quartz- Being a manmade stone, its biggest advantage will be its variety of colours to choose from. Despite not the natural stone, the improvement in this industry has succesfully discover a way to imitate the surface and patterns of the natural stone. Quartz is even more durable and water resistance due to its manmade properties. Having a quartz countertop, it allows the cleaning work to be done so easily, as it is non-porous at all. 😁😃

Corian Solid Surface- It does have a lot of colours to choose from. In overall, it give a very neat looking in design as corian can normally be used to make basin and even the countertop backboard. It is non-porous, thus it does not require to be sealed. Quite resistant to the dirt and not easily being destroyed and affected by acidic materials/detergents. However, even it can withstand with heat, but it is not recommended to contact at long period. 😉

Granite- The hardest natural stone. Its toughness is even higher than the knife. It is resistant to heat, scratch and usage. However, due to its natural properties, it is porous, thus we need to sealed their surface every 10 years in order to maintain their quality. With the sealed up granite, it looks more shiny.

Marble – The one and the only one. Same goes to other natural stone. marble is porous and it is more softer as compared to other. It needs to be extra taken care. Remember not to allow its surface to in contact with the dirt, acidic materials too long as they might interact with the surface and destroy the surface.

Laminate - This material is the most suitable to buy when it comes to your tight budget. No matter the baseprice, installation price or even the maintenance fees, laminate is always the most suitable one.
Lastly let's compare the pricing in Malaysia. For quartz, the price can be vary from low to high. It can go even up to RM 600 for the better quality and design. Solid surface, around RM 200. Granite is around RM 100 to RM 500. Marble, the price is differ in accordance with the design and quality. Lastly, the laminate can be around RM100.

Hope you learn something today !!!

Disclaimer: Pictures are downloaded from the Internet, It is shared for reference purpose only.

📞 : +60 11-1665 0288
MyMaison 官网 💻:https://mymaison.com.my
📩: mymaison.design@gmail.com

user posted image

user posted image

user posted image

user posted image

This post has been edited by My Maison: Aug 25 2022, 01:20 AM
TSMy Maison
post Aug 26 2022, 12:18 AM

Casual
***
Junior Member
319 posts

Joined: Jun 2018
QUOTE(learningvege @ Aug 10 2022, 11:16 AM)
Hi MyMaison,
Can help provide your views on Floor Grating/Floor Traps? What sizes would you reommend and what materials? Many materials ranging from Stainless steel/ Brass/ etc. And also what features to look out for? Some i see also have Anti-Insect/Rodents, others have Anti-Odour. DO they compromise water flow? Thanks a lot for your informative thread.
*
Hi sir, sorry for the late reply ya. Missed out your comment previously haha.

There is definitely many types of floor traps, grating in the market and the price can range slightly different. Normally, we would consult the supplier and ask for their catalog cut sheet and do some study. Yes you are right, material can range from plastic to even stainless steel and even more. There are always alot of new products specialised by each company. Normally we would go for what is your needs towards the area, and understand what kind of floor trap you need, and we would propose the most suitable one for you.
Feel free to google some company like SANSICO, JOHNSONSUISSE, PAZTEE Malaysia etc, and there is always surprise for you to compare.
TSMy Maison
post Sep 4 2022, 02:00 AM

Casual
***
Junior Member
319 posts

Joined: Jun 2018
#DesignTips #MyMaison

Furnishing, is it worth to spend more money on it? It is actually something which is not permanent, something that can be moved and replaced from time to time. In terms of selection, what are their possibilities and what are the tips that need to be take note of?

1. Colour -
It is advised that you consider the wall design when selecting your furniture/softcover. What is your mode of design? When the design is more to Modern Cool Grey, it is more suggestable to choose darker colour scheme – Eg: grey/black/white. When the mode is more towards warm, choose the softcover which is more comfortable and welcoming in colour.

2. Quality & Texture-
When selecting the most suitable furniture, we focus on the quality and texture as they are quite important as well. For example, don’t you feel that something that looks light and comfy is more suitable in a Muji design rather than choosing furniture that is elegant, sleek in design.

3. Lighting-
When selecting the lighting fixture, we focus on the colour temperature rather than its brightness solely. Colour temperature is important in creating the atmosphere and mood. They won’t cost you a lot of money. The value it brought is definitely worth than its pricing. A suitable floor lamp can even be the focus point in one space with its ambient lighting.

4. Plants/Carpet/Simple Accessories/Picture Sets
Other than furniture, we can also decorate our lovely home with small plants/simple accessories, suitable picture sets on wall, carpet etc. Please don’t think that carpet is extra as it somehow soften your floor and create a better touch of your feet on floor. If you worry of the dust accumulation, choose short shaggy carpet and vacuum it from time to time.

Hope you like our sharing today!

Disclaimer: Pic 1 belongs to MyMasion Design ; Pic 2-5 are downloaded from Internet for reference purpose only

user posted image

user posted image

user posted image

user posted image

user posted image

This post has been edited by My Maison: Sep 4 2022, 02:02 AM
TSMy Maison
post Sep 17 2022, 12:55 AM

Casual
***
Junior Member
319 posts

Joined: Jun 2018
#renovationproject #CommercialProject #MyMaison

Commercial Renovation Project

We used to share a lot of housing renovation project with some design tips! Let's talk about one of the project we had recently done in IOI City Mall, a shop renovation known as Memories Cafe. We are going to complete the jobs on Mid of September, and passing the two months baby back to the owner! Stay tuned on our completed project photos soon and let's make a comparison between before and after! Let me what you think about it that time.

Shop renovation needs a lot of manpower as compared to small renovation. Just look at how hard our team works! Starting from scratch, we lay bricks by bricks, from nothing to something. We look into details, to ensure that no silly mistake, no leakage, no cracks, no collapse from happening. We follow the rules and regulations set by the management, we follow the SOP and getting approval of start work from the authorities. Starting from site clearance, moving out unused items, hacking, disposing and more, steps by steps, slowly but surely!! rclxm9.gif rclxm9.gif

We arrange proper work program, ensure the timeline is followed all the time. A good discussion with the client, consultant team, site supervisor, inspector of works, management. We work together and ensure that work flows smoothly. We do provide a proper storage area for our materials to be placed, with pallets below. After complete with site survey and clearance, we do markings to ensure that everything built as per approved shop drawings. We provide sufficient render mix, and lay bricks with well-mixed mortar.

Let's call it a day for our sharing today! Let me share with you a more detailed work progress in my next sharing session. Enjoy our photos shared with you to see how we work as a team!!😄😉

Hope you learn something today!!!

Website💻:https://mymaison.com.my


user posted image

user posted image

user posted image

user posted image

user posted image

user posted image

user posted image

user posted image

user posted image

This post has been edited by My Maison: Sep 21 2022, 03:46 PM
TSMy Maison
post Sep 18 2022, 11:19 PM

Casual
***
Junior Member
319 posts

Joined: Jun 2018
#DefectTips #MyMaison

新屋缺陷 House Defect

Hi everyone. Welcome back to My Maison sharing session again. Let's talk about house defect checking for today's topic.
Many of us would think of how am I going to design and renovate my new house after getting my key once vacant possession is allowed. We are so excited about it but do you ever know that before doing this, there is something more important we need to know, which is checking whether there is any house defect in property before we start any renovation works again. Do you know that you are entitled with 30 months of defect liability period, whereby if there are any defects, which are unacceptable, you may request your developer to refine the final works for you.😅

Below are some of the tips for you to have a brief understanding and simple checklist as a guideline.
1. Take as many photos as you can for those defects found in your house. This is for you to attach the so called "evidence" when you submit the house defect inspection report to the developers. You can also make a comparison between before and after.
2. The most obvious thing in your house is definitely the large area wall and floor. You can easily seen if there is any patchy and uneven surface, wall cracks and even water seepage.
3. Is the floor and wall interface good enough? Is the skirting proper installed? Is there any cracks on the door architrave?
4. If there is cracks on floor tiles, or any uneven or deformation of timber floor, you may request for rectification works to be done.
5. Check if there is any water seepage on your ceiling, as water issue might be one of the most critical issue.
6. Check all your doors & windows. Can they operate smoothly? Are they properly sealed up?
7. Check the amount of power sockets, switches. Ensure all of the lights can function well also. No exposed wire can be seen.
8. Check all the water plumbing. Ensure the water pressure is good enough to be used.
9. Ensure that the toilet bowl can be flushed properly. Floor traps are proper installed and water gradients are done perfectly.
10. If there is any cabinet works, ensure the designs are exactly same. Check if there is any missing ironmongeries, accessories. By doing comparison with SPA, you can easily notify if there is any missing. Furthermore, check whether the workmanship are okay. Request for rectification if the gaps between each operable doors are not equal, or if the doors could not function properly.
11. Check if your gate are in good condition, no rusty edges. Check your mailbox condition, is it safe and no sharp edges?
12. Lastly, fill up the inspection from checklist, with the forms to be returned to the developers for their rectification works!

However, my advice to all, we need to know that there is no perfect items in this world. As long as the work is acceptable with no big issue, please don't try to be nitpicky. 😄
Hope you learn something today!😉

Disclaimer: Parts of the photos shared here are from online sources. It's for learning and sharing purpose only!

user posted image

user posted image

user posted image

user posted image

user posted image
BboyDora
post Sep 19 2022, 03:23 PM

Look at all my stars!!
*******
Senior Member
2,361 posts

Joined: Feb 2008
i had PM-ed you
TSMy Maison
post Sep 25 2022, 08:00 PM

Casual
***
Junior Member
319 posts

Joined: Jun 2018
#Materials Handling #Renovation Works #CommercialProject #MyMaison

Brickwork
Welcome back to our “Material Handling” topic sharing session. Previously, I used to share in general about how we arrange our manpower and ensuring our project timeline run within timeframe. For today, let us back to some basic, how do you lay a proper brickwork. rclxm9.gif

During the transportation of bricks at site, we unload the palleted bricks with electric pallet machine. After getting the materials, we inspect if there are any cracks on the received items. Just then, we pack, deliver and store them in a protected storage area to prevent any cracks, breakage and damages. We always ensure that our workers are proper trained before any commencement of work. rclxms.gif

Upon getting the construction drawing, as mentioned before, we set out the locations and positions for brickworks according to the gridline. As our preparatory work, we will discuss with other sub-contractor if there are any openings. We plan and locate if there are any service pipe sleeves. As preparation, we equip ourselves with wheelbarrows, spirit levels, measuring tapes, spatulas, tongs and more. mega_shok.gif

Firstly, mix the mortar to the proportion as required. We then transport the mixed mortar using wheelbarrows to the required area. We ensure that the bricks are all soaked in water before laying. You might be curious why we do so? This is because when the bricks are wet, they will not absorb any water from mortar mix anymore later on. If not, the mortar will not gain enough strength to create a strong bond between itself with the bricks. Soaking also helps to remove unnecessary dust from the bricks. For your information, if we are to construct a full height wall, we will provide RC stiffener for every 3m in vertical and horizontal direction. notworthy.gif

In this case, we place the mortar onto the bricks using the spatula, then lay the bricks over the mortar. Laying work is done layer by layer, slowly but surely to the correct thickness and with suitable type of bond. We also provide expanded metal mesh for every 4 course of bricks, laid embedded in the mortar jointing. We ensure that joints are maintained at 10mm gap evenly during the laying of bricks until the entire work is completed. With proper equipment, we check the verticality of brick wall all the time. Lastly, out site supervisor will carry out inspection to ensure that all the works done are quality and acceptable!

Just when everything is done, we proceed with our waterproofing works, which will be shared with you in next post. Stay tuned! Let’s talk more in future and I hope you learn something new today.
notworthy.gif notworthy.gif

MyMaison Website 💻:https://mymaison.com.my

user posted image

user posted image

user posted image

user posted image

user posted image

user posted image


TSMy Maison
post Sep 25 2022, 08:01 PM

Casual
***
Junior Member
319 posts

Joined: Jun 2018
user posted image

user posted image

user posted image

user posted image

user posted image
TSMy Maison
post Sep 27 2022, 11:31 PM

Casual
***
Junior Member
319 posts

Joined: Jun 2018
#Materials Handling #Renovation Works #CommercialProject #MyMaison

Bituminous Membrane Coating and Torch on Membrane

Welcome back to “Material Handling” sharing session again. Let us continue with the previous topic about commercial renovation project. For today, we will move into a more detailed work program and share with you topic related to waterproofing!

In this project, beside on using typical sand brick, we also introduce the usage of block wall, so called CMU- concrete masonry unit. This precast unit is larger in size and it eventually speeds up our construction work. The CMU walls are having a good resistance over fire, which are suitable to be used in restaurant. The improvement in material properties definitely provides us the opportunity to do better work.

However, our main focus today for today’s topic is actually the application of bituminous waterproofing coating with additional torch on applied waterproofing membrane, which is known as Atactic Polypropylene Plastic modified asphalt (APP). The bituminous membrane coating is in liquid form which include Polyurethane to strengthen the durability and flexibility. With this, it helps a lot in protecting the structure from moisture. There is always a must to do surface preparation. Ensure that the target area is free from loose particles before any the application of bituminous membrane coating. Some equipment we need here include brush or trowel, and we would apply at least two coats of coating over the substrate.

After the primer coat application, we can now apply the torch on membrane. We need to melt the layer onto the surface by using a heated blowtorch. For your information, if the substrate used is wood, then this torch on membrane is not the suitable one to be used, but in our case, we applied it onto a concrete surface. With this membrane, the area will be water-tight, no water seepage will happen and hence no mould, no damage to the carpentry installed later.

You definitely still need some skilled workers to serve the best quality of work. When torching, there are some details we need to take note. For example, the way the membrane overlapped with each other; the speed we roll out the membrane; the amount of heat we torch on the surface and more. Will there be any seam failure occurs? What will be the precautionary steps to handle the blowtorch? How are we going to rectify if there is any damage? These are the reasons why we need to hire a skilled contractor! As I mentioned before, you may not need to know the exact steps for the works, but when you have a concept on how the works being done, it would be an advantage to you.

I hope you learn something new today. Let’s talk more in future.

user posted image

user posted image

user posted image

user posted image

user posted image

user posted image

user posted image

user posted image
TSMy Maison
post Oct 3 2022, 11:02 PM

Casual
***
Junior Member
319 posts

Joined: Jun 2018
Screeding Work

We had talked about how the waterproofing work was done during the last session. For today, let us continue with floor screeding works, what is screeding and why is this necessary?

For your information, the reason of screeding the floor is to create a smooth & flat layer. Screeding work is actually a preparatory work before we can actually lay the floor tiles on it as the final finishing surface. In this case, we would need a screeding bar, a long aluminium bar to work with.

Getting ready with the cement mix, which is cement and sand with ratio of 1:3. Just then, we placed the screed mortar into the bays. Use a level peg to monitor the thickness of screed. Scraping motion is continuously done over the wet surface with the aluminium bar, to fill up the gaps by pushing the excess concrete into the hollows in between. We would also need a hand trowel to tamp the surface, until achieving 20 to 30mm thick of screeding. This is what we called compaction.

For wet area that require a gradient fall to the floor trap, don’t forget that the screeding work has to be done with minimum 1:100 gradient for the water to flow. Some additional tips for you; ensure that the surfaces are cured properly, no visible trowel marks, no ponding should occur upon completion of work. If there is crack, rectify it!

Some protection works that we always monitor:
1. Site traffic is regulated, light foot traffic is only allowed after 48 hours.
2. Protect the screed with plastic sheet / cardboard until it is fully dried and ready for final floor finish.

In our next posting, we will share with you with the design elements we use as our finishing material throughout the project. We move on to design, something aesthetic, and we care the most! Stay tuned and hope you learn something today!

user posted image

user posted image

user posted image

user posted image

user posted image

user posted image
TSMy Maison
post Oct 5 2022, 06:23 AM

Casual
***
Junior Member
319 posts

Joined: Jun 2018
#DesignMaterialSharing #Renovation Works #CommercialProject #MyMaison
建筑材料分享 Architectural Design Material Sharing

看了那么多水泥工,大家往往最好奇的就是Finishing Material 啦!究竟在选择这些材料时,具备了什么样的价值,值得我们去探讨呢?

1. 首先向为大家介绍的这一款网红材料是镂空花砖!它是一种轻性砌块,性质与砖块相似。其实,他非常适用于室内和室外,在建筑学里,我们经常应用它来解决通风和阻挡光线的问题。它可为建筑外形添加一份自然的美感。而回到室内,它常被应用来做隔断,也可为墙体添加一份隔而不断的感觉,装饰性极强,非常有颜值!别担心,它其实拥有很多图案和颜色供你选择,

2. 格子砖。在这一次的项目中,我们大量使用了不同种类的格子砖,这包括了长形和方形的格子砖。它的存在让整体的欧亚设计更为丰富和多元性。其表面有哑光平滑,也有粗糙面供你选择你要的风格!彩色的方砖也在视觉上提出了活泼的感觉,非常有个性。

3. 花砖。一个非常具有特色的设计。比起大面积同铺瓷砖,小花砖的出现终于·打破了沉闷的感觉。统一的选择非常的重要。你可以在这次的项目中,看见地面和墙面颜色统一,蓝色搭配蓝色、白色搭配白色,这样可避免混乱视觉.

好啦,这一系列的网红材料介绍篇,希望你们会喜欢。在这里想非常谢谢顾客对我们的信任,一次次的把不同分行的工程呈交给我们。大家有空,可千万要多多拜访 位于 Sunway Pyramid, Sunway Velocity, IOI City Mall 的 Memorie Cafe 分行哦!偷偷告诉大家,1 Utama Shopping Centre的工程也将在10 月份开始动工,大家可以敬请期待未来的动态哦!

That’s all for the sharing of the day! I would like to take this opportunity to thank our client for trusting our workmanship and professionalism. We are glad to be able to serve the best quality of works to you, Mr. Owner of Memorie Café. And to all of you who are reading this post, I hope you guys enjoy our sharing, please have a visit on any branches of Memorie Café located in Sunway Pyramid, Sunway Velocity, IOI City Mall to have a look on our works! Let’s look forward on our sharing in future, and that will be the new branch in 1 Utama Shopping Centre. Stay Tuned!

大家,我们下期再见!

user posted image

user posted image

user posted image

user posted image

user posted image

user posted image

user posted image

user posted image

user posted image
TSMy Maison
post Oct 5 2022, 06:24 AM

Casual
***
Junior Member
319 posts

Joined: Jun 2018
user posted image

user posted image

user posted image

user posted image

user posted image

user posted image

user posted image

user posted image

user posted image
TSMy Maison
post Oct 13 2022, 09:49 PM

Casual
***
Junior Member
319 posts

Joined: Jun 2018
#NewProject #Renovation Works #CommercialProject #MyMaison

场地考察 Site Recce

Tadaa!! 又是一场新Project 啦!这一次,我们随着团队来到了1 Utama Shopping Centre Old Wing 来做考察啦!除了详细了解场地之外,我们也要和负责人接洽,了解规则才能动工啊!看看这些照片,是不是很阴森呢?大家可别太担心,小编相信我们的团队,绝对可以把这一次的难题胜任并完成,相信设计的力量!!

每一次的开始都是一个尝试,究竟还有什么未知的可能性等待我们,关注我们,一起看下去吧!

Tadaa!! Here comes our new project! This time, we followed the crew to 1 Utama Shopping Centre Old Wing to do a thorough Site Recce. Beside on knowing the client requirement, the site condition, we also met the management officer to discuss in details! Look at all these photos, it might look dull and bare, but don’t worry! We would definitely convert this into something incredible in future, lets believe the power of designing!

Every time we start a new project, there is always a new chance for us to explore the possibilities. Follow us and continue to explore in this journey of renovation!


user posted image

user posted image

user posted image

user posted image

user posted image

user posted image

This post has been edited by My Maison: Oct 13 2022, 09:50 PM
TSMy Maison
post Oct 16 2022, 11:59 PM

Casual
***
Junior Member
319 posts

Joined: Jun 2018
#MaterialTips #MyMaison

亚克力灯箱 Acrylic Lightbox

大家好,今天小编想和大家继续分享材料的小知识,市面上的亚克力灯箱究竟有什么好处?
对于很多的业者而言,甚至是许多连锁店面,你都不难发现他们都应用了灯箱来打造光鲜亮丽的门面。灯箱不仅仅可作为你的品牌标识,丰富化logo的 设计,灯箱更让整体店面的设计更如画龙点睛。在广告牌宣传和装饰上,灯箱的存在吸引了消费者的眼球,无论白天或夜晚都能带来光线亮丽的效果。灯光的营造,也让店铺更加美观。
它之所以优势很大,是因为性价比极高,使用周期很长,维护成本低,安装费也不高。把你想要的设计和想法提交给专业的技术人员,无论是字体的选择、图案、颜色、你都可以得到你像要的效果。😃😃
在板材的选择上,若是使用在户外的灯箱,建议选择较厚和结实的亚克力板。它之所以称之为吸塑灯箱,主要原因即是将塑料片加热使变软,再采用真空将塑料吸附在模具的表面,所以模具的制作过程是非常的重要,它的精准度往往决定了成品的美观。至于图案的呈现就是将它打印在亚克力板上,便可以呈现出画面。最后,选择适合的灯条性质和灯光效果即可完成!🤘🤘
希望大家还喜欢这次的介绍,小编认为亚克力灯箱是一个很不错的选择,但千万记住要选择专业的师傅制作,以避免踩雷吖!🤘🤘😃😃 🙈🤪🤪😃

Disclaimer:图1- 4 为My Maison 所属;图5-7为网络摄取,仅作为参考用途


user posted image

user posted image

user posted image

user posted image

user posted image

user posted image

user posted image

TSMy Maison
post Oct 19 2022, 11:48 PM

Casual
***
Junior Member
319 posts

Joined: Jun 2018
#MaterialTips #MyMaison

无把手设计 Non-Handle Profile Design[/B]

说到家里的收纳空间,肯定少不了木工工艺。什么?不想要看见把手在柜子上,觉得碍眼,那就让小编来介绍你一些无拉手设计,喜欢的记得点赞收藏,也许下次装修时,可以派上用场哦!👍🏻😆😁

1. 门板下延1cm - Extend the door panel downward for 1cm
这也许是最普遍、最简单、最易明白、也是最直接的方式来打造你的无把手设计。然而这类型的设计更适用于吊柜。让你的吊柜门板向下延伸1cm, 让手指有足够的空间拉钩门板即可。相较于突兀的把手,这绝对是更好的选择!

2. 2片L 形挡板 - 2 pieces of backboard
这种直接的制作方式不需要特别的技术来制作。木工师傅只需要增加2片挡板在后方,再搭配上延的门板即可。透过这简单的搭配,便可形成小空间以让手指拉钩门板!挡板的颜色可选择与门板不同,让地柜的颜色搭配更有层次感。

3. 45°斜切角门板 - 45° Cut-off shape door panel
常用于抽屉或餐边柜,45°斜切角门板让你的柜子更具有特色。在门板上切出一个45°斜角,手指在拨动门板时也可以摆放得更加舒适。

4. 凹糟门板 /内崁式型材 - Extrusion inserted
凹槽门板的造型更为多样化。你可以和木工师傅讨论你的想法,让师傅设计出适合你的凹槽门板。通常适用于高柜,衣柜、壁柜等。不单单是设计在门板上方,你也可以把凹槽设计在门板侧边,一切根据需求所定!内崁式型材也可以是金属/不同颜色的塑料型材,以达到不一样的层次感!

5. 反弹器 Door panel damper
反弹器的使用需要一个回按的动作,才可以把门板关紧。所以,在你顺手的地方装下然而反弹器不适用于收纳太重物品的抽屉,这也许会导致反弹器失效。🧐🤪

user posted image

user posted image

user posted image
TSMy Maison
post Oct 22 2022, 08:51 PM

Casual
***
Junior Member
319 posts

Joined: Jun 2018
#LightingMaterial #DesignTips #MyMaison

线性灯 Strip Lights


又是那一层不变的主灯设计,你是不是一样看腻了那圆圆或方形的射灯了呢?我想要家里有个出彩的地方,到底该要这么做啊 👀👀?别担心,你绝对可以和别人不一样!今天小编想和大家介绍几款线性灯。不瞒你说,这是小编非常喜爱的一款设计哦!线性灯的玩法千变万化,其中包括阳角线性灯、阴角线性、平面线性灯、回光灯槽线性灯、下洗墙线性灯等等!👍🏻 🧐🤨

1. 阳角线性灯
所谓的阳角处,便是两面墙的凸面交界处。在墙角处开槽,把线性灯的型材放入槽中,利用螺丝把它固定在墙上,再利用腻子把型材遮盖到平整即可,最后在槽里贴上灯带便完成啦!装上后的效果绝对可以让你大吃一惊!

2. 阴角线性灯
两面墙凹面交界处,便是所谓的阴角。一样是在阴角处开槽,再以同样的步骤来安装即可!阴角被点亮后,家里整体视觉会更好哦!

3. 平面线性灯
这款线性灯非常的好用,不仅可以固定在墙面,也可以置放在天花板上。设计师有时也会一连把天花板的线性灯一把带到墙身,格外有特色,高级感满满!

4. 回光灯槽线性灯
在吊顶和墙身交界处安装这款回光灯槽,让灯光反射,呈现出来的灯光也更柔和,非常有氛围感,适合用在客厅!

5. 下洗墙线性灯
正如名字一样,这款线性灯直接把灯洗墙,明亮起来但又不刺眼!
总的来说,线性灯绝对可以帮你把家里的氛围感拉满。然而,适当地与射灯做搭配,除了解决了照明功用,一间好看又舒适的家也可以轻松地打造出来!

Boring with the typical lighting design, round, rectangular downlight.......🧐. What if I want to have some special design with lighting, what can i do? Don't worry, u can definitely create something different. Let us introduce with some strip lighting design, which we are also in fond with. We can play alot of design with strips lighting. There is much more flexibility and changes you can made based on your preferences and design mood.

1. Strip lights installed at exposed corner of two walls.
Just imagine you are having a protruding wall surface, it might look massive. One of the trick to treat the wall corner is by installing the strip lights at the corner. Leaving a small gap for the placement of light extrusion. We lock the extrusion on wall with screws. Skim coat or plaster the extrusion to conceal it from eyesight. Lastly, place your strip light into the extrusion. Its simple and nice. The outcome would be awesome with the line of lights running through the wall surface, so call creating a movement in your house.

2. Strip lights installed at embedded corner of two walls.
Not only on exposed corner, we can also light up the embedded corner with strip lights. With same method to install, the dark edges of wall can be lighten up and become the focal point. All of this design depend on how you play with it.

3. Mounted on flat surface
Flat strip light has more flexibility when it comes to design. It can be mounted on flat ceiling, even on flat wall as well. The ambient lights created are not eye-striking, suitable to be used in many areas.

I would say strip lightings has a lot of potential. You may consider it as it is more sleek in design. Dun worry, it can definitely used and designed together with your main light as well. Hope you like our sharing today.

Disclaimer: 图1 为My Maison 所属,图2-4为网络摄取,仅作为参考用途!Pic 1 belongs to My Maison, while Pic 2-4 were taken online for learning purpose only.

📞 : +60 11-1665 0288
MyMaison 官网 💻:https://mymaison.com.my
📩: mymaison.design@gmail.com

user posted image

user posted image

user posted image

user posted image

user posted image


TSMy Maison
post Oct 30 2022, 05:23 PM

Casual
***
Junior Member
319 posts

Joined: Jun 2018
#Construction #Architecture #MaterialTips #MyMaison #lightingmaterial

铝扣板 Aluminium Composite Panel Sheets

Hi everyone, welcome back to our new sharing session again! Today, let us share with you some of the basic construction material, which is abundantly used in this industry, the aluminium composite panel sheet!🤪😃

Just have a look on your living surrounding, the usage of aluminium composite panel can be seen everywhere. For example, the MRT stations, your condominium building façade design / guard house ceiling, residential housing fascia / false ceiling, building wall panelling, internal office partition and more.

So, what is actually ACP panel? It is a lightweight cladding panel, which is so good in enhance the visual appeal and also function as weather resistance of buildings. Made up of two thin sheets of aluminium sheets sandwiching a Polyethylene Plastic (PE) core in the middle, the 4mm thick ACP can withstand more than 10 years after installation. Not only durable, it is light, having high strength, perfect flatness, rigid, bendable for many shapes and weather resistance. Thus, it is always known as a perfect material, to form decorative motive for your building. Don’t you feel that it gives a very classy and satisfying look after installation? 🙈🙈

There are a lot of colours to choose from in the market. Normally, we would give the ACP long lasting finishes. You may decide a powder coated finish or even a pvdf finish. From there, choose the best colour from the available colour chart. I would say it is very versatile and many possibilities of design can be made. For me, workmanship and handling of material is important, especially when we look into the connection of two panel. The joint has to be carefully sealed up and adequate waterproofing as to be done so that no water can seep through the area. For this, it has to be linked to what kind of sealant used. What are each of the types mainly used for? What are the colour we can choose from? Will it be strong enough to hold two pieces of panels together? Will the colour of sealant affect the aesthetic of design? One of our previous project done, hopefully you learn and enjoy something new from us today!!🤘🤘

哈咯大家,又是我们啦!欢迎回到新一期的分享哦!今天想和大家探讨的话题是什么呢?铝扣板,一个建筑业习以为常及普及却令大众都能接受和喜爱的材料。🤪😃
环顾四周, 铝扣板的使用率很高,就如马来西亚的地铁站,公寓建筑设计的建筑材料, 保安亭设计,房子的室外天花, 办公室的隔断,还有很多很多!那铝扣板到底是什么?它是一款轻盈的装饰造型金属材料,增加设计的美感度。厚度仅仅4mm, 但却十分的耐用,可长达10年以上的寿命。它不仅仅轻盈坚固,更拥有平滑的材料表面,也可以被折成想要的形状。不仅如此,适用于户外的它,对下雨也无伤大雅。亮丽的材料可为建筑外层做出设计满满的装饰,也提供了非常Classy 的感觉。🙈🙈

通常呢,选择的材质外层,都会选择提供一层保护层,即应用粉末喷涂 (Powder Coating Surface Finish) 或是PVDF Finish 作为表层。它有一系列的颜色供你选择,取决于供应商,所以你可不用太担心颜色的多元性选择!对我来说,我们更讲求铝扣板的安装细节。两边材质的交界处必须处理好,避免水渗透其中。这是,适当的封密胶就是非常的重要了。不仅仅如此,我们必须确保封密胶足以承担两片铝扣板的重量,还有达到完美的封密性。同样的,封密剂的颜色选择也不容小看,透明?白色?灰色?黑色?🤘🤘

以下是我们的作品,希望你喜欢今天的分享哦!
MyMaison 官网 💻:https://mymaison.com.my

user posted image

user posted image

user posted image

user posted image
TSMy Maison
post Nov 1 2022, 12:01 AM

Casual
***
Junior Member
319 posts

Joined: Jun 2018
#CoatingSurface #MaterialTips #MyMaison

粉末图喷 Powder Coating / PVDF Finish Coating Better?

We talked about the aluminium panel in our last topic, so do you know that what are the treatments did to them before the entire product can be now installed by us? 🤪😃

Definitely, they are treated with final protective and decorative layer so that they are more long lasting and even looks better in appearance. The process is called powder coating treatment or either giving them a PVDF finish. Which on to choose from, it depends on the material suitability and where are they going to be used.

As compared to normal paint, these two treatments are definitely better in quality, and of course more expensive. Powder coating treatment is applying a layer of protective coating with “powder”, let the particles to cure and solidify in factory while PVDF is in liquid form. Powder coating is thicker as compared to PVDF finish, but it doesn’t mean that it is better. 🙈🙈

Both of these surface finishing treatments give the properties of material to withstand better with impact, scratches, chips and higher traffic. They are suitable to be used at outdoor area, like applying on the aluminium windows, aluminium strips etc. However, one of the advantages of PVDF finish material is it is UV resistant, which means adhere better in direct sunlight. They are not easy to fade as compared to powder coating finish, so in long term wise, I would say PVDF finish is a better choice for you.
This also proves that PVDF finish will be more expensive as compared to powder coating finish. In terms of colour choices, powder coatings are available in many colours, whereas PVDF is quite limited. In terms of design, they are so important for decorative purposes and hiding all those surface imperfections of the material. Just like us, bare material would also like to have “dressing” as well.

So, that’s all for our sharing today, and I hope you have a little idea on these, when you are choosing the construction material for your house in future!! 🤘🤘

Disclaimer: Photos are taken online for sharing purpose only.

user posted image

user posted image

user posted image

user posted image


This post has been edited by My Maison: Nov 1 2022, 12:02 AM

20 Pages « < 12 13 14 15 16 > » Top
 

Change to:
| Lo-Fi Version
0.0382sec    0.52    6 queries    GZIP Disabled
Time is now: 29th November 2025 - 01:50 AM