QUOTE(Lurker @ Oct 9 2007, 10:48 AM)
but there is a sanding technique tat does not need any painting rite?

wow really??? share plz...

Model Kits Model Kits/Toys Painting, Building, Modding Thread, Q&A about tips and technique here
|
|
 Oct 9 2007, 04:00 PM Oct 9 2007, 04:00 PM
|
 
Senior Member
2,239 posts Joined: Jun 2006 From: K.L |
QUOTE(Lurker @ Oct 9 2007, 10:48 AM) but there is a sanding technique tat does not need any painting rite? wow really??? share plz... |
|
|
|
|
|
Oct 9 2007, 04:15 PM
|

Senior Member
1,447 posts Joined: Mar 2006 |
QUOTE(VincC454 @ Oct 9 2007, 10:43 AM) you dont sand your kits if you dont intend to paint. If u r really hardworking type, u can sand it spray primer than AB it! Wow so many work! Sometimes i just smoothen the part with the knife!it will make things looks more ugly with all the sand scratch QUOTE(Lurker @ Oct 9 2007, 10:48 AM) but there is a sanding technique tat does not need any painting rite? Yah no painting! The lazy way! But u still some weathering to make it nice!And sanding them is even more work than AB them! |
|
|
Oct 10 2007, 01:09 AM
|

Junior Member
176 posts Joined: Sep 2006 From: KL |
guys..what size is this metal thruster?
i wanna add it to my G-defenser too.  edit: image from keita's site  This post has been edited by kurz: Oct 14 2007, 02:14 PM |
|
|
Oct 10 2007, 07:58 AM
|

Junior Member
431 posts Joined: Oct 2006 From: Hierarchical City of Kagutsuchi |
wanna know, how do u spray coating correctly? and what kind of coating is better for gundam?
|
|
|
Oct 10 2007, 08:32 AM
|
|
Senior Member
1,447 posts Joined: Mar 2006 |
QUOTE(SWATwolf @ Oct 10 2007, 07:58 AM) wanna know, how do u spray coating correctly? and what kind of coating is better for gundam? Of course use those Mr Hobby Flat Top Coat! It is the best! Dont go for industrial clear coat, those are so shiny there are gonna blind ur eyes!For applying them correctly.....this is easy, have some distance between ur kit (around 30cm may do) then spray the top coat on it! Dun focus on a single point! |
|
|
Oct 10 2007, 10:23 AM
|
|
Junior Member
9 posts Joined: Nov 2006 |
hey guys,
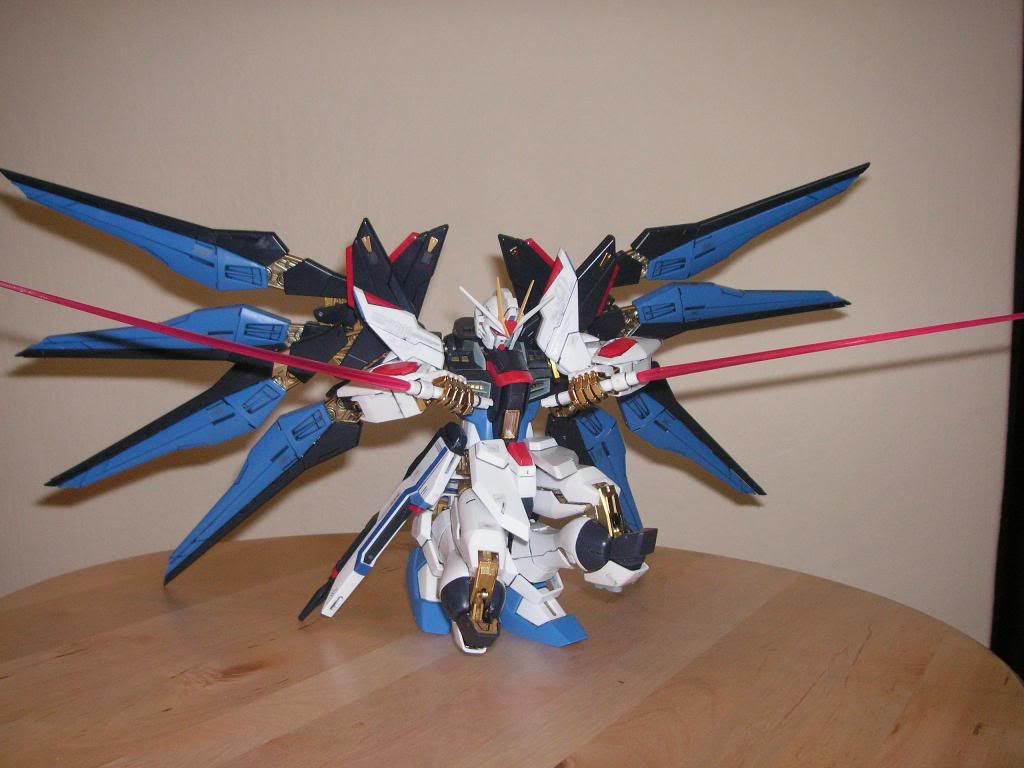
Just wanna ask a question. I completed my Strike Freedom like early this year and paint it a bit using the Gundam Marker ( Beginner for painting ). I am just wondering what will happen to the colour of the model, as I did not apply the topcoat after painting the gundam using the markers. ?? Trying to learn all about gundam painting.  Gonna get a Air Brush when I return back home.  ) )It is too late to apply the top coat when I return back home around Feb. ( the model is completed already with all the decals ). One of the Strike Freedom Dragoon, I painted it with the blue marker and I didnt like it. I was noob enough to take a tissue to wipe the paint off, thats when all the lint stick onto the dragoon. Anyway I can recover this ? thanks guys dante_cool |
|
|
|
|
|
Oct 10 2007, 11:08 AM
|

Junior Member
98 posts Joined: Oct 2006 |
O.o
lesson number 1) don't use tissue to wipe off the paint it may get worst so to recover tat problem use tinner and brush ^.^ lesson number 2) Maker is use to paint detail parts and small object and it not made to paint the big parts especially thing wider than 1 or 2 inc object u may get the feeling to see all ur paint stroke from the maker pen. lesson number 3) Always paint use hand brush or AB with a mile tinner or simaliry with tat other than tat depend on your skill. lesson number 4) repeat leasson 1 to 3 ^.^ and u are doing good |
|
|
Oct 10 2007, 11:18 AM
|
|
Senior Member
2,755 posts Joined: Dec 2004 |
Any good website on model brushing that you guy alway refer too for FAQ?
I think it will help a lot if it's put in thread #1. |
|
|
Oct 12 2007, 05:07 AM
|
|
Junior Member
9 posts Joined: Nov 2006 |
QUOTE(chriswoo @ Oct 10 2007, 02:08 PM) O.o hey Chris,lesson number 1) don't use tissue to wipe off the paint it may get worst so to recover tat problem use tinner and brush ^.^ lesson number 2) Maker is use to paint detail parts and small object and it not made to paint the big parts especially thing wider than 1 or 2 inc object u may get the feeling to see all ur paint stroke from the maker pen. lesson number 3) Always paint use hand brush or AB with a mile tinner or simaliry with tat other than tat depend on your skill. lesson number 4) repeat leasson 1 to 3 ^.^ and u are doing good thanks a lot mate. Just wondering as well, would your recommend I apply the Top Coat afte I recover my problem. Like you said in lesson number 2, I realised there are lot of paint strokes..it looks really ugly. I might need to repaint the DRAGOON WINGS again. You reckon I should apply the top coat after that? cheers buddy. dante_cool |
|
|
Oct 12 2007, 12:49 PM
|
|
Junior Member
5 posts Joined: May 2007 |
QUOTE(300078 @ Oct 9 2007, 04:15 PM) If u r really hardworking type, u can sand it spray primer than AB it! Wow so many work! Sometimes i just smoothen the part with the knife! when you sand..try making your sandpaper wet i use 800grid sandpaper i cut the size out and glue to a block,,dip in water then sand...reduce scratches Yah no painting! The lazy way! But u still some weathering to make it nice! And sanding them is even more work than AB them!  |
|
|
Oct 12 2007, 01:00 PM
|
|
Junior Member
98 posts Joined: Oct 2006 |
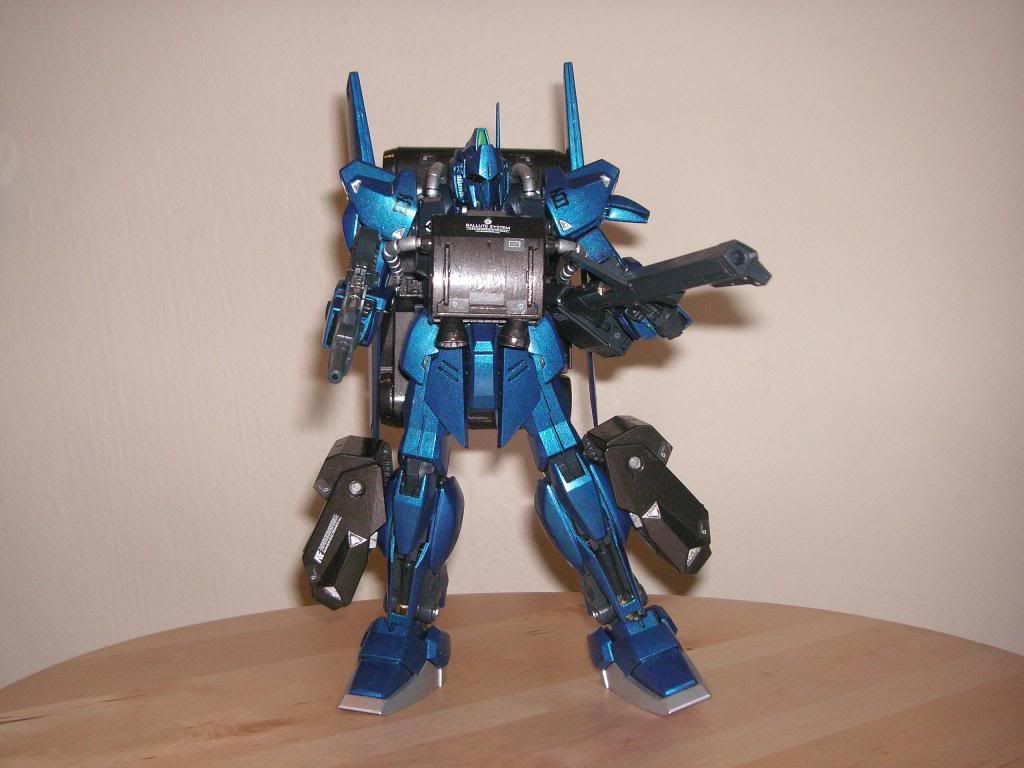
QUOTE(dante_cool @ Oct 12 2007, 05:07 AM) hey Chris, well is not necessay for top coat yet but make sure u make ur final touch then only top coat or u find lot of problem to cover it up if it didn't goes well. well my just touch up and all my model kit didn't apply any top coat. but work nicely.thanks a lot mate. Just wondering as well, would your recommend I apply the Top Coat afte I recover my problem. Like you said in lesson number 2, I realised there are lot of paint strokes..it looks really ugly. I might need to repaint the DRAGOON WINGS again. You reckon I should apply the top coat after that? cheers buddy. dante_cool here the example my strike freedoom and my hayushiki » Click to show Spoiler - click again to hide... « This post has been edited by chriswoo: Oct 12 2007, 01:50 PM |
|
|
Oct 12 2007, 10:08 PM
|

Junior Member
162 posts Joined: Aug 2007 From: Pearl of The Orient |
QUOTE(dante_cool @ Oct 12 2007, 05:07 AM) hey Chris, Ive been using Mr Hobby colours ( the mohawk shaped cap ) for quite some time now... and i dont use thinner to thin my paints before painting... all i do is add a few drops of Mr Retarder Mild... and all the brush strokes are gone. thanks a lot mate. Just wondering as well, would your recommend I apply the Top Coat afte I recover my problem. Like you said in lesson number 2, I realised there are lot of paint strokes..it looks really ugly. I might need to repaint the DRAGOON WINGS again. You reckon I should apply the top coat after that? cheers buddy. dante_cool  UNLESS if the paint is too thick... cause certain colours are particularly thick... like the flat black. Then u will need a drop of thinner or two. UNLESS if the paint is too thick... cause certain colours are particularly thick... like the flat black. Then u will need a drop of thinner or two. My standard procedure : 1. Stir paint bottle with toothpick.... ( dont use it to pick ur teeth after that  ) )2. Use toothpick to transfer the paint onto a Mr Hobby paint tray.. ( available online at xl-shop.com ) 3. Use a drip to transfer a few drops ( u have to test it out yourself... putting too much retarder will make ur paint too thin to paint ) of Retarder into the paint tray. 4. Start painting.  I noticed that the paint will even out ( spread out ) by itself when i leave it to dry... thus removing all the paint brush marks.  Never paint over an area when the area is still wet with paint... it will seriously ruin your work. Never paint over an area when the area is still wet with paint... it will seriously ruin your work. Sometimes the reason u get paint marks is because u use too little paint... make sure u re-dip ur brush after each stroke. And also dont blow a table fan directly onto your painted parts. The whole point of this is to make it dry SLOWER so that the paint will even out by itself... dont worry about smaller details like grooves on your kit... if the right amount of retarder is added, the paint will eventually spread out and u can see the grooves again.  Just my two cents. @ chriswoo Your strikefreedom and hayushiki dont have top coat ? I am considering not to apply topcoats too.  |
|
|
Oct 12 2007, 10:30 PM
|

Senior Member
7,516 posts Joined: Jun 2005 From: Petaling Jaya |
guys! i got my first model kit. my mum got it for me. i was just wondering, how much is it for a bottle of paint?
 cause the instruction booklet says i need, like, 13 colors.. cause the instruction booklet says i need, like, 13 colors..    |
|
|
|
|
|
Oct 12 2007, 10:32 PM
|
|
Junior Member
98 posts Joined: Oct 2006 |
QUOTE(-vip3rleon9- @ Oct 12 2007, 10:30 PM) guys! i got my first model kit. my mum got it for me. i was just wondering, how much is it for a bottle of paint? well 1st of all don't rush buy paint then 2nd u need to see is HG or MG 1st then u tell us wat model kit gundam name then only we can help u cause the instruction booklet says i need, like, 13 colors.. |
|
|
Oct 12 2007, 10:33 PM
|
|
Senior Member
7,516 posts Joined: Jun 2005 From: Petaling Jaya |
that's why i didn't get any paint. eh? this thread for gundam kits only? |
|
|
Oct 12 2007, 10:38 PM
|

Senior Member
2,134 posts Joined: Jun 2006 |
QUOTE(-vip3rleon9- @ Oct 12 2007, 10:33 PM) that's why i didn't get any paint. eh? this thread for gundam kits only? btw, tis thread is for every type of model kits/toys modding/building/coloring. figurines...transformers...evangelion...lol... figurines reli can? LOL This post has been edited by ShinAsakura: Oct 12 2007, 10:40 PM |
|
|
Oct 12 2007, 10:38 PM
|
|
Junior Member
98 posts Joined: Oct 2006 |
erm nope here is all the learning tread for all model kits but give more information about your kits or we can't help you more if we dunno wat kits u having
This post has been edited by chriswoo: Oct 12 2007, 10:40 PM |
|
|
Oct 12 2007, 10:50 PM
|
|
Senior Member
7,516 posts Joined: Jun 2005 From: Petaling Jaya |
ah.. seeing the thread about my kit is kinda dead, why not i ask them sifu's here? lol. it's a Tamiya 1:24 scale plastic model.
|
|
|
Oct 14 2007, 01:13 AM
|
|
Junior Member
431 posts Joined: Oct 2006 From: Hierarchical City of Kagutsuchi |
oh dear... i think i bought the wrong spray....
top coat spray is out of stock... hence the shop intro me this mr.hobby: mr. super clear (semi gloss) when i spray on my gundam... the color melt off. T_T now i have to repaint all over again. |
|
|
Oct 14 2007, 03:26 AM
|
|
VIP
9,270 posts Joined: Jan 2003 From: Somewhere out there |
QUOTE(SWATwolf @ Oct 14 2007, 01:13 AM) oh dear... i think i bought the wrong spray.... Ergh.. that sucks. Actually, the spray is not exactly wrong, I suspect its more to do with how u spray it on.top coat spray is out of stock... hence the shop intro me this mr.hobby: mr. super clear (semi gloss) when i spray on my gundam... the color melt off. T_T now i have to repaint all over again. Its likely that u held the spray too close to the model. Those spray cans has got a pretty high velocity, as well as a high volume output, so u need to hold the can from at least 12 inches away. This' why I tend to regard those spray cans as rather wasteful, but well, if u dun have an airbrush, then no choice lar... Added on October 14, 2007, 3:29 am QUOTE(-vip3rleon9- @ Oct 12 2007, 10:30 PM) guys! i got my first model kit. my mum got it for me. i was just wondering, how much is it for a bottle of paint? Mr Hobby's pretty good. Costs about RM6 per bottle. As for the booklet saying that u need 13 colors, its both yes and no. cause the instruction booklet says i need, like, 13 colors.. Yes in the sense that that's probly the most exact colors that they use on the model as per in the booklet. No as in, you dont really need to get all that 13 colors, just get the primary colors, such as: - Black - White - Red - Blue - Yellow - Brown - Silver - Gray That should allow u to pretty much mix all sorts of shades that's needed. You'll find that you'll use up the blacks and whites at a rather fast rate compared to the other colors too. Added on October 14, 2007, 3:32 am QUOTE(noob4life @ Oct 12 2007, 10:08 PM) Your strikefreedom and hayushiki dont have top coat ? I am considering not to apply topcoats too. This post has been edited by fyire: Oct 14 2007, 03:32 AM |
|
Topic ClosedOptions
|
| Change to: |  0.1090sec 0.1090sec
 0.77 0.77
 6 queries 6 queries
 GZIP Disabled GZIP Disabled
Time is now: 28th November 2025 - 07:22 PM |
 Quote
Quote