


Model Kits Gundam & Mecha Modelling Thread V39
Model Kits Gundam & Mecha Modelling Thread V39
|
|
 Sep 7 2017, 06:15 PM Sep 7 2017, 06:15 PM
|
 
Senior Member
675 posts Joined: Nov 2011 |
Am curious if anyone use ultrasound cleaner before doing paint job, always see it in Instagram builder build log
|
|
|
|
|
|
Sep 7 2017, 06:24 PM
|
Senior Member
540 posts Joined: Aug 2007 |
QUOTE(advocado @ Sep 7 2017, 05:46 PM) you can get the 3M half face gas mask that has a Main filter & pre filter. There are 2 models Blue more expensive white cheaper and can be found in ACE Hardware for the price of Blue on ebay. however i cannot gurantee the one on ebay are genuine but for me it passes the "Perfume Test". Ohh..I thought 3M only sells those disposable face mask. I'll try searching at ACE hardware. both should use same filter. for me M is too big for my face and if you wear spec it can be a hindrance but Ace only carries M size. you can get better package deal that comes with everything on ebay from China. should be under rm200. remember to get spare pre-filters as they wear out faster. normal face mask only good when you do sanding. it's advisable to wear it while sanding as you can notice there's alot of powder on the table/floor once you are done. vacuum the room once you are finish. i know people do them in their room but it's not that good for health. i'm not sure how superior Tamiya & Mr.Color spray cans are compared to Mr.DIY rm10 cans but for me 1/4 cost is worth the try. a decent compressor + airbrush may cost you rm300-400, but how many cans of Tamiya can you buy with rm400? 10?  I usually don't wear any masks when sanding as it is very difficult to breathe while wearing one. Maybe I should get a simple face mask for sanding. A normal N95 mask should be ok right  I have tried those regular spray cans from hardware shops and the paint is too wet to be used for modelling. Need to know if got any expert here that sprays with those cans and how to use it correctly. I am researching for an air brush kit but so far I haven't found any decent air compressor (60 psi) with external tank below RM 500. |
|
|
Sep 7 2017, 06:49 PM
|

Senior Member
2,948 posts Joined: Jun 2007 |
QUOTE(cllee86 @ Sep 7 2017, 06:24 PM) Ohh..I thought 3M only sells those disposable face mask. I'll try searching at ACE hardware. when you say wet do you mean spray until over flow dripping?I usually don't wear any masks when sanding as it is very difficult to breathe while wearing one. Maybe I should get a simple face mask for sanding. A normal N95 mask should be ok right I have tried those regular spray cans from hardware shops and the paint is too wet to be used for modelling. Need to know if got any expert here that sprays with those cans and how to use it correctly. I am researching for an air brush kit but so far I haven't found any decent air compressor (60 psi) with external tank below RM 500. i use Now Spray Paint from Ace rm16 per can. it's the cheapest grey primer i can find. they have most basic colors. i use Clear from DIY, Acrylic is rm5, Lacquer is rm9, i use them to level the decals because they are thick enough. Airbrush will take many coats & waiting time. only final coat i use airbrush. the rm9 White are OK, but you have to spray back & forth at a distance, if you only burst spray it will leave rough surface but that can be covered up if you follow up with 2 burst spray swiping from 1 side to another each burst. the rm9.90 Eagle Chrome are ok, shinier than the Mr Hobby Metallic Chrome Silver, but you can't polish it with compound, only paper towel, if you use compound you will wipe off the chrome layer and what left is a smooth shinny greyish Titanium layer. i don't know about Tamiya paint cans but the Mr.Hobby primer & top coat cans have very high pressure that requires much further distance. it can also give rough result so IMO i rather use the cheaper cans. down side is cheap cans sometimes inconsistent, maybe leave 15% paint but no more pressure. normally you read people say shake well and use a Spray Gun Trigger (found in ACE), spray at hot weather, but what people don't tell you is have a bucket of warm water ready so when you aren't using in between put the can in the bucket. because if you use the spray, the can will become cold & condense, resulting weaker pressure output, by putting it in warm water you can maintain the pressure output. i read this this morning on an old Hobby Japan magazine. if you can afford rm40 cans, you can afford a cheap kit & cheap can to test it out. IMO never go more than 3 static burst (pointing fixed area) or 5 swiping burst (more left to right right to left quickly) per session. but in the end your preference. i myself can't afford expensive cans. the Mr. top coat (flat & semi-Gloss) are also very difficult to use and may just ruin the whole thing. |
|
|
Sep 7 2017, 06:59 PM
|
|
Senior Member
540 posts Joined: Aug 2007 |
QUOTE(advocado @ Sep 7 2017, 06:49 PM) when you say wet do you mean spray until over flow dripping? Oooo...thanks for the advice bro i use Now Spray Paint from Ace rm16 per can. it's the cheapest grey primer i can find. they have most basic colors. i use Clear from DIY, Acrylic is rm5, Lacquer is rm9, i use them to level the decals because they are thick enough. Airbrush will take many coats & waiting time. only final coat i use airbrush. the rm9 White are OK, but you have to spray back & forth at a distance, if you only burst spray it will leave rough surface but that can be covered up if you follow up with 2 burst spray swiping from 1 side to another each burst. the rm9.90 Eagle Chrome are ok, shinier than the Mr Hobby Metallic Chrome Silver, but you can't polish it with compound, only paper towel, if you use compound you will wipe off the chrome layer and what left is a smooth shinny greyish Titanium layer. i don't know about Tamiya paint cans but the Mr.Hobby primer & top coat cans have very high pressure that requires much further distance. it can also give rough result so IMO i rather use the cheaper cans. down side is cheap cans sometimes inconsistent, maybe leave 15% paint but no more pressure. normally you read people say shake well and use a Spray Gun Trigger (found in ACE), spray at hot weather, but what people don't tell you is have a bucket of warm water ready so when you aren't using in between put the can in the bucket. because if you use the spray, the can will become cold & condense, resulting weaker pressure output, by putting it in warm water you can maintain the pressure output. i read this this morning on an old Hobby Japan magazine. if you can afford rm40 cans, you can afford a cheap kit & cheap can to test it out. IMO never go more than 3 static burst (pointing fixed area) or 5 swiping burst (more left to right right to left quickly) per session. but in the end your preference. i myself can't afford expensive cans. the Mr. top coat (flat & semi-Gloss) are also very difficult to use and may just ruin the whole thing.  I thought you have airbrush and use it exclusively to paint your models. What is the distance to keep when spraying? For Tamiya cans we usually spray a little closer but if I spray at the same distance using DIY cans then it will be too wet already. Oh yea too wet means the paint paint is overflowing and dripping. And what kind of paint is recommended? Acrylic or lacquer? |
|
|
Sep 7 2017, 07:44 PM
|
|
Senior Member
2,948 posts Joined: Jun 2007 |
QUOTE(cllee86 @ Sep 7 2017, 06:59 PM) Oooo...thanks for the advice bro i have AB but for basic colors & on main parts i use cans if available because it saves alot of time and don't cost too much. 1/100 kit usually needs 1.5 cans of Primer & Paint to cover. if use AB, will have to keep topping up the paint and this may also cause inconsistency with the mixture, even if you premix a big big bottle (i use mr.hobby size bottle) everytime you open up and close it will slowly dry up so you have to add more thinner, and AB is quite sensitive with mix ratio too thick it won't flow properly too thin it becomes too thin. if you spray many parts you need to spend more time to get each top up ratio properly. unless you have big paint compartment like Car Airbrush. I thought you have airbrush and use it exclusively to paint your models. What is the distance to keep when spraying? For Tamiya cans we usually spray a little closer but if I spray at the same distance using DIY cans then it will be too wet already. Oh yea too wet means the paint paint is overflowing and dripping. And what kind of paint is recommended? Acrylic or lacquer? also most AB are designed for detail works, it's difficult to get wet thick glossy coats unless you use bigger nozzle as you need thicker mixture, lower psi, which fine tip will have problem with paint flow. if you AB wet coat it might look wet when you spray but once dry it will look less smooth you get the airbrush dot pattern which is what you normally want, unless you want a glossy smooth look. it also depends on the brand & type of paint. in short, AB requires more experience as different AB perform differently. And not just paint brand/type, Even the thinner used can affect the performance. but the main reason is i'm just lazy to wash the AB la. i usually keep the part as far as i can maybe 50-60cm but people are saying 30cm so you try yourself. you have to test with 1 burst 1st as cans varies with temperature & brand, age of can also affects it's pressure. if you see very rough it means too far, and that coat probably won't stick very well, so just closer abit and spray away, by adding more burst you can cover those rough areas, any pop up dots you notice from the spray may dissolve if you continue with 2-3 moving sideway sprays (not 100%). for Mr.Hobby Top Coats you have to really leave the parts on a stool and stand even further. Mr.Hobby Flat & Semi-Gloss tend to smudge if you do more than 2 burst or 1 burst if you spray too close, and the finishing feels like sandpaper really rough, but Super Clear are very durable, but it's a dust magnet due to rough surface. Gloss are easier to use as they don't frost like Flat & Semi. A real pain to have sand to remove the smudges (those aren't oversprays). But for cans there aren't much option out there for Flat coats. Gloss, many options and there is a reason why, it's difficult to make proper flat coats. Like i said, never go more than 2 burst for static position spray, 4-5 for Side Swipe spray. Lacquer is tougher, sticks better, can take any layer of new paint without much issues, but may react if you spray Lacquer on other type paint. it takes longer time to cure, and is toxic. Enamel is ranked 2nd, is also toxic and takes longer time to cure, Acrylic is the safest, easier to find and cures faster and for bottles they "claim" you can use water to dilute and also cheaper. So depends what you want to do, the base is best using Lacquer, as it can take any new coats including top coats. If you panel wash then you must use Lacquer. if you panel line using marker, the surface must be very smooth so you can easily wipe off the excess with eraser. Rule of thumb is every new layer of paint, always start with mist coat, this will ensure minimal damage on the base coat. And don't bother with those flat white/black cans, they result in rough surface and can crack when you apply new layer even using same can. I mainly use AB on Flat Coat because i calculated the whole compressor + AB + clear+flat base is only worth a few cans of Top Coat and you can get much better matte result. Also, Lacquer a.k.a Mr.Color bottles are thicker than Acrylic a.k.a Mr.Hobby Aqeuos. so you are actually getting more for the same price if you buy Mr.Color. For Tamiya they have different codes for their Lacquer/Enamel/Acrylic paints. Mr.Hobby bottles generally will dry up after open but Tamiya bottles don't dry up much but Tamiya cost more as they are bigger. alternatively you can use Gaia Notes. You can only mix Lacquer with Lacquer, Acrylic with Acrylic, Enamel with Enamel, you can't mix different types of paint together but generally Lacquer Thinner works on all types of paint. |
|
|
Sep 8 2017, 12:56 AM
|
|
Senior Member
540 posts Joined: Aug 2007 |
QUOTE(advocado @ Sep 7 2017, 07:44 PM) i have AB but for basic colors & on main parts i use cans if available because it saves alot of time and don't cost too much. 1/100 kit usually needs 1.5 cans of Primer & Paint to cover. if use AB, will have to keep topping up the paint and this may also cause inconsistency with the mixture, even if you premix a big big bottle (i use mr.hobby size bottle) everytime you open up and close it will slowly dry up so you have to add more thinner, and AB is quite sensitive with mix ratio too thick it won't flow properly too thin it becomes too thin. if you spray many parts you need to spend more time to get each top up ratio properly. unless you have big paint compartment like Car Airbrush. My god bro I'm gonna use this guide as my bible. also most AB are designed for detail works, it's difficult to get wet thick glossy coats unless you use bigger nozzle as you need thicker mixture, lower psi, which fine tip will have problem with paint flow. if you AB wet coat it might look wet when you spray but once dry it will look less smooth you get the airbrush dot pattern which is what you normally want, unless you want a glossy smooth look. it also depends on the brand & type of paint. in short, AB requires more experience as different AB perform differently. And not just paint brand/type, Even the thinner used can affect the performance. but the main reason is i'm just lazy to wash the AB la. i usually keep the part as far as i can maybe 50-60cm but people are saying 30cm so you try yourself. you have to test with 1 burst 1st as cans varies with temperature & brand, age of can also affects it's pressure. if you see very rough it means too far, and that coat probably won't stick very well, so just closer abit and spray away, by adding more burst you can cover those rough areas, any pop up dots you notice from the spray may dissolve if you continue with 2-3 moving sideway sprays (not 100%). for Mr.Hobby Top Coats you have to really leave the parts on a stool and stand even further. Mr.Hobby Flat & Semi-Gloss tend to smudge if you do more than 2 burst or 1 burst if you spray too close, and the finishing feels like sandpaper really rough, but Super Clear are very durable, but it's a dust magnet due to rough surface. Gloss are easier to use as they don't frost like Flat & Semi. A real pain to have sand to remove the smudges (those aren't oversprays). But for cans there aren't much option out there for Flat coats. Gloss, many options and there is a reason why, it's difficult to make proper flat coats. Like i said, never go more than 2 burst for static position spray, 4-5 for Side Swipe spray. Lacquer is tougher, sticks better, can take any layer of new paint without much issues, but may react if you spray Lacquer on other type paint. it takes longer time to cure, and is toxic. Enamel is ranked 2nd, is also toxic and takes longer time to cure, Acrylic is the safest, easier to find and cures faster and for bottles they "claim" you can use water to dilute and also cheaper. So depends what you want to do, the base is best using Lacquer, as it can take any new coats including top coats. If you panel wash then you must use Lacquer. if you panel line using marker, the surface must be very smooth so you can easily wipe off the excess with eraser. Rule of thumb is every new layer of paint, always start with mist coat, this will ensure minimal damage on the base coat. And don't bother with those flat white/black cans, they result in rough surface and can crack when you apply new layer even using same can. I mainly use AB on Flat Coat because i calculated the whole compressor + AB + clear+flat base is only worth a few cans of Top Coat and you can get much better matte result. Also, Lacquer a.k.a Mr.Color bottles are thicker than Acrylic a.k.a Mr.Hobby Aqeuos. so you are actually getting more for the same price if you buy Mr.Color. For Tamiya they have different codes for their Lacquer/Enamel/Acrylic paints. Mr.Hobby bottles generally will dry up after open but Tamiya bottles don't dry up much but Tamiya cost more as they are bigger. alternatively you can use Gaia Notes. You can only mix Lacquer with Lacquer, Acrylic with Acrylic, Enamel with Enamel, you can't mix different types of paint together but generally Lacquer Thinner works on all types of paint. Thank you so much for the guide and effort Most people will say AB is superior to spray cans but now I know each have it's own advantages. Thanks again for the guide. Now I'm gonna hunt this thread for your build if you posted any here. Really curious to see your work  |
|
|
|
|
|
Sep 8 2017, 01:10 AM
|
|
Senior Member
2,948 posts Joined: Jun 2007 |
QUOTE(cllee86 @ Sep 8 2017, 12:56 AM) My god bro I'm gonna use this guide as my bible. i don't post my stuffs on the internet. nothing much to show anyway. knowledge and actual skills may differ. you can get all the info from the internet but you need to put in actual work for skills.Thank you so much for the guide and effort Most people will say AB is superior to spray cans but now I know each have it's own advantages. Thanks again for the guide. Now I'm gonna hunt this thread for your build if you posted any here. Really curious to see your work it's possible for AB to be superior in everyway to a can, but you need to know your AB really well. Compressors also have their issue of overheating, water build ups especially when things goes hot. so if you can, get a compressor with dust/mist catcher with pressure gauge+regulator, and an air tank so you have a prefilled can of air to use. having your air line going up before coming down (inverted U) can help reduce the water from going into your airbrush as water are heavier than air. you will still need to get rid of the water build up in the end though. can't help you much with compressor options as mine suffer from heat & water if i use more than 30mins. This post has been edited by advocado: Sep 8 2017, 01:10 AM |
|
|
Sep 8 2017, 02:47 AM
|
|
Senior Member
540 posts Joined: Aug 2007 |
QUOTE(advocado @ Sep 8 2017, 01:10 AM) i don't post my stuffs on the internet. nothing much to show anyway. knowledge and actual skills may differ. you can get all the info from the internet but you need to put in actual work for skills. I see. That's too bad as I am really curious to see the results from regular spray cans. it's possible for AB to be superior in everyway to a can, but you need to know your AB really well. Compressors also have their issue of overheating, water build ups especially when things goes hot. so if you can, get a compressor with dust/mist catcher with pressure gauge+regulator, and an air tank so you have a prefilled can of air to use. having your air line going up before coming down (inverted U) can help reduce the water from going into your airbrush as water are heavier than air. you will still need to get rid of the water build up in the end though. can't help you much with compressor options as mine suffer from heat & water if i use more than 30mins. After reading your post I think I will need to do more trials and research before deciding on AB. Seems like I am severely underestimating the complexities of using AB. Still I really appreciate the knowledge you shared here with me. Once more, thanks a lot |
|
|
Sep 8 2017, 10:15 AM
|
|
Senior Member
2,948 posts Joined: Jun 2007 |
QUOTE(cllee86 @ Sep 8 2017, 02:47 AM) I see. That's too bad as I am really curious to see the results from regular spray cans. Since i use both Cans & AB together you won't be able to see the results. Even high end cameras would have difficulty capturing the texture of the paint, so even if it looks great in picture things like bad panel lining, stains & paint chips do get magnified in photos (which is good for QC), it still won't be able to capture micro scratches, some uneven surfaces & other paint defects compared to looking at the actual item.After reading your post I think I will need to do more trials and research before deciding on AB. Seems like I am severely underestimating the complexities of using AB. Still I really appreciate the knowledge you shared here with me. Once more, thanks a lot also if you want to do non masking AB shading, you need a really fine tip brush and steady hands, the normal tip you use to paint will most likely be too wide for detailed works. so usually you need at least 2 AB. Ideal would be 3 1 for big parts, 1 for medium parts & 1 for fine detailing like shading/camo. if you need to split color, you will have to mask the whole part not painted if you use can and chance of uneven surface between painted & masked is high, with AB you just need to mask the surrounding areas not the whole part. for very fine brush you don't even need to mask. you can check youtube how people draw mickey mouse using airbrush like they are using pencil & pen. but it takes accuracy & steady hands, it's like shooting a gun, except you can't afford to miss your target. most people use double action AB top loaded, but there is a good thing about bottom loaded single action, is that you can tune the spread of the paint by turning the screw above the container and your AB won't get stuck since paint don't flow pass the AB and you can carry more paint per session (pretty much any bottle that fits the head as long the suction straw can reach). customizing the bottom loaded is also easier as you just unscrew 1 nozzle and put in the other. but paint flow is preset so you can't control it on the fly. |
|
|
Sep 8 2017, 10:20 AM
|
|
Senior Member
2,948 posts Joined: Jun 2007 |
QUOTE(cllee86 @ Sep 8 2017, 02:47 AM) I see. That's too bad as I am really curious to see the results from regular spray cans. another thing is don't go for cheap AB unless you just want to feel the difference using a cheap AB and after you upgrade to a decent one. you don't really need super high end ones but you can if you willing. you can get a decent AB+Compressor set for under rm500. AB design maybe simple that is why China can produce many cheap AB but it's a detailing tool so even few micron of difference in QC will have affect on your works.After reading your post I think I will need to do more trials and research before deciding on AB. Seems like I am severely underestimating the complexities of using AB. Still I really appreciate the knowledge you shared here with me. Once more, thanks a lot Think about it. how many Cans of Paint can you buy with rm500? 12 cans? how many kits can you build with 12 cans, probably less than 5 1/100 kits if you Prime, Paint & Top Coat. you probably need 2 cans just for top coat if you use those puny Mr.Hobby Topcoats. |
|
|
Sep 8 2017, 01:34 PM
|
|
Senior Member
675 posts Joined: Nov 2011 |
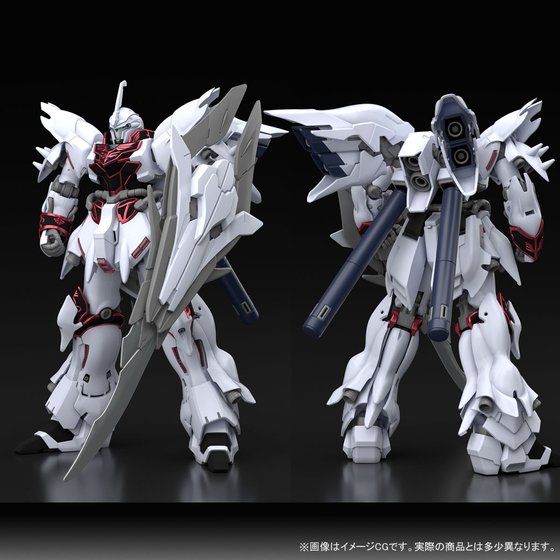
change color and give a ugly shield = P-Bandai
  |
|
|
Sep 8 2017, 02:27 PM
|
|
Senior Member
540 posts Joined: Aug 2007 |
QUOTE(advocado @ Sep 8 2017, 10:15 AM) Since i use both Cans & AB together you won't be able to see the results. Even high end cameras would have difficulty capturing the texture of the paint, so even if it looks great in picture things like bad panel lining, stains & paint chips do get magnified in photos (which is good for QC), it still won't be able to capture micro scratches, some uneven surfaces & other paint defects compared to looking at the actual item. Wow I'm not even close to that level of skill and attention to details. I'm not very artistic and my hand aren't steady enough to paint hands free with AB, or with anything also if you want to do non masking AB shading, you need a really fine tip brush and steady hands, the normal tip you use to paint will most likely be too wide for detailed works. so usually you need at least 2 AB. Ideal would be 3 1 for big parts, 1 for medium parts & 1 for fine detailing like shading/camo. if you need to split color, you will have to mask the whole part not painted if you use can and chance of uneven surface between painted & masked is high, with AB you just need to mask the surrounding areas not the whole part. for very fine brush you don't even need to mask. you can check youtube how people draw mickey mouse using airbrush like they are using pencil & pen. but it takes accuracy & steady hands, it's like shooting a gun, except you can't afford to miss your target. most people use double action AB top loaded, but there is a good thing about bottom loaded single action, is that you can tune the spread of the paint by turning the screw above the container and your AB won't get stuck since paint don't flow pass the AB and you can carry more paint per session (pretty much any bottle that fits the head as long the suction straw can reach). customizing the bottom loaded is also easier as you just unscrew 1 nozzle and put in the other. but paint flow is preset so you can't control it on the fly. In my case, even if I get AB I will just use it to spray mono color on 1 part without any highlight or weathering. I plan to start though after I mastered the basics. I don't think I will be able to get more than 1 AB, doubt if I can get even 1 decent AB in my house lol. Thanks for the advice on bottom and top paint loader. I always wonder which one is better. Plus I always prefer trigger type lol. QUOTE(advocado @ Sep 8 2017, 10:20 AM) another thing is don't go for cheap AB unless you just want to feel the difference using a cheap AB and after you upgrade to a decent one. you don't really need super high end ones but you can if you willing. you can get a decent AB+Compressor set for under rm500. AB design maybe simple that is why China can produce many cheap AB but it's a detailing tool so even few micron of difference in QC will have affect on your works. Beginners like me will definitely use more than 3 cans of spray simply because I waste too much or make too many mistakes. Think about it. how many Cans of Paint can you buy with rm500? 12 cans? how many kits can you build with 12 cans, probably less than 5 1/100 kits if you Prime, Paint & Top Coat. you probably need 2 cans just for top coat if you use those puny Mr.Hobby Topcoats. The MG Unicorn I'm building now, I haven't started on the legs and I almost finish my 2nd can. I know AB is more economic in the long run and that is why I'm contemplating to get 1. |
|
|
Sep 8 2017, 02:40 PM
|
|
Senior Member
2,948 posts Joined: Jun 2007 |
QUOTE(cllee86 @ Sep 8 2017, 02:27 PM) Wow I'm not even close to that level of skill and attention to details. I'm not very artistic and my hand aren't steady enough to paint hands free with AB, or with anything depends, if you want wet glossy smooth coat you have to run more passes with AB than spray cans, so end up easily use up 2-3 bottles of Mr.Color paint. if you aren't looking at thick coat AB saves alot of paint. In my case, even if I get AB I will just use it to spray mono color on 1 part without any highlight or weathering. I plan to start though after I mastered the basics. I don't think I will be able to get more than 1 AB, doubt if I can get even 1 decent AB in my house lol. Thanks for the advice on bottom and top paint loader. I always wonder which one is better. Plus I always prefer trigger type lol. Beginners like me will definitely use more than 3 cans of spray simply because I waste too much or make too many mistakes. The MG Unicorn I'm building now, I haven't started on the legs and I almost finish my 2nd can. I know AB is more economic in the long run and that is why I'm contemplating to get 1. anyway like i said 1 area should not have more than 5 bursts, so a 1/100 kit should just take 1.5 cans. it's easy to see if you are overspraying just use your eyes after each burst, if you think it's too wet just wait. like i said if you use point position only 2 burst at a time, sideway movement spray you can do 5 burst at min 30cm distance without much issue. the pressure on the parts is much higher if you don't sideswipe when you spray. get a spray can trigger from Ace: and spray it like this guy minus all the waste spraying at nothing :This post has been edited by advocado: Sep 8 2017, 02:41 PM |
|
|
|
|
|
Sep 8 2017, 02:46 PM
|
|
Senior Member
2,948 posts Joined: Jun 2007 |
QUOTE(cllee86 @ Sep 8 2017, 02:27 PM) Wow I'm not even close to that level of skill and attention to details. I'm not very artistic and my hand aren't steady enough to paint hands free with AB, or with anything btw Unicorn is an advance kit for beginners, coz it has many moving parts, might wanna check if the paint is too thick that you scratch the paint when playing with the gimmicks as you sound like you are putting a thick coat on it. also if you haven't assemble remember to scratch off the paint on the male pegs. In my case, even if I get AB I will just use it to spray mono color on 1 part without any highlight or weathering. I plan to start though after I mastered the basics. I don't think I will be able to get more than 1 AB, doubt if I can get even 1 decent AB in my house lol. Thanks for the advice on bottom and top paint loader. I always wonder which one is better. Plus I always prefer trigger type lol. Beginners like me will definitely use more than 3 cans of spray simply because I waste too much or make too many mistakes. The MG Unicorn I'm building now, I haven't started on the legs and I almost finish my 2nd can. I know AB is more economic in the long run and that is why I'm contemplating to get 1. |
|
|
Sep 8 2017, 03:15 PM
|
|
Senior Member
540 posts Joined: Aug 2007 |
QUOTE(advocado @ Sep 8 2017, 02:40 PM) depends, if you want wet glossy smooth coat you have to run more passes with AB than spray cans, so end up easily use up 2-3 bottles of Mr.Color paint. if you aren't looking at thick coat AB saves alot of paint. Wow..I do passes like that but I think I didn't do it as quickly. Yea gonna move my can a bit further and do faster passes like this guy.anyway like i said 1 area should not have more than 5 bursts, so a 1/100 kit should just take 1.5 cans. it's easy to see if you are overspraying just use your eyes after each burst, if you think it's too wet just wait. like i said if you use point position only 2 burst at a time, sideway movement spray you can do 5 burst at min 30cm distance without much issue. the pressure on the parts is much higher if you don't sideswipe when you spray. get a spray can trigger from Ace: and spray it like this guy minus all the waste spraying at nothing :Thanks a lot for sharing bro I usually spray 3 layers to the parts and for each layer I will wait around 15-20 mins before applying the next layer. I read somewhere that you need to wait around that time for the paint to be dry enough before applying another layer. Btw I have been thinking of using hair dryer to dry the paint but I'm afraid the heat will ruin the spray paint. Looks like I can give it a try lol. QUOTE(advocado @ Sep 8 2017, 02:46 PM) btw Unicorn is an advance kit for beginners, coz it has many moving parts, might wanna check if the paint is too thick that you scratch the paint when playing with the gimmicks as you sound like you are putting a thick coat on it. also if you haven't assemble remember to scratch off the paint on the male pegs. Lol I never really give it much thought on the complexity. I just get what I want lol. The next build in line is MG Build Strike and 1/100 Barbatos Lupus Rex. |
|
|
Sep 8 2017, 05:35 PM
|
|
Senior Member
2,948 posts Joined: Jun 2007 |
QUOTE(cllee86 @ Sep 8 2017, 03:15 PM) Wow..I do passes like that but I think I didn't do it as quickly. Yea gonna move my can a bit further and do faster passes like this guy. i don't really wait.Thanks a lot for sharing bro I usually spray 3 layers to the parts and for each layer I will wait around 15-20 mins before applying the next layer. I read somewhere that you need to wait around that time for the paint to be dry enough before applying another layer. Btw I have been thinking of using hair dryer to dry the paint but I'm afraid the heat will ruin the spray paint. Looks like I can give it a try lol. Lol I never really give it much thought on the complexity. I just get what I want lol. The next build in line is MG Build Strike and 1/100 Barbatos Lupus Rex. i just do 1 mist spray wait 10 seconds, then 4-5 swipe spray on each area. if the result not as good or thick enough wait few hours then do again. then let it dry for 1.5days. usually it dries within 2 days but only cures in 3-5days, meaning if you apply hard pressure on the paint it will deform or leave fingerprints. the type of paint and thickness will determine the curing time. hair dryer is not recommended, it's like frying frost chicken, you end up with overcooked surface and uncooked inside, now the solvent in the inner layer have no where to escape as the surface already cured, so when you press, the paint may sink in. if you want a quick dry method, you have to use oven bake to ensure everything is cured. in the end your methods has to do with your time available. slow way is always good but not everyone has the luxury. that is why i use spray can when available. for panel line you should use Sakura Micron or copic 0.05 or 0.03. Copic has a deluxe version where you can buy the spare parts and customize the pen but they are more expensive. you can find them in Art Friend. note 0.05 & 0.03, not 0.5 & 0.3. they don't clog as bad as Gundam Ultra Fine Marker and are thinner and cost less. as long your surface is glossy smooth you can easily rub away excess using eraser but wait a while before you start rubbing. for shading & weathering you can use Tamiya weathering powder, color pencil or dry brushing. it's easier to apply on matte surfaces. you can also make color pencil powder and apply like weathering powder using flat narrow tip brush. cotton bud area is big so it's difficult to do small shading. but you need to top coat to seal off the powder, just like decals. i use cheap Mr.DIY clear coats, only final coat i use AB. with Clear coat if you do 2 burst, you will get semi-gloss like surface & texture which is good enough to apply powder, no need waste the flat coats. |
|
|
Sep 8 2017, 06:00 PM
|
|
Senior Member
540 posts Joined: Aug 2007 |
QUOTE(advocado @ Sep 8 2017, 05:35 PM) i don't really wait. Haha yea hair dryer is bad idea lol. i just do 1 mist spray wait 10 seconds, then 4-5 swipe spray on each area. if the result not as good or thick enough wait few hours then do again. then let it dry for 1.5days. usually it dries within 2 days but only cures in 3-5days, meaning if you apply hard pressure on the paint it will deform or leave fingerprints. the type of paint and thickness will determine the curing time. hair dryer is not recommended, it's like frying frost chicken, you end up with overcooked surface and uncooked inside, now the solvent in the inner layer have no where to escape as the surface already cured, so when you press, the paint may sink in. if you want a quick dry method, you have to use oven bake to ensure everything is cured. in the end your methods has to do with your time available. slow way is always good but not everyone has the luxury. that is why i use spray can when available. for panel line you should use Sakura Micron or copic 0.05 or 0.03. Copic has a deluxe version where you can buy the spare parts and customize the pen but they are more expensive. you can find them in Art Friend. note 0.05 & 0.03, not 0.5 & 0.3. they don't clog as bad as Gundam Ultra Fine Marker and are thinner and cost less. as long your surface is glossy smooth you can easily rub away excess using eraser but wait a while before you start rubbing. for shading & weathering you can use Tamiya weathering powder, color pencil or dry brushing. it's easier to apply on matte surfaces. you can also make color pencil powder and apply like weathering powder using flat narrow tip brush. cotton bud area is big so it's difficult to do small shading. but you need to top coat to seal off the powder, just like decals. i use cheap Mr.DIY clear coats, only final coat i use AB. with Clear coat if you do 2 burst, you will get semi-gloss like surface & texture which is good enough to apply powder, no need waste the flat coats. I thought the paint will dry in 1 day. What I'm doing now is, after spraying the parts with Tamiya spray I will wait 1 day for the paint to dry and apply Tamiya semi gloss top coat. Wait another day and after that I will assemble the parts. Not sure how long it will take for the paint to cure but luckily I haven't encounter any deformation or paint chipping off. I usually use ink pen I got from online store to do panel line. I cannot remember the brand but it works fine. Recently I tried Tamiya black accent panel line with disastrous results It's harder to use than I thought lol. Really should try Mr. DIY clear coats. So far I haven't manage to try any clear coats yet. |
|
|
Sep 8 2017, 06:10 PM
|
|
Senior Member
2,948 posts Joined: Jun 2007 |
QUOTE(cllee86 @ Sep 8 2017, 06:00 PM) Haha yea hair dryer is bad idea lol. 1st of all, paint takes longer time to cure, top coat takes much less time, Mr.Hobby top coat takes 20 minutes to dry as long you use 2 burst only. normal clear usually takes less than 6 hours. primer & paint sometimes takes 2 days before safe to touch.I thought the paint will dry in 1 day. What I'm doing now is, after spraying the parts with Tamiya spray I will wait 1 day for the paint to dry and apply Tamiya semi gloss top coat. Wait another day and after that I will assemble the parts. Not sure how long it will take for the paint to cure but luckily I haven't encounter any deformation or paint chipping off. I usually use ink pen I got from online store to do panel line. I cannot remember the brand but it works fine. Recently I tried Tamiya black accent panel line with disastrous results It's harder to use than I thought lol. Really should try Mr. DIY clear coats. So far I haven't manage to try any clear coats yet. ink pen aren't as fine as 0.03. they cost less than rm10 i don't see why not. Tamiya panel line are enamel, it will eat away acrylic paints. and you need really smooth surface for it to flow, and to rub off clean, so semi-gloss isn't that ideal. if you panel line before it fully cures, the ink may sip into the paint making eraser ineffective and you have to use blade to scratch or sand paper to sand. you can get up to 2000 sandpaper from ace. after that you need Polishing compound for mirror look. |
|
|
Sep 8 2017, 06:17 PM
|
|
Senior Member
540 posts Joined: Aug 2007 |
QUOTE(advocado @ Sep 8 2017, 06:10 PM) 1st of all, paint takes longer time to cure, top coat takes much less time, Mr.Hobby top coat takes 20 minutes to dry as long you use 2 burst only. normal clear usually takes less than 6 hours. primer & paint sometimes takes 2 days before safe to touch. Yes I'll try to find Sakura Micron or copic 0.05 or 0.03. Seems good for panel lining ink pen aren't as fine as 0.03. they cost less than rm10 i don't see why not. Tamiya panel line are enamel, it will eat away acrylic paints. and you need really smooth surface for it to flow, and to rub off clean, so semi-gloss isn't that ideal. if you panel line before it fully cures, the ink may sip into the paint making eraser ineffective and you have to use blade to scratch or sand paper to sand. you can get up to 2000 sandpaper from ace. after that you need Polishing compound for mirror look.  For Tamiya panel line, you cannot wipe it off while it's still wet. I did that and it instantly removed the paint underneath Have to wait until the liquid is dry then remove the access using Tamiya X20 thinner. But I kena before the thinner removes the paint underneath even though I waited for the liquid to dry overnight..I guess maybe the base paint haven't cure yet.. |
|
|
Sep 8 2017, 06:33 PM
|
|
Senior Member
2,948 posts Joined: Jun 2007 |
QUOTE(cllee86 @ Sep 8 2017, 06:17 PM) Yes I'll try to find Sakura Micron or copic 0.05 or 0.03. Seems good for panel lining like i said, you have to have a Lacquer coat before the Tamiya panel line as it is enamel it will eat enamel & also acrylic layer off. For Tamiya panel line, you cannot wipe it off while it's still wet. I did that and it instantly removed the paint underneath Have to wait until the liquid is dry then remove the access using Tamiya X20 thinner. But I kena before the thinner removes the paint underneath even though I waited for the liquid to dry overnight..I guess maybe the base paint haven't cure yet.. and no you don't use thinner to remove as thinner will remove all Lacquer/Enamel/Acrylic. best you can use is denatured alcohol but only if you have Lacquer coat. alcohol will eat acrylic. you may try lighter fluid as they evaporate very fast. |
|
Topic ClosedOptions
|
| Change to: |  0.0209sec 0.0209sec
 0.41 0.41
 6 queries 6 queries
 GZIP Disabled GZIP Disabled
Time is now: 5th December 2025 - 11:29 PM |
 Quote
Quote