


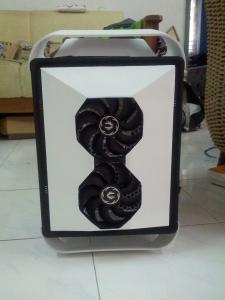
rig nampak cantik

Monochromos., Build & Mod, Completed 03/03/13
|
|
 Feb 7 2013, 12:12 AM Feb 7 2013, 12:12 AM
|
 
Senior Member
3,782 posts Joined: Aug 2010 From: subang jaya |
ooo hi hi Mr.Yakikuze
rig nampak cantik |
|
|
|
|
|
Feb 7 2013, 12:33 AM
|

Junior Member
191 posts Joined: Oct 2009 |
tq, mr
 |
|
|
Feb 8 2013, 09:32 AM
|

Senior Member
2,892 posts Joined: Oct 2007 From: Penang |
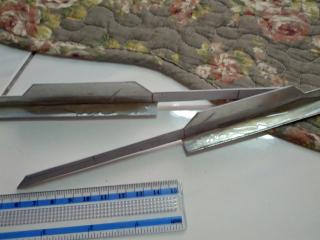
Hi. What model for this one Oscillation Cutter : Cordless or Corded ?
http://static.lowyat.net/uploads/attach-79...-1360145485.jpg |
|
|
Feb 8 2013, 09:35 AM
|
|
Junior Member
191 posts Joined: Oct 2009 |
this one is corded, but i dont know much the model name .
it belongs to my granpa. i only use it haha  This post has been edited by ichuck: Feb 8 2013, 09:35 AM |
|
|
Feb 8 2013, 11:22 PM
|
|
Junior Member
191 posts Joined: Oct 2009 |
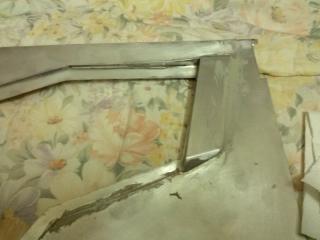
7. i continue with touch up with putty and sanding
so far here are what ive done 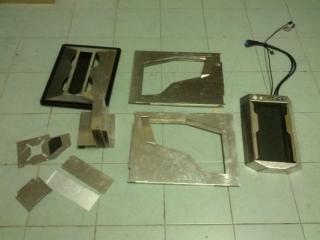
here is the top shroud with putty on, i use this to make the surface even n blend together. Becaude i only use araldite to fixed them together and some edges might be uneven 

touchup on the hdd holder, side panel and front panel 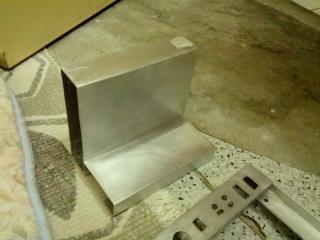

sidepanels 
This post has been edited by ichuck: Feb 9 2013, 12:31 PM |
|
|
Feb 9 2013, 12:42 PM
|
|
Junior Member
191 posts Joined: Oct 2009 |
8. For now the build is almost finish as only the paint job is left.
i used anchor spray can to paint all the stuff. Most of it are left over from my previous thing. just bough 2 can of flat white. 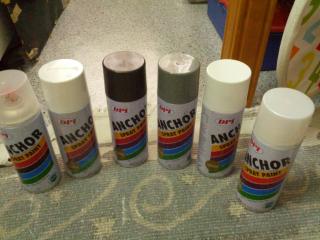

the first one to be painted is the top shroud. 

next one , are all the small part 
|
|
|
|
|
|
Feb 9 2013, 12:58 PM
|
|
Junior Member
191 posts Joined: Oct 2009 |
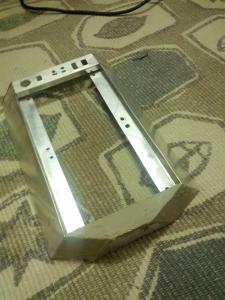
9. Some test fitting and more araldite glued on.
The two part that need to be join together 
The side panel already fixed on with the hinges. Here are the test fitting. 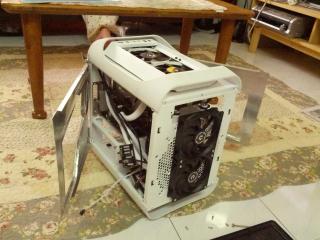


Later some more painting on the small part 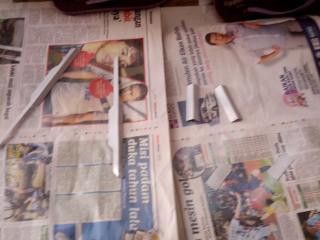
I bought a matte black vinyl sticker, for insulation of the backplate and also some design for the panel 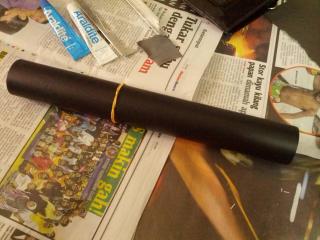
The mesh had already attached to the backplate n here the sticker for insulation. 
Now the final product of the back plate with some designed sticker on it. 
This post has been edited by ichuck: Feb 9 2013, 01:01 PM |
|
|
Feb 9 2013, 01:14 PM
|
|
Junior Member
191 posts Joined: Oct 2009 |
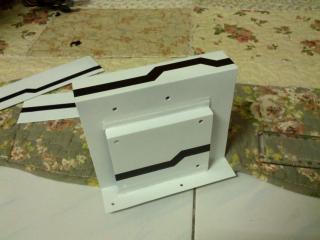
10. More sticker design on, and cable management.
Bought this at Daiso Queensbay for cable management 
This is the one that will hold my 24 pin, 6 pin, n most of the mobo cable to make it organize. 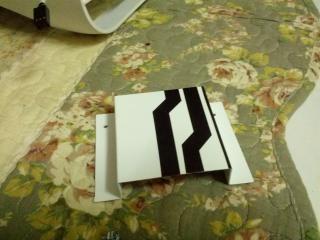
The sticker design for psu cover. 
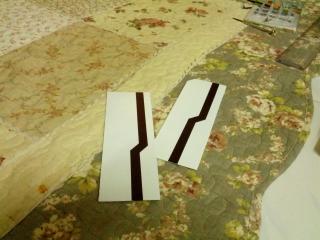
Now design for the Hdd holder. 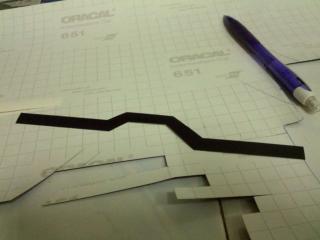
Test fitting for the cable holder, 
And then the test fitting for the hdd holder 
This post has been edited by ichuck: Feb 9 2013, 01:20 PM Attached thumbnail(s) 
|
|
|
Feb 11 2013, 08:39 AM
|

Junior Member
60 posts Joined: Aug 2012 |
very nice, neat and tidy cable management u got there. awesome job!
|
|
|
Feb 11 2013, 09:10 AM
|
|
Junior Member
191 posts Joined: Oct 2009 |
Thanks but not yet, fnish at the moment.
|
|
|
Feb 13 2013, 11:15 PM
|

Junior Member
443 posts Joined: Feb 2011 From: K.l Area |
DAMN, dude..u're the create king ..so nice all of thats...
|
|
|
Feb 14 2013, 01:07 AM
|
|
Junior Member
191 posts Joined: Oct 2009 |
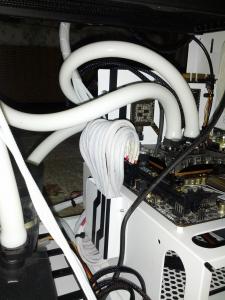
11. Some more cable management.
This is the wiring route for the switch panel at the top shroud. 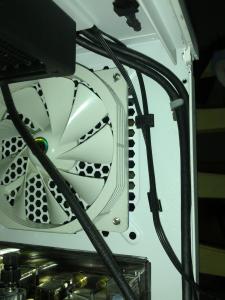
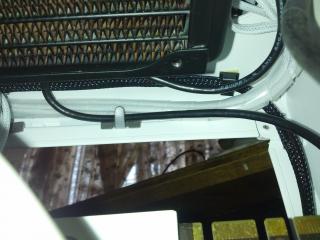
The psu cover. 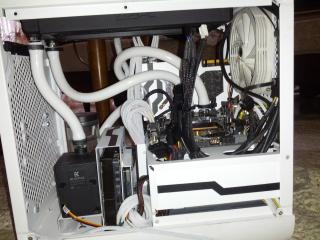
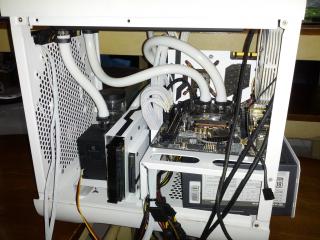
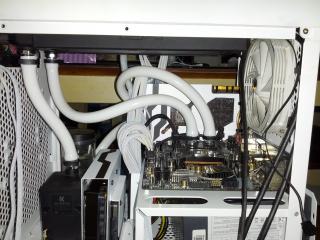
The result from the cable management and psu cover. It took me wholeday to manage n install n make everytg in place. Mainly it because i use non-modular psu. The right side. 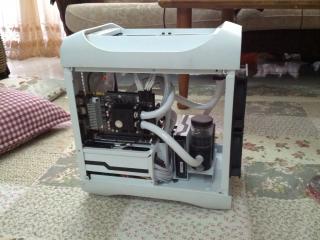
The left side. 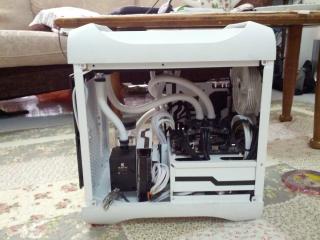
This post has been edited by ichuck: Feb 14 2013, 01:12 AM |
|
|
Feb 14 2013, 01:19 AM
|
|
Junior Member
191 posts Joined: Oct 2009 |
12. Top shroud detailing.
I cut out some design from the vinyl sticker for the shroud. 
The shroud. 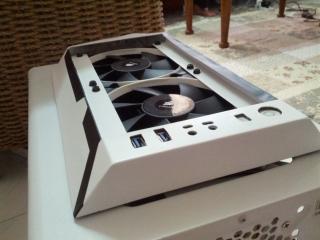
The Nzxt Led strip which i cut to make it shorter. White led color. 
The top shroud mesh, this part need to be joint together. 
What it looks like with the mesh cover. 
Next i clean the top part, because it is dirty with lots of my finger print on it. That is the downside of doing things in white, u can easily see the stain 
Later its time for the front panel to be sanded and paint. 
The freshly painted front panel test fitting. 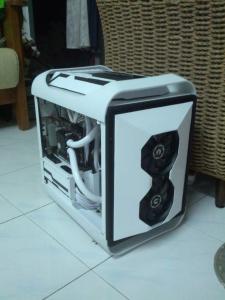
This post has been edited by ichuck: Feb 14 2013, 01:39 AM |
|
|
|
|
|
Feb 14 2013, 01:52 AM
|
|
Junior Member
191 posts Joined: Oct 2009 |
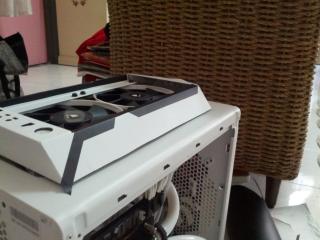
13. The last part that left un painted was the side panel.
Here the sanded side panels ready to be paint. 

Test fitting. This is the last piece. And now my build is almost done. I can say it is 90% COMPLETE. 

SO, WHAT LEFT TO DO? -Acrylic panel for the window -detailing sticker for side panel. -RAM, any suggestion what ram i should buy ????? thinking of Corsair Dominator Platinum 16gb(8gbx2) 1600mhz -and laaastly some super nice high quality photoshoot. This post has been edited by ichuck: Feb 14 2013, 01:58 AM |
|
|
Feb 14 2013, 02:39 AM
|

Senior Member
526 posts Joined: Oct 2007 |
dominator platinum will go nice with this awesome build, it fits the theme
|
|
|
Feb 14 2013, 04:47 AM
|

Junior Member
196 posts Joined: Sep 2012 |
Naissss bro...tangan very cun...keep it up..
|
|
|
Feb 14 2013, 08:55 AM
|
|
Senior Member
785 posts Joined: Jun 2012 |
sweeett...great mod to that small case. whats the temp?
|
|
|
Feb 14 2013, 11:19 AM
|
|
Junior Member
191 posts Joined: Oct 2009 |
QUOTE(najmul @ Feb 14 2013, 02:39 AM) dominator platinum will go nice with this awesome build, it fits the theme Yeah i think so, thats why i choose platinum.  QUOTE(topazzatech @ Feb 14 2013, 04:47 AM) Naissss bro...tangan very cun...keep it up.. Thanks, Dremel jugak yg membantu, hahaha QUOTE(qwe13 @ Feb 14 2013, 08:55 AM) sweeett...great mod to that small case. whats the temp? Thanks , for after the mod i didnt know yet. but before this idle about 32/34 max temp when rendering 51/54cif in AC room i get as low as 17c-30c |
|
|
Feb 14 2013, 11:20 AM
|
|
Junior Member
191 posts Joined: Oct 2009 |
And another one to add, should i do some benchmark test?
Prime95 or heaven benchmark? |
|
|
Feb 14 2013, 01:20 PM
|

Junior Member
91 posts Joined: Aug 2008 |
Nice bro. Nak tiru bole tak
|
| Change to: |  0.0317sec 0.0317sec
 0.37 0.37
 6 queries 6 queries
 GZIP Disabled GZIP Disabled
Time is now: 10th December 2025 - 10:40 AM |
 Quote
Quote