Welcome Guest ( Log In | Register )

4 Pages  1 2 3 > » Bottom

Outline · [ Standard ] · Linear+

 Monochromos., Build & Mod, Completed 03/03/13

views
     
TSichuck
post Jan 17 2013, 01:36 AM, updated 12y ago

Getting Started
**
Junior Member
191 posts

Joined: Oct 2009
INTRODUCTION: monochromos
user posted image


Featured on:
This build was feature at APES.MY during the wc setup APES.MY : IChuck Cooling Makeover.
Later it is choosen by Derek Smith/ East Coast Mod to be featured in their group page EastCoastMods FB : Mono Chromos
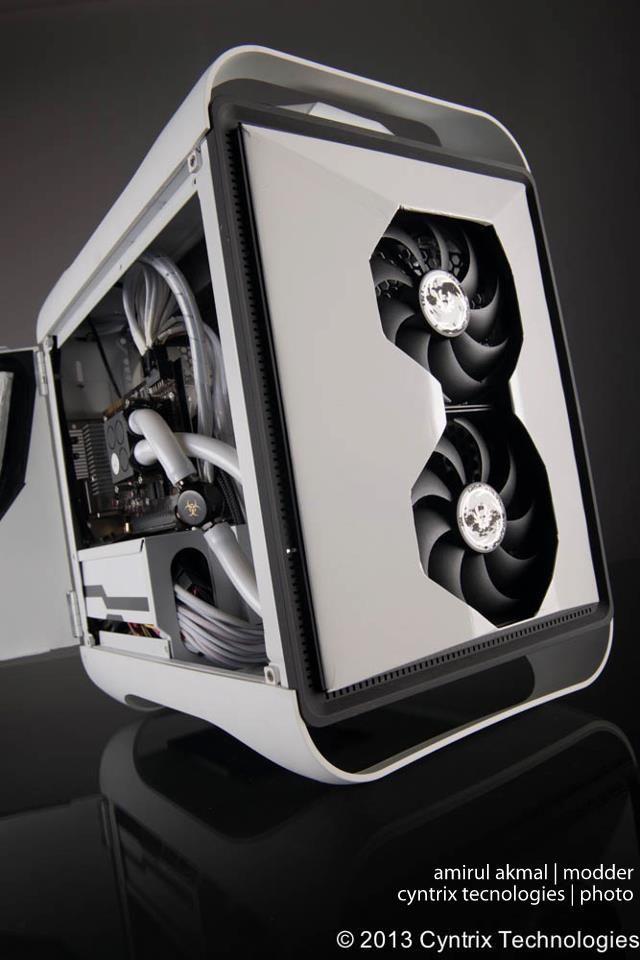
Thanks to Cyntrix Technologies for the photography session, and featured my rig on their page Cyntrix FB, Bitfenix prodigy modded by Ichuck
Paul tan had also advise and help me with the initial design of this mod, as he is my inspiration of modding, from the beginning he already asking me for the photos , to be feature on his page. PaultanDesigns: Featured Rig Monochromnos

Non-Sponsor build
Attached Image

It all started when i need to buy pc for my study purpose which im in architecture field. ive been away from desktop since form 4 which is when i went to boarding school. At first i bought ALIENWARE X-51,

But it sucks so bad, not good enough for me for gaming and also rendering.
here some of the pic from the previous pc and upgrade ive done.
Attached Image

That was my first setup. i5-2320, 8gb ram, gtx 555 1 gb, 1td hdd,
Attached Image

after not satisfied with the cpu temp, i bought this n thinking of modding the side panel. but common for SFF to have heat issue because of the size.
this also the first time i heard about the close loop water cooling, n also the custom watercooling, how noob is that.
Attached Image

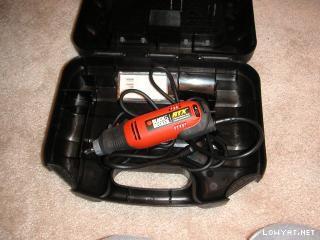
and then i bought b&d rtx, for the modding
Attached Image

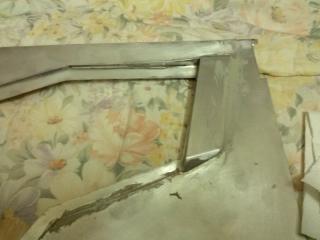
the disassembly of the X-51
Attached Image

got no pic during the cutting process because never thought i would create a worklog, and that time i also didnt know wht worklog is
Attached Image

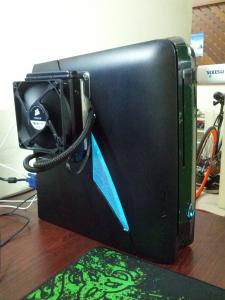
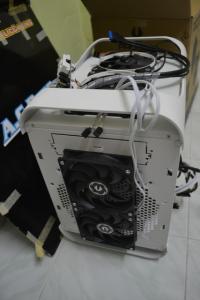
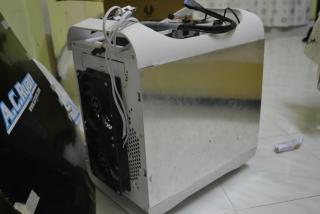
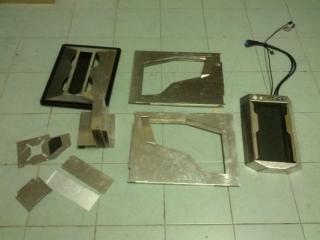
the final product of my mod session
Attached Image

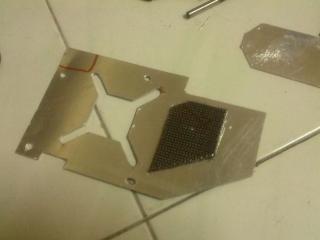
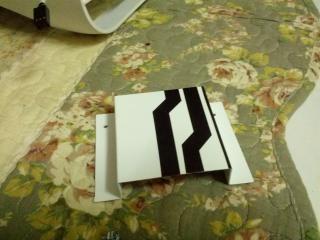
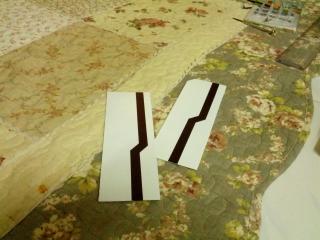
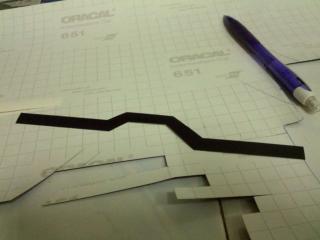
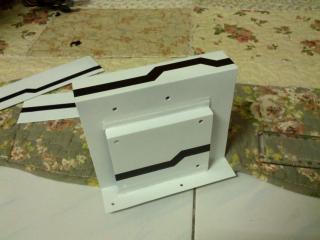
added a fan grill, customed made, order from niclasteoh

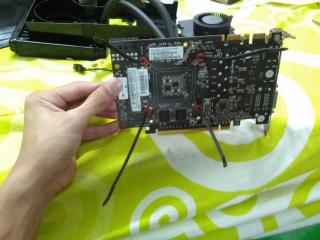
after some time, which only weeks from the modding day, i bought Palit gtx 660ti, which at first i want to buy 670/680 but the space and power constraint from the x51 made me choose 660ti

later i had good improvement from the previous gtx 555, but i got heat problem because the small case, my gpu easily hit up to 90+, i dont like that at all,
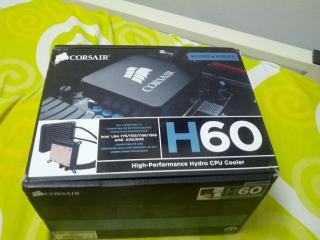
i went to Singapore n found some antec kuhler for 80$ at their mall, which also same like lowyat here in m'sia, i bought it and mount it on my gpu.
saw this method at overclock.net they call it "the mod" or "red mod" for amd. but i didnt use proper custom made bracket only use cable tie.
Attached Image

Without think much about the warranty this what i did,
Attached Image Attached Image Attached Image Attached Image Attached Image

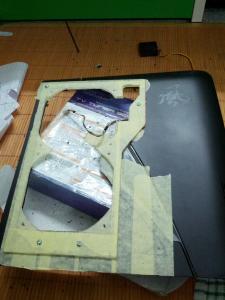
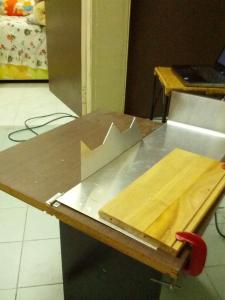
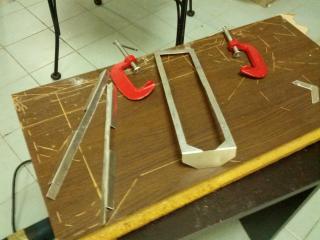
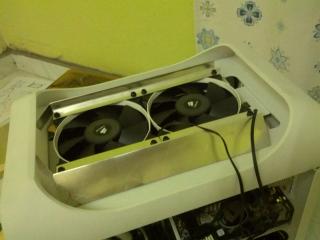
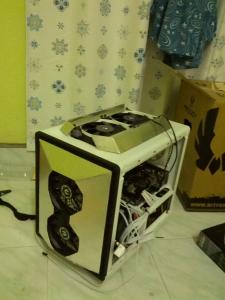
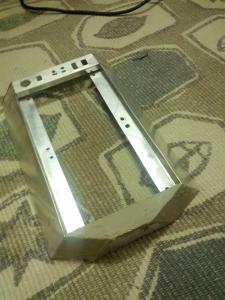
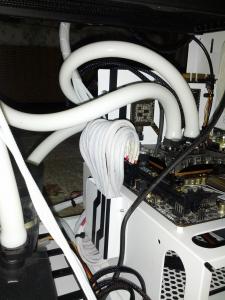
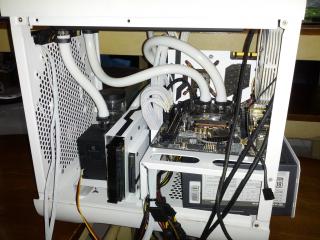
And now after done with the gpu i need mod the case so that i can add the 120 rad to my X51 which alrdy have one 120mm rad.
Attached Image

i made another hole to fit the rad
Attached Image

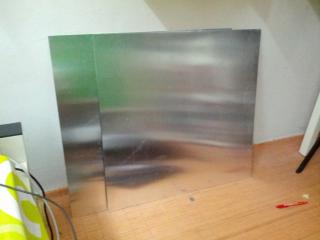
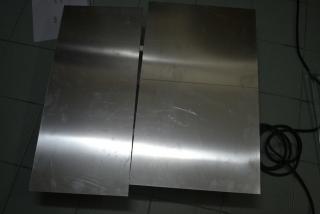
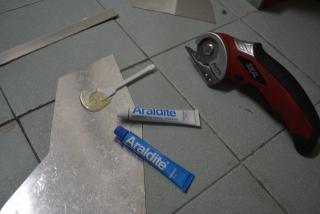
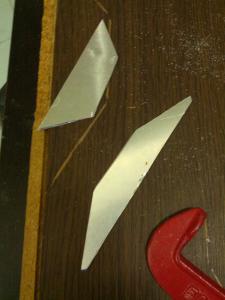
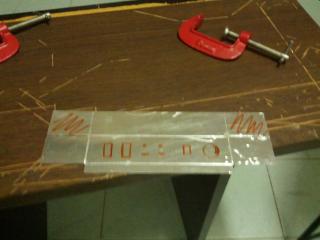
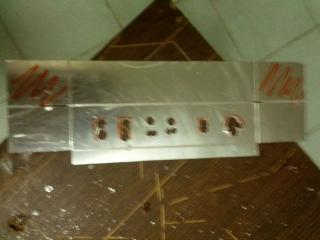
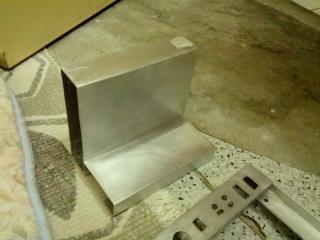
cut this 3mm acrylic to mount both of the rad n then mount the acrylic to the side panel
Attached Image Attached Image Attached Image Attached Image Attached Image

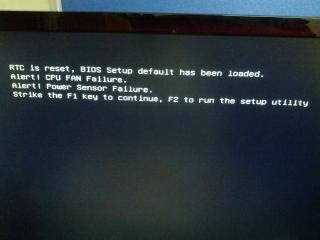
thats how my X51 evolve, but then my pc would only start for some period of time before it automatically turned off,
when im gaming, it only stayed for 4/5 minute before it shut down. i dont know what was the problem, cpu and gpu on full load only hit 50c,

i dont know how to solve this, n dont think if i sent it to shop they will found a solution without tipu me n charge extra money n item i have to buy.
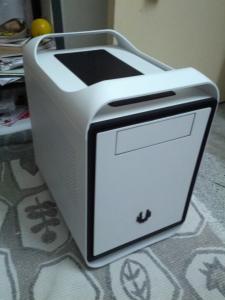
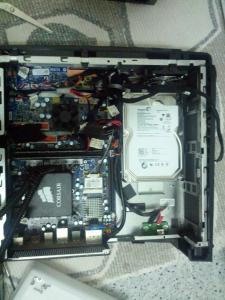
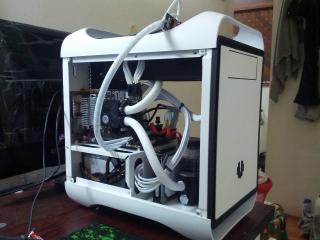
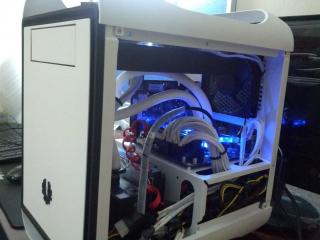
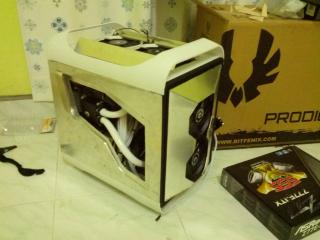
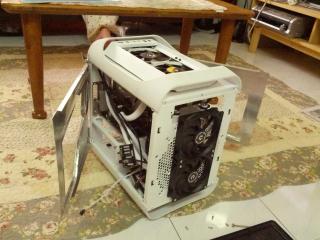
so i think that the problem is heat n not enough power. That is where my Prodigy build start.

This post has been edited by ichuck: Mar 3 2013, 01:22 PM
TSichuck
post Jan 17 2013, 01:37 AM

Getting Started
**
Junior Member
191 posts

Joined: Oct 2009
THE BUILD,

-SPEC
i5-3470 3.2 ghz,
Corsair Dominator Platinum 16gb 1600mhz,
Palit gtx 660 Ti,
Xigmatek 600w bronze,
Asrock Z77-e itx,
Crucial M4 ssd,
1Tb seagate barracuda,

-WATERCOOLING
CPU Block : XSPC Raystorm
VGA Block : EK Supremacy Copper Acetal
Pump: EK DCP 4.0
Radiator: EX240 Multiport & EX120
Tubing : Masterkleer 7/16" 5/8" Tubing White
Fittings : Bitspower 1/2" barb, XSPC Black Chrome 1/2'' barb, Enzotech T-Block & stopper
Reservoir: EK DCP 4.0 Res Combo


Since my moded X51 doesnt work out anymore, i decide to chnage the case n psu, because i think that the 330w power brick might not be enough to handle all the setup.

so i went to Apes Penang n buy a white arctic prodigy
Attached Image Attached Image Attached Image Attached Image

n then Xigmatek NRP-620 600watt Bronze,
Attached Image Attached Image

Before this i never knew about sleeving, just find it out during browsing psu. So i order the white sleeving 20m from topazzatech. i choose white because i like white and the case color also already white in color
Attached Image

Now its time to disassemble my X51 rip it all out, and put it into the new casing
Attached Image Attached Image Attached Image

So later i start sleeving the fan, n psu wire using stepler bullet and plier
Attached Image Attached Image Attached Image

Here what my rig looks like intially
Attached Image

I want to paint the gpu cover to white, but i only spray it on n this is how it turn out, with hose wrap
Attached Image Attached Image

THE Problem!! again, my pc always comeout with new problem at some point im giving up in doing this build, but thats why people say " learn from your mistake"

Heat is my nemesis now, my gpu temperature goes sky rocket to 50/60, on idle and up to 80+ when gaming, i only wait it to reach 100 at some time.
maybe the Antec Kuhler 620 gpu block doesnt contact properly on the gpu chip.

I am frustrated with the result for now, with lot of money i have wasted the come out really make me disspointed.

Later the H60 i use for my cpu also make heat problem, same as above. Im in a dead end which then lead me to bring my pc for a check at Apes Wangsa Maju.
they then found out that th H60 pump didnt work, which have been my fault for wrongly assemble the wire after sleeving, well thts a rookie mistake i guest.
So i decide to go with REAL Water cooling. Before that i did try to sell my gpu for cheap price so tht i can buy new gpu

here is my setup, u can also take a look at Apes.My fb APES.MY: Ichuck cooling makeover

Attached Image Attached Image Attached Image

At this moment im really grateful with my rig wink.gif 
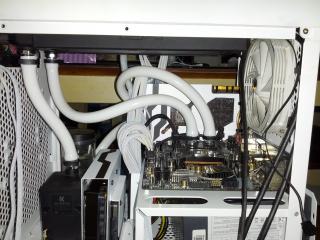
after lots of problem my rig is great for now.

Next i upgrade the rig, with Crucial M4 128gb ssd, Ripjaws X 8gb ram & NZXT white led strip, All from lingloong
Attached Image Attached Image Attached Image Attached Image

An update on my rig after the upgrade
Attached Image

This post has been edited by ichuck: Mar 3 2013, 04:00 AM
TSichuck
post Jan 17 2013, 01:37 AM

Getting Started
**
Junior Member
191 posts

Joined: Oct 2009
My pc was ok for some time, but then this screen appear on every boot, n i need to setup my time and date every single time.
At this time i still using my AlienwareX51 mobo.

Attached Image

So after that i decide just to change the mobo, thinking of Asus its or asrock, loving the Evga but its not available here.
so here what i bought for the upgrade.

i sell my mobo first. my empty prodigy
Attached Image

New mobo and some extra hehe.
Attached Image Attached Image Attached Image Attached Image Attached Image Attached Image

So again for now my pc is in the best state.
Attached Image Attached Image

This post has been edited by ichuck: Feb 5 2013, 01:59 AM
TSichuck
post Jan 17 2013, 01:41 AM

Getting Started
**
Junior Member
191 posts

Joined: Oct 2009
Yeah n i thought alrdy in the worklog part , thanks for reminding, donno how to shift haha

TSichuck
post Jan 17 2013, 01:44 AM

Getting Started
**
Junior Member
191 posts

Joined: Oct 2009
alright then, n thanks

This post has been edited by ichuck: Jan 17 2013, 01:45 AM
TSichuck
post Feb 5 2013, 02:19 AM

Getting Started
**
Junior Member
191 posts

Joined: Oct 2009
THE MOD.

Now here come the question, some of u might thought of why i never have my side panel on? maybe to show off etc etc.
but actually i had sent my side panel on the day the case was bought to a person from Promodding which is the same company Reiben05 work.
I sent to them to make me a side panel window, but they said poslaju lost it. Here the tracking number EM104404476MY.
but they promise to give me ganti rugi. but till now nothing i got.

So at first i only wanna make side panel for my Prodigy using 1mm aluminum plate. but there is where i start to look for modding site n get inspired alot by modders such as Paul Tan, Iren Modz, Tantric and many more.

FYI i never had any experience in modding.

so here all the stuff i get to start modding.
Attached Image Attached Image Attached Image

So later talking about designing, i start with some sketches, try to get the concept design n theme. so i came across "monochromos"
which means one color. which is why i choose white and black. Because some said that white is not a color because it is the mixture of all the colors of the rainbow, n thats how we get white. so the only color i use is Black.

Then i start with 3d modelling using skethcup n render by PodiumSu
Attached Image Attached Image Attached Image

that is roughly how my idea is. to fit 2x120mm fan infront so that later i can add another ex240 infront

1. First i start with the side panel. Install the fan for the top and front.
Attached Image Attached Image

here are my first cut
Attached Image Attached Image Attached Image
Attached Image Attached Image

Attached Image Attached Image Attached Image

2. Next i continue with the front panel.
the design. it is different part for the right and left side. n cutting it manually make it hard to get and identical result.
Attached Image Attached Image Attached Image
Attached Image

This post has been edited by ichuck: Feb 5 2013, 10:03 PM
TSichuck
post Feb 5 2013, 09:04 PM

Getting Started
**
Junior Member
191 posts

Joined: Oct 2009
its about rm48 for 600mmX600mm
TSichuck
post Feb 5 2013, 09:06 PM

Getting Started
**
Junior Member
191 posts

Joined: Oct 2009
buy from lun1986 hegot 2mm, 3mm also
TSichuck
post Feb 5 2013, 10:08 PM

Getting Started
**
Junior Member
191 posts

Joined: Oct 2009
3. Now its time to finish the front panel top and bottom part
a mockup using manila card
Attached Image

this is actually to cover the middle vertical part on the front panel
Attached Image
Attached Image


This post has been edited by ichuck: Feb 6 2013, 05:51 PM
TSichuck
post Feb 5 2013, 10:19 PM

Getting Started
**
Junior Member
191 posts

Joined: Oct 2009
4. Top shroud design.
Here are the 2 part of the top chroud before fully bent.
Attached Image

After the bending
Attached Image

Test fitting.
Attached Image

Another view from far
Attached Image

This is the front cover for the top shroud
Attached Image

The switch panel which is located at the back of the top shroud
Attached Image

Creating this small hole need alot of work. I use drill and the grinded it. Later do filing.
Attached Image

After it is dully bent
Attached Image

The final product. it is all fix together using araldite.
Attached Image

Now i do the additional part for the side panel. It is called fin i think biggrin.gif
Here what the side panel looks like after the araldite cured
Attached Image

The fins design, it is hard to make it identical doh.gif
Attached Image Attached Image

After the glued, and wht it looks like on the prodigy
Attached Image Attached Image

This post has been edited by ichuck: Feb 9 2013, 12:24 PM
TSichuck
post Feb 6 2013, 12:42 PM

Getting Started
**
Junior Member
191 posts

Joined: Oct 2009
thanks, itx suits me, haha. because i always bring my pc here and there.
thats the reason why i got the Alienware at the first place.
TSichuck
post Feb 6 2013, 06:02 PM

Getting Started
**
Junior Member
191 posts

Joined: Oct 2009
5. Next part is the hdd, ssd and pump holder.

Attached Image Attached Image Attached Image
TSichuck
post Feb 6 2013, 06:16 PM

Getting Started
**
Junior Member
191 posts

Joined: Oct 2009
6. The gtx 660 ti backplate
Attached Image
Attached Image
Attached Image
Attached Image
Attached Image

This post has been edited by ichuck: Feb 6 2013, 06:17 PM
TSichuck
post Feb 6 2013, 07:45 PM

Getting Started
**
Junior Member
191 posts

Joined: Oct 2009
QUOTE(najmul @ Feb 6 2013, 07:05 PM)
can i ask how u stick the alu plates together to make those shapes? or is it 100% bending?
*
i use araldite, but mostly i bent

This post has been edited by ichuck: Feb 6 2013, 07:45 PM
TSichuck
post Feb 7 2013, 12:33 AM

Getting Started
**
Junior Member
191 posts

Joined: Oct 2009
tq, mr wink.gif
TSichuck
post Feb 8 2013, 09:35 AM

Getting Started
**
Junior Member
191 posts

Joined: Oct 2009
this one is corded, but i dont know much the model name .
it belongs to my granpa. i only use it haha smile.gif

This post has been edited by ichuck: Feb 8 2013, 09:35 AM
TSichuck
post Feb 8 2013, 11:22 PM

Getting Started
**
Junior Member
191 posts

Joined: Oct 2009
7. i continue with touch up with putty and sanding
so far here are what ive done
Attached Image

here is the top shroud with putty on, i use this to make the surface even n blend together. Becaude i only use araldite to fixed them together and some edges might be uneven
Attached Image Attached Image Attached Image

touchup on the hdd holder, side panel and front panel
Attached Image Attached Image Attached Image

sidepanels
Attached Image

This post has been edited by ichuck: Feb 9 2013, 12:31 PM
TSichuck
post Feb 9 2013, 12:42 PM

Getting Started
**
Junior Member
191 posts

Joined: Oct 2009
8. For now the build is almost finish as only the paint job is left.

i used anchor spray can to paint all the stuff.
Most of it are left over from my previous thing. just bough 2 can of flat white.
Attached Image Attached Image

the first one to be painted is the top shroud.
Attached Image Attached Image

next one , are all the small part
Attached Image


TSichuck
post Feb 9 2013, 12:58 PM

Getting Started
**
Junior Member
191 posts

Joined: Oct 2009
9. Some test fitting and more araldite glued on.

The two part that need to be join together
Attached Image

The side panel already fixed on with the hinges. Here are the test fitting.
Attached Image Attached Image Attached Image

Later some more painting on the small part
Attached Image

I bought a matte black vinyl sticker, for insulation of the backplate and also some design for the panel
Attached Image

The mesh had already attached to the backplate n here the sticker for insulation.
Attached Image

Now the final product of the back plate with some designed sticker on it.
Attached Image

This post has been edited by ichuck: Feb 9 2013, 01:01 PM
TSichuck
post Feb 9 2013, 01:14 PM

Getting Started
**
Junior Member
191 posts

Joined: Oct 2009
10. More sticker design on, and cable management.

Bought this at Daiso Queensbay for cable management
Attached Image

This is the one that will hold my 24 pin, 6 pin, n most of the mobo cable to make it organize.
Attached Image

The sticker design for psu cover.
Attached Image Attached Image

Now design for the Hdd holder.
Attached Image Attached Image

Test fitting for the cable holder,
Attached Image Attached Image

And then the test fitting for the hdd holder
Attached Image Attached Image Attached Image

This post has been edited by ichuck: Feb 9 2013, 01:20 PM


Attached thumbnail(s)
Attached Image

4 Pages  1 2 3 > » Top
 

Change to:
| Lo-Fi Version
0.0394sec    0.72    7 queries    GZIP Disabled
Time is now: 10th December 2025 - 06:52 AM