QUOTE(golbeza @ Mar 16 2009, 01:48 AM)
seems like i did a surver on airbrushes price, looks like

to me. but i think since can sprays are gonna be adequate to me, can the small bottle paints from Time Machine used for handpaiting instead? does surfacer required before handpainting? must thinner be mixed with paint before handpaiting?
p.s: sry i ask much coz i'm really stressed coz i realli bought quite a number of those small bottle paints from time machine before surveying on the airbrush sets

omg, going to finish my very first master grade soon, the MG gundam 2.0, hehe. Btw, are the topcoats really necessary? coz when i sprayed colour on my gundam, it realli looks okay de...
Ok, airbrush and compressor setup...cheapest would be about RM650 or around there. In the long run, it would be better to get that but if money is a big contraint now...better not. no rush. handpaint first.
those small bottles of paint is that...paint. u can airbrush those, u can handpaint with those. so no worries about buying that. but u'll need to mix some thinner with the paint. chances are, straight fr bottle...the paint would be too thick to handpaint. so u'll need to dilute it a bit. don't ask me what ratio...it depends on how thick the paint has become. if u've painted ur house...u'll more or less figured out on what u'll need to do with that paint. if not...art classes in school would help too...poster color needs to be mixed with water to paint. same scenario...unless u sleep/ponteng thru ur art classes. or have they stopped art classes in secondary school?
Mix the paint with Mr Color Thinner. But it depends on the type of paint you bought fr TM. if it Mr Color...use back Mr Color Thinner. Preferably use Surfacer. as this would make the paint stick better. So it helps in handpainting. If it's the "aqueos" type...u can mix water with those paint. but takes a longer time to dry...water mar, how fast can it dry leh.
The Zaku is handpainted AND topcoated with semi-gloss...but didn't flat coat it. looks a bit glossy becos...if u spray too many layers of semi-gloss..it become glossy.


If you think the paint looks okay after you've sprayed color...then by all means. dun need to top coat. it's your personal preference. but i have to admit...if you top coat it...and let the paint cure properly, you'll less likely to scratch the paint. not full proof...but reduce scratching.
This post has been edited by davelcm: Mar 16 2009, 08:59 AM 

 Mar 12 2009, 12:01 PM

 like wat ray mentioned, it's hard to just explain through words. test it...try it first. you won't know until at least u've gotten ur hands dirtied. actually u're very lucky that there's online help to answer your questions. i started by bumping around on my own and searching internet (after it started) on how to build model kits. try ur own method...see if u like it.
  Quote
Quote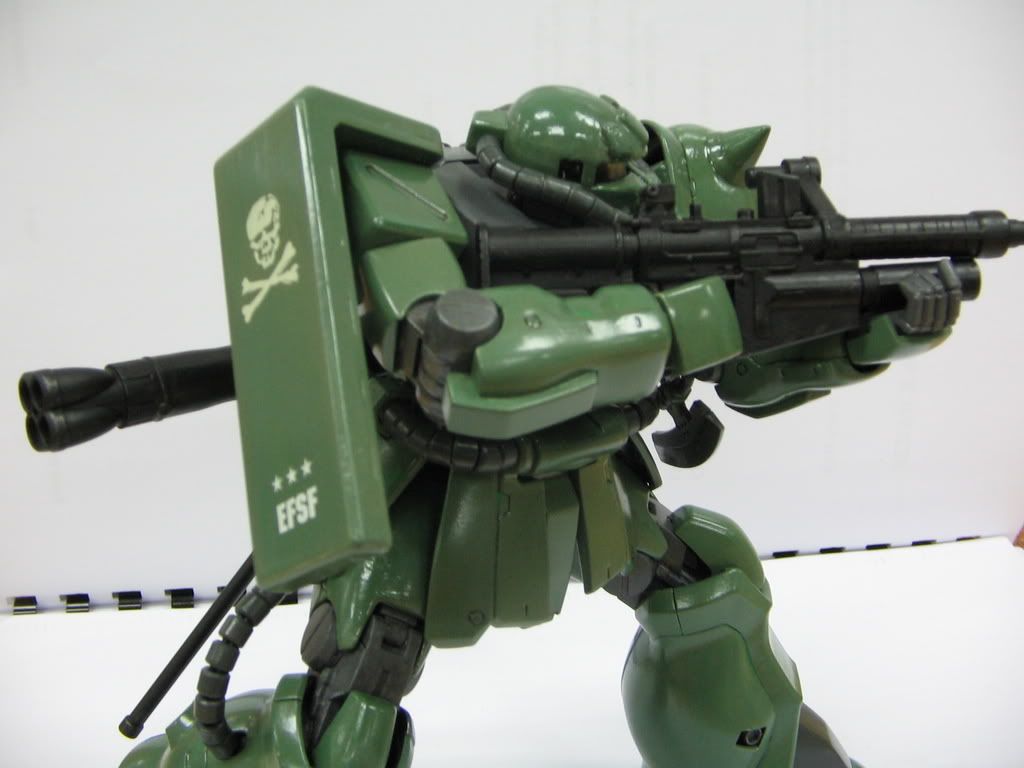

 0.0232sec
 1.00
1.00
 7 queries
 GZIP Disabled