QUOTE(UnknownH @ Jul 31 2020, 07:33 AM)
Use a test pen. One of them should be live. Others are ground and neutral. My guess, 2 of them are just a loop neutral.
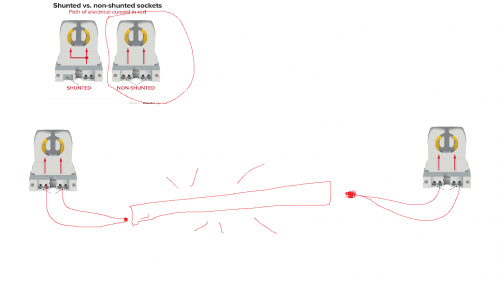
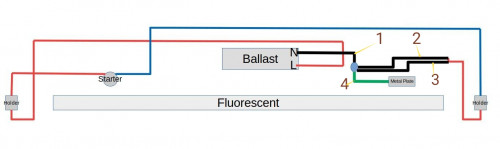
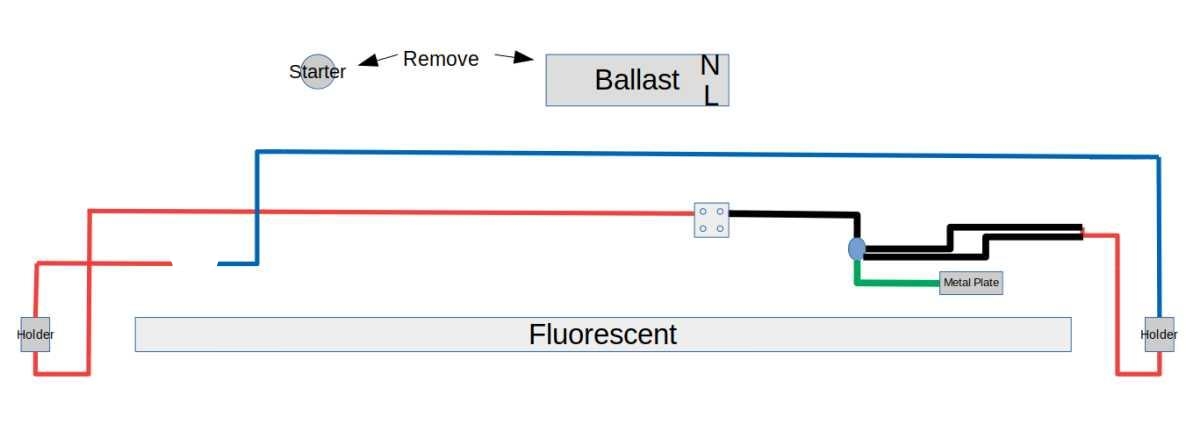
Anyway, this is normally a magnetic ballast fluo setup.

Note the live(L). The idea is you want the live go straight to the holder, skipping the ballast. That's it. Just connect them wires previously at the ballast together using a connector.
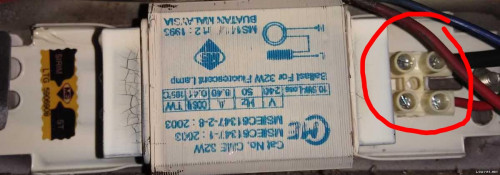
From your photo, seems like the connector on the ballast looks fine. You can use that. Just loosen all 4 screws on the connector, pull it out from the ballast.
You don't even need to bring down the casing. Less effort.
Basically, just need to connect two wires that's already in the case together.
The other end of holder should be to the neutral(N).
Then remove the starter if you're using Mr DIY or no name brand LED. If you're using Philips, replace it with the one that comes with Philips.
Since if going to fix the wiring , surely will turn off the circuit box.Does test pen works on Live ?
The diagram is quite complicated as beginner , rather if I hope someone can show me how am i suppose to fix wiring ? The wall wire came with 3 black , one should be Live without knowing which one , 2 black is connect to red cable and the last green cable ???
The ballast does not light up even change to other fluorescent/ remove starter and add LED also not working.
Rather than buying another ballast , it would be much cost effective by changing to all LED straight.
In the diagram , which i don't know why the tech wiring fix in that way.
Attached thumbnail(s)


 Jul 30 2020, 06:32 AM, updated 6y ago


 Quote
Quote


 0.0583sec
 0.78
0.78
 6 queries
 GZIP Disabled