Welcome Guest ( Log In | Register )

40 Pages  1 2 3 > » Bottom

Outline · [ Standard ] · Linear+

 Heatsink Lapping Tutorial+Pics(added 6600) lapped , Discussion and How-To's

views
     
TSneoxz
post Nov 5 2006, 05:58 PM, updated 18y ago

Newbie
******
Senior Member
1,098 posts

Joined: Oct 2004
Nothing much impressive. Just want to share about my ninja lapped few weeks ago.
QUOTE
Source : http://www.overclockersclub.com/guides/hea...appingguide.php
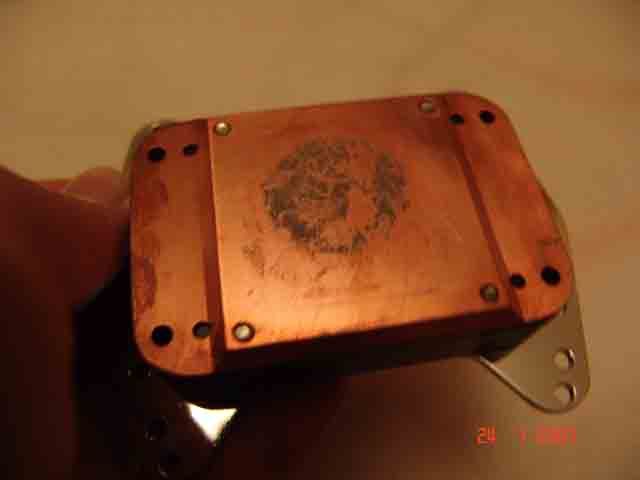
Why Lap?
Due to the machining process, just about every heat sink will have a rough surface. To the naked eye it may look flat or even feel smooth, but there are microscopic groves in the surface. These groves will trap air between the heat sink and the CPU, and cause a poor transfer of heat.

Thermal compound (Artic Silver, Nanotherm, etc.) is used to fill these groves and help transfer the heat from the CPU to the heat sink. Just like air, thermal compound is something else that the heat has to pass through to get from the CPU to the heat sink.

We lap the heat sink to make it smooth, allowing us to get the best possible contact between the CPU and heat sink. Even after lapping, there will still be grooves for the air to be trapped in, but the grooves will be much smaller, and cause less of a problem.

Lapping can be done on any heat sink, pelt, or water block, regardless of its material. Just keep in mind that a softer metal will sand away faster than a hard metal.

The Process
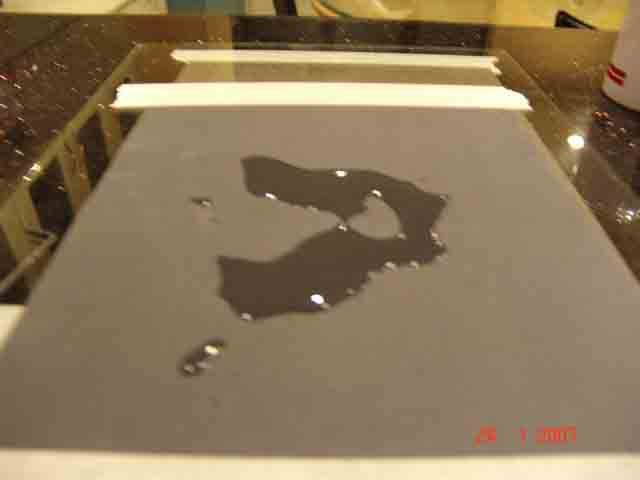
You will start out with the most coarse grit first (400 Grit), and repeat the process for each higher grit.

Completely soak the sandpaper under some running water, and then place it on your flat surface. I left a bit of standing water on my sandpaper. You can use hot water or cold water, it doesn't matter. I used cool, as I didn't want warm water on my hands to defrost my icy mug. smile.gif

Next place a drop of the dishwashing liquid onto the heat sink's base. You only need to do this on the part that we will be lapping. Now, spread the dishwashing liquid around so it covers the base, again, you only need to worry about the part that we will be lapping.

Place the heat sink on the wet sandpaper. Hold the heat sink by the side, and slowly move the heat sink up and down the paper. Be careful not to apply any pressure to the heat sink, we want its own weight to do the work for us.

After about ten passes across the sandpaper, rotate the heat sink 90° (that's a quarter of a turn) and continue to sand until you've made a complete rotation. I continue to do this until I've made 10 complete rotations, stopping every couple of rotations to rewet the sand paper, and reapply the soap.

Repeat the process using the 600, 800, 1000, 1500, and 2000 grit sand paper. In the end, you will have a nice, mirror like reflection on the heat sink base.

Congratulations, you've just lapped your heat sink and created a better surface for heat transfer. You should notice close to a 5°C drop in CPU temperature, though results may vary.
user posted image

user posted image

user posted image

user posted image

user posted image

user posted image

user posted image

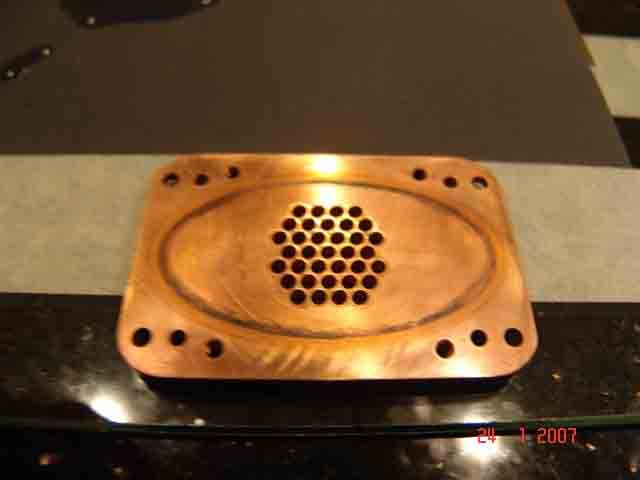
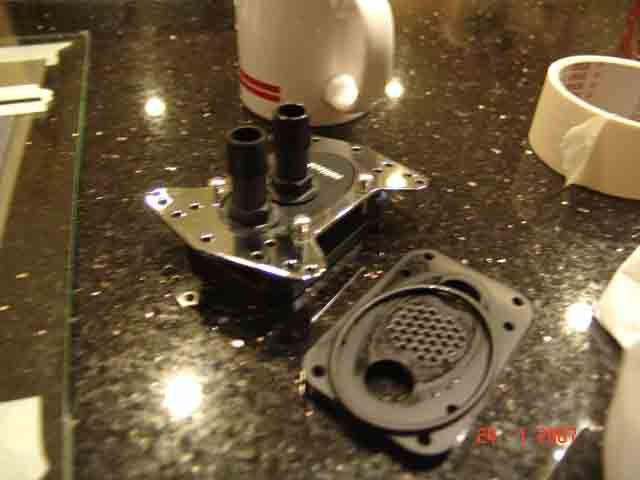
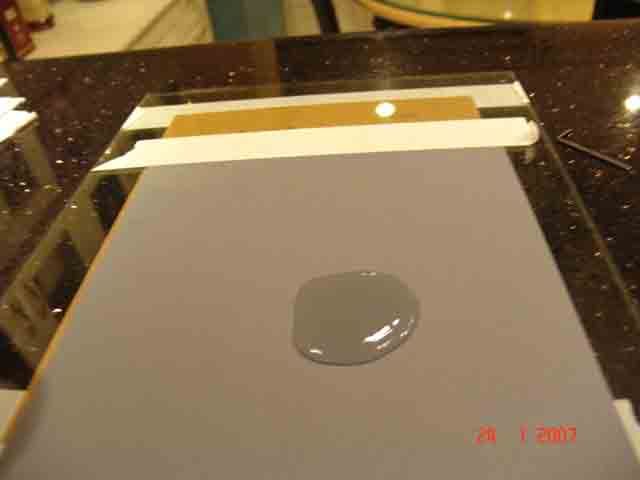
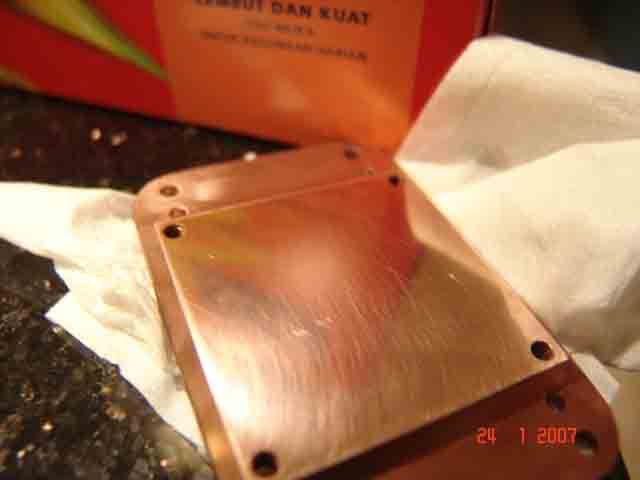
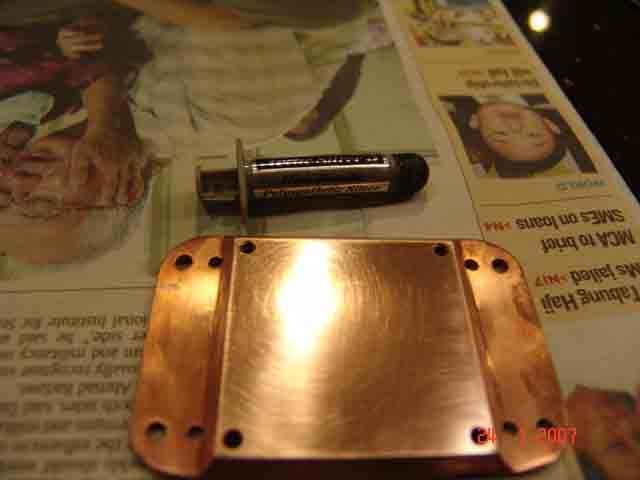
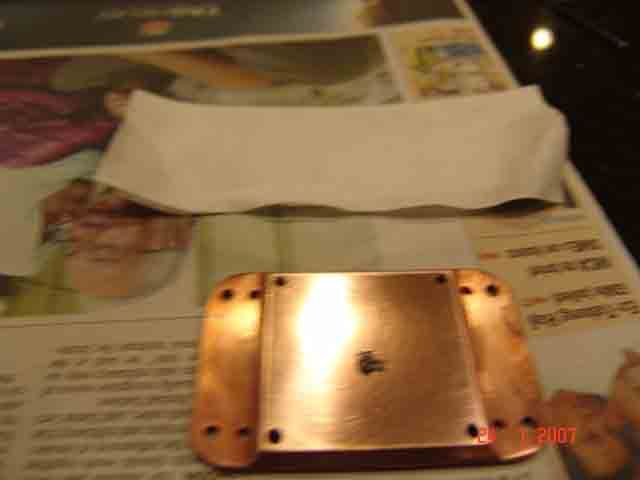
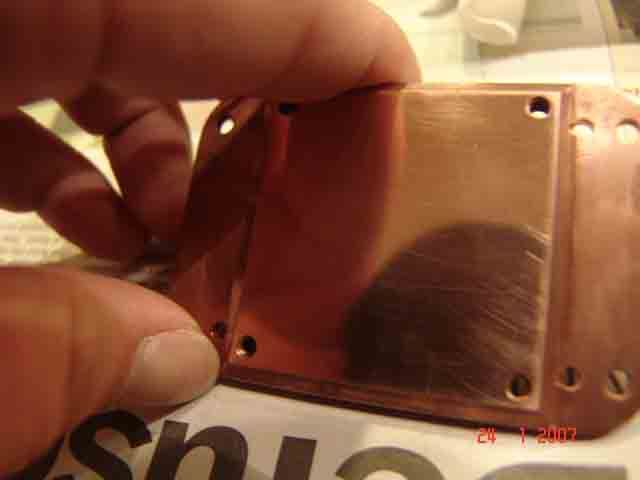
Using sandpaper grit -> 500>800>1000>1500>2000
Got around 10degrees drop.

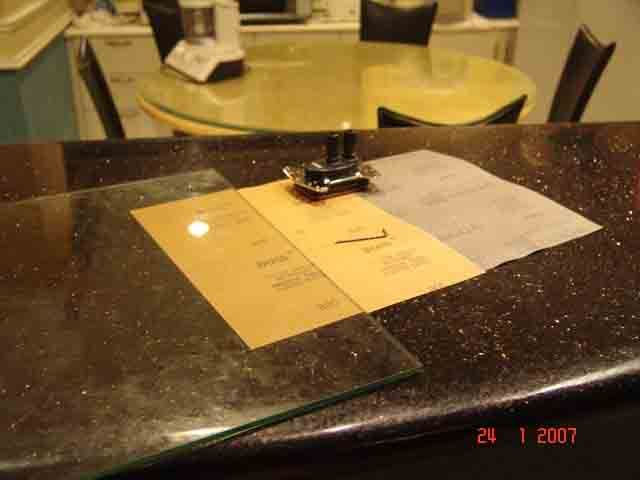
Pictures taken using w810i flex.gif

6600 to mirror perfection

user posted image

thx neoxz smile.gif

This post has been edited by neoxz: Nov 16 2007, 02:08 AM
stardust_kkk
post Nov 5 2006, 06:04 PM

Getting Started
**
Junior Member
144 posts

Joined: Apr 2006


Lapping Guide -By lolhalol

Ok here we go. Lapping, lapping, lapping, I know you would have heard about lapping from somewhere and wondered what it was. Well lapping is processes of sanding something to make it more flat. In our case, the bases of our heat sinks (or processors) to have improved contact with the processor or vice versa to further improve the thermal transfer between the heat sink and the processor or vice versa. The more contact both have, the better cooling is achieved. Nothing is flat, and lapping is one of the solutions we have to achieve better results. However, lapping doesn't fully make everything better. That's where thermal compounds come into play. They will fill in the microscopic valleys of the two metals. By lapping you are
reducing the size of the microscopic valleys thus making the thermal compound and metals work more efficiently. Lapping works and every heat sink you lap will give you experience to know just how flat those heat sinks really are.

Ok here is what you need:-
1) 800Grit Sandpaper, you can use any brand.
2) 1500Grit sandpaper, you can use any brand.
3) A piece of glass or mirror ( make sure its big enough for your sandpaper )
4) A rag/old cloth or a tack cloth
5) Arctic Silver 5
6) A glass of water
7) A roll of masking tape or any kind of tape
8) And obviously your heat sink or whatever you want to lap, in my case my Swiftech Storm G4 Rev.2.

This was the Storm before it was lapped.
user posted image

As you can see it was already pretty flat to begin with, look at the TIM spread out so well. I know, many of you guys will be like, don't lap a Swiftech block, you will only, make it worse. Well to tell u the truth, when I got it, and after I lapped it, I had a 1 degree drop, so I don't really care what you say. Of course you might have a different result. Ok enough bickering, let's move on.

Step 1: Take your piece of glass and lay it on some old newspapers or a magazine so that its lifted off the table or your workbench, this is so that you can easily move the glass or flip it over later.
user posted image

Step 2: Take the 800grit sandpaper and lay it out on the glass. Then tape it onto the glass using the roll of masking tape.
user posted image

Step 3: Take your 1500grit sandpaper and lay it out onto the other side of the glass using the same way as step 2.
user posted image

Step 4: Pour a small amount of water onto the 800grit sandpaper side of the glass.
user posted image

Step 5: Disassemble your heat sink, all fans, led's, anything that can be removed please do so now. In my case, I remove four bolts to get the cooper base out.
user posted image
user posted image

Step 6: Put your heat sink into the water that's on your sandpaper.
user posted image

Step 7: Grab hold of your heat sink/block and with even pressure, move it around in any way that is easier for you, figure 8, up-down, left-right, all is ok, and you can even mix the movement. You would know when to stop when you don't feel resistance (resistance from both directions left-right, up-down). Use your own judgment for this. The following picture is after 800grit.
user posted image
*


This post has been edited by DaRkSyThE: Jan 28 2007, 03:32 PM
fantagero
post Nov 5 2006, 06:04 PM

[ToFish4RepliesLikeYours]
*******
Senior Member
2,723 posts

Joined: Jan 2006
From: Pekopon Planet ~~~


Step 8: Pour a small amount of water onto the 1500 grit side of the glass.
user posted image

Step 9: Repeat steps 6 and 7. And the following picture is after 1500 grit.
user posted image

Step 10: Now this step if you don't want to do you can skip, but this is for those who have extra Arctic Silver 5 lying around. Ok, first put a small blob of Arctic Silver 5 onto the centre of the base. If you haven't figured it out yet, we will be using Arctic Silver 5 as a rubbing/polishing compound. You won't get a mirror finish but this enables you to really fill out the micro gaps. Take your cloth and really rub the Arctic Silver 5 into the base, you will notice that the cloth "sucks" up the Arctic Silver 5, so try your best to rub as much of the Arctic Silver 5 on the cloth onto the base.
user posted image
user posted image

Here is the base after I "polished" with Arctic Silver 5.
user posted image

Step 11: Now install everything you took out from your heat sink/water block, and install it back into your case. Apply your preferred TIM, like mine is Arctic Silver 5. (For users of Arctic Silver 5, look to the end of the guide for "Instructions for Arctic Silver 5" sourced from the manufacturer's website. You should see a 1~5 degree Celsius drop from your old temperatures. Oh and of course clean up after you're self, or else the missus or the girlfriend will be after you. (Highlight in red) You STILL HAVE TO APPLY TIM to your heat sink/water block.

Notes:

Having a mirror finish is not what we are after, look for "techpowerup lapping article" article at the end of the guide, but having a mirror finish sometimes comes naturally if you lap with 2000grit sandpaper, but I have had no real improvements by lapping with 2000grit.

If you touch the heat sink and it feels warm, you know that the heat sink is making a difference. The heat sink and the thermal pad/compound is absorbing the heat and dissipating it away. If I used a bigger heat sink the area of dissipated heat would become greater because you have a bigger surface area to move away heat. Lapping works, there is no reason why it wouldn't. Lapping is a bit tiring but is well worth the effort to get every last ounce of performance and cooling off your product.

Link to techpowerup lapping article, scroll down to the " Do i want a miror Finish" if you don't want to read the whole article.
Click Here
Attachment for the as5 installation.[attachmentid=186255]

Disclaimer: I am not responsible for any damages that resulted from following this guide directly or indirectly.

P/s sorry for the crappy photos, will post high res ones if requested.
*


thx lolhalol smile.gif


This post has been edited by DaRkSyThE: Jan 28 2007, 03:45 PM
LWRNCH6550
post Nov 5 2006, 06:05 PM

On my way
****
Senior Member
614 posts

Joined: Jun 2005
From: ლ(ಠ益ಠლ)
i cant find 2000grid sand papers at my place . sad.gif
ive learned one thing from my own heatsink lappin , i didnt lap the surface evenly , so there is a sinking in the center where the CPU contacts with it , so my CPU will have a suction between the CPU and the sink .

This post has been edited by LWRNCH6550: Nov 5 2006, 06:10 PM
LittleLinnet
post Nov 5 2006, 06:08 PM

Iophobia
*******
Senior Member
3,593 posts

Joined: Feb 2005
From: ***Penang***
10 degrees ??
That's really a lot.

You should include some pics while you are lapping though, lol
TSneoxz
post Nov 5 2006, 06:09 PM

Newbie
******
Senior Member
1,098 posts

Joined: Oct 2004
QUOTE(IcEMoCHa @ Nov 13 2007, 10:03 AM)
My Results:

Requirement:
2x400grit sandpaper
2x800grit sandpaper
2x1200grit sandpaper
2x1500grit sandpaper
1x2000grit sandpaper
a flat surface
some patience and time

This is the original heatsink...
user posted image

As you can see that it is very rough and not balanced...

Firstly, you use the flat surface to lay your sandpaper so that it wont be the heatsink wont be imbalance.. Start with 400grit you put the heatsink on the sandpaper.. then you push it(don't use force as it may cause the heatsink to have rounded edge) up and down after a few rounds turn the heatsink 180degrees and do it again... repeat until you have a full polished surface... Go either horizontally or vertically to make it easier to see which part of it is not polished... Repeat with ascending grit sandpapers..

Note: Start with 400grit if you have a very rough heatsink surface ...  Otherwise you can start with 800 or so...

After 400grit
user posted image

After 800grit
user posted image

After 1200grit
user posted image

After 1500grit
user posted image

After 2000grit
user posted image

After I finished polishing with the sandpaper... I used some industrial grade metal polish to make it shine further...

After metal polish
user posted image

You can do the same to the CPU but start with 1200grit as CPU IHS is made of soft metals...

After polishing CPU(my e6600)
user posted image

Results of hardwork:
Before polishing(ambient temp 24°C)
user posted image
After polishing(ambient temp 30.1°C)
user posted image

As you can see it shove of 2°C of the idle temp and almost 6­­°C of the load temp...
*
Thanks IcEMoCHa. GREAT work there!

This post has been edited by neoxz: Nov 16 2007, 02:01 AM
fantagero
post Nov 5 2006, 06:13 PM

[ToFish4RepliesLikeYours]
*******
Senior Member
2,723 posts

Joined: Jan 2006
From: Pekopon Planet ~~~


bro.. lapping mean u use the sand paper. to sand until shine eyh???
why it increases the performance??
styloe
post Nov 5 2006, 06:14 PM

6 sTaR wORkaHOLic JuNKie
******
Senior Member
1,242 posts

Joined: Aug 2005
From: Sila Mampir,JB sTaTus:GTX 680 SLI


QUOTE(neoxz @ Nov 5 2006, 06:09 PM)
10 degrees drop at max load tongue.gif at Idle, it dropped about 4 degrees only
*
Bro can teach us how to properly lapped our HSF... rclxms.gif if can lower by 10c is really good...my cooler isnt cooling my proc enuff maybe by lapping it can help alot since the surface aint that smooth....come come teach us rclxms.gif
TSneoxz
post Nov 5 2006, 06:28 PM

Newbie
******
Senior Member
1,098 posts

Joined: Oct 2004
QUOTE(LWRNCH6550 @ Nov 5 2006, 06:05 PM)
i cant find 2000grid sand papers at my place . sad.gif
ive learned one thing from my own heatsink lappin , i didnt lap the surface evenly , so there is a sinking in the center where the CPU contacts with it , so my CPU will have a suction between the CPU and the sink .
*
Actually it's bad like tat.

QUOTE(fantagero @ Nov 5 2006, 06:13 PM)
bro.. lapping mean u use the sand paper. to sand until shine eyh???
why it increases the performance??
*
Lap to make the contact area as flat as possible, so there will be more contact area.

QUOTE(styloe @ Nov 5 2006, 06:14 PM)
Bro can teach us how to properly lapped our HSF... rclxms.gif  if can lower by 10c is really good...my cooler isnt cooling my proc enuff maybe by lapping it can help alot since the surface aint that smooth....come come teach us rclxms.gif
*
Lapping is actually easy, but it'll indeed take lots of patience and time.
PowerSlide
post Nov 5 2006, 06:59 PM

----------
*******
Senior Member
6,035 posts

Joined: Jan 2003
From: Penang


very nice job..sure take alot of energy rclxms.gif


styloe
post Nov 5 2006, 07:00 PM

6 sTaR wORkaHOLic JuNKie
******
Senior Member
1,242 posts

Joined: Aug 2005
From: Sila Mampir,JB sTaTus:GTX 680 SLI


QUOTE(neoxz @ Nov 5 2006, 06:28 PM)
Actually it's bad like tat.
Lap to make the contact area as flat as possible, so there will be more contact area.
Lapping is actually easy, but it'll indeed take lots of patience and time.
*
care to teach me notworthy.gif notworthy.gif i need to cool my proc a lot before try OCing.my load temp on stok speed kinda high cry.gif
blaxez
post Nov 5 2006, 07:19 PM

Aficionado
******
Senior Member
1,885 posts

Joined: Jan 2005
From: Sydney / Penang


Wow, smooth like a mirror. Maybe you can help us by doing some lapping services here tongue.gif
styloe
post Nov 5 2006, 07:34 PM

6 sTaR wORkaHOLic JuNKie
******
Senior Member
1,242 posts

Joined: Aug 2005
From: Sila Mampir,JB sTaTus:GTX 680 SLI


a step by step way to do it shud be nice and it shud be pinned!!!!
TSneoxz
post Nov 5 2006, 07:37 PM

Newbie
******
Senior Member
1,098 posts

Joined: Oct 2004
QUOTE(styloe @ Nov 5 2006, 07:00 PM)
care to teach me notworthy.gif  notworthy.gif i need to cool my proc a lot before try OCing.my load temp on stok speed kinda high cry.gif
*
Ok.

QUOTE(blaxez @ Nov 5 2006, 07:19 PM)
Wow, smooth like a mirror. Maybe you can help us by doing some lapping services here tongue.gif
*
I think there are some people in here who already do so.

QUOTE(styloe @ Nov 5 2006, 07:34 PM)
a step by step way to do it shud be nice and it shud be pinned!!!!
*
Hahhaa. I'll be delighted to. but i do not have pictures step by step. Wont it be nice to have it step by step with pics?
mADmAN
post Nov 5 2006, 08:03 PM

10k Club
********
All Stars
10,530 posts

Joined: Nov 2004
From: Petaling Jaya & Mid Valley


nice....

i got the same result too when i lapped my XP-120 to copper base with mirror finish. 10C drop thumbup.gif using same grit sandpaper as neoxz

and for those of you who wants to lap...just google up guides...there are tonnes of it out there.... thats exactly what i did when i wanted to lap my XP-120. i picked one and just stick with that guide thumbup.gif

This post has been edited by mADmAN: Nov 5 2006, 08:04 PM
fantagero
post Nov 5 2006, 08:10 PM

[ToFish4RepliesLikeYours]
*******
Senior Member
2,723 posts

Joined: Jan 2006
From: Pekopon Planet ~~~


QUOTE(mADmAN @ Nov 5 2006, 08:03 PM)
nice....

i got the same result too when i lapped my XP-120 to copper base with mirror finish. 10C drop thumbup.gif using same grit sandpaper as neoxz

and for those of you who wants to lap...just google up guides...there are tonnes of it out there.... thats exactly what i did when i wanted to lap my XP-120. i picked one and just stick with that guide thumbup.gif
*
google now is a verb.. rclxm9.gif

can i lap my stock lga775 hsink????
last time i checked,, the themal paste kinnda like rubber..
is that normal thermal paste??
i mean, the one i always see in lowyat.. the one in injection...
if i lap,, that mean i hav to buy new one rite.. ehmm..
elhh82
post Nov 5 2006, 08:14 PM

Enthusiast
*****
Senior Member
737 posts

Joined: Jan 2003


very nice job lapping.. couldn't have been easy with that heavy and huge ass ninja smile.gif
styloe
post Nov 5 2006, 08:32 PM

6 sTaR wORkaHOLic JuNKie
******
Senior Member
1,242 posts

Joined: Aug 2005
From: Sila Mampir,JB sTaTus:GTX 680 SLI


QUOTE(fantagero @ Nov 5 2006, 08:10 PM)
google now is a verb..  rclxm9.gif

can i lap my stock lga775 hsink????
last time i checked,, the themal paste kinnda like rubber..
is that normal thermal paste??
i mean, the one i always see in lowyat.. the one in injection...
if i lap,, that mean i hav to buy new one rite.. ehmm..
*
Definately u can lapped ur stok but the diff wont be as much since ninja is a high end HSF.for thermal paste get those Artic silver5 my fren will cost u a bit but its worth the buy icon_rolleyes.gif

#do u really need the piece of glass any alternative...any g power pro user here how to disassemble the fan? icon_question.gif

This post has been edited by styloe: Nov 5 2006, 08:40 PM
fantagero
post Nov 5 2006, 08:53 PM

[ToFish4RepliesLikeYours]
*******
Senior Member
2,723 posts

Joined: Jan 2006
From: Pekopon Planet ~~~


QUOTE(styloe @ Nov 5 2006, 08:32 PM)
Definately u can lapped ur stok but the diff wont be as much since ninja is a high end HSF.for thermal paste get those Artic silver5 my fren will cost u a bit but its worth the buy icon_rolleyes.gif
*
ehmm.. so,, thermal paste harden like rubber eyh???
thanks for the knowldege..

i hope anyone can enlight me.. how hard to lap the ninja??
why so hard??

styloe
post Nov 5 2006, 08:56 PM

6 sTaR wORkaHOLic JuNKie
******
Senior Member
1,242 posts

Joined: Aug 2005
From: Sila Mampir,JB sTaTus:GTX 680 SLI


QUOTE(fantagero @ Nov 5 2006, 08:53 PM)
ehmm.. so,, thermal paste harden like rubber eyh???
thanks for the knowldege..

i hope anyone can enlight me.. how hard to lap the ninja??
why so hard??
*
one thing is because it darn heavy whistling.gif

40 Pages  1 2 3 > » Top
 

Change to:
| Lo-Fi Version
0.0247sec    1.32    6 queries    GZIP Disabled
Time is now: 16th December 2025 - 10:33 PM