

Thx Eelen for the tutorial ^^. Personally I prefer using 1.5mm drill since the hole will be tighter as well.
Hobbies Tamiya Mini 4wd V4, lets and go!
Hobbies Tamiya Mini 4wd V4, lets and go!
|
|
 Mar 3 2009, 12:31 PM Mar 3 2009, 12:31 PM
Return to original view | Post
#61
|
 
Newbie
0 posts Joined: Jan 2009 |
Thx Eelen for the tutorial ^^. Personally I prefer using 1.5mm drill since the hole will be tighter as well.
|
|
|
|
|
|
Mar 3 2009, 02:18 PM
Return to original view | Post
#62
|
|
Newbie
0 posts Joined: Jan 2009 |
You should be able to find them in hardware shops. Ima be posting gearbox mod for MS PRO later ^^.
|
|
|
Mar 3 2009, 05:36 PM
Return to original view | Post
#63
|
|
Newbie
0 posts Joined: Jan 2009 |
QUOTE(Lost4Love @ Mar 3 2009, 05:13 PM) any female racer here? You have the honour of being the 1st   Welcome here. Welcome here. |
|
|
Mar 4 2009, 02:02 AM
Return to original view | Post
#64
|
|
Newbie
0 posts Joined: Jan 2009 |
QUOTE(FatalMIND @ Mar 4 2009, 01:07 AM) ok boss, haha. u will be thr al the time? i once went thr n find it miserably quite, n scary too since thr r more ppl working thn visiting in TU. tat time i got myself a TRF-RACER Jr., shd b a weekday though.. im still lost in the cosmetic part, aka painting the 'shell'. haha. will thr b any tutorial? I am working on a clear body as well. I can take pics step by step and post it up. anyway, thx R3Ju7Ce for 'comforting'.. haharx |
|
|
Mar 4 2009, 10:22 PM
Return to original view | Post
#65
|
|
Newbie
0 posts Joined: Jan 2009 |
Gearbox Mod:
 This post has been edited by 13lack.12ose: Mar 5 2009, 01:08 AM |
|
|
Mar 4 2009, 10:56 PM
Return to original view | Post
#66
|
|
Newbie
0 posts Joined: Jan 2009 |
12ose's Tutorial 1 (Part 1): Decorating Polycarbonate Cover using Spray/Masking Method:
A) Introduction: Cars can have the same setting, same cover, but looks is what gives the car its soul and character. Now I will show you how to decorate polycarbonate bodies using Spray/ Masking Method. B) Tools You will Need: 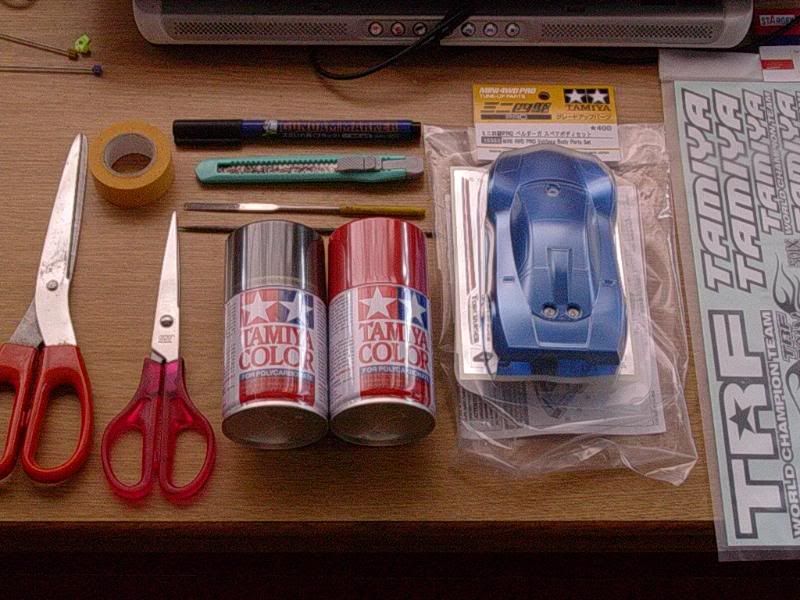 1. Cover of your choice 2. Tamiya Masking Tape (Highly recommended cause they do not peel off the paint) 3. Pen Knife 4. Files (1 Flat file for straight edges, 1 round file for wheel guard) 5. Scissors (Big for cutting long straight lines, Small for cutting curves/ trimming) 6. Polycarbonate Spray paints 7. Stickers and decals 8. Gundam Fine Tip Marker 9. Cutting Mat (or Hardback magazines if you do not have one like me  ) )10. Clean lint-free cloth (too shy to be in the picture )C) Preparing your cover: Since polycarbonate is very easy to work with, it is good to cut a little more so that your cover can sit lower on the chassis. Cut straight long lines using large scissors and use the small scissors for smaller/ shorter areas. Use penknife if necessary to shave off tiny bumps along the lines. 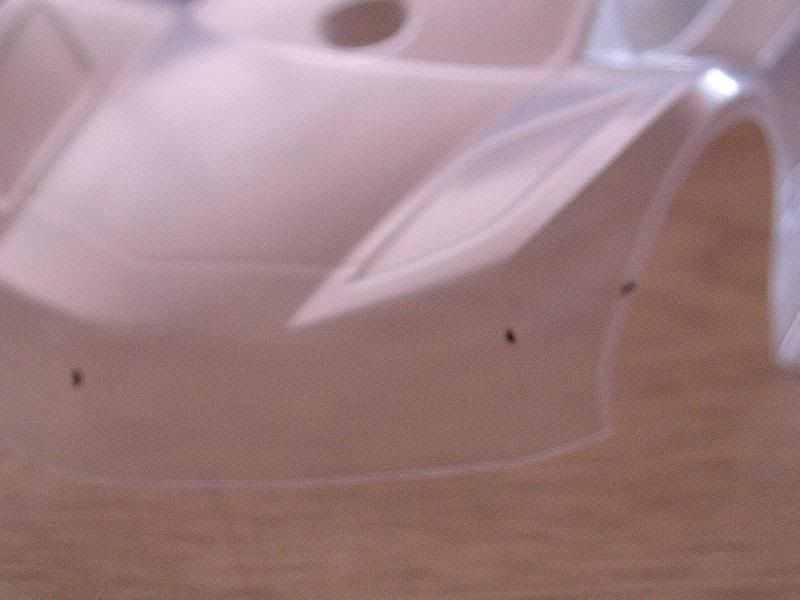 After cutting, sand the cut areas with a file in a diagonal direction for smoother and more uniform lines. Clean the cover with soapy water to remove the mold-releasing agent and dirt after everything is done. Leave it to dry or use the cloth (new spectacle cloth can be used) to wipe the cover dry. 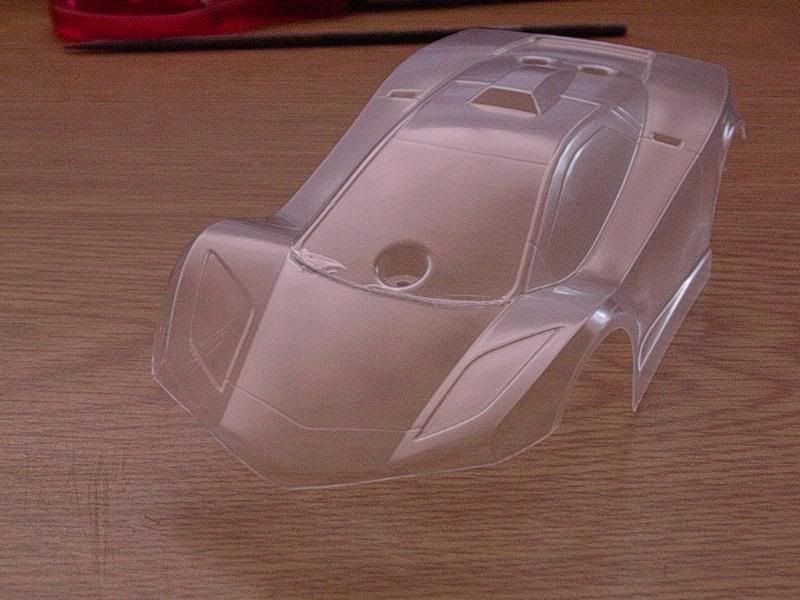 Added on March 4, 2009, 11:06 pmD) Designing Motifs and Masking the cover: Stick the masking tape onto the cutting mat. Using the marker, draw out the motifs that you want. I choose flames cause it is relatively easy to draw and looks really hot (no puns intended). After designing your motifs, cut them out with the penknife. Now take the headlight and windscreen stickers from your kit and paste them under the cover. Make sure all the edges are fully pressed down or the paint will run under the sticker. Then proceed to paste the motifs under the cover. 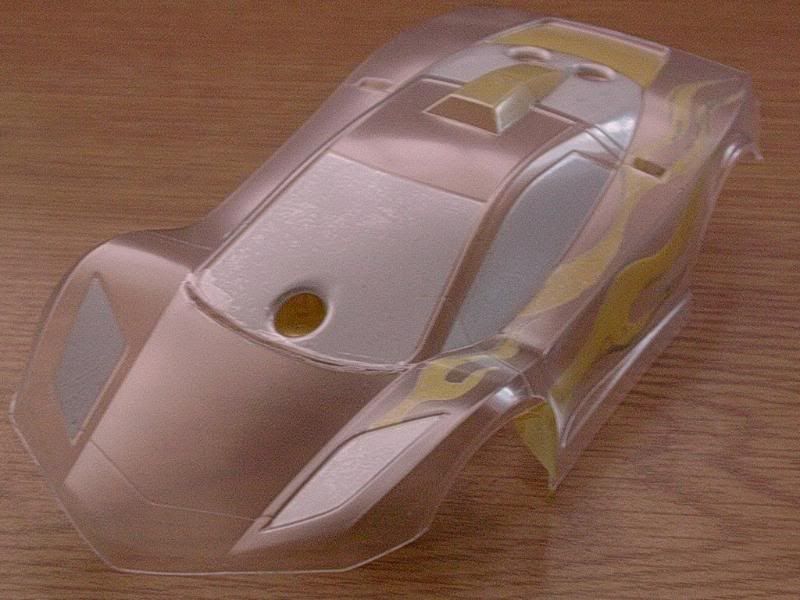 E)Painting the cover: USE ONLY POLYCARBONATE PAINTS. Normal spray paints and acrylic will melt the polycarbonate and also will crack after it dries. Tamiya Polycarbonate paints are denoted by PS-number. Shake the spray well before use (I shake for approx 30s, didn't count, but long enough for my mother to complain about the noise ). Hold it about 25-30cm from the cover and spray from left to right evenly. Do not spray a single thick coat. Many thin coats will not only dry faster, but produce a more even finish as well. I did 3 coats for each colour. After spraying the body colour, gently remove the masking tape motifs and colour the flames. 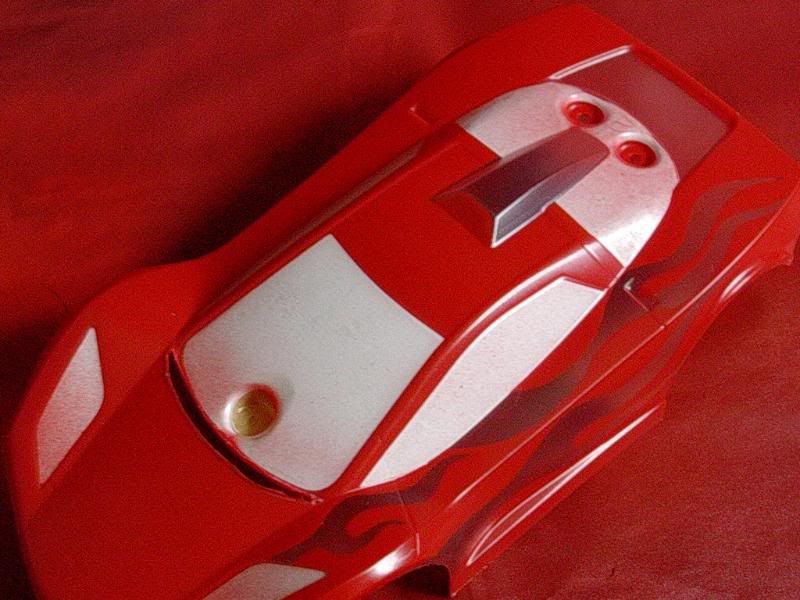 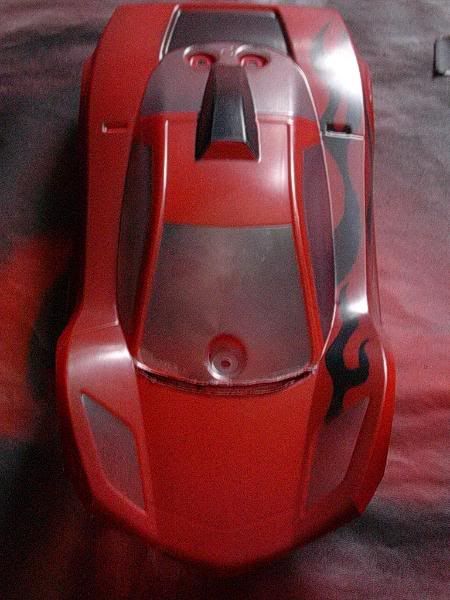 Ditto to the windscreen.  Now remove the protective coating on the top of the polycarbonate.... 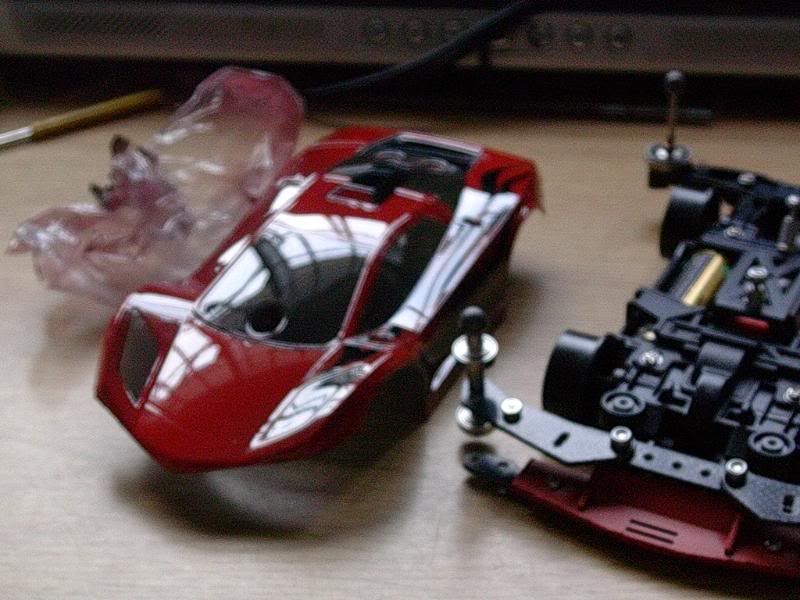 Still a bit bland isn't it? In Part 2 we will 1. Use stickers and decals to decorate the body, 2. Panel lining the cover to give it volume as well as 3. Modifying the Cover mount to let the cover sit lower on the chassis. Stay Tuned This post has been edited by 13lack.12ose: Mar 4 2009, 11:18 PM |
|
|
|
|
|
Mar 4 2009, 11:19 PM
Return to original view | Post
#67
|
|
Newbie
0 posts Joined: Jan 2009 |
QUOTE(doty @ Mar 4 2009, 11:16 PM) must make one tutorial liao if nt lose out ahha Haha faster make one so I can learn  |
|
|
Mar 5 2009, 12:03 AM
Return to original view | Post
#68
|
|
Newbie
0 posts Joined: Jan 2009 |
12ose's Tutorial 1 (Part 2): Decorating Polycarbonate Cover using Spray/Masking Method:
F) Stickers and Decals: I highly recommend stickers used for R/C since they are highly durable and will not peel off as easily as dress-up stickers. Except for the headlights and taillights, leave the normal stickers that comes with the kit back in the box, they are usually too thick and are made of paper. Cut out the stickers you need using penknife, cutting away the excess stickers. Next put it on the body and see how you want to position it. 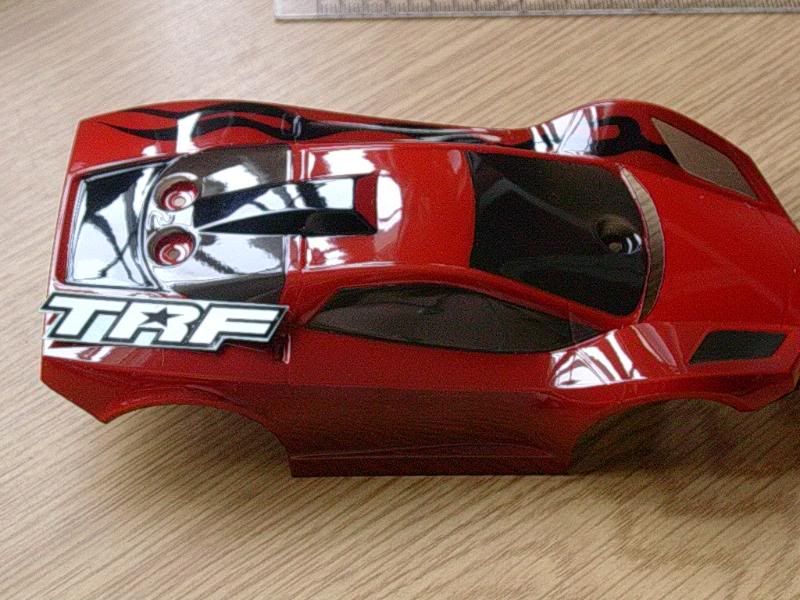 With a penknife holding onto the 1 corner of the sticker (so that you will not leave fingerprint under the sticker), apply the sticker onto the body. 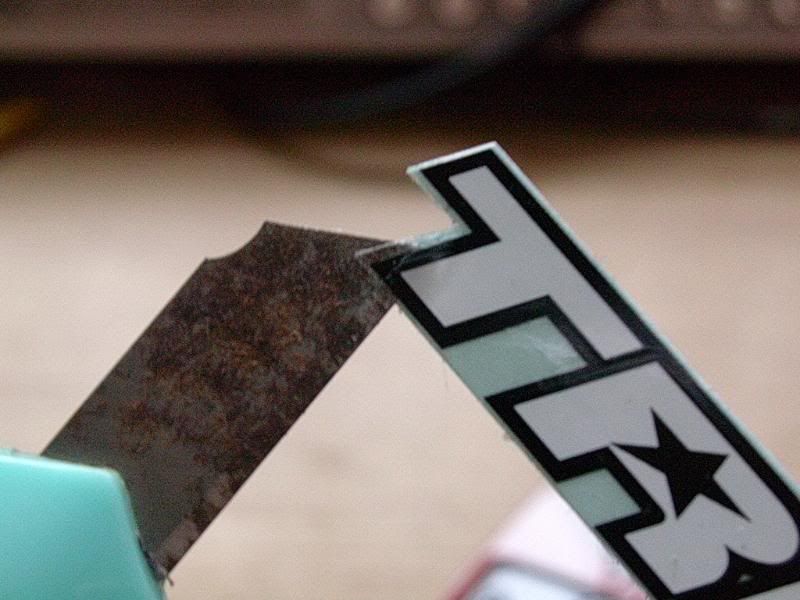 Water slide decals are good too if you want that "painted on" look. I took mine from my Gundam kits though water slide decals that comes with the static display models would be a better choice. G) Panel lining: Yes you read that right  . Even though we are not building a Gundam, panel lining at the right places of your car gives the car volume when viewed and highlights the details as well. . Even though we are not building a Gundam, panel lining at the right places of your car gives the car volume when viewed and highlights the details as well.Take the Gundam marker and gently draw on to the grooves on the body, particularly the windscreen and doors. Also in my example, I did a light lining on the taillight. Before the ink dries gently rub off the ink with your fingers/tissue/cotton bud. Do 1 area at a time. This means inking 1 windscreen and rubbing the ink off before inking the next windscreen. Examples: 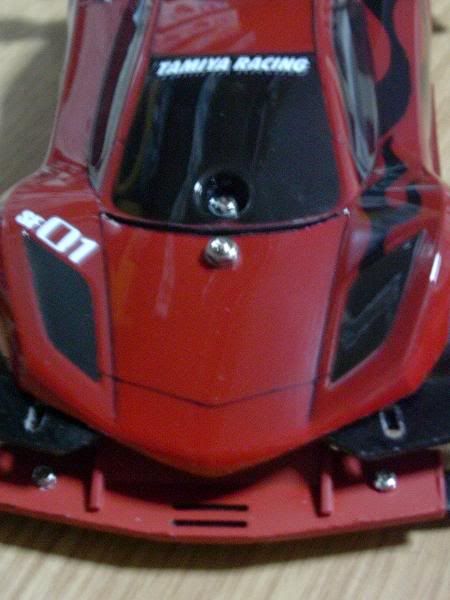 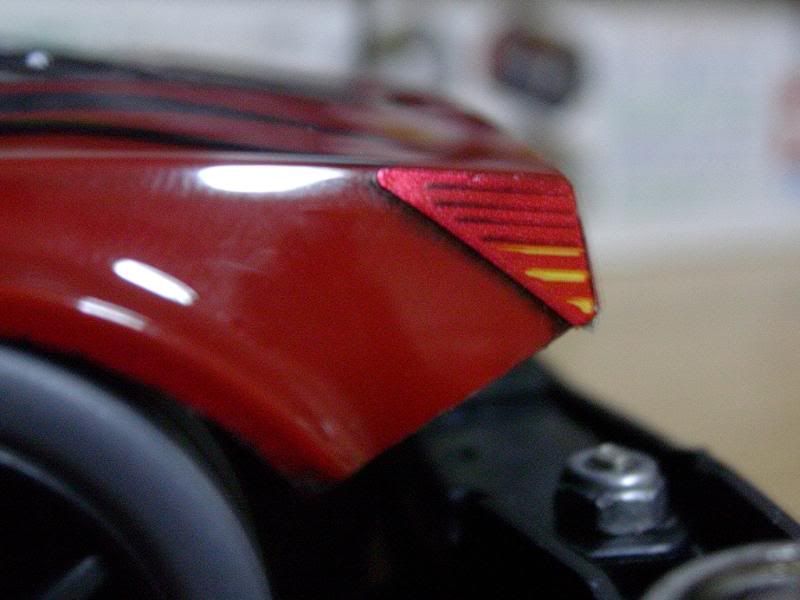 H) Mounting the Body: The normal mount that comes with a MS PRO kit is VERY HEAVY and sits too high on the chasis. I did a mod by using only the front "hook", removing the excess studs. Use a 4mm screw (can be found on Super-1 kits) to secure the front "hook" and the cover. The rear mount I used comes from Manta Ray Mk III. The rear mount is specially designed to sit nicely onto the chassis so the cover will not wobble. 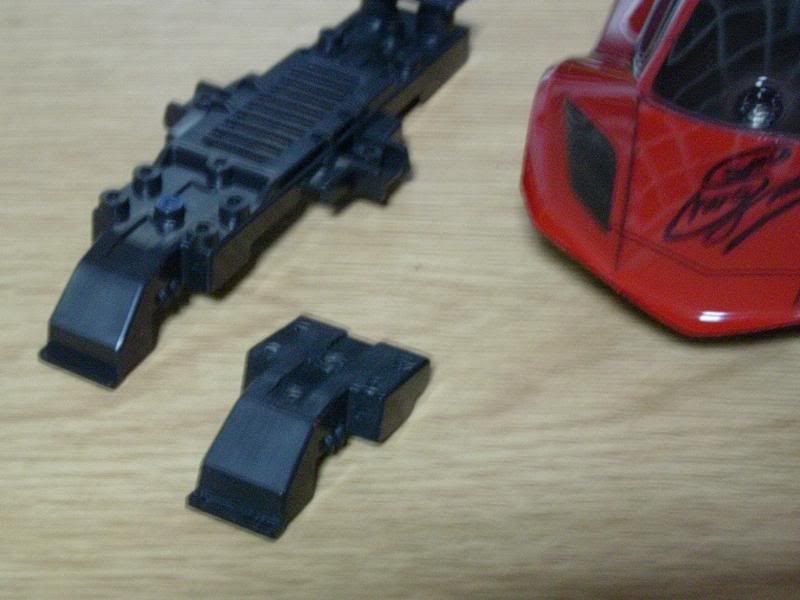 If the cover comes into contact with the wheels, use a small pair of scissors or a curved scissors to trim away the wheel guard on the body. A spacing of 1mm between the cover and the tyres would suffice. I)Results: Enjoy the pics 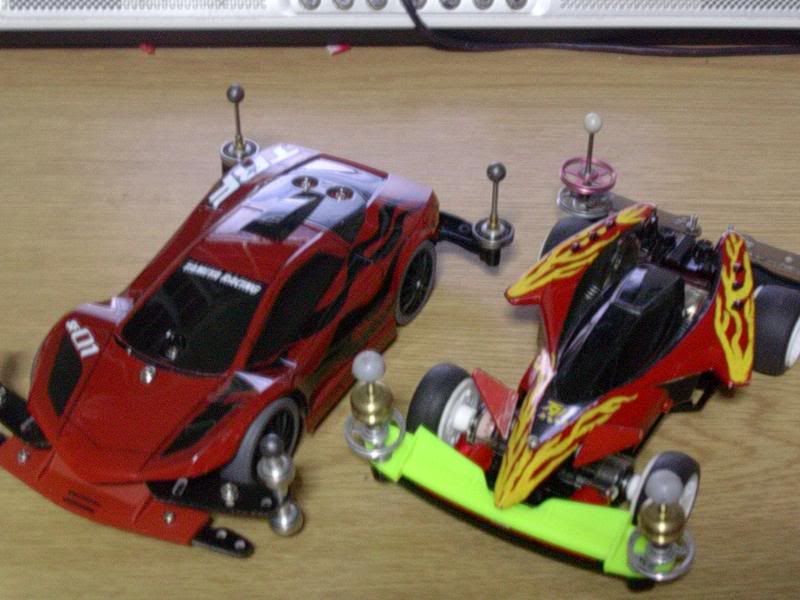 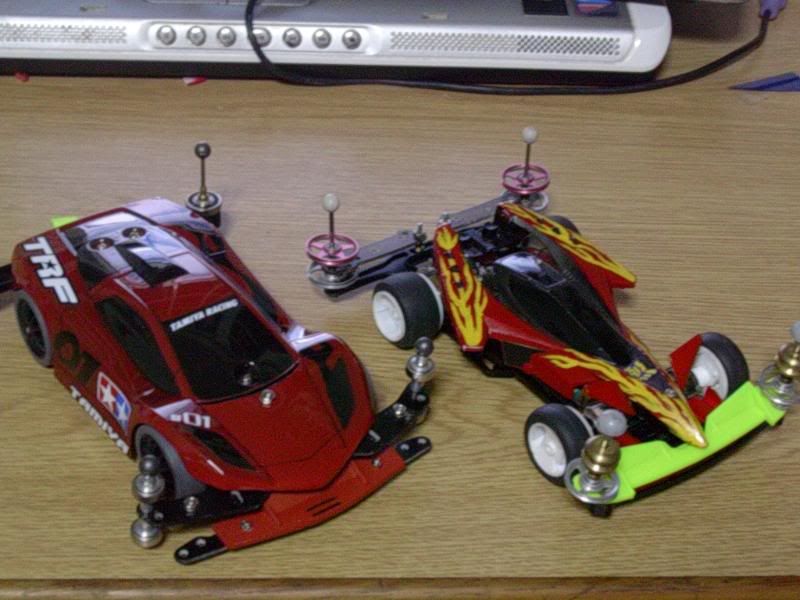 This post has been edited by 13lack.12ose: Mar 5 2009, 01:31 PM |
|
|
Mar 5 2009, 03:01 AM
Return to original view | Post
#69
|
|
Newbie
0 posts Joined: Jan 2009 |
@FatalMIND: My Pleasure. Just remember to post your TRF Jr up when you're done
 @Lost4Love: The motor you use depends on your car setting actually. But to keep things simple, for PRO motors, Rev Tuned is better for straights, Torque Tuned for cornering, and Atomic Tuned for best combination of these two. Currently the fastest PRO motor is Hyper Dash Pro. |
|
|
Mar 5 2009, 04:32 AM
Return to original view | Post
#70
|
|
Newbie
0 posts Joined: Jan 2009 |
Never liked Rev-Tuned b4. Remembered running it for a few times and the terminal inside broke. Anyway I find Rev Tuned to be slow as well.
I like the Avante. The roller setting is good as well. OT abit, how do u post small pictures? All the pictures I posted so big >.< |
|
|
Mar 5 2009, 12:07 PM
Return to original view | Post
#71
|
|
Newbie
0 posts Joined: Jan 2009 |
Eelen this sunday there'll be a race @ Tampines.
|
|
|
Mar 5 2009, 01:04 PM
Return to original view | Post
#72
|
|
Newbie
0 posts Joined: Jan 2009 |
I'll be going down see see look look. If the track is viable I do not mind giving it a few tries. Wouldn't wanna risk scratching my cover like the 1st one
Location is @ Blk 419 Tampines St 41. 50 cts a ticket, $1.50 per pair of batts. |
|
|
Mar 5 2009, 02:11 PM
Return to original view | Post
#73
|
|
Newbie
0 posts Joined: Jan 2009 |
Now making Polycarbonate Plates for my FRP and wheels
|
|
|
|
|
|
Mar 5 2009, 03:53 PM
Return to original view | Post
#74
|
|
Newbie
0 posts Joined: Jan 2009 |
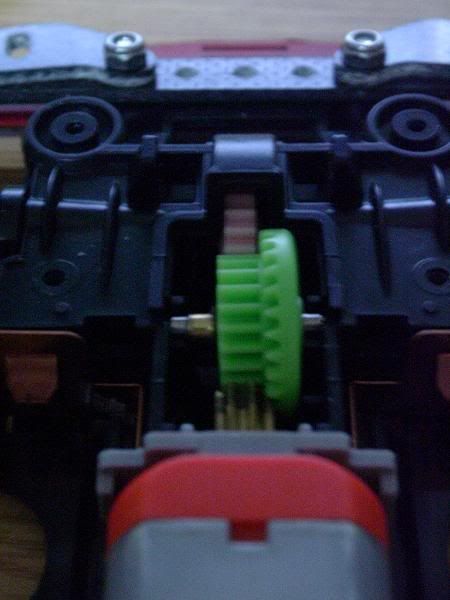
QUOTE(david tamiya @ Mar 5 2009, 02:45 PM) good then i will see u on the 15 , we can talk more about mini4wd there haha thx David but I am not sure if my method of breaking in motor is good. Consists of only running the motor without load with weak batts and then letting the motor to cool and use strong batts to run the motor without load. I deemed the motor completed breaking in if I do not see any sparks inside the motor. As to cleaning the motor I am not sure how to do it.and for running in the motor there few ways to do i am sure black rose will give tutorial on this as for nimh batt u can use smaller capacity for the car it is ok 1 of the main problem is higher capacity batts tends to be bigger in size compared to smaller ones so if u force in a bigger batt than the battery compartment in the car can hold it will tweak the chasis Perhaps someone with more knowledge on this can teach us  Added on March 5, 2009, 4:23 pmGearbox Mod continued 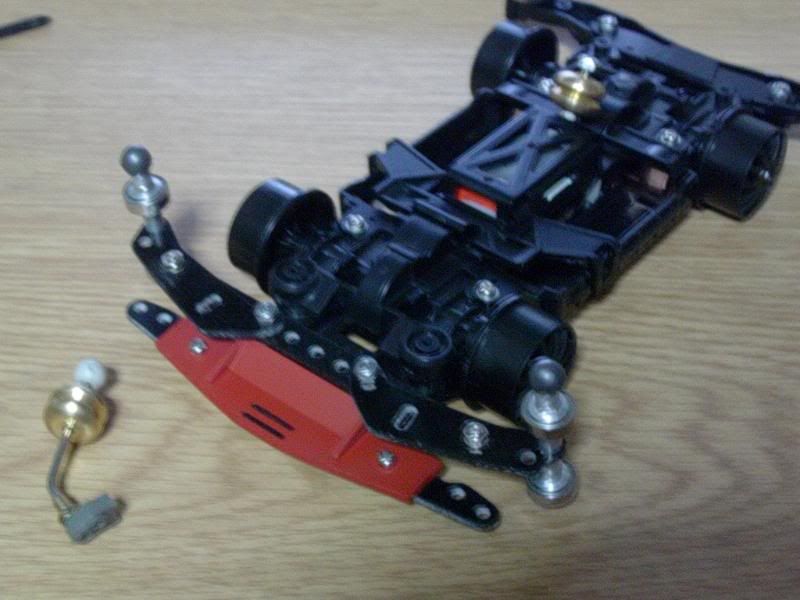 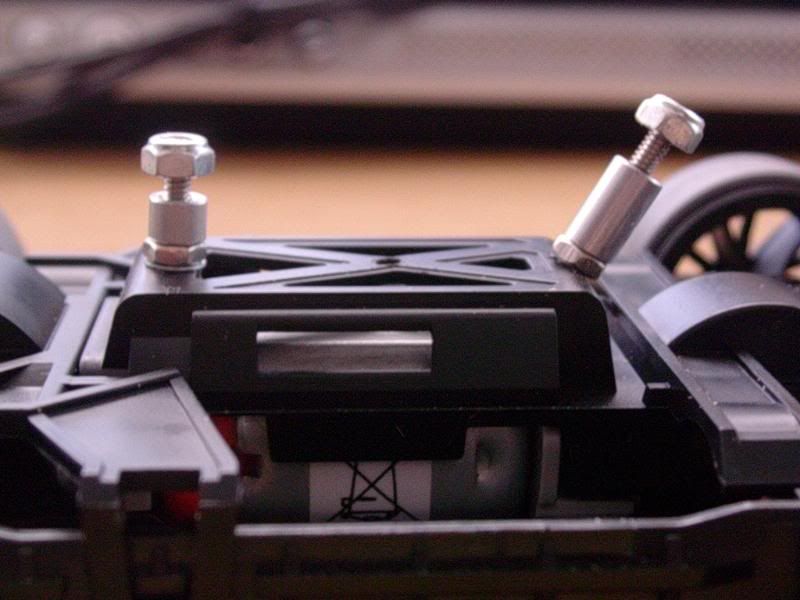 Guess what they are used for  This post has been edited by 13lack.12ose: Mar 5 2009, 04:23 PM |
|
|
Mar 5 2009, 07:10 PM
Return to original view | Post
#75
|
|
Newbie
0 posts Joined: Jan 2009 |
QUOTE(B-Mecha @ Mar 5 2009, 04:43 PM) to improve the engine's cooling? The 2nd pic you see are "vibration absorbers" when the gears are spinning, so the gears can turn more smoothly or to add the mass damper to the center of gravity?  I will be testing the effects of slighted mass damper placement. I am inclined to believe that tilting the mass damper back will be more beneficial compared to a perpendicular one. |
|
|
Mar 5 2009, 09:53 PM
Return to original view | Post
#76
|
|
Newbie
0 posts Joined: Jan 2009 |
Nice Ride! Modding Black Saber onto SFM chassis! Welcome aboard fm saber and susunooblike! Glad to see more and more people coming back.
Finalised my mass damper setting under the cover as well There are 3 effects achievable with this damper. See if you can figure them out This post has been edited by 13lack.12ose: Mar 5 2009, 11:30 PM Attached thumbnail(s) 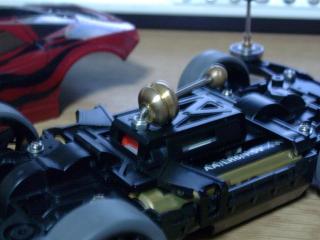
|
|
|
Mar 6 2009, 11:31 AM
Return to original view | Post
#77
|
|
Newbie
0 posts Joined: Jan 2009 |
QUOTE(Kay86 @ Mar 6 2009, 06:35 AM) Hmm.. let me guess ar Thx for the update. Will be testing my car this saturday to see if the effects are present. Perhaps we can discuss more then. 1) absorb vibration from motor as u mentioned2) absorb landing impact so wont bounce.. 3) i dunno.. Can teach me why u install the damper this way(pointing back) instead of pointing to the front? Btw, This sunday 8 march at tampines blk 419 the first prize abit different this time round  (2 lane track wif laptimer + MS car iirc) (2 lane track wif laptimer + MS car iirc) |
|
|
Mar 6 2009, 12:36 PM
Return to original view | Post
#78
|
|
Newbie
0 posts Joined: Jan 2009 |
QUOTE(washywashy @ Mar 6 2009, 11:43 AM) Is there a website you could lead me to as I want to see pics if possible.. 620 ball bearings? Wonder how that looks like.. What are mass dampers for? 620 ball bearings means the outer diameter is 6mm, and the hole diameter is 2mm. They are better than usual ball bearings cuz there is no unnecessary lateral movement between the inner and outer ball bearing casing, making your car more stable and faster.Mass dampers are used to absorb shock when the car lands. Though if you set it right, it can be used to alter the CG of the car during a jump. |
|
|
Mar 6 2009, 12:40 PM
Return to original view | Post
#79
|
|
Newbie
0 posts Joined: Jan 2009 |
QUOTE(FatalMIND @ Mar 6 2009, 12:11 PM) yoh! can anyone The Steering system is a dead weight. Because there is no mechanism to ensure the wheels will turn towards the right direction and it cannot keep the car running straight @ straight sections. and also, is it possible to find Item No:19420?   i'm vr  with the cover.. with the cover..  There are a few places in SG that still have Bergkaiser. It's a very beautiful car. I like it as well. Though slight modification have to be made to fit the cover onto other chassis. Added on March 6, 2009, 12:43 pm QUOTE(FatalMIND @ Mar 6 2009, 12:39 PM) LOL! thx dude.. haha I have been using Sliding Dampers since I first started competing. The black one works like a sliding damper. It's made from reinforced plastic so it does not bend as easily as the earlier ones.i was wondering waht is it for. it doesnt look like One-Way Wheel Set or Wheel Lock-Nut Set. so it cld turn left n right? haha. if so it shd hv sth to make it turn according to the track's direction rite? if not? its just for display... and one more, 15377  does it work like one of those Sliding Damper Rollers?  or it just work like Rear Double Roller Stay?  I install the sliding damper at the rear so as to achieve a turning effect during turns. This post has been edited by 13lack.12ose: Mar 6 2009, 12:43 PM |
|
|
Mar 6 2009, 12:59 PM
Return to original view | Post
#80
|
|
Newbie
0 posts Joined: Jan 2009 |
QUOTE(david tamiya @ Mar 6 2009, 12:46 PM) it works like a sliding damper brother black rose will explain more about this as he expert on sliding dampers Will slow down the car in a corner if you put the sliding damper in front. Put in the rear and it will achieve a faster cornering.i dont use also slows down the car If put the damper in front, car will change direction towards the wall, thus generating resistance and slowing the car down. However if put in the rear, the car will change direction away from the wall, reducing the forward resistance of the car pushing on the track wall. It is the same concept as to narrow/wide roller width front, wide/ narrow roller width rear. However only use the chrome spring. The black spring is too soft. Added on March 6, 2009, 1:01 pm QUOTE(FatalMIND @ Mar 6 2009, 12:52 PM) THANKYOU, BLACKROSE!! hahaha haha smoking the cover I have never heard about the method. I tried searching @ google before the tutorial but the only thing I found was powder painting. i'll c if david has it at TU.. if not, might tumpang him to buy since his goin down to SG next week.. haha.. is it ok, david tamiya? after the mech mod with tamiyas, the body mod is the 2nd thing that interest me most. haha... (tats y i still stuck at colouring  will try to get the spray this sunday. will try to get the spray this sunday. n, oh, how bout 'smoking' the poly-cover, black.rose? haha.. i was looking for ward for tat part the most, actually.. Perhaps you might want to add a bit more info on what is smoking the poly-cover? This post has been edited by 13lack.12ose: Mar 6 2009, 01:02 PM |
|
Topic ClosedOptions
|
| Change to: |  0.0490sec 0.0490sec
 0.41 0.41
 7 queries 7 queries
 GZIP Disabled GZIP Disabled
Time is now: 6th December 2025 - 08:30 PM |
 Quote
Quote