Alrighty as promised my HDR tutorial.

sorry took so long. i just got back from penang last night. and i managed to process a few pix and one hdr. so below is a step by step of the process that i went thru.
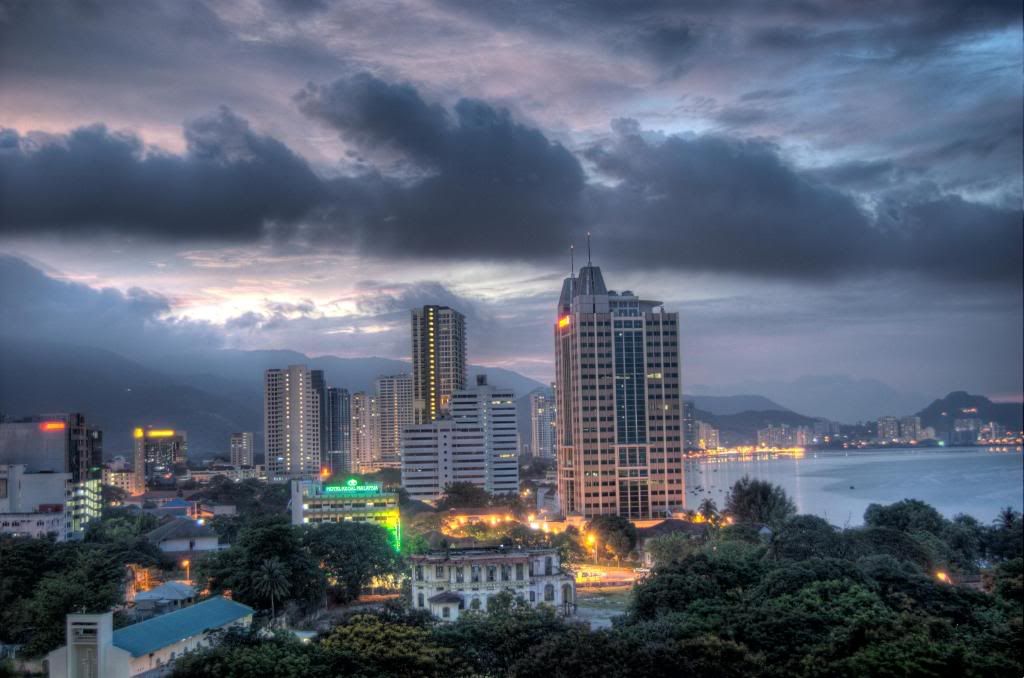
so we start off with the finished result. here it is
before

after
the process
so the first thing to look out for is high contrast locations be it buildings or landscapes. those that you won't be able to capture fully with conventional methods. i shot this one from my hotel window. tripod and camera outside the window since there's a pretty big ledge out there and shot three exposures manually and of course in RAW. the proper exposure means that im losing detail in the foreground with a lot of black clipping as seen below.
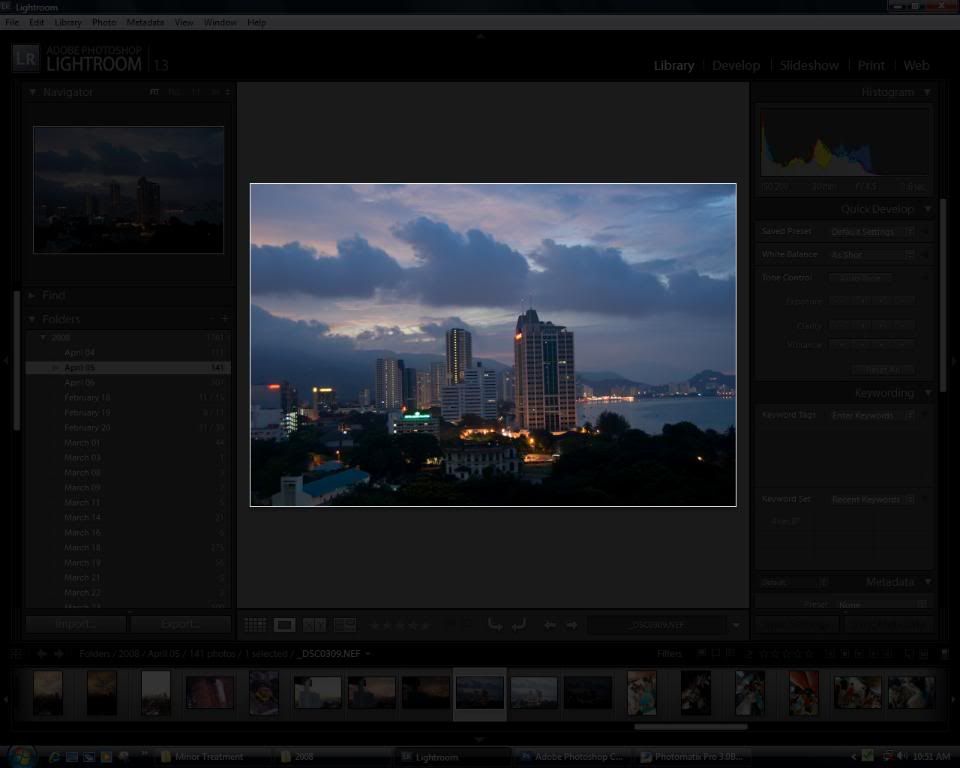
not a pretty bad shot actually but i wanted a HDR photo.
so i took another two over and under exposed photos of -+ 2 stops.
now you could either do the hdr process manually or use the automated process in photoshop or photomatix. im a bit lazy and since its quite hard to do it manually i usually go with photomatix.
merged all three in photomatix before tone mapping and it'll turn out like so.

and this is my typical photomatix settings. u can get pretty good results with these.
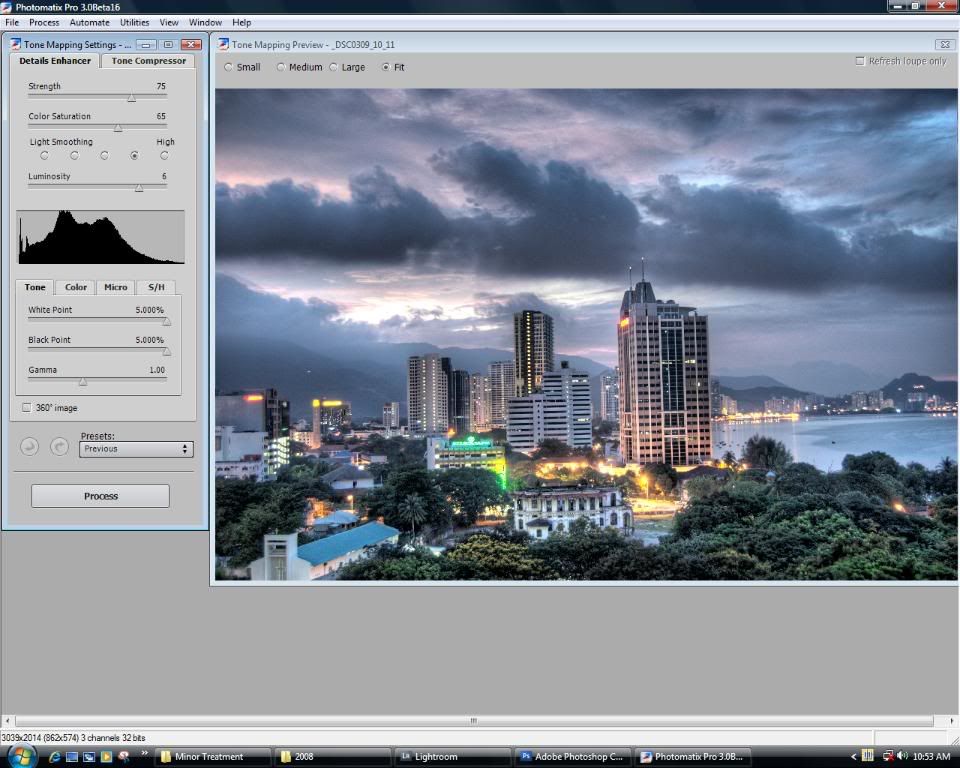
so here's what i got from that
now this actually looks pretty good. u would usually run it thru photoshop with curves and levles adjustments and you're done. but i prefer to take it a step further. since you shot in RAW you should exploit every damn thing out of it lol.
photoshop process
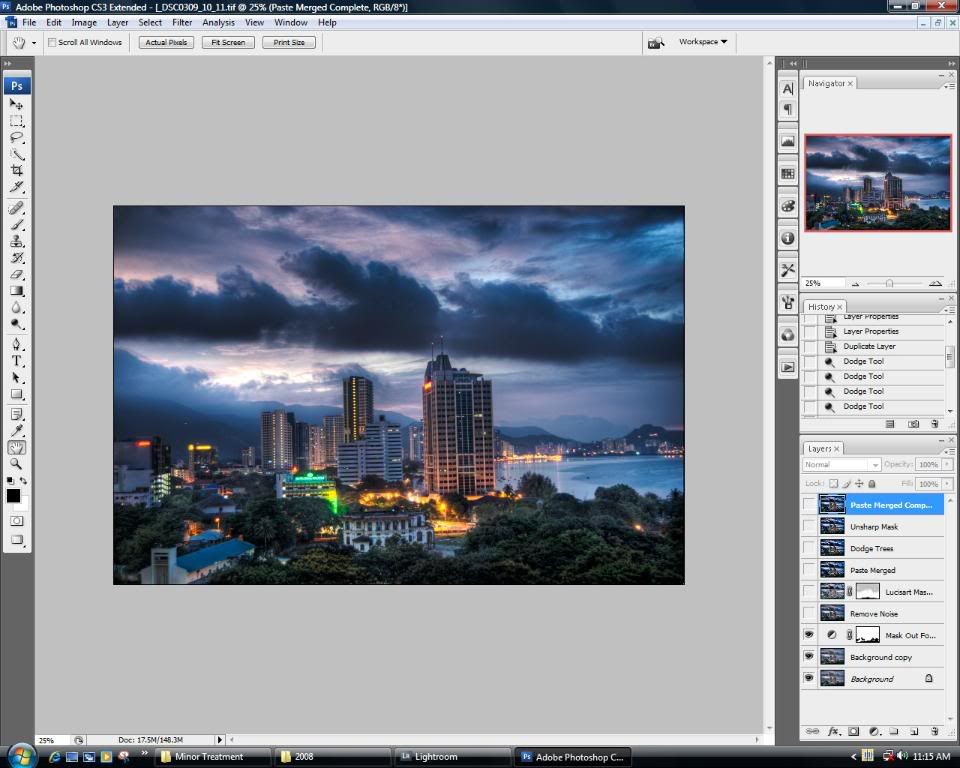
i started with curve adjustments, since the picture looks a bit flat. gave it a bit more contrast and i masked out the trees so i retain the detail and color

after that i removed the noise with noiseware and for the magic touch used lucisart blend for mega detail and contrast. usually i do it over several layers but this one turned out ok with just one. notice how i masked out the sky with a very low opacity brush. 7% - 15% should do fine. don't go over.
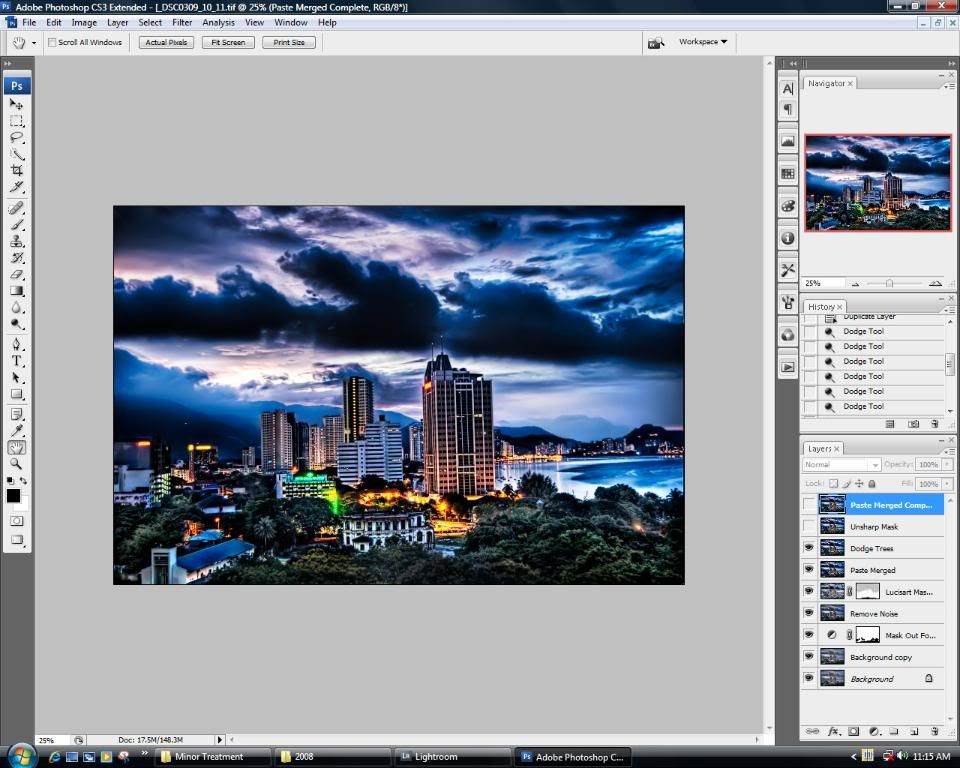
then i dodge the trees with settings set on midtones 7% - 15% and applied some unsharp mask
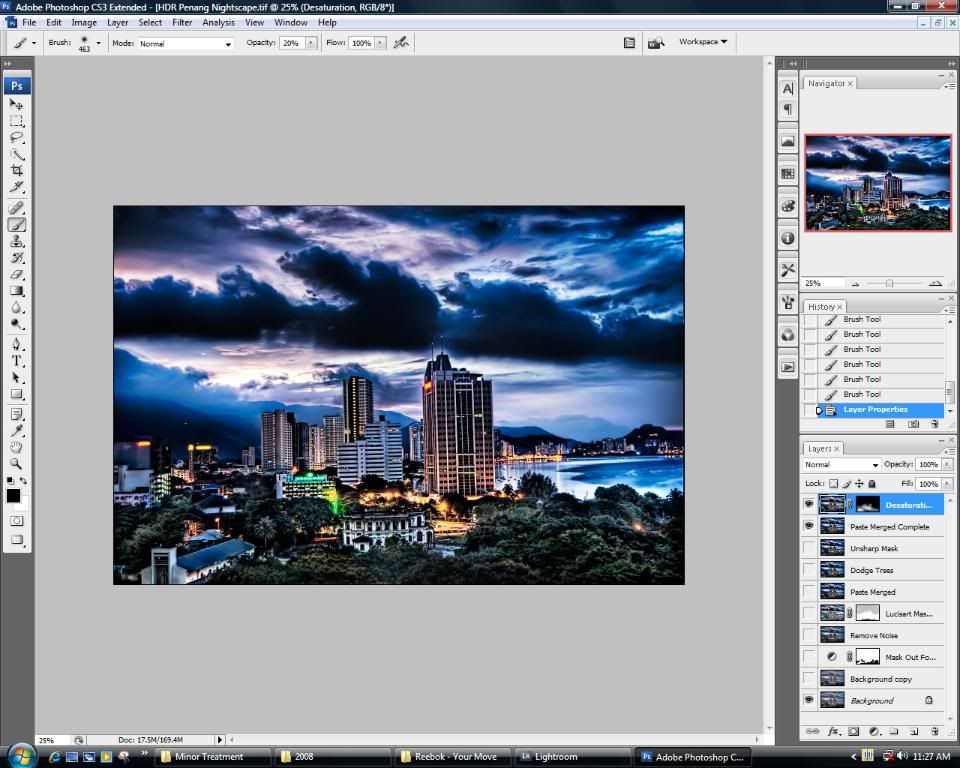
and finally i desaturated the mid section a bit since the street lights were a bit too saturated for my liking. cropped and straightened the image and voila its done!
hope you guys enjoyed this tutorial. later, lucis art tutorial. can't promise when tho. but will come soon lol.
This post has been edited by ' or 1=1 --: Apr 8 2008, 03:29 PM 

 Mar 19 2008, 04:26 PM


 Quote
Quote


 im starting to hate this job


 0.0244sec
 0.58
0.58
 5 queries
 GZIP Disabled