


[ Worklog ] AG's PIMP MY ICUTE.....completed !, update - final shots at page 9 !
[ Worklog ] AG's PIMP MY ICUTE.....completed !, update - final shots at page 9 !
|
|
 Oct 16 2006, 08:30 PM Oct 16 2006, 08:30 PM
|
 
Senior Member
1,313 posts Joined: Nov 2004 From: KUL, MAL |
I think milky white make the colour more warm tuned?
|
|
|
|
|
|
Oct 16 2006, 09:42 PM
|

Senior Member
4,561 posts Joined: Jan 2003 From: Penangites |
QUOTE(nghj @ Oct 16 2006, 04:49 AM) wow, nice fans. i am planning to build a PWM based circuit to control the brightness of the LEDs....so ur final product gonna include some fancy controller for the LEDs also?  total of 6 sets to be exact, or 18 channels or 18 knobs  3 channel for each fan, 4 fans in total, and 2 strips of RGB LED consists of 24LEDs per strip.... |
|
|
Oct 16 2006, 09:43 PM
|

VIP
4,809 posts Joined: Jan 2005 |
QUOTE(AllnGap @ Oct 16 2006, 09:42 PM) i am planning to build a PWM based circuit to control the brightness of the LEDs.... dude, u must be some wiring expert la.total of 6 sets to be exact, or 18 channels or 18 knobs 3 channel for each fan, 4 fans in total, and 2 strips of RGB LED consists of 24LEDs per strip.... i also wanna do the same thing but am unsure of how the circuitry will be. mind sharing with me? |
|
|
Oct 16 2006, 10:23 PM
|

VIP
15,705 posts Joined: Mar 2005 From: Tg. Rambutan |
QUOTE(DaRkSyThE @ Oct 16 2006, 09:43 PM) dude, u must be some wiring expert la. Lidat how can???????? That's like asking Colonel Sanders to gif u his super duper Secret Recipe lar. i also wanna do the same thing but am unsure of how the circuitry will be. mind sharing with me? |
|
|
Oct 16 2006, 10:43 PM
|
|
Senior Member
4,561 posts Joined: Jan 2003 From: Penangites |
QUOTE(ianho @ Oct 16 2006, 10:23 PM) Lidat how can???????? That's like asking Colonel Sanders to gif u his super duper Secret Recipe lar. i seriously dont know what to say man......you're really creative man  there are a lot of money wasted into developing the working product, but looks like nobody eager to share the loss with me, but a lot of people are eager to know how i do it |
|
|
Oct 16 2006, 10:55 PM
|

Junior Member
483 posts Joined: Jan 2006 |
sharing is caring..
 super cool mon btw.. you must have been graduated in some electronic IT stuff..lol..i dont know what im saying also.. super cool mon btw.. you must have been graduated in some electronic IT stuff..lol..i dont know what im saying also.. |
|
|
|
|
|
Oct 17 2006, 01:16 AM
|

Junior Member
259 posts Joined: Jan 2003 From: Cheras |
all i can say is....
WOW.... u ROCK...!!! eagerly waiting for the finish product... the proess of making it happen just teasing us with a lot of eye candy... drooling over those pics man.... |
|
|
Oct 17 2006, 10:18 AM
|

Senior Member
1,067 posts Joined: Nov 2004 From: Puncak Jalil |
whoa~ i personally like d RED effect.... looks like sumthing is being cooked inside the casing...
 fried harddisk, anyone? fried harddisk, anyone? This post has been edited by r4ydc24: Oct 17 2006, 10:19 AM |
|
|
Oct 17 2006, 12:49 PM
|
|
Senior Member
1,790 posts Joined: Feb 2006 From: KL |
QUOTE(AllnGap @ Oct 16 2006, 09:42 PM) i am planning to build a PWM based circuit to control the brightness of the LEDs.... 18 knobs??!! wahlau....total of 6 sets to be exact, or 18 channels or 18 knobs 3 channel for each fan, 4 fans in total, and 2 strips of RGB LED consists of 24LEDs per strip....  like that u gonna use up all your front empty bays just for the panel liao, isnt it? This post has been edited by nghj: Oct 17 2006, 12:50 PM |
|
|
Oct 19 2006, 03:13 AM
|

Senior Member
1,058 posts Joined: Apr 2006 From: Penang , Malaysia |
QUOTE(AllnGap @ Oct 16 2006, 11:43 PM) i seriously dont know what to say man......you're really creative man there are a lot of money wasted into developing the working product, but looks like nobody eager to share the loss with me, but a lot of people are eager to know how i do it mind of you to tell me are you working in Agilent? cos i'm working there last time and a product line bears AllnGap name..... similar with yr's. (LED product) AllnGap for Red colour right? Beast Pixar, Barracude, Antares, Flamenco, Jazz , Eos Flamenco, Ingan Prometheus, Sequoia........................................ are you familiar with those name?????????????? |
|
|
Oct 19 2006, 11:04 AM
|
|
Senior Member
4,561 posts Joined: Jan 2003 From: Penangites |
QUOTE(ggoo @ Oct 16 2006, 10:55 PM) sharing is caring.. yep, sharing is caring of course, but what have you shared with others ? super cool mon btw.. you must have been graduated in some electronic IT stuff..lol..i dont know what im saying also.. i share my creativity and ideas with others, isnt that good enough ? i'm still doing my mechatronics dood...it's doesnt have to take a electronic/electrical graduate to do all this...... QUOTE(duke_hunt @ Oct 17 2006, 01:16 AM) all i can say is.... thanks bro.......but progress is slow.....hopefully i can work on something this Raya holidaysWOW.... u ROCK...!!! eagerly waiting for the finish product... the proess of making it happen just teasing us with a lot of eye candy... drooling over those pics man.... QUOTE(r4ydc24 @ Oct 17 2006, 10:18 AM) whoa~ i personally like d RED effect.... looks like sumthing is being cooked inside the casing... hey, i dont want a burnt HDD okay fried harddisk, anyone? QUOTE(nghj @ Oct 17 2006, 12:49 PM) 18 knobs??!! wahlau.... thats why i dont know how to continue, i can wire all the fans together and the lights with a different light control, but i want rainbow colours inside my PC, not just the same colour for all the fans like that u gonna use up all your front empty bays just for the panel liao, isnt it? QUOTE(overclockalbert @ Oct 19 2006, 03:13 AM) hi AllnGap, AllnGap is a LED substrate name, Aluminium, Indium, Gallium and Phosporus. mind of you to tell me are you working in Agilent? cos i'm working there last time and a product line bears AllnGap name..... similar with yr's. (LED product) AllnGap for Red colour right? Beast Pixar, Barracude, Antares, Flamenco, Jazz , Eos Flamenco, Ingan Prometheus, Sequoia........................................ are you familiar with those name?????????????? i need to clarify something #1, i'm still studying #2, i was never an Agilent worker before i just know this model of LED (Prometheus) from their brochues only, the rest i dont know I love LEDs, |
|
|
Oct 20 2006, 07:59 PM
|
|
Senior Member
1,790 posts Joined: Feb 2006 From: KL |
QUOTE(AllnGap @ Oct 19 2006, 11:04 AM) thats why i dont know how to continue, i can wire all the fans together and the lights with a different light control, but i want rainbow colours inside my PC, not just the same colour for all the fans maybe u can figure out a combination where you can connect the led terminals in a series or parallel manner so that u can produce the same combination of colors with fewer controls. Fewer controls, but the connections not easy also |
|
|
Oct 24 2006, 02:18 PM
|
|
Senior Member
4,561 posts Joined: Jan 2003 From: Penangites |
guys, i've done something onto me CDROM and i've completed my dual ram cooler which is temperature controlled, but too bad i dont have the camera with me right now...
i'll update around thursday okies.... i've summed up a checklist of what i still got to do......and it's really long for top panel : - cut a 92mm fan grill using tinted acrylic - add another layer of paint - put double sided tape to stick acrylic firmly - spray interior of the top panel for ram cooler : - solder the thermistor lead out and extend it. - solder 3 pin connection and sleeve the cables for motherboard : - single 60mm cooling for PWM area, using motherboard mounts, extend the thermistor and let it touch the PWM heatsink - mod the 40mm SUNON fan and add bling bling on it. - buy chipset heatsink - put 40mm fan to blow onto the heatsink base - for PSU : - change the rear fan into a blower setup, L acrylic pipe like roofing ventilation system - add 80mm fan to the front. - add multi-colour LED onto the 92mm fan - change the 92mm fan if possible, coz it's barely spinning. - cable sleeving - get UV connectors. - remove those unnecessary cables for heatsink : - make a design for the top fin/ remove the fugly glue stain - get 8mm ' nut stud ' for the heatpipes, Scythe Ninja style - make acrylic duct to get better airflow for GPU : - wire out the thermistor n touch the heatsink - run the power from the main. for HDD bracket : - throw away the old bracket, cut another bracket and make design for it. - drill holes for the bottom part. for side panel (left) : - cut a bigger window, as big as possible - frosted flame design - 92mm for the side panel - temperature sensors if it's suitable - trim the edges to make way for 127mm Delta tri-blade, 200cfm for side panel (right) : - cut 2x 80mm fan holes for panaflo 80mm L model - frosted flame design for interior : - spray to flat black, make a box to hide the messy cables. - make the PWM circuit into a design or hide it - spray the delta-tri-blade 127mm to white, blade and the inner circular frame only. - add multi-colour LEDs for the tri-blade. - use black sponge to cover the PCI and the whole interior for front panel : - hide the ugly front part - cut unnecessary parts, hide circuits over there. - align knobs, vandal switches nicely, graphical LCD as well - trim front panel to put in the CDROM exterior : - spray the back and the bottom part to black, find wheels to replace the current rounded plastic stands. - put some lightings for the bottom problems : - 1x industrial blower, dont know where to put it - wiring planning..... - 320*240 graphical LCD - a lot of controls involved, 3x 92mm fan, 1x 127mm exhaust, CPU fan, lighting controls, 1 x blower speed control... - no time - wirings !!! - PWM circuit involves 3x [ 3 channels RGB ] , 2x for lighting purposes, 1x for all the fans, 1x for 127mm, 1x for the blower exhaust. hmmm......i cant believe that my to-do list is so long let me count how many knobs do i have 3 knobs for RGB, 3 sets of RGB 1 for 127mm 1 for 92mm CPU 1 for blower exhaust total of 3*3 + 1 + 1 + 1 = 12 knobs !!!! and 2x vandal switch for the reset and power I am starting to think to wire everything into a controller box which is separate from the casing coz it's gonna make the casing look so complicated and messy...... This post has been edited by AllnGap: Oct 24 2006, 02:28 PM |
|
|
|
|
|
Oct 24 2006, 04:52 PM
|

Senior Member
1,298 posts Joined: May 2005 From: Penang Island |
Woah this mod projcet gonna be Pimping
    |
|
|
Oct 27 2006, 12:19 AM
|
|
Senior Member
4,561 posts Joined: Jan 2003 From: Penangites |
okay, i've been using around 2 days to complete all these mod, and my battery out of juice, so i cannot show you guys my pimped 200cfm delta tri-blade which is uver cool
so this is my old Liteon CDRW........I've made a window and added around 20pcs of LEDs inside. The LEDs comprises of [ blue ] - [ white ] - [ white ] - [ blue ]- [ white ] - [ white ] - [ blue ]- [ white ] - [ white ] - [ blue ] ........ I purposely do it this way since pure white is too dull, and pure blue is way too ah beng...so i've decided to make it look like HID colour which is white with a blueish tone... actually, this mod is not that hard because all the metal part of the drive can be removed. but becareful not to damage the circuit behind and particularly the disc head. I'll put back the front bezel once i've completed my front panel design 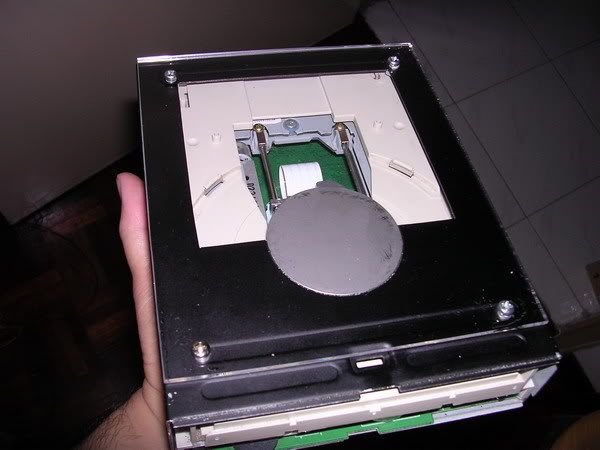 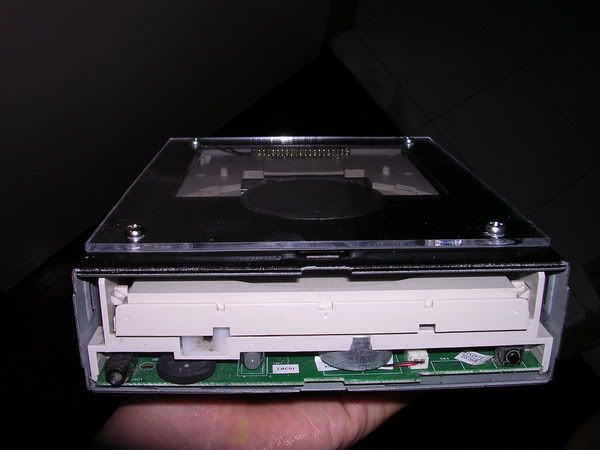 see the array of LEDs inside ? the one with the yellow colour will emit white colour 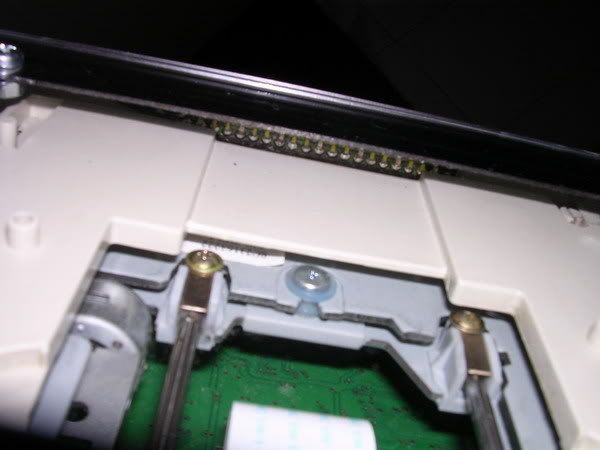 okay, money shot !!! It will look dimmer under my top panel, but it'll be cool i guess. my initial plan was to make the colour change when it's reading, but i was too lazy to hook up the front LED to make it work.... 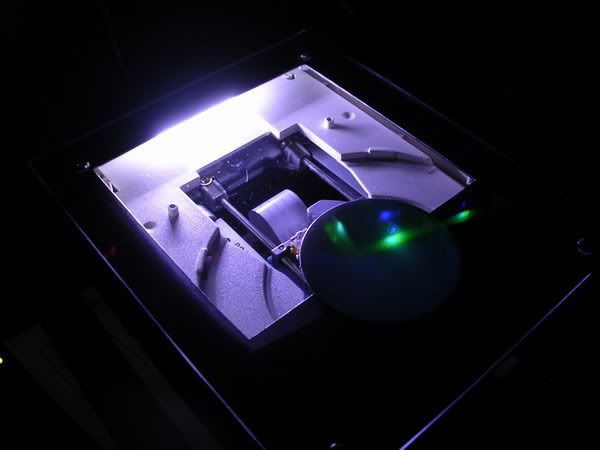 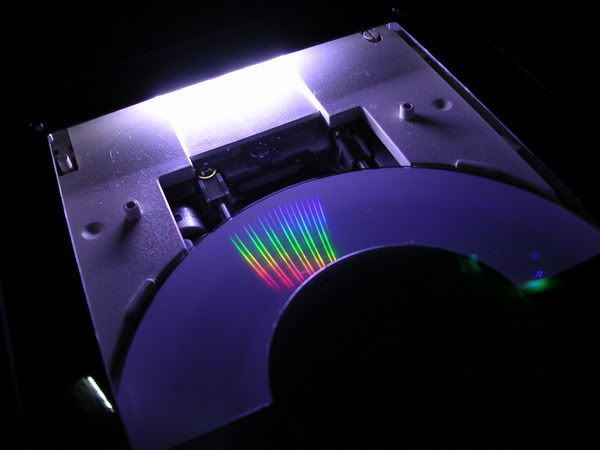 This post has been edited by AllnGap: Oct 27 2006, 12:33 AM |
|
|
Oct 27 2006, 12:21 AM
|
|
Senior Member
4,561 posts Joined: Jan 2003 From: Penangites |
this is the complete metal work on my casing, i'm not going to cut any metals on it anymore......
I've cut off some parts from the front panel, made the left side panel bigger, made a window on the right side panel, trim the rear part of the left side panel..... and all is ready for the acrylic and some design to be installed inside !!!! i've also finished up the spray job on the whole casing, the interior is black and i will cover it with sound absorbing material.....not capalang stuff !!!!  The areas that i dont spray will not be seen when everything is assembled Finally, i think my coping saw has not disappoint me at all despite i break a lot of saw blades......the window is not crooked and i think the rounded edges are quite good also....   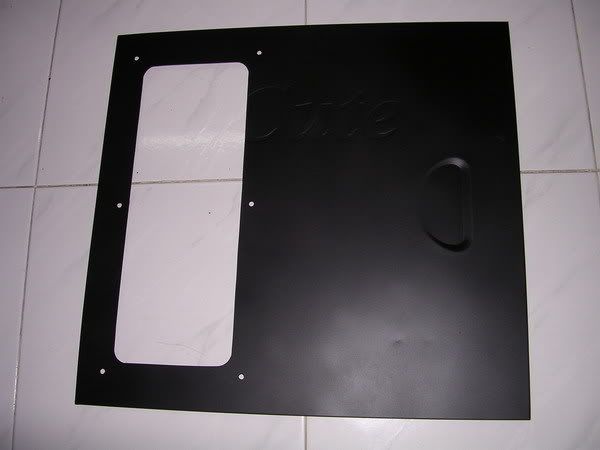  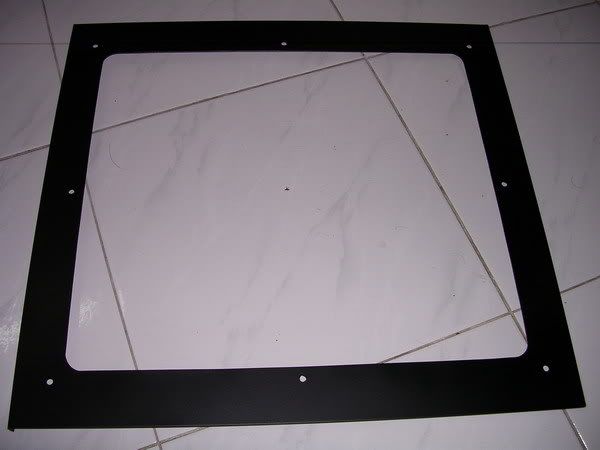 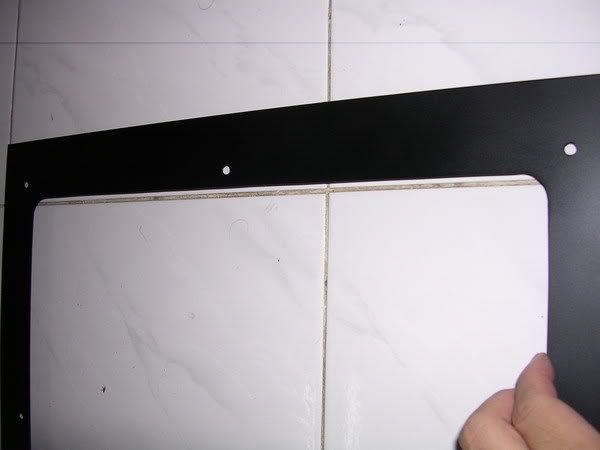 This post has been edited by AllnGap: Oct 27 2006, 12:39 AM |
|
|
Oct 27 2006, 12:22 AM
|
|
Senior Member
4,561 posts Joined: Jan 2003 From: Penangites |
Okay, time for my new design !!!
Dual 60mm NMB, thermal controlled ram coolers..... I'll finish up the ugly wiring and connect the thermal sensors to my rams to make the temperature control thing working again..... my Titan heatsink top is damn ugly, but i will do something about it very soon....... 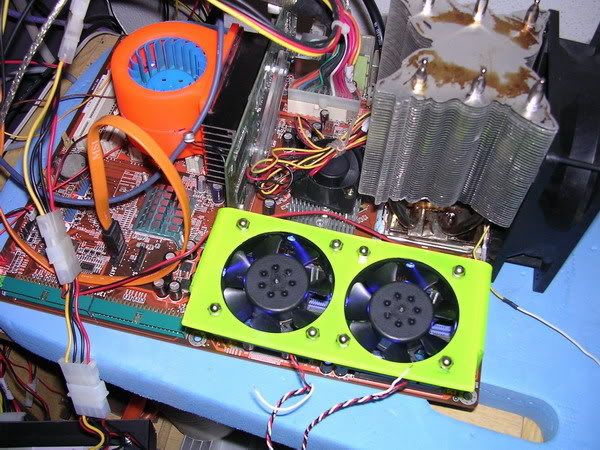 These are the money shots........actually i've assembled everything inside my casing before and it looks great ! The whole dark area under the CPU will be lighted up and the UV yellow effect is there !!! 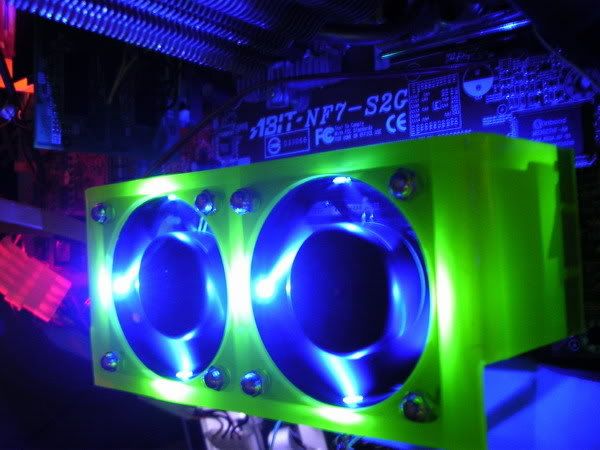 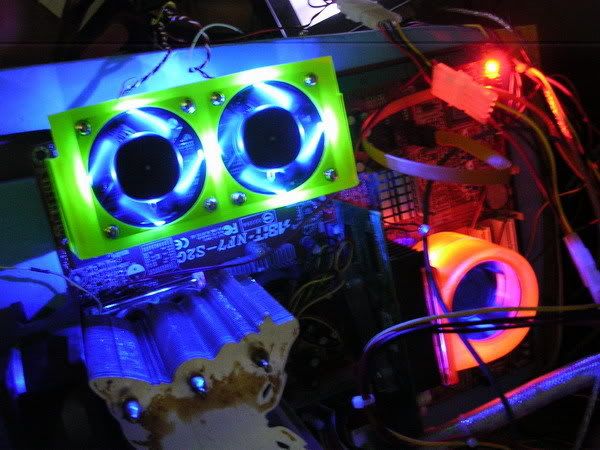 This post has been edited by AllnGap: Oct 27 2006, 12:43 AM |
|
|
Oct 27 2006, 12:22 AM
|
|
Senior Member
4,561 posts Joined: Jan 2003 From: Penangites |
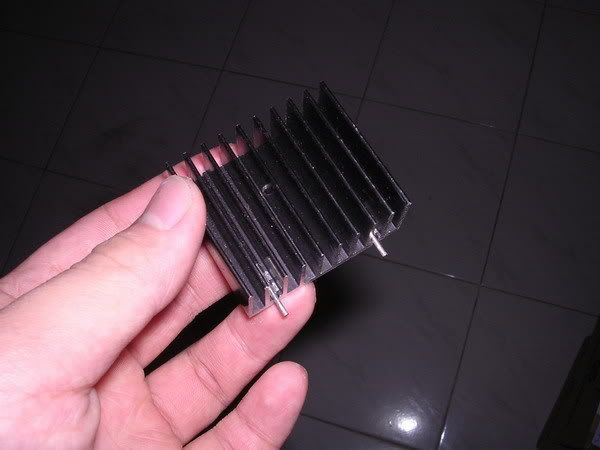
I'll be using this to replace my chipset heatsink tomorrow.......and might be making a 60mm PWM cooler which is located beside the heatsink to cool those mofsets
 This post has been edited by AllnGap: Oct 27 2006, 12:44 AM |
|
|
Oct 27 2006, 12:33 AM
|

Senior Member
2,239 posts Joined: Jun 2006 From: K.L |
QUOTE(AllnGap @ Oct 27 2006, 12:21 AM)  a bit cacat, if u could do smting wiv it then nicer |
|
|
Oct 27 2006, 12:45 AM
|
|
Senior Member
4,561 posts Joined: Jan 2003 From: Penangites |
QUOTE(z3r0717 @ Oct 27 2006, 12:33 AM) i feel this panel not so nice coz still can see the Icute word smmore the I is gone. dont worry, that is not my final product yet.....i'll cover with something flaming hot a bit cacat, if u could do smting wiv it then nicer |
| Change to: |  0.0265sec 0.0265sec
 0.70 0.70
 6 queries 6 queries
 GZIP Disabled GZIP Disabled
Time is now: 20th December 2025 - 02:57 AM |
 Quote
Quote