g88 Interested party here for sharing the large volume wheel cleaner but wish to know exactly what price and what product is selling in Sonax now because from the discussion it seems a lot of confusion there.
Quazacolt This year CNY SONAX got promotion, that time I bought one set with the wheel coating + wheel cleaner (small little spray bottle). It does turn red upon contact on dirty wheel. It smells like urine also. But color wise I am not so remember, seems to be transparent. Is this the newer version (the one with weaker strength) you mean?
I just FB message SONAX Malaysia. They say no they do not carry the 5L or 25L Wheel Cleaner woh. Is this secretly sell to other or only sell to shop operator?
And they also said that this 5L and 25L wheel cleaner are exact same product with the 500ml wheel cleaner that comes with the wheel coating aerosol spray.
My sheepskin wash mitt damage already but I am unable to get a replacement so quickly so I bought one microfiber wash mitt to use for the time being. And then one can of Meguiar's Brake Dust Barrier. Previously was disappointed by the durability offered by Sonax Wheel Rim Coating NanoPro so want to try this alternative. That's all la din buy much. But if you are AUTOGYM fans then now is indeed good time to buy from there. The best thing about this web store is shipping is free within peninsular.
Finally I found a wheel LSP that exhibits durability that within my expectation. That is Megiuar's consumer range product, the Hot Rims Brake Dust Barrier:
Previously I was using SONAX Wheel Rim Coating NanoPro:
I am not satisfy with this Sonax product due to its weak durability. It barely last me one single wash on the wheel then the water beading effect is gone. (My wheel wash include using degreaser, MPC, brushing)
Since then I have been searching for another replacement that is readily available in Malaysia and durability must be long enough for several washes.
Finally try this Meguiar's Hot Rim Brake Dust Barrier. It has both advantages and disadvantages over the Sonax Wheel Rim Coating NanoPro:
Advantages: 1) Meguiar's one really can spray with even distribution like a real spray paint, where you indeed can end up with no run at all. With the Sonax, I never had chance to get it spray nicely as its spray head design is inferior compare to the Meguiar's one. I always need to use towel to spread the Sonax product so the run will not stick there.
2) Meguiar's durability really outlast the Sonax by many times! I have wash my wheels for twice with brushing and the wheel rim is still beading after it is clean. I do weekly wash.
Disadvantages: 1) It is my habit to spray tar spot remover on the wheel rim and wipe it away then rinse with water as the last step of my wheel cleaning (after I rinse out all the degreaser, MPC). I realize after my 1st wash that the Meguiar's product has a very reactive action with the tar spot remover (I use OSREN), it forms white marks all over my wheel rims. I am not particularly concern about it because I think this is on the coating surface itself and once the coating fade away as time passes, this ugly looking thing will be gone, then the next time I just be careful not to let the tar spot remover sits too long on the wheel rim. Today I realize these white marks can be partially remove after I spray the tar spot remover again (but this time i wipe and rinse it quickly), not completely gone but apparent reduction. I take this as supportive evidence to my conjecture that it is the tar spot remover that causing problem with the Meguiar's product (instead of the degreaser and MPC), and I am right that it can be remove, not a permanent damage (good to know with assurance now). The solution to this is just simply do not let the tar spot remover sits too long on the wheel surface, immediately wipe it and rinse it is the best practice. Sonax product in this case, I am unable to assert whether it has reactive action with tar spot remover or not because after my cleaning done, it already no beading, indicating product already gone, so no chance for me to test. But so far I didn't see any such observation with Sonax, so preliminary guess is Sonax is inert to the tar spot remover.
Because I need the durability, so despite the disadvantage of Meguiar's Hot Rim Brake Dust Barrier as listed above, I still decide I will continue to use it until I found another alternative (next to try will be the 22PLE wheel coating).
Be reminded that, the Meguiar's one is a BARRIER for brake dust, it does not repel brake dust. Meaning brake dust still can be found on the surface of the wheel with this product applies, but these brake dusts are much easier to clean and has a harder time to cake on your wheel. Nevertheless, I am not suffer from serious brake dust issue, so I do not test this effectiveness of this product at its limit yet. But for my daily driver, it already can fulfill my need, and I recommend others to try.
If you browse oversea forum, you can see that there are also negative feedback. So I believe this product might not satisfy certain people with special need.
able to outline/summary most of the negative feedback via oversea forums?
The negative feedback mostly are as below:
1) Users still can find break dust on the rim. What is the point of having a LSP on the rim if break dust still sits there.
2) It turns whitish upon contact with some other maintenace product like TarX, TriX, etc. Users are shocked that it destroyed the wheel and spend a lot of time "un-f***" the wheel back to normal condition. Some asserts that this is a sign of strong acid base ingredient in the product, similar to how acid wheel cleaner reacts with bare aluminum wheel rim. No good, do not recommend to use.
3) Some apply it on half the wheel, leaving another half as it is to use as control. After miles of driving, prior to washing, no apparent difference of cleaner rim on the side with product applied. Waste of money.
The facts are actually as listed below, which Meguiar's USA has made it crystal clear in their product label (I guess not every one read and interpret English correctly) and explain in detail in their forum:
1) The product is never made with objective to repel brake dust. It is intended to make the wheel cleaning, particularly break dust cleaning much more convenient, easier compare to bare wheel. And in this sense, the product achieves its design objective, proven from many users sharing experience. User cannot expect the wheel will stay clean by itself. This product does not eliminate the act of cleaning, it merely makes it easier to clean. Just as usual, unrealistic expectation from users. If one is looking for break dust repellant like a PTFE coated wheel, no this is not the product.
2) As told by Michael Stoops in this page: Whitish on wheel where he also observes the same thing (just like me), it is proven the product react unexpectedly reactive with tar remover ingredient and turn to whitish. But the whitish is not a permanent damage, nor does it forms on the wheel paint or metal, it is forms on the coating. It is removable by either using rubbing alcohol or using the product again. It does not contain strong acid as accused by others.
3) This is another expectation from user which the product never claim to deliver. But if the user ever bother to rinse down the wheel rim, he should have notice that one half of the wheel is beading well and clean easier too.
I think I have made sufficient understanding on the product before I use it so I do not have unrealistic expectation or hope that the product is not design to do. For what it is designed to do, this product so far works fine for me. As for the whitish thing, I am not concern about it at all. I simply use other means to remove tar on the wheel if there is still any. Product is fix, but human should be flexible in adapting to situation on hand.
Give it a try, maybe you will like it, or hate it. LOL
Btw there are also people who compare this with Armor All. A lot of western users made comparison already, and so far I read better review on Meguiar's one than Armor All.
It is been a while since I am away. Now I back from my Europe working trip and I brought back along a new toy for myself.
Here I present, the Fupes LOL.
It is an Autobrite Direct branded Chinese made 21mm 880Watt DA polisher. It costs me 165 UK Pound, about RM900. But I have to ship it from UK to Germany so some courier fee add up and made it like RM1k. But just product alone if buy at UK is like RM900. Imagine if you manage to find a shop in China that sells it, you probably can get lesser than RM900. And for those who selling it at RM1.5K or above in Malaysia, I will say the profit margin is too high, because if this thing ships from China to UK and still selling at RM900 over there, I do not understand why China to Malaysia will cost more than RM1k.
Un-boxing it and these are what is inside looks like. It comes with 2 backing plates, one to use with 7" pad another to use with 6" pad. (Similar to the Rupes LHR15 and LHR21 backing plate size). It is already 220V so no transformer needed. No foam pad is included. In contrast with Rupes, this polisher comes with a traditional 8mm DA polisher handle, but I didn't bother to use it.
Built quality wise I feel fine. Not to say top like Bosch or Flex. If you have ever touch the Osren Ultramate DA polisher, this is the same level of built quality. It is definitely a sturdy built machine. No loose trim or nut. Buttons all feel good.
Here you get to look at the inside of the rotating assembly.
If you own a Rupes or has seen one before then the design feature is similar but definitely not on par with Rupes. Well, for the price I am paying, I feel fine and acceptable.
Here is the backing plate looks like:
It uses Hex screw but not exactly identical to the Rupes. So it still uses Allen key to tighten and loosen and no wrench is needed.
This Fupes also has a shroud design feature to slow down the backing plate rotation speed, similar to the Rupes. The Rupes user will do the famous washer mod to increase the clearance distance and enable the backing plate to rotate freely like a traditional DA. I tried to do the same, and I notice it requires 2 washers to completely make it free from touching the shroud.
The reason is because the shroud of this Fupes is a flexible, rubber kind of material. It bevel down by itself, so when the backing plate is installed, it will touch and lightly press on the backing plate, providing friction to slow the backing plate rotation. I cannot remember whether the shroud of the Rupes is a hard plastic or flexible rubber like this Fupes.
Adding two washers has no issue to me, I tried it and it still works. But then I soon discover something. The shroud is just a press fit rubber part. It can be taken out. So I go ahead and remove it, since i do not need it. I can re-install at ease when I need it.
This is how it looks like with the rubber shroud remove.
Now I can install the backing plate like usual, without any friction from the shroud at all because there is a huge gap between them.
The only potential disadvantage I can think of from this modification is the bigger gap might allow thing like string to get caught in between during working. But I am not particularly concern or worry about it, because traditional DA has such big gap too and never before I encounter any difficulty, rotary even dun have any covering at all. So I am not going to be worry for the time being.
Now with this modification, the backing plate is completely free. With one washer I get like 50% free. With 2 washers close to 100% but it leaves lesser space for the nut to tighten on the spinning head (but still can be tighten). As stated before this is due to the bevel angle of the shroud (which is purposefully designed to be so). I am not sure about the Rupes shroud bevel angle is lesser than this or not because I do not have a Rupes to compare with side by side. But I personally do not think I need the shroud if my sole purpose is to unleash the full strength of the machine.
I haven got the suitable foam pad to put on it yet so I do not yet use this machine on a panel before. Hence I can't share any user feedback yet. I am getting the Lake Country HD pads soon then I will update. But I do have LC 6.5" Hybrid pad, which I tried to put on the Fupes. With this combination, at speed 6, I feel the smoothness of the machine is good.
Now I would like to highlight a few features where the Rupes has but this Fupes does not have:
1) Rupes has a place to put the allen key on the machine itself. Fupes no. But i do not feel this is a deal breaker or issue to me. Because for this kind of machine once you settle down on the choice of backing plate you rarely change it again.
2) Rupes has lesser noise I believe. But I can't be sure because no side by side comparison possible. Nevertheless I do not feel different by a lot.
3) Rupes speed control dial is facing top, where as Fupes is follow Flex 3401 design facing left. I personally like the Flex configuration more because my thumb is on the left on my right arm when operating the machine.
Overall I feel this machine is a worthy purchase. For the price I paid and the features I get, I cannot ask for more.
Remark: There is another version of Fupes, which is made by Ansi Auto, completely follow the outer shape of the Rupes. Mine is the Maxshine version, follow a hybrid design look from Flex and Rupes. I could have bought the other one when I was in Europe but I eventually settle down on this Maxshine version because I feel I like its ergonomics more, nevertheless this is completely individual preference.
This post has been edited by scoutfai: May 3 2015, 01:18 PM
Thanks for such detail introduction Scout, especially the photo inputs, should I call it ? Would really like to see how it works , sure it helps those who wish to get their first polishing tool.
You're welcome. I too hope my input will be beneficial to other members who looking to get their 1st DA or 1st large throw DA. Should you call it? Hahaha bro I cannot answer for you. I have the opportunity to visit Europe so I can purchase it at a reasonable price and without the costly shipping fee from Europe to Malaysia. So it is a worthy purchase for me. But if you have to involve shipping fee from Europe to Malaysia then it might not be worth the effort anymore. I have heard there are people bringing in this type of machine (and the other version I mentioned) to Malaysia and sells it. But I am not sure how much they selling. Another thing to consider is the durability. I am not particularly concern about this because I am just a weekend warrior, I will definitely have no chance to overload the machine. But if you are a heavy user on daily basic then maybe the extra cost involve with the Rupes is worth it because you can get local after sale service.
Sure I will update again once I got my suitable foam pads to use with this beast.
QUOTE(roxx @ May 4 2015, 12:21 PM)
Master scoutfai balik ady.. Hows europe?
Your DA sell to me laa.. Since u got fupes ady.. Heh heh heh..
Hey bro long time no see. Europe is very cool during the time I was there. I spent my entire duration in winter. But other than that everything else is a nice experience.
hahah sorry bro now my traditional DA will be taking the role as a 3" pad polisher for spot buffing. It still has a place in my heart.
This post has been edited by scoutfai: May 4 2015, 01:00 PM
1) Input Wattage: Mine 880W, the one shown is 600W.
2) Throw distance: Mine 21mm, the one shown I believe is 8mm (it is not state in the web). (so mine is large throw machine like the Rupes Bigfoot LHR21, whereas the one you show is traditional DA).
3) ergonomics: Mine is try to mimic the rotary design (it is a Rupes + Flex combine), so it is longer in length. Your is shorter. No verdict here because ergonomics is personal preference.
4) Backing plate attachment menthod: Mine uses allen key with a spline feature on the backing plate head, so I do not need to use a wrench. Yours need to use a wrench to hold on the bearing nut otherwise it will never get tighten, wrench is usually come together with the package.
5) Backing plate choice: As mentioned above, I will be restricted to use the backing plate with the spline feature, so I basically can only use the two backing plates shown in my post only. I will have to buy from Maxshine for a replacement. Although I am curious also whether Rupes backing plate will fit on my machine. Yours is like universal, any common traditional DA backing plate choice can be used. So you will have less problem when come to re-stock.
Basically it is two different category of DA machine. Mine is large throw, the one shown by you is traditional DA. I have one traditional DA myself too. Both have a place in my work, none replace the other.
The only thing I am concern with your machine is:
1) You do not have a chance to test it yourself. So you will never know the quality until it is shipped which by that time might be too late. Taobao electrical items always got risk, TianMao will be more reliable. Try search for same product from TianMao instead. Both Taobao and TianMao, like Aliexpress, all belong to Alibaba, same China man boss. Provided you have friend in China who can test for you upon receive the item, then the risk is lower because there is a policy of return given by Taobao. You can still do the return even when you are in Malaysia but the courier cost might not justify the action.
2) Because you didn't test it yourself or hear no other user feedback on forum before, you never know whether the motor will bog down under pressure or not. Forum member here who purchased China made rotary before experience this problem on certain cheap model. If it does bog down under pressure then it is pretty much useless. But again you will never know until you test it yourself or hear from previous user.
3) It is really cheap, too cheap to be good to trust but I cannot assert it is a bad product. The reason I say it is hard to believe because there is another identical machine carried by Aikka Malaysia: Aikka DA Polisher but it is selling at RM600+. Almost twice the price. Well we never know whether it is due to Aikka trying to make a huge profit margin or it is indeed two different grade of quality. I will suggest you email Aikka, find out which branch has a ready stock, go there and try it out yourself.
That is all I can feedback to you at the moment from the info you provide. I wish you find your machine soon.
My 7" and 6" Lake Country HD Orbital pads finally arrived. These are the pads made by LC specifically for long throw DA machine. Although I am not sure whether they are as good as the Rupes pads or not but definitely cheaper than Rupes pads.
Here showing the 7" blue cutting pad.
Have some thickness on the pad, there is a black color layer of interface.
How it looks like after attached to my 21mm DA machine.
I do not have a panel that needs to be detailed yet so I do not test it on a panel yet. Here showing some free run video.
I then discover this marking on the machine: This verify my conjecture that this model is indeed manufactured by Maxshine China but branded as AutoBrite Direct machine when sold in UK.
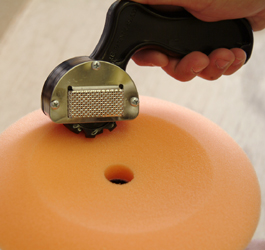
My 12pcs wax applicator pads just arrived. Can use it with Tesco Palm holder. [attachmentid=4455294]
I have the same foam applicator palm holder. To share with you some of my usage experience:
1) The contact circle (more like ellipse) of the palm holder is actually quite smaller then a standard foam applicator. This causes the circumference of the foam applicator does not exerted any pressure during usage. There is hardly anything can be done to fix this issue, unless you customized another plastic piece precisely cut to the foam applicator shape (smaller a little to add some safety margin).
2) The center of the palm holder is hollow. So same issue like the (1), the center will have no pressure.
3) Situation described in (1) and (2) cause only the ellipse ring of the palm holder (the velco surface) has pressure, so you will find that you have product (wax, polish, etc) slowly accumulated at these two areas. So once in a while when you working, you have to bring back the accumulated product manually to the velco area otherwise it just keep collecting there and wasted.
4) The palm holder does not really hold the foam pad firmly, because the foam pad does not has a velco. So when your product dried up, and your hand is pressing hard and moving, there is a chance the palm holder will slide away and if unlucky, it will hit on the panel. So be careful, do not use brute force when working. Pay attention when feel the pad starting to have friction to move around.
Well...the thing is...mine dissintegrated with age cuz I don't really use them much....
Now that is a product that forces people to work more. But I have the same looking plate for my traditional DA. So far still looking fine. Let me see how long this thing will last. A new replacement from Taobao quite affordable also. But my most curious question is will the rupes plate fits on it.
This post has been edited by scoutfai: May 26 2015, 10:11 PM
Today I want to share my DIY proof of concept project of detailing tool belt.
My house has limited space, so when I am detailing or do weekly routine wash, I do not have the luxury of convenience to use a wheel trolley (any cheap trolley will do, those that you can get from Tesco, Aeon Big, Aeon, etc) to put my items and move around with me.
As a result, I need to put my items on ground (trigger spray, product bottle, etc) or nearby object with a flat surface while doing my work. Often times, I will forget to grab it when I move to a new spot. So this frequent walking, grabbing, relocating of items always annoy me. In short, inconvenience.
I then looking for a solution, and the tool belt is the 1st idea comes to my mind. I shop around Ace Hardware, I find a lot. But they are mostly made for carpenter wood work. Material is extremely durable, stiff, rough to touch, some even have metal hanger on it. They serve the purpose as a carpenter tool belt very well, but not so suitable for detailing, where accidentally scratching the paint is a major concern.
I eventually still bought one from Ace Hardware. It is a fully fabric made, come with 5 pockets and 2 leather hanger loops. It looks like this:
I bought this instead of the others because I feel this one is the safest among the options available there for paint. I plan to utilize the two loops to hang my trigger spray.
Used it two times and immediately deem a fail attempt. The reasons:
1) The pockets are actually made for nail or tool like plier. They are usually short in length, so the depth of pocket also short. This makes putting any detailing brush in it and securely remain in the pocket while moving around (squatting, walking, bending) not so well. There are times my brushes fall out. 2) The opening of the pocket is not big enough for convenience insert and take out of items like bottle of polishing product. 3) The loops work! But only when you are standing. Once you squat down, the bottom of the trigger sprayer lands on the floor, then it already detach from the loop. Then when you stand back, and walk to another place, stretch your arm to the side expecting to grab the sprayer, it is missing! Then you look around, it is magically standing on the floor nicely as in someone put it there.
Then I look for something that is made purposely for detailing. I manage to find two in the market now. One is from Rupes:
But the problem with Rupes belt is: 1) It only fits its own bottle size. 2) The material quite stiff also. 3) It is expensive like batman belt! USD $90 before shipping. Perhaps Rupes Singapore carries it.
The other better, more general purpose alternative is from a USA detailer who creates a company to sell this product he designs himself, Detailer's Helper:
The detailer's helper cost USD $60 and shipment from USA to Malaysia by USPS priority mail is USD $ 23.50.
Although Detailer's Helper tool belt seems to fit my requirement but the cost involve is a factor to consider, albeit I actually willing to pay.
Nevertheless, I keep asking how to DIY something that can fit my purpose. I am not a hard core tailor so sewing pocket pouch like the Detailer's Helper from a blank cloth sounds like a difficult task to me. I have asked some tailors (who custom made shirt for human) regarding possibility of ordering such job, but all turn me down because do not know how to do it (I never expect making pouch is so much different from making shirt).
Eventually, one day when I was shopping in a mall. I saw something that inspire my DIY idea. So ladies and gentlemen, with this I present you my cheapskate, pasar malam style, DIY attempt of detailing tool belt. it is just a proof of concept stage, and still in testing phase. No proper, accurate measurement with ruler is used. I just do it according to feeling. So it will look ugly, hopefully practical (yet to know still testing). Future real production maybe will employ proper method and increase aesthetic appearance a bit.
The materials used: See! Nothing special, just the recycle bag people use in shopping mall at Sat no plastic bag day! But in this case I have to find a right size one, not too big, not too small. The Standard Chartered backpack is just to be used as a material to make the belt hanger for the bag. Matching the color is also deliberately made.
The purpose is the make it so that the trigger spray hang at a waist level that my hand can comfortably grab it. Too high, then it will hit my elbow. Too low is ok but just not ideal.
This is the rough measurement. I am going to make the tool bag to be able to use two height levels. At this time I do not finalize on what to be used as the belt yet. I just simply use the normal belt as a measurement of width. The reason I want two levels is sometime I will put shorter item, the lower level will enable my hand to reach it easier. But after I test it actually one level enough.
It is time to machine sew! I knew how to use, I just not good at it. My last usage was like 10 years ago.
I cut the Standard Chartered bag, remove the ropes, and starts sewing.
This post has been edited by scoutfai: May 31 2015, 05:04 PM
This is initial result. This is the most I can do with the machine. It is not completely finish sewing yet.
Before I continue with hand sewing, I test it first.
Looking fine to me. Height wise is as I want.
So I continue with hand sewing the rest of the part. It has to be hand sew because the opening of the pouch is so small, I cannot flip open it till the machine needle can reach it comfortably. This is the most time consuming job. But I always hand sew repair my clothes back in the uni time so this kind of feel nostalgia.
Finally, done! I cannot remember how long I spent. But definitely not 5 minutes job. Although I said I knew how to do it, I didn't say I can do it beautifully You can see that ugly, non-straight sew line by my hands.
Test wear! It works as it is anticipated.
Today morning I did my routine wash and I use this new toy. Instead of using the belt as shown in the picture above, I use back the ropes that I take out from the Standard Chartered bag. Because it feels softer, I think safer than the belt.
Some after-use experience:
1) The tool belt height level is good. My hand can reach to the bottom of the bag without the need to bend my waist. 2) The bag depth and the position where I sew it to the belt holder back piece is also just right for the trigger sprayer. The highest point of the trigger sprayer does not disturb my elbow. I can comfortably reach to the trigger spray head to grab it also. 3) When squat down, the trigger sprayer bottle sit firmly in the bag. Good, now it is singing "I Will Follow You".
Some improvement on next DIY attempt base on current observation:
1) It is better to use a slightly bigger mouth opening bag, or bag with a fold layer like the following: Right now my bag is like envelope type, at the bottom there is no flat area. This actually is not a problem, it is the mouth opening. With a envelope style of design, once hang on waist, the mouth kind of tend to stay closer to the back piece, making me must use two hands, one to open the opening, another hand to insert the bottle. It will be ideal if the opening is open by itself, then I just need to put in and take out the bottle with one hand. Which is why I suggested fold layer bag, because the opening has larger area.
2) One belt level is enough, no need to make lower belt level on the back piece.
Overall, I realize that this recycle bag material is really a suitable kind of material to use, because unlike cloth, once you cut it, you will need to back fold it once and sew, in order to prevent the strings that made the cloth starts to come out by itself slowly. Whereas for recycle bag material, no such problem.
It is also soft. I think should be safe on paint as long as I do not brute force.
The only drawback is it is not waterproof. Although it get wet, but it still can be use continuously, just that a wet thing is next to your pants.
I will continue testing it for several times to see its durability. As for now, I am satisfy with this DIY attempt.
Cost: Maybe RM10? The bag is after all taken from my mother without informing her in advance. Appearance: Admittedly ugly. Practicability: Definitely working as I want it to so far.
In USA, the establish brand Griot's Garage, who produces (though they do not manufacture it themselves) the USA market famous traditional DA and 3" mini DA, have now join the big throw machine family, by introducing their own big throw polishing system, called BOSS (Best Of Show System).
Unlike the Rupes, which officially stated they do not recommend and deem unnecessary for the user to perform the washer modification, the Griot's Garage goes ahead and tell you if you want to do it, just do it, they even provide a washer for you.
Just like Rupes system, they also have their own products.
One feature on this machine that I see is potential threat to Rupes machine is, its trigger has feathering feature, i.e. like your rotary buffer, the speed can go from zero to full (depending on your dial setting) depend on how hard you press on the trigger.
One hand job is not an issue, so I am guessing balancing wise even if it is not on par with Rupes, will not be far.
Btw this machine is 900W.
When Griot's Garage first came out with its 8mm traditional DA, it rapidly replaces the position long held by the Porter Cable 7424XP, becoming the 1st choice among US users. Because it offers more wattage power but at a similar price tag. I would guess the same will happen here. This is the 1st official alternative big throw machine that enter US market, although Europe market has long got their alternatives. I think Rupes has some serious competition in US now.
Been away for a while and now it seems like the forum getting active.
Ok today I want to share some 1st user experience on my Fupes on an actual panel of my daily driver.
It has been a long time since I applied the Collinite 476s on my car. So I think is time to re-apply a new coat. Also take this opportunity to test the machine.
So I first give my car a routine wash and then clay it the day before. After that I mask up the trim with 3M Multi Surface masking tape (blue color type). I can't finish in a single day so I have to do it in two days.
Here is how the car looks like after masked.
I just have Meguiar's consumer range of products to be used at the moment. Still got a lot, I do not plan to invest into other product till I finish them.
I will use the Meguiar's Ultimate Polish. The intention is not to cut, but to clean up pores embedded dirt that can't be removed by clay alone. I will be using two machines, one for big area, one for small or curvy panel. On the big one, it is a 21mm throw DA polisher, with Lake Country (LC) 6" HD Orbital Polishing pad (orange). On the small one, it is a 8mm throw traditional DA Ultramate polisher, with LC White Polishing 3" Foam Pad.
The whitish looking blue machine is actually having a layer of transparent PlastiDIP on it. I purposely spray it for scratch protection and since it is peel-able, I can always remove it any time. I will spray same PlastiDIP on the red machine too soon.
I first prime the pad thoroughly.
Then add a few drops of product as actual working product. From experience Ultimate Polish dries very fast so I put more products.
The following video shows some demonstration:
Previously I have share with you guys that I purposely remove the rubber shroud from my 21mm DA, which is designed to slow down the pad rotation (similar feature in Rupes).
In the video from 0:00 to 1:43 I am using such setup. At the beginning I was turning on and off the machine because I try to get the trigger locked but I was not yet familiar with the machine so it took me some attempts. Now I know that the trick is I must release the lock button first before I release the trigger. On speed 1 (spreading product) the vibration of the machine is actually quite apparent, on par with traditional DA. Once I dial up the speed to 3 (actual working speed), the vibration is reduced noticeably. So the observation is for this machine, its vibration level at low speed (1-2) is noticeably higher than high speed (3-6). But if you can handle a traditional DA at middle speed setting, you will be able to handle this 21mm machine at low speed setting because the feel of vibration is on par.
With such a big throw and big pad, when the machine is put on ground with pad facing up, depending on which position the pad is stopped, the machine is easily tilt to the side. I myself too dislike the machine body touching the ground, so I add a black sponge pad (those that you can buy at Ace Hardware to be used under the chair legs). But because my hand is already got Ultimate Polish, which contains a lot of polishing oil, the body of the machine is already a bit oily, so the sponge does not stick well. At the beginning of the video you see something fly out, that is this sponge.
Later on I decided to install back the handle so the machine will rest at a more stable angle when put on ground or flat surface. I also use masking type to cover the rear area of the machine where it touches the ground too. This is just a temporary ugly solution. Once I finish today and clean up the machine body I will put on a nice foam there.
As mentioned earlier, the setup of the machine is without the rubber shroud. Later on, I decided to put back the rubber shroud and use a single washer. This set-up gives better controllability and smoothness. (this set-up is shown starting at 2:04). The reason as I observe is, with such big pad, a little bit of angle tilting by my hand when holding the machine has a noticeable effect on the pad behaviour. Certain tilt angle will easily cause the pad to stop or slow down rotation, certain angle will cause the machine starts to increase vibration. The rubber shroud actually help a little bit in guiding the hand to hold the pad flat on the panel albeit just little, however I feel that it is better than without the shroud.
In the video I also try to show that it is possible to just lightly hold the machine and let it runs by itself. (2:41, where I holding the cable, and use 1 finger to guide the machine only)
At the later part of the video I shoot some views of the side of the car, which already finish polished. The hood is the last panel, the roof is the 1st panel.
I have to highlight that the car prior to polish is already decent to start with. So this video unable to demonstrate to the viewer the cutting ability of the machine (I do not intend to cut anyway at this time).
From 6:49 in video, I snap a zoom in on the pad. This is how it looks like at the end of the polishing. The dirty looking pad shows the amount of dirt pulled up from the polishing process. Some might argue that the dirty pad indicates I do not clay clean enough. I actually clay pretty thoroughly already but in my experience there is something I just cant clay away but to remove by polishing, although I cant be sure this is my bad skill in claying or not. I recommend viewer to refer to the following post by autogeek. They call this paint cleansing:
In between, about 2 panels interval, I will use a Lake Country Duo Spur Wool & Foam Pad Cleaning Tool to clean up the pad before continuing. The tool looks like this:
Nevertheless, this merely give a little bit of cleaning to the pad, do not expect it to return to flash new.
The above process merely tackle the large panel area. Now I repeat the process again with the 3" pad on intricate area. I do not take any recording for this as I am rushing.
After all of this is done, this concluded the 1st half of my 2nd day detailing, which is paint cleansing by polishing.
After lunch I used Odorless Mineral Spirit (MS) to wipe clean the car surface. I am lazy to do another wash, I simply do not have the time. Plus I am not cutting so I do not have a lot of residue. I also want to save the masking tape as 3M masking tape quite expensive. But good thing about 3M is it sticks well without leaving any glue residues.
I do not use IPA this time because I want to try the recommendation by Autogeek.net. When first wipe, MS will give you an oily feel. I was like "this does not look like making my paint surface squeaky clean for LSP application". But give it some time to evaporate. Once it done evaporate, the surface left over is squeaky clean, just like IPA result. But it has one extra bonus, that is during the wiping (before it finish evaporates), this oily feel actually lubricates the cloth and the panel, making wiping less prompt to induce swirl/scratch back on the finish polish surface. First impression of using the MS on the entire body is quite promising. But I can only conclude as much until I have more observation on the effect of longevity of LSP adhesion on panel by the use of MS instead of IPA.
After a short rest, I resume to machine apply the Collinite 476s wax. Basically same procedure but just using an even softer pad (LC Red Finishing 6" HD Orbital foam pad and LC Black Finishing 3" Flat Foam Pad). This time I think I forgotten some advise given by the other. Unlike other wax, which user can wax the whole car first before buffing out, the Collinite 476s is recommended to wax 2 panels then buff out immediately. I forgotten and wax the whole car first then only buffing by hand. This proves to be very elbow grease demanding. It took me very long time. To show you how long it takes, after I finish buffing, I realize a spider has successfully make a full spider net on top of my car. One of the string is sticking on my spoiler, which is the 1st panel I buff.


 Nov 4 2014, 10:36 PM
 Quote
Quote


 Then I can only hope that with my no so heavy usage it will not break on me so soon.
 Now that is a product that forces people to work more.


 0.0758sec
 0.37
0.37
 7 queries
 GZIP Disabled