

Thanks but not yet, fnish at the moment.
Monochromos., Build & Mod, Completed 03/03/13
Monochromos., Build & Mod, Completed 03/03/13
|
|
 Feb 11 2013, 09:10 AM Feb 11 2013, 09:10 AM
Return to original view | Post
#21
|
 
Junior Member
191 posts Joined: Oct 2009 |
Thanks but not yet, fnish at the moment.
|
|
|
|
|
|
Feb 14 2013, 01:07 AM
Return to original view | Post
#22
|
|
Junior Member
191 posts Joined: Oct 2009 |
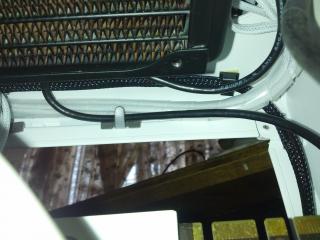
11. Some more cable management.
This is the wiring route for the switch panel at the top shroud. 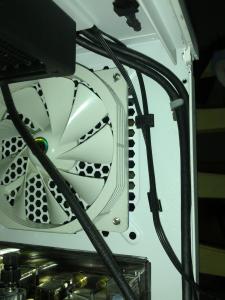
The psu cover. 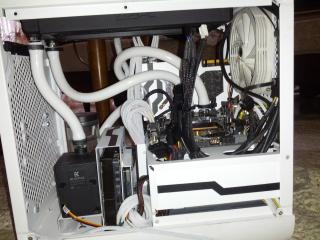
The result from the cable management and psu cover. It took me wholeday to manage n install n make everytg in place. Mainly it because i use non-modular psu. The right side. 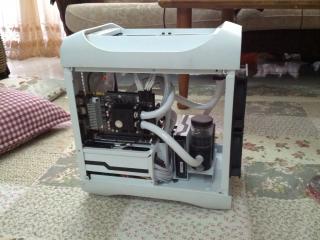
The left side. 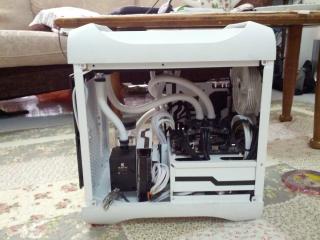
This post has been edited by ichuck: Feb 14 2013, 01:12 AM |
|
|
Feb 14 2013, 01:19 AM
Return to original view | Post
#23
|
|
Junior Member
191 posts Joined: Oct 2009 |
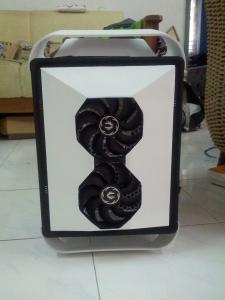
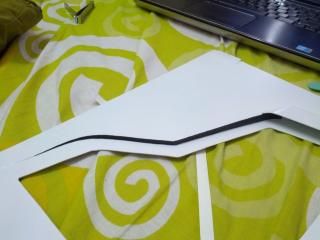
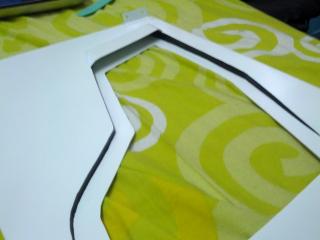
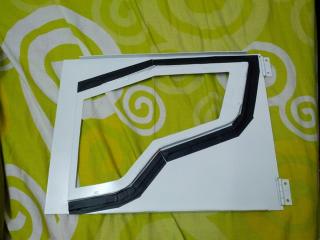
12. Top shroud detailing.
I cut out some design from the vinyl sticker for the shroud. 
The shroud. 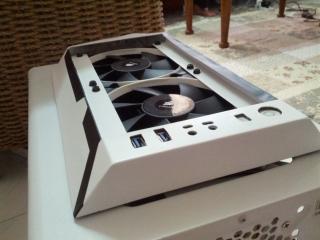
The Nzxt Led strip which i cut to make it shorter. White led color. 
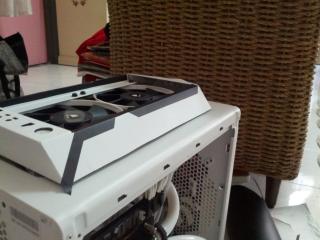
The top shroud mesh, this part need to be joint together. 
What it looks like with the mesh cover. 
Next i clean the top part, because it is dirty with lots of my finger print on it. That is the downside of doing things in white, u can easily see the stain 
Later its time for the front panel to be sanded and paint. 
The freshly painted front panel test fitting. 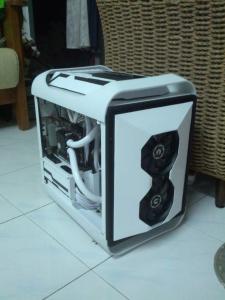
This post has been edited by ichuck: Feb 14 2013, 01:39 AM |
|
|
Feb 14 2013, 01:52 AM
Return to original view | Post
#24
|
|
Junior Member
191 posts Joined: Oct 2009 |
13. The last part that left un painted was the side panel.
Here the sanded side panels ready to be paint. 

Test fitting. This is the last piece. And now my build is almost done. I can say it is 90% COMPLETE. 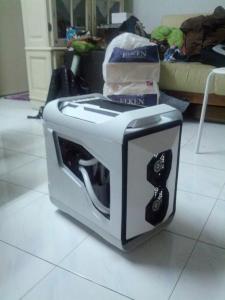

SO, WHAT LEFT TO DO? -Acrylic panel for the window -detailing sticker for side panel. -RAM, any suggestion what ram i should buy ????? thinking of Corsair Dominator Platinum 16gb(8gbx2) 1600mhz -and laaastly some super nice high quality photoshoot. This post has been edited by ichuck: Feb 14 2013, 01:58 AM |
|
|
Feb 14 2013, 11:19 AM
Return to original view | Post
#25
|
|
Junior Member
191 posts Joined: Oct 2009 |
QUOTE(najmul @ Feb 14 2013, 02:39 AM) dominator platinum will go nice with this awesome build, it fits the theme Yeah i think so, thats why i choose platinum.   QUOTE(topazzatech @ Feb 14 2013, 04:47 AM) Naissss bro...tangan very cun...keep it up.. Thanks, Dremel jugak yg membantu, hahaha  QUOTE(qwe13 @ Feb 14 2013, 08:55 AM) sweeett...great mod to that small case. whats the temp? Thanks , for after the mod i didnt know yet. but before this idle about 32/34 max temp when rendering 51/54cif in AC room i get as low as 17c-30c |
|
|
Feb 14 2013, 11:20 AM
Return to original view | Post
#26
|
|
Junior Member
191 posts Joined: Oct 2009 |
And another one to add, should i do some benchmark test?
Prime95 or heaven benchmark? |
|
|
|
|
|
Feb 14 2013, 01:44 PM
Return to original view | Post
#27
|
|
Junior Member
191 posts Joined: Oct 2009 |
QUOTE(ajepyatt @ Feb 14 2013, 01:20 PM) Nice bro. Nak tiru bole tak Bole je xde copyright pun hahaha. |
|
|
Feb 15 2013, 05:10 PM
Return to original view | Post
#28
|
|
Junior Member
191 posts Joined: Oct 2009 |
QUOTE(homerthewhopper @ Feb 15 2013, 08:22 AM) nice build i envy your skill if i ever try to do anything like this the cut would be terrible first of all thanks  btw how is the fan configuration? are all those intake? arent you worried about dusts?  , , and one most important thing i learn when modding is that, u need to be patient so the product u produce would be great. i did spend the whole of my semester break modding, but still till now it does not completely done. yup front and top is intake and, one exhaust at the back. i do afraid of the dust. i might put a layer of filter later to atleast reduce the dust. i dont have the chance to turn on the pc yet for now, later i see how it goes if its does collect lots of dust then i will change the top to be exhaust. QUOTE(lun1986 @ Feb 15 2013, 09:57 AM) nice build bro, Actually thanks to ur alu plate if not i cant do this mod haha:)where u get the modder mesh huh ? the modder mesh is AC ryan. bought from limhongwoon. u can also ask pristine to buy for u, because he take order from performance pcs This post has been edited by ichuck: Feb 15 2013, 05:29 PM |
|
|
Feb 18 2013, 09:10 PM
Return to original view | Post
#29
|
|
Junior Member
191 posts Joined: Oct 2009 |
14. So now some final mod for the case.
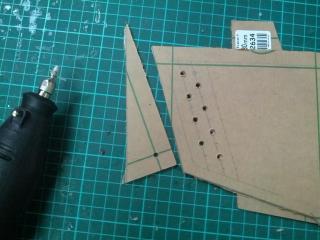
first i cut the acrylic window. just using the acrylic cutter. lazy to use dremel because so noisy -.- 

Then i made some hole for the gpu ventilation, i hope it does function and helps. 
Now im gonna make the sticker for the side panel. 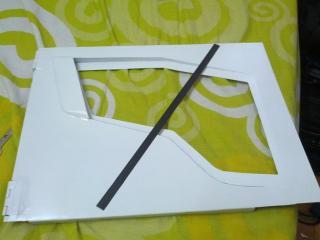
N then the inside sticker to cover the ugly part from the inside. 
Here some sticker to cover the un even part of the hinges, 


To attached the acrylic window i use this clear acrylic tape, it is very strong n its transparent. 


Now the panel is ready. 
Some photos with sidepanel on. 


This post has been edited by ichuck: Feb 19 2013, 10:33 AM |
|
|
Feb 19 2013, 10:47 AM
Return to original view | Post
#30
|
|
Junior Member
191 posts Joined: Oct 2009 |
now here some problem i have, n need some opinion or advice anytg u can help me with.
at first im thinking of using the magnet to hold the the side panel so that it is shut close. 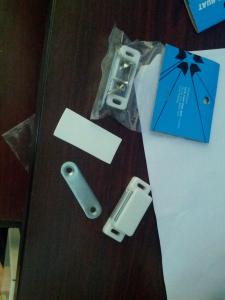
here the problem is. the tube is obstructing from the sidepanel to be close. 
this as far as i can push it in. 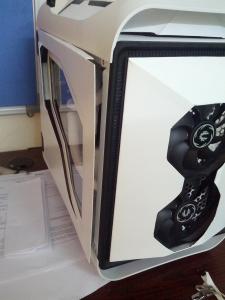
so any suggestion on how i can really shut it close? im thinking of push to open latch maybe. the lastttttt part which is the ram, have been order. hope can finish my build soon. This post has been edited by ichuck: Feb 19 2013, 10:48 AM |
|
|
Feb 20 2013, 11:31 AM
Return to original view | Post
#31
|
|
Junior Member
191 posts Joined: Oct 2009 |
QUOTE(usop8290 @ Feb 19 2013, 11:39 AM) maybe you can use angle fitting at your pump in order to tidy up the tube routing Yeah im thinking like that too, but that would be my last choice, because i dont want to drain the loop n fill it back.hope tht there is another solution |
|
|
Feb 20 2013, 12:45 PM
Return to original view | Post
#32
|
|
Junior Member
191 posts Joined: Oct 2009 |
QUOTE(topazzatech @ Feb 20 2013, 11:41 AM) Bro. How much price acrylic per sq feet? at the place i bought it, they sell according to standard paper size, a4, a3 like that. The one i use thickness 2.6mm size A3 about rm15 |
|
|
Feb 20 2013, 12:58 PM
Return to original view | Post
#33
|
|
Junior Member
191 posts Joined: Oct 2009 |
QUOTE(topazzatech @ Feb 20 2013, 12:48 PM) u cut acrylic using dremel ke bro? Xlah bro, i use acrylic cutter only, because im in college using dremel going to be noisy hahaha. |
|
|
|
|
|
Feb 21 2013, 03:51 PM
Return to original view | Post
#34
|
|
Junior Member
191 posts Joined: Oct 2009 |
QUOTE(qwe13 @ Feb 20 2013, 03:01 PM) since the tube from the gpu outlet into the pump is causing the problem, myb just setback the pump a little bit to the side. that way, the tube would be push further inside. still got space for the pump ontop of the HDD bay i think i tried that i does help, but i need to offset the pump far to the right and it looks weird. so ive made decision to get a 90 degree fitting. maybe with some extra wc parts too |
|
|
Feb 21 2013, 04:40 PM
Return to original view | Post
#35
|
|
Junior Member
191 posts Joined: Oct 2009 |
QUOTE(qwe13 @ Feb 21 2013, 04:25 PM) bro..i think better 45 degree adapter for the inlet of the res is better. or can have 45 degree outlet from ur card and another 45 degree to the res, then it'll make ur tube straight and looks better. ok thanks for the suggestion, never think of that before haha  |
|
|
Feb 21 2013, 06:17 PM
Return to original view | Post
#36
|
|
Junior Member
191 posts Joined: Oct 2009 |
QUOTE(ValityMental @ Feb 21 2013, 05:23 PM) Awesome Build ! Salute  Thanks bro |
|
|
Feb 21 2013, 08:08 PM
Return to original view | Post
#37
|
|
Junior Member
191 posts Joined: Oct 2009 |
As i thought i was "this" close to finish. but not..
stay tuned for more new updates.  This post has been edited by ichuck: Feb 21 2013, 10:25 PM |
|
|
Feb 22 2013, 10:32 AM
Return to original view | Post
#38
|
|
Junior Member
191 posts Joined: Oct 2009 |
for current wc setup it is RM 1080, bought from Apes
|
|
|
Feb 22 2013, 10:47 PM
Return to original view | Post
#39
|
|
Junior Member
191 posts Joined: Oct 2009 |
here some teaser of my new stuff
lots of work more to do.
|
|
|
Feb 23 2013, 12:42 AM
Return to original view | Post
#40
|
|
Junior Member
191 posts Joined: Oct 2009 |
QUOTE(ocz @ Feb 23 2013, 12:13 AM) Good luck modding bro.. Thanks bro. since u good in photography , did u have any suggestion on how i can make my final photoshoot great? |
| Change to: |  0.0357sec 0.0357sec
 0.65 0.65
 7 queries 7 queries
 GZIP Disabled GZIP Disabled
Time is now: 12th December 2025 - 12:40 AM |
 Quote
Quote