Welcome Guest ( Log In | Register )

Bump Topic Topic Closed RSS Feed

Outline · [ Standard ] · Linear+

 [Project] Balrog, Moving to watercooling world...

views
     
TSinfernoaswen
post Jan 8 2013, 09:33 PM, updated 12y ago

(╯°□°)╯︵ ┻━┻)
*******
Senior Member
3,782 posts

Joined: Aug 2010
From: subang jaya


Inspirations

Before I start my worklog on my upcoming watercooling build I would like to thank all the people that are involved in helping me with my doubts & giving me advice since I was a total noob hehehe...

Big thanks to Overclock.net, the members in the water cooling forum is probably the most helpful people that I ever meet online. Special thanks to Martin & Skinnee Labs for all the unbiased testing data that they put out online for people like us. Without their data, making decision would be extremely hard for me & I will probably end up opening so many threads asking questions around instead of reading.

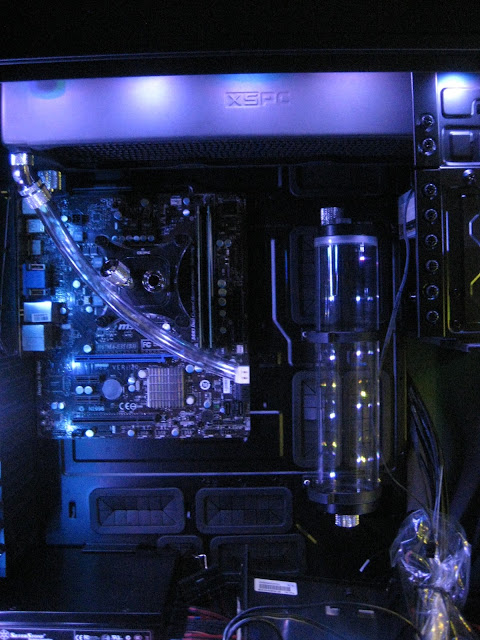
Thanks to Martin & Bundymania for their reviews on radiators, helped me a lot on choosing the right radiator. Biggest inspiration on why I want to watercool is probably form everybody awesome build that I saw in the Water Cooling Gallery in OCN & XtremeSystems. Really motivated me since its so aesthetically pleasing. Thanks to Million Dollar Pc too, the gallery in there is like porn hahaha...

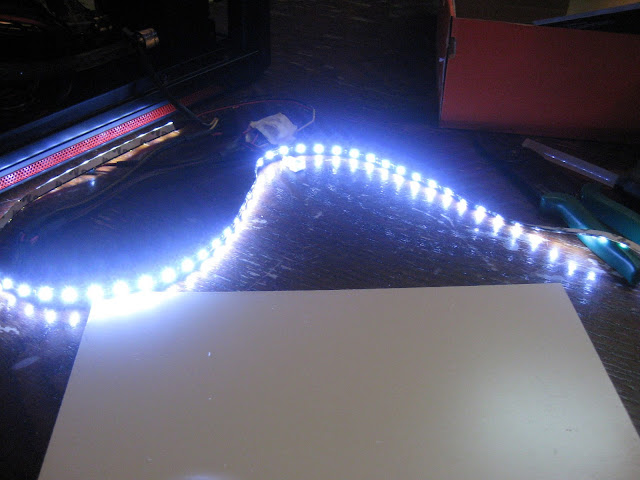
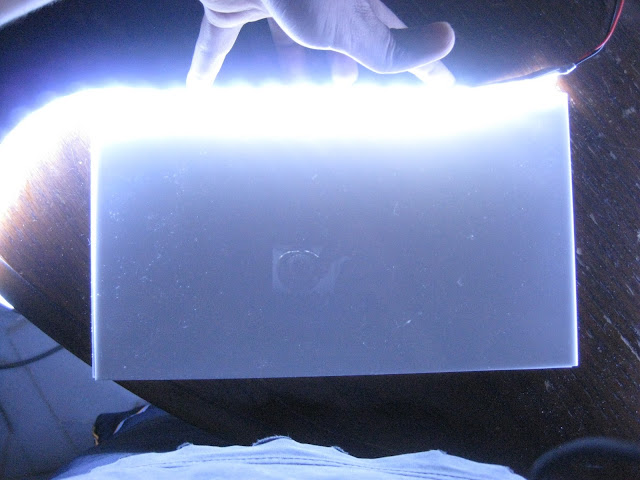
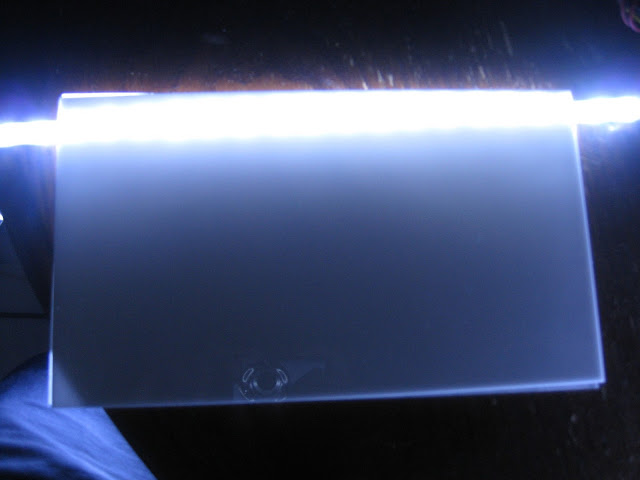
Thanks to Irie too, gave me some inspiration on the luminous panel. Thanks to the members in forum.lowyat.net too, without them getting watercooling parts would be my biggest challenge.

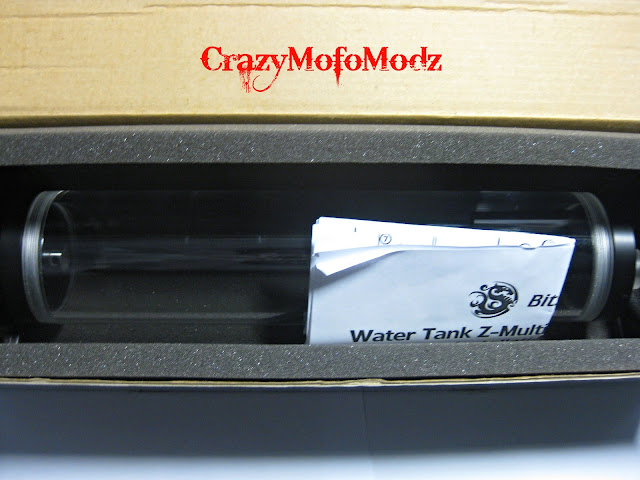
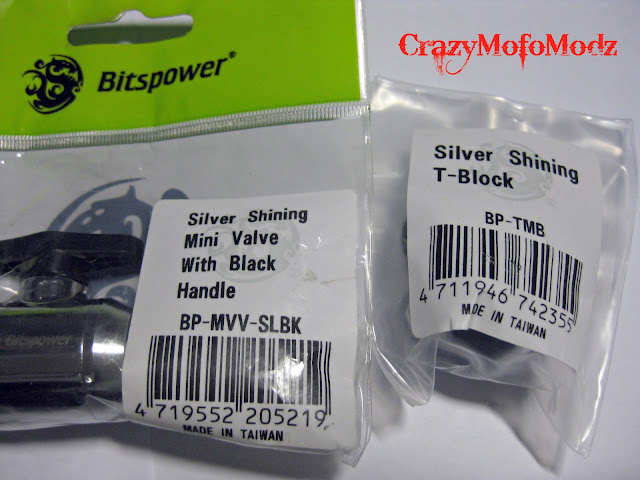
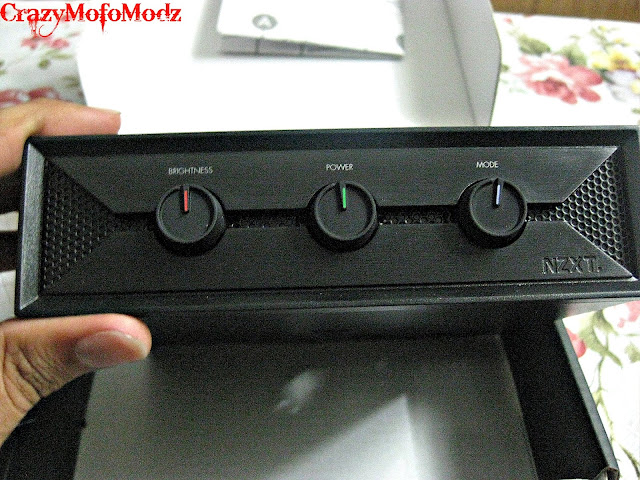
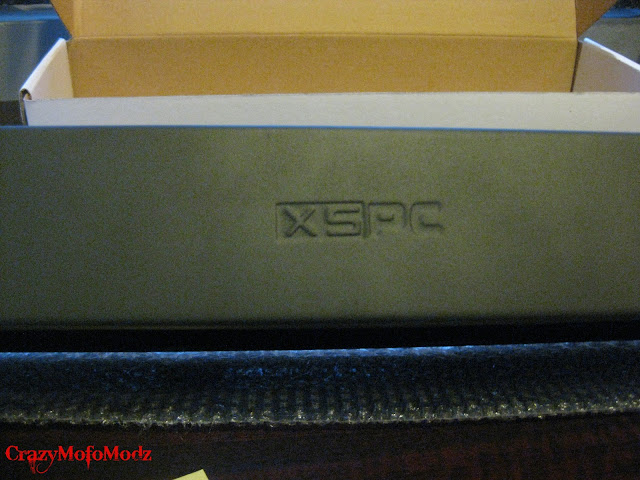
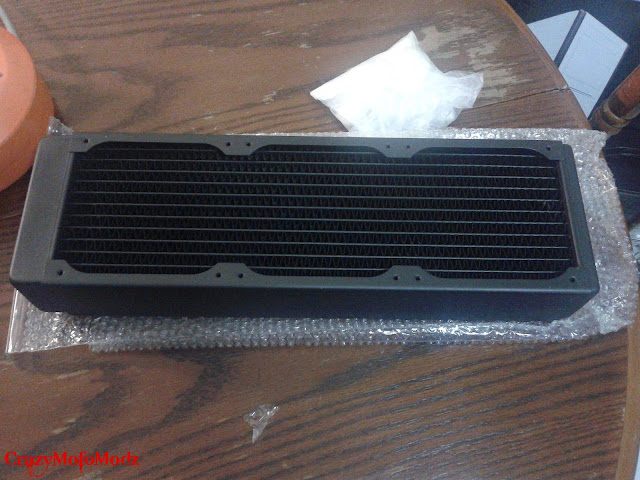
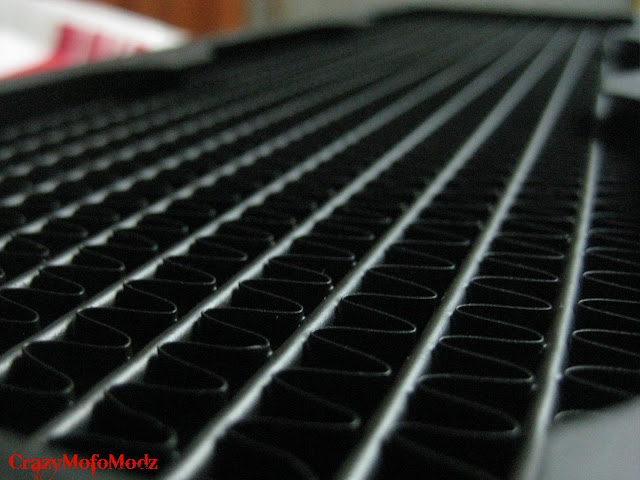
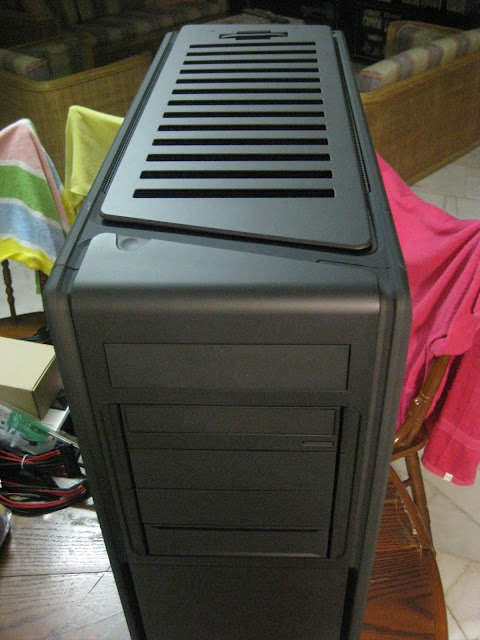
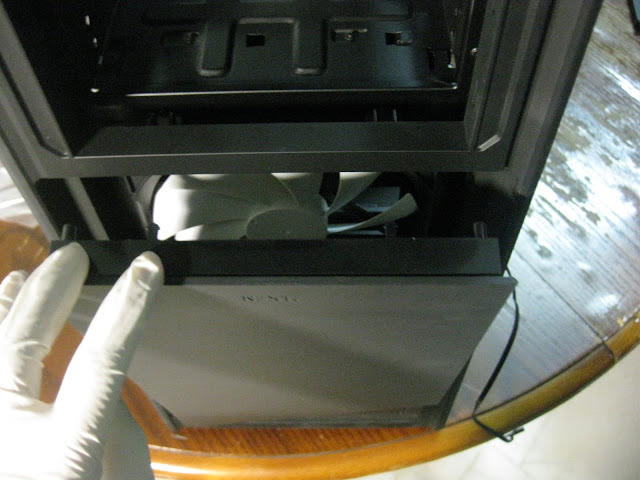
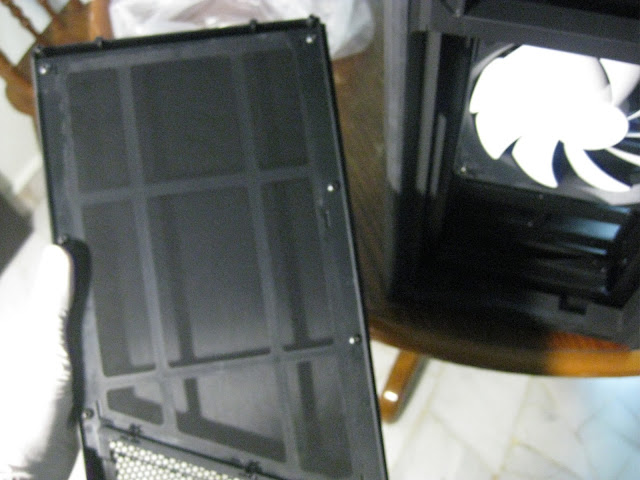
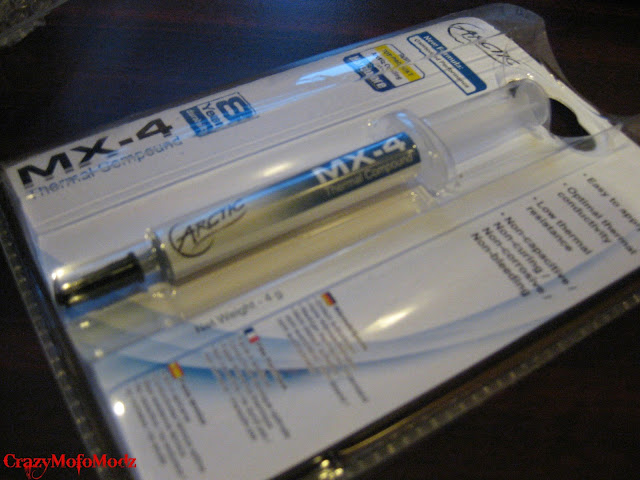
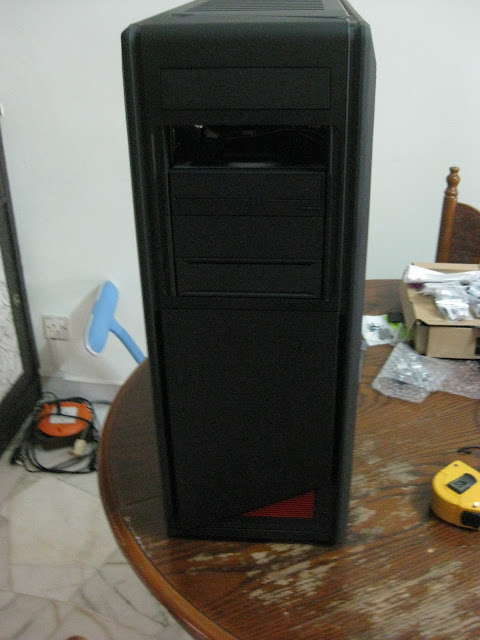
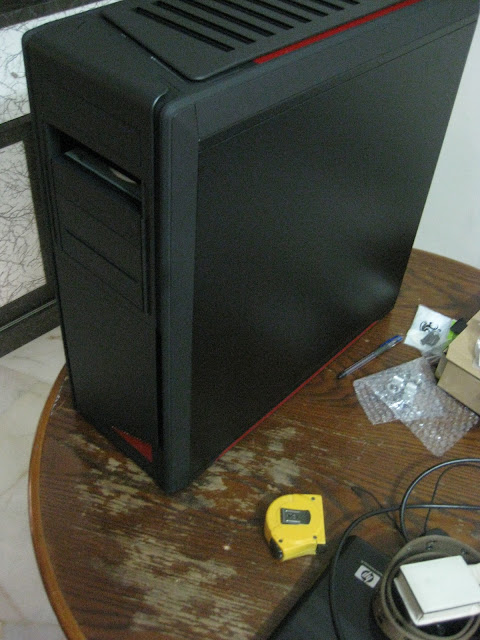
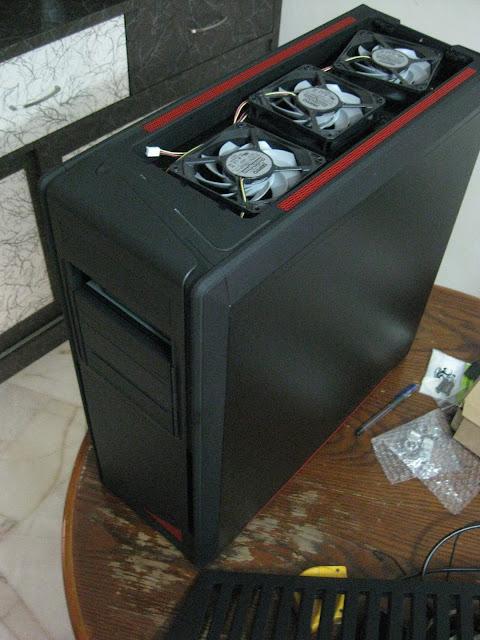
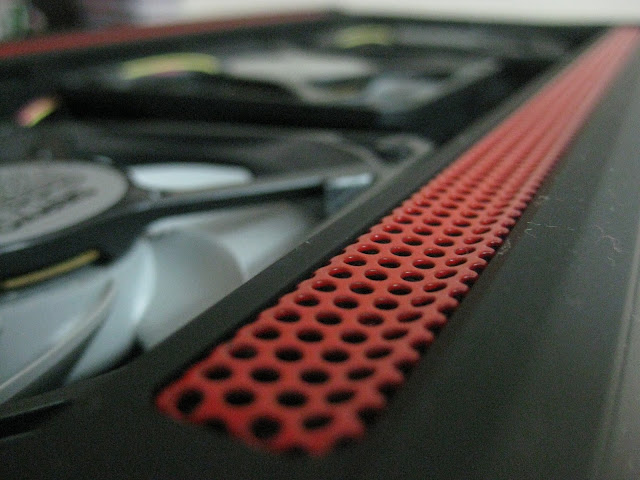
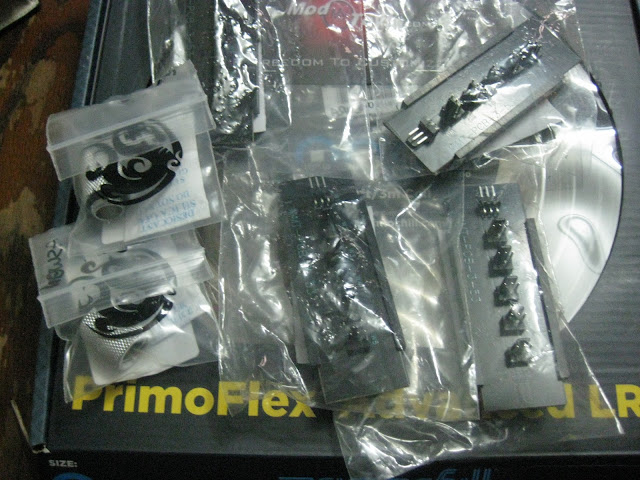
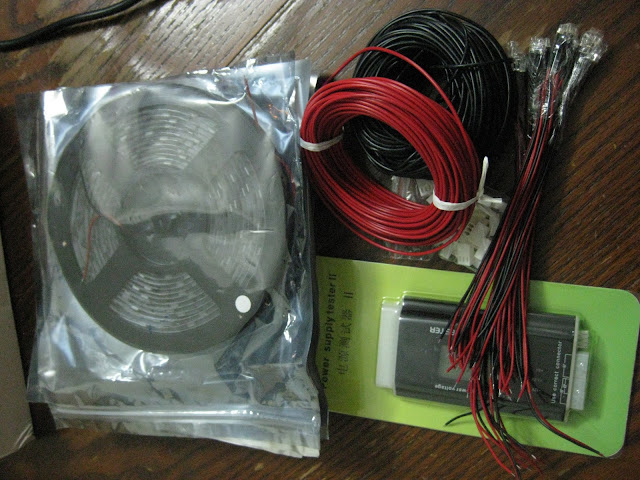
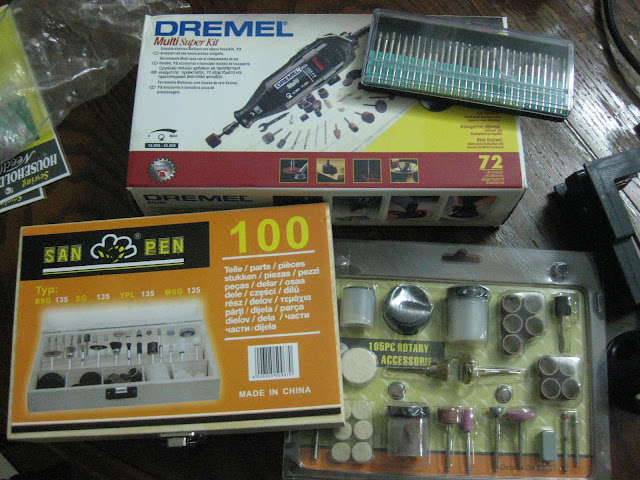
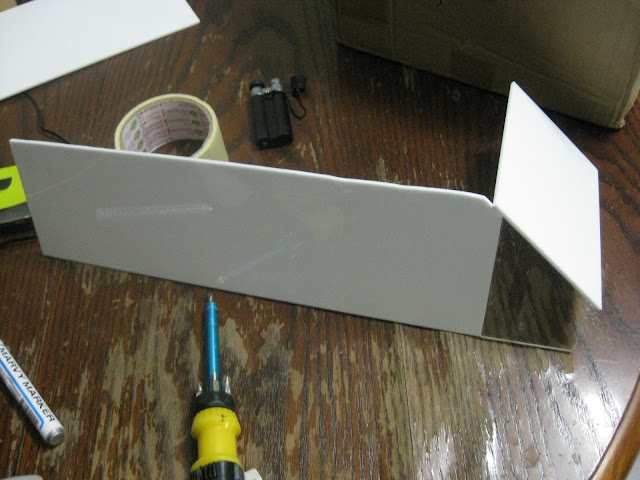
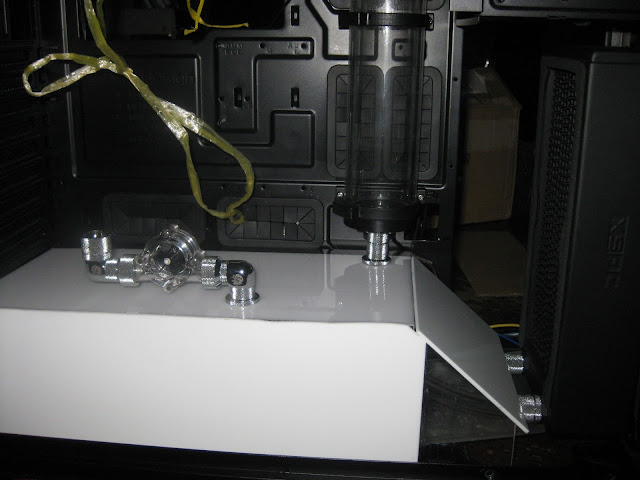
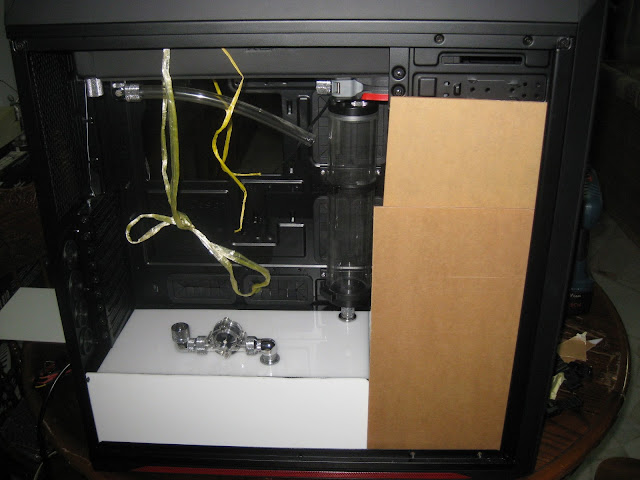
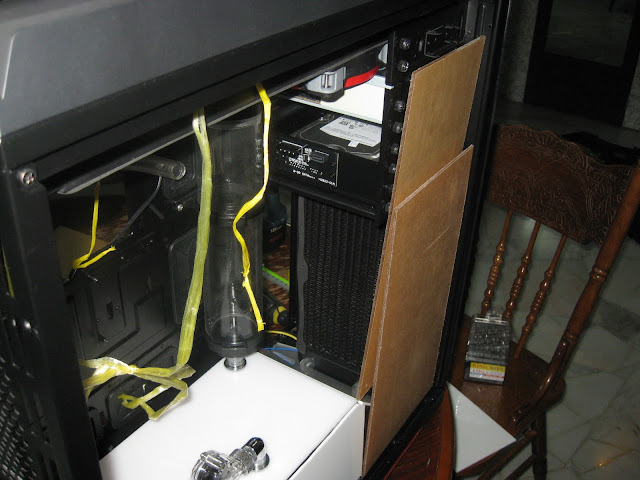
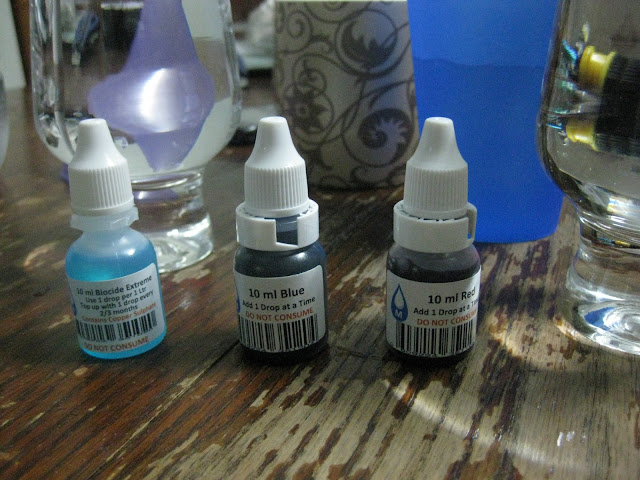
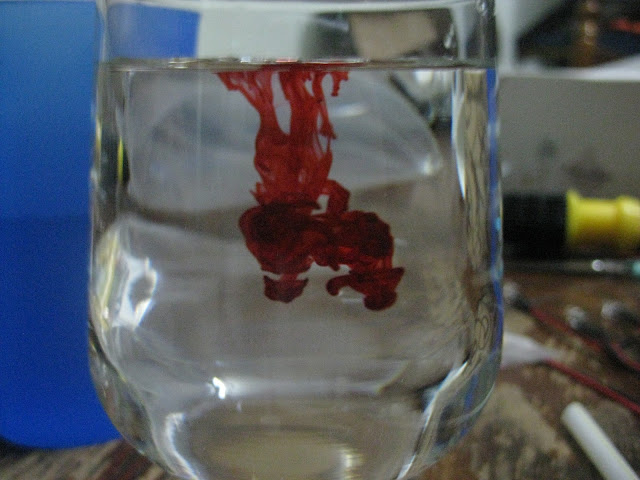
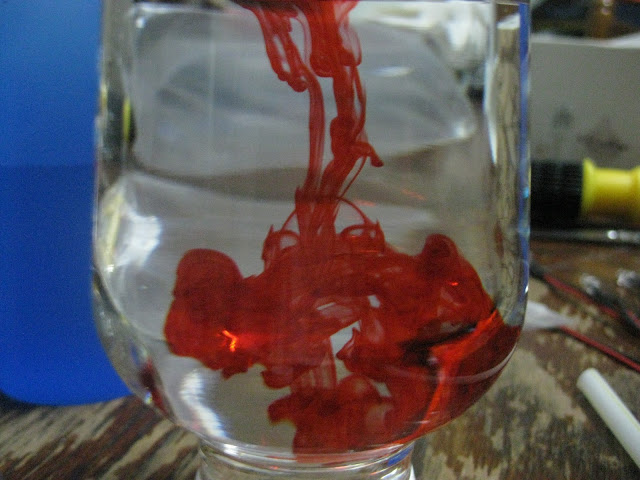
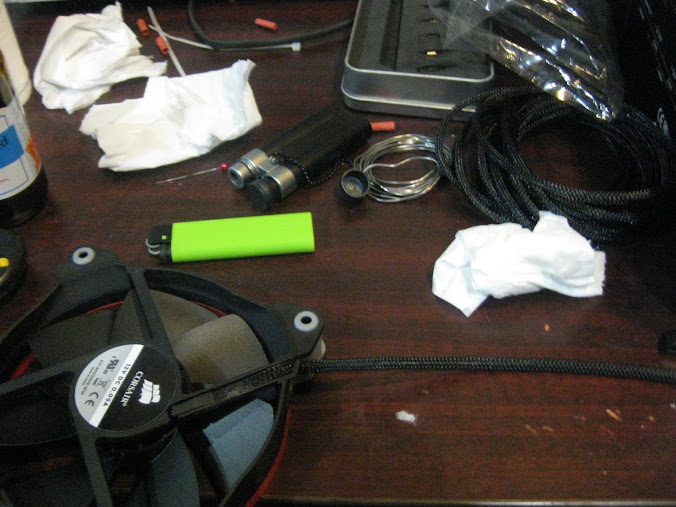
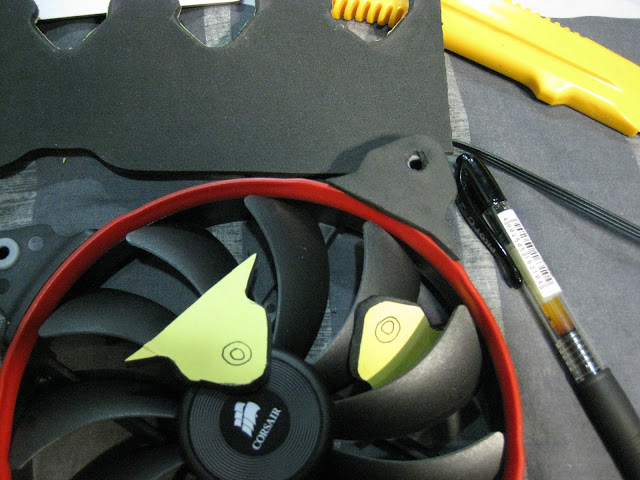
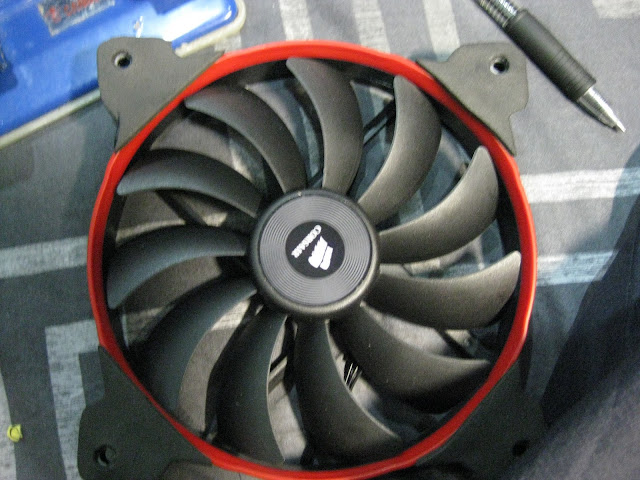
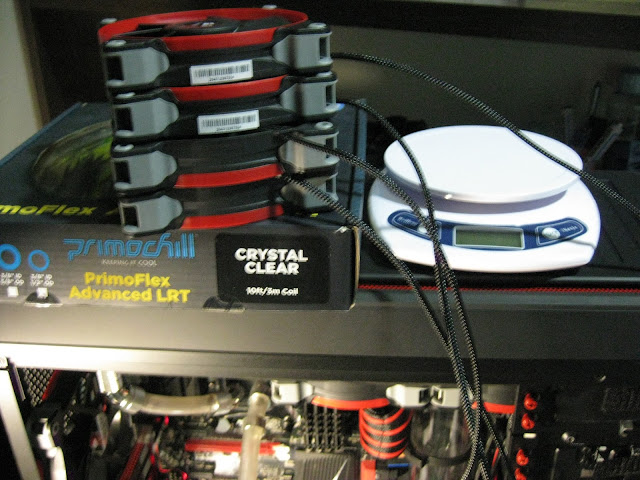
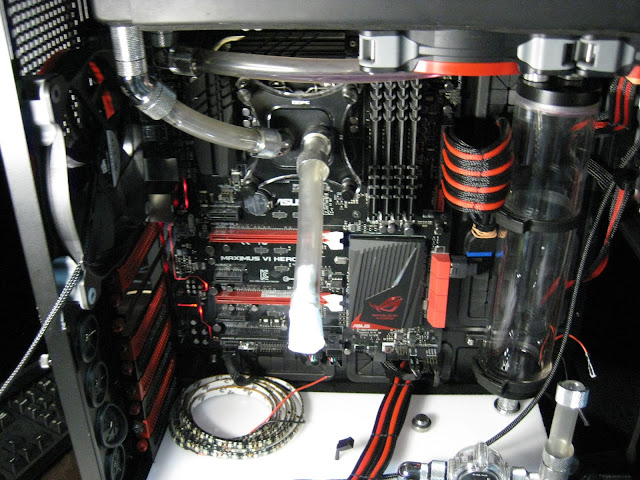
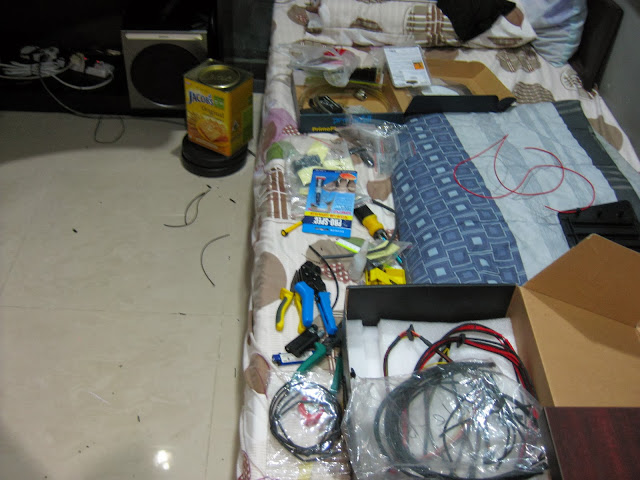
Note: Feel free to skip the first few pages, its more of collecting parts here & there, unboxing this & that. No major updates & also ignore the "crazymofomodz" trademark, decided to stop putting that half way of the worklog. Didn't really care if anyone wanted to use my images or not
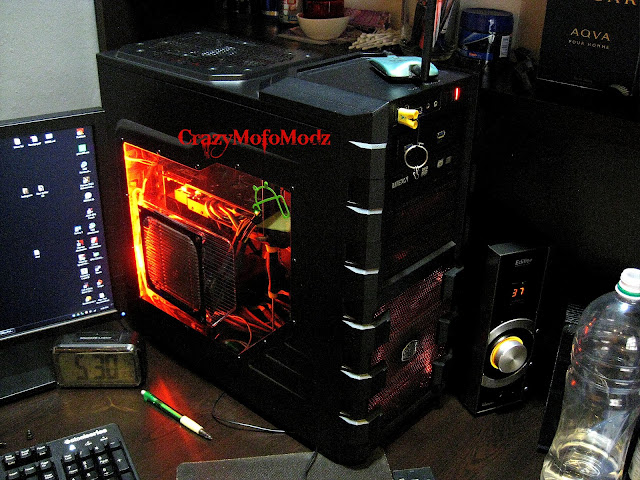
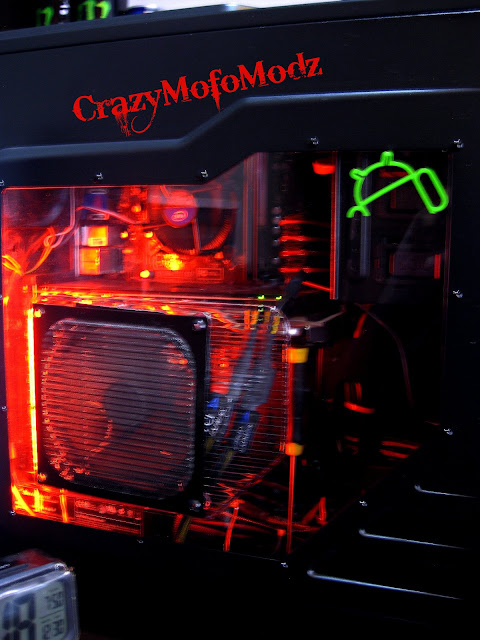
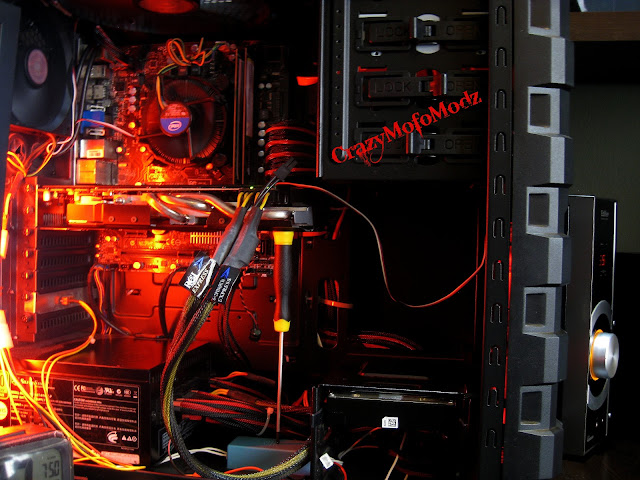
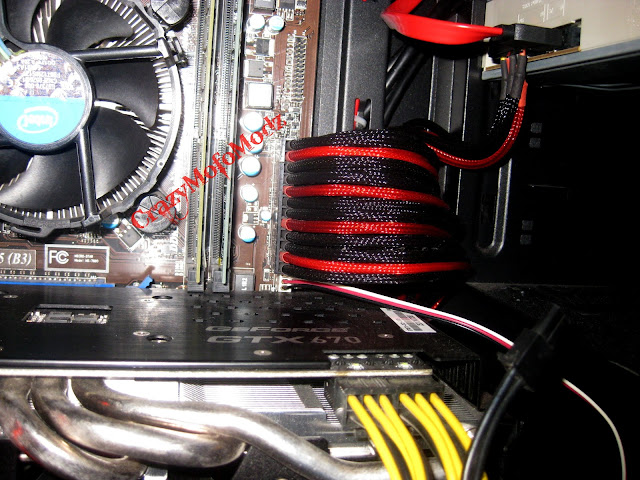
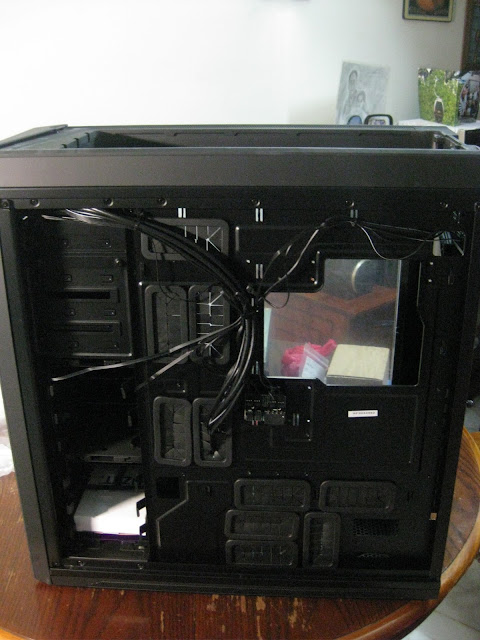
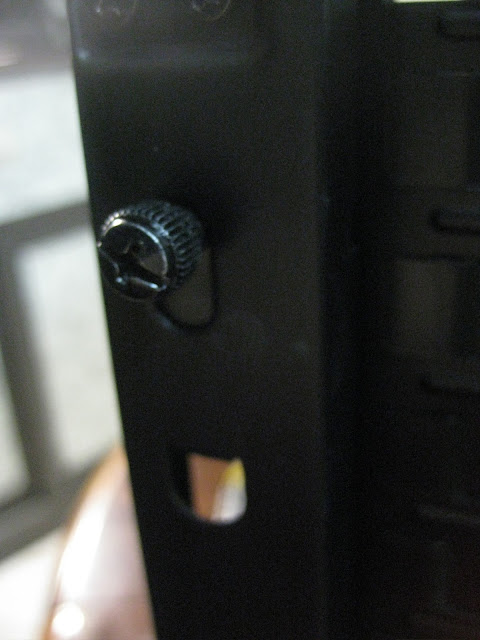
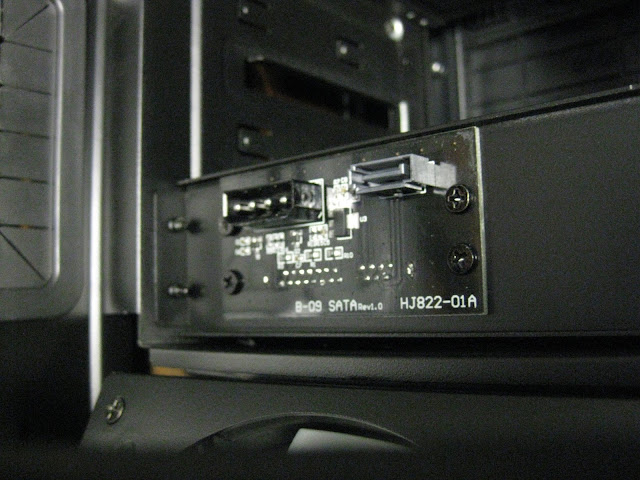
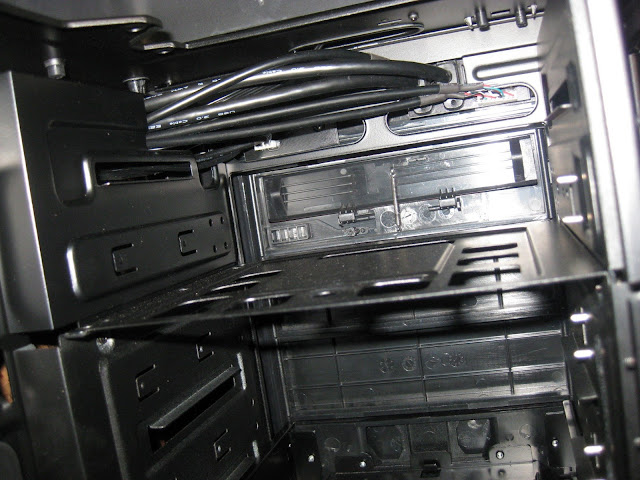
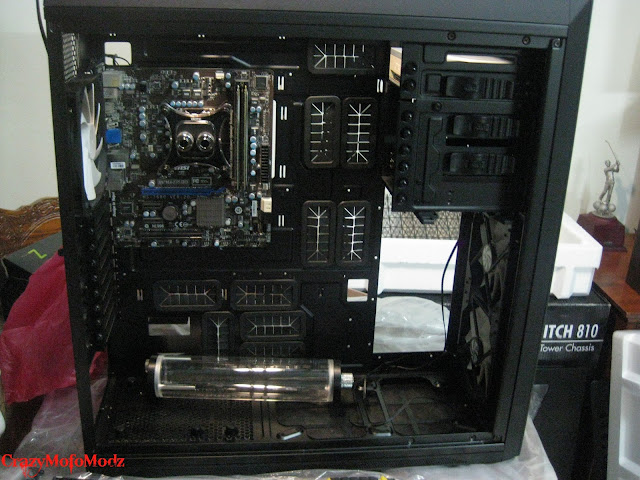
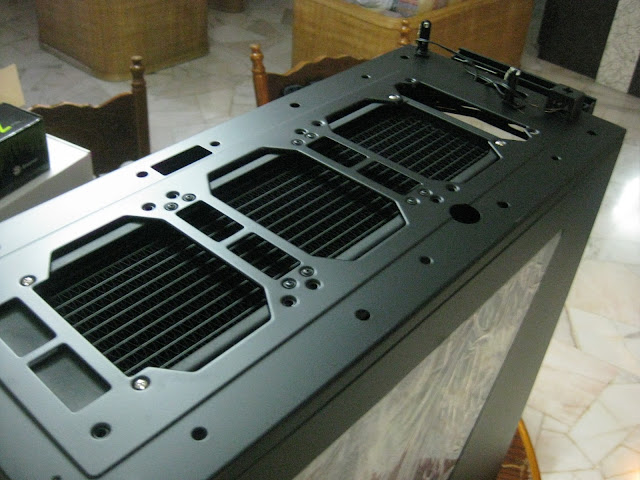
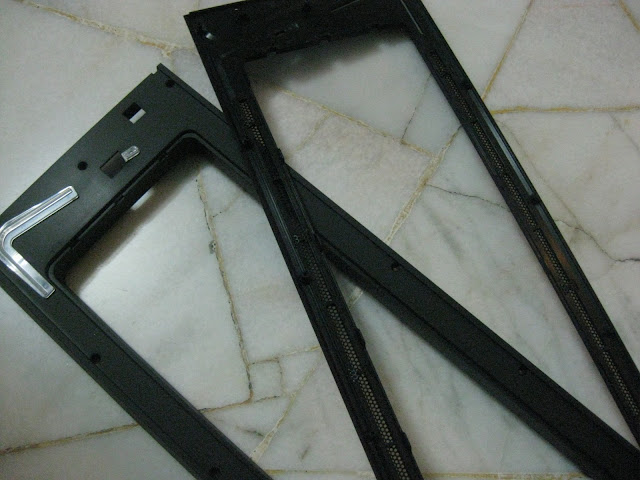
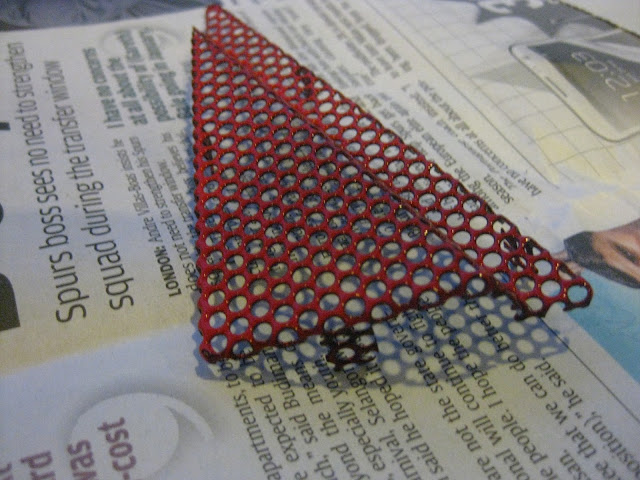
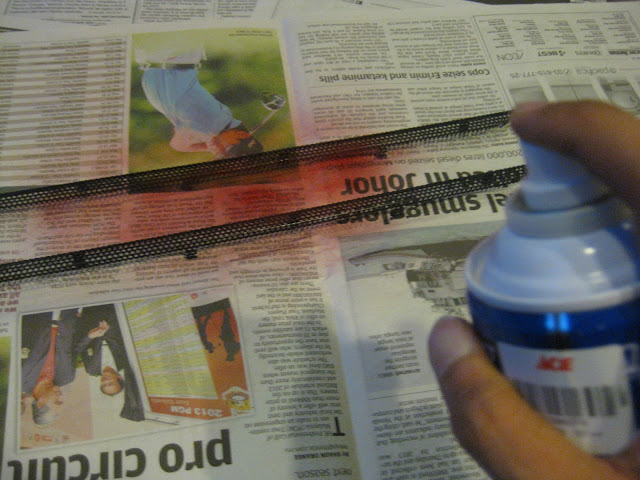
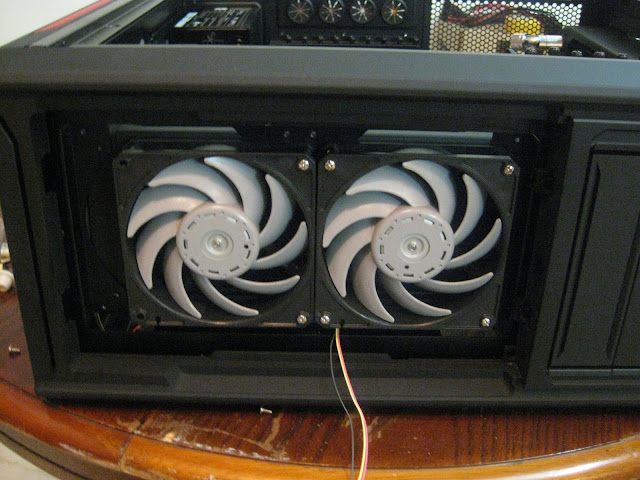
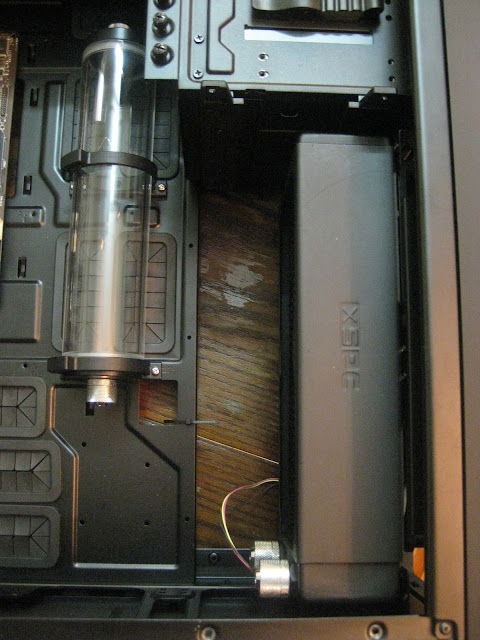
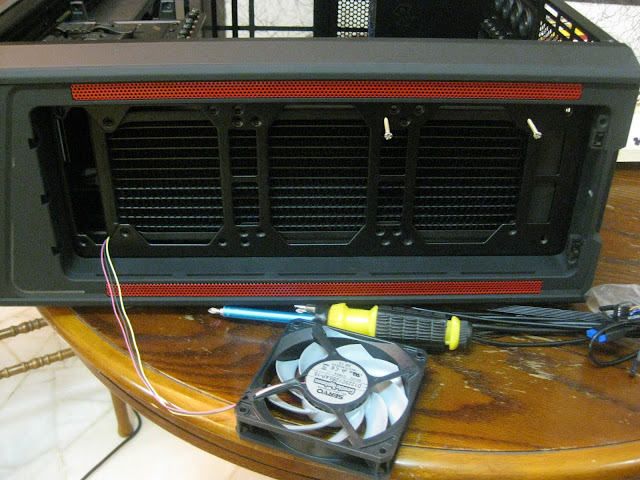
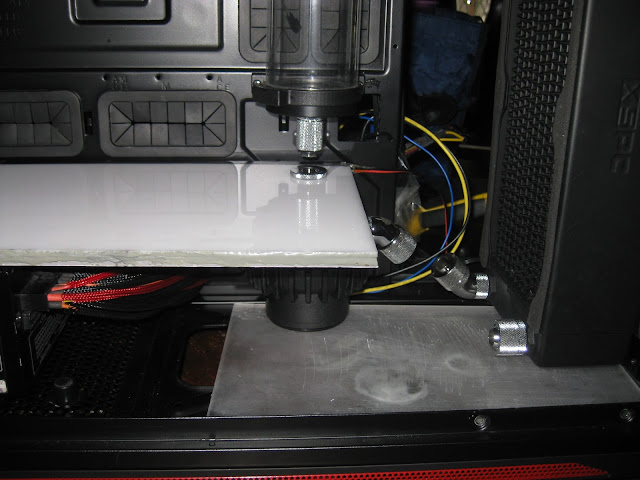
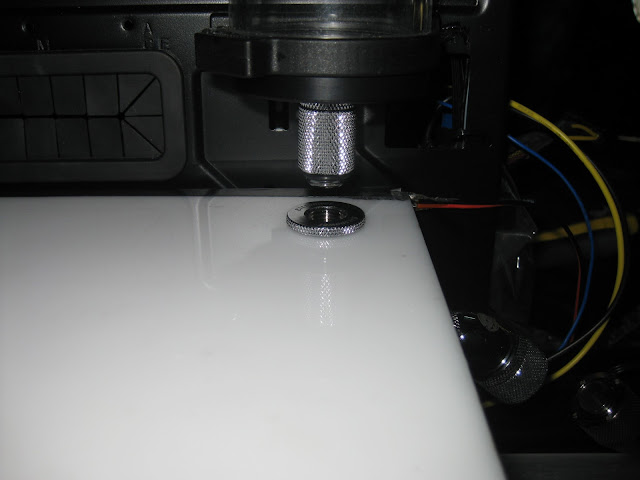
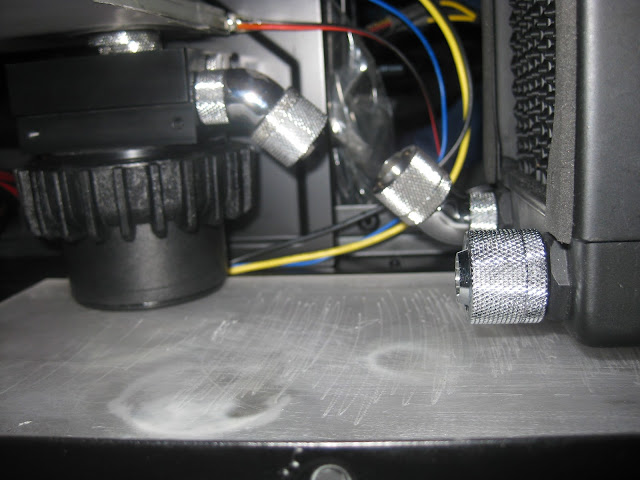
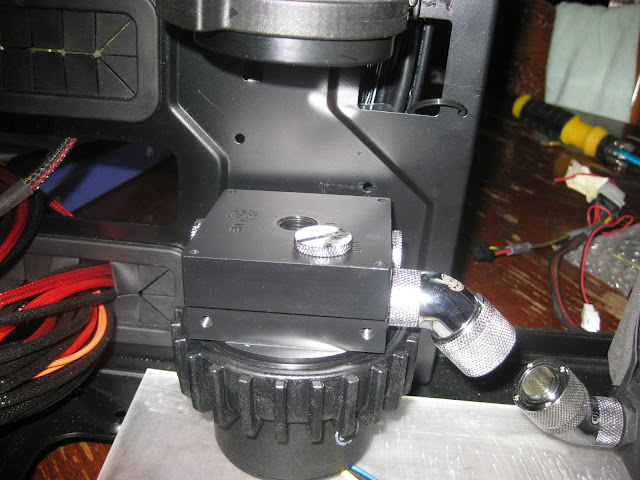
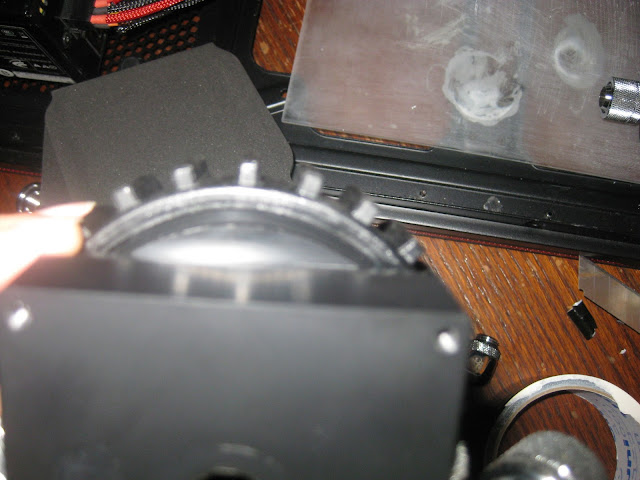
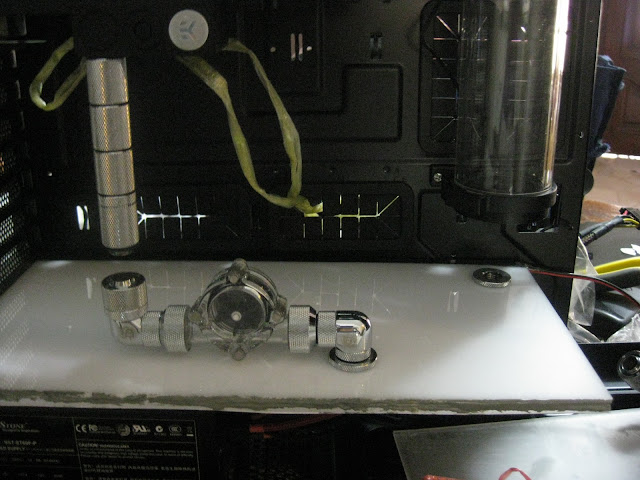
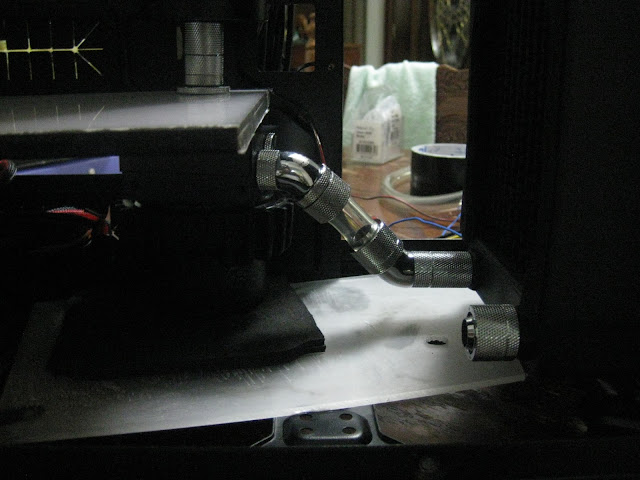
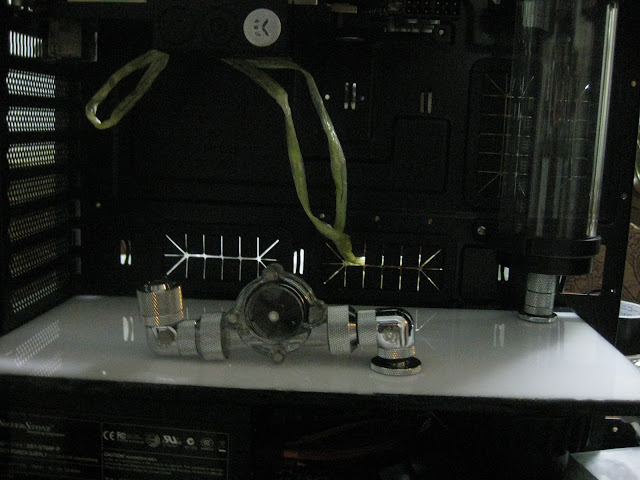
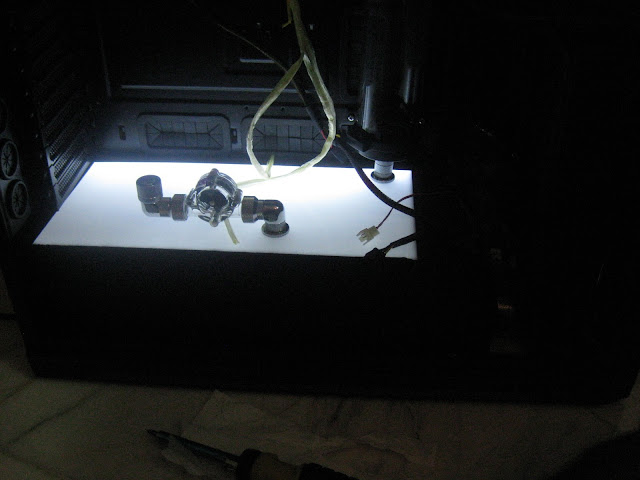
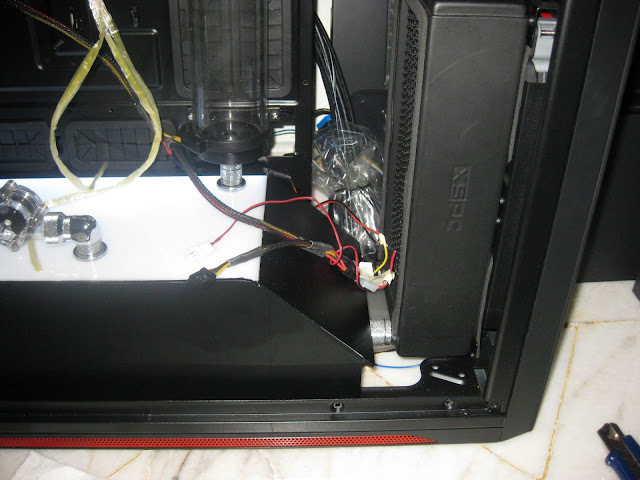
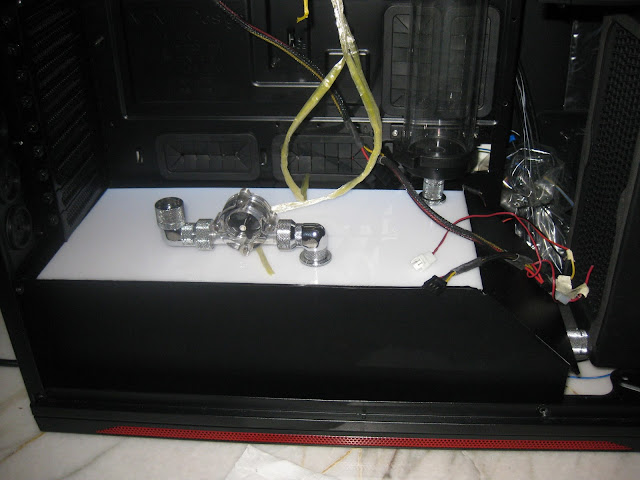
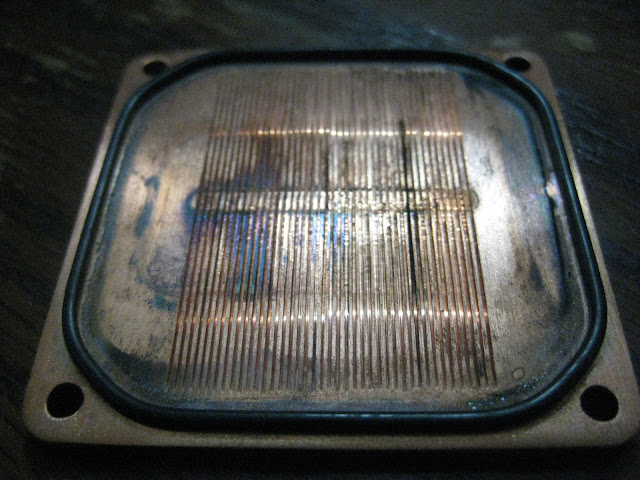
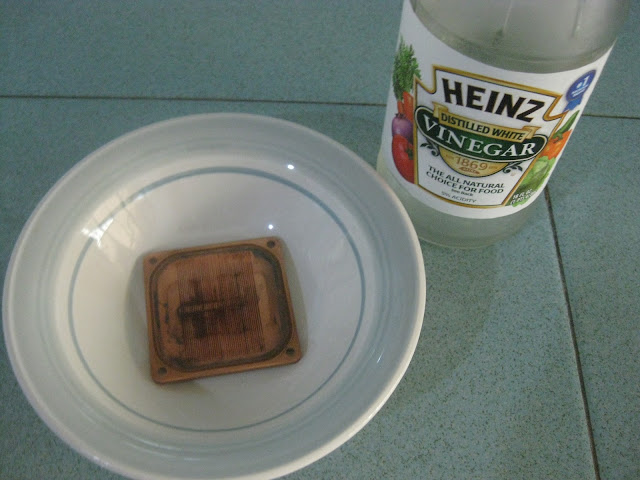
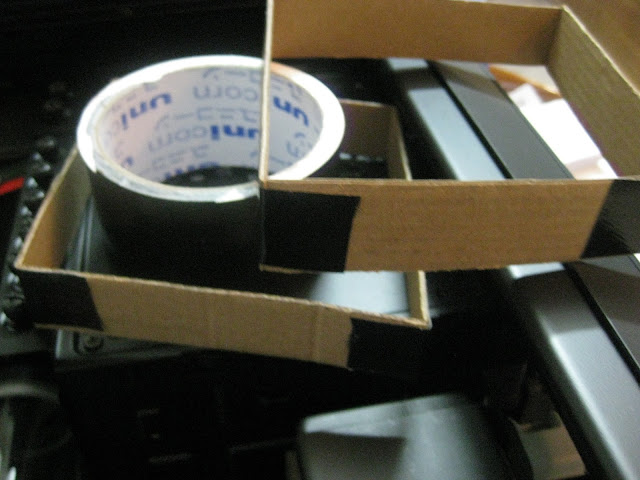
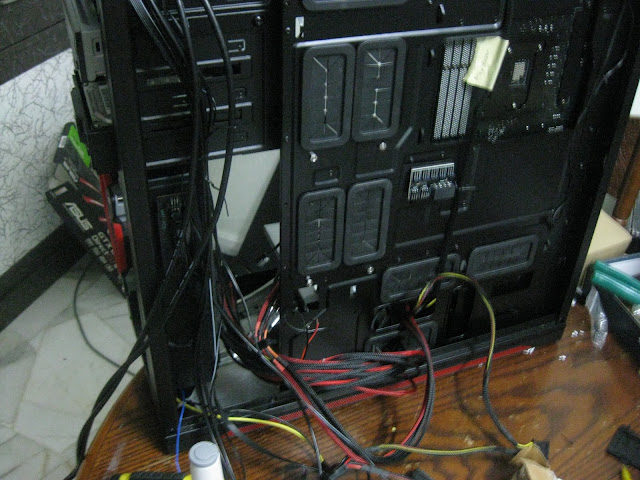
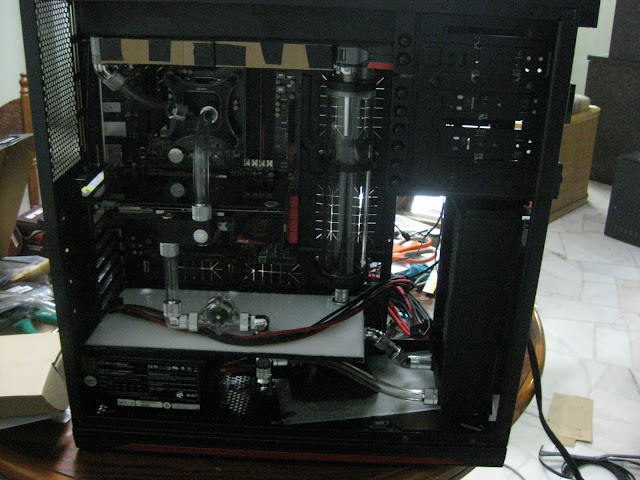
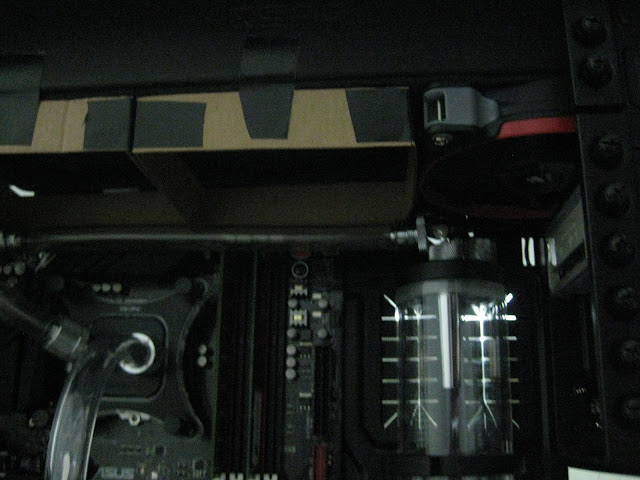
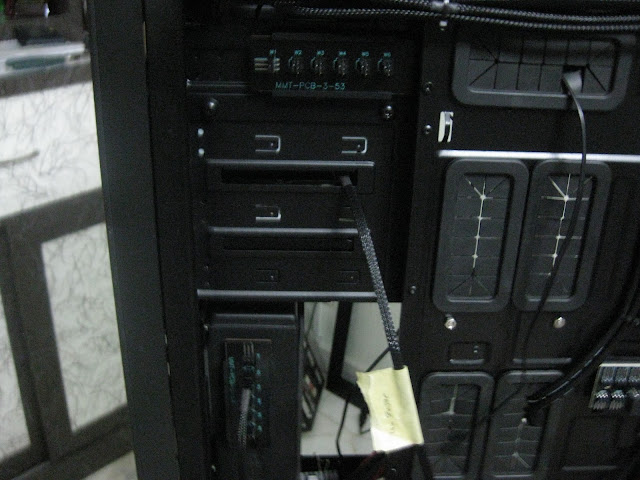
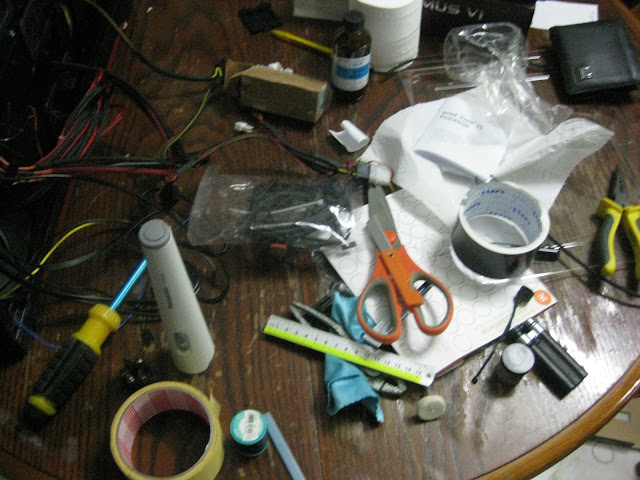
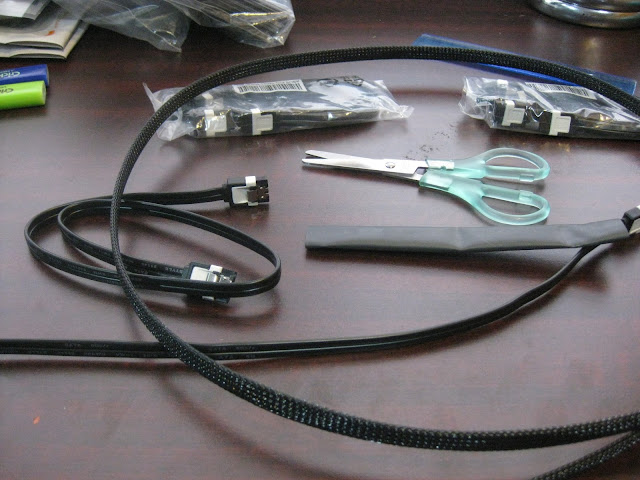
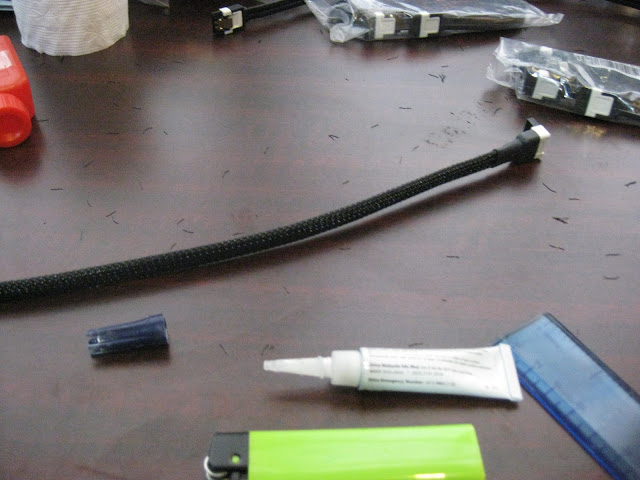
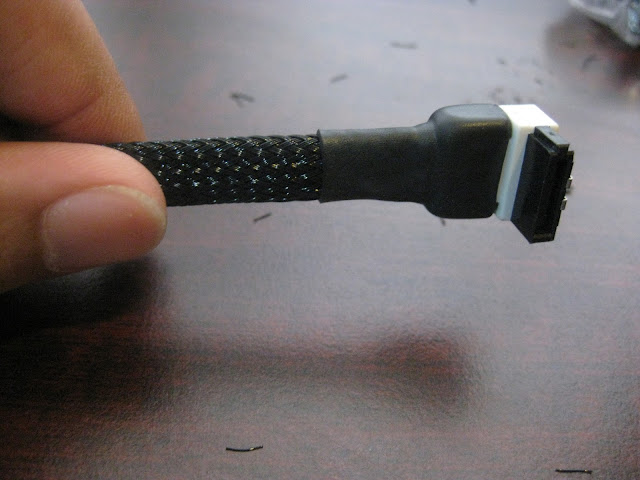
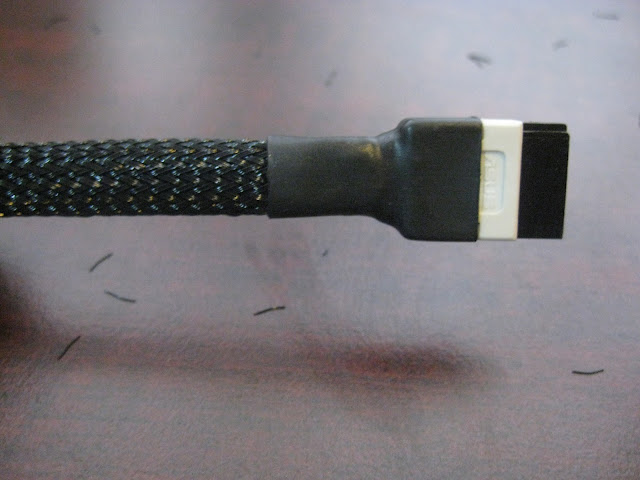
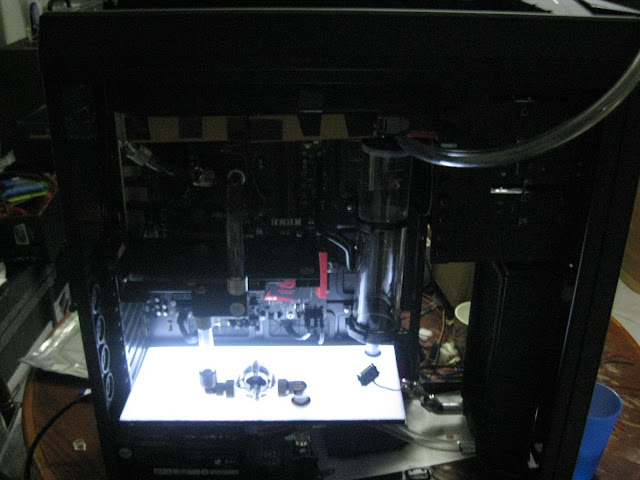
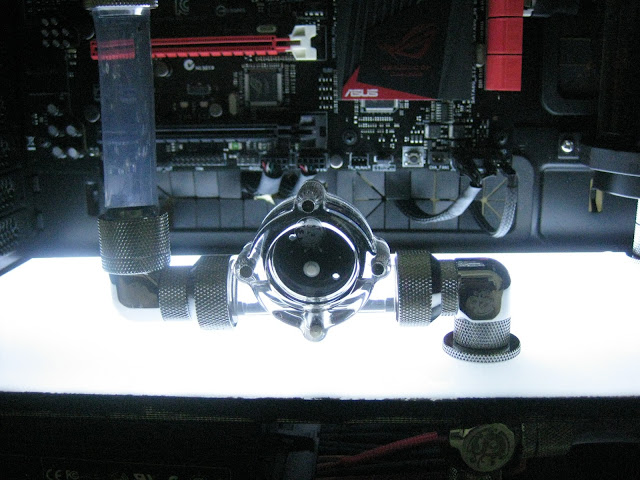
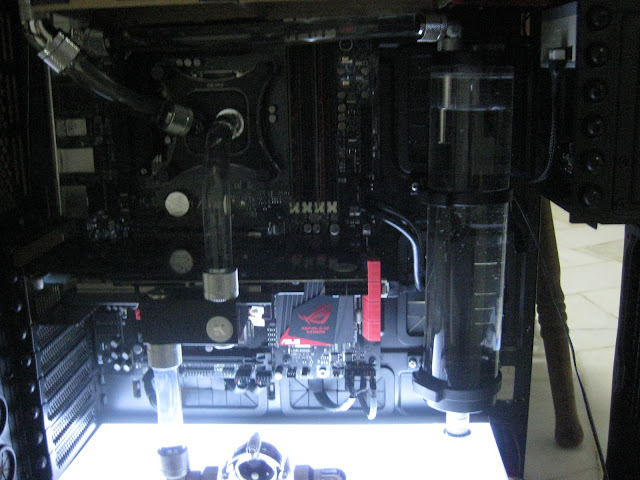
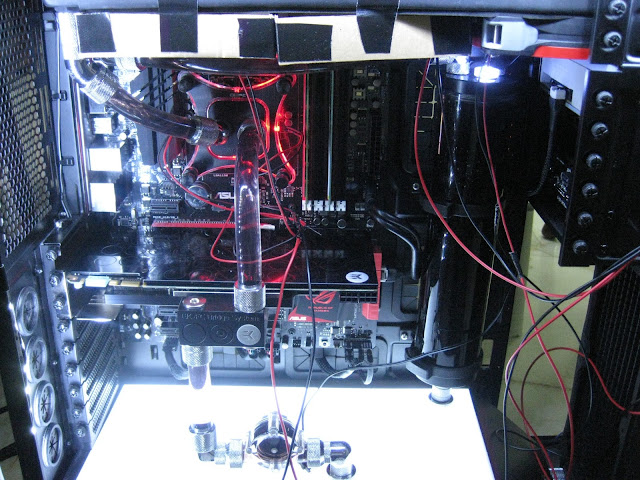
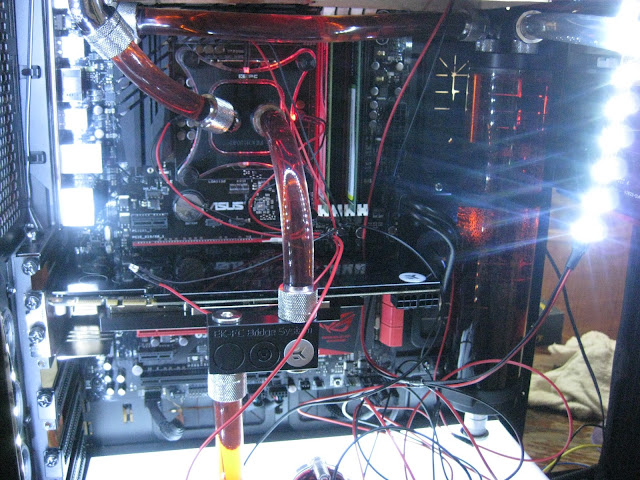
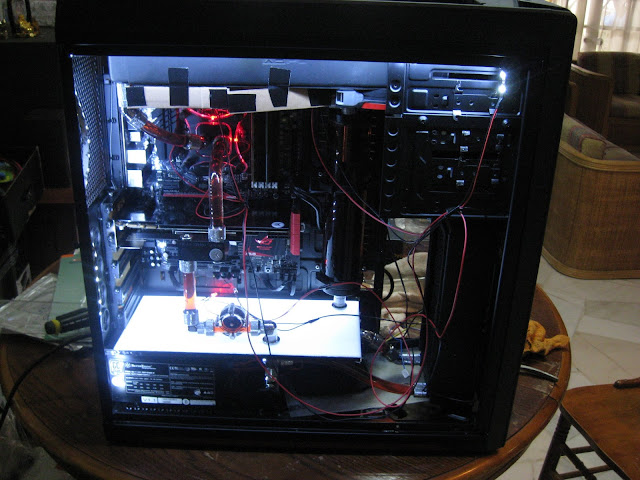
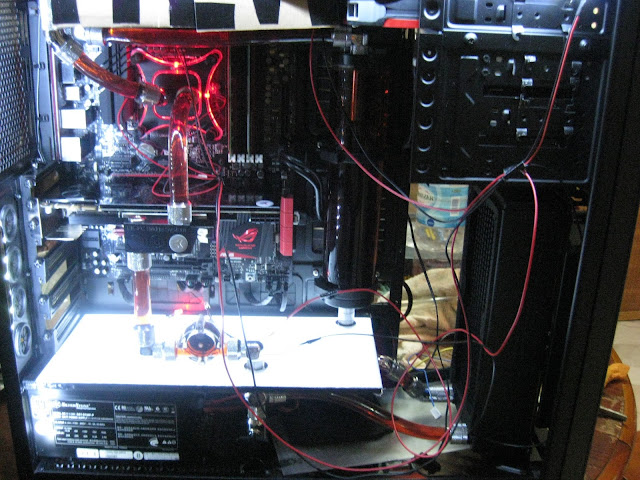
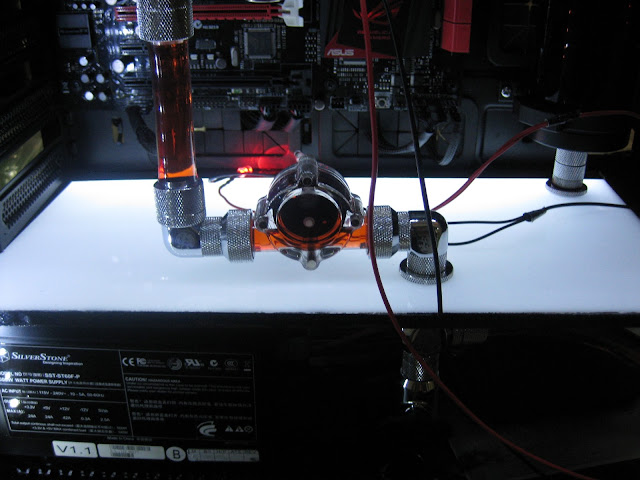
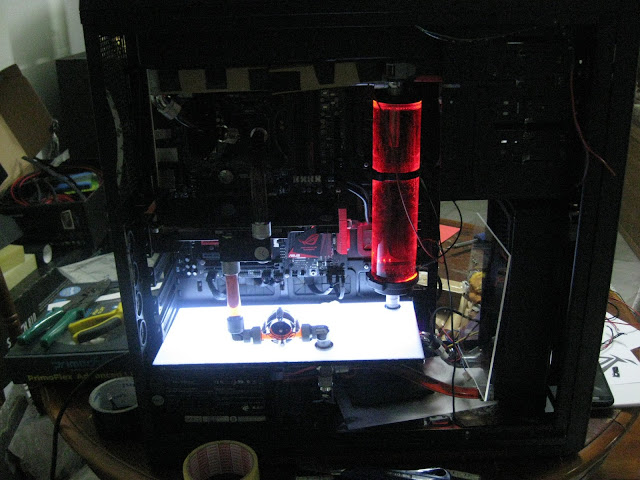
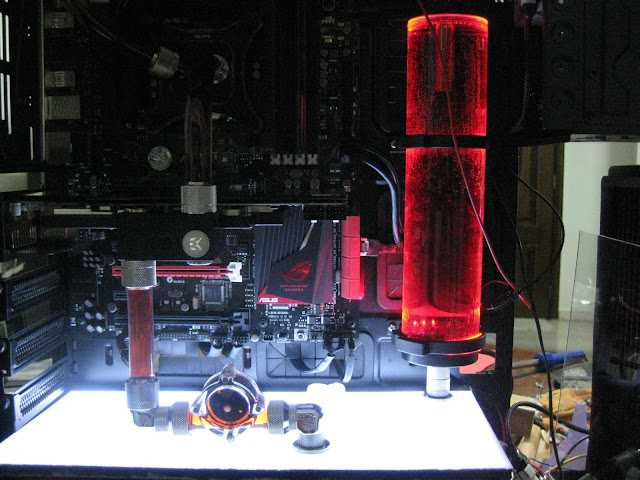
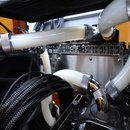
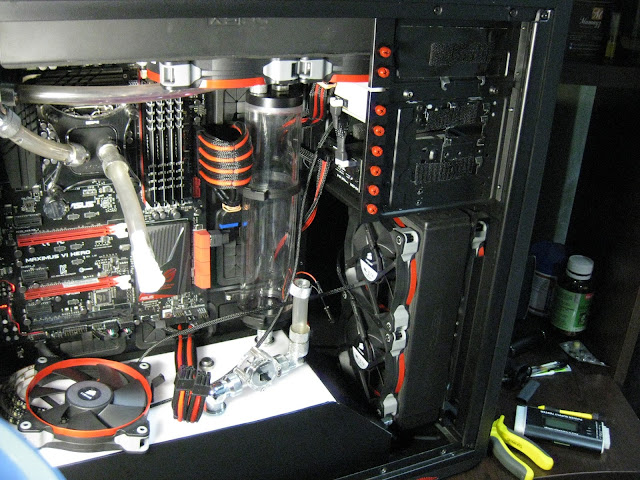
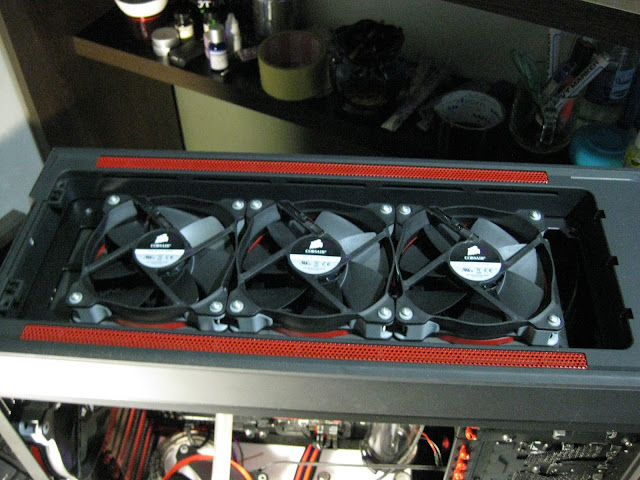
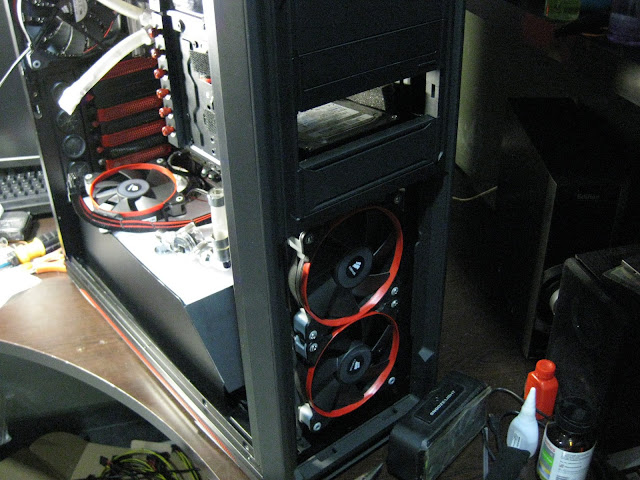
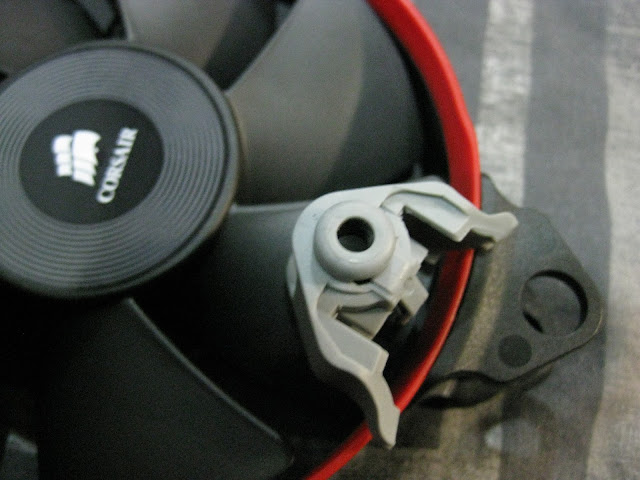
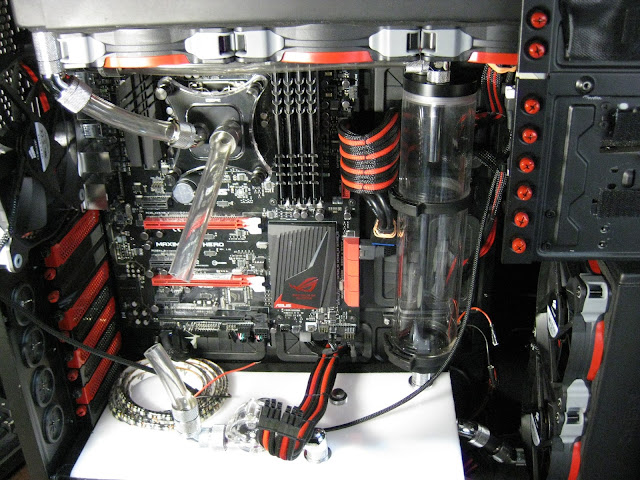
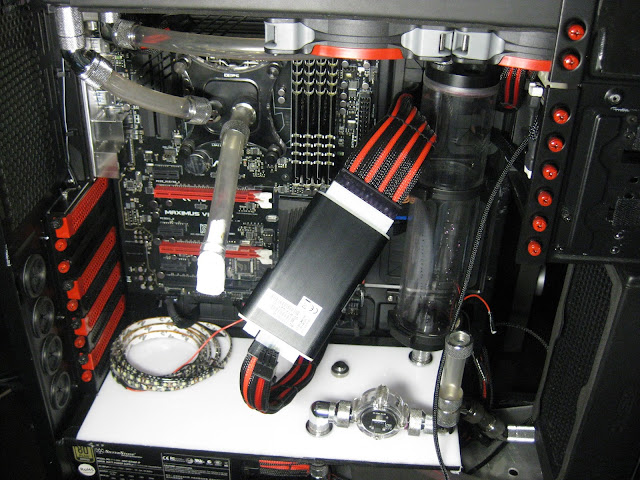
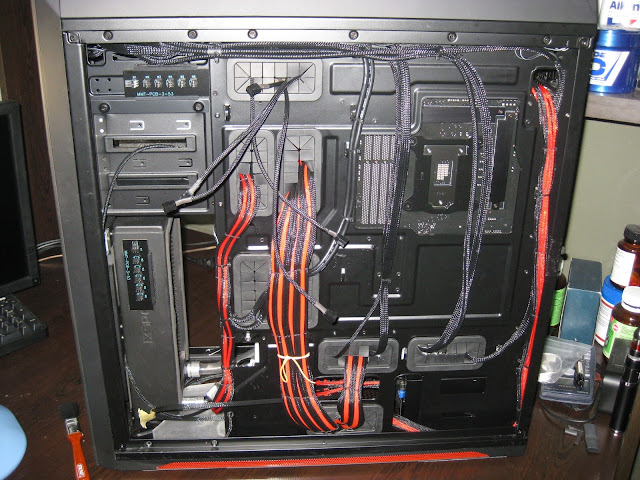
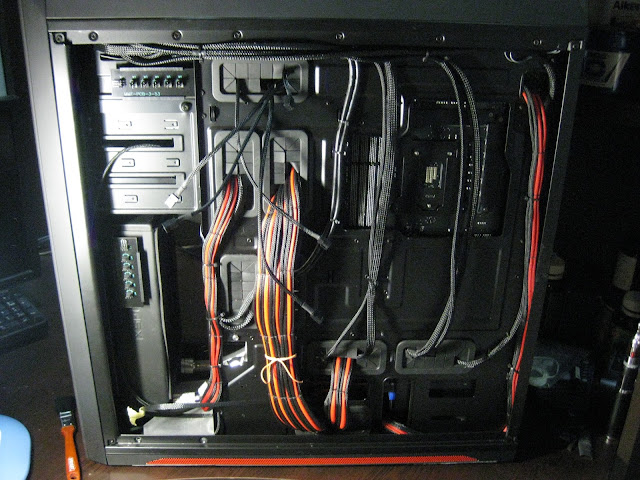
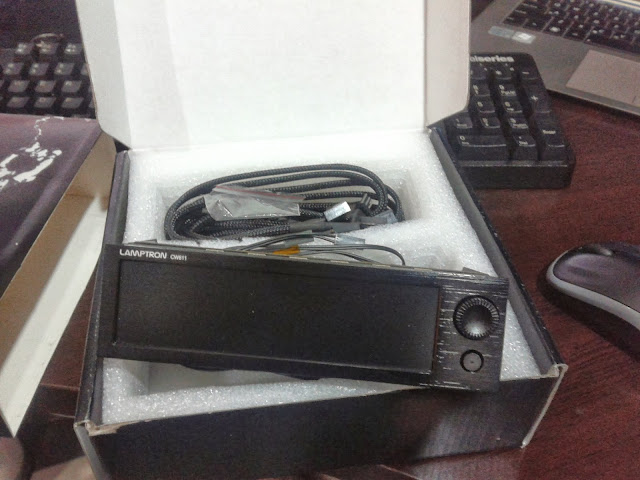
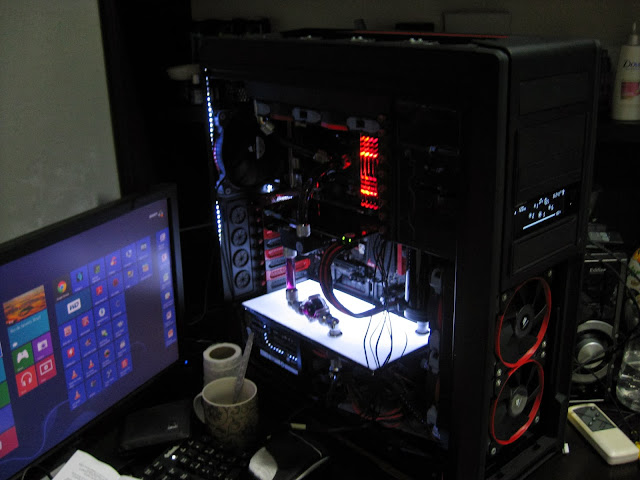
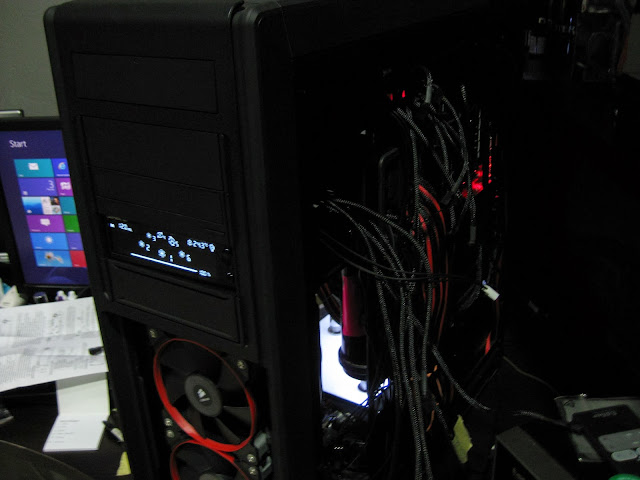
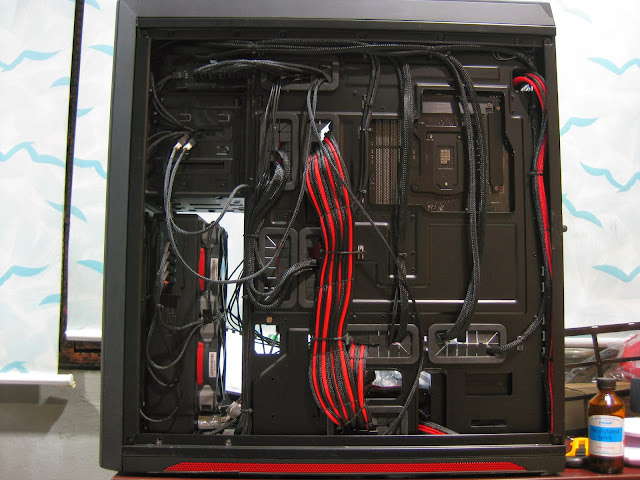
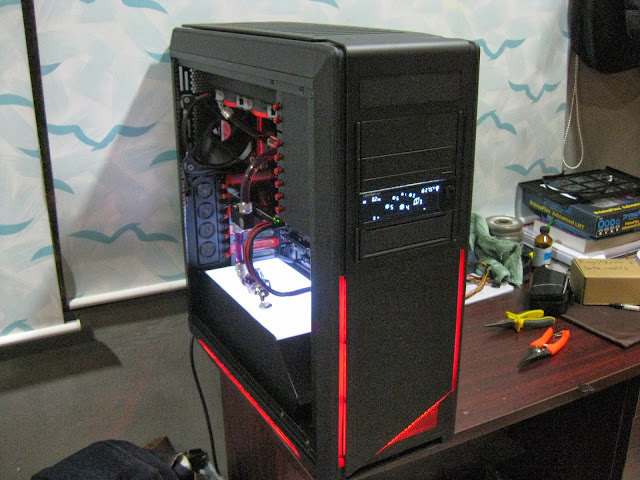
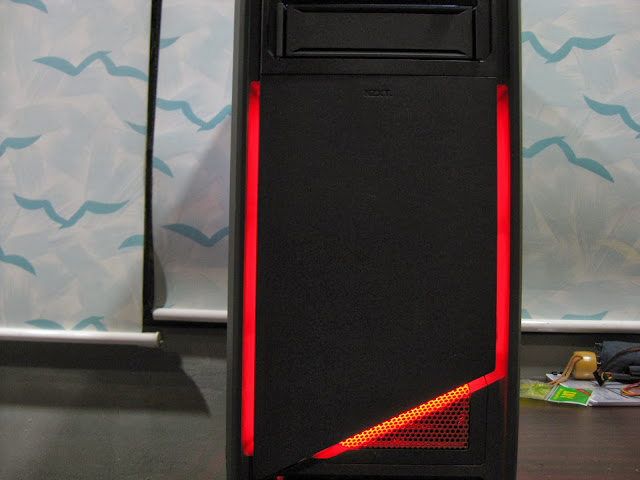
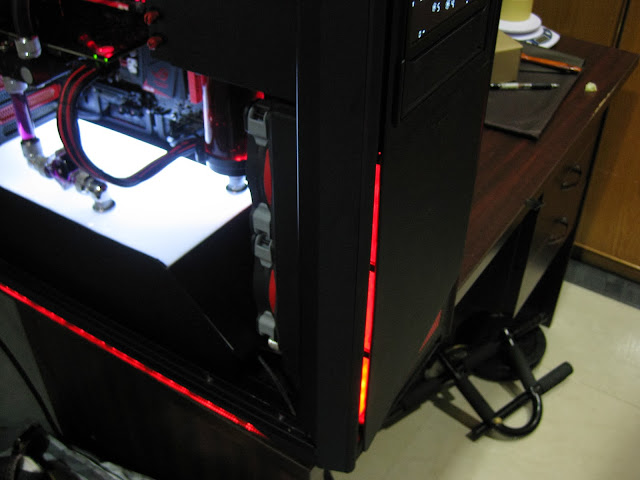
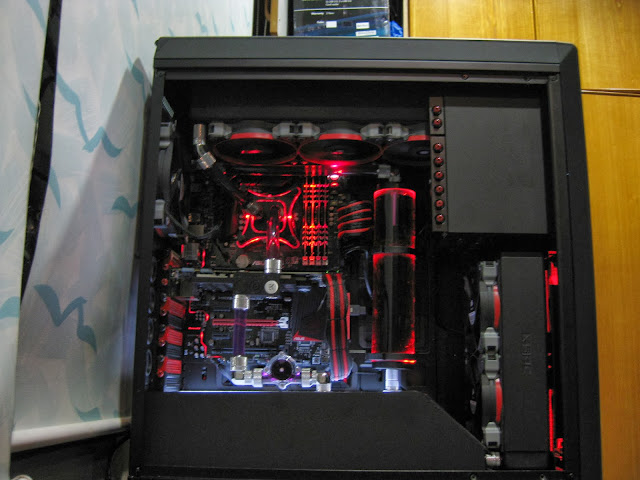
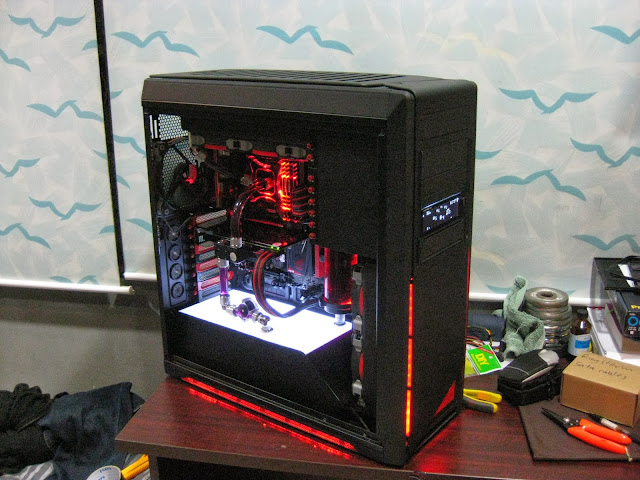
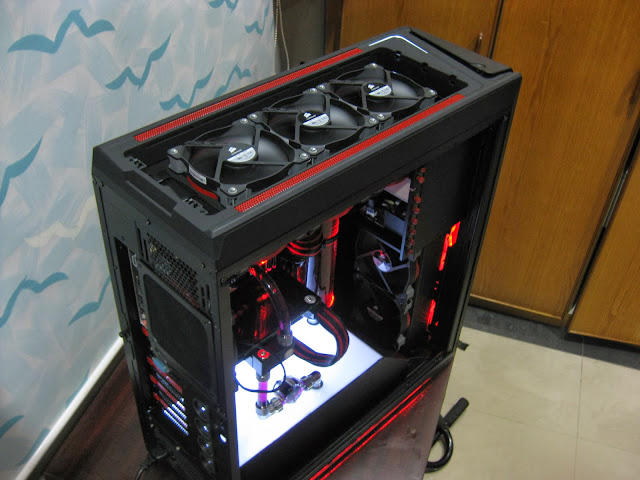
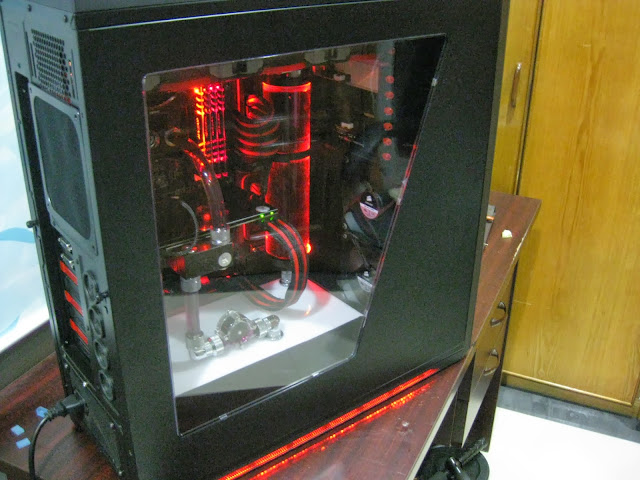
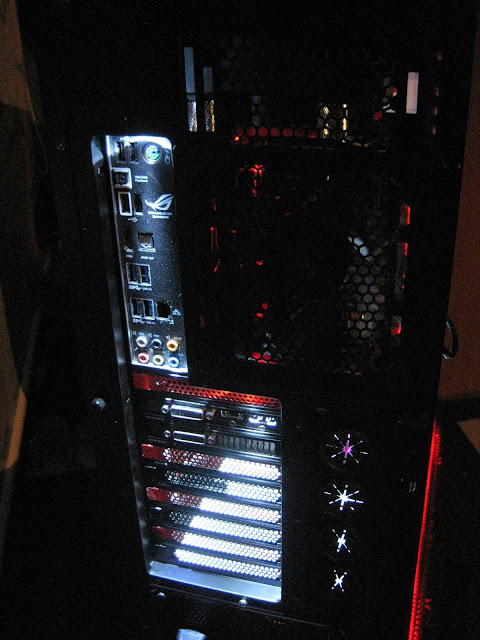
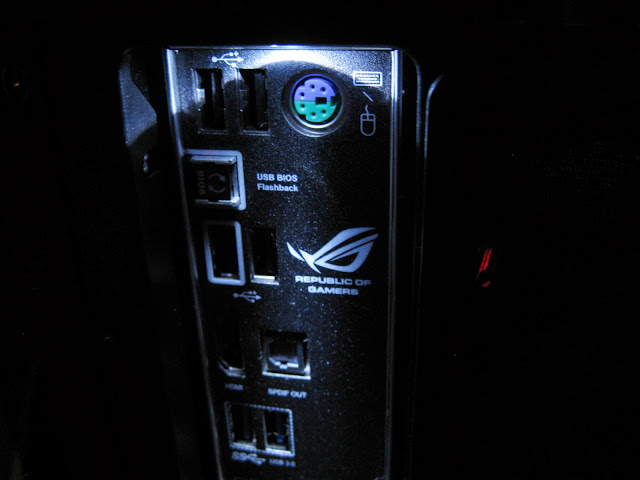
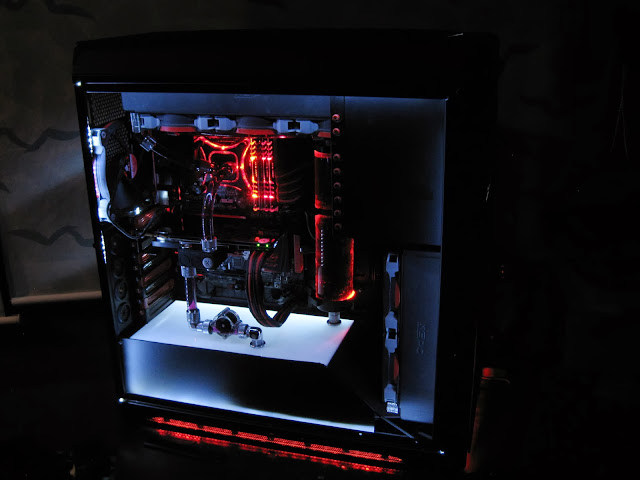
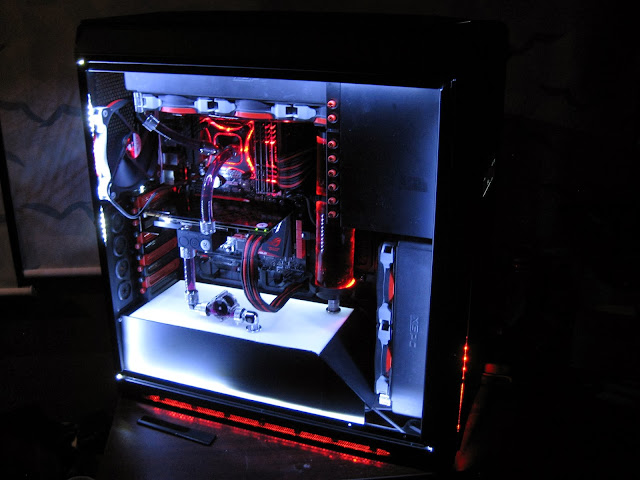
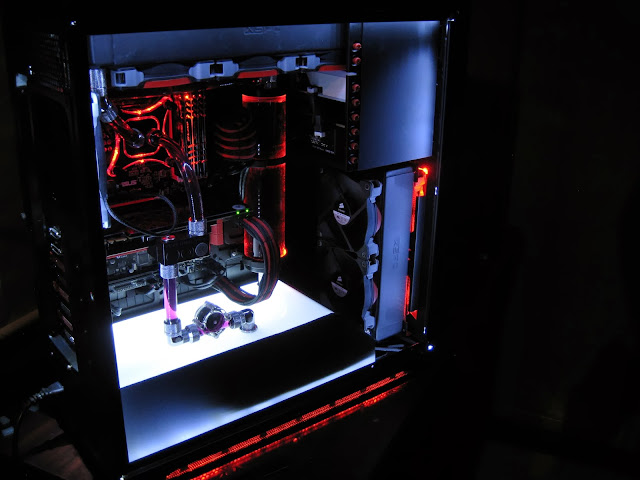
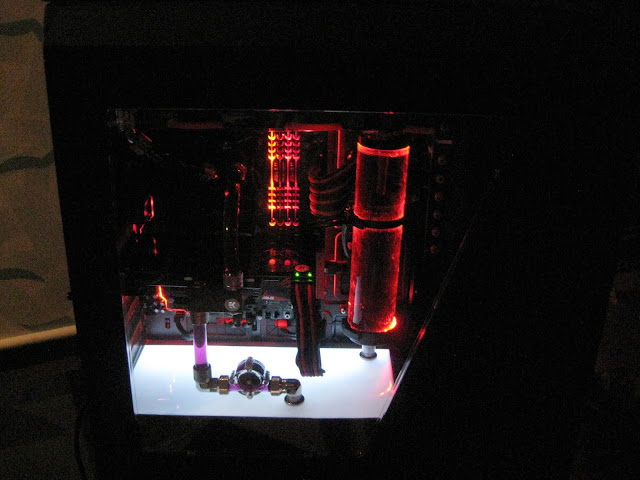
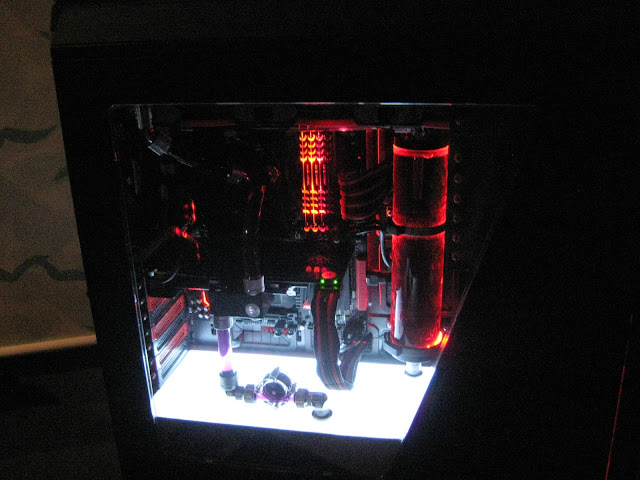
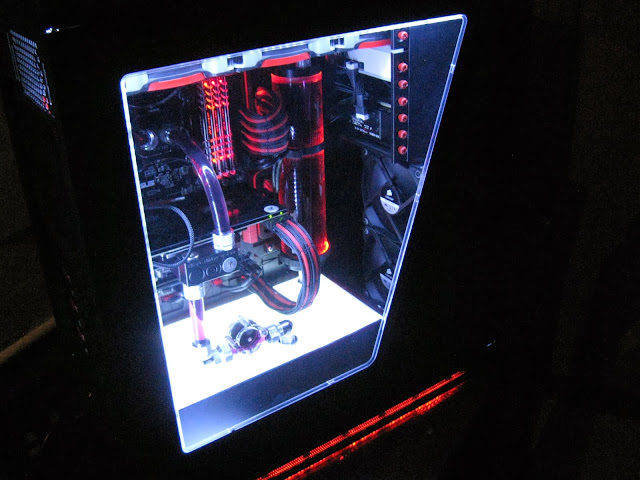
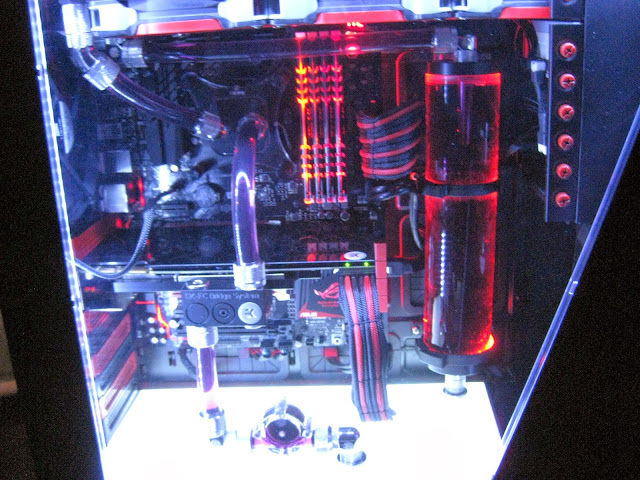
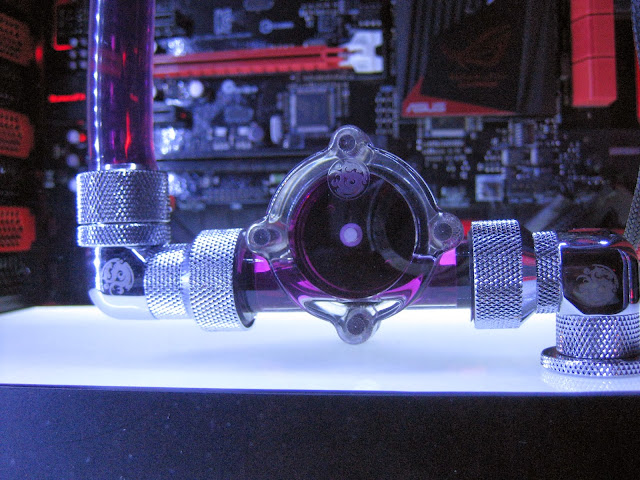
 laugh.gif

Current Progress:

*Reserved*

This post has been edited by infernoaswen: Dec 31 2013, 02:51 AM
TSinfernoaswen
post Jan 8 2013, 09:34 PM

(╯°□°)╯︵ ┻━┻)
*******
Senior Member
3,782 posts

Joined: Aug 2010
From: subang jaya


My old rig...

Please ignore the un-sleeved cables, cheap mobo & the ghetto screw driver support.

user posted image user posted image

user posted image user posted image

user posted image

This post has been edited by infernoaswen: Dec 30 2013, 09:54 PM
TSinfernoaswen
post Jan 8 2013, 09:34 PM

(╯°□°)╯︵ ┻━┻)
*******
Senior Member
3,782 posts

Joined: Aug 2010
From: subang jaya


Fittings...

user posted image user posted image

user posted image user posted image

user posted image user posted image

user posted image

This post has been edited by infernoaswen: Dec 30 2013, 10:10 PM
TSinfernoaswen
post Jan 8 2013, 09:34 PM

(╯°□°)╯︵ ┻━┻)
*******
Senior Member
3,782 posts

Joined: Aug 2010
From: subang jaya


Got the reservoir already brows.gif

user posted image user posted image

user posted image user posted image

Just a quick unboxing on the NZXT Hue & XSPC Raystorm.

user posted image user posted image

user posted image user posted image

user posted image

This post has been edited by infernoaswen: Dec 30 2013, 10:16 PM
TSinfernoaswen
post Jan 8 2013, 09:35 PM

(╯°□°)╯︵ ┻━┻)
*******
Senior Member
3,782 posts

Joined: Aug 2010
From: subang jaya


RX360 Unboxing & initial thoughts

Unboxing the radiator was fast. This was how it came, packed in the retail box.

user posted image user posted image

user posted image user posted image


I like the matte black finish it has, feels different when you touch it. I even tried putting it in front of my air conditioner & it becomes so cold in less than a minute.


user posted image user posted image

user posted image

This post has been edited by infernoaswen: Dec 30 2013, 10:20 PM
hdd-corrupted
post Jan 8 2013, 10:29 PM

Getting Started
**
Junior Member
279 posts

Joined: Aug 2009
From: KL


1st. must be good.
TSinfernoaswen
post Jan 8 2013, 10:36 PM

(╯°□°)╯︵ ┻━┻)
*******
Senior Member
3,782 posts

Joined: Aug 2010
From: subang jaya


Okay flushing time....

user posted image user posted image

user posted image user posted image

user posted image user posted image

user posted image user posted image

user posted image

Radiator build & paint quality is excellent. Price is cheaper than other radiators. The end tank for mine isn't completely flat, its a little swollen but maybe this is just for my unit? So far I tested there isn't any leaks but will check again once I get my pump. Radiator is quite thick so check if it fits for your casing or not before buying.

This post has been edited by infernoaswen: Dec 30 2013, 10:27 PM
TSinfernoaswen
post Jan 8 2013, 11:38 PM

(╯°□°)╯︵ ┻━┻)
*******
Senior Member
3,782 posts

Joined: Aug 2010
From: subang jaya


Unboxing the Switch 810

user posted image user posted image

First look is nice, I like the black matte paint feel to it. It feels very nice when you touch it.

user posted image user posted image

I would prefer if the window is square instead of this shape. Top panel build quality is bad. So flimsy, in fact the clip came broken. Basically there is two tiny plastic holding the top panel for its quick removal feature. All you need to do is press the panel & pop it out but 1 of my plastic clip was broken so it's very hard to get it in place. Its still useable but it takes really long time to find the hole to put it back in its place.

user posted image user posted image

This is what I am talking about.

user posted image user posted image

Cable management is great in this case, lots of big rubber grommets. All the cables are black colour so that is a good thing, even for the fans too. It came with a fan hub, so you can plug all your fans over here. Little things like this makes the building experience easier.

user posted image user posted image

This post has been edited by infernoaswen: Dec 30 2013, 10:37 PM
TSinfernoaswen
post Jan 8 2013, 11:48 PM

(╯°□°)╯︵ ┻━┻)
*******
Senior Member
3,782 posts

Joined: Aug 2010
From: subang jaya


Another feature is the quick removal side panel feature. Basically all you need to do is push this screw downwards & pop that side panel off. It gets stuck sometimes, probably need to spray the mechanism with WD-40 to lubricate it. You can also secure the side panel with two more screws if you desire to do so.

user posted image user posted image

This is another great feature. It allows you to mount your hdd/ssd into your 5.25 drive bay. Just mount the hdd into the tray & slot it into the drive bay. It will connect to this pcb & you can plug the cables into this.

user posted image user posted image

Notice those holes at the drive bay? Basically if you mount a radiator that is too long, your fans with push pull setup can still be installed. The holes allows airflow for the fans.

user posted image

Front fan filter comes out easily. Just push it & pop it out. All the fan filters in the casing is great! The filter holes is quite small so this will ensure less dust particles will enter but this will add more restriction to the airflow though. I dont mind because the previous cooler master casing that I was using, the fan filter was shit. The holes was quite big & the casing gets dusty overtime.

user posted image user posted image

Got new stuff in the mail today. Ordered some thermal paste & modding tool kit.

user posted image user posted image

I ordered silver but I got black instead, not a big deal...just colour difference. Quality seems reasonable, cant tell much until I started sleeving with it.

user posted image

This post has been edited by infernoaswen: Dec 30 2013, 11:17 PM
TSinfernoaswen
post Jan 8 2013, 11:49 PM

(╯°□°)╯︵ ┻━┻)
*******
Senior Member
3,782 posts

Joined: Aug 2010
From: subang jaya


Time to remove that stock intel cooler! Cooler, gtfo...

user posted image user posted image

Just finished cleaning it with alcohol...thats right, intel i5 2400. Made a mistake last time & didn't get the 2500K but I am going to sell this off soon once haswell is out so no big deal. This processor is still pretty good though...

user posted image user posted image

Installed to the motherboard. Before you guys say anything, I just want to say that this motherboard is just a temporary solution. Will be changing to ROG motherboard when haswell is out wink.gif

user posted image user posted image

Oh my, that motherboard looks so tiny in that casing hahaha...

user posted image user posted image

user posted image user posted image

This post has been edited by infernoaswen: Dec 30 2013, 11:25 PM
TSinfernoaswen
post Jan 8 2013, 11:50 PM

(╯°□°)╯︵ ┻━┻)
*******
Senior Member
3,782 posts

Joined: Aug 2010
From: subang jaya


Easy removable hdd tray is cool smile.gif

user posted image user posted image

user posted image user posted image

Where do you think the NZXT hue sits well? I think the 3rd bay looks better...

user posted image user posted image

3 of the leds on the led strip are not working as it should. I believe the wire inside the strip is loose or something because there is a specific spot when I press it, it works otherwise it shows a different colour.

user posted image user posted image

Drilled some holes for the radiator. Trying to use magnets to collect the metal shavings.

user posted image user posted image

This post has been edited by infernoaswen: Dec 30 2013, 11:40 PM
ntw
post Jan 9 2013, 07:53 PM

One Each At A Time
******
Senior Member
1,432 posts

Joined: Aug 2010
From: Ipoh mali~~~


can wait to see those "Monsters" performance in your setup
TSinfernoaswen
post Jan 18 2013, 01:27 AM

(╯°□°)╯︵ ┻━┻)
*******
Senior Member
3,782 posts

Joined: Aug 2010
From: subang jaya


Injured myself while drilling...

user posted image user posted image

user posted image user posted image

user posted image

The psu cable looks nice this way. Its not the cable that I am going to use though, this was my previous sleeving job. I still need to make my custom cable because this cable length is too short & I am not planning to use any extenders.

user posted image

Actually I wanted to go for this setup, where I have the cables on top of the reservoir but This makes the cable look too long. Maybe later if I get a new motherboard that is bigger in size it will look better. Will see how it goes...

user posted image

This post has been edited by infernoaswen: Dec 31 2013, 12:38 AM
TSinfernoaswen
post Jan 25 2013, 05:51 PM

(╯°□°)╯︵ ┻━┻)
*******
Senior Member
3,782 posts

Joined: Aug 2010
From: subang jaya


So I decided to add some red highlights to my casing since it will be an ASUS ROG theme build. So I started with striping down the casing.

user posted image user posted image

Next was to remove the casing feet...

user posted image user posted image

This is the top panel that I removed previously. It was 2 plastic joined together with more than 10 screws so had to open it in order to remove the mesh.

user posted image

This mesh is from the bottom part of the casing, i.e the casing plastic foot. It was quite simple, after removing the 4 screws from the bottom you can then pull out the plastic feet. Then you can use a plier to bend the mesh notches straight. After doing it for all then just push it & it should pop right out.

user posted image user posted image

After applying some red coating to it...

user posted image user posted image

So this is where the problem came, first of all I was painting above the original coating & without any primer. On top of that I applied too thick coats already so the next day I wasn't very happy with the result.

user posted image

This post has been edited by infernoaswen: Dec 31 2013, 12:42 AM
TSinfernoaswen
post Jan 25 2013, 05:58 PM

(╯°□°)╯︵ ┻━┻)
*******
Senior Member
3,782 posts

Joined: Aug 2010
From: subang jaya


The next day I started sanding all the red coating I applied last night. I sanded until the original coating was removed. Cleaned it & started coating it with red paint under the sun. It was very hot so the paint dries up quite fast. I applied thin coating every 10mins or so. Sorry didnt take picture of this process too, plus I was sweating like hell under the hot sun so yeah...

Tip: Use a primer, but if you are a poorfag & cheapskate like me then just sand it all the way so that your paint can stick better to the material surface. Make sure you do in under a hot sun for it to dry faster, I did the painting at night & it didnt want to dry. The next day the result didnt turn out nice but after re-doing it under the sun it turned out better.

user posted image user posted image

user posted image user posted image

user posted image

I like the red highlights at the top but when I cover it with the top panel, only half of it will be visible. Plus I think its not enough red yet, still thinking what to paint, not much choice I have because some of the materials like top cover etc are made of those rubberized matte black material so painting that is not an option I guess. I am thinking of putting some red leds for under glow effect & maybe on the top so the lights will bleed to the side and gives it a nice effect.

Haven't decide yet, because I dont want to overdo the red colour otherwise it will look too red & ugly. Will see how it goes with the flow hehehe, let me get some corsair fans first & fan controller.

This post has been edited by infernoaswen: Dec 31 2013, 12:47 AM
hmwgbworld
post Jan 25 2013, 06:15 PM

Look at all my stars!!
*******
Senior Member
3,375 posts

Joined: Apr 2012
From: Sarawak


Wonder how the NZXT chasis will be modded o.o....
TSinfernoaswen
post Jan 26 2013, 01:49 AM

(╯°□°)╯︵ ┻━┻)
*******
Senior Member
3,782 posts

Joined: Aug 2010
From: subang jaya


QUOTE(hmwgbworld @ Jan 25 2013, 06:15 PM)
Wonder how the NZXT chasis will be modded o.o....
*
wont be modding it. Maybe just need to drill couple of holes & thats about it I think. Will see how it goes with progress, if modding is needed then will give it a shot...

I might spray the mesh to add some red accent to it, but all that is at final stages once I have all the stuff fitted in.
unequalteck
post Jan 29 2013, 11:57 PM

Custom member title
*******
Senior Member
2,690 posts

Joined: Dec 2008
From: Kota Kinabalu Current: Wangsa Maju


u buy the raystorm WB only? or kit?
nurazwanzainor
post Jan 30 2013, 11:58 AM

Getting Started
**
Junior Member
290 posts

Joined: Jul 2012
From: Sarawak Tanah Tumpah Darahku


Attached Image
TSinfernoaswen
post Jan 30 2013, 01:02 PM

(╯°□°)╯︵ ┻━┻)
*******
Senior Member
3,782 posts

Joined: Aug 2010
From: subang jaya


QUOTE(unequalteck @ Jan 29 2013, 11:57 PM)
u buy the raystorm WB only? or kit?
*
ya waterblock only... why?

This post has been edited by infernoaswen: Dec 30 2013, 10:17 PM
unequalteck
post Jan 30 2013, 01:12 PM

Custom member title
*******
Senior Member
2,690 posts

Joined: Dec 2008
From: Kota Kinabalu Current: Wangsa Maju


QUOTE(infernoaswen @ Jan 30 2013, 01:02 PM)
ya waterblock only... why?
LOL!!
*
just asking smile.gif
im still considering whether buy separately or buy xspc kit
can list down the price of each component? tongue.gif
TSinfernoaswen
post Jan 30 2013, 03:46 PM

(╯°□°)╯︵ ┻━┻)
*******
Senior Member
3,782 posts

Joined: Aug 2010
From: subang jaya


QUOTE(unequalteck @ Jan 30 2013, 01:12 PM)
just asking smile.gif
im still considering whether buy separately or buy xspc kit
can list down the price of each component? tongue.gif
*
well it depends if you care about aesthetics or not. Getting kit is way cheaper than buying separately. Only reason why I didnt go for kit is I want tube reservoir & wanted shiny compression fittings. Wanted to hide my pump next to my psu also...so yeah...but if you dont mind bay reservoir then get a kit lor...cost you less.

price depends on seller lor...buy more stuff 1 shot & they can quote you cheaper price...anyways raystorm is rm1xx, reservoir i bought for rm100 (used) & radiator is rm3xx. check garage sales...someone selling used for rm250 brows.gif

unequalteck
post Jan 31 2013, 12:22 AM

Custom member title
*******
Senior Member
2,690 posts

Joined: Dec 2008
From: Kota Kinabalu Current: Wangsa Maju


QUOTE(infernoaswen @ Jan 30 2013, 03:46 PM)
well it depends if you care about aesthetics or not. Getting kit is way cheaper than buying separately. Only reason why I didnt go for kit is I want tube reservoir & wanted shiny compression fittings. Wanted to hide my pump next to my psu also...so yeah...but if you dont mind bay reservoir then get a kit lor...cost you less.

price depends on seller lor...buy more stuff 1 shot & they can quote you cheaper price...anyways raystorm is rm1xx, reservoir  i bought for rm100 (used) & radiator is rm3xx. check garage sales...someone selling used for rm250  brows.gif
*
im targeting xspc rs240 kit. bay res not very good looking. but start with a kit first then upgrade slowly afterward
TSinfernoaswen
post Jan 31 2013, 12:42 AM

(╯°□°)╯︵ ┻━┻)
*******
Senior Member
3,782 posts

Joined: Aug 2010
From: subang jaya


QUOTE(unequalteck @ Jan 31 2013, 12:22 AM)
im targeting xspc rs240 kit. bay res not very good looking. but start with a kit first then upgrade slowly afterward
*
rs series ar...limited space ah?...well that is a good choice...you can use it straight away & upgrade slowly later...if like me need to wait for weeks & months coz not enough money to buy more parts lmfao...

This post has been edited by infernoaswen: Feb 3 2013, 02:25 PM
TSinfernoaswen
post Feb 3 2013, 02:37 PM

(╯°□°)╯︵ ┻━┻)
*******
Senior Member
3,782 posts

Joined: Aug 2010
From: subang jaya


Just an update on how it currently looks like. The lights are actually more white than in the picture, but there is still a little "blue" to it. Not sure if I will stick with nzxt hue or get a pure white led strip. Once I get everything setup, only then I can tell if the lights are sufficient or not.

user posted image user posted image

user posted image user posted image

The red here in the picture looks very dim but in real life its actually brighter than the picture below but still not bright enough for me. But most probably I am sticking with white due to the fact white gives a better view to the components IMO. If its red, its kinda hard to see the components details.

user posted image user posted image

It looks more like this in real life (adjusted the camera ISO settings tongue.gif )

user posted image

This post has been edited by infernoaswen: Dec 31 2013, 12:58 AM
TSinfernoaswen
post Feb 3 2013, 02:38 PM

(╯°□°)╯︵ ┻━┻)
*******
Senior Member
3,782 posts

Joined: Aug 2010
From: subang jaya


So I went to the local hardware shop just to browse around & found some clear tubing? They were selling it for RM1.50/feet so I was like dafuq! That is so cheap, what if I can use this as my rig tubing? So I wondered how will it perform because i doubt it was designed for watercooling rigs, so I bought 1 feet just to do some testing on it.

First testing I did was on kink testing and it failed miserably. I wouldn't even post any testing details about how flexible it is, all I can say is if your loop needs some bend, this wouldn't work. Period!

Next I tested it for plasticizer. First of all I would like to say the test I did was just for fun & by right its not a perfect testing condition as I do not own the proper equipment for testing. The testing data is more like for my personal use but I am sharing out for those who are curious like me.

The first test was to cut the tubing in small pieces and dump it in a hot water. I do not have a thermometer that can measure high temps but its pretty hot, water used to make tea. I am guessing its around 80-90'C. The middle tubing is the result of it after 1 day in that water temp compare to the above tubing which is brand new. Also take note that the water & tubing was thrown in a flask (coffee flask) which keeps water warm for long period, so I am assuming the temps falls with a slow gradient through time.

The next test was testing it with a warm temp that was excatly 40'C. Yes I am sure of this because I used a thermometer that measures fever lol, it can go up to 40'C only sadly therefore couldn't get reading for higher temps. As shown in the picture (the last tubing at the bottom) it still leaches. So if the tubing can't even perform at 40'C without plasticizer then there is no point in using it as your temps confirm will go above 40'C because malaysia temps are now freaking 35-40'C outside!

user posted image

This is what plasticizer is if those who are wondering. White stuff that are like powder when dried, can easily scrap it off from the tubing if you can reach it.

user posted image

I got my MDPC sleevings already & the pins for custom cables but guess what? I am having a hard time finding awg cables from my local electrical shops...Dang it! Went to jalan pasar & no luck at there either, now I am planning to order it from china although it will take me around 2weeks to get it. Been getting bad luck since last week. I could do sleeving last week but pins got delay & now couldn't find cables which I thought should be the easiest thing lol.

user posted image user posted image

user posted image

Turns out that the NZXT hue plastic cover can fit at the top but I need to grind the plastic edge so that the 25mm fan can fit in there as well. But then I realized that I still need to wait to RMA the led strip so better not modify the nzxt hue first otherwise the shop can reject the RMA anytime if they require to see the nzxt hue even if its just cutting the plastic a little bit. Better not take the risk till RMA is done I guess

user posted image

So I had nothing to do but to take pictures on my fittings! Hehehe, total cost of that fittings are more than RM600 yo! There is a few rotary in the rig & I am lazy to remove it for photo session...

user posted image user posted image

This post has been edited by infernoaswen: Dec 31 2013, 01:02 AM
TSinfernoaswen
post Feb 3 2013, 02:49 PM

(╯°□°)╯︵ ┻━┻)
*******
Senior Member
3,782 posts

Joined: Aug 2010
From: subang jaya


More stuff have arrived for my build. I am waiting for pump to arrive...maybe in 2weeks time? 1 month time? ETA is unknown but I hope its as soon as possible. In the meanwhile, I will wait for the lamptron cw611 fan controller biggrin.gif

user posted image user posted image

user posted image user posted image

user posted image user posted image

This post has been edited by infernoaswen: Dec 31 2013, 01:04 AM
TSinfernoaswen
post Feb 3 2013, 02:50 PM

(╯°□°)╯︵ ┻━┻)
*******
Senior Member
3,782 posts

Joined: Aug 2010
From: subang jaya


Got my custom cables, leds, led strips etc...

user posted image user posted image

Hohoho, my made in china dremel is here & all its accessories. Not sure how long this is going to last but quality seems decent. Accessories feels cheap though but cant judge it before using tongue.gif

user posted image

Special thread & needles. Guess why I need this for my build? tongue.gif

user posted image

My long waited D5 pump is here! Although this is not MCP655, I can't wait for swiftech anymore, been waiting since January & still no stock, so decided to get xspc the moment my local supplier restocked it so that I can push some progress with my rig & start playing bioshock.

user posted image

user posted image user posted image


Bitspower pump top! I immediately fell in love with it. Bitspower seriously makes high quality stuff & their packaging is top notch!

user posted image


More white led strips for testing, this is the 600 bulb version biggrin.gif

user posted image user posted image

Finally got my nzxt hue led strip replacement, previous strip came with problems...had to RMA it. Still waiting for my top panel though lol

This post has been edited by infernoaswen: Dec 31 2013, 01:05 AM
TSinfernoaswen
post Feb 3 2013, 02:51 PM

(╯°□°)╯︵ ┻━┻)
*******
Senior Member
3,782 posts

Joined: Aug 2010
From: subang jaya


My new RX240 radiator hohohoho....

user posted image user posted image

user posted image user posted image


This post has been edited by infernoaswen: Dec 31 2013, 01:06 AM
TSinfernoaswen
post Feb 3 2013, 02:52 PM

(╯°□°)╯︵ ┻━┻)
*******
Senior Member
3,782 posts

Joined: Aug 2010
From: subang jaya


I decided to start making my custom cables & start sleeving it but had a few setbacks. First of all I ordered the wrong housing, I need 2 male atx housing but I got female & male lol. Then the 2nd problem was the pins, I bought 18awg cables but the pins are for 16awg meaning their crimping wings are longer thus giving a very bad crimping result.

user posted image user posted image

On top of that, the crimping tool that I am using is crap. Hard to crimp it properly as the biting is not aligned properly and the pins are not so malleable, thus not following the crimping bite properly.

user posted image

This is very bad, although it might work but sleeving will be a big problem then, so cable sleeving will be put on hold till I get all my pins & the crimping tool. Gonna cost me a lot now, I still need to get sp120 fans, fan controller, acrylic panels & now this lol.

user posted image


My plan was to mount the RX240 radiator on the front of the casing but the mounting holes are not designed for mounting a 240 radiator so I had to drill some extra holes. Not a surprised to me though since I stumble upon someone worklog before regarding this problem and I am aware of it.

user posted image user posted image

user posted image user posted image

user posted image

This post has been edited by infernoaswen: Dec 31 2013, 01:08 AM
TSinfernoaswen
post Feb 3 2013, 03:01 PM

(╯°□°)╯︵ ┻━┻)
*******
Senior Member
3,782 posts

Joined: Aug 2010
From: subang jaya


Flushing radiator time!

user posted image

Btw just so you know, both radiator are RX series but both are different in terms of the build quality & paint. My RX360 has a bulge to it at the end tank, not so serious but you cant make it stand straight though. On top of that the paint texture is very rough, where as the RX240 has a smoother finish to it & in perfect condition. Bought both radiators new (RX360 from A.P.E.S & RX240 from cyntrix). I am guessing the RX360 are the old batch radiators? Not sure if the bulge will cause any performance impact or not, lets hope everything works out great.

user posted image user posted image


Gunk from RX240 with warm water. Then I started flushing with vinegar, lots of dirt came out from RX240 though. I did flush the RX360 with warm water few weeks before but didn't do it with vinegar, so I did it today together with RX240.

user posted image user posted image

Effect from flushing with vinegar.

user posted image user posted image

Installed the pump top...pretty simple.

user posted image


Another problem is the pump thread are so close to each other that prevents me from adding a compression fittings directly to it as the cap for other port it blocking. No idea why the hell bitspower design like this, will need to get extra rotary & male to male adapters now...

user posted image user posted image

This post has been edited by infernoaswen: Dec 31 2013, 01:23 AM
TSinfernoaswen
post Feb 3 2013, 03:02 PM

(╯°□°)╯︵ ┻━┻)
*******
Senior Member
3,782 posts

Joined: Aug 2010
From: subang jaya


Gentle typhoon is mounted temporary till I get my hands on corsair sp120.

user posted image user posted image

As you can see, the casing dosen't seems to be long enough. It reaches till the radiator water tank so I have no choice but to leave this.

user posted image

I cut a thin piece of wood with my dremel just to test it.

user posted image user posted image

And more problems, the top radiator cannot be secured to the fans with the provided screws. They are too short as the switch 810 has a curve to the holes. Solution to this is to grind it to smoother and reduce the space but I decided to get custom length screws instead, since I will be using gasket on top of that and this will not work with the given 3cm screws.

user posted image user posted image

This post has been edited by infernoaswen: Dec 31 2013, 01:25 AM
TSinfernoaswen
post Feb 3 2013, 03:03 PM

(╯°□°)╯︵ ┻━┻)
*******
Senior Member
3,782 posts

Joined: Aug 2010
From: subang jaya


Playing around with leds & acrylic panels. Still can't recreate a proper luminous panel. Will get few types of sandpaper & play around with it again to get an even light distribution on it.

user posted image user posted image

user posted image user posted image

user posted image user posted image

user posted image user posted image

user posted image

This post has been edited by infernoaswen: Dec 31 2013, 01:26 AM
TSinfernoaswen
post Feb 3 2013, 03:04 PM

(╯°□°)╯︵ ┻━┻)
*******
Senior Member
3,782 posts

Joined: Aug 2010
From: subang jaya


I am back brows.gif


Tested the acrylic panel this time with 5mm sanded + super bright led strip, still getting uneven brightness...

user posted image

Went back to the drawing board & made changes, manage to mount the led at the side & cover with wire tape. I am not sure how long these china leds are going to last before failing plus its covered directly to the acrylic with no gap & wire tape so the heat is going to be trapped. Lets just hope it does not get too hot & burn the leds otherwise I need to rethink how to do it...

user posted image

Luminous panel in action, replaced the led strip with a dimmer one. Looks much better now but still uneven brightness. Its not very noticeable in real life though. I think laser engraved acrylic will give a better result. Will try making one with laser engraved instead of sanded...

user posted image user posted image

user posted image user posted image


Lego for adults...

user posted image

This post has been edited by infernoaswen: Dec 31 2013, 01:27 AM
TSinfernoaswen
post Feb 3 2013, 03:04 PM

(╯°□°)╯︵ ┻━┻)
*******
Senior Member
3,782 posts

Joined: Aug 2010
From: subang jaya


Doing some tests to find the prefect fans for my needs. This is the ambient sound noise at night...

user posted image

Gentle typhoon at full speed:

user posted image

Ambient sound noise during corsair sp120 tests (done in the daytime):

user posted image


SP120 Quiet Edition at full speed (12v):

user posted image

SP120 Quiet Edition (7v - using the included adapter):

user posted image


SP120 High Performance at full speed (12v):

user posted image

SP120 High Performance (7v - using the included adapter):

user posted image

All this tests are not accurate & do not serve as a guide or comparison on which fans are noisy/silent. Its purely for my own usage, to finding the fans that will suit me well. I decided to use the corsair SP120 quiet edition in my build since I am going with a push + pull setup. Gentle typhoon is a good fan no doubt but its not pleasant to my eyes tongue.gif

Oh and I also got my top panel replacement from nzxt already biggrin.gif

user posted image

This post has been edited by infernoaswen: Dec 31 2013, 01:28 AM
TSinfernoaswen
post Feb 3 2013, 04:11 PM

(╯°□°)╯︵ ┻━┻)
*******
Senior Member
3,782 posts

Joined: Aug 2010
From: subang jaya


Tiny update:
So I just finished installing the gaskets in my rig, I am the very paranoid type of person when it comes to sound. I am planning to go for the ultra silent rig yet performs well in cooling which explains why I keep changing fans from SGT to SP120 high performance to quiet editions and its pretty obvious why I am installing gaskets all over the places haha. Anywhere there is fans contacts, there will be gasket! Also my supplier only had the 360mm size so I had to cut it to fit at the front radiator.

user posted image user posted image

Flowsensor is here! I had to make a special order for this since cant get it locally!

user posted image user posted image

And some 'rare' fitting sizes & g1/4 rotary's since local retailer only carry 1 size sad.gif

user posted image

Best part of unpacking is to find suprised goodies! Its not that it very expensive or what but its just the surprise that you get free stuff makes the whole experience happier. The packaging is superb too, wrapped in bitspower own bubble wrap!

user posted image

This post has been edited by infernoaswen: Dec 31 2013, 01:32 AM
hmwgbworld
post Feb 4 2013, 12:20 AM

Look at all my stars!!
*******
Senior Member
3,375 posts

Joined: Apr 2012
From: Sarawak


A large update brows.gif
Btw how much the modding toolkit cost?
TSinfernoaswen
post Feb 4 2013, 01:11 AM

(╯°□°)╯︵ ┻━┻)
*******
Senior Member
3,782 posts

Joined: Aug 2010
From: subang jaya


QUOTE(hmwgbworld @ Feb 4 2013, 12:20 AM)
A large update brows.gif
Btw how much the modding toolkit cost?
*
actually I did a few update last week also but didnt had the time to upload the pictures haha today only a bit free brows.gif even when building I dont really feel like taking so much pictures coz very concentrated in building laugh.gif

modding tool kit I bought RM6x from niclasteoh. If you are interested better grab it fast before out of stock. I was searching for this item since last year october if I am not mistaken. No stock, waited so long till last month only got new stocks. But honestly if want to do cable sleeving without the toolkit also can, in fact my previous sleeving was done with pure homemade stuff its just easier to use the tools la, no need to search for the right stuff in the house haha.

My next update I will try to post some info on how I did my cable sleeving & what house tools I used for cable sleeving. If got time la tongue.gif
hmwgbworld
post Feb 4 2013, 01:31 AM

Look at all my stars!!
*******
Senior Member
3,375 posts

Joined: Apr 2012
From: Sarawak


QUOTE(infernoaswen @ Feb 4 2013, 01:11 AM)
actually I did a few update last week also but didnt had the time to upload the pictures haha today only a bit free  brows.gif even when building I dont really feel like taking so much pictures coz very concentrated in building  laugh.gif

modding tool kit I bought RM6x from niclasteoh. If you are interested better grab it fast before out of stock. I was searching for this item since last year october if I am not mistaken. No stock, waited so long till last month only got new stocks. But honestly if want to do cable sleeving without the toolkit also can, in fact my previous sleeving was done with pure homemade stuff its just easier to use the tools la, no need to search for the right stuff in the house haha.

My next update I will try to post some info on how I did my cable sleeving & what house tools I used for cable sleeving. If got time la  tongue.gif
*
Definitely will stay tune for your cable sleeving by using house tools rclxms.gif
As far that I seen in youtube video they use something like a needle pin to pull out the cable from the connector.
unsure.gif
TSinfernoaswen
post Feb 4 2013, 01:33 AM

(╯°□°)╯︵ ┻━┻)
*******
Senior Member
3,782 posts

Joined: Aug 2010
From: subang jaya


QUOTE(hmwgbworld @ Feb 4 2013, 01:31 AM)
Definitely will stay tune for your cable sleeving by using house tools  rclxms.gif
As far that I seen in youtube video they use something like a needle pin to pull out the cable from the connector.
unsure.gif
*
I use hairpin brows.gif way more effective than pins or stapler bullets brows.gif brows.gif

will post pictures & some info once I got time biggrin.gif
hmwgbworld
post Feb 4 2013, 01:36 AM

Look at all my stars!!
*******
Senior Member
3,375 posts

Joined: Apr 2012
From: Sarawak


QUOTE(infernoaswen @ Feb 4 2013, 01:33 AM)
I use hairpin  brows.gif way more effective than pins or stapler bullets  brows.gif  brows.gif

will post pictures & some info once I got time  biggrin.gif
*
brows.gif I may go steal my sis hairpin if I'm gonna do some cable sleeving. Hope she wont get mad on me tongue.gif
TSinfernoaswen
post Feb 4 2013, 08:45 AM

(╯°□°)╯︵ ┻━┻)
*******
Senior Member
3,782 posts

Joined: Aug 2010
From: subang jaya


QUOTE(hmwgbworld @ Feb 4 2013, 01:36 AM)
brows.gif I may go steal my sis hairpin if I'm gonna do some cable sleeving. Hope she wont get mad on me  tongue.gif
*
thumbup.gif 
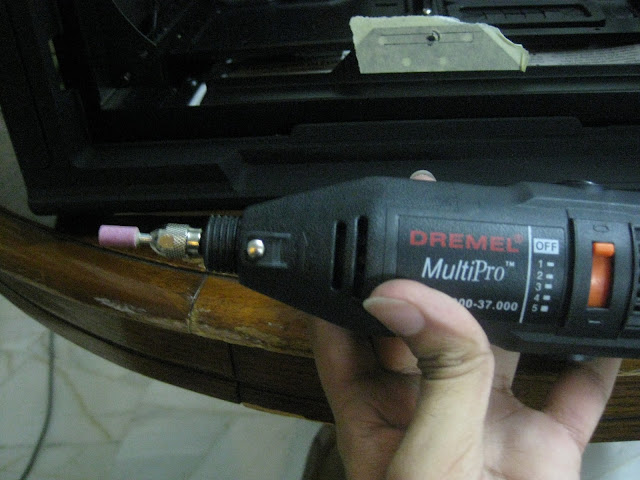
can work I tested already, just need to cut the front part & then grind the metal a bit to make it thinner coz its a bit thick so cant enter to push the pins. Unless you can find a thinner hairpin hehe...
Dreadlock13
post Feb 6 2013, 02:11 PM

Casual
***
Junior Member
480 posts

Joined: Aug 2011
Dam....
TSinfernoaswen
post Feb 7 2013, 12:16 AM

(╯°□°)╯︵ ┻━┻)
*******
Senior Member
3,782 posts

Joined: Aug 2010
From: subang jaya


QUOTE(Dreadlock13 @ Feb 6 2013, 02:11 PM)
Dam....
*
oh hi there user posted image
fridel
post Feb 7 2013, 09:33 AM

kuran ka? ok e oi?
******
Senior Member
1,659 posts

Joined: Nov 2010
From: the tip of borneo
not bad..next,upgrade ur camera pls tongue.gif
TSinfernoaswen
post Feb 7 2013, 03:11 PM

(╯°□°)╯︵ ┻━┻)
*******
Senior Member
3,782 posts

Joined: Aug 2010
From: subang jaya


QUOTE(fridel @ Feb 7 2013, 09:33 AM)
not bad..next,upgrade ur camera pls tongue.gif
*
yup plan to get dslr haha but not anytime soon...out of budget. Probably end of the year cry.gif
TSinfernoaswen
post Feb 8 2013, 12:18 AM

(╯°□°)╯︵ ┻━┻)
*******
Senior Member
3,782 posts

Joined: Aug 2010
From: subang jaya


I bought some MDPC sleevings yesterday. Got sata sleevings also hehehe...excited to start sleevings biggrin.gif
ted.mosby
post Feb 8 2013, 01:09 AM

Getting Started
**
Junior Member
60 posts

Joined: Aug 2012
QUOTE(infernoaswen @ Feb 8 2013, 01:18 AM)
I bought some MDPC sleevings yesterday. Got sata sleevings also hehehe...excited to start sleevings biggrin.gif
*
where did u get all the sleevings?
TSinfernoaswen
post Feb 8 2013, 01:17 AM

(╯°□°)╯︵ ┻━┻)
*******
Senior Member
3,782 posts

Joined: Aug 2010
From: subang jaya


QUOTE(ted.mosby @ Feb 8 2013, 01:09 AM)
where did u get all the sleevings?
*
colortrail sleevings can get from Topazzatech
for mdpc sleevings can get it from Token

both also awesome seller... thumbup.gif
ted.mosby
post Feb 8 2013, 01:26 AM

Getting Started
**
Junior Member
60 posts

Joined: Aug 2012
QUOTE(infernoaswen @ Feb 8 2013, 02:17 AM)
colortrail sleevings can get from Topazzatech
for mdpc sleevings can get it from Token

both also awesome seller...  thumbup.gif
*
thanks brah. looking forward to sleeve every cables drool.gif
TSinfernoaswen
post Feb 8 2013, 09:04 AM

(╯°□°)╯︵ ┻━┻)
*******
Senior Member
3,782 posts

Joined: Aug 2010
From: subang jaya


QUOTE(ted.mosby @ Feb 8 2013, 01:26 AM)
thanks brah. looking forward to sleeve every cables  drool.gif
*
good luck rclxms.gif be prepare to get come cuts on your fingers though laugh.gif
ted.mosby
post Feb 8 2013, 09:31 AM

Getting Started
**
Junior Member
60 posts

Joined: Aug 2012
QUOTE(infernoaswen @ Feb 8 2013, 10:04 AM)
good luck  rclxms.gif be prepare to get come cuts on your fingers though  laugh.gif
*
lock and load. thumbup.gif
topazzatech
post Feb 8 2013, 11:37 AM

Getting Started
**
Junior Member
196 posts

Joined: Sep 2012


QUOTE(ted.mosby @ Feb 8 2013, 10:31 AM)
lock and load.  thumbup.gif
*
all sleeve in stock..pm me when u ready.. biggrin.gif rclxms.gif
ted.mosby
post Feb 8 2013, 12:31 PM

Getting Started
**
Junior Member
60 posts

Joined: Aug 2012
QUOTE(topazzatech @ Feb 8 2013, 12:37 PM)
all sleeve in stock..pm me when u ready.. biggrin.gif  rclxms.gif
*
i love it when people are very sensitive with their surrounding. will pm u later, gonna find sleeving kit first drool.gif
TSinfernoaswen
post Feb 8 2013, 01:05 PM

(╯°□°)╯︵ ┻━┻)
*******
Senior Member
3,782 posts

Joined: Aug 2010
From: subang jaya


QUOTE(ted.mosby @ Feb 8 2013, 12:31 PM)
i love it when people are very sensitive with their surrounding. will pm u later, gonna find sleeving kit first  drool.gif
*
I bought my lamptron modding tool kit from niclasteoh. You can pm him but give him some time to reply...he is quite busy...
ted.mosby
post Feb 8 2013, 02:53 PM

Getting Started
**
Junior Member
60 posts

Joined: Aug 2012
QUOTE(infernoaswen @ Feb 8 2013, 02:05 PM)
I bought my lamptron modding tool kit from niclasteoh. You can pm him but give him some time to reply...he is quite busy...
*
thanks for the info. looking forward to buy the kit from him. good luck brah!
topazzatech
post Feb 8 2013, 03:01 PM

Getting Started
**
Junior Member
196 posts

Joined: Sep 2012


QUOTE(ted.mosby @ Feb 8 2013, 01:31 PM)
i love it when people are very sensitive with their surrounding. will pm u later, gonna find sleeving kit first  drool.gif
*
yes.thanks. just notice lowyat now can summon people like tagging in facebook. shakehead.gif
TSinfernoaswen
post Feb 8 2013, 03:58 PM

(╯°□°)╯︵ ┻━┻)
*******
Senior Member
3,782 posts

Joined: Aug 2010
From: subang jaya


QUOTE(topazzatech @ Feb 8 2013, 03:01 PM)
yes.thanks. just notice lowyat now can summon people like tagging in facebook. shakehead.gif
*
lowyat ke arah kuasa besar dunia.... laugh.gif
TSinfernoaswen
post Feb 9 2013, 08:23 PM

(╯°□°)╯︵ ┻━┻)
*******
Senior Member
3,782 posts

Joined: Aug 2010
From: subang jaya


update: bought a can of red spray paint today, luckily rushed to ace hardware before cny otherwise shops will be closed liao.

Started spraying all the mesh to highlight red colour on the casing unfortunatly I applied too much, layer is a little thick haha, need to wait for it to dry so tomorrow continue spraying at the otherside...will see how it turns out tomorrow morning. Will upload pictures tomorrow if I manage to get it done, hopefully I wake up early tomorrow la & it don't rain. Stay tuned for more pictures brows.gif

This post has been edited by infernoaswen: Feb 9 2013, 08:24 PM
LWRNCH6550
post Feb 9 2013, 09:50 PM

On my way
****
Senior Member
614 posts

Joined: Jun 2005
From: ლ(ಠ益ಠლ)
QUOTE(infernoaswen @ Feb 9 2013, 08:23 PM)
update: bought a can of red spray paint today, luckily rushed to ace hardware before cny otherwise shops will be closed liao.

Started spraying all the mesh to highlight red colour on the casing unfortunatly I applied too much, layer is a little thick haha, need to wait for it to dry so tomorrow continue spraying at the otherside...will see how it turns out tomorrow morning. Will upload pictures tomorrow if I manage to get it done, hopefully I wake up early tomorrow la & it don't rain. Stay tuned for more pictures  brows.gif
*
You are blessed with a good weather for modding tomorrow, as a part time modder i know a good weather can determine a good or bad outcome of a case mod.
ted.mosby
post Feb 11 2013, 08:22 PM

Getting Started
**
Junior Member
60 posts

Joined: Aug 2012
all hail for Project Balrog and Aswen! Cant wait for the next update. Teach me sleeving, master! drool.gif
TSinfernoaswen
post Feb 11 2013, 09:01 PM

(╯°□°)╯︵ ┻━┻)
*******
Senior Member
3,782 posts

Joined: Aug 2010
From: subang jaya


QUOTE(ted.mosby @ Feb 11 2013, 08:22 PM)
all hail for Project Balrog and Aswen! Cant wait for the next update. Teach me sleeving, master! drool.gif
*
lol thanks mate, small project only blush.gif ...nice meeting you just now....tomorrow got new episode of how i met your mother brows.gif Need to wait for more cash to spend & also local stores to restock biggrin.gif

Sure will post some pictures & guides, very easy actually just need lots of patience. I wanted to start sleeving this weekend but I still haven't get my crimping pins & wires. Otherwise maybe this week or next week need to head over to jalan pasar to find it. I am no master, also in learning process tongue.gif

This post has been edited by infernoaswen: Feb 11 2013, 09:01 PM
TSinfernoaswen
post Feb 11 2013, 09:06 PM

(╯°□°)╯︵ ┻━┻)
*******
Senior Member
3,782 posts

Joined: Aug 2010
From: subang jaya


I know its been sometime since the last update & I apologize for that. Was busy so had to put the work log on hold. Don't worry though, I am free now for a month or so. You will be seeing more updates now. I just finished installing the gpu waterblock, ek bridge & the backplate (I forgot to take picture of the final product). Anyways I plan to start making fill ports tomorrow on the luminous panel.

user posted image user posted image

user posted image user posted image

user posted image user posted image

Almost forgotten to remove the original asus washer haha, luckily I realized it otherwise it might not have good contacts with the waterblock laugh.gif

This post has been edited by infernoaswen: Dec 31 2013, 01:34 AM
ted.mosby
post Feb 11 2013, 10:13 PM

Getting Started
**
Junior Member
60 posts

Joined: Aug 2012
QUOTE(infernoaswen @ Feb 11 2013, 10:01 PM)
lol thanks mate, small project only  blush.gif ...nice meeting you just now....tomorrow got new episode of how i met your mother  brows.gif Need to wait for more cash to spend & also local stores to restock  biggrin.gif

Sure will post some pictures & guides, very easy actually just need lots of patience. I wanted to start sleeving this weekend but I still haven't get my crimping pins & wires. Otherwise maybe this week or next week need to head over to jalan pasar to find it. I am no master, also in learning process tongue.gif
*
haha cant wait for the new episode, thought it is literally the same from one episode to another, we still dont know the kids' mother. same goes with me, need fund first, then slowly buy stuff, then go sleeving all the way. good luck bro.
TSinfernoaswen
post Mar 3 2013, 12:47 AM

(╯°□°)╯︵ ┻━┻)
*******
Senior Member
3,782 posts

Joined: Aug 2010
From: subang jaya


Had to draw circles for making hole to fit the fill port.

user posted image user posted image

user posted image

It worked out great, perfectly aligned but I have a new problem.

user posted image user posted image

So my main objective was to get the pump directly under the reservoir but its super tight. As you can see there is no gap at all between the pump top & the luminous panel.

user posted image

Another problem was the pump inlet fitting & the fillport is not aligned. The pump is a little too thick so it offsets outwards a little bit. And also the 45deg rotary isnt straight. I can solve it by rising the pump higher but I dont have space though to rise the pump so had to use 20mm extender at the radiator tongue.gif

user posted image user posted image


As for the pump offset problem, I had to use a dremel to grind the pump cover or whatever you call that round circle thing that secures the pump top & the pump. Basically I trim the gripping material a little bit so that the pump can enter inwards a little more. Sorry for not taking a lot of pictures, when it comes to modding, taking pictures is my less priority since I spend too much time doing the actual work tongue.gif

user posted image

Made the 2nd fillport yay! My initial plan was to put this flowsensor at the reservoir inlet at the top & use extenders from the fillport to the bottom of the gpu inlet. So that I can run a straight tubing from the bottom to the gpu inlet. This will give the straight tubing that we usually see in acrylic tubing builds but then I thought why not replace the extenders with my flowsensor? Plus it will be easier to see on the luminous panel instead of the top & also save me from using extenders therefore less cost! That long extenders is just for aligning, will replace that with compression fitting & tubing.

user posted image

This post has been edited by infernoaswen: Dec 31 2013, 02:00 AM
TSinfernoaswen
post Mar 3 2013, 12:48 AM

(╯°□°)╯︵ ┻━┻)
*******
Senior Member
3,782 posts

Joined: Aug 2010
From: subang jaya


I tell you, this is probably the hardest part in my build so far! First I need to attach the pump to the fillport at such a tight space, then from the fillport I need to connect to the reservoir at such a tight space to work with. Once everything is set, I had to connect this small piece of tubing to the radiator & oh boy...it was so hard! Because I cant move the pump or have enough space to work with. Took me more than 1 hour to get the lower portion done. I had to remove to rivets at the back of the casing to fit this luminous panel properly below the pci bracket & I also drilled 2 big holes at the bottom acrylic panel to route the pump wire from below the casing & also allow me to adjust the pump speed. Not convenient to adjust the speed from under the casing but at least I have the option if needed. I plan to connect this pump on a lamptron cw611 though so it will allow me to adjust the speed through the fan controller instead.

user posted image user posted image

This is what you get when you dont have motherboard. Had to hang the gpu with strings to get the accurate measurement for the fillport locations.

user posted image

So far everything is looking good, will work on the psu side cover & at the front. Took me more than half a day to get the lower portion routing done. It looks simple but I did a lot of small modding here & there to get it in such a tight space.

user posted image

The luminous panel is just a prototype though, but I dont plan to change it since is amount of work I need to remove the fittings & put it back is such a pain. If the led 1 day failed then only I will decide to create a new luminous panel with laser engraved instead of hand sanded for better light distribution. I also have an idea to make a aluminum bracket to fit the led inside whenever it fails, this will make the whole replacing led process easier. Basically what I mean is instead of using black tape to hold the led strip to the side of the acrylic, I will create a thin spacing with aluminum instead.

Not sure if you understand what I am trying to say but for now I think I will just use the current luminous panel.

Thanks to pristine for borrowing me his hole saw tongue.gif Making fillport will be super hard without it! But the hole saw is a little small for the bitspower diameter so I had to use grinding stone to sand the hole further so that the fillport can fit inside nicely. I know the holesaw was designed like that because when you make hole with metal, you can use the fill port threads to screw the fillport in but not with thick acrylic panels smile.gif

pristine, I will return it back to you soon biggrin.gif

This post has been edited by infernoaswen: Dec 31 2013, 01:36 AM
TSinfernoaswen
post Mar 3 2013, 01:13 AM

(╯°□°)╯︵ ┻━┻)
*******
Senior Member
3,782 posts

Joined: Aug 2010
From: subang jaya


The side cover is a little high so I will need to trim it a little bit.

user posted image user posted image

My design is to put another acrylic at this angle to help the airflow from the radiator. Due to short acrylic panel, I had to glue another acrylic to it tongue.gif I am going to cover it with matte black sticker so the colour dosen't matter. Most importantly is to make good use of the resources you have! Don't waste it biggrin.gif

user posted image user posted image

Done with the whole cover but I had to make a hole & attach a screw to keep the acrylic panel touching the luminous panel otherwise there will be a gap. Easy to remove too, so cable management from the psu shouldn't be a problem. Just pop it out & plug in hehehe

user posted image user posted image

I know the side panel is not straight but this is probably the best I can do with a dremel. Once I put the sticker I think it wont be noticeable.

user posted image

Now I need your suggestion, should I cover this part like below? Full cover or partial?

user posted image

If I cover it fully then the 5.25" drive bay part also I will need to cover. Or should I just cover the top part, meaning the radiator & sp120 fans will be visible. I plan to make an ROG logo ...still thinking which to go for since full acrylic cover is very common & everyone done that already. I am thinking of doing something different.

user posted image user posted image

This post has been edited by infernoaswen: Dec 31 2013, 01:38 AM
TSinfernoaswen
post Mar 3 2013, 01:51 AM

(╯°□°)╯︵ ┻━┻)
*******
Senior Member
3,782 posts

Joined: Aug 2010
From: subang jaya


Got my vinyl from kray_keigo today. Serious good high quality stuff thumbup.gif As you can see from the picture, my previous cut with the dremel wasn't that perfect. Shaky hands tongue.gif so a quick fix with eproxy & you won't even notice it hehehe

user posted image user posted image

My touch & go card definitely helped me in applying the sticker without bubbles biggrin.gif

user posted image user posted image

I am quite satisfied with the psu cover considering this was my first attempt, not so satisfied with the luminous panel yet as you all know but since this isn't a sponsored build or what sort, just my personal rig so who gives a fark tongue.gif I can perfect the luminous panel but that would mean me taking apart the panel, unscrewing lots of fittings here & there that took me quite some time to get it in place with such a low clearance plus I might need to spend probably another RM50-100 to get the material, laser cutting etc so I think i'll pass.

In case if there is a leak during the leak test somewhere under the psu cover & I couldn't fix it without taking apart then I might consider getting the luminous panel perfected. Lets just hope no leaks ya tongue.gif

user posted image user posted image

user posted image

Still deciding to go with 5.25" bay cover with acrylic + matte black sticker or acrylic + ROG logo. Once the side panel is on, there won't be any difference so I am still thinking on my options

user posted image

It's either bending the metal or cutting it off with a dremel. Went with the lazy method lol otherwise the acrylic panel wont be able to sit nicely over here.

user posted image

This post has been edited by infernoaswen: Dec 31 2013, 01:40 AM
Dennos
post Mar 3 2013, 09:36 PM

Look at all my stars!!
*******
Senior Member
2,736 posts

Joined: Dec 2006


get the cable from taobao, arrive in 1 weeks time using EMS
TSinfernoaswen
post Mar 3 2013, 10:18 PM

(╯°□°)╯︵ ┻━┻)
*******
Senior Member
3,782 posts

Joined: Aug 2010
From: subang jaya


QUOTE(Dennos @ Mar 3 2013, 09:36 PM)
get the cable from taobao, arrive in 1 weeks time using EMS
*
yup I plan to do that...going through the list lol...so many sellers to choose from
qwe13
post Mar 4 2013, 10:09 AM

Enthusiast
*****
Senior Member
785 posts

Joined: Jun 2012
great build brooo... rclxms.gif
cant wait to see the finish product
Kidz1995
post Mar 12 2013, 02:06 AM

Elite
******
Senior Member
1,539 posts

Joined: Aug 2008
From: Coexist

damn nice build bro.
somehow, this project poison me to buy switch 810 cry.gif
TSinfernoaswen
post Mar 12 2013, 07:53 AM

(╯°□°)╯︵ ┻━┻)
*******
Senior Member
3,782 posts

Joined: Aug 2010
From: subang jaya


QUOTE(Kidz1995 @ Mar 12 2013, 02:06 AM)
damn nice build bro.
somehow, this project poison me to buy switch 810  cry.gif
*
do it bro laugh.gif

This post has been edited by infernoaswen: Dec 31 2013, 01:40 AM
qwe13
post Mar 12 2013, 12:16 PM

Enthusiast
*****
Senior Member
785 posts

Joined: Jun 2012
good for u bro...
finally an update..its been a while yes biggrin.gif
TSinfernoaswen
post Mar 12 2013, 05:06 PM

(╯°□°)╯︵ ┻━┻)
*******
Senior Member
3,782 posts

Joined: Aug 2010
From: subang jaya


QUOTE(qwe13 @ Mar 12 2013, 12:16 PM)
good for u bro...
finally an update..its been a while yes  biggrin.gif
*
hahaha, its not that I dont want to update...i got nothing to update...waiting for stuff, either no stock or keep getting delay here & there yawn.gif

I want to play crysis 3 & far cry 3 also cannot....got the game but the rig not ready yet laugh.gif
qwe13
post Mar 12 2013, 05:10 PM

Enthusiast
*****
Senior Member
785 posts

Joined: Jun 2012
hell yeah!! Crysis 3 is damn niceeeeee broo... but the game play..hmm much easier compared to Crysis 2.. Graphics wise, DamnSUPERB!! huhu
TSinfernoaswen
post Mar 12 2013, 05:44 PM

(╯°□°)╯︵ ┻━┻)
*******
Senior Member
3,782 posts

Joined: Aug 2010
From: subang jaya


QUOTE(qwe13 @ Mar 12 2013, 05:10 PM)
hell yeah!! Crysis 3 is damn niceeeeee broo... but the game play..hmm much easier compared to Crysis 2.. Graphics wise, DamnSUPERB!! huhu
*
yeah everyone is telling me that...damn I am missing it out...

guess what, I just bought a blue flame lighter for cable sleeving...damn its not working anymore...cant enlight it, need to exchange a new one tomorrow...damn keep getting bad luck doh.gif
qwe13
post Mar 13 2013, 12:26 AM

Enthusiast
*****
Senior Member
785 posts

Joined: Jun 2012
QUOTE(infernoaswen @ Mar 12 2013, 05:44 PM)
yeah everyone is telling me that...damn I am missing it out...

guess what, I just bought a blue flame lighter for cable sleeving...damn its not working anymore...cant enlight it, need to exchange a new one tomorrow...damn keep getting bad luck  doh.gif
*
lol...steady bro. usually among smokers, we test it first, than pay the guy.. biggrin.gif
TSinfernoaswen
post Mar 13 2013, 12:44 AM

(╯°□°)╯︵ ┻━┻)
*******
Senior Member
3,782 posts

Joined: Aug 2010
From: subang jaya


QUOTE(qwe13 @ Mar 13 2013, 12:26 AM)
lol...steady bro. usually among smokers, we test it first, than pay the guy.. biggrin.gif
*
tested it, was working fine...then when bring back home somehow cant light it up (or am I noob?) lol...

after trying few times I can light it up if its at low, if I set the flame high it wont be able to light up. Anyways will exchange with a new 1 tomorrow if possible, I think its the spark problem. Cheap china quality so I am not surprised la tongue.gif
qwe13
post Mar 13 2013, 01:11 AM

Enthusiast
*****
Senior Member
785 posts

Joined: Jun 2012
QUOTE(infernoaswen @ Mar 13 2013, 12:44 AM)
tested it, was working fine...then when bring back home somehow cant light it up (or am I noob?) lol...

after trying few times I can light it up if its at low, if I set the flame high it wont be able to light up. Anyways will exchange with a new 1 tomorrow if possible, I think its the spark problem. Cheap china quality so I am not surprised la tongue.gif
*
candles would be efficient biggrin.gif
TSinfernoaswen
post Mar 13 2013, 10:20 AM

(╯°□°)╯︵ ┻━┻)
*******
Senior Member
3,782 posts

Joined: Aug 2010
From: subang jaya


QUOTE(qwe13 @ Mar 13 2013, 01:11 AM)
candles would be efficient  biggrin.gif
*
when sleeving need to use blue flame to get the best result. Although normal lighter works well, there is still some possibility of the yellow flame to touch the heatshrink thus causing it to look "burned" with that black mark making it look ugly laugh.gif
pristine
post Mar 13 2013, 11:38 AM

junkie
*******
Senior Member
2,808 posts

Joined: Jan 2009
From: Subang Jaya


QUOTE(infernoaswen @ Mar 13 2013, 10:20 AM)
when sleeving need to use blue flame to get the best result. Although normal lighter works well, there is still some possibility of the yellow flame to touch the heatshrink thus causing it to look "burned" with that black mark making it look ugly laugh.gif
*
Buy zippo blus. laugh.gif

This post has been edited by pristine: Mar 13 2013, 11:38 AM
qwe13
post Mar 13 2013, 11:53 AM

Enthusiast
*****
Senior Member
785 posts

Joined: Jun 2012
QUOTE(pristine @ Mar 13 2013, 11:38 AM)
Buy zippo blus. laugh.gif
*
i thought zippo also create yellow flame...so to say pembakaran berjelaga..huhu..
That's why we always use RON97 not 95..RON 95 creates yellow flame (pembakaran berjelaga)...off topic biggrin.gif
TSinfernoaswen
post Mar 13 2013, 12:09 PM

(╯°□°)╯︵ ┻━┻)
*******
Senior Member
3,782 posts

Joined: Aug 2010
From: subang jaya


QUOTE(qwe13 @ Mar 13 2013, 11:53 AM)
i thought zippo also create yellow flame...so to say pembakaran berjelaga..huhu..
That's why we always use RON97 not 95..RON 95 creates yellow flame (pembakaran berjelaga)...off topic  biggrin.gif
*
zippo also got blue flame models...but pricey... >RM100 cry.gif

This post has been edited by infernoaswen: Mar 13 2013, 12:09 PM
Ohiki
post Mar 13 2013, 01:14 PM

New Member
*
Junior Member
47 posts

Joined: Nov 2004
From: Ipoh Mali but stuck @ Kota Damansara =(
In the 1st page, how come you put a screw driver under your graphic card ? It will fall is it ?
TSinfernoaswen
post Mar 13 2013, 02:58 PM

(╯°□°)╯︵ ┻━┻)
*******
Senior Member
3,782 posts

Joined: Aug 2010
From: subang jaya


QUOTE(Ohiki @ Mar 13 2013, 01:14 PM)
In the 1st page, how come you put a screw driver under your graphic card ? It will fall is it ?
*
nope, just put it for fun hahaha. Usually when you install graphic card it will bend slightly so I didnt want to add stress to the pcb therefore I used it as a support. I am just a little paranoid like that biggrin.gif it will do just fine without the screwdriver laugh.gif
TSinfernoaswen
post Mar 14 2013, 05:02 PM

(╯°□°)╯︵ ┻━┻)
*******
Senior Member
3,782 posts

Joined: Aug 2010
From: subang jaya


Hero & haswell is here, yeah I went for hero finally. Dont intend to wait for formula any longer plus I got hero from a friend at an attractive price smile.gif

user posted image

So I did the usual process, install cpu, mobo standoff etc..before putting on the waterblock with thermal paste I decided to open it to take a look inside & what a horror!!! Oxidation so badly, this is basically my fault though. I run the loop for 2days & drained it for some changes but didnt let the components to dry properly & just left it there to dry itself haha. Also if you notice the o-ring somehow left those black marks on the copper & it was hard to remove it even with vinegar. Not exactly sure what is going on but I hope it dosen't leak. o-ring condition is still good though...

user posted image

The usual vinegar + warm water + lime solution

user posted image

So since I am doing push + pull config, available space is quite tight considering I am using RX radiators. To make sure I have sufficient spacing, I made myself 120mm fan body to estimate the distance when installing my loop. This is because I dont have any 120mm fans spare & the sp120 fans I ordered will arrive in 3weeks time laugh.gif

user posted image

Started with cable sleeving, just the internal I/O cables only though, psu cables haven't yet and oh boy it was time consuming alright. Took me more than 2hours to get it done. Hard since I had to sleeving while standing & the cables are quite thick & of different sizes.

user posted image user posted image

user posted image user posted image

user posted image user posted image

This post has been edited by infernoaswen: Dec 31 2013, 01:42 AM
ted.mosby
post Mar 14 2013, 05:05 PM

Getting Started
**
Junior Member
60 posts

Joined: Aug 2012
dude, heard that ur bulk order with pristine coming this friday?
TSinfernoaswen
post Mar 14 2013, 05:08 PM

(╯°□°)╯︵ ┻━┻)
*******
Senior Member
3,782 posts

Joined: Aug 2010
From: subang jaya


QUOTE(ted.mosby @ Mar 14 2013, 05:05 PM)
dude, heard that ur bulk order with pristine coming this friday?
*
came already bro brows.gif can check the items I got, posted above tongue.gif
ted.mosby
post Mar 14 2013, 09:11 PM

Getting Started
**
Junior Member
60 posts

Joined: Aug 2012
damnnnnn jelly. rare stuff indeed
TSinfernoaswen
post Mar 14 2013, 09:21 PM

(╯°□°)╯︵ ┻━┻)
*******
Senior Member
3,782 posts

Joined: Aug 2010
From: subang jaya


QUOTE(ted.mosby @ Mar 14 2013, 09:11 PM)
damnnnnn jelly. rare stuff indeed
*
lol which stuff are you referring to? I only need the 3pin pcb & tubing but since I was paying for shipping might as well add the extender & gasket together haha...now need to wait for next shipment from china for my cables rclxm9.gif
ted.mosby
post Mar 14 2013, 09:27 PM

Getting Started
**
Junior Member
60 posts

Joined: Aug 2012
haha. i wanted the tube but the red color one, and the fan hub lol. whats the difference between these tubing and normal tubing?
TSinfernoaswen
post Mar 14 2013, 09:46 PM

(╯°□°)╯︵ ┻━┻)
*******
Senior Member
3,782 posts

Joined: Aug 2010
From: subang jaya


QUOTE(ted.mosby @ Mar 14 2013, 09:27 PM)
haha. i wanted the tube but the red color one, and the fan hub lol. whats the difference between these tubing and normal tubing?
*
» Click to show Spoiler - click again to hide... «


Basically its one of the best tubing out there currently that wont have plasticizer issues, well non so far. Interested in getting? brows.gif in case if you not sure what is plasticizer, refer to my previous post on the test I did on tubing... biggrin.gif


Also here reply from mayhems to someone asking similar question yesterday... So yeah, pretty much best tubing out there in the market currently thumbup.gif

» Click to show Spoiler - click again to hide... «


This post has been edited by infernoaswen: Mar 14 2013, 09:53 PM
ted.mosby
post Mar 14 2013, 09:57 PM

Getting Started
**
Junior Member
60 posts

Joined: Aug 2012
haha read that post about plasticizer, one of my tubing got plasticized thats why planning on buying primochill tube. haha really interested but maybe later will order it. bila Balrog nak siap ni lol
TSinfernoaswen
post Mar 14 2013, 10:28 PM

(╯°□°)╯︵ ┻━┻)
*******
Senior Member
3,782 posts

Joined: Aug 2010
From: subang jaya


QUOTE(ted.mosby @ Mar 14 2013, 09:57 PM)
haha read that post about plasticizer, one of my tubing got plasticized thats why planning on buying primochill tube. haha really interested but maybe later will order it. bila Balrog nak siap ni lol
*
honestly I also dont know bro...

This post has been edited by infernoaswen: Dec 31 2013, 02:04 AM
pristine
post Mar 14 2013, 10:29 PM

junkie
*******
Senior Member
2,808 posts

Joined: Jan 2009
From: Subang Jaya


which dremel did you get?
TSinfernoaswen
post Mar 14 2013, 10:54 PM

(╯°□°)╯︵ ┻━┻)
*******
Senior Member
3,782 posts

Joined: Aug 2010
From: subang jaya


QUOTE(pristine @ Mar 14 2013, 10:29 PM)
which dremel did you get?
*
its a direct replica of multipro 395...looks like the link below but with more accessories. Thats what they say la...see la when it arrives rclxms.gif

http://www.zerotohundred.com/newforums/all...nd-modding.html

This post has been edited by infernoaswen: Dec 31 2013, 02:04 AM
TSinfernoaswen
post Mar 15 2013, 12:22 AM

(╯°□°)╯︵ ┻━┻)
*******
Senior Member
3,782 posts

Joined: Aug 2010
From: subang jaya


QUOTE(ted.mosby @ Mar 14 2013, 09:57 PM)
haha read that post about plasticizer, one of my tubing got plasticized thats why planning on buying primochill tube. haha really interested but maybe later will order it. bila Balrog nak siap ni lol
*
Bro I am going to start taking orders for primochill primoflex advance lrt & durelene tubing. I have a shipment coming end of this month contains 10ft primochill (Bloodshed Red) 1/2 3/4, durelene & primochill 7/16 5/8. Let me know if you are interested in any of this sizes. PM me for price.

Its a small shipment because I need to figure out taxes & exact shipping cost, but a friend of mine already made payment for the 7/16 5/8 primochill tubing size. If everything goes well I can take more orders in the future, ONLY for tubing though.
ted.mosby
post Mar 15 2013, 01:31 AM

Getting Started
**
Junior Member
60 posts

Joined: Aug 2012
woaahh thanks bro. i'll pm u
TSinfernoaswen
post Mar 16 2013, 03:33 AM

(╯°□°)╯︵ ┻━┻)
*******
Senior Member
3,782 posts

Joined: Aug 2010
From: subang jaya


Update: I am currently working on a article or more like a compilation of information & data that I can find in the internet regarding plasticizers & how different tubing compares. Once I am done with it, I will ask mayhems permission if its ok to share it out to the public since most of the information comes from him. My only objective is to educate the users to go for quality tubing as it will save them time & maintenance effort and also to give a proper explanation on what its all about & why it might not be a concern to you.

Its almost done 80%? lol, and some editing here & there as my grammar isnt the best since english wasn't excatly my first language tongue.gif
qwe13
post Mar 16 2013, 10:52 AM

Enthusiast
*****
Senior Member
785 posts

Joined: Jun 2012
QUOTE(infernoaswen @ Mar 16 2013, 03:33 AM)
Update: I am currently working on a article or more like a compilation of information & data that I can find in the internet regarding plasticizers & how different tubing compares. Once I am done with it, I will ask mayhems permission if its ok to share it out to the public since most of the information comes from him. My only objective is to educate the users to go for quality tubing as it will save them time & maintenance effort and also to give a proper explanation on what its all about & why it might not be a concern to you.

Its almost done 80%? lol, and some editing here & there as my grammar isnt the best since english wasn't excatly my first language tongue.gif
*
nice bro...ur effort would also elevate this forum a step higher rclxms.gif

This post has been edited by qwe13: Mar 16 2013, 10:53 AM
TSinfernoaswen
post Mar 30 2013, 05:29 PM

(╯°□°)╯︵ ┻━┻)
*******
Senior Member
3,782 posts

Joined: Aug 2010
From: subang jaya


I sleeved using MDPC sleeving & I find it way better than colortrail sleeving in quality wise. Colortrail is quite good too & most importantly cheap but MDPC is much easier to sleeve but too expensive lol. I almost used up all my sata sleevings already for the internal I/O cables such as usb cables, etc. Need to get more for the sata cables. I am a little OCD on stuff like these, I know you dont really need to sleeve it but thats just how I roll. Maybe I am a perfectionist?

user posted image

ModMyToys pcb installed! tongue.gif

user posted image user posted image

This post has been edited by infernoaswen: Dec 31 2013, 01:44 AM
TSinfernoaswen
post Apr 5 2013, 07:49 PM

(╯°□°)╯︵ ┻━┻)
*******
Senior Member
3,782 posts

Joined: Aug 2010
From: subang jaya


So yesterday I was sleeving the switch 810 front I/O cables & I used up most of the sata sleeving which was meant only for the sata cable. Sadly its enough to sleeve 1 sata cable only so now I got to order more.

user posted image user posted image

I am using MDPC sleeving btw and the quality is top notch. Applied a little super glue to the sleeving & cable so that it will not come out no matter how hard I pull it. I had bad experience with previous sleeving I did on 24pin cables so this time I will be adding super glue to give that stronger hold.

user posted image user posted image

Time to start filling up the loop.

user posted image user posted image

I plan to go for blood red colour to match the ROG theme.

user posted image user posted image

This post has been edited by infernoaswen: Dec 31 2013, 01:45 AM
TSinfernoaswen
post Apr 5 2013, 07:49 PM

(╯°□°)╯︵ ┻━┻)
*******
Senior Member
3,782 posts

Joined: Aug 2010
From: subang jaya


Just experimenting with how much dye I need.

user posted image user posted image

user posted image user posted image

I only added 1 drop red & 1 drop blue but the liquid turned straight away to dark purple. This means the red ratio must be more than blue.

user posted image

Sadly I was too confident & added lots of red & 1-3 drops of blue straight away into the loop. It straight away turned to purple. Now I got to drain the whole liquid & flush it with distilled water & get the ratio right. Learned my lesson lol, then I mixed the dye in a seprate 1.5 bottle first & started filling the loop from the bottle.

user posted image user posted image

I got the colour that I need, the ratio I used was around 20drops of red & half a drop of blue. I drop the blue into a small glass of distilled water & slowly fill the water into the 20drops of red water. Used around half a glass so approximately only half a drop of blue is required. Upper part red looks fantastic but the luminous panel kinda make the red looks yellow/orange at the bottom part.

user posted image user posted image

This post has been edited by infernoaswen: Dec 31 2013, 01:49 AM
andydutz
post Apr 5 2013, 10:54 PM

Getting Started
**
Junior Member
126 posts

Joined: Feb 2012
From: Kota Kinabalu


I sense bitspower d5 mod kit coming. Lol
TSinfernoaswen
post Apr 6 2013, 01:58 AM

(╯°□°)╯︵ ┻━┻)
*******
Senior Member
3,782 posts

Joined: Aug 2010
From: subang jaya


QUOTE(andydutz @ Apr 5 2013, 10:54 PM)
I sense bitspower d5 mod kit coming. Lol
*
Not so sure yet, hoping to hide the pump so there wont be any purpose for that kit, will see how it goes with progress biggrin.gif

****************************************************************************************************************

Special request for devilish_yin :

user posted image user posted image

user posted image user posted image

user posted image user posted image

user posted image

This post has been edited by infernoaswen: Dec 31 2013, 01:49 AM
TSinfernoaswen
post Apr 6 2013, 01:59 AM

(╯°□°)╯︵ ┻━┻)
*******
Senior Member
3,782 posts

Joined: Aug 2010
From: subang jaya


user posted image user posted image

user posted image user posted image

user posted image


My noob paint skills:
» Click to show Spoiler - click again to hide... «


This post has been edited by infernoaswen: Dec 31 2013, 01:50 AM
unequalteck
post Apr 6 2013, 12:20 PM

Custom member title
*******
Senior Member
2,690 posts

Joined: Dec 2008
From: Kota Kinabalu Current: Wangsa Maju


start work start work!
devilish_yin
post Apr 6 2013, 01:18 PM

On my way
****
Senior Member
543 posts

Joined: Jan 2009
From: Kuantan/Melaka


nice thanks biggrin.gif

TSinfernoaswen
post Apr 8 2013, 09:45 PM

(╯°□°)╯︵ ┻━┻)
*******
Senior Member
3,782 posts

Joined: Aug 2010
From: subang jaya


Ignore the cable mess, I am playing around with leds. Apperantly the 3mm & 5mm leds I bought was wrong, they are not giving constant light. The led is have the "pulse effect" blinks & dims, blinks & dims etc. This may be nice for some people but I dont really like it so I got to find the correct ones now haha.

user posted image user posted image

user posted image

So do you like my reservoir? I hope the tiny bubble stays hahaha it gives a really nice effect to it, but unfortunately there are few scratches on the res. Oh well, people are not going to stare at it too long anyways right? tongue.gif

user posted image user posted image

user posted image user posted image

user posted image

This post has been edited by infernoaswen: Dec 31 2013, 01:50 AM
TSinfernoaswen
post Apr 8 2013, 09:46 PM

(╯°□°)╯︵ ┻━┻)
*******
Senior Member
3,782 posts

Joined: Aug 2010
From: subang jaya


I did some red touch up today, just to highlight more red colour in my build since its pretty dark atm. Sanding the pci bracket is a pain in the ass I tell you, wished I had some paint stripper lol.

user posted image user posted image

user posted image

Here is the optical bay cover. Its a temporary cover I think. I haven't decide yet should I make a big ass ROG logo at here or just mount ssd over here. Oh & yeah, I painted some screws hehe, looks nice isn't it...

user posted image

Initially I was thinking to make a luminous panel to display the ROG logo in white + red like how kier did with his build, but then I am thinking if I were to get SSD then where should I mount it. You know you gotta "show off" if you are using SSD right. So I am still deciding. Sorry for this blurry picture, lazy to adjust the camera ISO haha

user posted image

Also kustom pcs is out of lamptron CW611. Noooooo!! Gotta wait for them to restock D:<

This post has been edited by infernoaswen: Dec 31 2013, 01:51 AM
TSinfernoaswen
post Apr 8 2013, 09:47 PM

(╯°□°)╯︵ ┻━┻)
*******
Senior Member
3,782 posts

Joined: Aug 2010
From: subang jaya


edited

This post has been edited by infernoaswen: Dec 31 2013, 01:52 AM
nurazwanzainor
post Apr 9 2013, 01:07 PM

Getting Started
**
Junior Member
290 posts

Joined: Jul 2012
From: Sarawak Tanah Tumpah Darahku


QUOTE(infernoaswen @ Apr 5 2013, 07:49 PM)


Finally got my nzxt hue led strip replacement, previous strip came with problems...had to RMA it. Still waiting for my top panel though lol
*
where u get those rgb hue bro?..... rclxms.gif
TSinfernoaswen
post Apr 9 2013, 01:18 PM

(╯°□°)╯︵ ┻━┻)
*******
Senior Member
3,782 posts

Joined: Aug 2010
From: subang jaya


QUOTE(nurazwanzainor @ Apr 9 2013, 01:07 PM)
where u get those rgb hue bro?..... rclxms.gif
*
cyntrixtech
codenamew
post Apr 12 2013, 09:22 PM

On my way
****
Senior Member
601 posts

Joined: Oct 2008
From: Penang


Wow bro, looking at ur worklog makes me can't wait to build my wc rig. But unlike urs, mine is more to beginner. Glad to see ur worklog as it helps me in building my wc rig.
TSinfernoaswen
post Apr 12 2013, 09:41 PM

(╯°□°)╯︵ ┻━┻)
*******
Senior Member
3,782 posts

Joined: Aug 2010
From: subang jaya


QUOTE(codenamew @ Apr 12 2013, 09:22 PM)
Wow bro, looking at ur worklog makes me can't wait to build my wc rig. But unlike urs, mine is more to beginner. Glad to see ur worklog as it helps me in building my wc rig.
*
lol mine also beginner...first time watercooling my rig also but I went all crazy, been spending money like there is no tomorrow... right now insufficient funds after ordering few corsair sp120 fans, waiting for next month hahaha, then only can add gpu waterblock & some extra fittings...

glad my worklog can help you out...there are few great worklogs around this forum too..try checking them out biggrin.gif
[Krauser]
post Apr 14 2013, 10:16 PM

Getting Started
**
Junior Member
119 posts

Joined: Feb 2010
From: Bukit Tinggi - Klang щ(ಠ益ಠщ)
» Click to show Spoiler - click again to hide... «


bro go find other crimper this crimper not human/moder use one lo..
see how it damage ur pin? sumore the pin not even bite ur awg cable
TSinfernoaswen
post Apr 14 2013, 11:04 PM

(╯°□°)╯︵ ┻━┻)
*******
Senior Member
3,782 posts

Joined: Aug 2010
From: subang jaya


QUOTE(Krauser @ Apr 14 2013, 10:16 PM)
» Click to show Spoiler - click again to hide... «


bro go find other crimper this crimper not human/moder  use one lo..
see how it damage ur pin? sumore the pin not even bite ur awg cable
*
yup, will be getting my tools maybe this week. I thought maybe can use my dad tools and save cost but I was wrong...china tools can throw in the dustbin laugh.gif

Will see if the new tool can crimp properly or not otherwise will be getting some 18awg pins. Also will be getting my acrylic panels this week. Then I can start playing around with leds smile.gif
supernothing
post Apr 15 2013, 12:40 AM

super ☆
******
Senior Member
1,343 posts

Joined: Jun 2006
From: Wangsa Maju/TTDI/Ampang


that crimping tool is trash. you need to invest on a better crimp tool. crimping 16awg contactor to 18awg wire is do-able, i do it all the time. just need to make a few adjustment. need lots of patience, trial and error. good luck.
[Krauser]
post Apr 15 2013, 12:48 AM

Getting Started
**
Junior Member
119 posts

Joined: Feb 2010
From: Bukit Tinggi - Klang щ(ಠ益ಠщ)
but not all china tools brand not good,
u get what u pay biggrin.gif
anyway bro if u wan to buy a crimping tool i suggest this

» Click to show Spoiler - click again to hide... «


TSinfernoaswen
post Apr 15 2013, 11:12 AM

(╯°□°)╯︵ ┻━┻)
*******
Senior Member
3,782 posts

Joined: Aug 2010
From: subang jaya


QUOTE(supernothing @ Apr 15 2013, 12:40 AM)
that crimping tool is trash. you need to invest on a better crimp tool. crimping 16awg contactor to 18awg wire is do-able, i do it all the time. just need to make a few adjustment. need lots of patience, trial and error. good luck.
*
I see, ok thanks for the feedback...will get my new tool soon & play around with it biggrin.gif

QUOTE(Krauser @ Apr 15 2013, 12:48 AM)
but not all china tools brand not good,
u get what u pay biggrin.gif
anyway bro if u wan to buy a crimping tool i suggest this

» Click to show Spoiler - click again to hide... «

*
Thanks, will keep an eye out on that tool. It doesn't crush the pin wings on the insulator?
azilazwa
post Apr 15 2013, 11:32 AM

Enthusiast
*****
Senior Member
838 posts

Joined: May 2008
From: Setiu, Terengganu
» Click to show Spoiler - click again to hide... «


I havent flush my rad and res/pump yet. is there any specific type of vinegar to use for this process, or any normal (cooking type) vinegar can be use? Btw, ur project is going great! Cant wait to see ur wc loop working when it is complete.
supernothing
post Apr 15 2013, 12:25 PM

super ☆
******
Senior Member
1,343 posts

Joined: Jun 2006
From: Wangsa Maju/TTDI/Ampang


that big roll of led strip. boleh share sikit?
TSinfernoaswen
post Apr 15 2013, 03:04 PM

(╯°□°)╯︵ ┻━┻)
*******
Senior Member
3,782 posts

Joined: Aug 2010
From: subang jaya


QUOTE(azilazwa @ Apr 15 2013, 11:32 AM)
» Click to show Spoiler - click again to hide... «


I havent flush my rad and res/pump yet. is there any specific type of vinegar to use for this process, or any normal (cooking type) vinegar can be use? Btw, ur project is going great! Cant wait to see ur wc loop working when it is complete.
*
Not sure if can use ordinary vinegar or not, maybe can but based on what I read online...people recommend to use distilled white vinegar & my mum had that....so.... brows.gif

QUOTE(supernothing @ Apr 15 2013, 12:25 PM)
that big roll of led strip. boleh share sikit?
*
laugh.gif I am not sure how much I need, will need to see how much left after rig is done. I plan to put some strip as underlight also & maybe some at my desk biggrin.gif

Will see how things goes first icon_rolleyes.gif
qwe13
post Apr 15 2013, 04:52 PM

Enthusiast
*****
Senior Member
785 posts

Joined: Jun 2012
Distilled white vinegar eah... hmm.gif
does it smell like the usual vinegar..smells like %^#%^@ rclxub.gif
usop8290
post Apr 15 2013, 05:21 PM

Enthusiast
*****
Senior Member
998 posts

Joined: May 2009
From: Bangi & Kuala Terengganu


QUOTE(infernoaswen @ Apr 15 2013, 11:12 AM)
I see, ok thanks for the feedback...will get my new tool soon & play around with it biggrin.gif
Thanks, will keep an eye out on that tool. It doesn't crush the pin wings on the insulator?
*
go grab them at jalan pasar..bought mine @RM105..but make sure you bought the right one..got lots of similar looking tool but for different applications..or just bring along your pin and ask the shop for the right tool and test it on the spot tongue.gif
TSinfernoaswen
post Apr 15 2013, 05:44 PM

(╯°□°)╯︵ ┻━┻)
*******
Senior Member
3,782 posts

Joined: Aug 2010
From: subang jaya


QUOTE(qwe13 @ Apr 15 2013, 04:52 PM)
Distilled white vinegar eah... hmm.gif
does it smell like the usual vinegar..smells like %^#%^@  rclxub.gif
*
I dont have normal vinegar to compare to so I am not sure but for sure distilled white still smells like $%^&....need to flush few times to remove the smell laugh.gif

QUOTE(usop8290 @ Apr 15 2013, 05:21 PM)
go grab them at jalan pasar..bought mine @RM105..but make sure you bought the right one..got lots of similar looking tool but for different applications..or just bring along your pin and ask the shop for the right tool and test it on the spot  tongue.gif
*
I see, thanks for sharing...will head over there when I am free... nod.gif
TSinfernoaswen
post Apr 20 2013, 11:38 PM

(╯°□°)╯︵ ┻━┻)
*******
Senior Member
3,782 posts

Joined: Aug 2010
From: subang jaya


Didnt had any progress last week because my father accident 2weeks ago so I was staying up night in the hospital. Another bad news is that the rig is partially done, so I been playing games on it. Finished far cry 3 on it but today when I was listening songs the display suddently just went off. Now there isnt any display from the graphic card. I think my graphic card died so will need to test it & most likely send to RMA. This is farked up laugh.gif

I am almost done with it, just left to install the remaining fans & make custom cables but shit happens. I was hoping to finish this build by end of this month but...

Anyways thanks to HoNeYdEwBoY for the rams wub.gif 
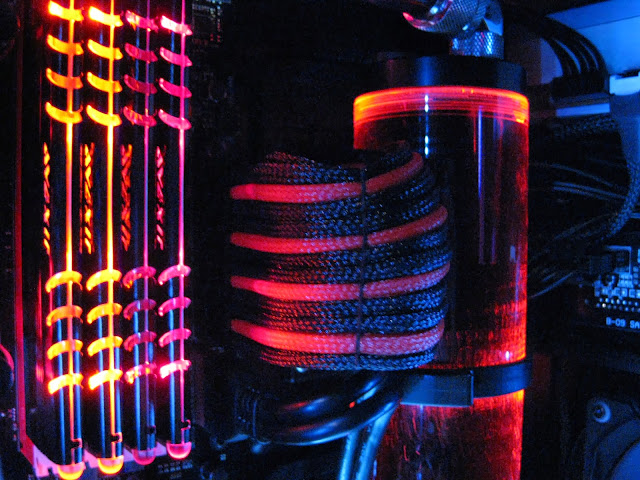
I didnt know the ram led has a pulse effect. I thought it was just a normal constant led (didnt read reviews laugh.gif ). Remember previously I had 3mm led for the raystorm & I didnt like the blinking effect, but since the ram has a nice pulse effect to it, I think maybe adding that blinking led to raystorm might match. Will test it & see how it goes smile.gif

user posted image user posted image

So I started adding fans on top & the standard 3cm radiator screws doesnt fit so I had to custom make my own screws that is slightly longer.

user posted image user posted image

Started sleeving the fans too. Yes I am a perfectionist I guess, even fan cables I will sleeve even though its already black. Usually small touches like this can make a difference in a build.

user posted image user posted image

Its my first time creating custom cables so I had to experiment on which technique works best with which tools. I spent like around 1hour with 25pins for trial & error & finally manage to get the perfect technique that works best for me.

user posted image

This post has been edited by infernoaswen: Dec 31 2013, 01:53 AM
TSinfernoaswen
post Apr 26 2013, 12:18 AM

(╯°□°)╯︵ ┻━┻)
*******
Senior Member
3,782 posts

Joined: Aug 2010
From: subang jaya


Because of that I would like to create a short tutorial for you guys laugh.gif I said before I wanted to share my cable sleeving technique but I guess I'll pass that since you guys can watch lutr0 videos. His guide is probably the best out there & when I first started I followed his guide as well.

So basically to make custom cables you will need 3 important tools. First is a regular all in 1 tool for wires that you can buy from hardware shops. This is a must have tool, I use this to cut my wires, cut my M4 screws to custom sizes, strip the 18awg cables & even cable crimping. The second tool is used to entertain yourself during this long process tongue.gif Its an e-cig. The 3rd tool is obviously crimping ratchet. I am using a decent crimping ratchet which is why additional steps are required to get the perfect crimp. Maybe if you get those expensive ratchet life will be easier, I dont know because no way in hell I am going to spend more than RM100 to get a crimping ratchet, mine cost less than RM50. Btw I am selling the same ratchet (will revise the price later in my thread).

user posted image

First step is to strip the insulator.

user posted image

user posted image

You will need to estimate yourself, so there will be some trial & error involved.

user posted image

Because it can't be too long or if its too short then you wont be able to get a good crimp grip.

user posted image

Next is to placed that wire into this pin, but the pin wings are straight & I find it hard to crimp them because they will be shaking & the pin can easily fall off. So what I do is I bend the wings first to a curve shape & then only insert the wire, this will reduce the amount of movement & chances of the pin falling down is reduced.

user posted image

Just remember to place it properly in the ratchet or you will destroy your pin.

user posted image

user posted image

Do ignore my beautiful fingernails ya tongue.gif

user posted image

See, now its easier to place the wire into the pin. The way I estimate how much insulator to cut is the amount of copper wire should be sufficient that its able to enter in the "pin square house". Just barely, like a tiny mm only because you dont want too much in there or you will have a hard time connecting the male pins into it later.

user posted image

This post has been edited by infernoaswen: Dec 31 2013, 01:54 AM
TSinfernoaswen
post May 21 2013, 04:04 PM

(╯°□°)╯︵ ┻━┻)
*******
Senior Member
3,782 posts

Joined: Aug 2010
From: subang jaya


Anyway once you done placing the wire, carefully put the pin & wire into the ratchet & crimp it fully.

user posted image

This may look a good crimp to you, but its not. Because if you pull the pin from the wire, with sufficient force the pin will come out. No mater how hard you crimp it with the crimper, the grip is just not too strong.

user posted image

This is where the other tool will come in handy. As you can see, the crimping curve is much sharper, so I just need to crimp the pins again to give that "extra grip". You will know how much pressure to apply with trial & error. Too much & your pin will break, too little & the gripping strength wont be strong enough.

user posted image

Once that is done, I can pull the wire from the pins as hard as I want & it wont come out. Of course if you pull really hard it will come out though but it should be sufficient la for our usage.

This post has been edited by infernoaswen: Dec 31 2013, 01:55 AM
TSinfernoaswen
post May 31 2013, 10:06 PM

(╯°□°)╯︵ ┻━┻)
*******
Senior Member
3,782 posts

Joined: Aug 2010
From: subang jaya


Installed the corsair fans. I am thinking of replacing the corsair sticker to something else. Maybe rog logo stickers instead? Hmmm

user posted image

I have no issue with the clearance at the ram or cpu heatsink for corsair fans in push pull config but I will be having problems at the 8pin cable for the cpu.

user posted image

Not sure how I am going to put the fans over here, maybe I will need to modify the corsair fans, might need to cut the shroud with a dremel I guess.

user posted image

Shit ton of connectors for custom cables.

user posted image user posted image

I went with heatshrinkless style smile.gif

user posted image

My custom cable doesn't work directly from the psu due to different cable layout from the original psu cable layout. So I had to rearrange the cables back to the original layout. I was hoping the 24pin cable didnt need to follow original layout but apparently not. I think gpu cables & 8pin cables the layout doesn't matter as long as the wire colours are right. Will see how things goes.

user posted image user posted image

Double wire! We meet again...muahahaha

user posted image user posted image

This post has been edited by infernoaswen: Dec 31 2013, 01:56 AM
najmul
post Jun 1 2013, 11:02 PM

On my way
****
Senior Member
526 posts

Joined: Oct 2007


» Click to show Spoiler - click again to hide... «


looking at your pics make me want to buy a flow sensor drool.gif drool.gif btw, where you buy your acrylic panels?
TSinfernoaswen
post Jun 1 2013, 11:21 PM

(╯°□°)╯︵ ┻━┻)
*******
Senior Member
3,782 posts

Joined: Aug 2010
From: subang jaya


QUOTE(najmul @ Jun 1 2013, 11:02 PM)
» Click to show Spoiler - click again to hide... «


looking at your pics make me want to buy a flow sensor  drool.gif  drool.gif btw, where you buy your acrylic panels?
*
brows.gif but you will need something that will be able to read the flowsensor readings. I plan to get lamptron CW611 (when its available locally), that fan controller will be able to read my flows & also used it to control fan speeds biggrin.gif

Acrylic panel I got from a friend (his dad shop business got use acrylic panels), but if you want you can get from jalan landak (nearby jalan pasar). You can also order from nichlasteoh or shepred. They can cut to your requirements too biggrin.gif
TSinfernoaswen
post Jun 21 2013, 10:19 PM

(╯°□°)╯︵ ┻━┻)
*******
Senior Member
3,782 posts

Joined: Aug 2010
From: subang jaya


After rearranging the cables to original layout, it works. Readings all seems alright, 24pin custom cable success!

user posted image

Time for cable sewing smile.gif

user posted image

This gonna be a long process so bye bye, see you next month tongue.gif

user posted image

user posted image

user posted image

user posted image

24pin should be done by tomorrow, then will continue on 8pin & 2x 6pins laugh.gif So much work yet so little time. I have yet to diagnose the problem with my pc, I suspect need to RMA graphic card. Need to borrow my friend gpu to test rclxub.gif

This post has been edited by infernoaswen: Dec 31 2013, 01:57 AM
TSinfernoaswen
post Jun 23 2013, 01:06 AM

(╯°□°)╯︵ ┻━┻)
*******
Senior Member
3,782 posts

Joined: Aug 2010
From: subang jaya


Not much progress anyways since sunday I was pretty free & couldn't do anything because I am out of black sleeving. Should be arriving monday though smile.gif 24pin cable done! cpu 8pin & graphics card custom cables are done too, just need black sleeving for the cpu cables & my D5 pump.

user posted image

I couldn't stitch it all the way because of the layout of the wires. I just dont understand why psu manufacturer can't produce pin layout that is exactly the same as on the motherboard. I mean c'mon, if they can standardize pin layout on motherboard then why cant they do that for psu also? But then again I am not an electrical engineer so there must be a reason for it.

Not that bad anyways, this part will be under the psu cover so you will not even notice it. Also I learned that I need a thick long ruler & I will need to drill it to my table because to make extension cables I MUST get the wire measurement exactly the same for all the wires. Not even 0.5cm difference otherwise it will not turn out to be straight & nice in the end. So if I were to provide custom extension services to others, measurement is really important, but then again I am not sure if I have enough time to provide such service because its kinda time consuming to be honest. I think I will just sell the materials so you guys can buy from me & make it yourself smile.gif

user posted image user posted image

user posted image

I dont even need to do any cable management here...its that easy LOL

user posted image

Here is a comparison on mdpc sleeving colour with colortrail. Top is mdpc, bottom is colortrail. Btw don't get me wrong with my previous post. Colortrail is no doubt a good sleeving with decent quality, its just that I think there is room for improvement for it the be perfect. I am just sharing my experience on using both type of sleeving because it might help anyone who is deciding. Both requires a different technique of measuring the sleeving so you will need to figure that out.

Support local product hehe, not many country have their own local sleeving you know. In the end all depends on your budget. Btw I am going to try some china sleeving too, its way way cheaper than colortrail & mdpc haha. Its all about trying things out & getting experience. Those who are interested to get in bulk do shoot me a PM smile.gif

cc: HoNeYdEwBoY

user posted image

Here is the custom gpu cables.

user posted image user posted image

Notice the caps are still there? Yeah I pull it out from the original cable & soldered to this cable. Kinda time consuming but hey I don't go the nick crazymofo for no reason tongue.gif You can also argue I didn't need to stitch my 24pin all the way at the back since once the side panel are on I wouldn't even notice it, but then again don't forget I am crazy tongue.gif

user posted image

Anyways this part will be under the psu cover, so you wouldn't notice it anyways smile.gif

user posted image

This post has been edited by infernoaswen: Dec 31 2013, 02:08 AM
TSinfernoaswen
post Jun 23 2013, 01:10 AM

(╯°□°)╯︵ ┻━┻)
*******
Senior Member
3,782 posts

Joined: Aug 2010
From: subang jaya


Got some 22awg wires which I plan to make custom 3 pin cables. It turns out 22awg wire is kinda bigger so I might need to play around with it later if its suitable or not. Hopefully shouldn't be a problem because I saw lutro selling 22awg so I guess it could work.

user posted image user posted image

Because I only got gasket for 120mm sizes, I had to make my own gasket for the 140mm fan tongue.gif

user posted image user posted image

As usual, need to sleeving the fan cables...

user posted image user posted image

I got 11 corsair fans in here at the moment, that means I spent ~RM800 just for fans bwahahaha. Only if my mum knew about it...

user posted image user posted image

Oh & I am still waiting for Lamptron CW611, most likely by end of september it will arrive. No news on the GPU RMA yet, hopefully I can get it soon. Asus faster speed up the process...battlefield 4 is coming out soon sad.gif

user posted image

This post has been edited by infernoaswen: Dec 31 2013, 02:09 AM
pristine
post Jun 23 2013, 01:29 AM

junkie
*******
Senior Member
2,808 posts

Joined: Jan 2009
From: Subang Jaya


Good to know the saw worked for you.

Actually, even for metal it's a bit small. But it's the closest size to a fill port diameter and smaller is always better, can always file or sand off to get a perfect fit. thumbup.gif
TSinfernoaswen
post Jun 23 2013, 08:28 PM

(╯°□°)╯︵ ┻━┻)
*******
Senior Member
3,782 posts

Joined: Aug 2010
From: subang jaya


I had some minor problem with fitting the fan due to the cpu EPS cable. The cable was just slightly too thick. I could force the fan in there but there will be a slight flex to the motherboard & the connector so I didnt want to risk it. Decided to mod the corsair fan instead. Removed the rubbery material & cut of the lower plastic section

user posted image user posted image

Everything fits nicely now and I replaced the old tubing (not really old, just few weeks old). Now I am left with hooking up the leds to a 3pin connector & everything should be set. Just need to wait for gpu & fan controller.

user posted image user posted image

This post has been edited by infernoaswen: Dec 31 2013, 02:10 AM
Jinster
post Jun 23 2013, 11:04 PM

Saber <3 VioletEvergarden <3
*****
Senior Member
902 posts

Joined: Mar 2009


depending on ur side panel window~
but seems like if u just cover the top bays would look nicer..
at least can see the curves at the bottom
TSinfernoaswen
post Jun 23 2013, 11:28 PM

(╯°□°)╯︵ ┻━┻)
*******
Senior Member
3,782 posts

Joined: Aug 2010
From: subang jaya


QUOTE(Jinster @ Jun 23 2013, 11:04 PM)
depending on ur side panel window~
but seems like if u just cover the top bays would look nicer..
at least can see the curves at the bottom
*
yeap I am thinking the same thing too, at least the corsair fans will be visible which is sexy imo lol. I will try to make the top bay cover first..see how it goes. If doesn't look nice then I will make full cover haha.

Now need to figure out how to get the red & white led on the same panel to make the ROG logo glowing...plan to do something like the logo in this picture biggrin.gif

https://fbcdn-sphotos-g-a.akamaihd.net/hpho...396217666_o.jpg
doopie
post Jun 24 2013, 02:18 AM

Getting Started
**
Junior Member
84 posts

Joined: Mar 2011


QUOTE(infernoaswen @ Jun 23 2013, 11:28 PM)
yeap I am thinking the same thing too, at least the corsair fans will be visible which is sexy imo lol. I will try to make the top bay cover first..see how it goes. If doesn't look nice then I will make full cover haha.

Now need to figure out how to get the red & white led on the same panel to make the ROG logo glowing...plan to do something like the logo in this picture biggrin.gif

https://fbcdn-sphotos-g-a.akamaihd.net/hpho...396217666_o.jpg
*
the chick in the pic...she's got some nice ass-ets rclxms.gif
TSinfernoaswen
post Jun 24 2013, 02:25 AM

(╯°□°)╯︵ ┻━┻)
*******
Senior Member
3,782 posts

Joined: Aug 2010
From: subang jaya


QUOTE(doopie @ Jun 24 2013, 02:18 AM)
the chick in the pic...she's got some nice ass-ets  rclxms.gif
*
no doubt on that, half of the time I spent looking at her brows.gif

anyways I am scrapping the ROG logo idea. Its easy to make it but since my side panel cant really see the drive bay area there is no point of me making it lol. It wont be visible anyways once the side panel is on.

Those who are interested with making it, the concept is easy. You require 3 acrylic panels (or 2 also can). The main acrylic panel will be black colour, which you laser cut/CNC the ROG logo to it. Then you sandwich white + red acrylic panel at the back to create the ROG red + black logo. Thats pretty much it & just add a backlight to make it glow. icon_rolleyes.gif
najmul
post Jun 24 2013, 03:35 PM

On my way
****
Senior Member
526 posts

Joined: Oct 2007


» Click to show Spoiler - click again to hide... «


good to see the panels coming together bro, cant wait to see it finished. i really wanna do acrylic panels too but no budget cry.gif , how much would u say the cost to make the panels like yours?
TSinfernoaswen
post Jun 24 2013, 03:53 PM

(╯°□°)╯︵ ┻━┻)
*******
Senior Member
3,782 posts

Joined: Aug 2010
From: subang jaya


QUOTE(najmul @ Jun 24 2013, 03:35 PM)
» Click to show Spoiler - click again to hide... «


good to see the panels coming together bro, cant wait to see it finished. i really wanna do acrylic panels too but no budget  cry.gif  , how much would u say the cost to make the panels like yours?
*
Depends from where you get the acrylic panels. The material itself cost less than RM50, but you might require tools to make holes, cutting etc. If panel itself then not so expensive la...
TSinfernoaswen
post Jun 25 2013, 06:13 PM

(╯°□°)╯︵ ┻━┻)
*******
Senior Member
3,782 posts

Joined: Aug 2010
From: subang jaya


Not much of an update, been lazy during this week plus I am waiting for my 22awg cables & sp120 fans so nothing much to do atm for the build. Its pretty much almost completed, just a little touch up here & there is needed.

So I was testing which looks better on the sata cable, I guess heatshrinkless looks much nicer as expected.

user posted image

My switch 810 has an LED button for the leds at the back I/O. So I decided to hook up my luminous panel to this button so that I can use it to switch on the panel & off when is needed. I went straight to cutting the wires & hardwiring the luminous panel to it & it wasn't working. I didnt use a multimeter to test the voltage but I suspect the voltage is running around 3.3V which is the standard voltage for most leds. I thought since the front panel were powered up with a sata power cable, the voltages should be 12V but I was wrong. So I had to scrap that idea off, it would be great though if I could use this LED button sad.gif

user posted image

Turns out pretty nice smile.gif

user posted image

Bad news though, I had to drain the loop because as I mention earlier my GPU died so I sent it for RMA. Turns out the tubing is having some slight plasticizer issues. I think so, I haven't do a close up inspection to it but its most certainly not crystal clear. When the loop was filled, its not really noticeable but it is once I drained it. Kinda surprising though because I thought primochill advance lrt wouldn't have this issue or at least what I been hearing from others.

I am not exactly sure what the hell is going on, maybe because I mixed durelene + primochill? Or was it the biocide? Lots of factors are to be considered, so I will be doing some tubing testing tomorrow. Another excuse to update the plasticizer thread that I created haha, I been so lazy that I didn't bothered updating that thread anymore tongue.gif

user posted image

Anyways I am going to replace all this tubing with my left over primochill & flush the loop at least twice. Will see how it performs, if problems still exist then I am going with acrylic tubing. Also I am currently deciding should I replace my Maximus VI Hero to Maximus VI formula? Already drained the loop so I could also change the motherboard eh?

user posted image

So far I am almost done with the major cable management. Already sew and sleeve the EPS, 24pin, sata cables. I am left with molex, will get it done tomorrow smile.gif

user posted image

This post has been edited by infernoaswen: Dec 31 2013, 02:44 AM
TSinfernoaswen
post Jul 2 2013, 05:24 PM

(╯°□°)╯︵ ┻━┻)
*******
Senior Member
3,782 posts

Joined: Aug 2010
From: subang jaya


edited, admin please delete this post

This post has been edited by infernoaswen: Dec 31 2013, 02:45 AM
hirie
post Jul 2 2013, 08:00 PM

Getting Started
**
Junior Member
67 posts

Joined: Jul 2011
From: Tawau, Sabah


QUOTE
ok i cant wait for maximus vi formula anymore, I am gonna use hero on this build for now. Formula is taking too long to release, i cant wait for another 1 month for the board...rig needs to be completed ASAP! 


hahaha...me too..i dunno what take them so long to release it..eventho i wont buy it(but if got extra money why not) but i want it to be released soon..LOL mad.gif
TSinfernoaswen
post Jul 2 2013, 08:33 PM

(╯°□°)╯︵ ┻━┻)
*******
Senior Member
3,782 posts

Joined: Aug 2010
From: subang jaya


QUOTE(hirie @ Jul 2 2013, 08:00 PM)
hahaha...me too..i dunno what take them so long to release it..eventho i wont buy it(but if got extra money why not) but i want it to be released soon..LOL  mad.gif
*
yeah too slow, not gonna wait...maybe will sell the hero board & grab formula when its out. Provided I can sell at good price laugh.gif

formula will be released end of july, based on teamtechsquad info & also an ASUS rep from sweden. This means it will take another 1-2weeks it to arrive over here & seller to collect from distro. So I think it will be available mid august. Can't wait that long so just gonna use hero for the time being biggrin.gif

http://teamtechsquad.com/895/asus-clarifie...fb_source=pubv1
hirie
post Jul 2 2013, 08:44 PM

Getting Started
**
Junior Member
67 posts

Joined: Jul 2011
From: Tawau, Sabah


QUOTE(infernoaswen @ Jul 2 2013, 08:33 PM)
yeah too slow, not gonna wait...maybe will sell the hero board & grab formula when its out. Provided I can sell at good price laugh.gif

formula will be released end of july, based on teamtechsquad info & also an ASUS rep from sweden. This means it will take another 1-2weeks it to arrive over here & seller to collect from distro. So I think it will be available mid august. Can't wait that long so just gonna use hero for the time being biggrin.gif

http://teamtechsquad.com/895/asus-clarifie...fb_source=pubv1
*
nice to read..agreed with the 'evil' section..it also happend here thou..well, will be looking at ur 'hero' thread in the future then..hahaha thumbup.gif
doopie
post Jul 3 2013, 01:12 PM

Getting Started
**
Junior Member
84 posts

Joined: Mar 2011


buy hero while waiting for M4F and collect a bit more money..when it comes out sell Hero to purchase the m4F!!! come on poison!
TSinfernoaswen
post Jul 3 2013, 01:53 PM

(╯°□°)╯︵ ┻━┻)
*******
Senior Member
3,782 posts

Joined: Aug 2010
From: subang jaya


QUOTE(doopie @ Jul 3 2013, 01:12 PM)
buy hero while waiting for M4F and collect a bit more money..when it comes out sell Hero to purchase the m4F!!! come on poison!
*
M6F you mean? tongue.gif

yeah I know, but you can't denie m6f is sexy as hell...the thermal armor, vrm wb etc wub.gif wub.gif Not confirm la, once I fixed everything already sure dont really feel like changing wan coz you know need to remove the waterblock, drain the loop etc, so much work to do...depends la see how things goes tongue.gif hero should be arriving tomorrow though rclxm9.gif
najmul
post Jul 3 2013, 09:31 PM

On my way
****
Senior Member
526 posts

Joined: Oct 2007


» Click to show Spoiler - click again to hide... «


those panels looking good bro brows.gif btw, what do use to stick the acrylic together? what sort of chemical?
TSinfernoaswen
post Jul 3 2013, 09:32 PM

(╯°□°)╯︵ ┻━┻)
*******
Senior Member
3,782 posts

Joined: Aug 2010
From: subang jaya


QUOTE(najmul @ Jul 3 2013, 09:31 PM)
» Click to show Spoiler - click again to hide... «


those panels looking good bro  brows.gif  btw, what do use to stick the acrylic together? what sort of chemical?
*
no chemical, just eproxy at the panel edges...

edit: oh you mean I join the acrylic pieces? I use plastic glue (also known as acrylic glue), not as good as weld-on series but it does the job better than normal super glue...

This post has been edited by infernoaswen: Jul 3 2013, 09:33 PM
TSinfernoaswen
post Jul 6 2013, 02:16 AM

(╯°□°)╯︵ ┻━┻)
*******
Senior Member
3,782 posts

Joined: Aug 2010
From: subang jaya


edited, admin please delete this post

This post has been edited by infernoaswen: Dec 31 2013, 02:45 AM
TSinfernoaswen
post Jul 6 2013, 02:17 AM

(╯°□°)╯︵ ┻━┻)
*******
Senior Member
3,782 posts

Joined: Aug 2010
From: subang jaya


edited, admin please delete this post

This post has been edited by infernoaswen: Dec 31 2013, 02:45 AM
TSinfernoaswen
post Jul 9 2013, 12:35 AM

(╯°□°)╯︵ ┻━┻)
*******
Senior Member
3,782 posts

Joined: Aug 2010
From: subang jaya


edited, admin please delete this post

This post has been edited by infernoaswen: Dec 31 2013, 02:46 AM
TSinfernoaswen
post Jul 9 2013, 12:36 AM

(╯°□°)╯︵ ┻━┻)
*******
Senior Member
3,782 posts

Joined: Aug 2010
From: subang jaya


edited, admin please delete this post

This post has been edited by infernoaswen: Dec 31 2013, 02:47 AM
TSinfernoaswen
post Jul 9 2013, 12:37 AM

(╯°□°)╯︵ ┻━┻)
*******
Senior Member
3,782 posts

Joined: Aug 2010
From: subang jaya


edited, admin please delete this post

This post has been edited by infernoaswen: Dec 31 2013, 02:47 AM
TSinfernoaswen
post Jul 12 2013, 12:09 AM

(╯°□°)╯︵ ┻━┻)
*******
Senior Member
3,782 posts

Joined: Aug 2010
From: subang jaya


edited, admin please delete this post

This post has been edited by infernoaswen: Dec 31 2013, 02:48 AM
irienaoki
post Jul 12 2013, 12:19 AM

Janitor
*******
Senior Member
3,428 posts

Joined: May 2008
From: Toilet


more more
TSinfernoaswen
post Jul 12 2013, 12:46 AM

(╯°□°)╯︵ ┻━┻)
*******
Senior Member
3,782 posts

Joined: Aug 2010
From: subang jaya


QUOTE(irienaoki @ Jul 12 2013, 12:19 AM)
more more
*
Ordered pins & connectors, need to wait for it to arrive to continue modding. Nothing else left to mod, just need to make custom cables, sleeving & install fans. Will be ready for BF4! laugh.gif
najmul
post Jul 12 2013, 01:54 AM

On my way
****
Senior Member
526 posts

Joined: Oct 2007


so far so good bro, really admire your mod biggrin.gif especially the luminate panel drool.gif what kind of colors u plan on using for sleeving? mixed colors or just red maybe?
TSinfernoaswen
post Jul 12 2013, 02:14 AM

(╯°□°)╯︵ ┻━┻)
*******
Senior Member
3,782 posts

Joined: Aug 2010
From: subang jaya


QUOTE(najmul @ Jul 12 2013, 01:54 AM)
so far so good bro, really admire your mod biggrin.gif especially the luminate panel  drool.gif  what kind of colors u plan on using for sleeving? mixed colors or just red maybe?
*
lol, luminous panel is murdermod idea. I just copy it & also with info from irienaoki on how he did his before & some slight modification on the specification to make it as thin as possible smile.gif After they created that, everyone also started making their own luminous panel since it looks really nice haha.

Here is some info for those who plan to do what I did. http://www.overclock.net/t/1187138/banthra...-panel-analysis

Sleeving will be red + black MDPC sleevings smile.gif

This post has been edited by infernoaswen: Jul 12 2013, 02:16 AM
TSinfernoaswen
post Jul 24 2013, 03:36 AM

(╯°□°)╯︵ ┻━┻)
*******
Senior Member
3,782 posts

Joined: Aug 2010
From: subang jaya


edited, admin please delete this post

This post has been edited by infernoaswen: Dec 31 2013, 02:44 AM
TSinfernoaswen
post Jul 24 2013, 04:06 AM

(╯°□°)╯︵ ┻━┻)
*******
Senior Member
3,782 posts

Joined: Aug 2010
From: subang jaya


edited

This post has been edited by infernoaswen: Dec 31 2013, 02:40 AM
TSinfernoaswen
post Jul 24 2013, 04:07 AM

(╯°□°)╯︵ ┻━┻)
*******
Senior Member
3,782 posts

Joined: Aug 2010
From: subang jaya


Adding stickers!

user posted image user posted image

user posted image user posted image

Sticker didnt turn out to be that good, I mean its kinda small as you can see. Not giving a very nice look but I think its still better than the corsair stickers. Since this is an ROG theme build, no choice but to go for it unless I custom make my own stickers.

user posted image

I drained the purple coolant & refill with red. So far its been good, just that it turned darker red than when I filled. I am guessing the left over purple stains in the rad mixed with the red dye? Maybe I need to do a second round of refilling. Either that or there is some stubborn air pockets in the radiator which is causing the radiator to oxidize & when the coolant touches that oxidized part it turns darker colour. I saw mayhems recent post regarding radiator oxidation & how it affects the pastel coolant, not sure if it applies to the distilled water with dyes but its possible I guess.

user posted image

Got some stickers for the ssd mod & touch up but turns out SSD mod will need to be canceled.

user posted image

Bad news, the nand chips is not on the upper part, but upside down instead. If I were to cut a hole & put acrylic, can only see the green pcb! This is ugly! Unless I change SSD, ssd moding is a no go. I could cut it at the bottom part but then if I put acrylic I wont be able to screw the pcb in I guess since clearance is too small & I prefer it to be secured so no choice but to cancel this mod. Oh well, 1 ssd is warranty is voided sad.gif

user posted image

This is what I wanted to do if you dont get it:


This post has been edited by infernoaswen: Dec 31 2013, 02:29 AM
usop8290
post Jul 24 2013, 03:53 PM

Enthusiast
*****
Senior Member
998 posts

Joined: May 2009
From: Bangi & Kuala Terengganu


congrats..featured on nzxt fb page summore rclxms.gif
TSinfernoaswen
post Jul 26 2013, 09:43 PM

(╯°□°)╯︵ ┻━┻)
*******
Senior Member
3,782 posts

Joined: Aug 2010
From: subang jaya


QUOTE(usop8290 @ Jul 24 2013, 03:53 PM)
congrats..featured on nzxt fb page summore  rclxms.gif
*
Thanks bro, I have no idea nzxt was following up with my build LOL.

This post has been edited by infernoaswen: Dec 31 2013, 01:56 AM
TSinfernoaswen
post Jul 26 2013, 09:44 PM

(╯°□°)╯︵ ┻━┻)
*******
Senior Member
3,782 posts

Joined: Aug 2010
From: subang jaya


edited

This post has been edited by infernoaswen: Dec 31 2013, 02:39 AM
najmul
post Jul 27 2013, 02:39 AM

On my way
****
Senior Member
526 posts

Joined: Oct 2007


» Click to show Spoiler - click again to hide... «


cable sewing drool.gif drool.gif drool.gif nice bro! this build gonna look more cleaner, and that heat shrinkless sleeving looks nice, was it easy to do with mdpc sleeves? i tried using colortrail, but it was damn hard i just gave up
TSinfernoaswen
post Jul 27 2013, 04:11 AM

(╯°□°)╯︵ ┻━┻)
*******
Senior Member
3,782 posts

Joined: Aug 2010
From: subang jaya


QUOTE(najmul @ Jul 27 2013, 02:39 AM)
» Click to show Spoiler - click again to hide... «


cable sewing  drool.gif  drool.gif  drool.gif  nice bro! this build gonna look more cleaner, and that heat shrinkless sleeving looks nice, was it easy to do with mdpc sleeves? i tried using colortrail, but it was damn hard i just gave up
*
Just done the 2nd stitch, was doing the 2nd stitch but the thread broke so had to redo it laugh.gif

What is hard? Making heatshrinkless sleeving with colortrail? My 24pin actually is a mixture of mdpc & colortrail (only for black colour). The only difference I find is colortrail sleeving diameter seems to be slightly smaller & while mdpc is a little bigger. So if you stretch it, mdpc can actually stretch more than colortrail. So its much easier to put sleeving on cables for mdpc compare to colortrail (bear in mind my colortrail sleeving was last year batch, maybe now its improved idk).

Another good thing about mdpc is the heatshrink. Its way way better than colortrail, its much bigger in diameter seems to compress better when heated. So its much easier to put the heatshrink on sleevings with mdpc, if colortrail everytime I need to put the heatshrink I need to use needle piler to stretch it. Again my colortrail sleeving is very old batch, maybe the newer batch is better idk but just bought 2 more packet of colortrail because I am running out of sleevings & mdpc is costly. Thats the only difference I can spot, colour wise they are both the same.

For heatshrinkless sleeving, there is no difference if you use mdpc or colortrail. Both works fine, its all about the technique you use. Once you mastered the technique its easy laugh.gif I follow lutro0 guide, his guide is basically the best out there PERIOD. Although his videos are long but its very informative believe it or not. Practice makes perfect, just like how I "wasted" around 20pins to master crimping to make custom wires. Now that I got my technique right, crimping wires are quite easy & I haven't have any wires that came out of the crimp so far even when I had to rearrange the 24pin cable layout to the original layout from the psu manufacturer.


This post has been edited by infernoaswen: Dec 31 2013, 01:58 AM
najmul
post Jul 27 2013, 04:27 AM

On my way
****
Senior Member
526 posts

Joined: Oct 2007


» Click to show Spoiler - click again to hide... «


i think its because of my noobness i cant seem to do it properly tongue.gif the heatshrink was a problem for me, too small imo. i think i may need a few practices before i can master the technique. if i could get it to look like yours i would be very happy smile.gif so clean, especially after that sewing, looks so damn perfect, cant wait to see it in your rig
TSinfernoaswen
post Jul 27 2013, 04:34 AM

(╯°□°)╯︵ ┻━┻)
*******
Senior Member
3,782 posts

Joined: Aug 2010
From: subang jaya


QUOTE(najmul @ Jul 27 2013, 04:27 AM)
» Click to show Spoiler - click again to hide... «


i think its because of my noobness i cant seem to do it properly tongue.gif the heatshrink was a problem for me, too small imo. i think i may need a few practices before i can master the technique. if i could get it to look like yours i would be very happy smile.gif so clean, especially after that sewing, looks so damn perfect, cant wait to see it in your rig
*
I see, yeah thats what annoys me about colortrail sleeving. Their heatshrink is too small, always need to use needle pliers to make it bigger, kinda wasting time. Mdpc sleeving heatshrink are bigger in size but then I am a cheapskate, so no choice la tongue.gif

Try to watch lutro0 video on sleeving then follow it. Should be easy to follow smile.gif You will be able to do your heatshrinkless sleeving in no time...
TSinfernoaswen
post Jul 29 2013, 03:30 AM

(╯°□°)╯︵ ┻━┻)
*******
Senior Member
3,782 posts

Joined: Aug 2010
From: subang jaya


edited

This post has been edited by infernoaswen: Dec 31 2013, 02:38 AM
TSinfernoaswen
post Jul 29 2013, 03:31 AM

(╯°□°)╯︵ ┻━┻)
*******
Senior Member
3,782 posts

Joined: Aug 2010
From: subang jaya


edited

This post has been edited by infernoaswen: Dec 31 2013, 02:39 AM
TSinfernoaswen
post Aug 10 2013, 05:18 AM

(╯°□°)╯︵ ┻━┻)
*******
Senior Member
3,782 posts

Joined: Aug 2010
From: subang jaya


edited

This post has been edited by infernoaswen: Dec 31 2013, 02:39 AM
oxJustMexo
post Aug 29 2013, 11:15 AM

Getting Started
**
Junior Member
155 posts

Joined: Jul 2013


Just wondering the sata cable one u did the sleeve ? Cannot buy the custom one ?
TSinfernoaswen
post Aug 29 2013, 06:20 PM

(╯°□°)╯︵ ┻━┻)
*******
Senior Member
3,782 posts

Joined: Aug 2010
From: subang jaya


QUOTE(oxJustMexo @ Aug 29 2013, 11:15 AM)
Just wondering the sata cable one u did the sleeve ? Cannot buy the custom one ?
*
the sata power cable or data cable?

Why buy when I can sleeve it myself & save money tongue.gif
oxJustMexo
post Aug 29 2013, 07:46 PM

Getting Started
**
Junior Member
155 posts

Joined: Jul 2013


the data cable one....
>.< sleeve for me can arr tongue.gif

TSinfernoaswen
post Aug 29 2013, 07:57 PM

(╯°□°)╯︵ ┻━┻)
*******
Senior Member
3,782 posts

Joined: Aug 2010
From: subang jaya


QUOTE(oxJustMexo @ Aug 29 2013, 07:46 PM)
the data cable one....
>.< sleeve for me can arr tongue.gif
*
oh, yeah its cheaper since I got the cables already which came with the motherboard.

I dont think I have enough sleeving left, bought 1 meter only for mine lol.
oxJustMexo
post Aug 29 2013, 08:03 PM

Getting Started
**
Junior Member
155 posts

Joined: Jul 2013


haha if the sata data cable one can make it shorter arr ? i mean i just wanna short one..
TSinfernoaswen
post Aug 29 2013, 08:21 PM

(╯°□°)╯︵ ┻━┻)
*******
Senior Member
3,782 posts

Joined: Aug 2010
From: subang jaya


QUOTE(oxJustMexo @ Aug 29 2013, 08:03 PM)
haha if the sata data cable one can make it shorter arr ? i mean i just wanna short one..
*
Nope, I dont think you can cut the cable & make it short.
pristine
post Aug 29 2013, 08:25 PM

junkie
*******
Senior Member
2,808 posts

Joined: Jan 2009
From: Subang Jaya


QUOTE(infernoaswen @ Aug 29 2013, 08:21 PM)
Nope, I dont think you can cut the cable & make it short.
*
Definitely not. lol. You need a short SATA data cable to begin with.
oxJustMexo
post Aug 29 2013, 09:12 PM

Getting Started
**
Junior Member
155 posts

Joined: Jul 2013


owh k k like that one ha

TSinfernoaswen
post Aug 30 2013, 04:41 PM

(╯°□°)╯︵ ┻━┻)
*******
Senior Member
3,782 posts

Joined: Aug 2010
From: subang jaya


edited

This post has been edited by infernoaswen: Dec 31 2013, 02:37 AM
TSinfernoaswen
post Aug 30 2013, 04:41 PM

(╯°□°)╯︵ ┻━┻)
*******
Senior Member
3,782 posts

Joined: Aug 2010
From: subang jaya


edited

This post has been edited by infernoaswen: Dec 31 2013, 02:38 AM
pristine
post Aug 30 2013, 05:03 PM

junkie
*******
Senior Member
2,808 posts

Joined: Jan 2009
From: Subang Jaya


11 fans for about 800 is not too bad ok. Try about 3xx for 3 fans. laugh.gif moneyflies.gif
TSinfernoaswen
post Aug 30 2013, 05:14 PM

(╯°□°)╯︵ ┻━┻)
*******
Senior Member
3,782 posts

Joined: Aug 2010
From: subang jaya


QUOTE(pristine @ Aug 30 2013, 05:03 PM)
11 fans for about 800 is not too bad ok. Try about 3xx for 3 fans. laugh.gif moneyflies.gif
*
its still expensive m'kay tongue.gif
pristine
post Aug 30 2013, 05:15 PM

junkie
*******
Senior Member
2,808 posts

Joined: Jan 2009
From: Subang Jaya


QUOTE(infernoaswen @ Aug 30 2013, 05:14 PM)
its still expensive m'kay tongue.gif
*
Hahaha. Yes. Definitely. By worth it thumbup.gif
TSinfernoaswen
post Sep 22 2013, 12:45 AM

(╯°□°)╯︵ ┻━┻)
*******
Senior Member
3,782 posts

Joined: Aug 2010
From: subang jaya


Did some wiring on the fan cables & seems like 22awg wire is just nice for crimping. Will be restocking 24awg wires as well soon because for making fan spliter, 22awg is a little too thick. The most is you can cramp two wires into 1 pin therefore if you plan to split single 3pin to 3x3pin that might not be possible.

user posted image

Had some idea with red leds, credit goes to keir though since I saw him doing it for his mod & decided to copy it to mine hahaha laugh.gif iirc he used acrylic to give the nice underglow effect but I am not that OCD & this is my own personal build so decided to go with plain led.

user posted image user posted image

solder the wires to the led as usual

user posted image user posted image

user posted image user posted image

It gives a nice red underglow effect eh? Pretty sweet, although using acrylic would be better but lazy la. Need to make custom acrylic, glue it, measure, fit it etc...

user posted image user posted image

It even lit up the rog red line section & nope I didnt power up the board yet biggrin.gif
user posted image

This post has been edited by infernoaswen: Dec 31 2013, 02:36 AM
TSinfernoaswen
post Sep 22 2013, 12:59 AM

(╯°□°)╯︵ ┻━┻)
*******
Senior Member
3,782 posts

Joined: Aug 2010
From: subang jaya


Just a few shots on the current progress. My gpu is back from RMA already, will be getting some thermal pads on monday from HoNeYdEwBoY & my loop should be up by night smile.gif All I need now is lamptron cw611 & the build will be done I guess, just some minor touch up here & there like the fan sticker etc. Hopefully will be ready before 4th October & I am sure you all know whats on 4th october right? tongue.gif

user posted image user posted image

user posted image user posted image

user posted image user posted image

user posted image user posted image

Not much modding today, just adding up the red led so made some custom wires for my customer & a psu jumper for me to test the leds. Oh & I also will need to get 2 corsair force gs ssd for this build. Will be modding the SSD too smile.gif

user posted image


This post has been edited by infernoaswen: Dec 31 2013, 02:35 AM
ahjoes
post Sep 22 2013, 05:38 AM

New Member
*
Junior Member
22 posts

Joined: Jun 2013
From: Kuala Lumpur / Bentong pahang


Bro are you using stok tube ? rclxms.gif
btw nice rig setup
TSinfernoaswen
post Sep 22 2013, 10:30 AM

(╯°□°)╯︵ ┻━┻)
*******
Senior Member
3,782 posts

Joined: Aug 2010
From: subang jaya


QUOTE(ahjoes @ Sep 22 2013, 05:38 AM)
Bro are you using stok tube ? rclxms.gif 
btw nice rig setup
*
stok tube? I am using primochill advanced lrt tubing smile.gif
ahjoes
post Sep 22 2013, 03:22 PM

New Member
*
Junior Member
22 posts

Joined: Jun 2013
From: Kuala Lumpur / Bentong pahang


QUOTE(infernoaswen @ Sep 22 2013, 11:30 AM)
stok tube? I am using primochill advanced lrt tubing smile.gif
*
owh nice :3 sorry im newbie tongue.gif

TSinfernoaswen
post Sep 22 2013, 03:46 PM

(╯°□°)╯︵ ┻━┻)
*******
Senior Member
3,782 posts

Joined: Aug 2010
From: subang jaya


QUOTE(ahjoes @ Sep 22 2013, 03:22 PM)
owh nice :3 sorry im newbie  tongue.gif
*
haha no problem we all start as a newbie anyways wub.gif

Plan to change the tubing to acrylic tubes maybe next year during the next maintenance biggrin.gif
TSinfernoaswen
post Sep 28 2013, 12:37 PM

(╯°□°)╯︵ ┻━┻)
*******
Senior Member
3,782 posts

Joined: Aug 2010
From: subang jaya


Just got myself SSD, will be modding these soon. Just found out the dvd rom is not working due to loose contact with the sata power cables. I guess my method of pushing the wire into the EZ crimp connector is wrong laugh.gif Will need to redo the sata cables & also the hdd part.

user posted image

This post has been edited by infernoaswen: Dec 31 2013, 02:34 AM
TSinfernoaswen
post Sep 29 2013, 01:29 PM

(╯°□°)╯︵ ┻━┻)
*******
Senior Member
3,782 posts

Joined: Aug 2010
From: subang jaya


Just saw this rig in facebook today. Seems like the red led at the mesh looks pretty cool so I might be copying the idea brows.gif

Actually I did think of inserting leds in the mesh area but didnt really go for it because the red leds that I have is pretty bright so I am afraid it might not turn out that good. I think I might have a solution for that though, going to sleeve the leds to reduce the brightness if its too bright smile.gif

» Click to show Spoiler - click again to hide... «


This post has been edited by infernoaswen: Sep 29 2013, 01:31 PM
[Krauser]
post Sep 29 2013, 05:41 PM

Getting Started
**
Junior Member
119 posts

Joined: Feb 2010
From: Bukit Tinggi - Klang щ(ಠ益ಠщ)
How about put some resistor?
TSinfernoaswen
post Sep 29 2013, 06:13 PM

(╯°□°)╯︵ ┻━┻)
*******
Senior Member
3,782 posts

Joined: Aug 2010
From: subang jaya


QUOTE(Krauser @ Sep 29 2013, 05:41 PM)
How about put some resistor?
*
I could do that too laugh.gif
TSinfernoaswen
post Oct 3 2013, 02:58 AM

(╯°□°)╯︵ ┻━┻)
*******
Senior Member
3,782 posts

Joined: Aug 2010
From: subang jaya


Nothing major, just got myself a lamptron cw611 today. Going to be busy for this few weeks since lots of deadline to meet so wont be doing any modding anytime soon tongue.gif

user posted image

This post has been edited by infernoaswen: Dec 31 2013, 02:34 AM
laut masin
post Oct 4 2013, 11:45 AM

New Member
*
Junior Member
22 posts

Joined: Feb 2013
QUOTE(infernoaswen @ Oct 3 2013, 02:58 AM)
Nothing major, just got myself a lamptron cw611 today. Going to be busy for this few weeks since lots of deadline to meet so wont be doing any modding anytime soon tongue.gif

user posted image
*
how much for this bro?? thumbup.gif
TSinfernoaswen
post Oct 4 2013, 11:59 AM

(╯°□°)╯︵ ┻━┻)
*******
Senior Member
3,782 posts

Joined: Aug 2010
From: subang jaya


QUOTE(laut masin @ Oct 4 2013, 11:45 AM)
how much for this bro??  thumbup.gif
*
around 300
faezfahmi618
post Oct 5 2013, 07:37 AM

Casual
***
Junior Member
435 posts

Joined: Apr 2010


wow u build ur wc rig about 9 months right now
im reading ur thread from first page btw tongue.gif
well good luck with ur project
TSinfernoaswen
post Oct 5 2013, 10:37 AM

(╯°□°)╯︵ ┻━┻)
*******
Senior Member
3,782 posts

Joined: Aug 2010
From: subang jaya


QUOTE(faezfahmi618 @ Oct 5 2013, 07:37 AM)
wow u build ur wc rig about 9 months right now
im reading ur thread from first page btw tongue.gif
well good luck with ur project
*
Yup, actually thought of just upgrading to simple watercooling but as time goes on while upgrading, keep buying more parts so not enough budget then have to wait to collect money. Initially wanted mid tower casing with simple watercooling then I changed my mind went with switch 810 with thicker radiators so need more money laugh.gif Then keep doing new mods e.g luminous panel, when I first start the worklog I had no plans of luminous panel, as time goes by I thought it would be cool to do that so keep delay here & there hahaha.

I got all the parts already actually, I can finish it & close this worklog but busy with deadlines doh.gif Maybe next week la laugh.gif
chongxm
post Oct 6 2013, 04:42 PM

Enthusiast
*****
Senior Member
730 posts

Joined: Nov 2010
Total cost tell ya tongue.gif
3years later i graduate from degree i wan loan to mod rig brows.gif
BuckRoger
post Oct 11 2013, 12:01 AM

Sakit Perut
*****
Senior Member
903 posts

Joined: Dec 2008
QUOTE(infernoaswen @ Mar 3 2013, 01:51 AM)
So I went to the local hardware shop just to browse around & found some clear tubing? They were selling it for RM1.50/feet so I was like dafuq! That is so cheap, what if I can use this as my rig tubing? So I wondered how will it perform because i doubt it was designed for watercooling rigs, so I bought 1 feet just to do some testing on it.

First testing I did was on kink testing and it failed miserably. I wouldn't even post any testing details about how flexible it is, all I can say is if your loop needs some bend, this wouldn't work. Period!

Next I tested it for plasticizer. First of all I would like to say the test I did was just for fun & by right its not a perfect testing condition as I do not own the proper equipment for testing. The testing data is more like for my personal use but I am sharing out for those who are curious like me.

The first test was to cut the tubing in small pieces and dump it in a hot water. I do not have a thermometer that can measure high temps but its pretty hot, water used to make tea. I am guessing its around 80-90'C. The middle tubing is the result of it after 1 day in that water temp compare to the above tubing which is brand new. Also take note that the water & tubing was thrown in a flask (coffee flask) which keeps water warm for long period, so I am assuming the temps falls with a slow gradient through time.

The next test was testing it with a warm temp that was excatly 40'C. Yes I am sure of this because I used a thermometer that measures fever lol, it can go up to 40'C only sadly therefore couldn't get reading for higher temps. As shown in the picture (the last tubing at the bottom) it still leaches. So if the tubing can't even perform at 40'C without plasticizer then there is no point in using it as your temps confirm will go above 40'C because malaysia temps are now freaking 35-40'C outside!

user posted image

This is what plasticizer is if those who are wondering. White stuff that are like powder when dried, can easily scrap it off from the tubing if you can reach it.

user posted image
/UTI4p9L1oPI/AAAAAAAABV4/gG5pIyqpeq4/s640/IMG_5082.JPG[/img]


Bro, regards to the chepo tube, have do the same plasticizer test on tube u r using nw?? Its good to know the comparison smile.gif

This post has been edited by BuckRoger: Oct 11 2013, 12:05 AM
TSinfernoaswen
post Oct 11 2013, 12:17 AM

(╯°□°)╯︵ ┻━┻)
*******
Senior Member
3,782 posts

Joined: Aug 2010
From: subang jaya


QUOTE(BuckRoger @ Oct 11 2013, 12:01 AM)
Bro, regards to the chepo tube, have do the same plasticizer test on tube u r using nw?? Its good to know the comparison smile.gif
*
There is a dedicated thread regarding plasticizer issue actually. Basically, if want plasticizer free our only choice right now is acrylic tubing.

https://forum.lowyat.net/topic/2755861
BuckRoger
post Oct 11 2013, 12:25 AM

Sakit Perut
*****
Senior Member
903 posts

Joined: Dec 2008
QUOTE(infernoaswen @ Oct 11 2013, 12:17 AM)
There is a dedicated thread regarding plasticizer issue actually. Basically, if want plasticizer free our only choice right now is acrylic tubing.

https://forum.lowyat.net/topic/2755861
*
Thanks for the reference.. smile.gif
TSinfernoaswen
post Oct 12 2013, 01:26 PM

(╯°□°)╯︵ ┻━┻)
*******
Senior Member
3,782 posts

Joined: Aug 2010
From: subang jaya


Was almost done with the rig so I was testing it & turns out my hard disk & optical drive wasnt working. Checked in bios & it didnt detect the drives so I thought maybe something is wrong with the sata cable connected to the motherboard. After diagnosing it, it turns out the power cables isnt working properly. Had to remove the custom cables I made & redo it. The EZ crimp connector isnt making a very good contact with the wires. I guess in order to use this type of connector, I will need 16awg wires instead of 18awg.

user posted image user posted image

Yeap, now its working. Redo the wires but this time I didnt sleeve it, too lazy already. Wires will be hidden anyways so wouldn't make much of a difference.

user posted image user posted image

And another problem now, seems like the corsair fans isnt working with lamptron cw611. Fans all are working, I tested it before.

user posted image

Had to strip off this 3pin pcb, to test it. Is it faulty? After doing few tests, it turns out the 3pin extension cable that I made was wired wrongly laugh.gif no wonder nothing seems to power up. My bad for being a fool, luckly no fans burnt for wiring up the + & - wires wrongly.

user posted image user posted image

I know, I am pretty crazy right? There is so much leds in my rig that I lost count of it already...

user posted image user posted image

Quick question, is 12.7LPH a good flow rate?

user posted image

This post has been edited by infernoaswen: Dec 31 2013, 02:33 AM
TSinfernoaswen
post Oct 12 2013, 02:04 PM

(╯°□°)╯︵ ┻━┻)
*******
Senior Member
3,782 posts

Joined: Aug 2010
From: subang jaya


Cable management

user posted image

Current progress on how it looks like. I am almost done with it, just left SSD modding & few finishing touches.

user posted image user posted image

user posted image user posted image

Guess where I am going to mount 2 SSD? I think its pretty obvious right?

user posted image user posted image

Ordered some ROG fan stickers already, will be replacing all the corsair stickers with it.

user posted image

My legendary ultra fine magnetic filter, the rear fan is an intake to bring fresh air to the radiators so thats why I need a fan filter for it.

user posted image user posted image

This post has been edited by infernoaswen: Dec 31 2013, 02:33 AM
TSinfernoaswen
post Oct 12 2013, 09:47 PM

(╯°□°)╯︵ ┻━┻)
*******
Senior Member
3,782 posts

Joined: Aug 2010
From: subang jaya


Here is some shots of the current progress. Just left SSD modding, currently testing the SSD before I start modding it biggrin.gif

user posted image user posted image

user posted image user posted image

user posted image user posted image

user posted image user posted image

user posted image user posted image

This post has been edited by infernoaswen: Dec 31 2013, 02:32 AM
TSinfernoaswen
post Oct 12 2013, 09:48 PM

(╯°□°)╯︵ ┻━┻)
*******
Senior Member
3,782 posts

Joined: Aug 2010
From: subang jaya


user posted image user posted image

user posted image user posted image

user posted image user posted image

user posted image user posted image

user posted image user posted image

This post has been edited by infernoaswen: Dec 31 2013, 02:31 AM
gxthelord
post Oct 13 2013, 02:26 AM

Tech Enthusiast
*******
Senior Member
2,313 posts

Joined: May 2009


despite no dlsr those are still some awesome photos.. Really nice to see the final. Just one thing, modding the ssd? o_O! Can't wait to see it! ^^
Puteih
post Oct 13 2013, 03:21 AM

Dah ludah jilat balik
******
Senior Member
1,082 posts

Joined: Dec 2010
My god that's one heck of a mod you've done O.O

So cool wey! (Y)
ntw
post Oct 13 2013, 02:04 PM

One Each At A Time
******
Senior Member
1,432 posts

Joined: Aug 2010
From: Ipoh mali~~~


great build and love your tiny details to the mods. rclxms.gif rclxms.gif notworthy.gif

just one thing:
» Click to show Spoiler - click again to hide... «

TSinfernoaswen
post Oct 14 2013, 12:24 AM

(╯°□°)╯︵ ┻━┻)
*******
Senior Member
3,782 posts

Joined: Aug 2010
From: subang jaya


QUOTE(ntw @ Oct 13 2013, 02:04 PM)
great build and love your tiny details to the mods. rclxms.gif  rclxms.gif  notworthy.gif

just one thing:
» Click to show Spoiler - click again to hide... «

*
Actually its the heat, its the second time the coolant changed colour to purple doh.gif
pristine
post Oct 14 2013, 12:25 AM

junkie
*******
Senior Member
2,808 posts

Joined: Jan 2009
From: Subang Jaya


When you're out of dye or want to try coolant, hit me a pm. I have EC6. brows.gif
k3lvinNdad
post Oct 14 2013, 08:16 AM

Uulala
****
Senior Member
511 posts

Joined: Sep 2012
From: Malaysia


damn the red lines are so cool~
diehardart
post Oct 14 2013, 10:52 AM

New Member
*
Junior Member
8 posts

Joined: Sep 2010


thats really awesome build man..btw is there any solution for the coolant colour change problem?are u sure its because of the heat not the led light?
TSinfernoaswen
post Oct 14 2013, 02:59 PM

(╯°□°)╯︵ ┻━┻)
*******
Senior Member
3,782 posts

Joined: Aug 2010
From: subang jaya


QUOTE(pristine @ Oct 14 2013, 12:25 AM)
When you're out of dye or want to try coolant, hit me a pm. I have EC6. brows.gif
*
Sure but EC6 blood red looks pretty dark, any samples in a watercooling loop? I am thinking of something like mayhems pastel, much brighter red but not so sure yet laugh.gif

QUOTE(diehardart @ Oct 14 2013, 10:52 AM)
thats really awesome build man..btw is there any solution for the coolant colour change problem?are u sure its because of the heat not the led light?
*
No idea, i think its because of unstable dye based on a quick google search. Its purple because I did remove a little coolant & put it on a tissue paper, the water is purple instead of red doh.gif
pristine
post Oct 14 2013, 04:53 PM

junkie
*******
Senior Member
2,808 posts

Joined: Jan 2009
From: Subang Jaya


QUOTE(infernoaswen @ Oct 14 2013, 02:59 PM)
Sure but EC6 blood red looks pretty dark, any samples in a watercooling loop? I am thinking of something like mayhems pastel, much brighter red but not so sure yet laugh.gif
*
Haha. I've got pastels too. smile.gif

Anyway, EC6 sample:

user posted image

user posted image


TSinfernoaswen
post Oct 14 2013, 06:08 PM

(╯°□°)╯︵ ┻━┻)
*******
Senior Member
3,782 posts

Joined: Aug 2010
From: subang jaya


QUOTE(pristine @ Oct 14 2013, 04:53 PM)
Haha. I've got pastels too. smile.gif

Anyway, EC6 sample:

user posted image

user posted image
*
owh, not bad actually hmm.gif
TSinfernoaswen
post Oct 18 2013, 06:47 PM

(╯°□°)╯︵ ┻━┻)
*******
Senior Member
3,782 posts

Joined: Aug 2010
From: subang jaya


My rig is sort of done, been playing games on it for quite sometime. So today I decided to touch it up since I left it at 95% completion state?

So when I was making custom led cables for all my leds I decided to drain the loop as it turned to purple colour. This time I bought a ph meter to test the coolant on why it is keep changing colour. Sorry for crappy images, will take better pictures with my nexus 5 when I free tongue.gif

user posted image

Look at the coolant, what the shit is this! I seriously dont know why it keep changing from red to purple doh.gif
user posted image

So the ph meter is a bit off, had to calibrate it
user posted image

Calibrating the ph meter..
user posted image

This is the value of distilled water, its a little off. Need to do a 2nd calibration...
user posted image

So I tested the coolant that is in my loop, dafuq is this shit. Why is the ph value so high? I was expecting it to be acidic since I read a post mayhem said that if the coolant is acidic & we didnt bleed the loop properly then copper oxidation can occur in the radiator & thus changing the coolant colour. I am no chemist, can someone give me an explanation or perhaps a theory on why this is happening?
user posted image

user posted image

Done filling her up again. This time I added little red dye compare to what I did before, I hope if it turn darker it wont affect that much. Well at least I hope so...
user posted image

This is the reading when I added dye into distilled water.
user posted image

When I add 1 drop of biocide into 1 cup of water, the ph drops a lot. I know I am supposed to use 1 drop per liter, I am just testing what is the possible cause of my problem. Distilled water alone & with dye has almost no difference so only possible cause now is mayhems biocide.
user posted image


My measurement is right, 1 drop of biocide in 1 liter of water. Thats what is in my loop atm, nothing more nothing less. No silver coil etc either. Its been 1 day, colour is still good & I tried my best to bleed it (it was a tough job since I have 2 RX radiators). The coolant ph value that is in my loop atm is around 6.3. I thought mayhems said his dye would stabilize the ph value but that isnt the case I see. This would probably be my last try, if it still changes colour then I give up. The next time I do maintenance I will get a premix coolant instead.

Another issue I have is my sata cables is too short lol, ordered some extension. Need to wait for it to arrive to touch up & send my rig to apes for some photo session tongue.gif

This post has been edited by infernoaswen: Dec 31 2013, 02:30 AM
ntw
post Oct 19 2013, 02:57 AM

One Each At A Time
******
Senior Member
1,432 posts

Joined: Aug 2010
From: Ipoh mali~~~


stick a piece of black paper on the pcb area to "fake" the appearance of chip?
TSinfernoaswen
post Oct 19 2013, 03:01 AM

(╯°□°)╯︵ ┻━┻)
*******
Senior Member
3,782 posts

Joined: Aug 2010
From: subang jaya


QUOTE(ntw @ Oct 19 2013, 02:57 AM)
stick a piece of black paper on the pcb area to "fake" the appearance of chip?
*
I am still deciding to mod the SSD or not, what I can do is rotate the ssd board upside down to show the chip I guess but this will require some cutting to the ssd casing. Still not sure to go for that route or not hmm.gif
TSinfernoaswen
post Dec 22 2013, 04:29 AM

(╯°□°)╯︵ ┻━┻)
*******
Senior Member
3,782 posts

Joined: Aug 2010
From: subang jaya


Please ignore all my messed up post. I tried to reorganize this thread by shuffling images around pages but end up messing up lol. So if some of the post doesn't make any sense to you then thats why.

This post has been edited by infernoaswen: Feb 6 2014, 01:51 AM
TSinfernoaswen
post Feb 6 2014, 01:59 AM

(╯°□°)╯︵ ┻━┻)
*******
Senior Member
3,782 posts

Joined: Aug 2010
From: subang jaya


Decided to do some cleaning for my rig & finally manage to mount the SSD in the proper place. Rig was pretty much done for quite some time, just recently did some tiny touch up for the ssd. pristine I might need to borrow your holesaw again to make another hole for a fillport laugh.gif

user posted image

user posted image

user posted image

user posted image

user posted image

user posted image

user posted image

user posted image

user posted image

user posted image


TSinfernoaswen
post Feb 6 2014, 01:59 AM

(╯°□°)╯︵ ┻━┻)
*******
Senior Member
3,782 posts

Joined: Aug 2010
From: subang jaya


user posted image

user posted image

user posted image

user posted image

user posted image

user posted image

user posted image

user posted image

user posted image

user posted image

TSinfernoaswen
post Feb 6 2014, 02:00 AM

(╯°□°)╯︵ ┻━┻)
*******
Senior Member
3,782 posts

Joined: Aug 2010
From: subang jaya


user posted image

user posted image

gxthelord
post Feb 8 2014, 06:39 PM

Tech Enthusiast
*******
Senior Member
2,313 posts

Joined: May 2009


wahh as usual~! Amazing job from aswen! biggrin.gif Btw mind I asking u for ur SP120 on the front, u removed the washer behind it and just leave it like that for easy cleaning?
TSinfernoaswen
post Feb 9 2014, 12:13 AM

(╯°□°)╯︵ ┻━┻)
*******
Senior Member
3,782 posts

Joined: Aug 2010
From: subang jaya


QUOTE(gxthelord @ Feb 8 2014, 06:39 PM)
wahh as usual~! Amazing job from aswen! biggrin.gif Btw mind I asking u for ur SP120 on the front, u removed the washer behind it and just leave it like that for easy cleaning?
*
What washer? You mean the coil there? I just pop the fan blades & clean the radiator. Once done, just pop it back in...
gxthelord
post Feb 9 2014, 12:40 AM

Tech Enthusiast
*******
Senior Member
2,313 posts

Joined: May 2009


QUOTE(infernoaswen @ Feb 9 2014, 12:13 AM)
What washer? You mean the coil there? I just pop the fan blades & clean the radiator. Once done, just pop it back in...
*
yaya~ usually we remove the blade need to pop out behind first to take out the small washer and o-ring right. Means those u never put back o ? biggrin.gif Good idea ehhh xD
TSinfernoaswen
post Feb 9 2014, 12:46 AM

(╯°□°)╯︵ ┻━┻)
*******
Senior Member
3,782 posts

Joined: Aug 2010
From: subang jaya


QUOTE(gxthelord @ Feb 9 2014, 12:40 AM)
yaya~ usually we remove the blade need to pop out behind first to take out the small washer and o-ring right. Means those u never put back o ? biggrin.gif Good idea ehhh xD
*
Oh no, corsair fans are using magnets. Just pull the blades with a bit of force & it will come out automatically.
gxthelord
post Feb 9 2014, 12:46 AM

Tech Enthusiast
*******
Senior Member
2,313 posts

Joined: May 2009


QUOTE(infernoaswen @ Feb 9 2014, 12:46 AM)
Oh no, corsair fans are using magnets. Just pull the blades with a bit of force & it will come out automatically.
*
what?? serious??!! Wait Imma take my SP120 try! Haha
TSinfernoaswen
post Feb 9 2014, 12:49 AM

(╯°□°)╯︵ ┻━┻)
*******
Senior Member
3,782 posts

Joined: Aug 2010
From: subang jaya


QUOTE(gxthelord @ Feb 9 2014, 12:46 AM)
what?? serious??!! Wait Imma take my SP120 try! Haha
*
Yeah, some of the fans might require more force to remove. Just make sure you hold the back for those that are harder to remove.
gxthelord
post Feb 9 2014, 01:00 AM

Tech Enthusiast
*******
Senior Member
2,313 posts

Joined: May 2009


QUOTE(infernoaswen @ Feb 9 2014, 12:49 AM)
Yeah, some of the fans might require more force to remove. Just make sure you hold the back for those that are harder to remove.
*
okay~~ it is held together quite tight dun dare to push it some more scared it break doh.gif
TSinfernoaswen
post Apr 30 2014, 09:51 AM

(╯°□°)╯︵ ┻━┻)
*******
Senior Member
3,782 posts

Joined: Aug 2010
From: subang jaya


I am selling this rig smile.gif

https://forum.lowyat.net/index.php?showtopic=3208391&hl=

Topic ClosedOptions
 

Change to:
| Lo-Fi Version
0.1446sec    0.97    6 queries    GZIP Disabled
Time is now: 19th December 2025 - 12:56 PM