


[Project] Balrog, Moving to watercooling world...
[Project] Balrog, Moving to watercooling world...
|
|
 Feb 11 2013, 08:22 PM Feb 11 2013, 08:22 PM
|
 
Junior Member
60 posts Joined: Aug 2012 |
all hail for Project Balrog and Aswen! Cant wait for the next update. Teach me sleeving, master!
|
|
|
|
|
|
Feb 11 2013, 09:01 PM
|

Senior Member
3,782 posts Joined: Aug 2010 From: subang jaya |
QUOTE(ted.mosby @ Feb 11 2013, 08:22 PM) all hail for Project Balrog and Aswen! Cant wait for the next update. Teach me sleeving, master! lol thanks mate, small project only   ...nice meeting you just now....tomorrow got new episode of how i met your mother ...nice meeting you just now....tomorrow got new episode of how i met your mother  Need to wait for more cash to spend & also local stores to restock Need to wait for more cash to spend & also local stores to restock  Sure will post some pictures & guides, very easy actually just need lots of patience. I wanted to start sleeving this weekend but I still haven't get my crimping pins & wires. Otherwise maybe this week or next week need to head over to jalan pasar to find it. I am no master, also in learning process  This post has been edited by infernoaswen: Feb 11 2013, 09:01 PM |
|
|
Feb 11 2013, 09:06 PM
|
|
Senior Member
3,782 posts Joined: Aug 2010 From: subang jaya |
I know its been sometime since the last update & I apologize for that. Was busy so had to put the work log on hold. Don't worry though, I am free now for a month or so. You will be seeing more updates now. I just finished installing the gpu waterblock, ek bridge & the backplate (I forgot to take picture of the final product). Anyways I plan to start making fill ports tomorrow on the luminous panel.
      Almost forgotten to remove the original asus washer haha, luckily I realized it otherwise it might not have good contacts with the waterblock  This post has been edited by infernoaswen: Dec 31 2013, 01:34 AM |
|
|
Feb 11 2013, 10:13 PM
|
|
Junior Member
60 posts Joined: Aug 2012 |
QUOTE(infernoaswen @ Feb 11 2013, 10:01 PM) lol thanks mate, small project only haha cant wait for the new episode, thought it is literally the same from one episode to another, we still dont know the kids' mother. same goes with me, need fund first, then slowly buy stuff, then go sleeving all the way. good luck bro. ...nice meeting you just now....tomorrow got new episode of how i met your mother Need to wait for more cash to spend & also local stores to restock Sure will post some pictures & guides, very easy actually just need lots of patience. I wanted to start sleeving this weekend but I still haven't get my crimping pins & wires. Otherwise maybe this week or next week need to head over to jalan pasar to find it. I am no master, also in learning process |
|
|
Mar 3 2013, 12:47 AM
|
|
Senior Member
3,782 posts Joined: Aug 2010 From: subang jaya |
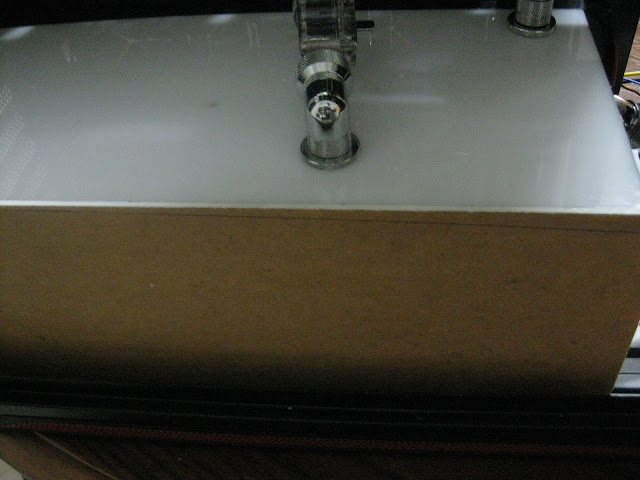
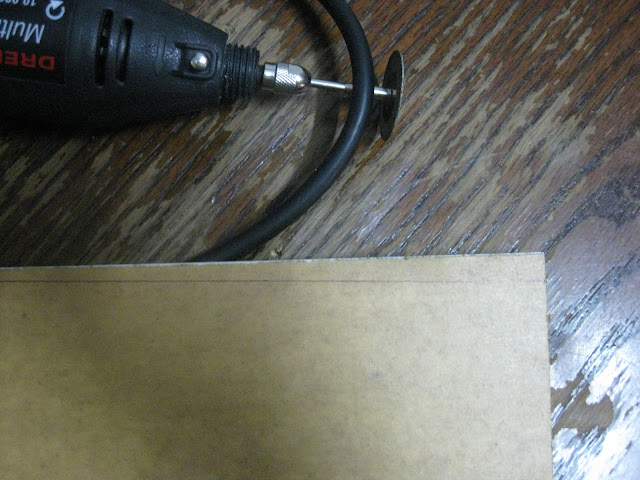
Had to draw circles for making hole to fit the fill port.
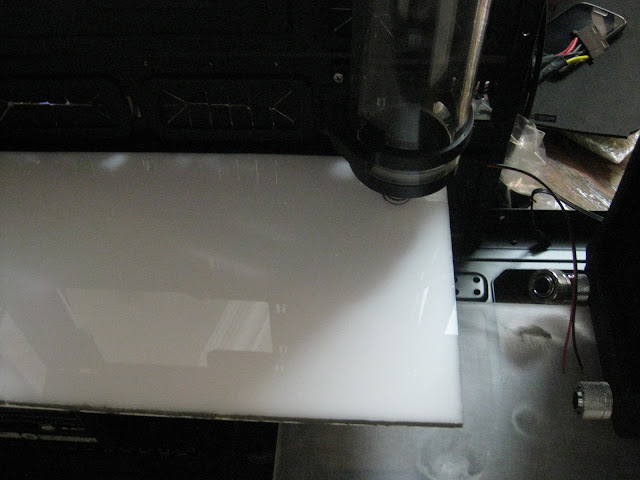 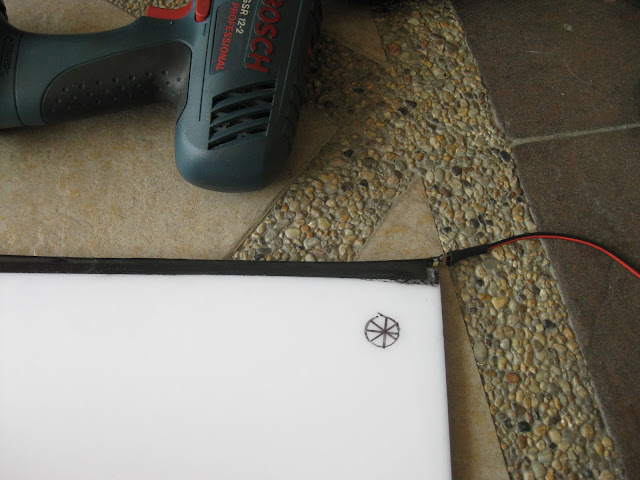  It worked out great, perfectly aligned but I have a new problem. 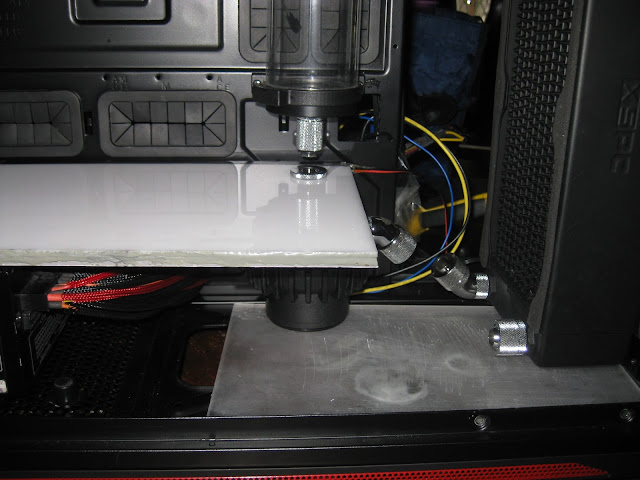 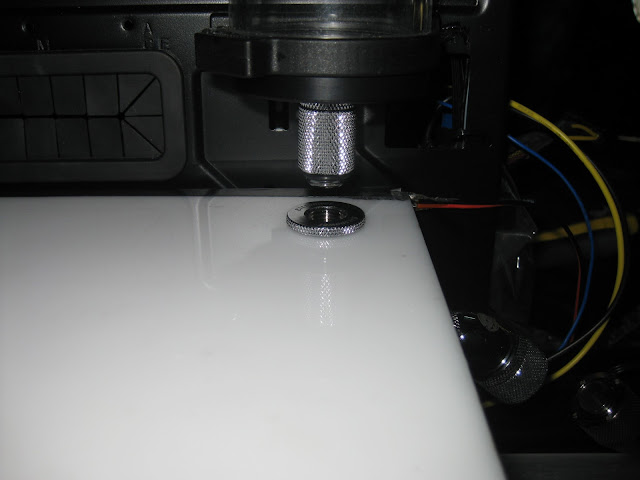 So my main objective was to get the pump directly under the reservoir but its super tight. As you can see there is no gap at all between the pump top & the luminous panel. 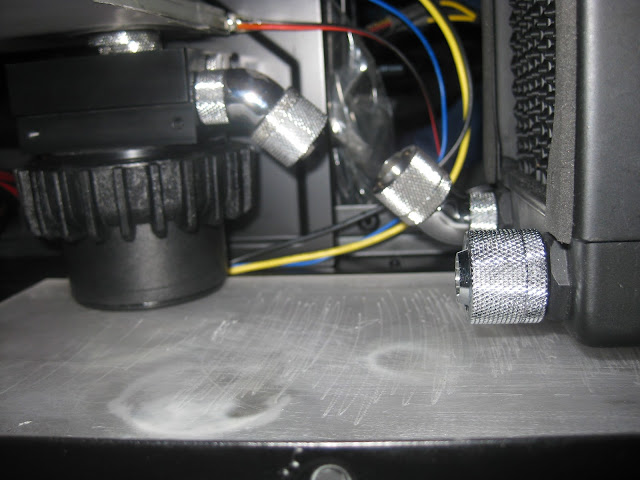 Another problem was the pump inlet fitting & the fillport is not aligned. The pump is a little too thick so it offsets outwards a little bit. And also the 45deg rotary isnt straight. I can solve it by rising the pump higher but I dont have space though to rise the pump so had to use 20mm extender at the radiator  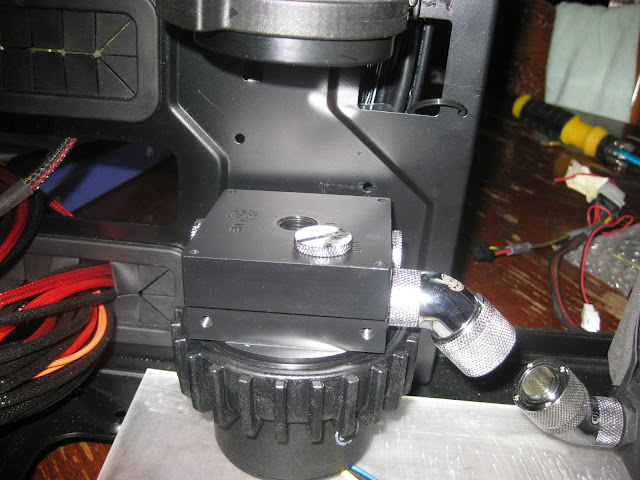 As for the pump offset problem, I had to use a dremel to grind the pump cover or whatever you call that round circle thing that secures the pump top & the pump. Basically I trim the gripping material a little bit so that the pump can enter inwards a little more. Sorry for not taking a lot of pictures, when it comes to modding, taking pictures is my less priority since I spend too much time doing the actual work 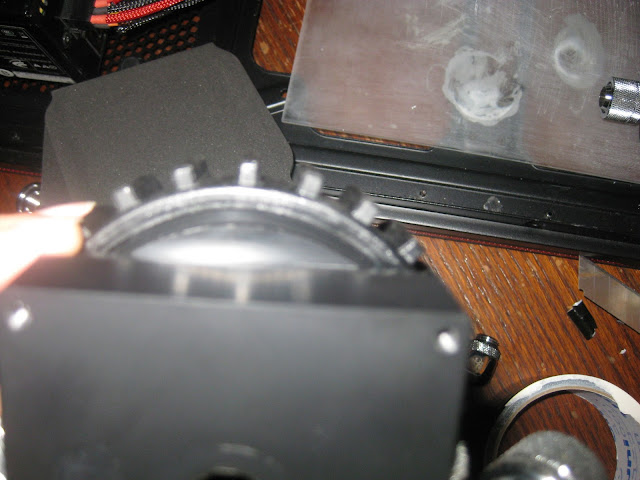 Made the 2nd fillport yay! My initial plan was to put this flowsensor at the reservoir inlet at the top & use extenders from the fillport to the bottom of the gpu inlet. So that I can run a straight tubing from the bottom to the gpu inlet. This will give the straight tubing that we usually see in acrylic tubing builds but then I thought why not replace the extenders with my flowsensor? Plus it will be easier to see on the luminous panel instead of the top & also save me from using extenders therefore less cost! That long extenders is just for aligning, will replace that with compression fitting & tubing. 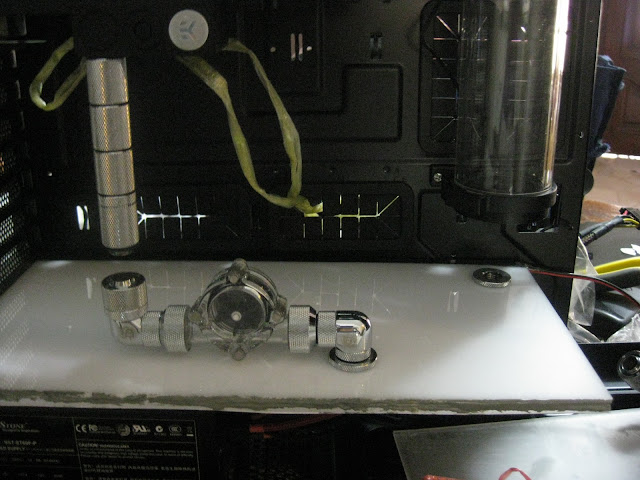 This post has been edited by infernoaswen: Dec 31 2013, 02:00 AM |
|
|
Mar 3 2013, 12:48 AM
|
|
Senior Member
3,782 posts Joined: Aug 2010 From: subang jaya |
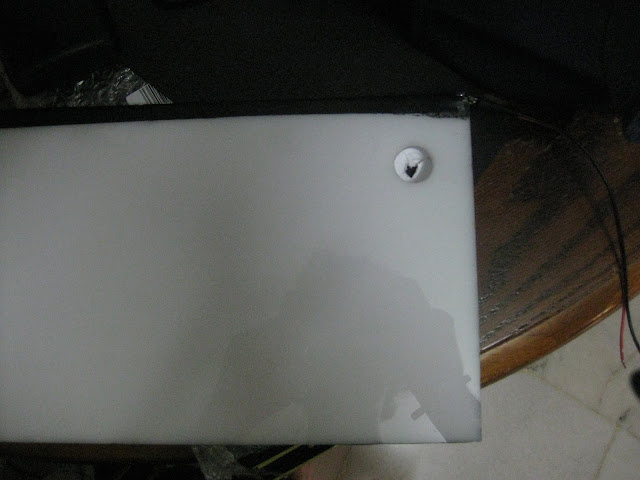
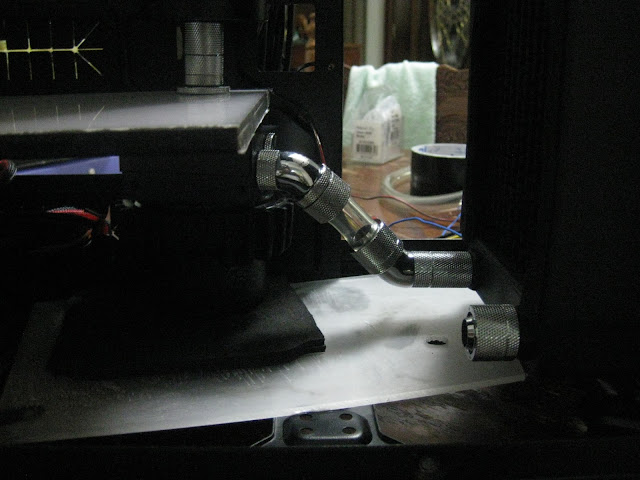
I tell you, this is probably the hardest part in my build so far! First I need to attach the pump to the fillport at such a tight space, then from the fillport I need to connect to the reservoir at such a tight space to work with. Once everything is set, I had to connect this small piece of tubing to the radiator & oh boy...it was so hard! Because I cant move the pump or have enough space to work with. Took me more than 1 hour to get the lower portion done. I had to remove to rivets at the back of the casing to fit this luminous panel properly below the pci bracket & I also drilled 2 big holes at the bottom acrylic panel to route the pump wire from below the casing & also allow me to adjust the pump speed. Not convenient to adjust the speed from under the casing but at least I have the option if needed. I plan to connect this pump on a lamptron cw611 though so it will allow me to adjust the speed through the fan controller instead.
 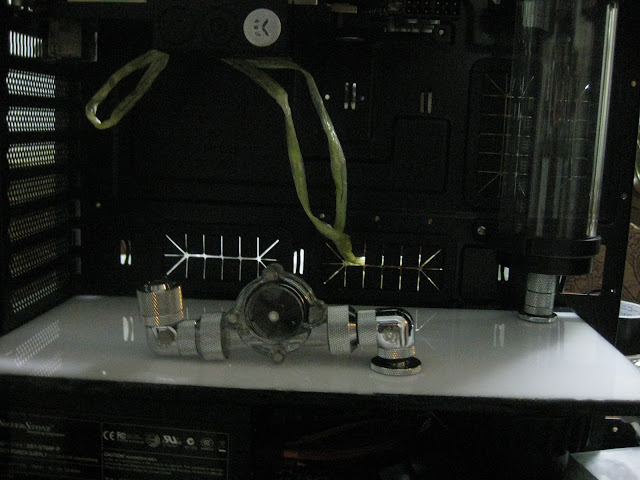 This is what you get when you dont have motherboard. Had to hang the gpu with strings to get the accurate measurement for the fillport locations.  So far everything is looking good, will work on the psu side cover & at the front. Took me more than half a day to get the lower portion routing done. It looks simple but I did a lot of small modding here & there to get it in such a tight space.  The luminous panel is just a prototype though, but I dont plan to change it since is amount of work I need to remove the fittings & put it back is such a pain. If the led 1 day failed then only I will decide to create a new luminous panel with laser engraved instead of hand sanded for better light distribution. I also have an idea to make a aluminum bracket to fit the led inside whenever it fails, this will make the whole replacing led process easier. Basically what I mean is instead of using black tape to hold the led strip to the side of the acrylic, I will create a thin spacing with aluminum instead. Not sure if you understand what I am trying to say but for now I think I will just use the current luminous panel. Thanks to pristine for borrowing me his hole saw Making fillport will be super hard without it! But the hole saw is a little small for the bitspower diameter so I had to use grinding stone to sand the hole further so that the fillport can fit inside nicely. I know the holesaw was designed like that because when you make hole with metal, you can use the fill port threads to screw the fillport in but not with thick acrylic panels  pristine, I will return it back to you soon This post has been edited by infernoaswen: Dec 31 2013, 01:36 AM |
|
|
|
|
|
Mar 3 2013, 01:13 AM
|
|
Senior Member
3,782 posts Joined: Aug 2010 From: subang jaya |
The side cover is a little high so I will need to trim it a little bit.
  My design is to put another acrylic at this angle to help the airflow from the radiator. Due to short acrylic panel, I had to glue another acrylic to it I am going to cover it with matte black sticker so the colour dosen't matter. Most importantly is to make good use of the resources you have! Don't waste it  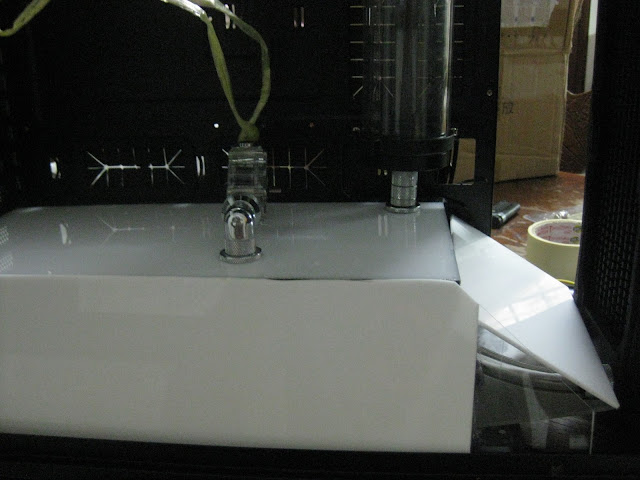 Done with the whole cover but I had to make a hole & attach a screw to keep the acrylic panel touching the luminous panel otherwise there will be a gap. Easy to remove too, so cable management from the psu shouldn't be a problem. Just pop it out & plug in hehehe 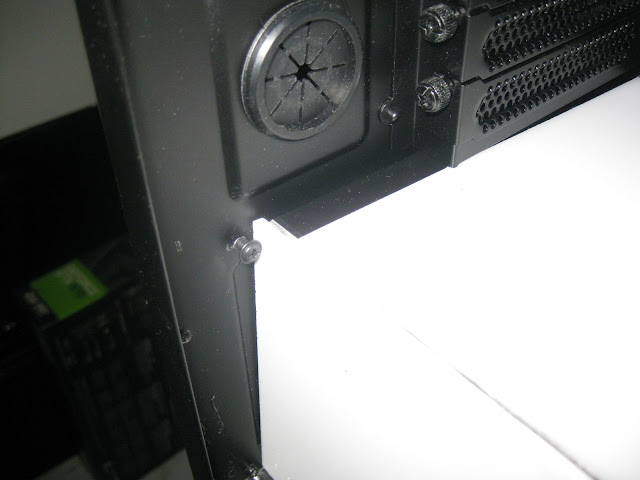 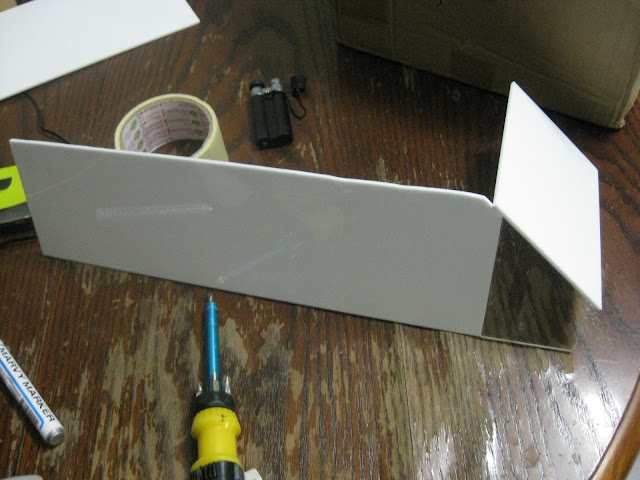 I know the side panel is not straight but this is probably the best I can do with a dremel. Once I put the sticker I think it wont be noticeable. 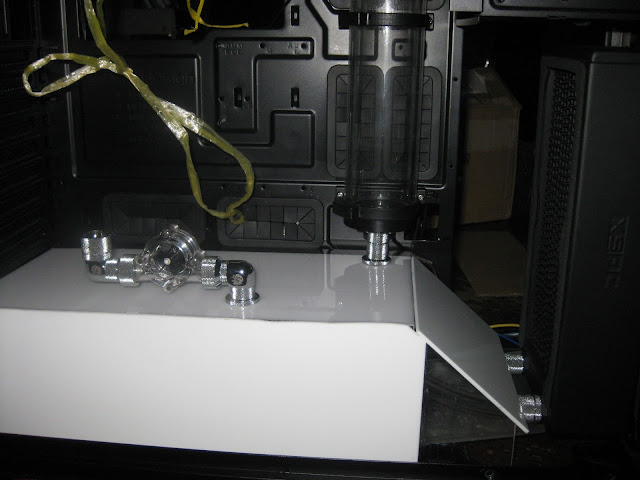 Now I need your suggestion, should I cover this part like below? Full cover or partial? 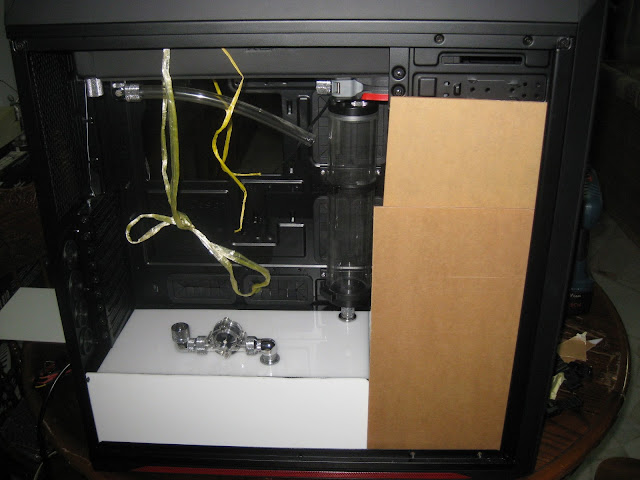 If I cover it fully then the 5.25" drive bay part also I will need to cover. Or should I just cover the top part, meaning the radiator & sp120 fans will be visible. I plan to make an ROG logo ...still thinking which to go for since full acrylic cover is very common & everyone done that already. I am thinking of doing something different. 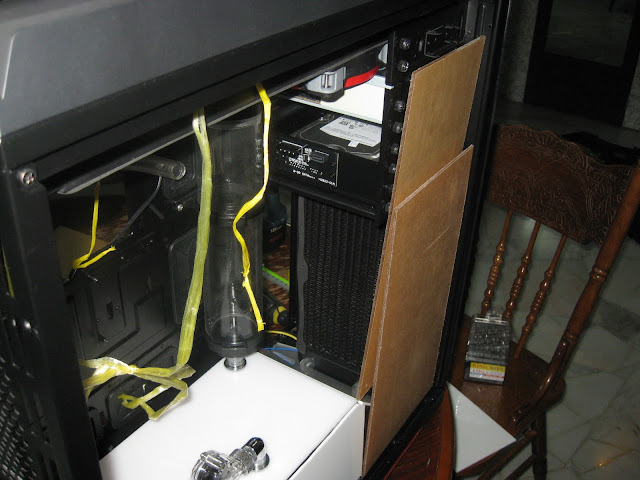  This post has been edited by infernoaswen: Dec 31 2013, 01:38 AM |
|
|
Mar 3 2013, 01:51 AM
|
|
Senior Member
3,782 posts Joined: Aug 2010 From: subang jaya |
Got my vinyl from kray_keigo today. Serious good high quality stuff
 As you can see from the picture, my previous cut with the dremel wasn't that perfect. Shaky hands so a quick fix with eproxy & you won't even notice it hehehe As you can see from the picture, my previous cut with the dremel wasn't that perfect. Shaky hands so a quick fix with eproxy & you won't even notice it hehehe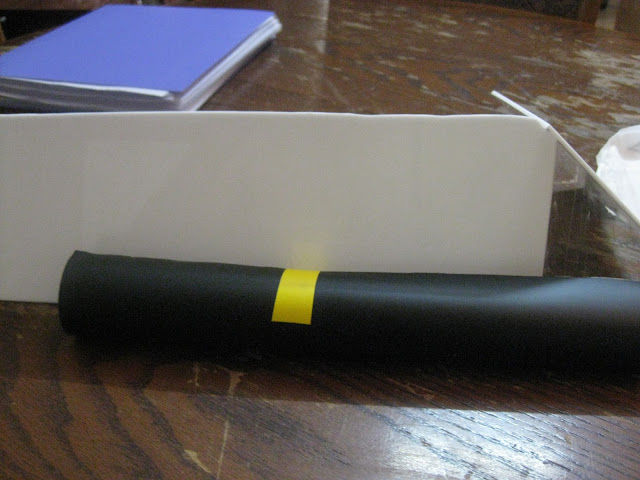  My touch & go card definitely helped me in applying the sticker without bubbles 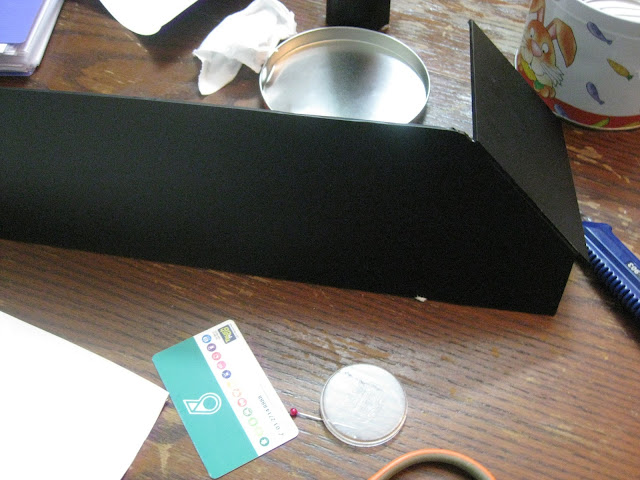  I am quite satisfied with the psu cover considering this was my first attempt, not so satisfied with the luminous panel yet as you all know but since this isn't a sponsored build or what sort, just my personal rig so who gives a fark I can perfect the luminous panel but that would mean me taking apart the panel, unscrewing lots of fittings here & there that took me quite some time to get it in place with such a low clearance plus I might need to spend probably another RM50-100 to get the material, laser cutting etc so I think i'll pass.In case if there is a leak during the leak test somewhere under the psu cover & I couldn't fix it without taking apart then I might consider getting the luminous panel perfected. Lets just hope no leaks ya 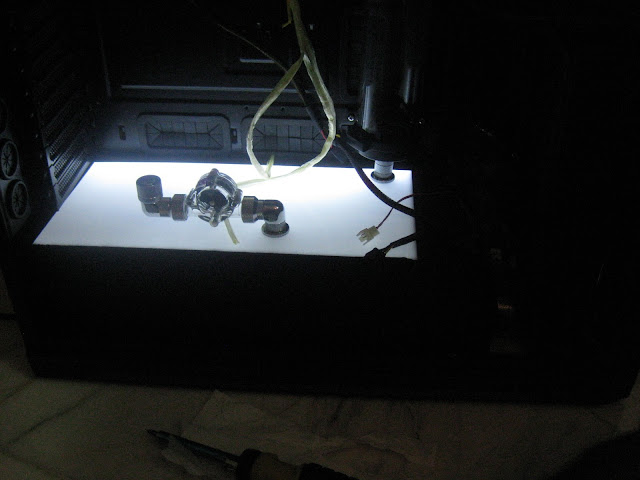 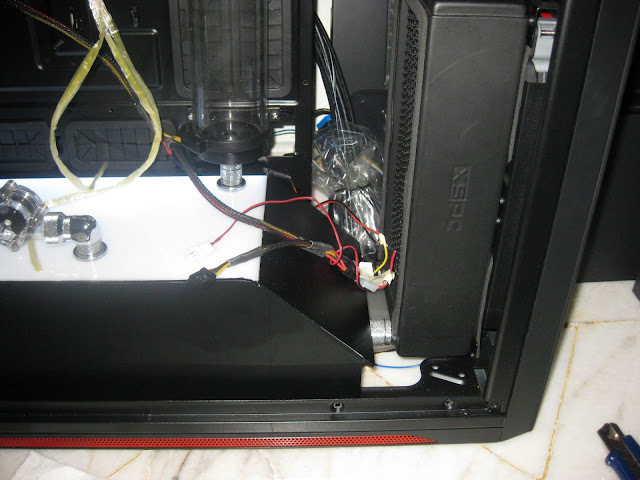 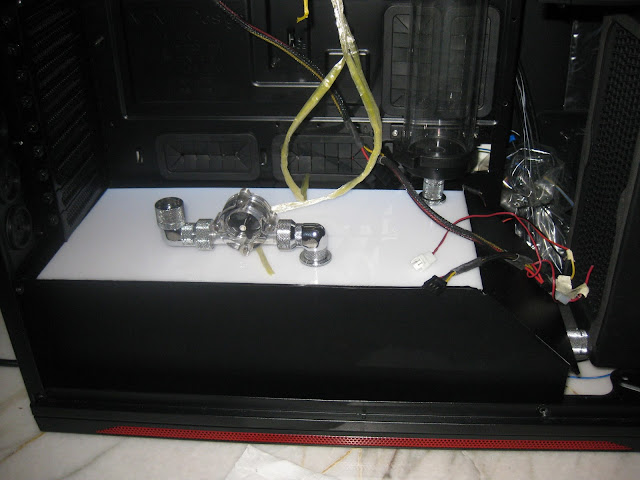 Still deciding to go with 5.25" bay cover with acrylic + matte black sticker or acrylic + ROG logo. Once the side panel is on, there won't be any difference so I am still thinking on my options 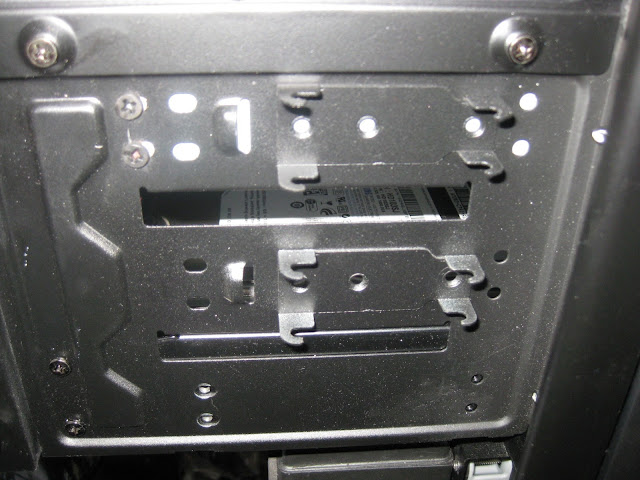 It's either bending the metal or cutting it off with a dremel. Went with the lazy method lol otherwise the acrylic panel wont be able to sit nicely over here.  This post has been edited by infernoaswen: Dec 31 2013, 01:40 AM |
|
|
Mar 3 2013, 09:36 PM
|
|
Senior Member
2,736 posts Joined: Dec 2006 |
get the cable from taobao, arrive in 1 weeks time using EMS
|
|
|
Mar 3 2013, 10:18 PM
|
|
Senior Member
3,782 posts Joined: Aug 2010 From: subang jaya |
QUOTE(Dennos @ Mar 3 2013, 09:36 PM) get the cable from taobao, arrive in 1 weeks time using EMS yup I plan to do that...going through the list lol...so many sellers to choose from |
|
|
Mar 4 2013, 10:09 AM
|
|
Senior Member
785 posts Joined: Jun 2012 |
great build brooo...
 cant wait to see the finish product |
|
|
Mar 12 2013, 02:06 AM
|

Senior Member
1,539 posts Joined: Aug 2008 From: Coexist |
damn nice build bro.
somehow, this project poison me to buy switch 810  |
|
|
Mar 12 2013, 07:53 AM
|
|
Senior Member
3,782 posts Joined: Aug 2010 From: subang jaya |
QUOTE(Kidz1995 @ Mar 12 2013, 02:06 AM) damn nice build bro. do it bro somehow, this project poison me to buy switch 810 This post has been edited by infernoaswen: Dec 31 2013, 01:40 AM |
|
|
|
|
|
Mar 12 2013, 12:16 PM
|
|
Senior Member
785 posts Joined: Jun 2012 |
good for u bro...
finally an update..its been a while yes |
|
|
Mar 12 2013, 05:06 PM
|
|
Senior Member
3,782 posts Joined: Aug 2010 From: subang jaya |
QUOTE(qwe13 @ Mar 12 2013, 12:16 PM) good for u bro... hahaha, its not that I dont want to update...i got nothing to update...waiting for stuff, either no stock or keep getting delay here & there finally an update..its been a while yes  I want to play crysis 3 & far cry 3 also cannot....got the game but the rig not ready yet |
|
|
Mar 12 2013, 05:10 PM
|
|
Senior Member
785 posts Joined: Jun 2012 |
hell yeah!! Crysis 3 is damn niceeeeee broo... but the game play..hmm much easier compared to Crysis 2.. Graphics wise, DamnSUPERB!! huhu
|
|
|
Mar 12 2013, 05:44 PM
|
|
Senior Member
3,782 posts Joined: Aug 2010 From: subang jaya |
QUOTE(qwe13 @ Mar 12 2013, 05:10 PM) hell yeah!! Crysis 3 is damn niceeeeee broo... but the game play..hmm much easier compared to Crysis 2.. Graphics wise, DamnSUPERB!! huhu yeah everyone is telling me that...damn I am missing it out...guess what, I just bought a blue flame lighter for cable sleeving...damn its not working anymore...cant enlight it, need to exchange a new one tomorrow...damn keep getting bad luck  |
|
|
Mar 13 2013, 12:26 AM
|
|
Senior Member
785 posts Joined: Jun 2012 |
QUOTE(infernoaswen @ Mar 12 2013, 05:44 PM) yeah everyone is telling me that...damn I am missing it out... lol...steady bro. usually among smokers, we test it first, than pay the guy.. guess what, I just bought a blue flame lighter for cable sleeving...damn its not working anymore...cant enlight it, need to exchange a new one tomorrow...damn keep getting bad luck |
|
|
Mar 13 2013, 12:44 AM
|
|
Senior Member
3,782 posts Joined: Aug 2010 From: subang jaya |
QUOTE(qwe13 @ Mar 13 2013, 12:26 AM) lol...steady bro. usually among smokers, we test it first, than pay the guy.. tested it, was working fine...then when bring back home somehow cant light it up (or am I noob?) lol...after trying few times I can light it up if its at low, if I set the flame high it wont be able to light up. Anyways will exchange with a new 1 tomorrow if possible, I think its the spark problem. Cheap china quality so I am not surprised la |
|
|
Mar 13 2013, 01:11 AM
|
|
Senior Member
785 posts Joined: Jun 2012 |
QUOTE(infernoaswen @ Mar 13 2013, 12:44 AM) tested it, was working fine...then when bring back home somehow cant light it up (or am I noob?) lol... candles would be efficient after trying few times I can light it up if its at low, if I set the flame high it wont be able to light up. Anyways will exchange with a new 1 tomorrow if possible, I think its the spark problem. Cheap china quality so I am not surprised la |
|
Topic ClosedOptions
|
| Change to: |  0.0301sec 0.0301sec
 0.46 0.46
 6 queries 6 queries
 GZIP Disabled GZIP Disabled
Time is now: 18th December 2025 - 06:23 AM |
 Quote
Quote