Welcome Guest ( Log In | Register )

Bump Topic Topic Closed RSS Feed

Outline · [ Standard ] · Linear+

Model Kits Model Kits/Toys Painting, Building, Modding Thread, where the 'deja-vu are tradition in here

views
     
kevinn7
post Mar 29 2010, 12:05 AM

Casual
***
Junior Member
455 posts

Joined: Nov 2004


Hi guys,

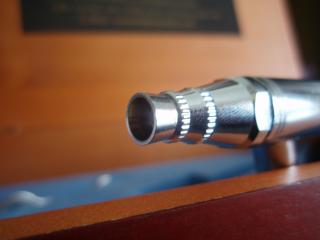
I am having some problems with my airbrush. I don't know why when I color a certain part of my model, the color appears flat. I usually mix my X-18 (Semi Glossed Black) Tamiya acrylic paint with my X20A thinner with a 1:2 ratio (Color:Thinner). When I use brush, the color has the semi-gloss effect. My airbrush pump pressure is about 10 PSI. Below are the pics of my airbrush and pump.

Attached Image

Attached Image

Attached Image

Attached Image

Attached Image


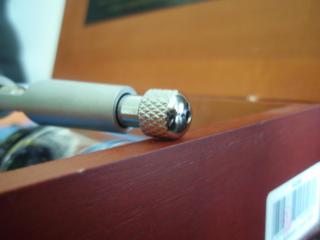
The picture below shows an adjustment screw to which I can adjust the amount of paint that comes out. I usually leave it fully closed so that I don't accidentally pull the button more towards the back while airbrushing. This will cause a sudden flush of paint to come out which may lead to the object having different waves of paint.

Attached Image


I would also like to ask, if i were to spray my car with primer and then with the normal Tamiya X1 (white) paint, will there be any problems? Because when I spray with X1, it will be mixed with the X20A thinner prior to airbrushing. Wouldn't the thinner go through the primer as well?

Attached Image


I also noticed the pump having a little water vapour in a glass like tube. How do i get it out?

Attached Image


Thanks for your help.

This post has been edited by kevinn7: Mar 29 2010, 12:07 AM
kevinn7
post Mar 29 2010, 02:05 PM

Casual
***
Junior Member
455 posts

Joined: Nov 2004


QUOTE(blowsperior @ Mar 29 2010, 11:36 AM)
kevinn7,

X20A is an acrylic thinner and Tamiya Surfacer is a lacquer paint. So, mix Tamiya Surfacer with lacquer thinner only.  smile.gif
*
Luckily I asked first. I thought Surfacer is acrylic. I have the lacquer thinner too. Thanks !


Added on March 29, 2010, 2:25 pm
QUOTE(rayloke @ Mar 29 2010, 11:59 AM)
» Click to show Spoiler - click again to hide... «


It is very good of you to provide photos when asking question rclxms.gif  thumbup.gif

1. The paint appeared more flat than it should be (or compare to hand painting) when air brushed, is probably the thinner dry too fast when still in the air, so the leveling effect doesnt happen much, and the surfacer is a lot rougher than it shold be. As a result, it looks more flat.

However, this is my guess only. Mebbe u can try make the paint more watery/thiner; ot try spray is closer to the plastic. and see how's the effect.

2. yeah the adjustment thingy at the back of a hand piece is useful. However, if u ask me, i would recommend u to try learning to use the strangth n sensitivity of your finger to adjust the paint amount. More fun tongue.gif  Haha just my preference.

3. by theory as, especially if u r using lacquer paint and lacquer thinner. But for acrylic thinner, it wont be a problem at all cause the primer is lacquer based. Even for lacquer paint n thinner, spraying thin layer by layer, the thinner will vaporised too quickily before it can even have reaction with the already dried primer. On top of that, it takes a longer time for primer to react with thinner if compared to paint. Usually ther will be no problem.

4. Usually there is a knob at the bottom of the water trap. Most likely it's a spring operated one. U push the knob n water will fill up. If u want a more thorough clean (Also my own preference  tongue.gif ) Fill up the compressor tank first, push the knob, and the air pressure will make sure the water spraying out......
*
Firstly, thanks for your reply.

1. For the paint to appear flat after primer is normal but I was talking about the other parts like the lower arm etc (Sorry for not making that clear in my initial post tongue.gif). Semi glossed black appears as flat black. Could it be because I mixed my acrylic paint with lacquer thinner. I never knew acrylic thinner existed until the other day when I saw it in Tamiya Underground. I straight bought it.

If I spray it close to the plastic, the object will have lumps of paint. Hmm... must be my skills that is giving the problems. lol

Whats your portion of mixture usually? I usually use 1:2 (Paint:thinner)

2. Haha Ok, I will keep that in mind. What about the compressor pressure? I use about 10psi. Is that ok?

3. Okie. I will keep that in mind. What about the clear coat on top of the colored bodY?
For example;
I first spray my car with Tamiya primer which is mixed with lacquer thinner. Done.
I then spray Tamiya acrylic (X1-White) mixed with Tamiya X20A (Acrylic thinner). Done.

What about the clear coat on top (X22)? I will have to mix it with Tamiya X20A right? Wouldn't that mixture interfere with my painted body?

4. Ok, meaning at the end of the day there will definitely be abit of vapor left?

This post has been edited by kevinn7: Mar 29 2010, 02:25 PM
kevinn7
post Mar 29 2010, 04:58 PM

Casual
***
Junior Member
455 posts

Joined: Nov 2004


QUOTE(rayloke @ Mar 29 2010, 03:24 PM)
1. Hehee..... i m quite an old school person; everything based on feel n experience; sorry cant really give you the ratio. but usually the paint is a little thinner than milk.

2. different psi gives u different effect. if u r doing cars with high shine paint, i would recommend a low psi; for shading or gradient, high psi. To me, i set the psi, spray a little n see the effect. tune it untill i like it. Yes 10 psi is pretty common i guess.

3. Yes, i think the thinner in the paint will definitely react with the base paint or primer, especially u r doing wet coat; eg on high shine car models. However, dont worry too much, the reaction is very light n slow; moreover, u r not touching the wet surface, hence there's no interferance in between layers of paint n primer.

Eg, u try putting your finger on the surface after u have a layer of wet coat, u will realise ur finger will pull out not only the paint u have just sprayed, but the layer of paint or primer underneath it too. It should be an evidence of the lower layer has chemical reaction.

So for car or high shine parts which i need to wetcoat, normally i will first spray a thin layer of paint, before it got totally dried, i will do my heavy wet coat.  So the chemical reaction with primer will be minimized; yet the layer is still wet enough to have the leveling ability with the wet coat layer.
4. Yes, if the moist trap has water in it, it means it is working nicely, trapping the air inside n not letting the water to be sprayed together with your paint into the air.
*
Thanks smile.gif
kevinn7
post Mar 30 2010, 06:23 PM

Casual
***
Junior Member
455 posts

Joined: Nov 2004


QUOTE(erh_teo @ Mar 29 2010, 05:16 PM)
Wah, long time never come here sibuk. This thread is still alive tongue.gif

Kevinn7, if you like to know more about auto modelling, try here:
http://z12.invisionfree.com/ScaleModelsMalaysia
or alternatively, clicking on rayloke's signature will bring you to zerogunz.
There are more people doing cars/autos there and their WIP has more info for you to learn more about making cars.
Any, I my attempt to answer some of your queries if you don't mind..

1) & 2)
I suppose you wonder the effects of paint finishing (gloss, matt, orange peel, etc) with changes in paint thinning and airbrush setting.

Ok, since 1) and 2) are related, I shall explain together.
Like what been explain, the faster the paint dry the coarser the paint dries (ie. rough, matt or flat).
The only way to get a smooth surface and glossy is a wet coat spray where you spray the plastic surface with paint until it turns "wet", but not too much until you get runny paints.
I think 10psi is too low for wet coat as the paint emmission is too slow for the paint to build up a wet-coat.
By the time it build sufficiently thick enough coat, most of the paint on the surface has dried and more paint landing on dried/semi dried surface will create a flat-look.
To get a satisfactory glossy surface, you need to get the job done fast.
How fast? Google on youtube on those car makers, you know how fast you need to work with your airbrush.
They usually spray with higher psi around 18-25, and moving the hand fast to cover as much area with paint as even and smooth.
Spraying with low psi takes longer and risk the danger of paint pooling/accumulating.

Besides, I assume you spray semi-gloss paint to get semi-gloss finishing, flat to get flat and gloss to get gloss.
Spraying on a flat/rough surface will get you a flat/semi-gloss or rough finishing despite you are spraying with a gloss paint on top. So, make your primed surface matches your finishing need.

As for thinning, it's really very versatile.
Some prefer thinner, some thicker.
Thinner paint means runnier paint and require thinner paint layer, but more layer.
Thicker paint means less layer but risk of orange peel/ paint pooling.
It's up to individual to adjust to their need. Key is practice. Get some disposable plastic spoon to practice your airbrush if you're not confident  blush.gif
3) For clear coat on painted surface, it's about paint on paint.
I believe you should already know the basics of paint strength (acrylics < enamel < lacquer)
Never get a stronger paint type on top of a weaker (that's why primer are usually lacquer base).
Same type paint on top of each other is OK.
And whenever you need to spray another paint (clear is also a paint) on top another paint, make sure the first spray is always a mist coat. Because a wet coat will carry sufficiently enough thinner to do much damage on the paint beneath (eg. paint smearing).
Once the first 2-3 mist coat has dried on top of the lower paint layer (say 3 mist coat of clear on a painted white surface), the successive wet coat of clear will do sufficiently damage/or so call bonding to the clear coat, but will not reach the white layer paint.
Had you skipped the mist coat step, your wet clear coat will directly react with white and get smearing all across.
4) Of course there will be vapor, so after every wet coat, always allow 1-2 days for it to "gas-out".
Try touch with your fingers, if finger print stays.. (not oily finger prints), that means your paint is still soft and not fully cured.
Wait for it to fully cure before another wet coat (if necessary).
Hope it helps  biggrin.gif
*
Yeah.. that website is awesome.. ehehe

1 &2) Ok. I have a clearer picture on the PSI settings now.
In terms of thinning, I think I will stick with thinner paint, sounds safer. At least until I'm comfortable taking a step higher. smile.gif

3) I did not know the rule of "acrylics < enamel < lacquer" until you told me. Thanks for the heads up. hehe
I think I will go for 2 mist coats, put in my decals, another 3 mist coats and one final wet coat. Slowly sand it down with 800 then 1000 grit sandpaper and then polish. Sounds ok right?

4) I was referring to the machine pump itself that has a glass like reservoir.
I think I will leave the car for a few days without having any sort of contact, wanna play safe tongue.gif ehhe...

Thanks for your help!

kevinn7
post Mar 31 2010, 11:27 PM

Casual
***
Junior Member
455 posts

Joined: Nov 2004


QUOTE(rayloke @ Mar 30 2010, 07:48 PM)
kevinn7:Seems like we have another car model enthusiast here rclxms.gif  (Is kinda lonely doing automobile here in KL. The forum erh_Teo intro u, u can find a modeler's work-in-progress of a Impreza. He's a very good car modeler, mebbe u guys would click. I do cars too, but i suck at that tongue.gif
*
What kind of models do you build?
kevinn7
post Apr 2 2010, 08:21 AM

Casual
***
Junior Member
455 posts

Joined: Nov 2004


QUOTE(erh_teo @ Apr 1 2010, 01:42 PM)
It would be preferably applying decals on gloss surface to avoid any "silvering" effect on the decals.
Silvering (Frost-like-effect under clear film of decals) will happen when you apply decals on top of flat/matt surface.
Since you are going to paint white, can apply decals before top-coat wt clear. Just make sure your white is gloss enough.
*
Hehe.. Thanks !! smile.gif

Topic ClosedOptions
 

Change to:
| Lo-Fi Version
0.2442sec    0.84    7 queries    GZIP Disabled
Time is now: 28th November 2025 - 09:14 AM