Welcome Guest ( Log In | Register )

Outline · [ Standard ] · Linear+

 My First Self Built Rig[12700F,32G D4,B660,3060Ti], Wifi7 addin, NVME adaptor, & GUNDAMS!!!

views
     
buraqdunia
post Jan 4 2023, 03:22 AM

On my way
****
Junior Member
617 posts

Joined: Jul 2006


QUOTE(babylon52281 @ Dec 27 2022, 01:46 AM)
Hi, not yet. Still reading up on the bios flash and what to do if shit happens. Mine doesnt come with bios flashback so am a bit concern.

What do you think of Asrock bios flashing? Can a noob like me get it right first time?
*
QUOTE(buraqdunia @ Jan 4 2023, 03:22 AM)
Well 1st thing 1st , UPS is must. Longer backup power's time, better.  We don't want power trip while flashing in progress. But  I read somewhere some bios chip can revert back by itself , if flashing fail. Can't remember though.
*
This post has been edited by buraqdunia: Jan 4 2023, 03:26 AM
buraqdunia
post Jan 4 2023, 03:24 AM

On my way
****
Junior Member
617 posts

Joined: Jul 2006


Edit

This post has been edited by buraqdunia: Jan 4 2023, 03:25 AM
TSbabylon52281
post Jan 8 2023, 01:25 AM

Look at all my stars!!
*******
Senior Member
2,673 posts

Joined: Apr 2017
QUOTE(buraqdunia @ Jan 4 2023, 03:22 AM)

*
Thanks for the advice. And yes I am running with a UPS. Have been doing that since a few years ago because previously with it, I had a few blackouts which hard crashed and corrupted my Windows a few times so badly that it also killed by SSD.
TSbabylon52281
post Feb 18 2023, 05:08 PM

Look at all my stars!!
*******
Senior Member
2,673 posts

Joined: Apr 2017
A tip for those who would like to get replacement Intel CPU label stickers.

This method I used to get the Intel label for this 12700F rig. Haha

https://forum.lowyat.net/index.php?showtopic=5357413
TSbabylon52281
post Jul 2 2023, 11:56 PM

Look at all my stars!!
*******
Senior Member
2,673 posts

Joined: Apr 2017
After 8 months, my rig had its first upgrade.

Mainly due my paranoia and worry that I might get missmatched RAMs which could affect system stability, I finally caved in and bought a matching RAM kit to the one that came in my system.

This Teamgroup Delta RGB 3600MHZ 8GBx2 18-22-22-42
user posted image

At that time this kit was selling at RM378 (from the same shop that sold me my system), and had been holding there for the many months I have been tracking on both Lazada & Shopee. Yes it was ridiculously expensive when DRAM prices were dropping so much earlier this year. So when I found it dropped to RM 274, I quickly purchased.

An upshot to the high prices was this particular kit did not move much stocks during the 8 months I have been tracking so when I bought I asked if they could select the stock with matching paired serial numbers closest to my current system RAM sticks.

It was a big hope, but lo & behold the RAM kit I got was just a couple of serial digits apart from those in my current system.
user posted image
Super lucky that I still can quad match my RAM sticks despite so many months apart! Woo hoo! rclxm9.gif

Installation was therefore smooth and seamlessly easy. The Asrock mobo automatically detected the extra RAMs and I didn't have to touch the XMP profile that I had already manually tuned for the existing 2 sticks I had.
user posted image

Turning on the RGB lighting the all 4 sticks running synchronously, I can see the appeal of having some lighting
user posted image

After a brief moment of waiting the memory learning process, it booted into Windows at first attempt. So far so good and this is running @G1.
user posted image

This post has been edited by babylon52281: Jul 3 2023, 12:11 AM
TSbabylon52281
post Jul 3 2023, 12:12 AM

Look at all my stars!!
*******
Senior Member
2,673 posts

Joined: Apr 2017
CPUZ showed the new RAM stick SPD data and XMP profile. So far so good.
user posted image

Extracting the SPDs via Thaiphoon, it confirms that all 4 RAM sticks are from the same batch & manufactured at the same time. RAM chips are all from Micron but incomplete part numbers shown for all four.
user posted image

So next a series of RAM tests to check for any instabilities. Testing was done in a 2+ weeks time period as some test spanned a few days and I had to retest a few others.

First up is Memtest86. All green so so far so good.
user posted image

Next is Memtestpro which I did for 12-15hrs iinm, and I stopped it once passed 2400% without a single error.
user posted image

Then next I ran Windows Memory Diagnostics. I did 2 runs on different days both which also passed. Still good.
user posted image

After that I hammered with TestMem5, running 3 cycles each for 1usmus_v3 and Extreme1@anta777. Both also passed.
user posted image user posted image

The biggest hurdle was OCCT AVX2 memory test, and this time it caught 3 memory errors. vmad.gif
user posted image

But overall the system was still stable, so being dissatisfied I did a customised maximum system stress load test, utilising TestMem5 for the RAM, Furmark for the GPU & MSI Kombustor for the CPU.
user posted image user posted image

As you can see from the sidebar monitor, the simulated stress test fully loads & pushes nearly everything to the max except GPU VRAM.
After running without hang or crash, I am finally happy the system has proven to be stable enough for me despite the bad mark from OCCT.

A final run with 3D Mark Timespy & Firestrike did not find any issues.

PS And about those Micron chips, what info I gathered from Reddit seems to point that these are E-dies tho without the complete part names I cannot be fully certain.

This post has been edited by babylon52281: Jul 3 2023, 12:31 AM
TSbabylon52281
post Nov 26 2023, 07:22 PM

Look at all my stars!!
*******
Senior Member
2,673 posts

Joined: Apr 2017
Its been a while but here is a review of my next upgrade with a 2nd hand Scythe Mugen 5 RevB with a LGA1700 adaptor kit.
user posted image

Link: https://forum.lowyat.net/topic/5422872


This post has been edited by babylon52281: Nov 26 2023, 07:26 PM
TSbabylon52281
post Dec 31 2023, 11:23 PM

Look at all my stars!!
*******
Senior Member
2,673 posts

Joined: Apr 2017
Alrighty just to cap out 2023 before I head out for New Year celebrate, this upgrade came a lot more sooner than I planned as am still happily rocking my SATA SSD running Win10, but due to the (back then) eminent SSD price rising I took the opportunity during 11.11 sales to get an ADATA XPG GAMMIX S70 Blade 2TB @RM499.
user posted image user posted image

After vouchers & coins deducted the final price paid is RM 427 (inc delivery).

This is a full fat Gen4x4 NVME SSD rated to 7400MB/s read & 6800MB/s writes.
user posted image user posted image

Main reason I went for it being less popular than the Samsungs, WDs, & pletora of Phison based drives. Yep shocking isnt it, the brains is an Innogrit IG5236CAA running 4 chips of ADATA branded B47R Micron TLC NAND, driving such high speeds via 2x1GB Samsung DDR4 DRAMs.
The IG controller is a pretty big chip, neccessitating this to be dual sided where NAND & DRAM are placed on both sides of the PCB.

Another key reason was its cheaper price as compared to other comparable SSD; Kingston KC3000 were in the RM 55x while Samsung 990Pro & WD SN850X are even pricier.

One thing I liked about this SSD is the drive comes as a bare unit and the heatsink is optional, allowing to use direct contact with my mobo SSD heatsink.

And ohh boy there is a huge difference in cooling potential, as the XPG heatsink plate is only 1mm thick as compared to my mobo Asrock M2 Armor (4mm thickness).
user posted image user posted image

Keeping the ADATA provided heatsink, I may be able to use it in future when I replace it and relegate the S70 to the secondary M2 slot (also a Gen4x4).


This post has been edited by babylon52281: Jan 1 2024, 10:00 PM
TSbabylon52281
post Dec 31 2023, 11:24 PM

Look at all my stars!!
*******
Senior Member
2,673 posts

Joined: Apr 2017
I am no pro SSD reviewer so I can only benchmark my results using the more well known testers.

ADATA own Toolbox Tester
user posted image

Crystal DiskMark (Read is slightly below specs while write is a tiny bit below specs)
user posted image

AS SSD
user posted image

Hammering it with AS SSD compression write showed a dip with drive over 80% written. Impressive, this is the benefit of an onboard DRAM.
user posted image

Anvil Storage Utilities
user posted image

4K Random Read (Above specs 750k IOPS)
user posted image

4K Random Write (Above specs 750k IOPS)
user posted image
TSbabylon52281
post Dec 31 2023, 11:24 PM

Look at all my stars!!
*******
Senior Member
2,673 posts

Joined: Apr 2017
Copying to & fro my SATA SSD to this NVME SSD maxed out the SATA3 bandwidth without any dips
user posted image user posted image

Lastly a test using MS Direct Storage 1.2 Avocado benchmark. Comparison with netizen bench results showed that Im nearly there, lacking in their RTX4090 GPU only.
user posted image

But more impressively is that my near ancient ADATA SP900 SATA SSD is doing not too bad in comparison, somehow achieving NVME Gen3 speeds
user posted image

Anyways, that it for now. If there is anything amiss or you would like me to test, do let me know. But I plan to transfer my Windows to this very soon so by then all testing will cease.

Bye for now!
TSbabylon52281
post Mar 1 2024, 11:13 PM

Look at all my stars!!
*******
Senior Member
2,673 posts

Joined: Apr 2017
Hey guys,

Since I had a long break for CNY, I planned for a few minor improvements to my PC

1) I recently replaced my work PC 1TB HDD to SSD, so without a use for this drive anymore I brought it back to fill up another empty SATA slot. I mount it in the case HDD cage using a 3.5" to 2.5" adaptor.
user posted image

2) I decided I want to maximise the cooling performance so firstly I changed out the front 3x120mm case stock fans with 2x140mm & 1x120mm Scythe Kaze Flex RGB fans in a 140-120-140 arrangement
user posted image user posted image

Why such an oddly sized fan array?
Scythe's 140mm & 120mm has a higher RPM range and better efficiency at pushing air thru, however the Nexus Air case only can support 3x120 or 2x140 fan sizes. By going with a round 140mm fan size I can just about squeeze a 120mm square fan in between.

Why Scythe RGB fans?
No reason in particular, it was the cheapest 140mm round fan I can find and the RGB is just an extra plus.

I also replaced all fan mounting screws with rubber fan stubs to dampen any vibrations coming from these case fans including the rear stock fan. I then moved the stock case fans to the top mount so they can vent heat out the top.

user posted image user posted image
TSbabylon52281
post Mar 1 2024, 11:21 PM

Look at all my stars!!
*******
Senior Member
2,673 posts

Joined: Apr 2017
3) With greater airflow comes more dust intake into the case. To tackle this issue I did 2 additions.

At front I put on 3x 140mm fine mesh filters.
user posted image

These are magnetic so they stick on the steel front grille really well. It also helps that this particular case has a flat front grille profile.

As you can see it already captured a noticeable amount of dust particles.

The next addition is a bit more janky as I fashioned out rear filters from a fine porous filter bag secured to the case walls with magnetic stripes. It helps to keep dust out while remain breathable for air/heat to go thru
user posted image user posted image

The top portion above the rear fan also gotten the filter.

Lastly I wanted some spare USB ports at the rear since all mobo rear ports are used and I had a free voucher from Shopee, so I gotten a rear panel USB 2.0 expansion. It sits hidden above the GPU top most PCIE slot.
user posted image

Lastly lastly, just for the heck of it because I had another free Shopee voucher, I replaced the PCIE slots screws with a set of thumbscrews that you would find on premium branded cases.
user posted image user posted image

Imho it helps elevate to look more expensive than a typical budget case.

This post has been edited by babylon52281: Mar 1 2024, 11:39 PM
TSbabylon52281
post Mar 1 2024, 11:48 PM

Look at all my stars!!
*******
Senior Member
2,673 posts

Joined: Apr 2017
Oh and I added a CPU cooler & GPU combi support holder during the same update.
user posted image

Full details is at my Mugen 5 review tered https://forum.lowyat.net/index.php?showtopi...ost&p=109215207


TSbabylon52281
post Jun 23 2024, 12:03 PM

Look at all my stars!!
*******
Senior Member
2,673 posts

Joined: Apr 2017
During last Raya weekend I wanted to fine tune my RAM timings because why not yawn.gif

A summary post I put up in RAM Handbook tered if this is too long https://forum.lowyat.net/index.php?showtopi...ost&p=109966938

My hellish journey of RAM tuning actually started on Friday nite when this time, I didnt want to repeat killing my Windows OS again thru boot looping instability, I therefore made a scratch boot OS on my spare HDD so that can I use for test boots and all the RAM testing. Lesson learnt, in case this Windows corrupts , I can ditch it to reinstall and redo easily. Luckily this time I didnt have to do that and maybe its because this round had a better bios

And coming to that, I had on Bios 5.01 for my Asrock B660M PG Riptide mobo, I did try XMP 3600MHZ @Gear1 again but while it booted to Windows (YAY!) it was still not stable to pass a RAM test (boo!).
It still managed to set an Aida64 benchmark as baseline:
user posted image

So started on Saturday morning, by keeping speeds at 3466MHZ while maintaining Gear1 mode and voltage at XMP 1.35V, I step by step lower timings, starting with CL, then both tRCD & tRP, then tRAS, each time going thru hours of testing (Memtest86, TestMemPro, TM5 w/ Absolut).
Once tRAS passes, I rinse & repeat again by reducing CL, then the rest, again and again finally end up with
user posted image

Before it was XMP default CL18-22-22-42
The final timings that I feel comfortable to drop down is CL16-18-18-37 HECK YEAH! rclxm9.gif

Theoretically my First Word Latency went from a poor 10.3ns down to 9.2ns.

I could probably try go further down but the last tRAS drop to 36 caused TM5 to CTD so bumping up a notch I finally stopped. And because I ran out of tuning days, it was ady Monday nite... sweat.gif

Compared before & after, Aida64 showed some significant gains in Read (+1890), Write (+6962) & Copy (+6180) but the big change comes from Latency (-17.5ns !)
user posted image user posted image
TSbabylon52281
post Jun 23 2024, 12:03 PM

Look at all my stars!!
*******
Senior Member
2,673 posts

Joined: Apr 2017
Stress testings then began...
MemTest86 - ALL PASSED
user posted image

TestMem5 with Absolut & Extreme profiles - ALL PASSED
user posted image user posted image

HCI MemtestPro & Intel BurnTest - BOTH PASSED
user posted image user posted image

Running OCCT RAM test (AVX2 for 1Hr) had failed before but this round IT PASSED TOO!
user posted image

In between, I did more other testings; TestMem5 with 1usmus, Windows Memory Diagnostics, Intel XTU RAM test, XTU benchmark (scored 7192 points), YCrunch, Prime95, Cinebench 15,20,23 - ALL PASSED...

So I spent most of last weekend just waiting and waiting and waiting for the various RAM test to complete, each and every run.
At end of it all...

user posted image

biggrin.gif This will be my setup going forward from now unless I encounter any later instability issues. I did have some niggling boot issues tho... hmm.gif
TSbabylon52281
post Sep 28 2024, 11:53 PM

Look at all my stars!!
*******
Senior Member
2,673 posts

Joined: Apr 2017
Wassup guys!

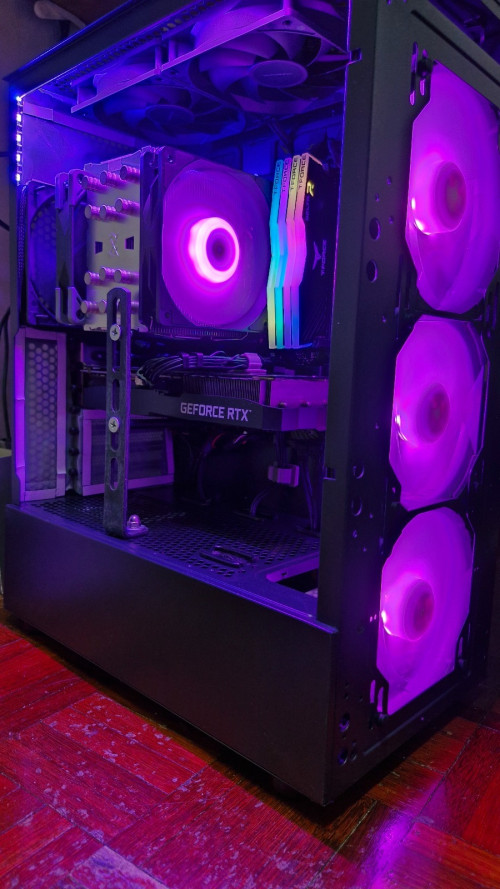
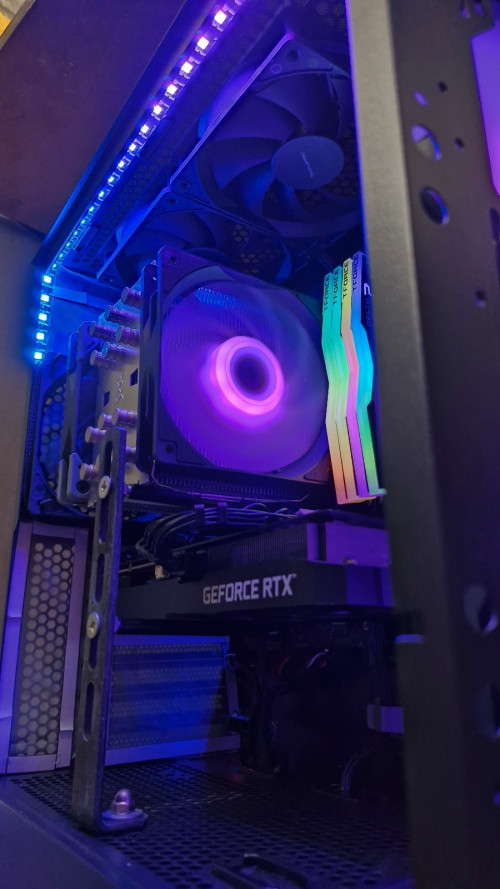
During the long weekend holidays, I made some additions to my PC.

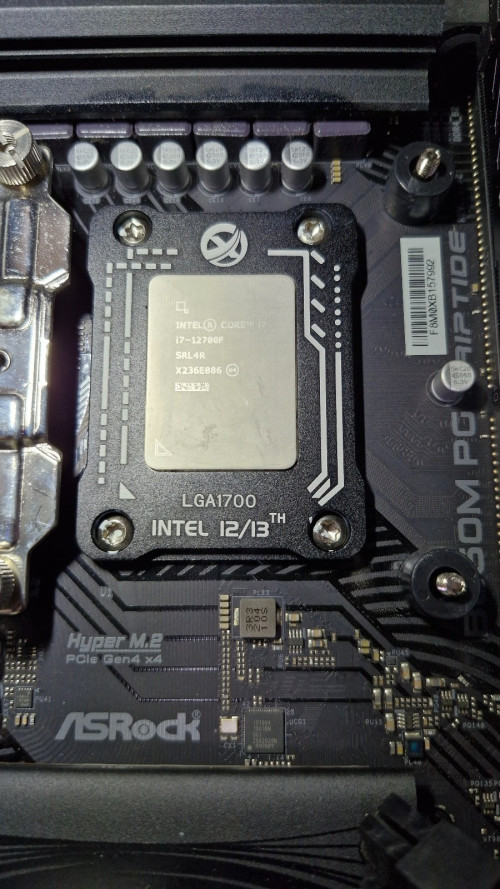
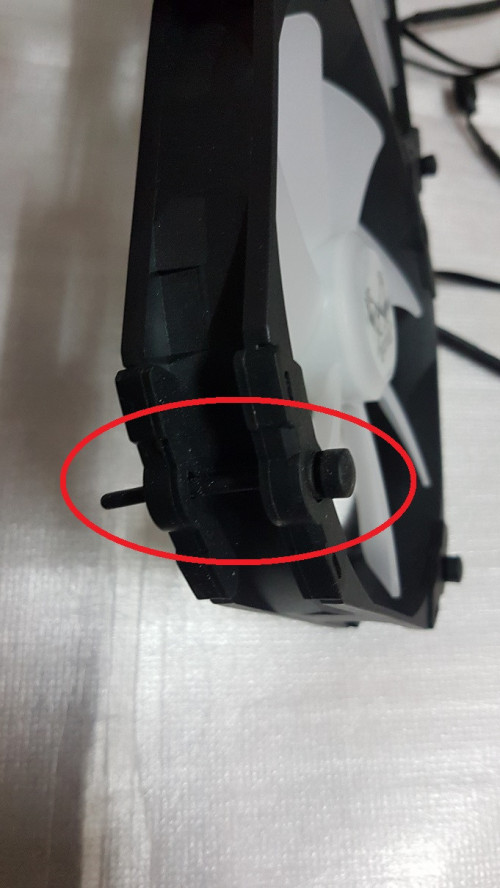
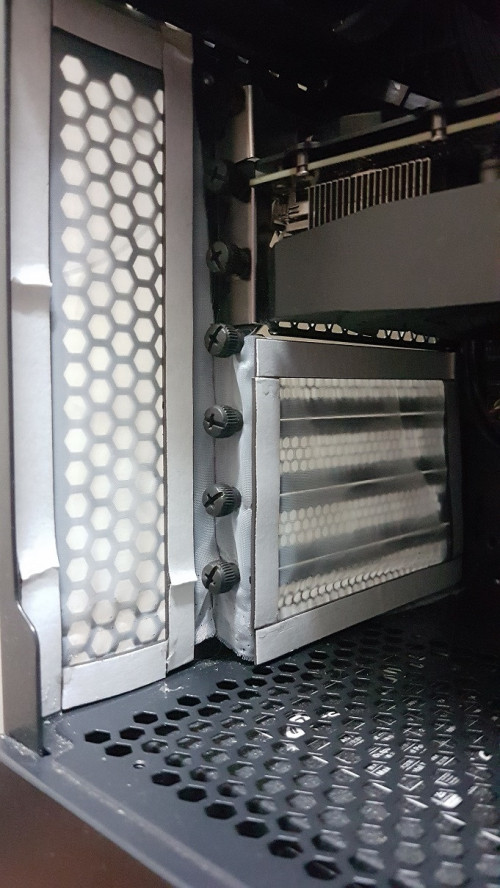
The biggest one that I added is LGA1700 ILM replacement frame! rclxm9.gif Yes, I finally made the jump!
user posted image user posted image

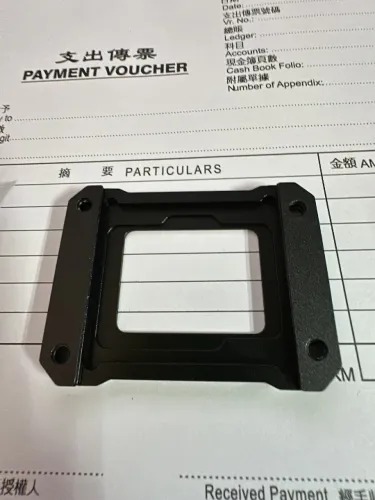
This in particular is Shopee/China clone of Thermalright's version which is a clone of DerBauer's version. Cloneception haha.

Although at half the price of TR's its not a cheap arsed clone as looks exactly like TR's and it fits just as perfectly plus it also has insulating contact pads similar to stock ILM.
user posted image

Installation was pretty easy, but I did take a bit more precaution to ensure even pressure on all 4 sides:
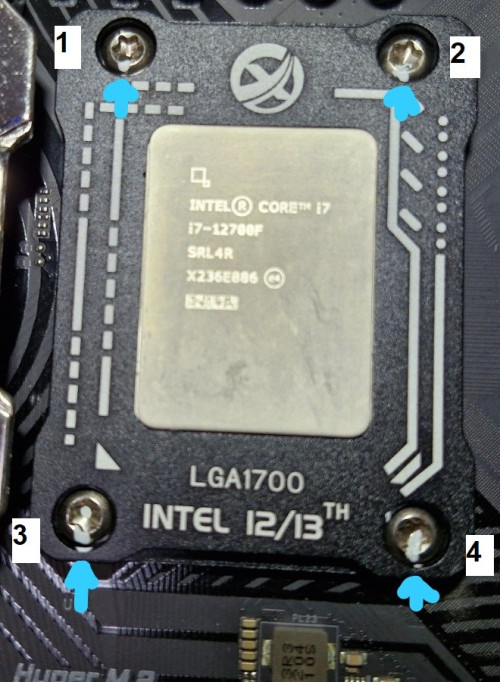
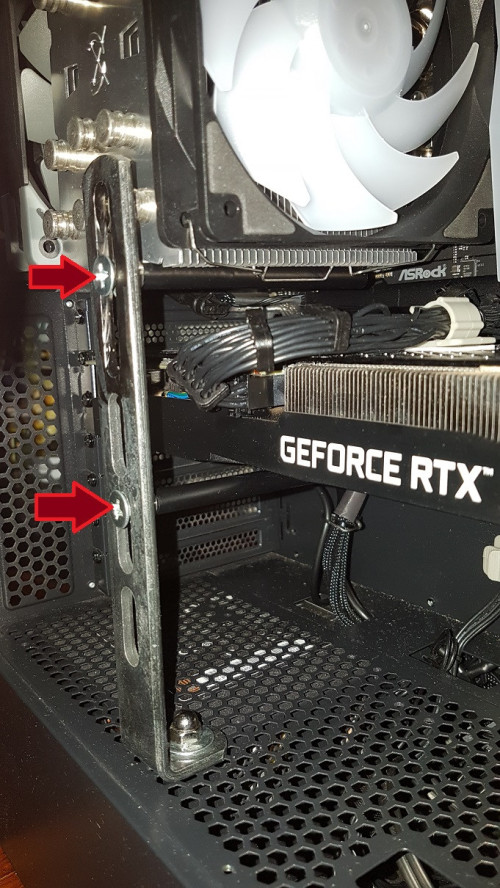
1. Following GN method, I back rotated the screws until the threads fall into the hole with a click sound. Then give it a 90 degree turn to latch onto the thread grooves.
2. Once all screws are secured, I used liquid paper to mark each screw datum point.
3. Starting from Screw 1 then I turned 180 degrees, doing the same with Screw 4, then Screw 2, then Screw 3 in cross pattern.
4. Once I feel resistance, I continue tighten in 90 degrees instead.
5. I tighten down until I feel a hard wall where it cannot go anymore. With this method I found that Screw 1, 2, 4 stops nearly same position while Screw 3 needed a bit more angle to fully tighten.
user posted image user posted image

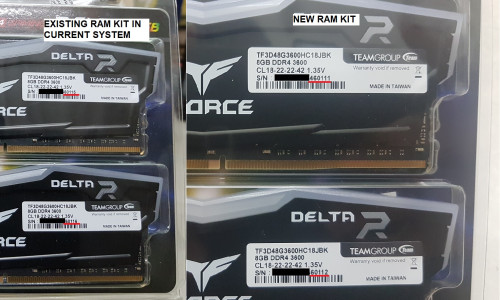
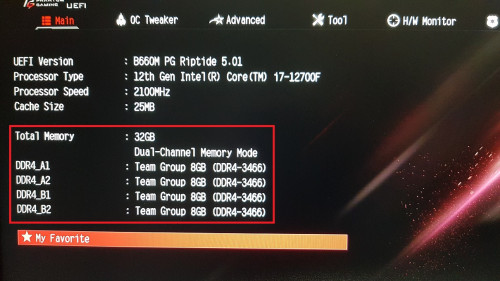
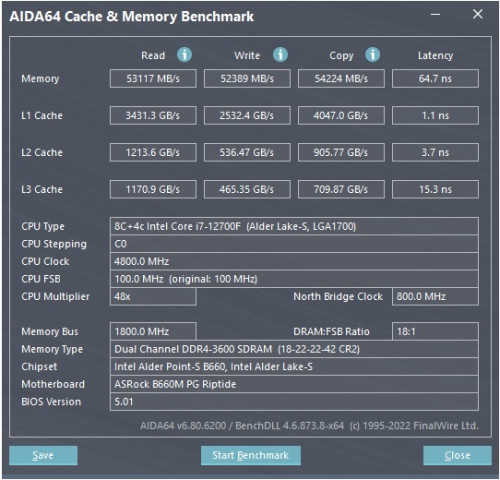
I found that with this method, I had no problems booting up at first go and I didn't even have to default RAM speed, it was perfectly stable.

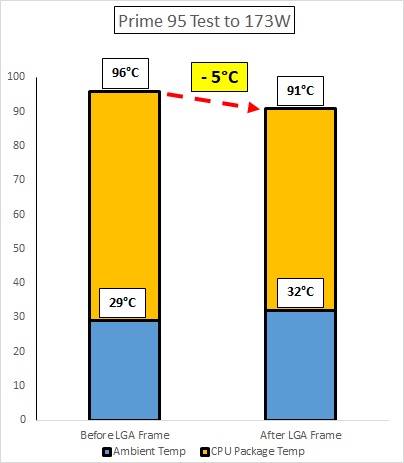
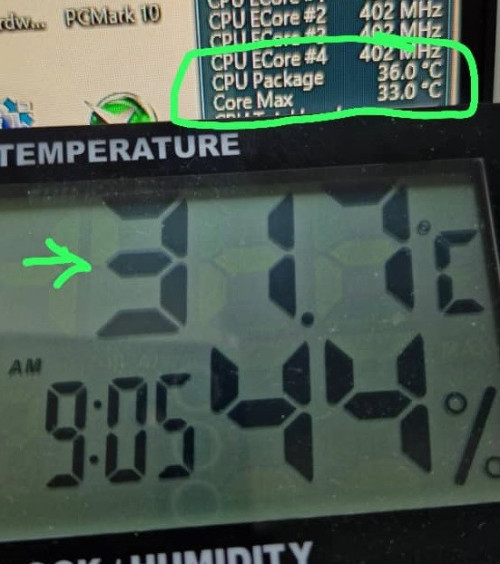
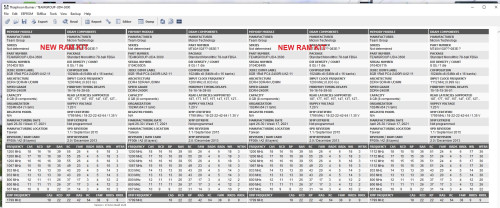
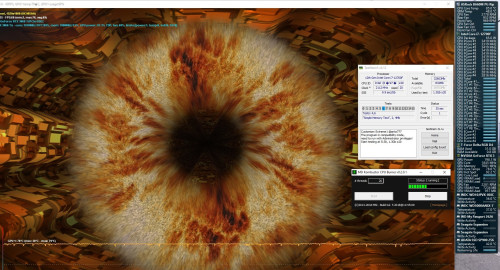
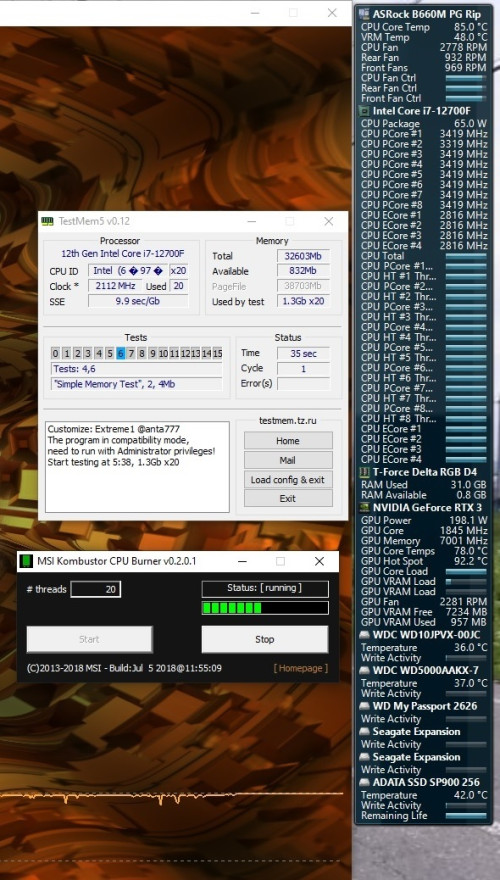
Results I got is 91oC @174W with ambient 32oC as compared to previous max of 96oC @173W with ambient 29oC (before the LGA frame), so if I normalise temps to delta T ambient, I am actually 8oC lower with the new contact frame. Looking at the chart, I can say it works really well for my case.
user posted image user posted image

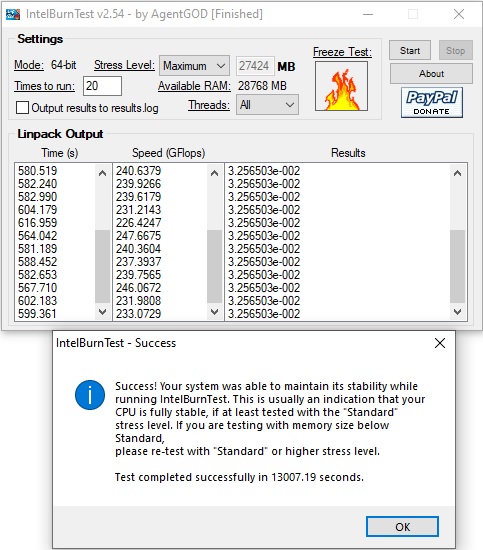
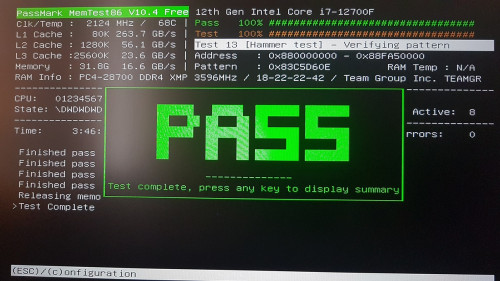
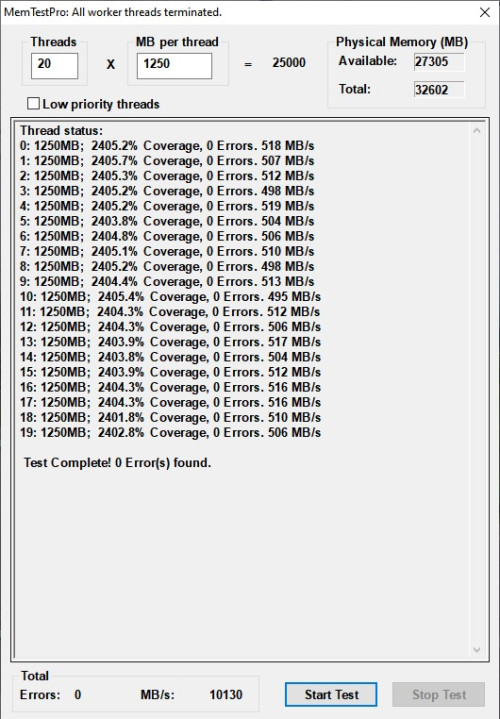
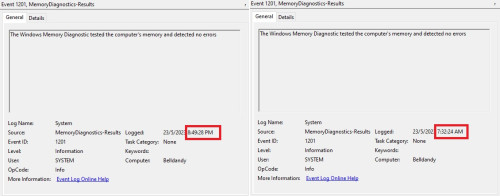
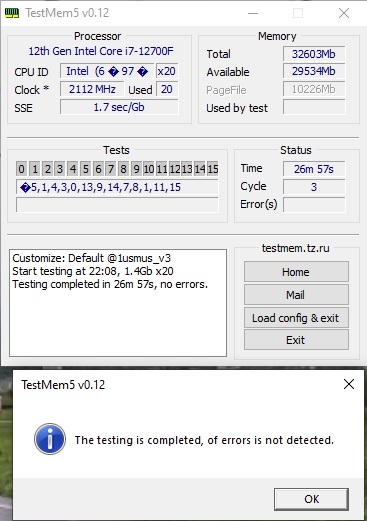
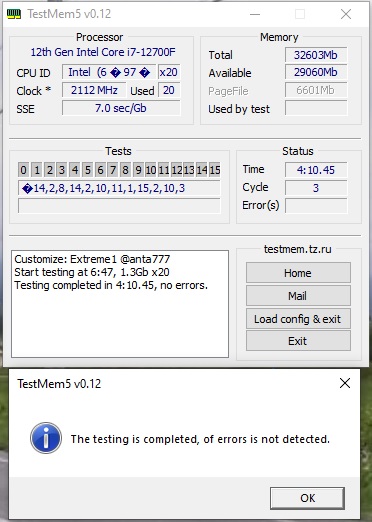
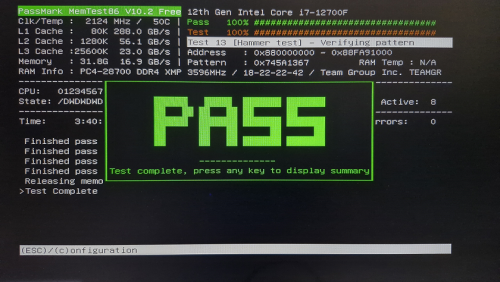
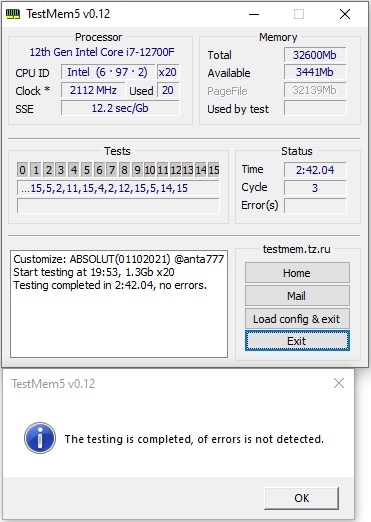
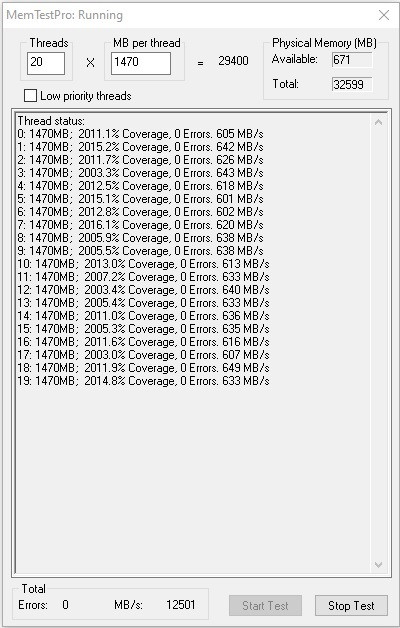
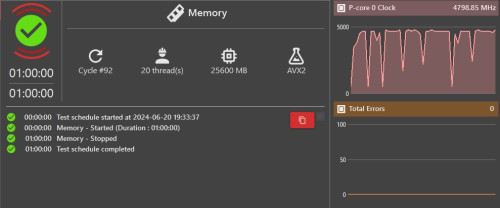
Stability test went smoothly, in fact I read that some modders had to turn off XMP but I booted with my XMPed tuned RAM settings and passed Intel extreme burn test. Idle temps hovering at 4oC above ambient.
user posted image user posted image

This post has been edited by babylon52281: Sep 29 2024, 12:41 AM
TSbabylon52281
post Sep 29 2024, 12:10 AM

Look at all my stars!!
*******
Senior Member
2,673 posts

Joined: Apr 2017
Next update I put in was some grommets for the PSU shroud cover where I find most cases, even expensive ones, don't have.

Because there are no ready sized ones, I modded some general purpose oval ones by selecting a length longer than the holes to cover and I cut off the roundels. This gives an oblong which matches the hole.
user posted image user posted image
TSbabylon52281
post Sep 29 2024, 12:14 AM

Look at all my stars!!
*******
Senior Member
2,673 posts

Joined: Apr 2017
Next addition is adding a used 500 GB WD Black HDD as extra storage which I harvested from my workplace since we are switching over to SSD now. With this I maxed out all the SATA ports on my mobo. I still have a spare NVME M2 port remaining...

user posted image

This post has been edited by babylon52281: Sep 29 2024, 12:16 AM
TSbabylon52281
post Sep 29 2024, 12:21 AM

Look at all my stars!!
*******
Senior Member
2,673 posts

Joined: Apr 2017
Next addon is probably something for the future, seeing that my GPU is 2 slots which meant the only PCIE slot is not practical for use bumping up against that GPU.

So I gotten a X1 riser in order to 'move' that slot away to make use of it.
user posted image user posted image

However I have nothing planned for it so it remains open for now.


This post has been edited by babylon52281: Sep 29 2024, 12:23 AM
TSbabylon52281
post Sep 29 2024, 12:27 AM

Look at all my stars!!
*******
Senior Member
2,673 posts

Joined: Apr 2017
Last to add, you can see most of my mods seen here are quality of life stuff & for performance sake but haha I finally gave in to the RGB virus! Just for looks I added an ARGB strip lighting. Behold my PC now spews rainbow vomit!

user posted image user posted image

With its magnetic backing I mounted it closer to the glass side. Now it is a true gamers PC LOL! rclxms.gif

This post has been edited by babylon52281: Sep 29 2024, 12:30 AM

3 Pages < 1 2 3 >Top
 

Change to:
| Lo-Fi Version
0.0379sec    0.62    6 queries    GZIP Disabled
Time is now: 29th November 2025 - 03:09 AM