If you want to venture into digital art, I recommend iPad with Procreate app. Any older generation ipad which support apple pencil will do. You can draw anytime and anywhere, it's really versatile and portable, also the drawing experience is really good.
I'm a full time artist, and almost all my works and commissions were done in ipad.
I see and thanks for the recommendation. Do you have a gallery to share with me with your digital art works?
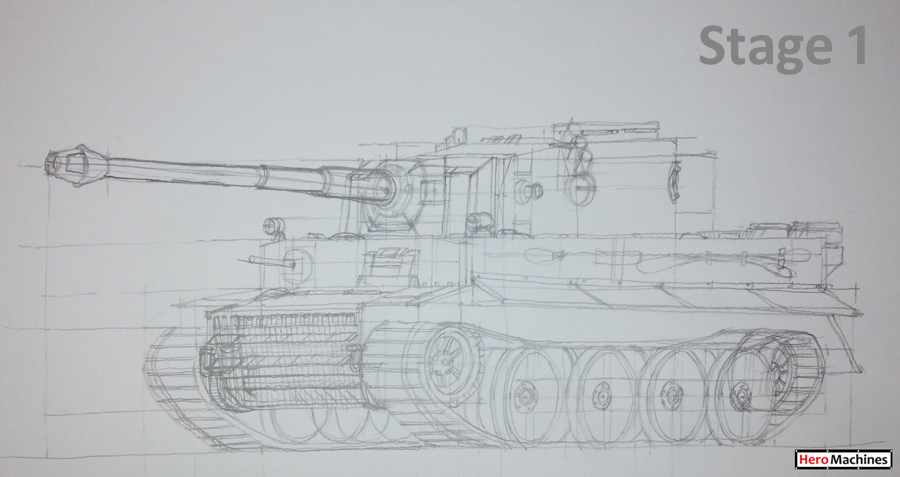
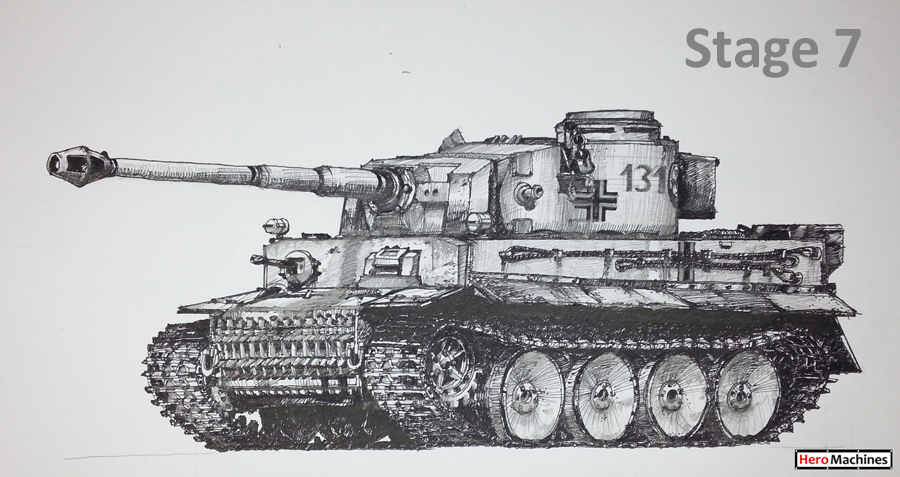
This is the 2nd drawing I’d like and happy to share. The drawing is done free-hand, and I acknowledge it isn’t the best example around. Anyway, the subject is an old (but extremely famous) World War II era German tank, Tiger 131, also known as Panzerkampfwagen (loosely translated “ Armored Fighting Vehicle”). This explains why this particular tank look so dated and boxy by comparison. As usual, my stationary consists of just felt-tip pen (0.2mm and 0.4mm nib) and a mechanical pencil using 2B lead. The drawing was done on A3 multi-purpose paper, commonly used in office.
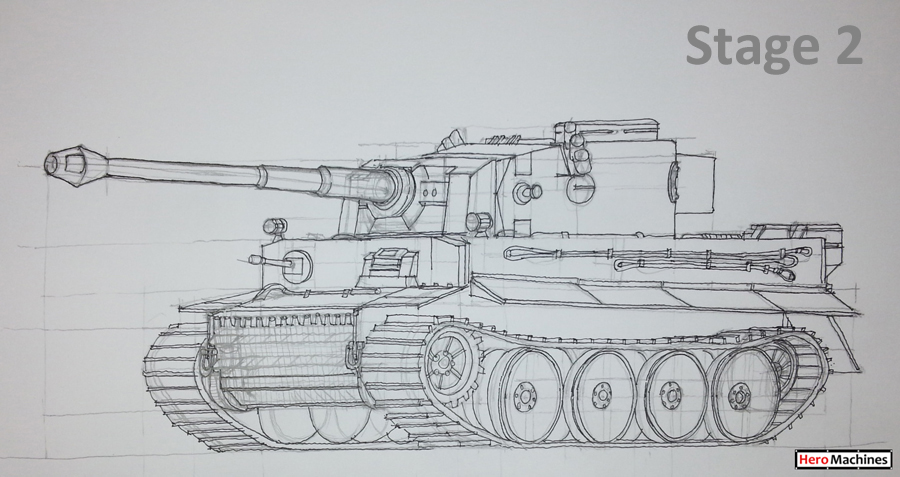
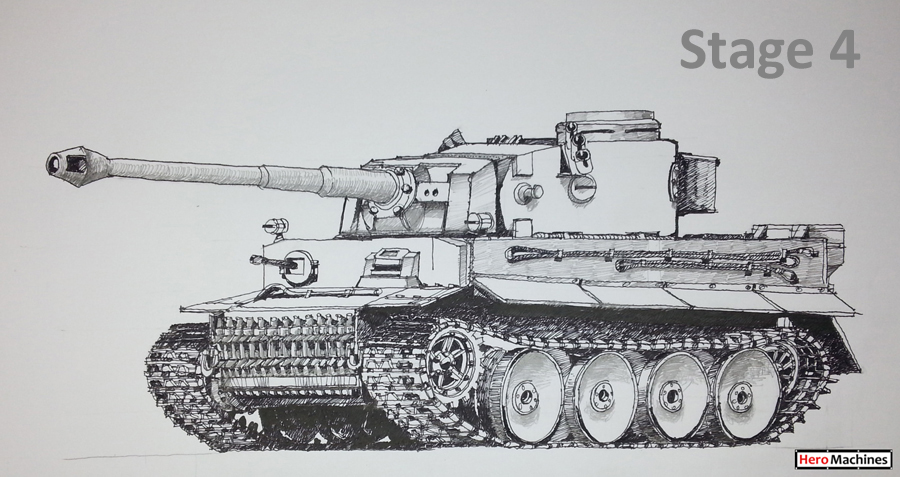
Below are series of photos showing the stages of my tank drawing: Stage 1: Drawing “wireframe” the tank using pencil. Apply light or medium pencil pressure would suffice. Stage 2: Over the pencil lines, draw outlines & object lines using felt-tip pen. This would produce clearer drawing and give “shape” to the tank. You can erase-off the pencil lines once you have inked the drawing. Stage 3: Use felt-tip pen to create “solid hatch” and “cross hatch”, at area under shade or shadow. The light source is assumed at overhead. odd baby names Stage 4 & 5: Continue adding layers of “solid hatch” and “cross hatch”, as shown in the above photo. It is advisable to do it in multiple passes (or layers) where/when needed. I normally apply 2-3 passes. Stage 6: Preferably, use 0.2mm felt-tip pen to highlight detail elements of the tank, such as nuts/bolts, tank tracks, body panel lines, scratch marking, etc. where necessary. Stage 7: Use a 0.2mm felt-tip pen to create tank “marking”, such as army symbols/emblem/badge, and designation number. Use a combination of felt-tip pen and pencil to create “road dirt” & “weather effect” especially at the front of the tank, lower part of the tank, tank tracks, track wheels, etc. Stage 8: Draw the “ground line” to make the tank looks “planted”. Accessorize the tank with human figure(s) with correct & appropriate uniform, to lend the drawing an overall realistic look. Below is the youtube video that shows the complete process of the drawing. Please check out the video, if you are interested.
Thanks for your time and if you have any questions regarding the drawing, please do not hesitate to ask.


 Aug 11 2022, 12:26 PM

 Quote
Quote


 0.0128sec
 0.62
0.62
 5 queries
 GZIP Disabled