Welcome Guest ( Log In | Register )

Outline · [ Standard ] · Linear+

 Update no. 10: Sharing my drawings, and how to draw them

views
     
TScode10
post Jun 21 2022, 03:05 PM, updated 4y ago

Getting Started
**
Junior Member
145 posts

Joined: Apr 2008
Hi All,


I just thought of sharing tank drawings I’ve made previously. They are done in freehand. I think doing freehand drawings develop confidence.
I’m showing the process of which how the drawing is made, from the beginning to the end, using attached photos as references.

The entire drawing wasn’t that difficult, if you apply the simple techniques/steps. Just give it some time and have some patience when drawing.

The stationary that I’m using are pretty basic and affordable. All easily available at local stationary shop. You don’t need hi-tech electronic tablet/high-end computer to start drawing. As least, this is true for my case.

Anyway, the items I'm using:

1. Felt tip pens (0.2mm and 0.4mm nib) black. Artline brand.
2. Mechanical pencil 0.5mm. 2B lead.
3. A3 size multi-purpose paper. I preferred this size as it give me more room to expand when drawing my subject.


Drawing process
user posted image
Drawing a "skeletal" of the subject. Which is a tank, in this case. Pencil lines can be easily corrected if mistakes are made. When drawing your lines, keep your hand steady, do it slowly if you need to. Control your lines.


user posted image
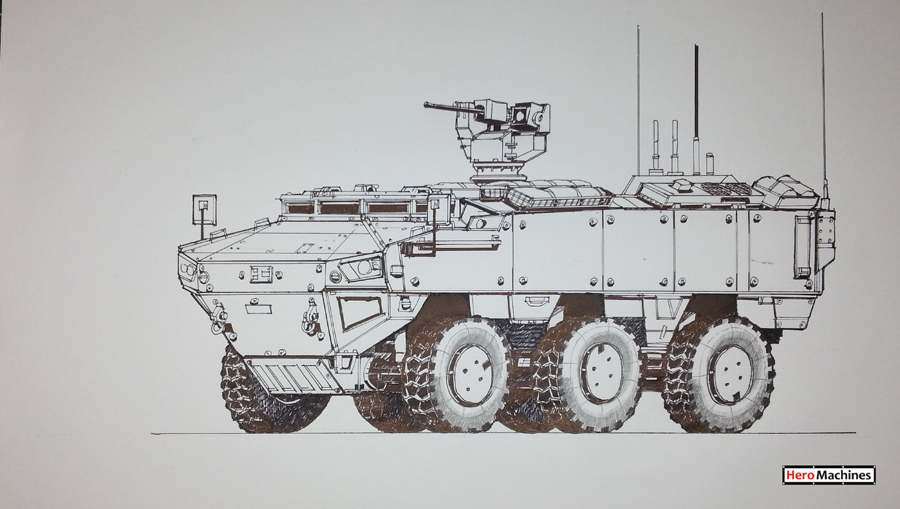
Outline the pencil lines with felt tip pen. Use 0.4mm pen for outline (profile), while 0.2mm for object lines. This makes the drawing clearer, and indicate what is at the front, middle and at the back.
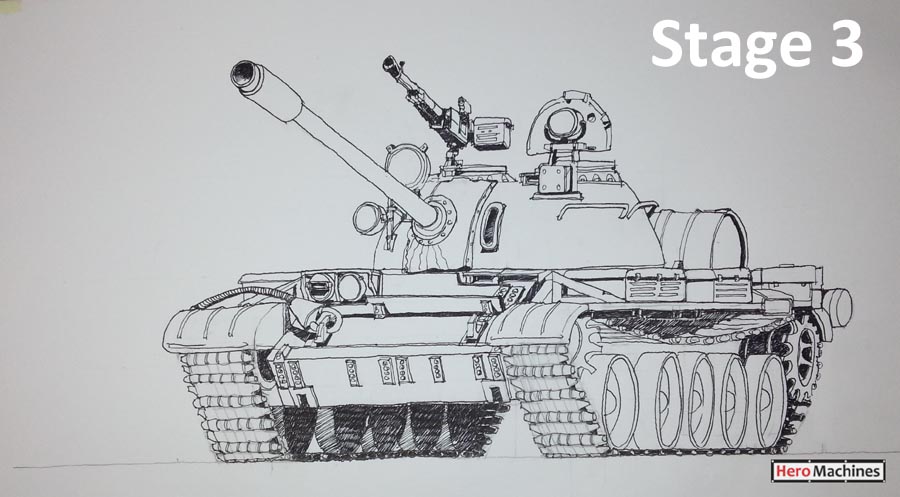


user posted image
Use the felt tip pen to hatch/darken the areas under shade or shadow, like wheel, tracks, hull, and other area below the tank.
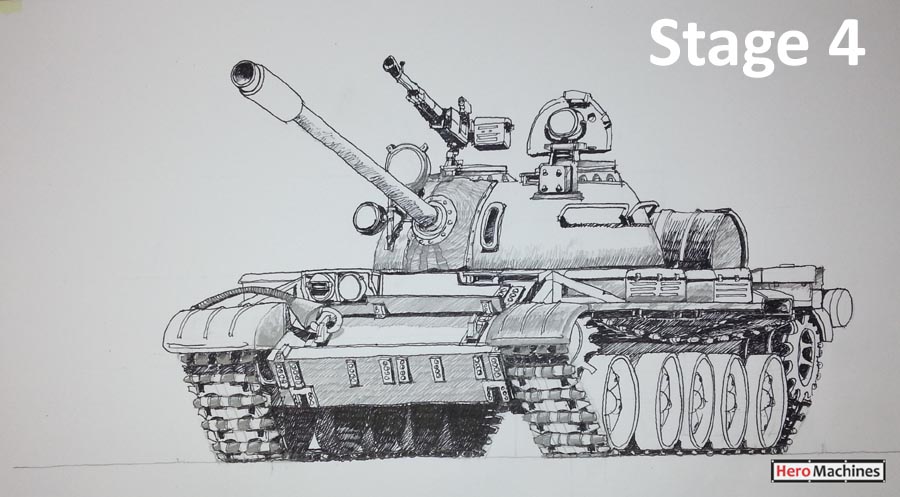


user posted image
Additionally, use a mechanical pencil to continue hatching/darken the areas under shade or shadow. Pencil lines aren't as heavy as ink lines.
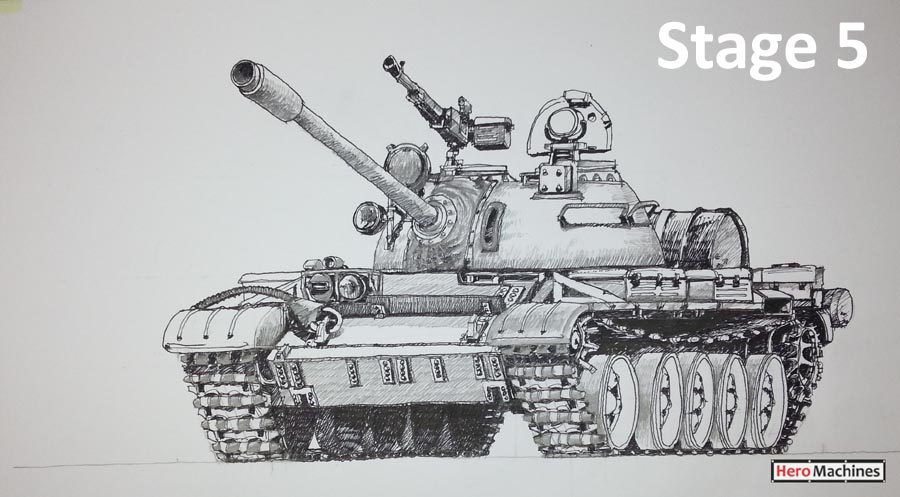
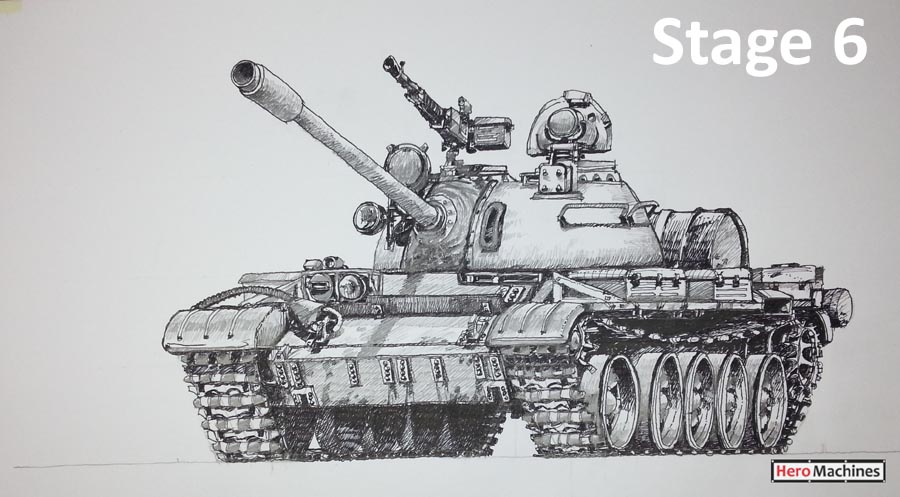

user posted image
user posted image
Continue adding gradual layers of pencil lines and pen lines. This is to create more visual depth and 3D to the tank drawing. Tank details such as nuts, handles, hinges, brackets, lamps, etc. are highlighted.

user posted image
user posted image
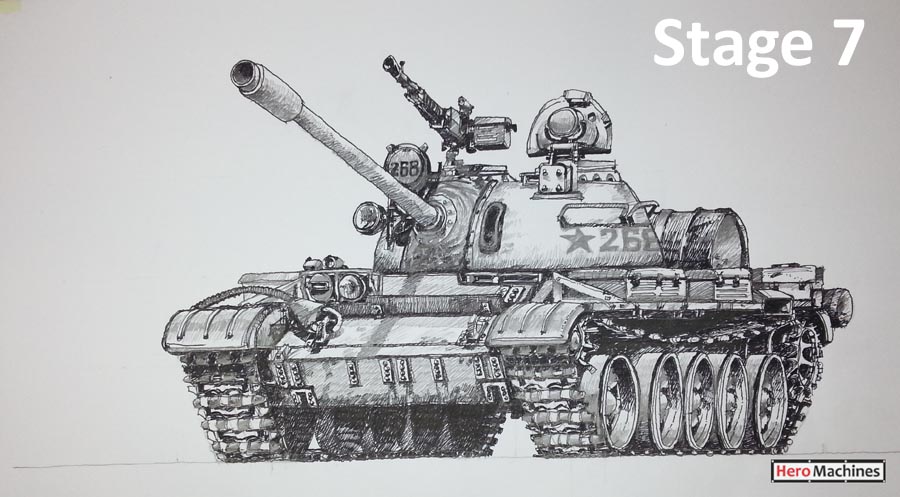
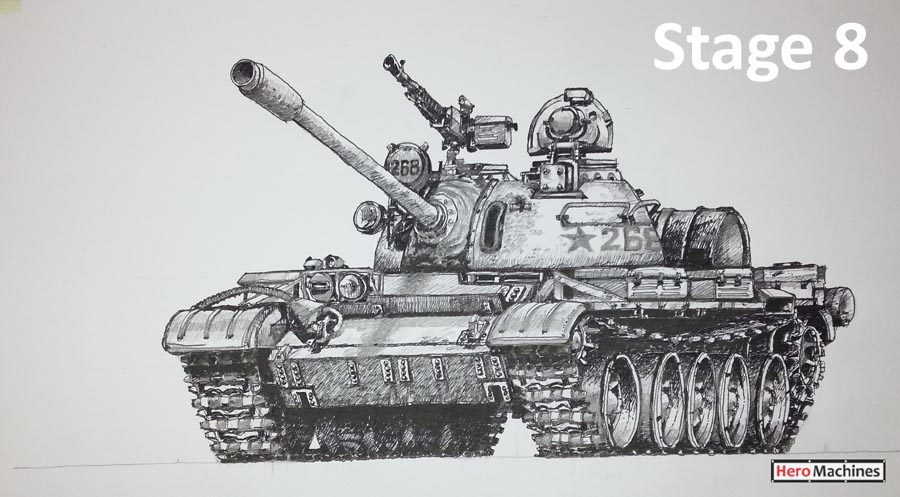
Use pencil lines to "scratch" your drawing to create markings/graphics, impression of dirt, weathering, wear & tear marking, etc. to the tank.
A felt tip pen can be used to create similar but deeper impression. Use it sparingly though.


user posted image
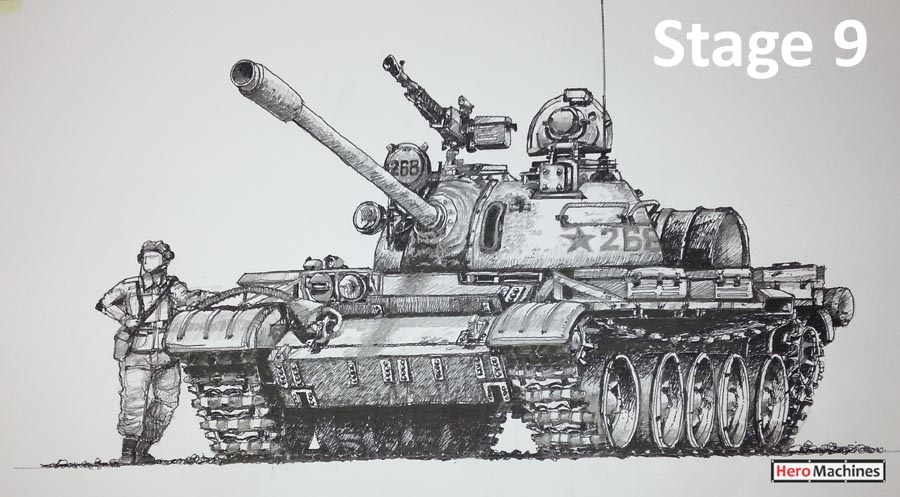
Adding final touch to the drawing, by giving it a human figure, antenna, ground line, etc. This gives an impression of scale and a bit of realism to the drawing.


This thread is done on the fly. and if I have missed out a few things by accident, please let me know. My drawings aren't perfect and I'm still learning to draw by doing it. Practice doesn't always make perfect, but I think it makes improvement.


Lastly, I’ll provide a link of a Y/T video of how the entire drawing is made, for those who are keen to know more about the drawing.


If you have any comments/questions……please don't hesitate to highlight or ask. I'll answer them the best I can.


Cheers!

This post has been edited by code10: Aug 22 2022, 11:45 AM
TScode10
post Jun 22 2022, 12:04 AM

Getting Started
**
Junior Member
145 posts

Joined: Apr 2008
QUOTE(mowlous @ Jun 21 2022, 04:21 PM)
Sad to say Arts and design eye ball is like maybe 10 people once in a while, barely get any traffic at all. TS look like a good student who is willing to share how to draw technique for potential viewers such as my self that want or think to be serious artist ..... I think mod can accept this as part of social discussion since its interest also attract a niche in a more formal way. I'd see A&D is more of a question and answer zone for industrial related topic mostly, compare to TS is more social interest.

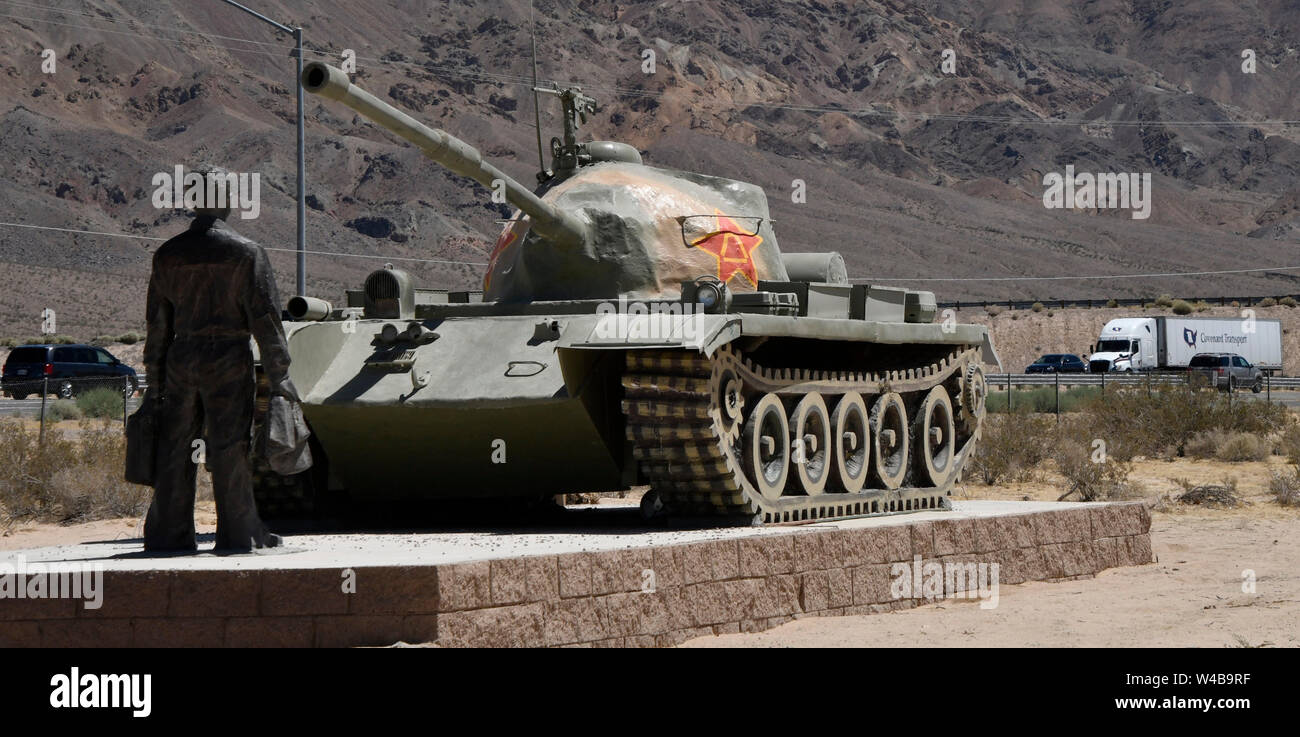
As for TS, the position of the tank reminds me of "tank man" at different angle

» Click to show Spoiler - click again to hide... «


While drawing on paper with pencil is the cheapest option, I'd suggest people whom is seriously considering art as a hobby or carrier should get a good cheap tablet if you already have a com, as digital mistake much faster to correct, no need to waste paper (because after your draw either store in somewhere that require space or throw if not nice). Easier to transit to selling them online, keep as record or reference and whole lot of other benefit that out weight in the long run. That's in my own personal experience and opinion.
*
Thank you for time and comments given, Mowlous. I appreciate it. I initially had consider posting my thread at Arts and Design but held back because of low traffic observed. In fact, I have pose questions in that section before, and only gotten reply after 2-3 days later. That somewhat discouraging for TS and the other interested members. Some of my questions weren't even answered in that section -like the thread "a drawing a day". I guess the TS was too busy with other things.

I have posted a couple of my videos/drawing at Kopitiam section, asking for their feedback/comments. Sometimes, I received constructive comments and feedbacks from members on how to improve the drawings. They were all very helpful and useful.

Other times, I have gotten comments/respond from members, like....:if I could draw sexy lenglui, sexual innuendo remarks, which were totally out of topic. Some respond were quite rude. Then again, I am not offended by them knowing that it's Kopitiam afterall. Different folks, different strokes.

Yes, most of the tanks I drew are "standard" tank-man angle. They are done because its naturally at eye-level, and easier to relate to viewers. Also, it is much easier to draw, esp. to those who are interested to learn drawing. Architecture drawings are sometimes presented in such a way.

For the time being, I am doing drawings the simple, old fashion way- using paper, pen and pencil. My Y/T channel banner conveyed my intention. Teaching and learning to draw can be intimidating already sometimes, and I don't want to scare/discourage members by teaching them drawings via tablet. I suppose in most technical schools, basic drawings are always conducted manually at first. The students need to have a good grasp of the fundamentals before moving on to the next level.

If I remember correctly, my first lesson in technical drawing class wasn't about drawing. It was about knowing your paper, pencils, and other stationary, and use them correctly. My supervisor once said "Scale ruler is to measure distance/length in drawing, while a straight edge (ruler) is to draw straight lines". Once I used them incorrectly, my supervisor threw my ruler out of the design studio window. Taking care of the drawing paper was also important, keeping it clean, no folding, use a folder to protect the drawing paper, etc.

Just sharing a bit of my experience of taking technical drawing lessons long time ago.


TScode10
post Jun 22 2022, 12:02 PM

Getting Started
**
Junior Member
145 posts

Joined: Apr 2008
QUOTE(poooky @ Jun 22 2022, 06:40 AM)
wow this is really good. just curious, did u always have an innate talent in drawing?

unker rmbr as a kid his drawings sucked ass all out of proportions compared to some classmates who jist seemed to have a natural ability to draw photocopy of target.

even now unker see some kids around 10yrs old drawing even able to draw the shadows of things all in proportion with good details. meanwhile unker can only draw stickmans.
*
I can't really say I have an innate talent in drawing, but I can say I have plenty of interest in drawings. I've been doing it since late primary school, on school exercise books that cost 40 cents each. 40 pages books gets filled up with all sort of drawings pretty quick, so I had to resort to 120 pages one.

I have a few classmates that had similar drawing interest. We used to show-off and awed by each other's drawings, and sometimes modified these drawings, out of interest, and to "power-up" the subjects like adding more guns, make character more muscular, etc.

So, I guess being able to draw requires combination of interest, encouragement and environment.
TScode10
post Jun 24 2022, 12:38 PM

Getting Started
**
Junior Member
145 posts

Joined: Apr 2008
Good day to all

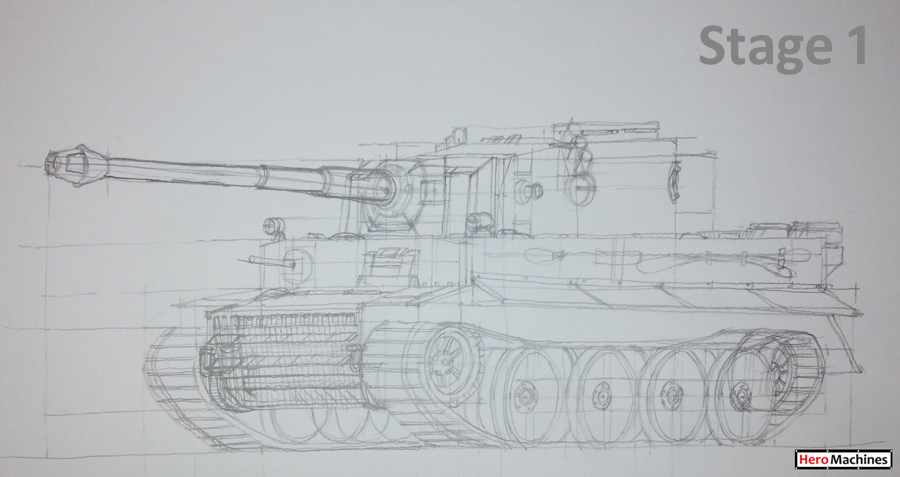
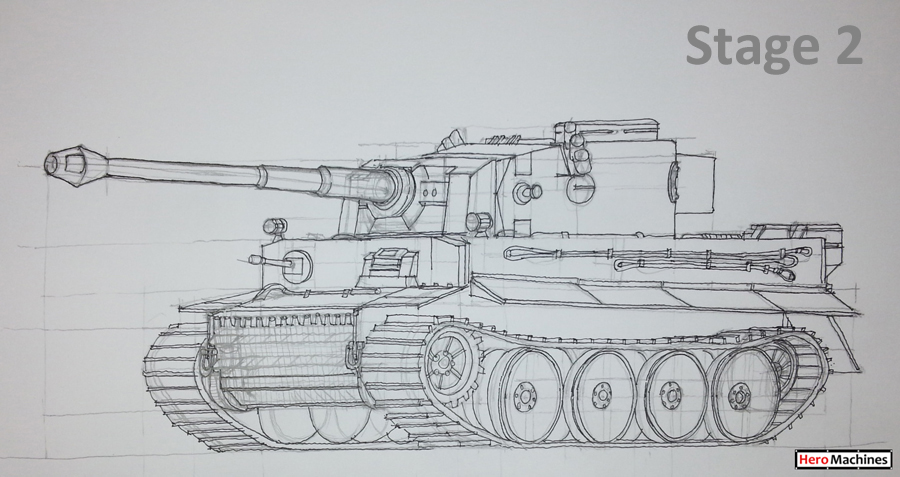
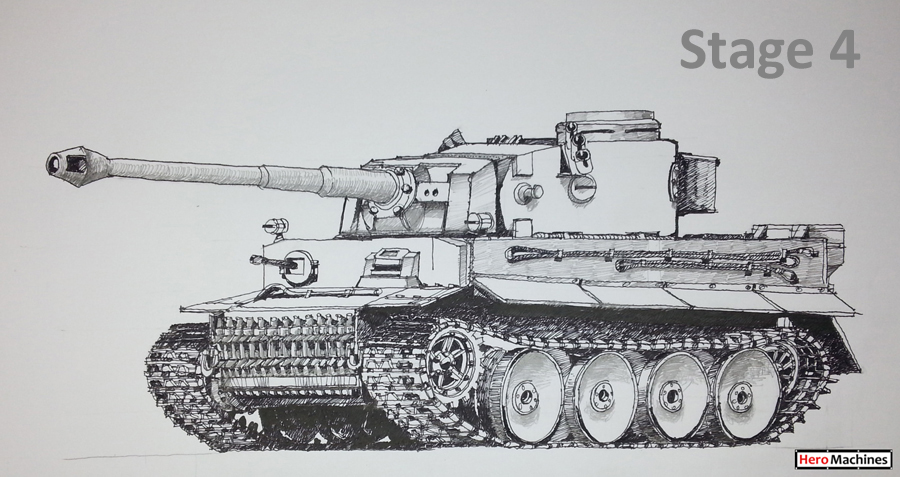
This is the 2nd drawing I’d like and happy to share. The drawing is done free-hand, and I acknowledge it isn’t the best example around. Anyway, the subject is an old (but extremely famous) World War II era German tank, Tiger 131, also known as Panzerkampfwagen (loosely translated “ Armored Fighting Vehicle”). This explains why this particular tank look so dated and boxy by comparison.
As usual, my stationary consists of just felt-tip pen (0.2mm and 0.4mm nib) and a mechanical pencil using 2B lead. The drawing was done on A3 multi-purpose paper, commonly used in office.

Below are series of photos showing the stages of my tank drawing:


user posted image
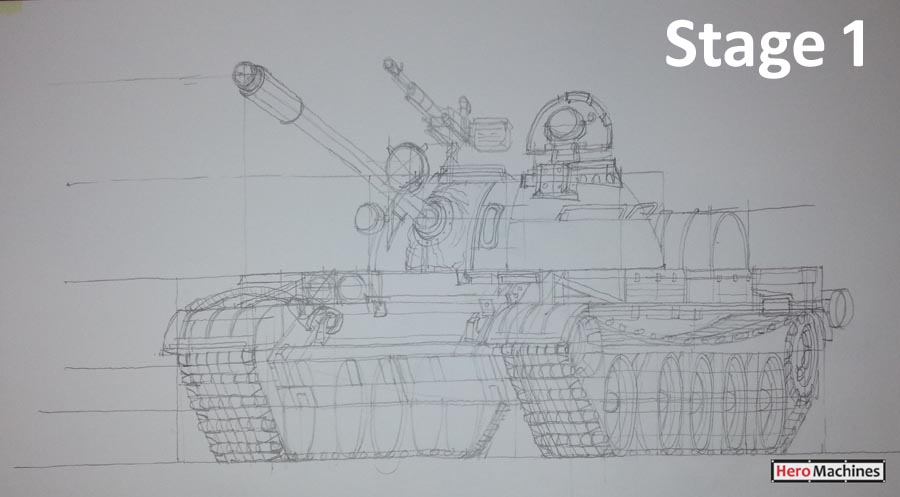
Stage 1: Drawing “wireframe” the tank using pencil. Apply light or medium pencil pressure would suffice.


user posted image
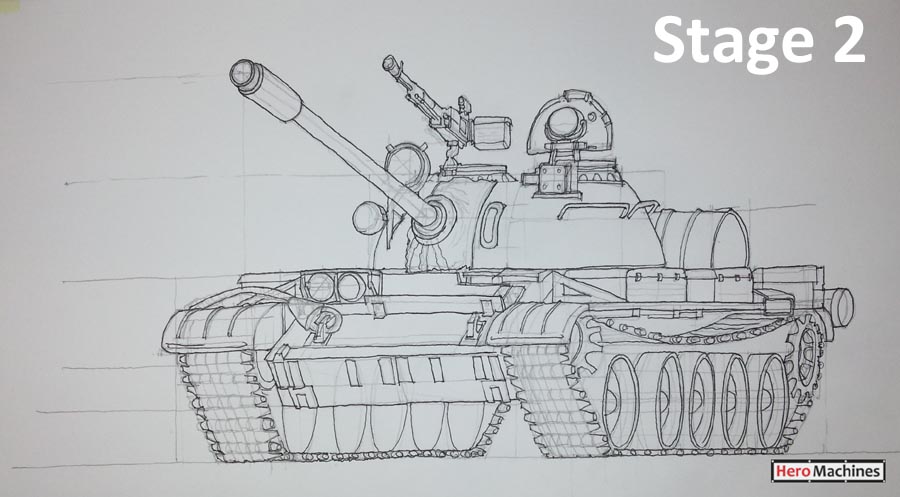
Stage 2: Over the pencil lines, draw outlines & object lines using felt-tip pen. This would produce clearer drawing and give “shape” to the tank. You can erase-off the pencil lines once you have inked the drawing.


user posted image
Stage 3: Use felt-tip pen to create “solid hatch” and “cross hatch”, at area under shade or shadow. The light source is assumed at overhead.


user posted image
user posted imageodd baby names
Stage 4 & 5: Continue adding layers of “solid hatch” and “cross hatch”, as shown in the above photo. It is advisable to do it in multiple passes (or layers) where/when needed. I normally apply 2-3 passes.


user posted image
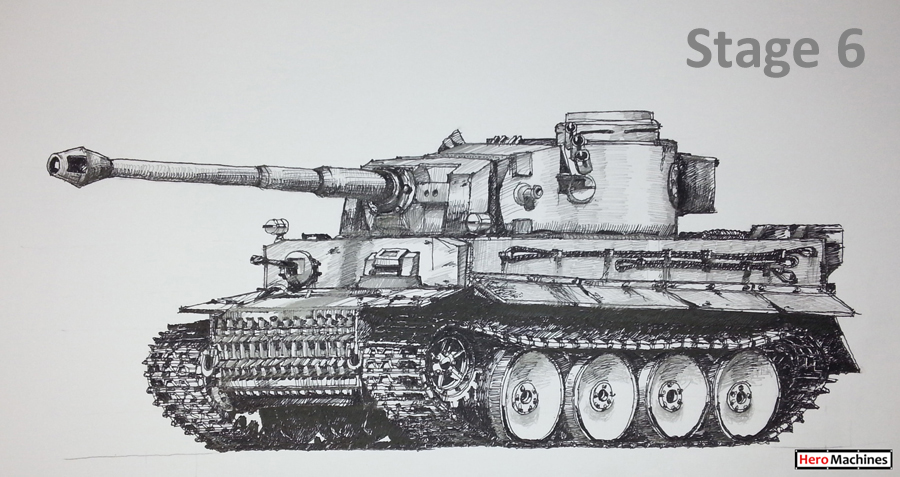
Stage 6: Preferably, use 0.2mm felt-tip pen to highlight detail elements of the tank, such as nuts/bolts, tank tracks, body panel lines, scratch marking, etc. where necessary.


user posted image
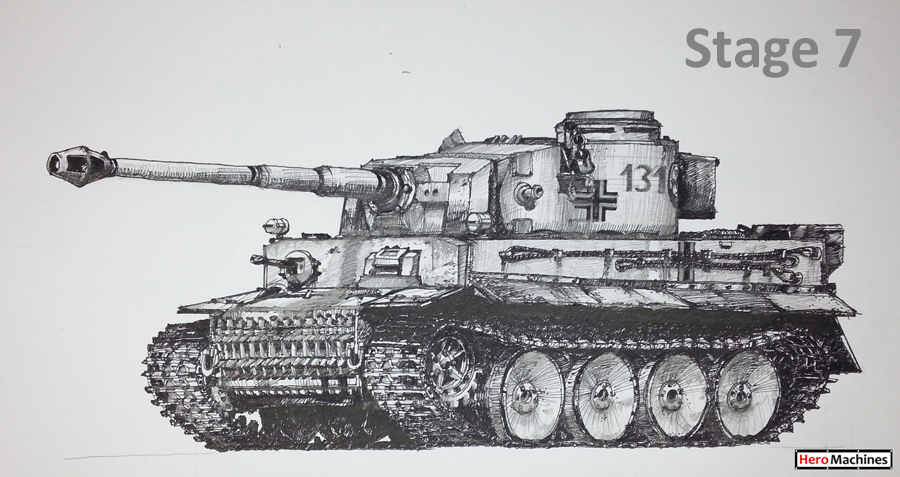
Stage 7: Use a 0.2mm felt-tip pen to create tank “marking”, such as army symbols/emblem/badge, and designation number. Use a combination of felt-tip pen and pencil to create “road dirt” & “weather effect” especially at the front of the tank, lower part of the tank, tank tracks, track wheels, etc.


user posted image
Stage 8: Draw the “ground line” to make the tank looks “planted”. Accessorize the tank with human figure(s) with correct & appropriate uniform, to lend the drawing an overall realistic look.


Below is the youtube video that shows the complete process of the drawing. Please check out the video, if you are interested.


Thanks for your time and if you have any questions regarding the drawing, please do not hesitate to ask.
TScode10
post Jul 5 2022, 01:09 PM

Getting Started
**
Junior Member
145 posts

Joined: Apr 2008
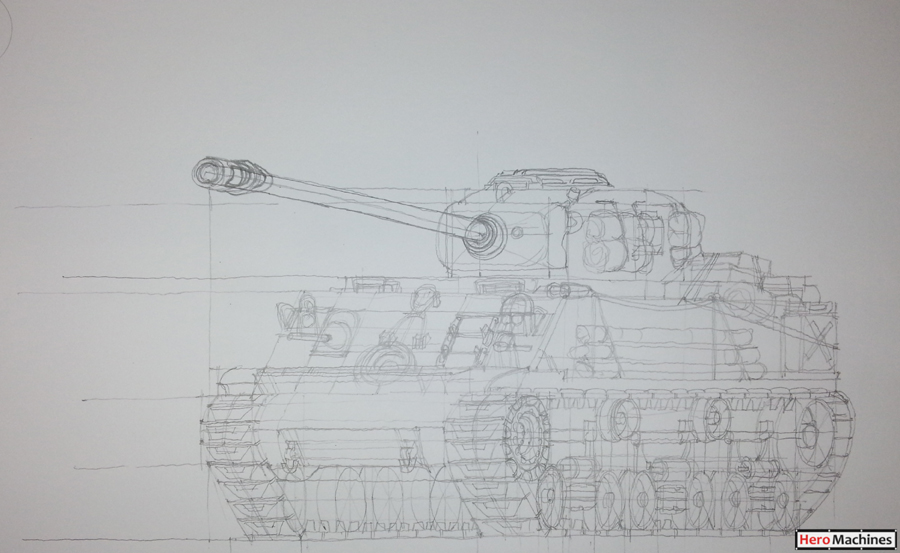
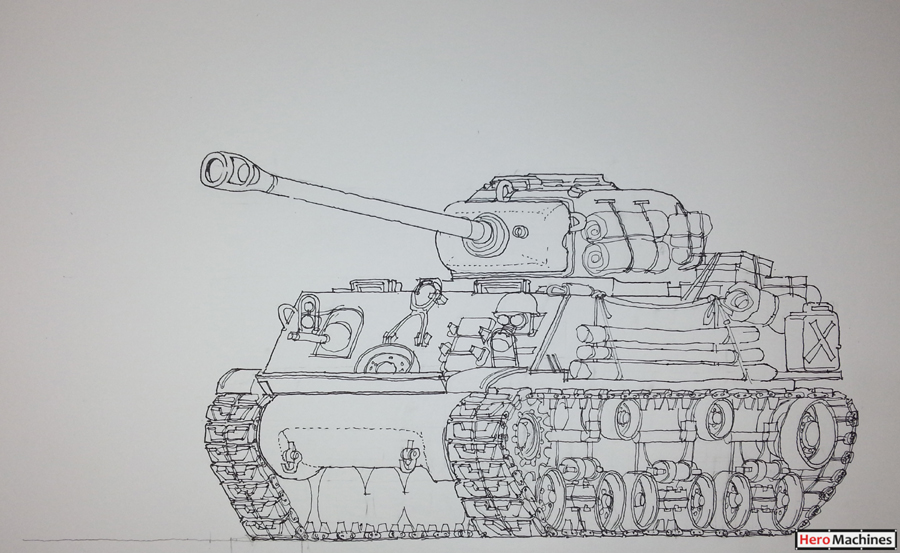
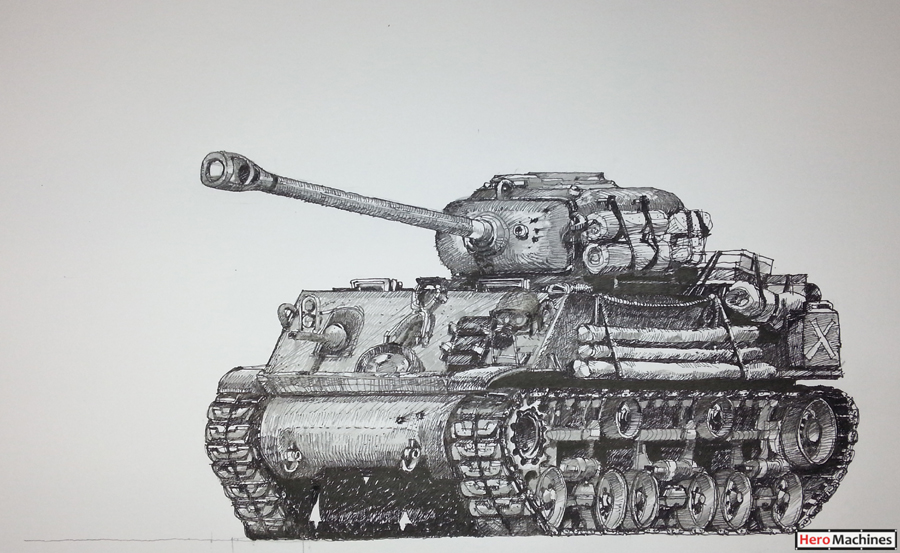
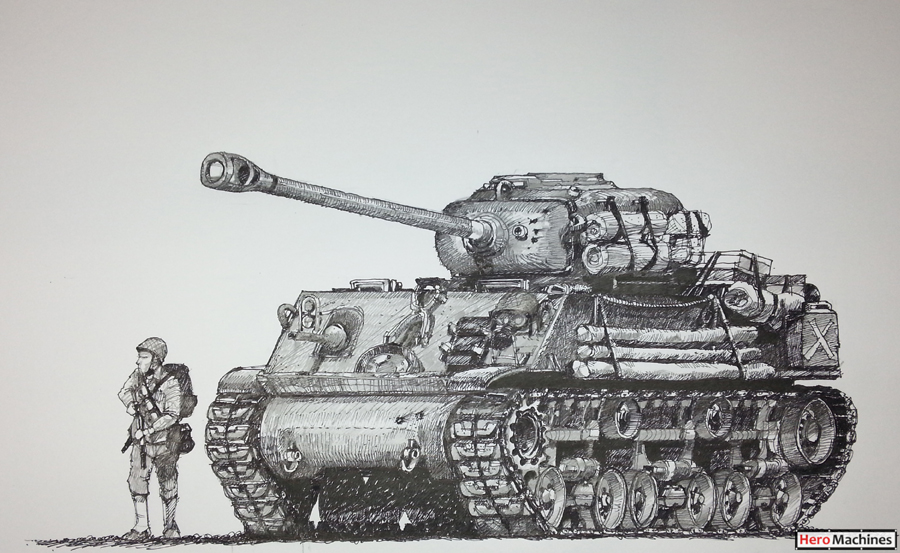
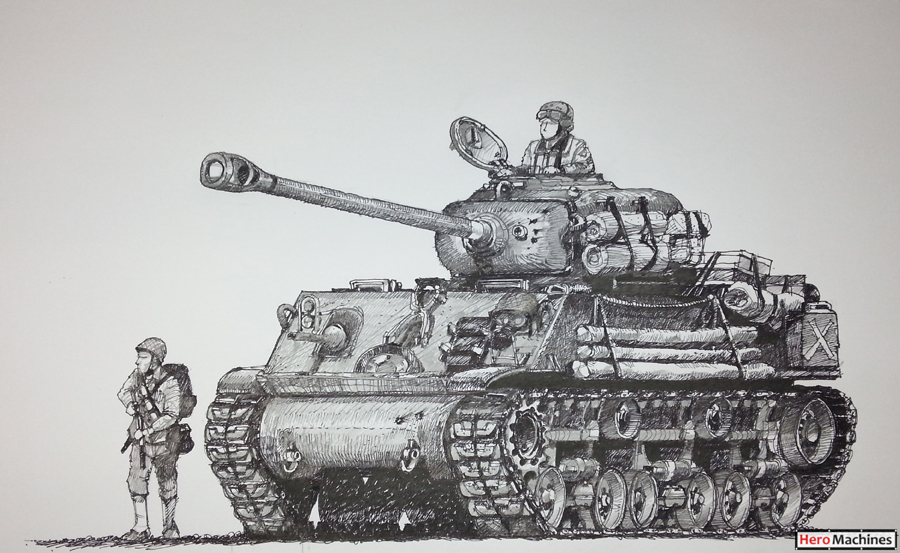
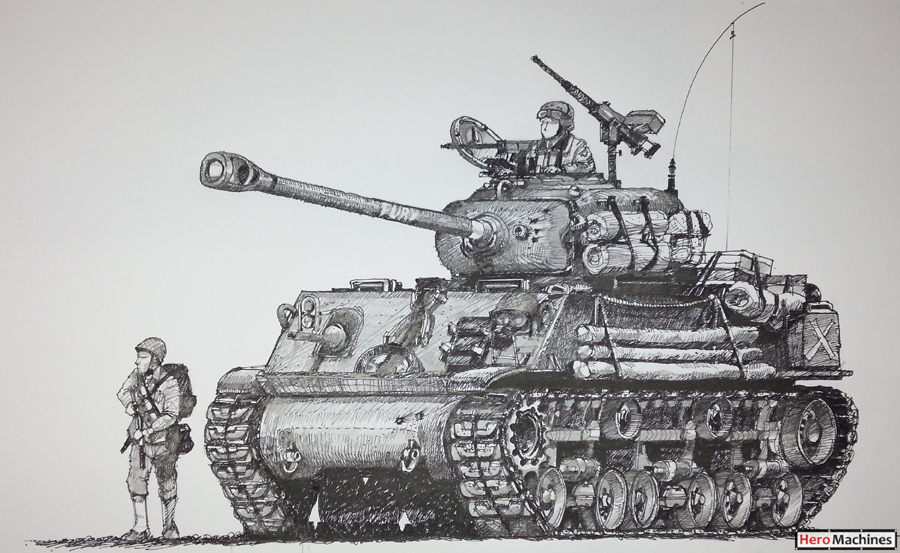
Just an update of the (freehand) drawings I've made recently. This time round, the drawing of a Sherman tank from WW II era. Not those modern tanks with sleek and sexy appearance. BTW, the Sherman tank was featured in the movie "Fury", if you like to know.


As usual, I'll be sharing the drawing process, via various stages as shown in the pictures below. I suppose the pictures could tell a thousand (more) words.

If you have any questions/comments about the drawings, please do share smile.gif


user posted image


user posted image


user posted image


user posted image


user posted image


user posted image


And if you keen to watch the entire drawing process, please do check out the video below wink.gif


TScode10
post Jul 8 2022, 03:15 PM

Getting Started
**
Junior Member
145 posts

Joined: Apr 2008
Goof afternoon to all forummers,


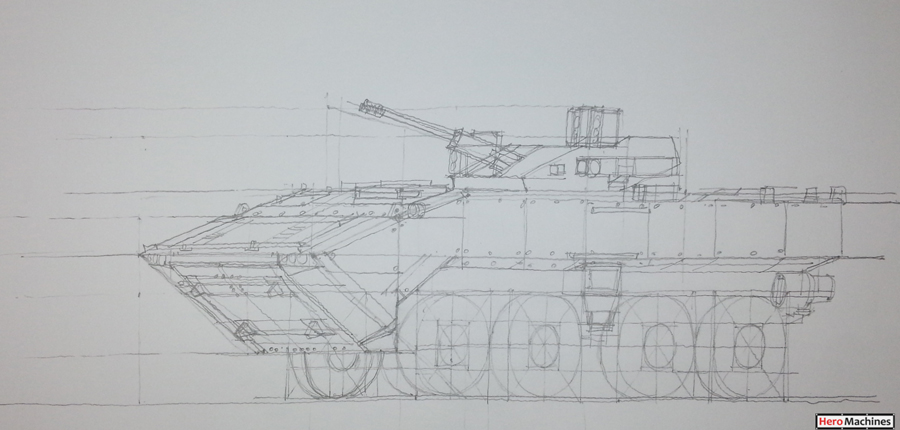
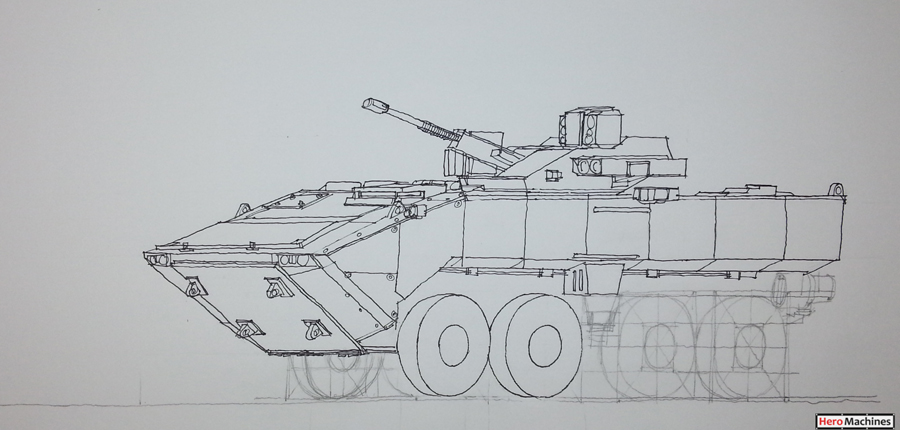
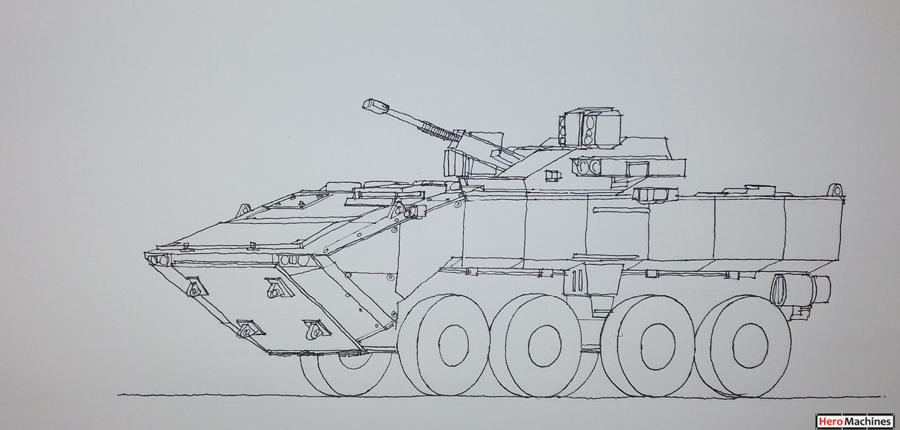
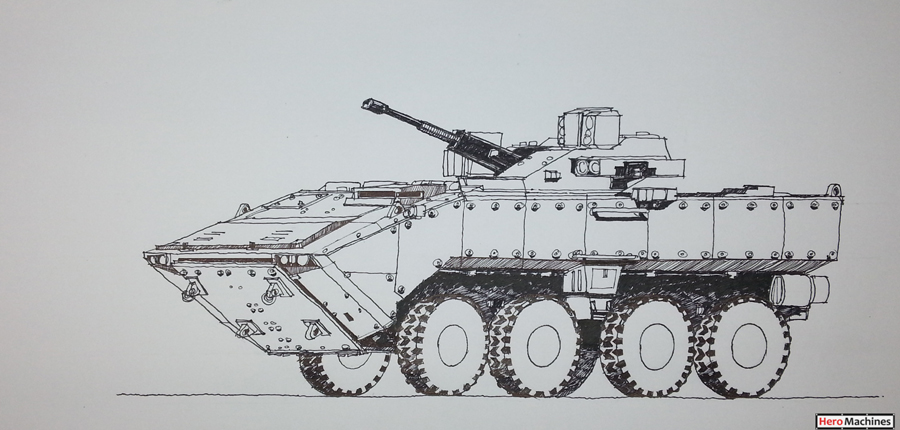
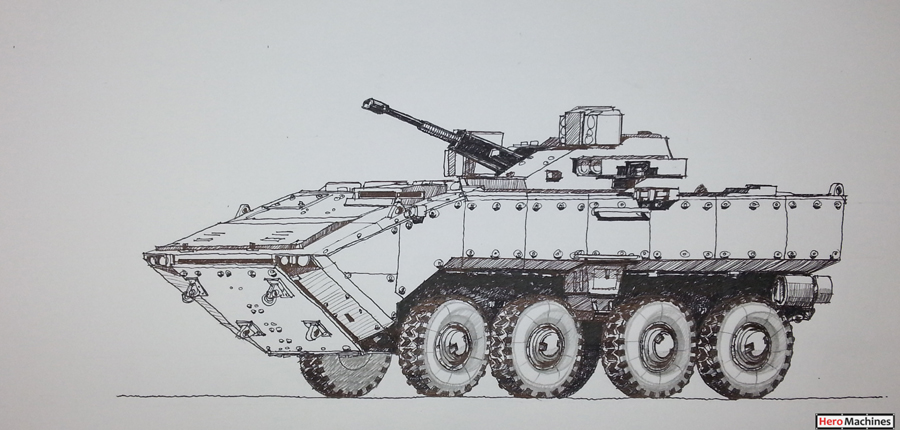
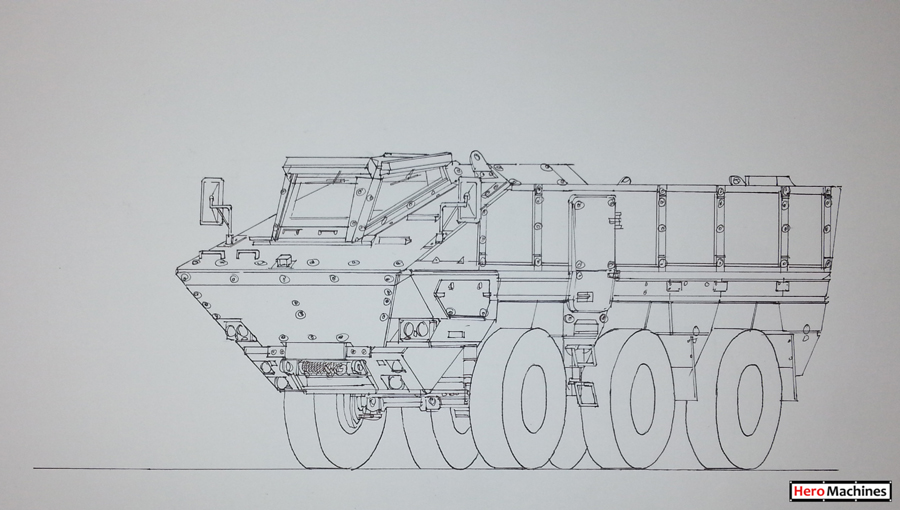
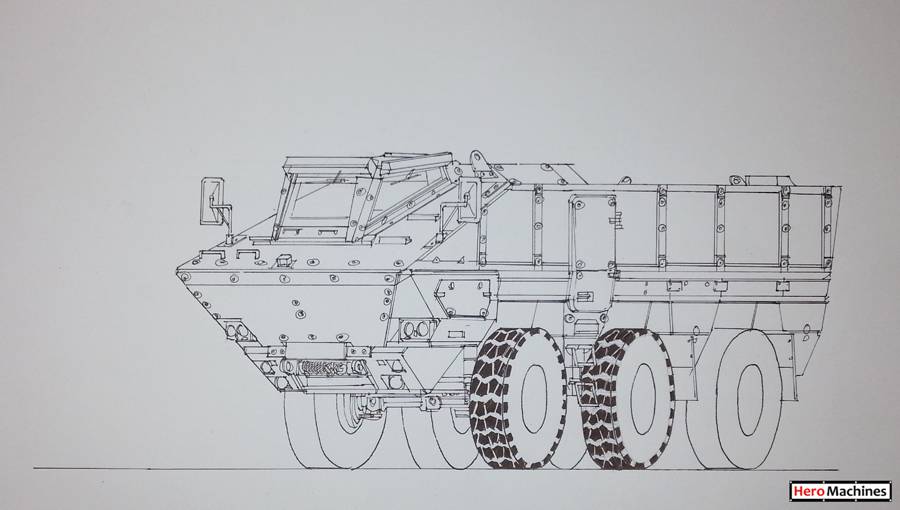
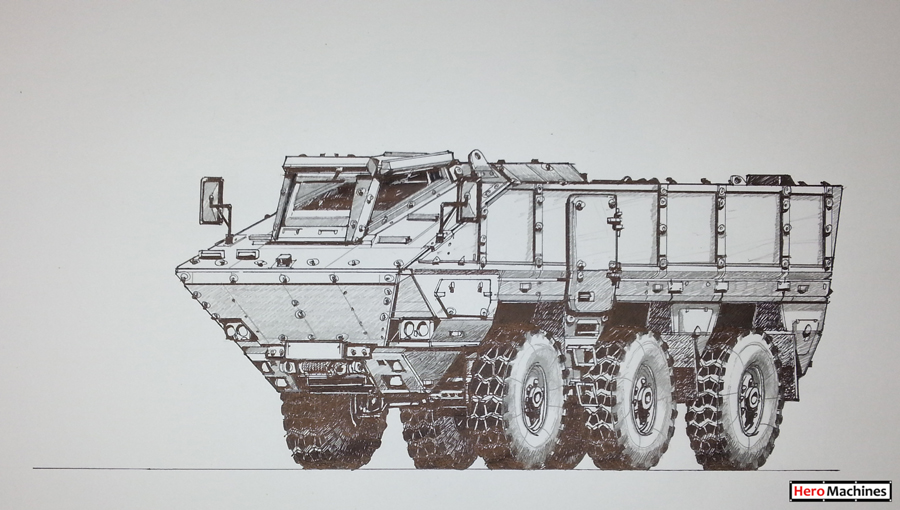
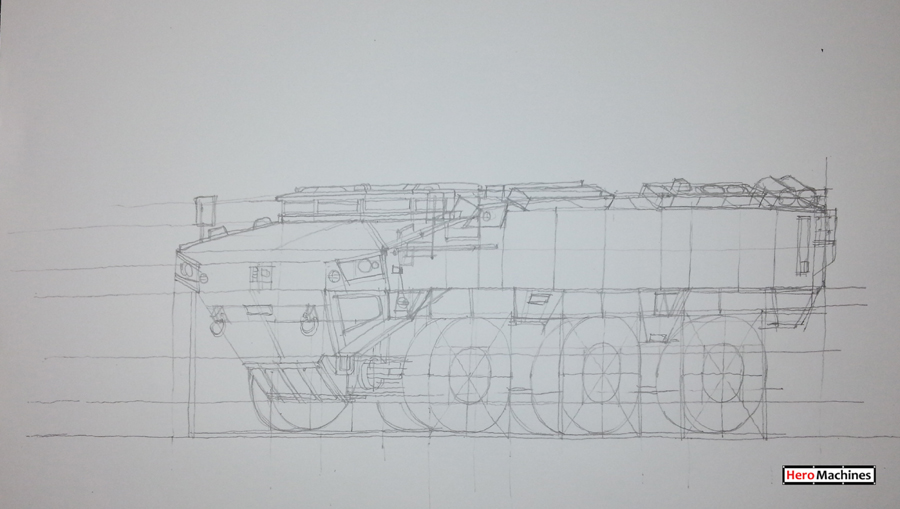
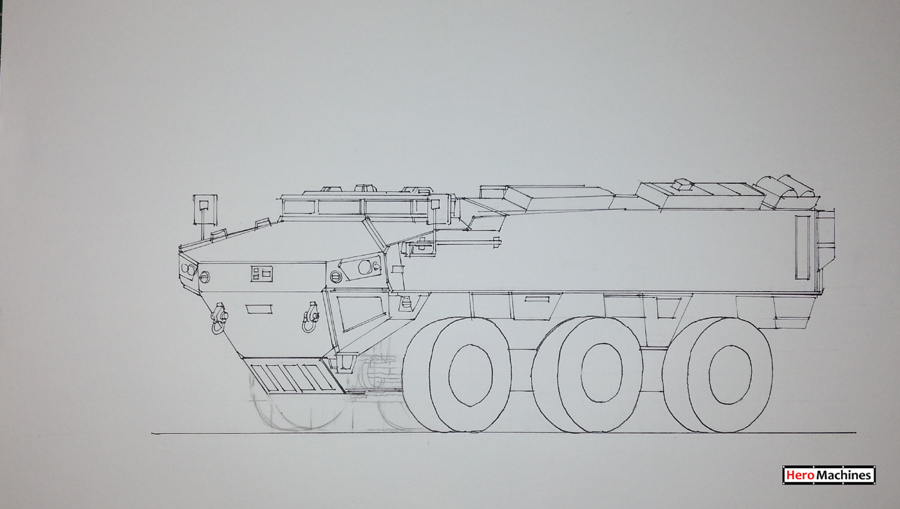
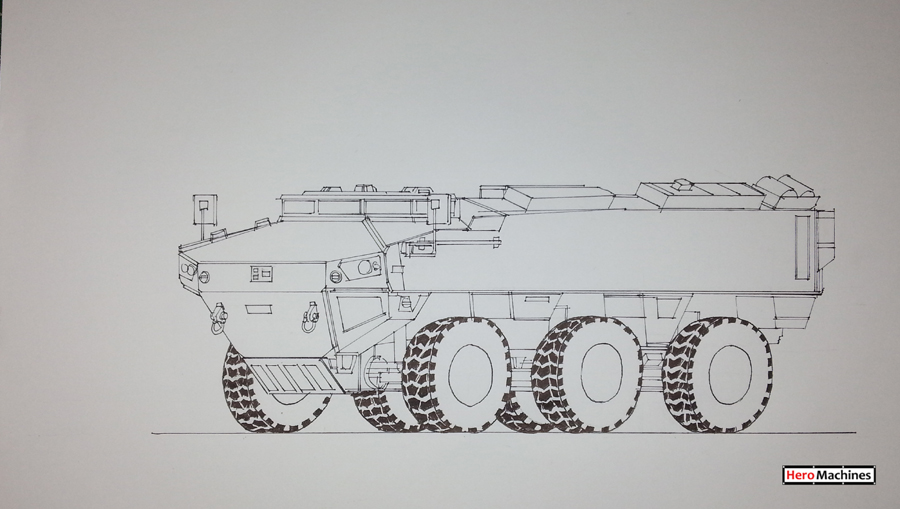
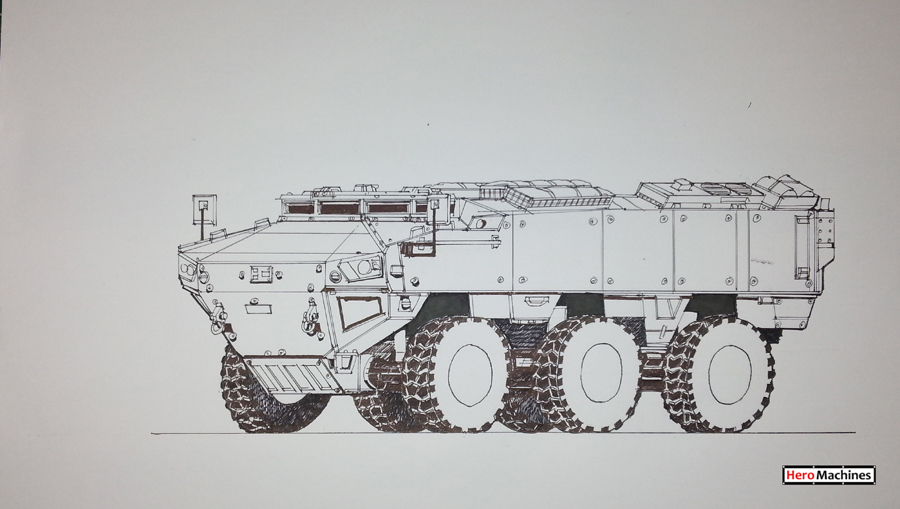
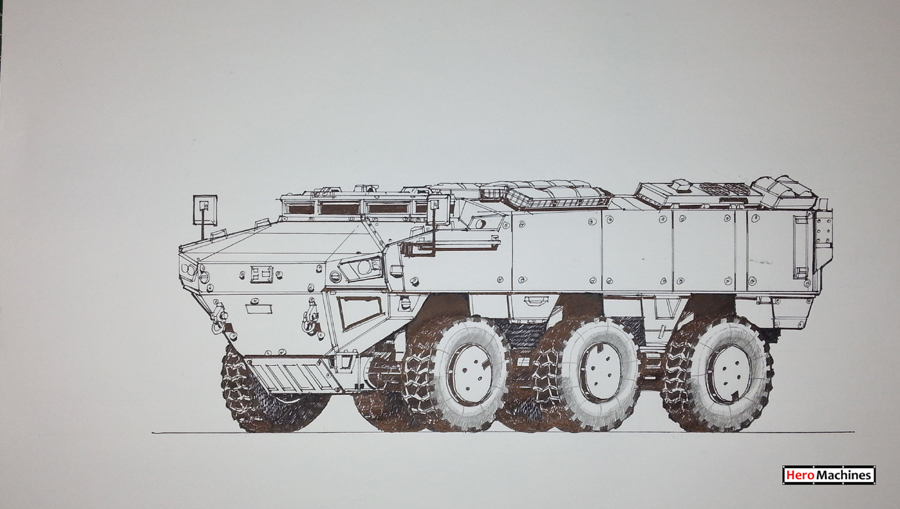
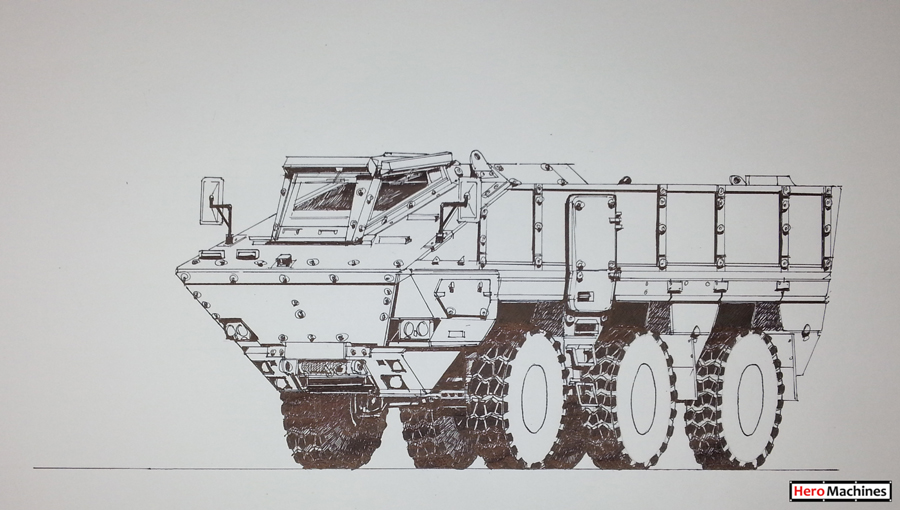
Just an update of the (freehand) drawings I've made recently. This time, the drawing of a Russian Bumerang tank.

For me, the initial pencil sketch need not to be very exact, as one could always make necessary adjustments during inking stage.
I think too many pencil lines could easily smudge and dirty the paper, leaving undesired marking on the paper especially when pencil lines are drawn with a little too much pressure.

As always, I'll be sharing the drawing process, via various stages as shown in the pictures below. A few pictures could tell a thousand (more) words.


user posted image


user posted image


user posted image


user posted image


user posted image


And if you like to watch the (speed up) drawing process, please check out the video below smile.gif


If you wish to ask anything about the drawing, please don't be shy to ask. As always, I'll be happy to hear your constructive comments.

Thank you very much.


This post has been edited by code10: Jul 16 2022, 12:19 PM
TScode10
post Jul 16 2022, 12:22 PM

Getting Started
**
Junior Member
145 posts

Joined: Apr 2008
Good day to all Forumers,


This is an update of the (freehand) drawings I've made. This time, the drawing of a German Fuchs tank.
The drawing process, via various stages as shown in the pictures below.

user posted image

user posted image

user posted image

user posted image

user posted image

user posted image


The final touch shown in the video thumbnail below. If you require to see the drawing process, just click the video.

Thanks!


TScode10
post Jul 18 2022, 11:26 AM

Getting Started
**
Junior Member
145 posts

Joined: Apr 2008
QUOTE(oe_kintaro @ Jul 16 2022, 01:23 PM)
TS do you use acid/sulphur free paper or ink? Otherwise would be a waste if the paper fell apart or yellowed after a while
*
Hi oe_kintaro,

Thank you for your advice and concern. At them moment, I'm using general purpose paper. Acid paper is hard to find around my place, not to mention that it cost more than normal paper. Whenever I can, I would buy the ones that I could best afford.

The pen I use is the ordinary felt-tip ones, and I believe the pigment isn't as good as drawing pen by comparison.


TScode10
post Jul 18 2022, 04:58 PM

Getting Started
**
Junior Member
145 posts

Joined: Apr 2008
QUOTE(sanosizo @ Jul 18 2022, 01:11 PM)
did you take any class or learn somewhere? did you like to doodle during primary school?
*
I did drawings on exercise books during primary school years, like a hobby thing.

The formal lesson that I could relate to was the technical drawing subject during my secondary school. Some poeple call it lukisan kejuruteraan.
TScode10
post Jul 21 2022, 09:30 AM

Getting Started
**
Junior Member
145 posts

Joined: Apr 2008
Good morning, Forumers,


This is an update of the (freehand) drawings I've made. This time, the drawing of a Russian Typhoon tank.
The drawing process, via various stages shown in the pictures below.

Pencil lines to built the "wireframe" of the object (make sure the pressure is light, so the lines can be erased without leaving any marks on the paper).
Pen lines to build the "solid" object. Afterwards, all the pencil lines can be erased.

user posted image


user posted image


user posted image


user posted image


user posted image


user posted image


user posted image


TScode10
post Jul 22 2022, 02:08 PM

Getting Started
**
Junior Member
145 posts

Joined: Apr 2008
QUOTE(jojolicia @ Jul 22 2022, 11:23 AM)
Hi code10, good day to you Sir.

Do you mind sharing a photoshoot of your freehand writting in textbox form of 6 lines of 6-8 words each?
*
Hi Jojolicia,

I don't quite understand your message.
Could you please explain about the mentioned photoshoot? May I know what is the purpose of it?


TScode10
post Jul 22 2022, 02:26 PM

Getting Started
**
Junior Member
145 posts

Joined: Apr 2008
QUOTE(gashout @ Jul 22 2022, 02:12 PM)
You draw super well, sir.

i think you are a fan of tanks etc?

do you draw people's face too? sure looks nice.

well done again smile.gif
*
Thank you, Gashout. I'm just a regular guy. (no need to call "sir").
I'm glad and happy that you like the drawing.

I can't say I'm fan of tanks, but I'm inclined towards mechanical stuffs.


TScode10
post Jul 24 2022, 03:26 PM

Getting Started
**
Junior Member
145 posts

Joined: Apr 2008
A wonderful day, Forumers,

This is a quick update of a tank drawing that I wish to share with fellow forumers.
This tank is another variant of the Typhoon, except with lesser passenger carrying capacity (compared to previous Typhoon which was "bus-like")

The drawing process, via various stages is shown in the pictures below.


user posted image
I wish to point out that the amount of detail expressed in pencil lines varies. Critical details should be drawn in, while minor ones can be added during inking stage. So, there is no need to cram everything into your pencil drawing.


user posted image


user posted image


user posted image


user posted image
It is better to construct the drawing from top to bottom of drawing. This reduces the pencil graphite smudges on your drawing when your hand glides on the paper. Pen lines are "cleaner" to deal with, because the ink dries up on paper. It's all common sense, right?.


user posted image
Shade and solid hatch tend to make the drawing "grounded" and give it weight. It's easy to overdoing it, so do it bit by bit. No rush, ok?.


user posted image
Similarly, pencil hatches could give the drawing weight. However, pencil lines are harder to "show" when you are doing video recording, or taking a photo of it. Even 6B pencil lines don't show-up well via camera. I suspect the pencil graphite is light reflecting. So, these lines tend to appear grey in almost every time on camera.


The final touch of the drawing is shown in the video thumbnail.


I might have missed out a few things or two in the post. Please feel free to ask if you have questions about the above drawing.

Thanks and see ya


TScode10
post Aug 5 2022, 02:29 PM

Getting Started
**
Junior Member
145 posts

Joined: Apr 2008
Hi guys and gals,

Just sharing an update of my tank drawing done previously smile.gif


user posted image


user posted image


user posted image


user posted image


user posted image


user posted image


TScode10
post Aug 5 2022, 09:25 PM

Getting Started
**
Junior Member
145 posts

Joined: Apr 2008
QUOTE(Ewww! @ Aug 5 2022, 03:52 PM)
Fuuu! Awesome drawings, brah.

Remembered many years back when I was in secondary school, I drew a map of Malaysia.

My art teacher commented; Why peta Semenanjung Malaysia macam pisang goreng?  doh.gif

Aduiii! Discouraging betul. Lol!
*
hahaha....During my student years, my geography teacher gave us home work to copy/draw peta of Malaysia in buku latihan.
I did last minute work.......and my peta Malaysia appeared to be ubi kayu. I kana marah by cikgu kaw-kaw, while the teacher showed me a neat, coloured map drawing (done by a girl classmate). Me so malu wei. The teacher demanded me to re-draw as pembetulan.

Those were the days.

This post has been edited by code10: Aug 5 2022, 09:26 PM
TScode10
post Aug 11 2022, 09:48 AM

Getting Started
**
Junior Member
145 posts

Joined: Apr 2008
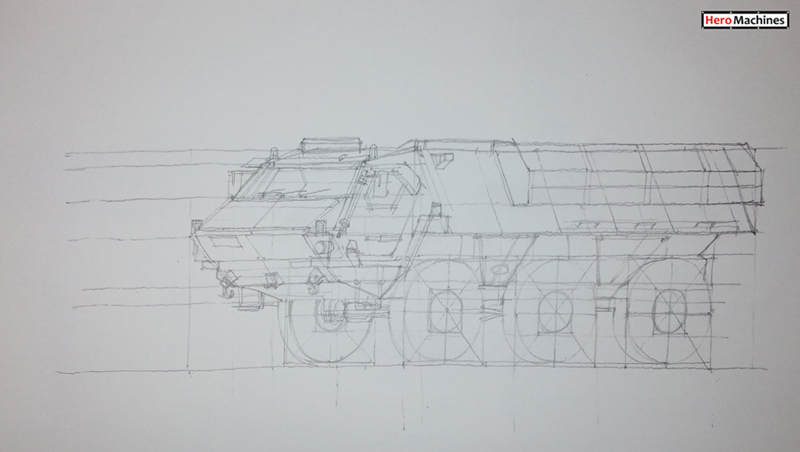
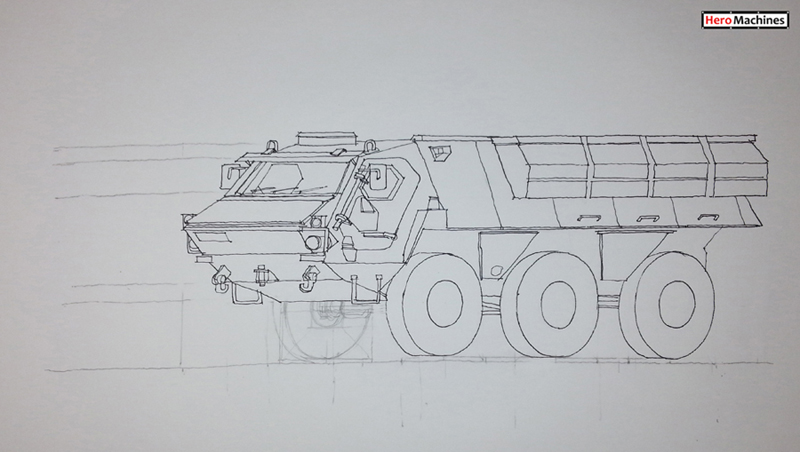
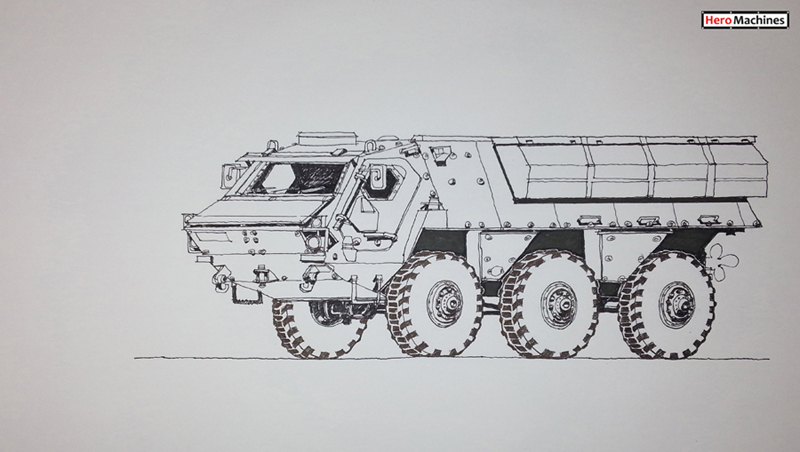
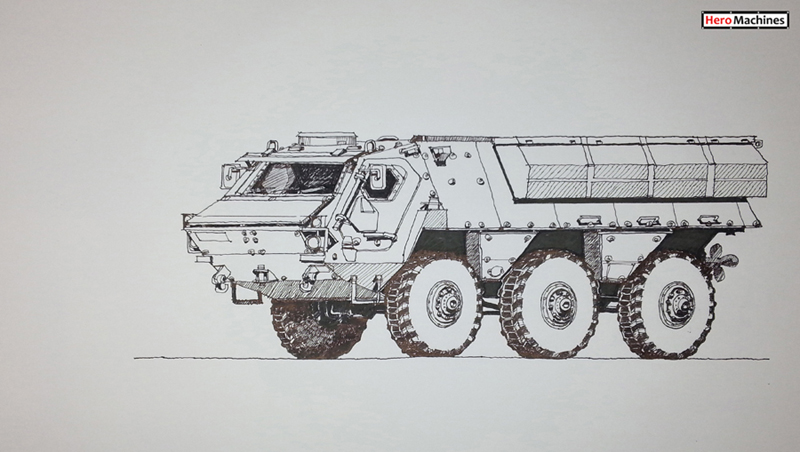
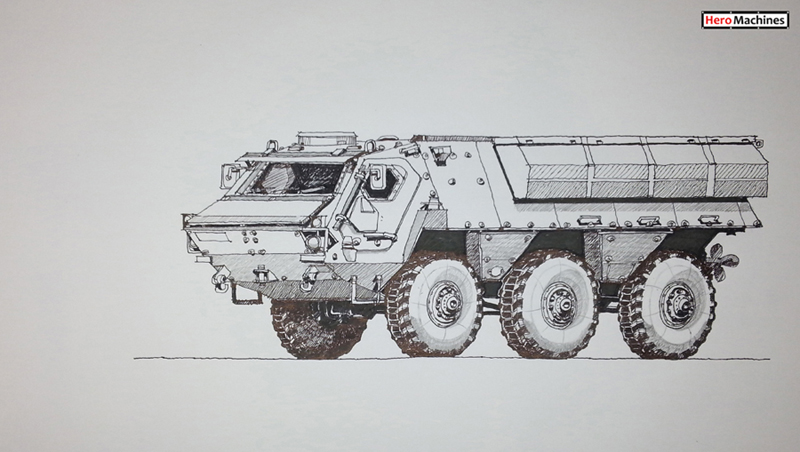
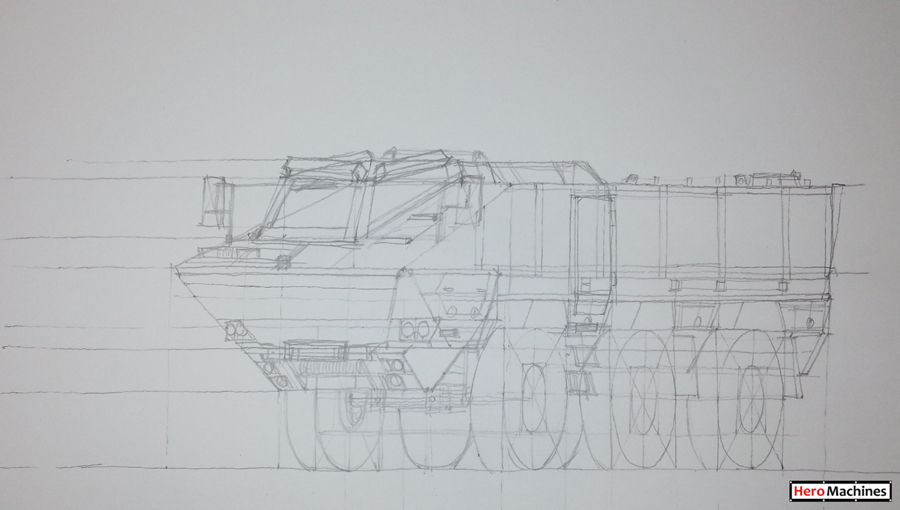
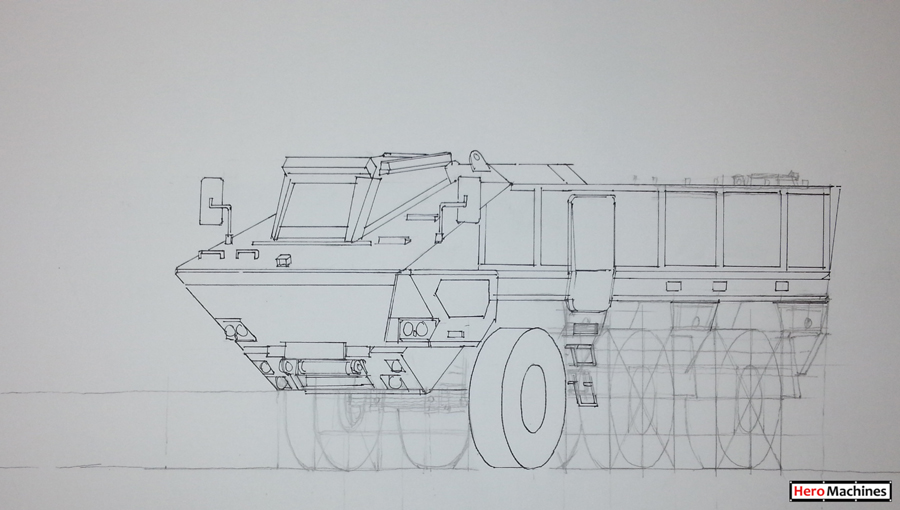
Hello guys and gals,

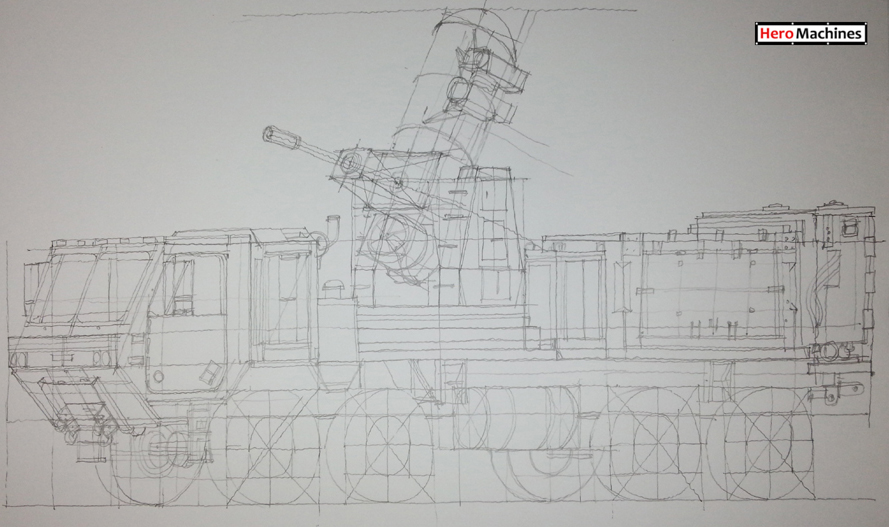
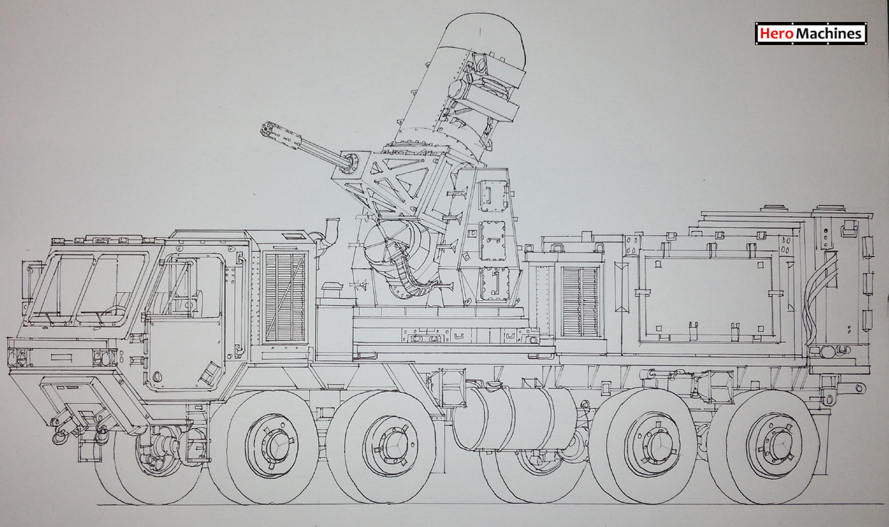
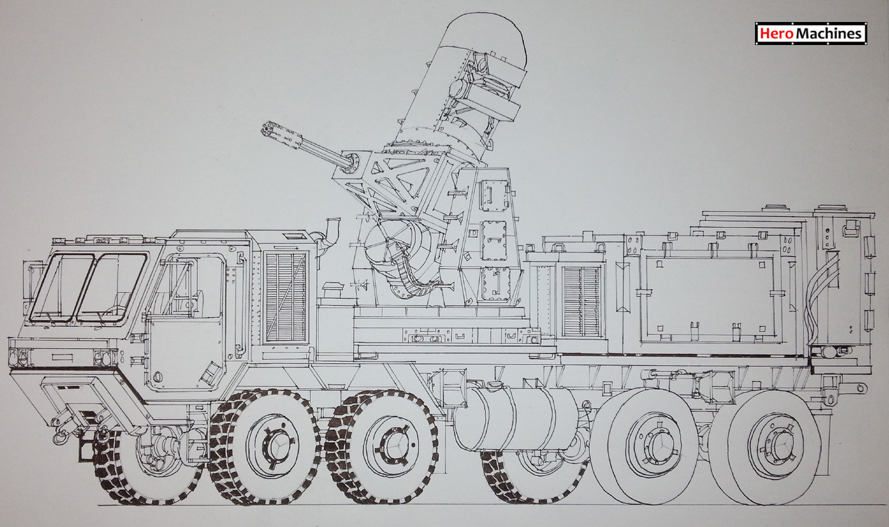
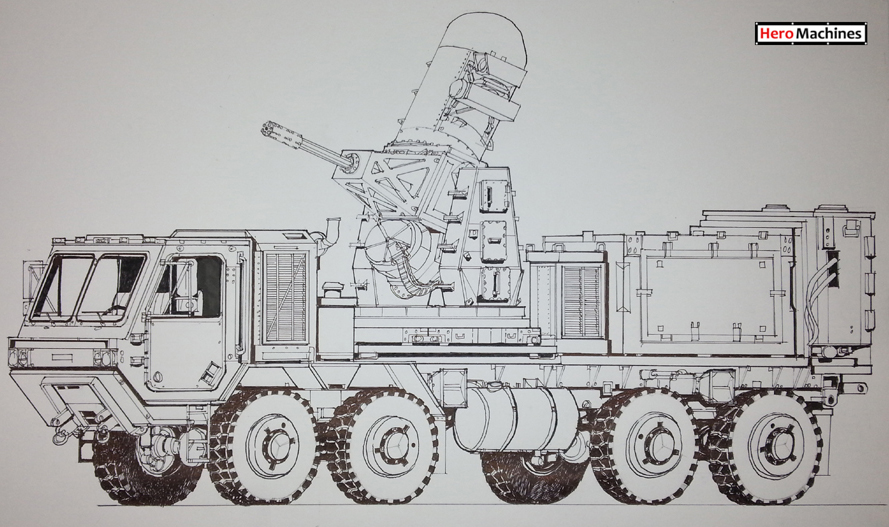
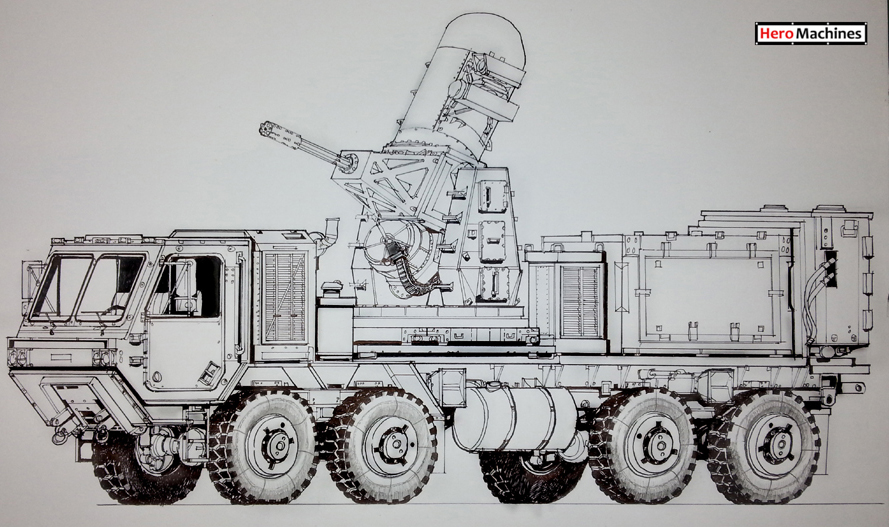
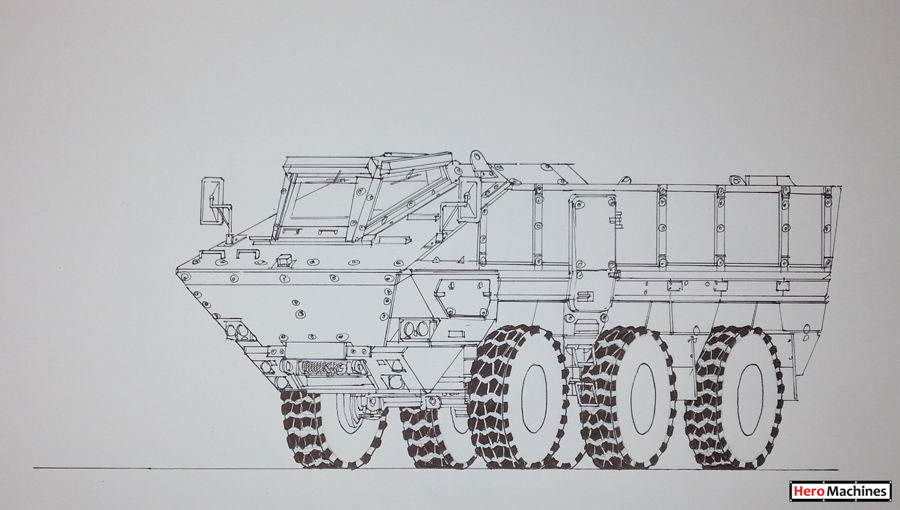
Here's is an update of my truck drawing done awhile ago. It's a pretty long one and almost fully occupy the paper space. I hope you all would like it.


user posted image


user posted image


user posted image


user posted image


user posted image


TScode10
post Aug 11 2022, 12:08 PM

Getting Started
**
Junior Member
145 posts

Joined: Apr 2008
QUOTE(dudester @ Aug 11 2022, 09:55 AM)
Good job TS. I know is your preference, but maybe you can try tablet or pc drawing pad. digital art is good skill and in demand.
*
Thanks for the recommendation, Dudestar. wink.gif Will think of buying one when the time is right and money isn't so tight. I've tried a few and its quite good.
TScode10
post Aug 11 2022, 12:31 PM

Getting Started
**
Junior Member
145 posts

Joined: Apr 2008
QUOTE(lotter92 @ Aug 11 2022, 12:26 PM)
If you want to venture into digital art, I recommend iPad with Procreate app. Any older generation ipad which support apple pencil will do. You can draw anytime and anywhere, it's really versatile and portable, also the drawing experience is really good.

I'm a full time artist, and almost all my works and commissions were done in ipad.
*
I see and thanks for the recommendation. Do you have a gallery to share with me with your digital art works?
TScode10
post Aug 22 2022, 11:43 AM

Getting Started
**
Junior Member
145 posts

Joined: Apr 2008
Here is to share an update of a drawing I've made.

user posted image

user posted image

user posted image

user posted image

user posted image


This post has been edited by code10: Aug 22 2022, 11:44 AM


Change to:
| Lo-Fi Version
0.0253sec    0.21    6 queries    GZIP Disabled
Time is now: 26th November 2025 - 09:10 AM