Welcome Guest ( Log In | Register )

Outline · [ Standard ] · Linear+

 Need more confidence installing aftermarket HU, Advice from sifus needed

views
     
TSboygenetic
post Dec 29 2018, 03:08 AM, updated 6y ago

Getting Started
**
Junior Member
129 posts

Joined: Mar 2009
Dear ICE gurus,

There comes a time when a man needs to learn to install his own damn HU.
I bought a single din HU from 12.12 sales and got laughed at when brought to accessories to install , reason being no one in this era using single din anymore.

Long story short, decided to install it meself.

I've even bought a fascia and a single din storage to go with the player.

The issue I have at the moment :

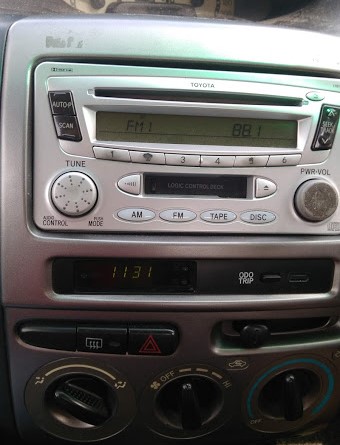
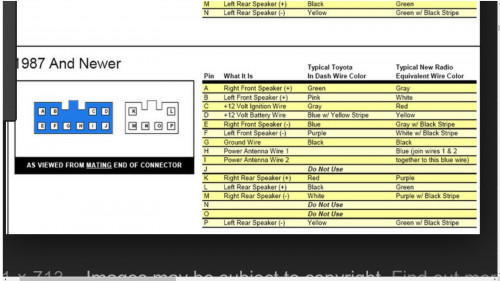
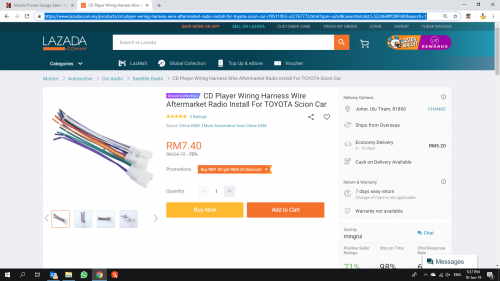
1) which site can I get a OEM factory radio player wiring diagram for Vios (04), Grand Vitara (08)

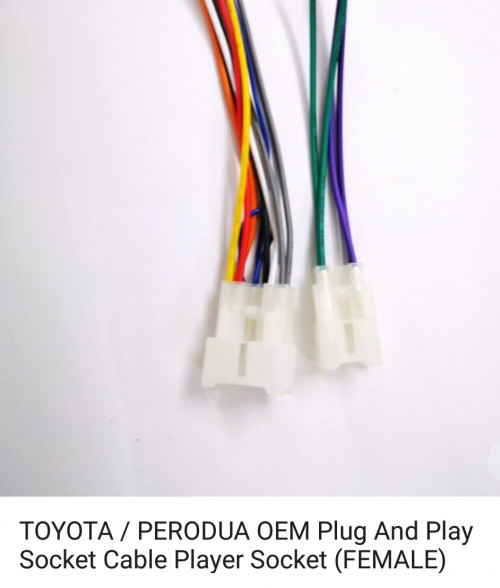
2) I've been interested in buying a Nakamichi double din for Grand Vitara and it says it's plug and play. When I asked (online chat function) if the steering wheel control works and they say I need to get socket and antenna. Does the socket means harness?

Therefore, as you can see I have lots to learn. Been watching YT for HU installation and just need few more information to gain more confidence to proceed.

Again, appreciate any advice for this DIY attempt.

Thank you in advance.
fireballs
post Dec 29 2018, 05:42 AM

10101
*******
Senior Member
5,627 posts

Joined: Mar 2012
For diy get the right harness to convert just plug and play
You can take a pic of your existing sockets and show to seller. They will include it for you.
TSboygenetic
post Dec 29 2018, 09:08 AM

Getting Started
**
Junior Member
129 posts

Joined: Mar 2009
QUOTE(fireballs @ Dec 29 2018, 05:42 AM)
For diy get the right harness to convert just plug and play
You can take a pic of your existing sockets and show to seller. They will include it for you.
*
Thank you, my kind Sir. However, don't I need to know the function of each wire? Ex: Black for ground, white for front left speaker, etc.

I found the harness online and even ask seller if they can tell me the assignment of each wire and seller is unable to provide such information.

In this case, do I need to use the testpen and AA battery to find out ?

user posted image
fireballs
post Dec 29 2018, 12:21 PM

10101
*******
Senior Member
5,627 posts

Joined: Mar 2012
Yes. If you can find the pinout of each pin.
Important are the yellow batt, red ignition, black ground.
Rest are speaker and illumination.
TSboygenetic
post Dec 29 2018, 01:20 PM

Getting Started
**
Junior Member
129 posts

Joined: Mar 2009
QUOTE(fireballs @ Dec 29 2018, 12:21 PM)
Yes.  If you can find the pinout of each pin.
Important are the yellow batt, red ignition, black ground.
Rest are speaker and illumination.
*
The reason I posted in low yatt Vios forum hoping someone has the wiring diagram. First time doing electronic work, that's why so many questions.

Any further advice is much appreciated.
fireballs
post Dec 29 2018, 02:37 PM

10101
*******
Senior Member
5,627 posts

Joined: Mar 2012
I suppose each is different. Can you show the socket and the player
TSboygenetic
post Dec 30 2018, 03:38 PM

Getting Started
**
Junior Member
129 posts

Joined: Mar 2009
QUOTE(fireballs @ Dec 29 2018, 02:37 PM)
I suppose each is different. Can you show the socket and the player
*
erm, cant show the socket as i yet to remove it but heres a pic of the stock radio.

Grand Vitara
user posted image

Vios
user posted image
ahchun
post Jan 2 2019, 06:52 PM

MiddleAge
******
Senior Member
1,115 posts

Joined: Jan 2003
From: HeRe
You can try from taobao or aliexpress for the socket
I am not sure about vitara. But for Nissan they do have it

craziechild
post Jan 10 2019, 09:41 AM

ICE HiFi Fanatic!
*****
Senior Member
721 posts

Joined: Mar 2006
From: Malaysia | Singapore


user posted image

there is your toyota pin-out diagram... check the colours...

general rule on a toyota is the smaller harness is for the rear speakers... the bigger harness is one side front speaker the other side for everything else..

for your vitara though... good luck...

what you need for the job... on a toyota vios,
1. Short Philips screw driver size 6
2. No. 8 Hex socket
3. pin type 12V test pen
user posted image

4. no. 10 Hex socket
5. Wire cutter
6. Wire tapes
7. 4" cable zip ties
8. AA battery


This post has been edited by craziechild: Jan 10 2019, 09:54 AM
TSboygenetic
post Jan 10 2019, 12:56 PM

Getting Started
**
Junior Member
129 posts

Joined: Mar 2009
QUOTE(craziechild @ Jan 10 2019, 09:41 AM)
user posted image

there is your toyota pin-out diagram... check the colours...

general rule on a toyota is the smaller harness is for the rear speakers... the bigger harness is one side front speaker the other side for everything else..

for your vitara though... good luck...

what you need for the job... on a toyota vios,
1. Short Philips screw driver size 6
2. No. 8 Hex socket
3. pin type 12V test pen
user posted image

4. no. 10 Hex socket
5. Wire cutter
6. Wire tapes
7. 4" cable zip ties
8. AA battery
*
Nicely written. Thank you.
I am finding every excuse not to do it myself and looking for anyone that want to mess this up together. Knowing myself, i_ll probably miss a step or two.

Thank you though. Much appreciated

craziechild
post Jan 10 2019, 05:33 PM

ICE HiFi Fanatic!
*****
Senior Member
721 posts

Joined: Mar 2006
From: Malaysia | Singapore


QUOTE(boygenetic @ Jan 10 2019, 12:56 PM)
Nicely written. Thank you.
I am finding every excuse not to do it myself and looking for anyone that want to mess this up together. Knowing myself, i_ll probably miss a step or two.

Thank you though. Much appreciated
*
its fairly easy on the the first gen vios...
a clip screw on top of the meter board... take that out using the short philip screw driver... then pull the whole panel out...
you will see 4 pcs of no. 8 hex screw... reachable by socket/box spannar...
open all 4... pull the HU out...
then unplug the wires harness at the back of the HU... 3 of them... 2 socket and 1 antenna...
trace and check the wires using the pin test pen... do the speaker first then the power and then ground...
re-check everything...
install the side mounting from the old HU to the new HU... put it back on screw it back on...
then test before you put the panel back on...
30 to 45 mins job...

if not... buy this... then skip all the wire tracing part...

user posted image


This post has been edited by craziechild: Jan 10 2019, 05:38 PM


Change to:
| Lo-Fi Version
0.0127sec    0.14    5 queries    GZIP Disabled
Time is now: 29th March 2024 - 06:40 AM