QUOTE(kaizor11 @ Sep 25 2016, 11:20 AM)
Already in da house 

Already on the way (WIP) » Click to show Spoiler - click again to hide... «
Model Kits China Gundam/Plamo Model V9, China Gunpla and Plamo Discussion Only
|
|
 Sep 25 2016, 06:13 PM Sep 25 2016, 06:13 PM
Return to original view | Post
#1
|
 
Junior Member
20 posts Joined: Sep 2005 |
QUOTE(kaizor11 @ Sep 25 2016, 11:20 AM) Already in da house Already on the way (WIP) » Click to show Spoiler - click again to hide... « |
|
|
|
|
|
Oct 2 2016, 12:45 PM
Return to original view | Post
#2
|
|
Junior Member
20 posts Joined: Sep 2005 |
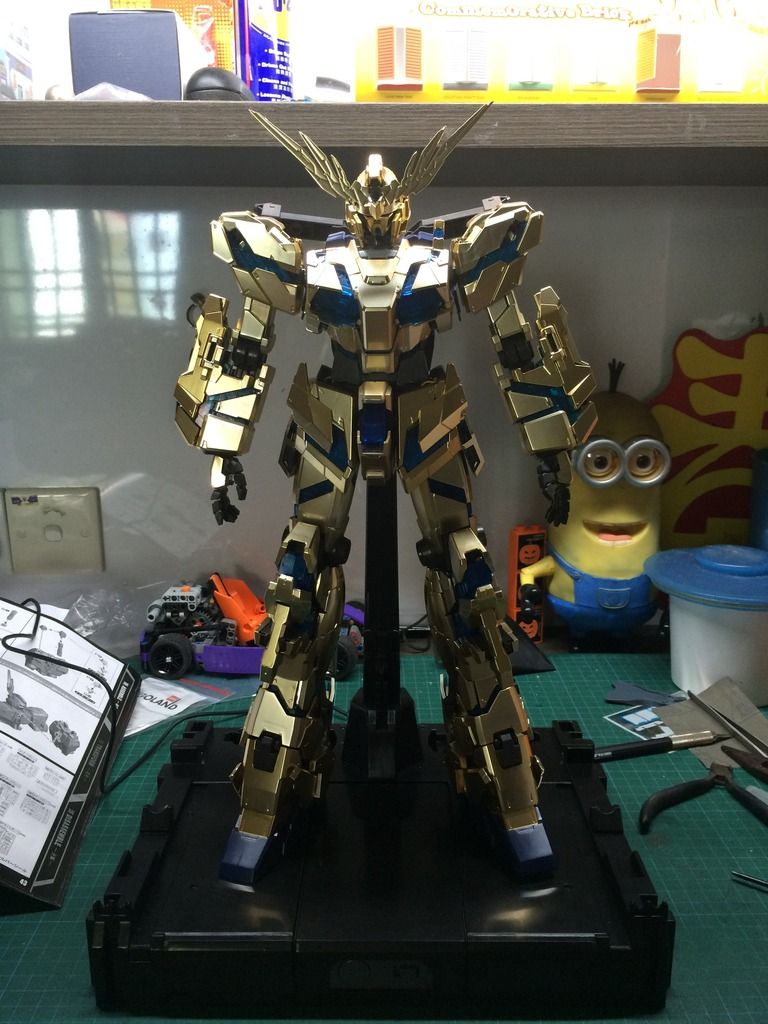
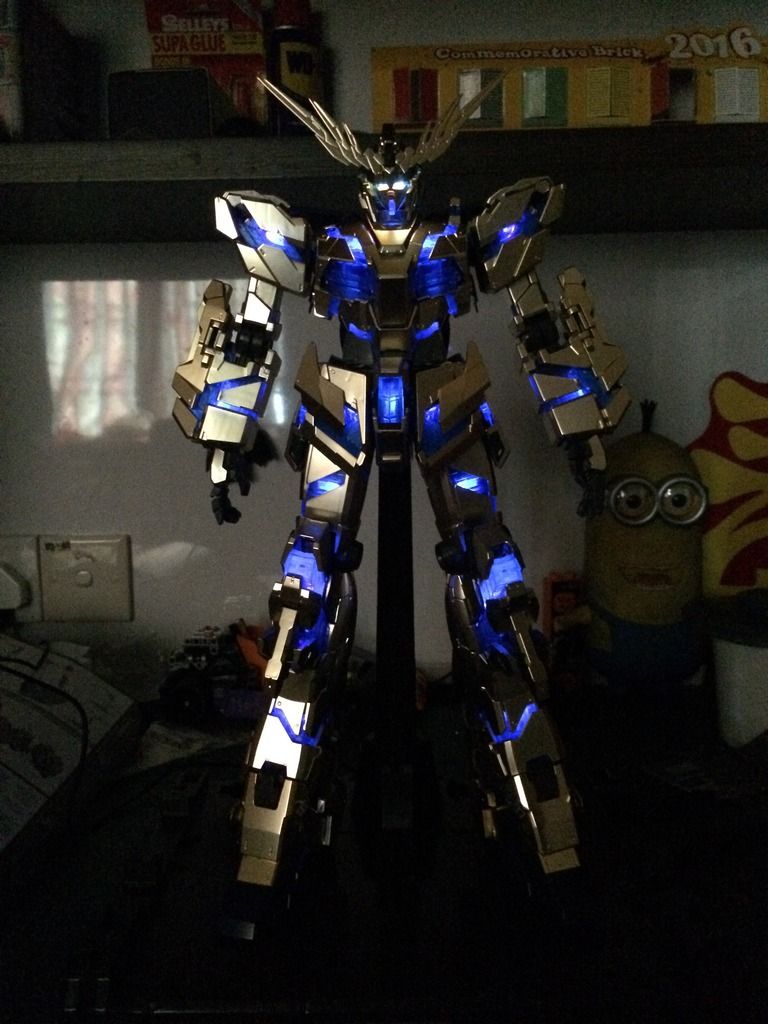
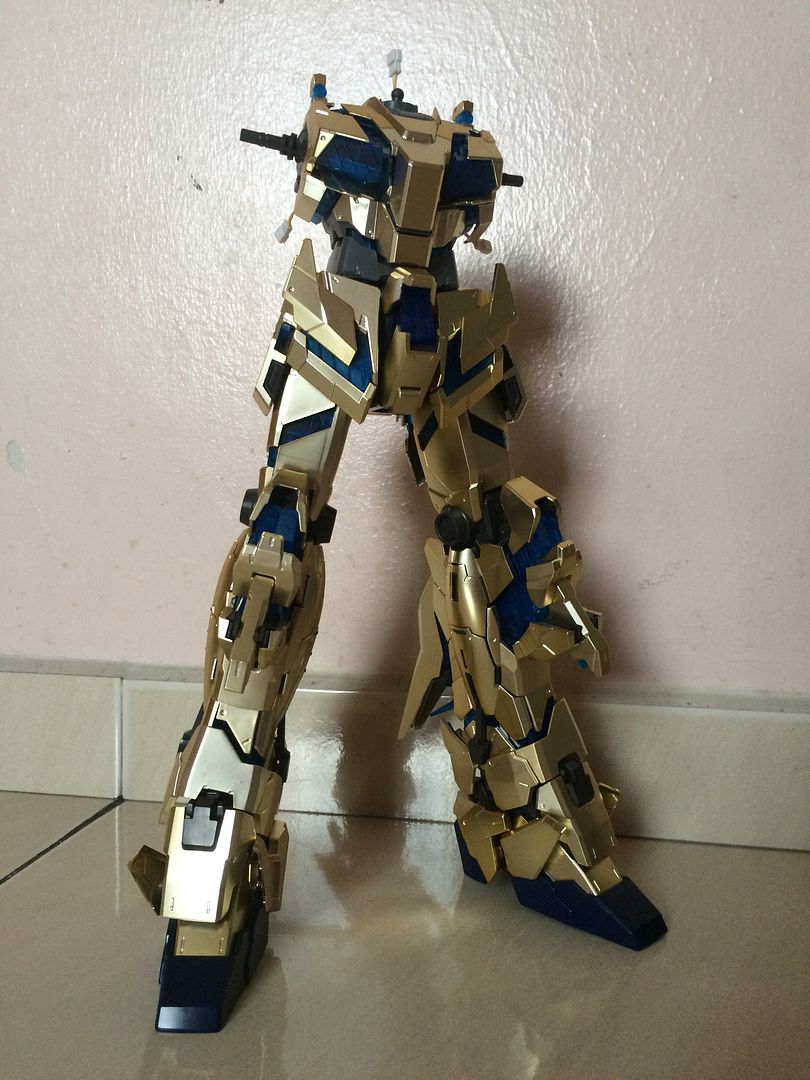
WIP update....Please don't mind the messy background
 » Click to show Spoiler - click again to hide... « » Click to show Spoiler - click again to hide... « QUOTE(menghua84 @ Sep 26 2016, 12:20 PM) OMG Quality wise, I'll give them 9/10, plastic feels almost identical to B's  .. how's the quality and build experience? .. how's the quality and build experience? QUOTE(clivengu @ Sep 26 2016, 04:08 PM) Oh my god. you guys are so fast. I havent got the time to collect mine yet. Please review... How is the coating finish? The coating looks very nice, too bad there are still some parts are not undergated, making nub marks very visible upcloseQUOTE(Lurker @ Oct 1 2016, 12:09 AM) Waiting for a review good sir...hope the joints are strong Overall OK, except for a few difficulties I faced during assembling- impossible to insert the arms to the body; either the part Q10 is too thick, or the polycap POM7 is too small. In the end, I trimmed the Q10 and managed to insert them - almost broke N1 during head assembly. Studied the manual carefully, referred to videos, still unable to assemble it. Used too much force and the part almost broke into half. Finally, no choice, super glued the head portion. Need some advise on this portion. - correct me if I'm wrong, Daban's LED seems dimmer as compared to ori's. If that's true, I truly regretted using them, shld hv used ori from the beginning - the LEDs on the shoulder armor cannot be pulled to firm, right hand side will cause all LED not functional, left side will cause only left arm not functional Other than that, parts snap fit very nice, no loose parts, joints are tight, able to stand independently (without backpack of cos) Because the parts are so tight, I decided to build it in it's Destroy mode. Also, I preferred it in this mode |
|
|
Oct 2 2016, 06:13 PM
Return to original view | Post
#3
|
|
Junior Member
20 posts Joined: Sep 2005 |
QUOTE(Nawar @ Oct 2 2016, 04:01 PM) what touch up gold are closest to use? I was using Artline Gold, so so only, wanna try Sharpie, seems OK but out of ink liaotamiya gold leaf or normal gold marker wld suffice? I don't hv Tamiya so couldn't comment |
|
|
Oct 2 2016, 08:25 PM
Return to original view | Post
#4
|
|
Junior Member
20 posts Joined: Sep 2005 |
QUOTE(:3mushy:3 @ Oct 2 2016, 06:19 PM) Artline and Sharpie are basically the same, Tamiya Gold Leaf is brighter than those two. I seldom build coated kits, so I seldom use these. Will try and find tamiya's to try. If I'm not wrong, the coated gold shld b similar to Hyaku Shiki and DM Akatsuki right? If tamiya's blend well with them, I think it wouldn't b a problem with the Phenex. |
|
|
Oct 4 2016, 11:57 AM
Return to original view | Post
#5
|
|
Junior Member
20 posts Joined: Sep 2005 |
QUOTE(kaizor11 @ Oct 4 2016, 09:30 AM) - impossible to insert the arms to the body; either the part Q10 is too thick, or the polycap POM7 is too small. In the end, I trimmed the Q10 and managed to insert them The N1 part maybe can be explained as the part B19 is coated and thus is thicker, making the part impossible to insert into it.- almost broke N1 during head assembly. Studied the manual carefully, referred to videos, still unable to assemble it. Used too much force and the part almost broke into half. Finally, no choice, super glued the head portion. Need some advise on this portion. same with me.the hand part almost impossible to insert in.i push2 harder n mange to clip in.so afraid to break it. N1 also i superglue it.same issue with u.i didnt have this problem with daban banshee though The Banshee wouldn't hv this problem because it's not coated. Wonder if all of them (Phenex) having this similar issue. The arm part, highest possibility I guess will be the POM7 being too small. And one more problem with I faced, since I'm using Daban's LED, the backpack LED seems to be faulty, which suks..... |
|
|
Oct 4 2016, 12:16 PM
Return to original view | Post
#6
|
|
Junior Member
20 posts Joined: Sep 2005 |
QUOTE(kaizor11 @ Oct 4 2016, 12:02 PM) i put my daban led on my B Unicorn. the light not dim as per ur claim but i need to solder the led back to get it work as it got problem.for banshee n phenex i decide not put LEd.enough with unicorn Then maybe my expectation for the LED is too high lolI expected them to be much brighter. No way to compare now, at least until I build B's Banshee |
|
|
|
|
|
Feb 6 2017, 06:06 PM
Return to original view | Post
#7
|
|
Junior Member
20 posts Joined: Sep 2005 |
QUOTE(clivengu @ Feb 6 2017, 02:55 PM) Want to ask advice from those who has built Daban PG Phenex/unicorn , is it really difficult to assembly the unicorn head? The one that connect the back head piece with the upper head piece... I spend whole night still couldnt figure out ... I check video of ppl assembly d bandai one.. it seems to be able to "click" in place easily.. and hold firmly. But I hv no luck and a bit worry my led cable will broken if I keep forcing it.. For me; I almost broke the part into 2 when I force it in. In the end, I superglued it.I suspect because of the gold coating which makes the part slightly thicker. |
|
|
Feb 7 2017, 10:53 AM
Return to original view | Post
#8
|
|
Junior Member
20 posts Joined: Sep 2005 |
QUOTE(clivengu @ Feb 6 2017, 08:07 PM) If you superglue it, does it mean you won't able to transform the head already? Yeah, because I never plan on transforming it into Unicorn mode, it will stay in it's Destroy mode.I finally manage to get all the pieces in place just now... this is really the most frustrated experience I had with any model kit  But luckily manage to solve it... I disassemble every pieces, and test fit one by one, sand a few parts (not sure it actually helps or not), and putting the part back in reverse sequence... and finally sort it out after struggling for hours.. Putting the led wiring all around making it even harder to work with... I hope other parts wont be as complicated as the head. But luckily manage to solve it... I disassemble every pieces, and test fit one by one, sand a few parts (not sure it actually helps or not), and putting the part back in reverse sequence... and finally sort it out after struggling for hours.. Putting the led wiring all around making it even harder to work with... I hope other parts wont be as complicated as the head. But really quite sexy after finish... this is my first unicorn & a first pg, so really an interesting experience Glad you found another way in assembling it.  Not sure about the others; you'll find another roadblock when assembling the torso, a small block but I don't think you'll have any problem with it |
|
|
May 17 2017, 06:57 PM
Return to original view | Post
#9
|
|
Junior Member
20 posts Joined: Sep 2005 |
QUOTE(clivengu @ May 14 2017, 11:54 PM) I need some guide here with my Daban PG Phenex.. I almost want to crash and throw the whole kit away.... I gave an advise on this few months back. It's the joint, too big, file it to make it smaller, for both left and right.I am building the kit with LED, so assembly is a bit complicated.. Now I try to put the whole shoulder & arms into the torso.. but even with elephant strength, I couldn't get it to goes in. Is this a common problem with the kit? I tried both left & right joints, also same. I couldn't really see what is going internally , so I can't figure out which area it stucks at, and which part I should sand it down for it to works. Any advice? I will not even be thinking about transforming it once I am done with this kit. It does look very good.. I just hope there is no disastrous damage before I finish it:( |
| Change to: |  0.0396sec 0.0396sec
 0.74 0.74
 7 queries 7 queries
 GZIP Disabled GZIP Disabled
Time is now: 28th November 2025 - 06:27 PM |
 Quote
Quote