Outline ·
[ Standard ] ·
Linear+
Worklog: Project Hypoglossal, Watercooled SLi gaming rig. Lotsa bling
|
pizzaboy
|
 Aug 28 2006, 01:43 AM Aug 28 2006, 01:43 AM
|
Look at all my stars!!


|
Sounds GOOD to meE! I'm wayyyting.....
Isn't this case like, really quite flimsy and clumsy?
My friend bought, and ask me to install the parts, it was really difficult. Especially on an SLI setup like his.
Good luck fixing it man.....you'll need it.
|
|
|
|
|
|
uglyvamp
|
Aug 28 2006, 03:58 AM
|
|
|
luv the part u actually strip the front one 1 by 1 ...
|
|
|
|
|
|
iamsteven
|
Aug 28 2006, 04:14 AM
|
Getting Started

|
wow....tats was a great job btw, can i know wat mm jigsaw blade u use to cut those metal n acrylic???plan to take my old icute casing to abuse it  anyway, got a cavalier waiting for u to mod...not dare to make myself since nvr try....wait me save some $$$ 1st ya  |
|
|
|
|
|
TSianho
|
Aug 29 2006, 03:17 AM
|
Cucimangkoklife
|
Updatesssssss. Time to install the completed top window with radiator mounted on it. Look at this pix. U'll notice there is a reinforcement bar for the chassis at the top to hold the ROM cage shape. It's gonna block the radiator. 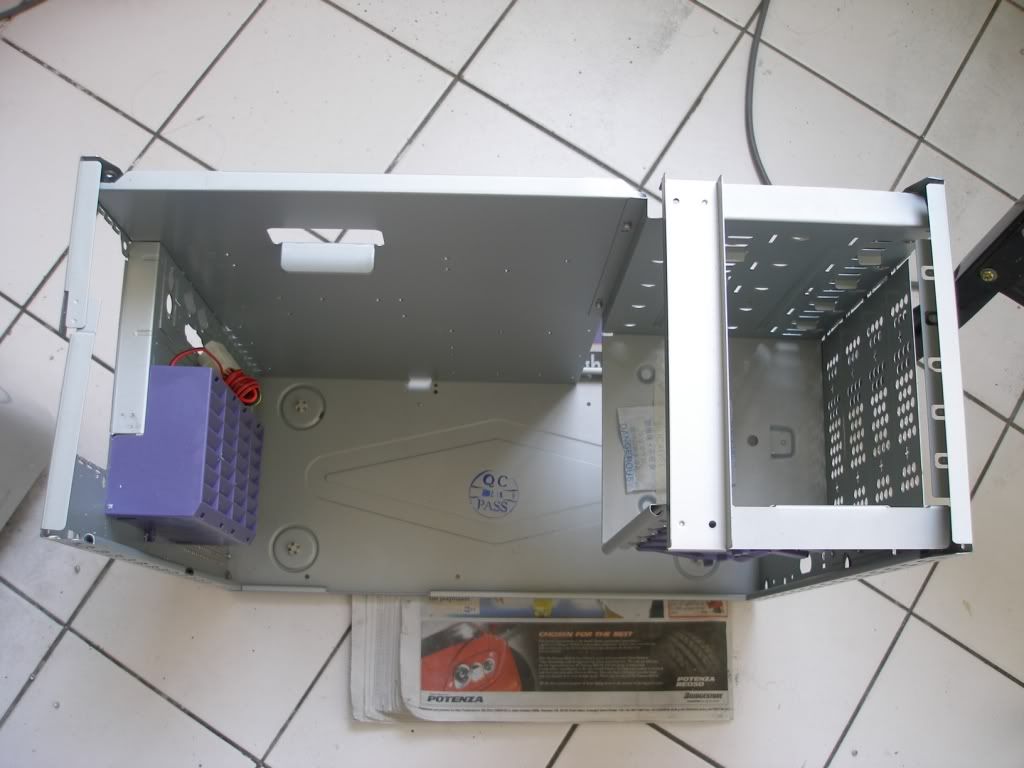 So.................... it's time to chop chop choppity chop. Removed it from chassis. 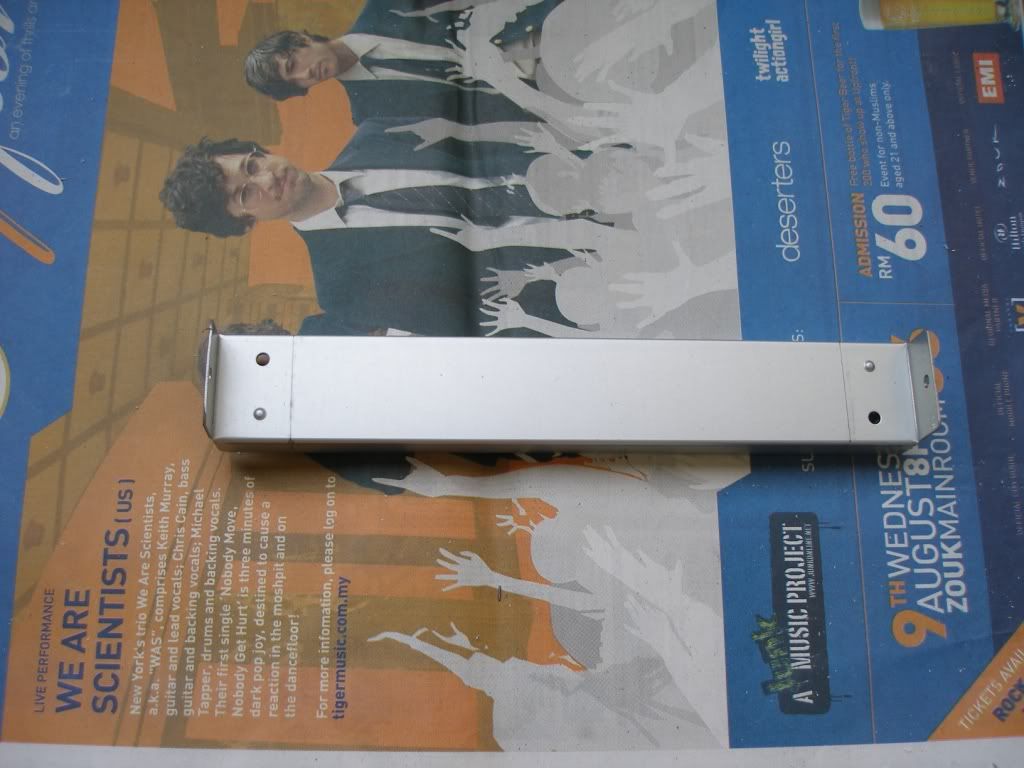 Chop chop choppity chop. 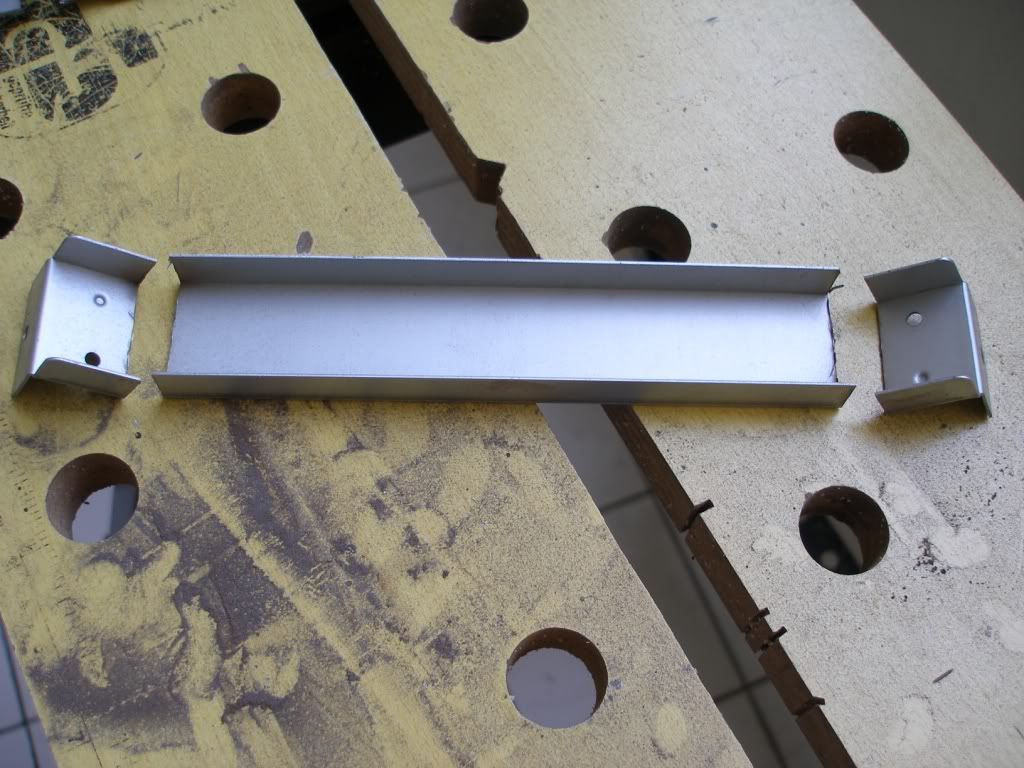 Installing the modified bar back onto chassis. 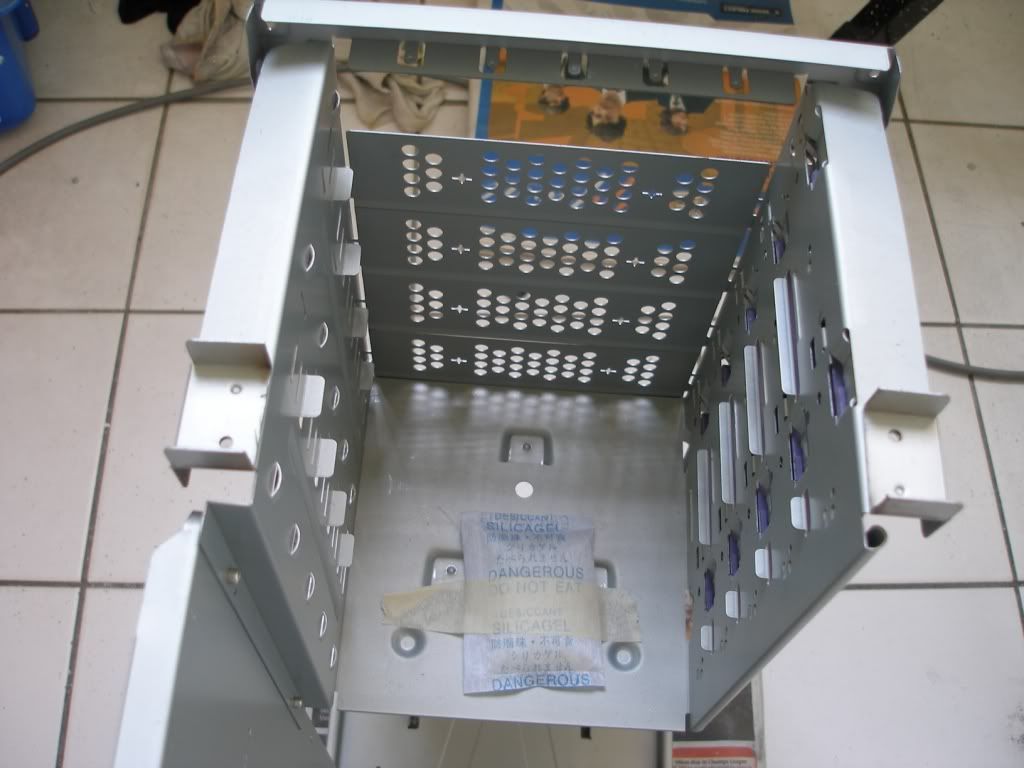 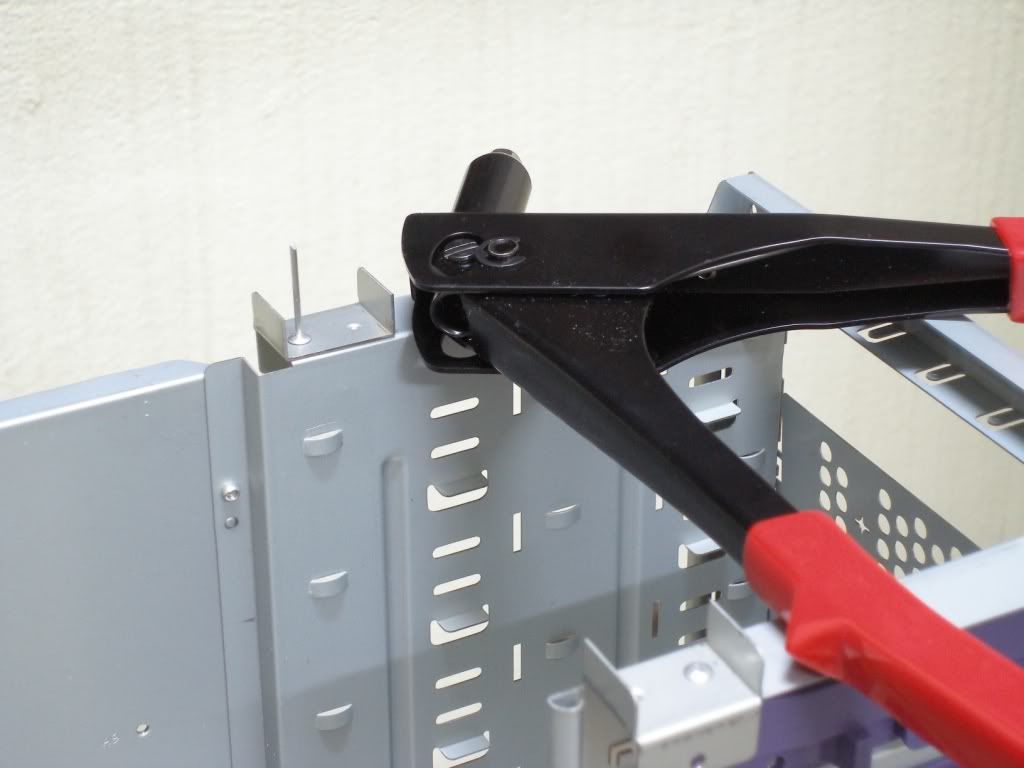 More updatesssssssssss coming. This post has been edited by ianho: Aug 29 2006, 08:20 AM |
|
|
|
|
|
TSianho
|
Aug 29 2006, 08:35 AM
|
Cucimangkoklife
|
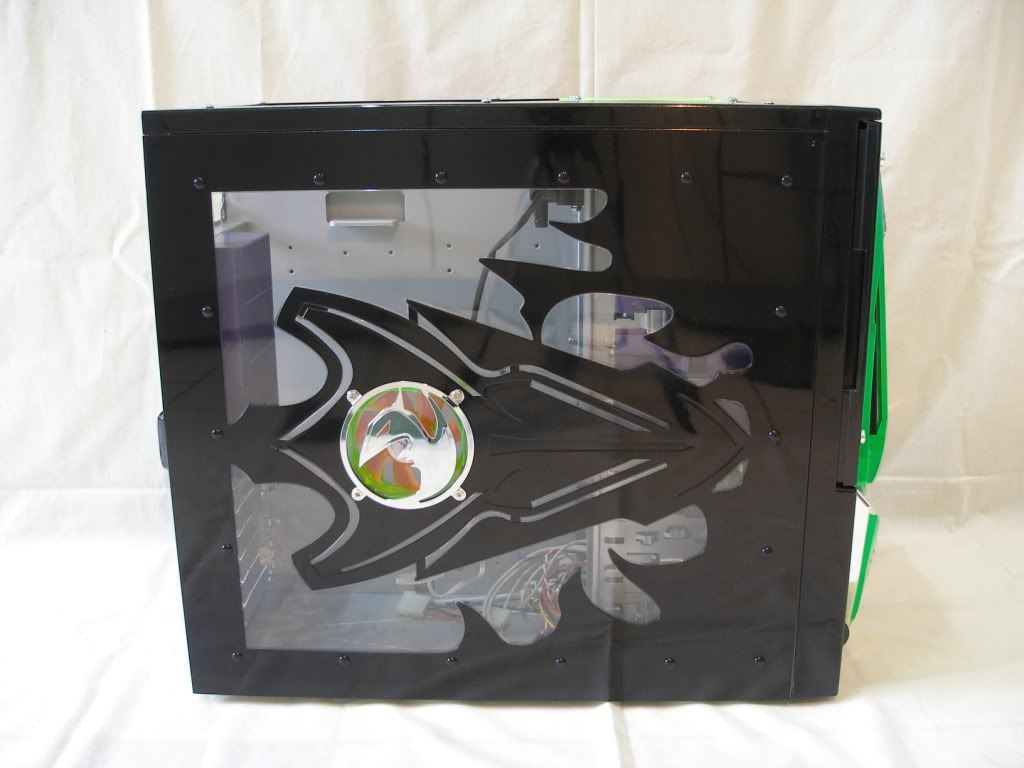
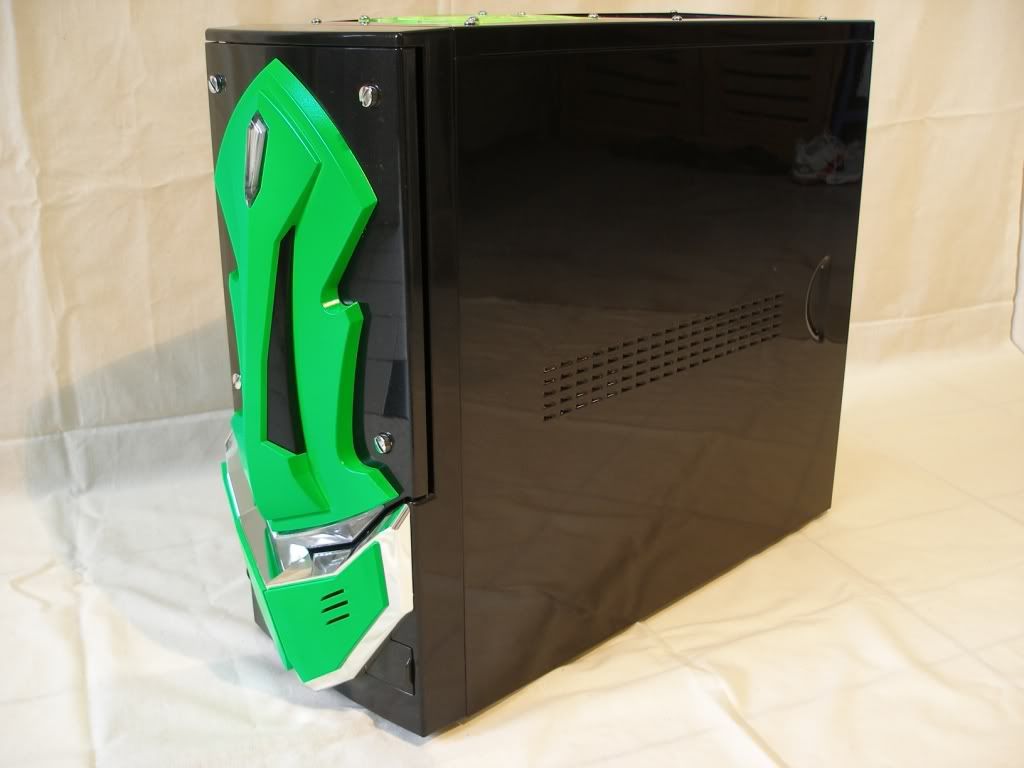
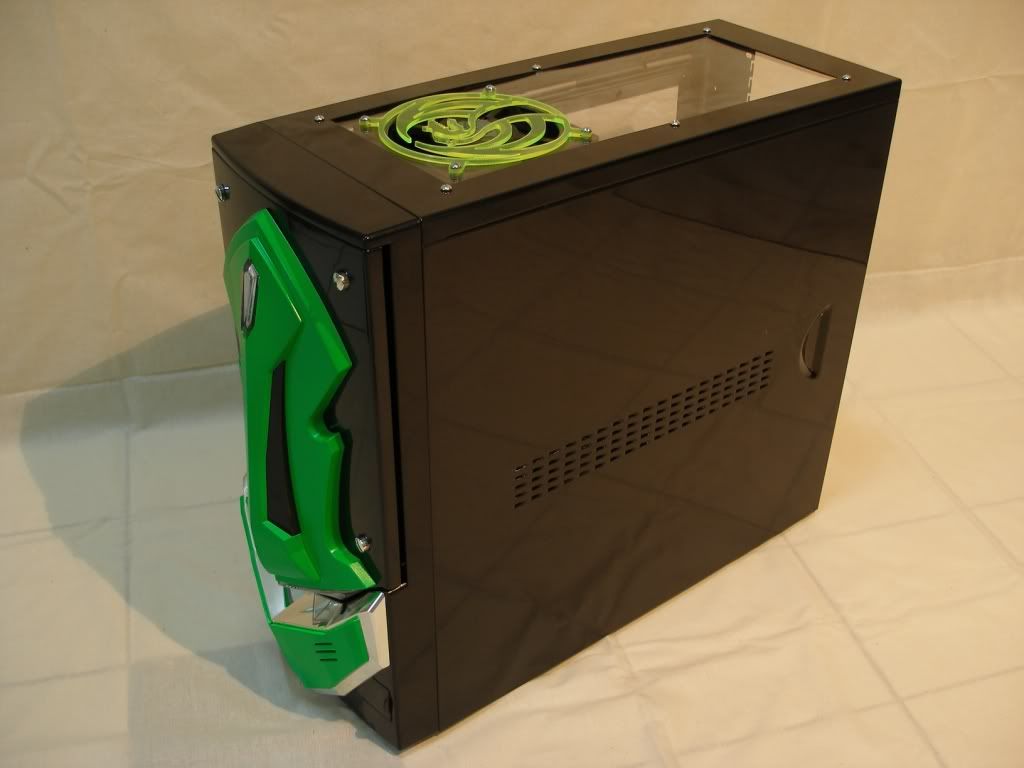
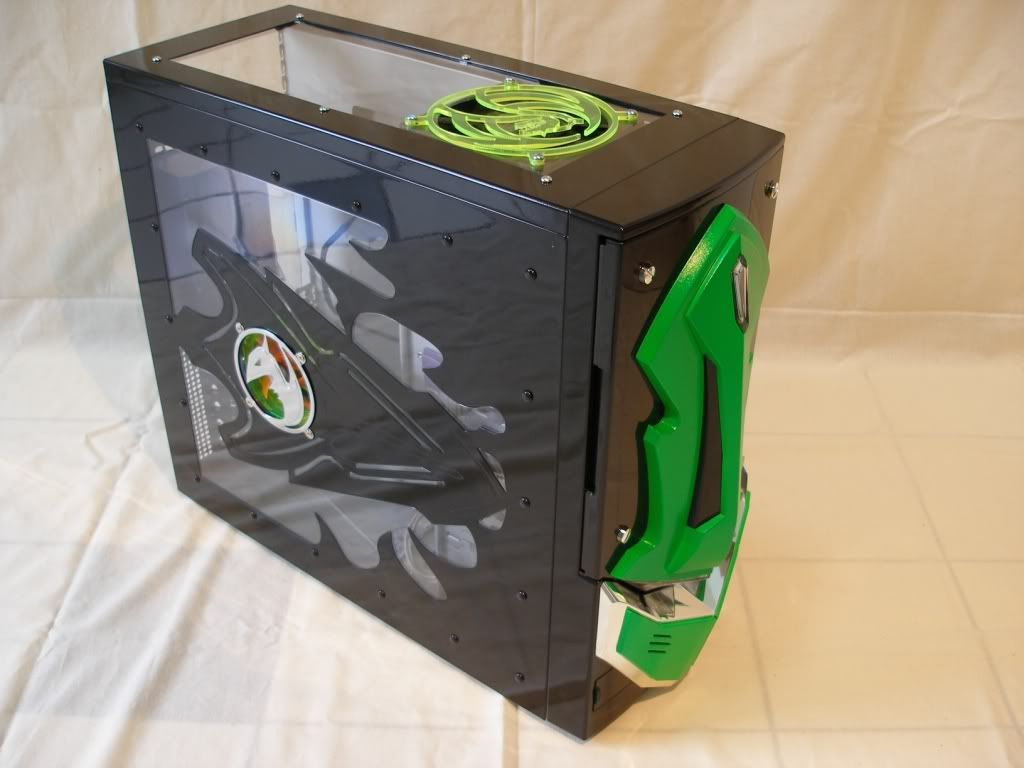
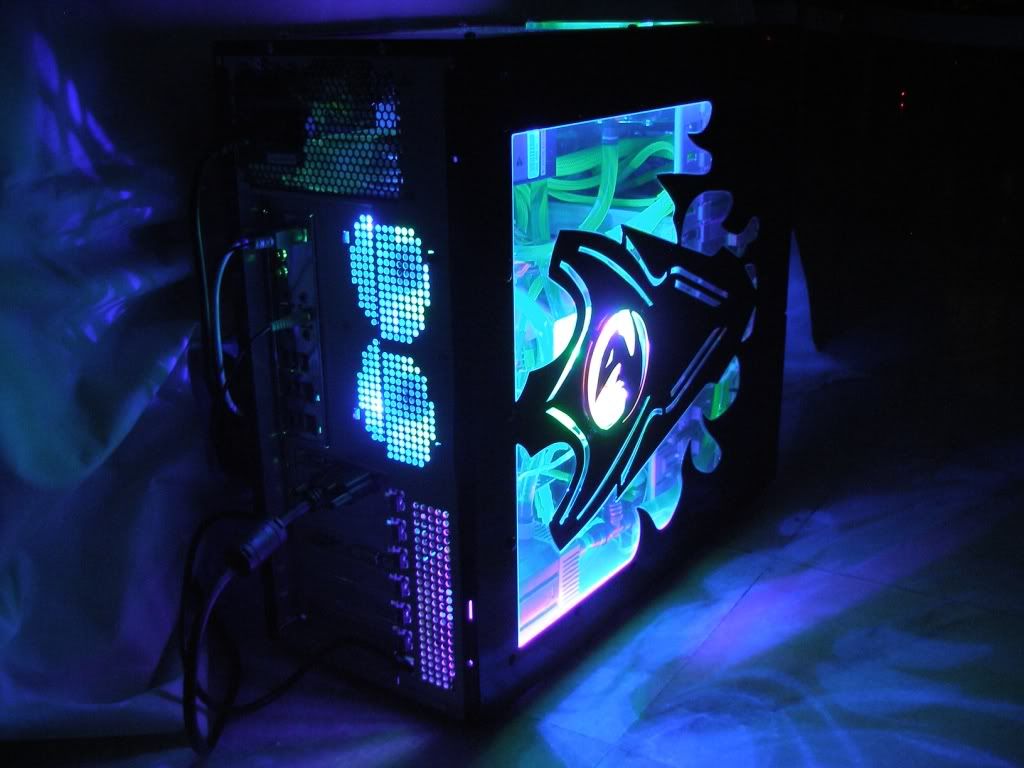
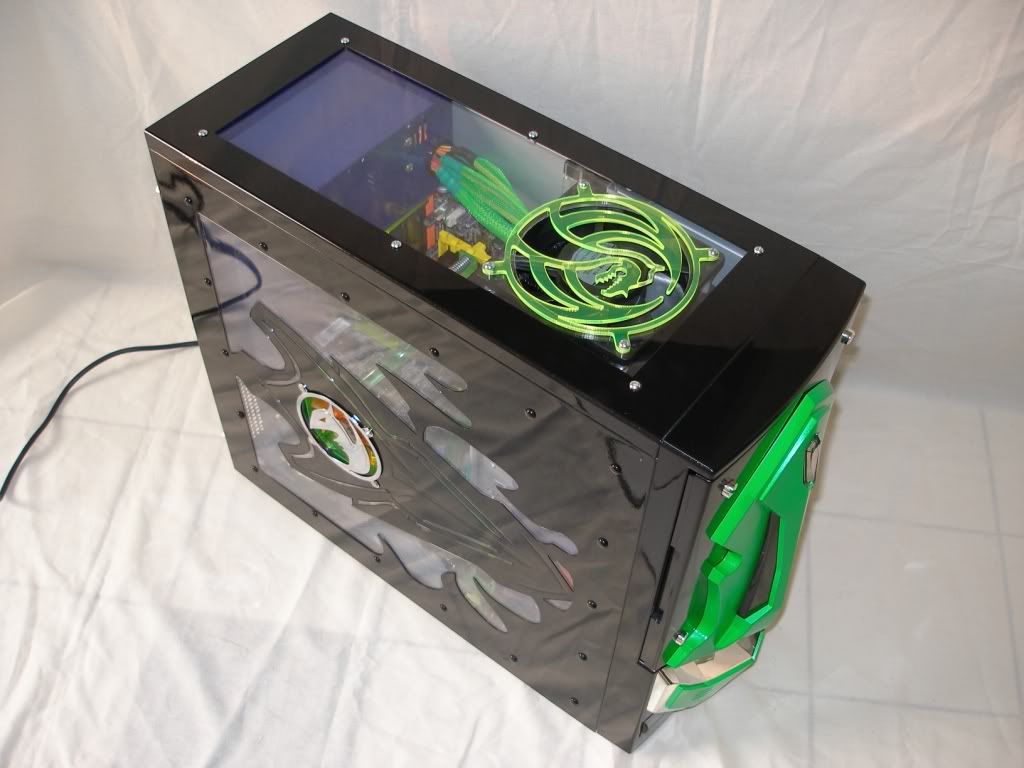
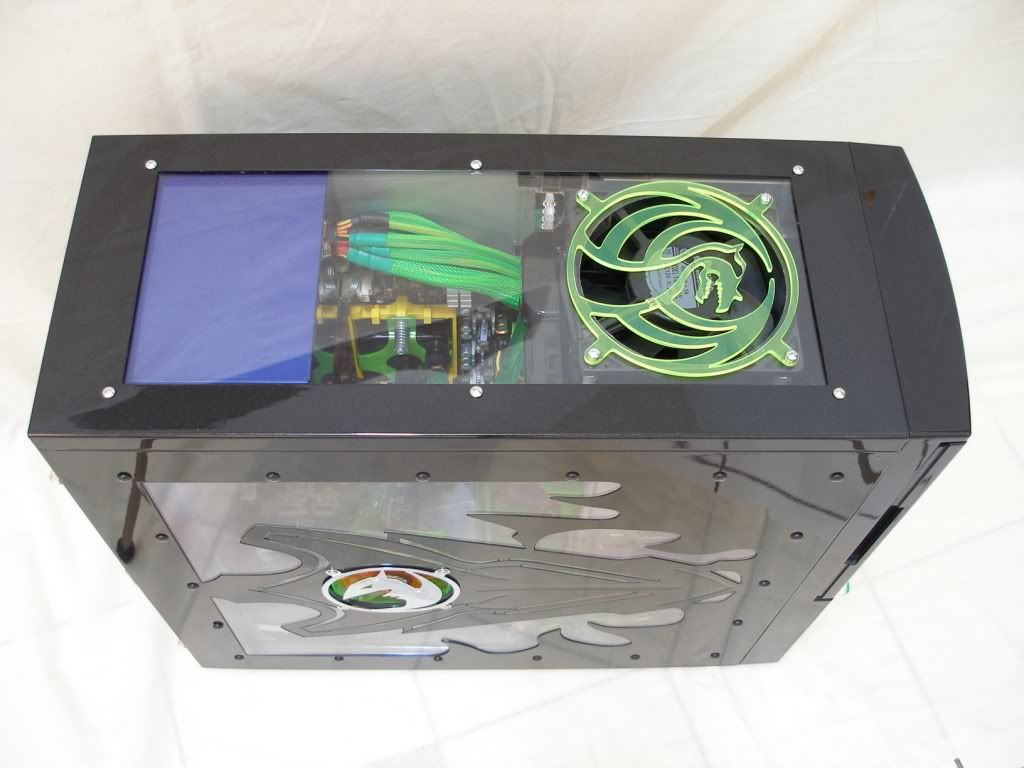
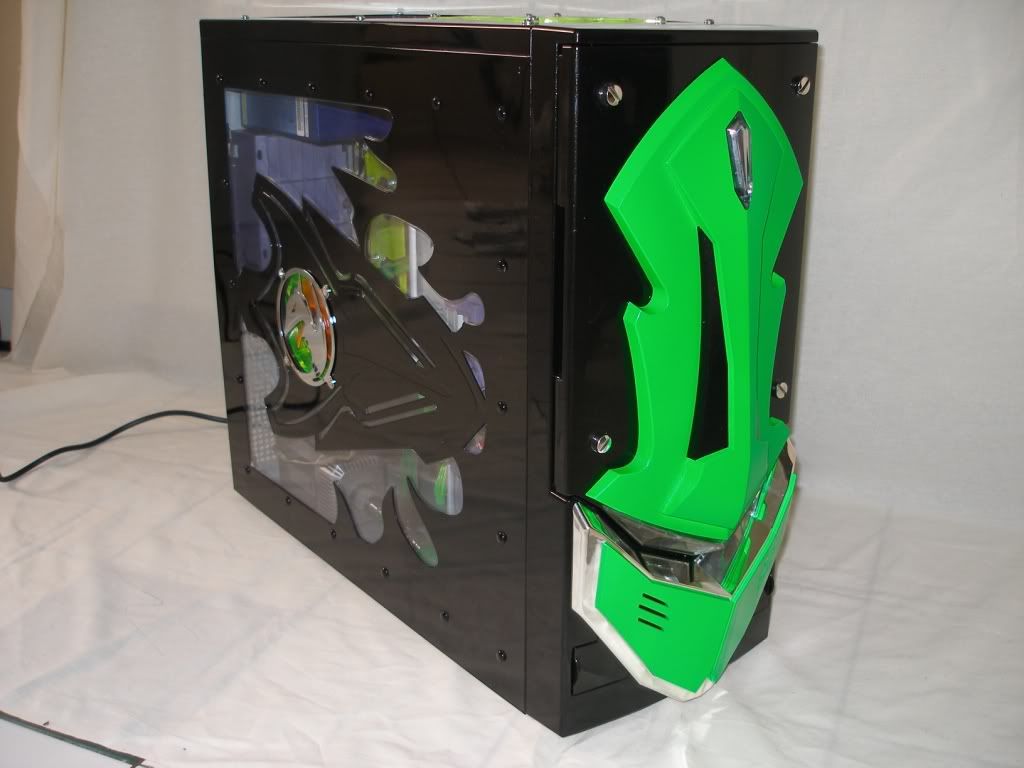
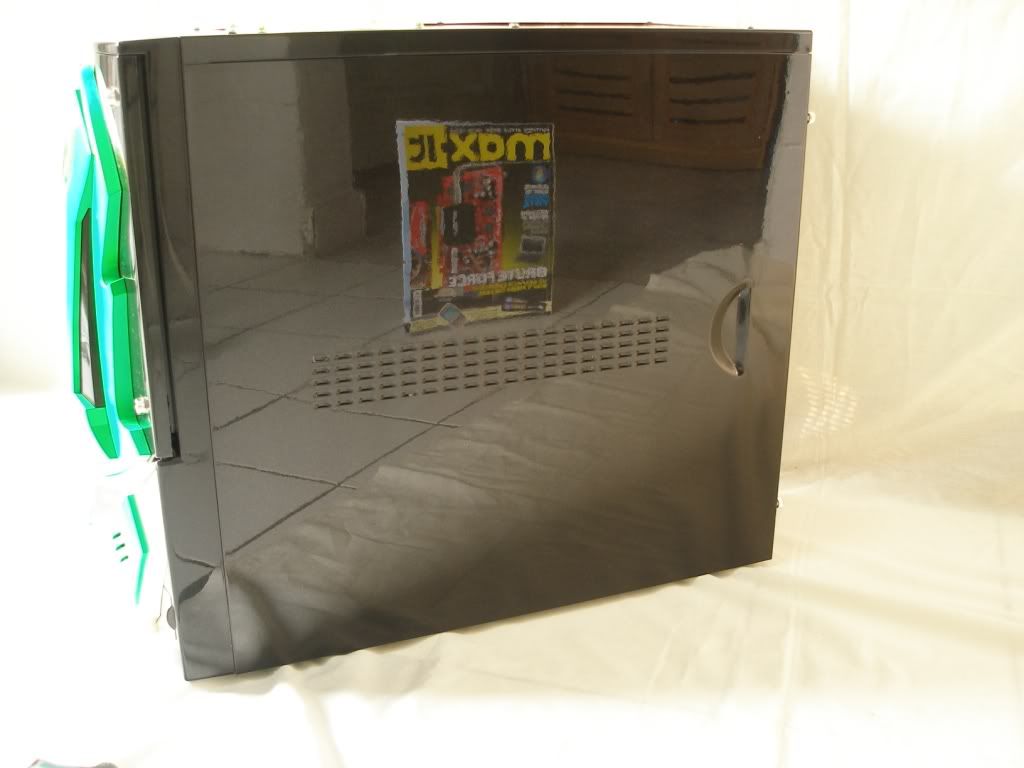
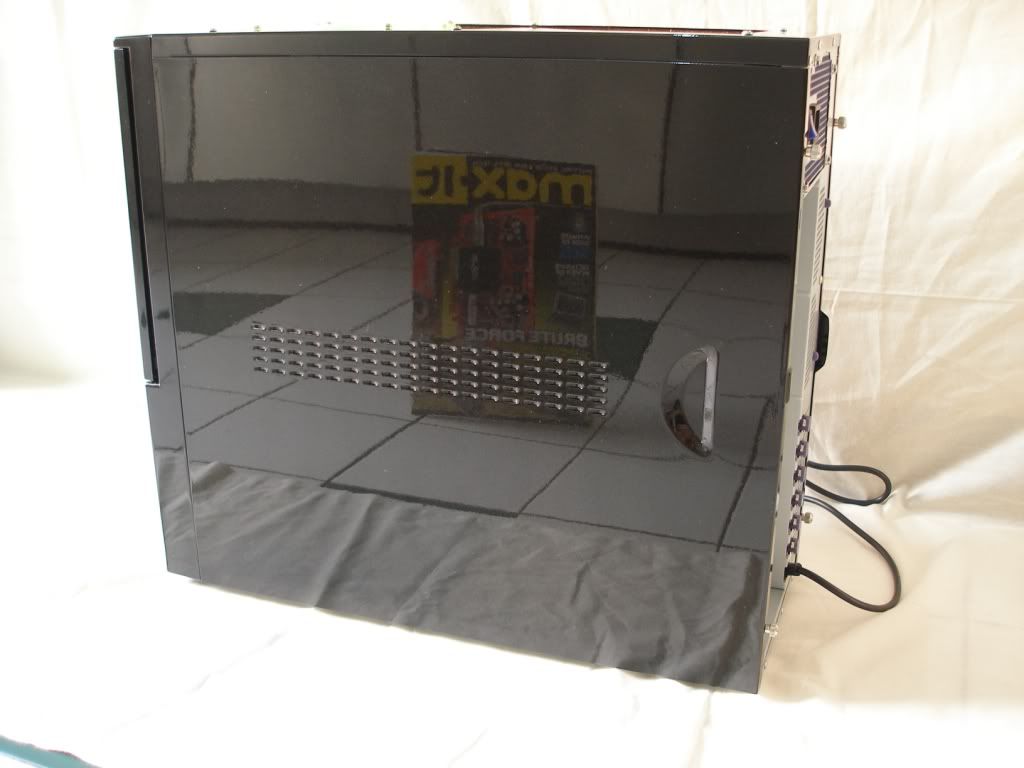
Time to install the rear exhaust fans. C that purple box thingy at the back? That's the thing that contains the 2x80mm fans. 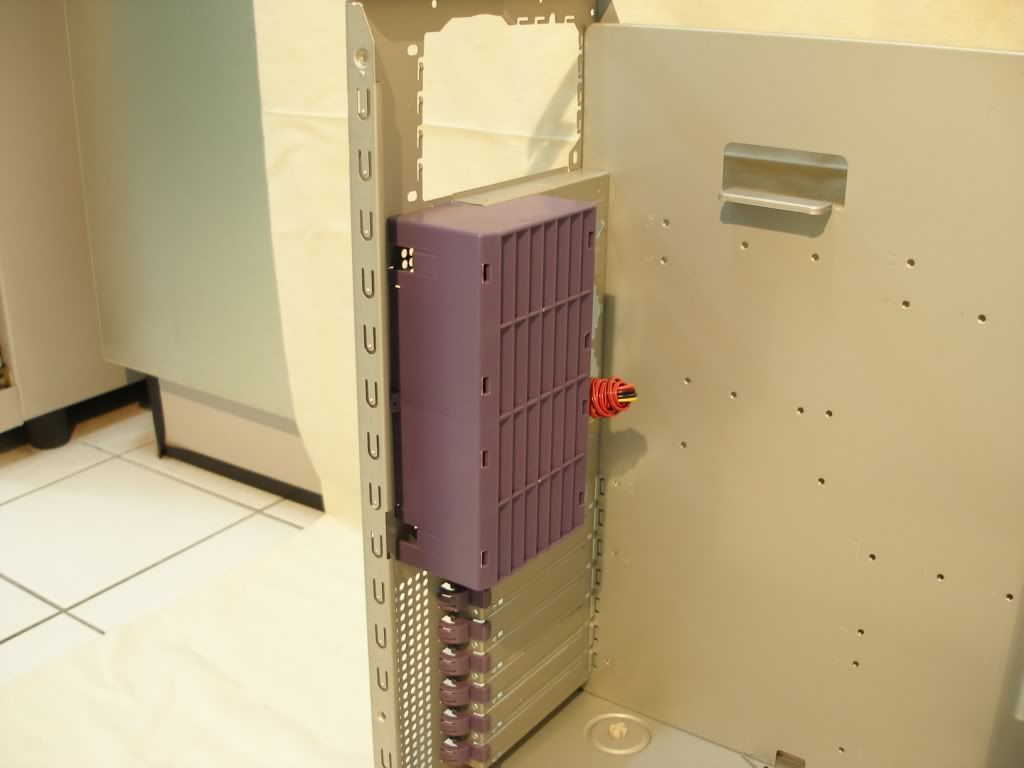 Here's how it looks like after taking it off the chassis. Funny thing is NZXT only gaf 1 fan with it. It's a plain ugly black fan anyway so no probs. Let's get rid of it. 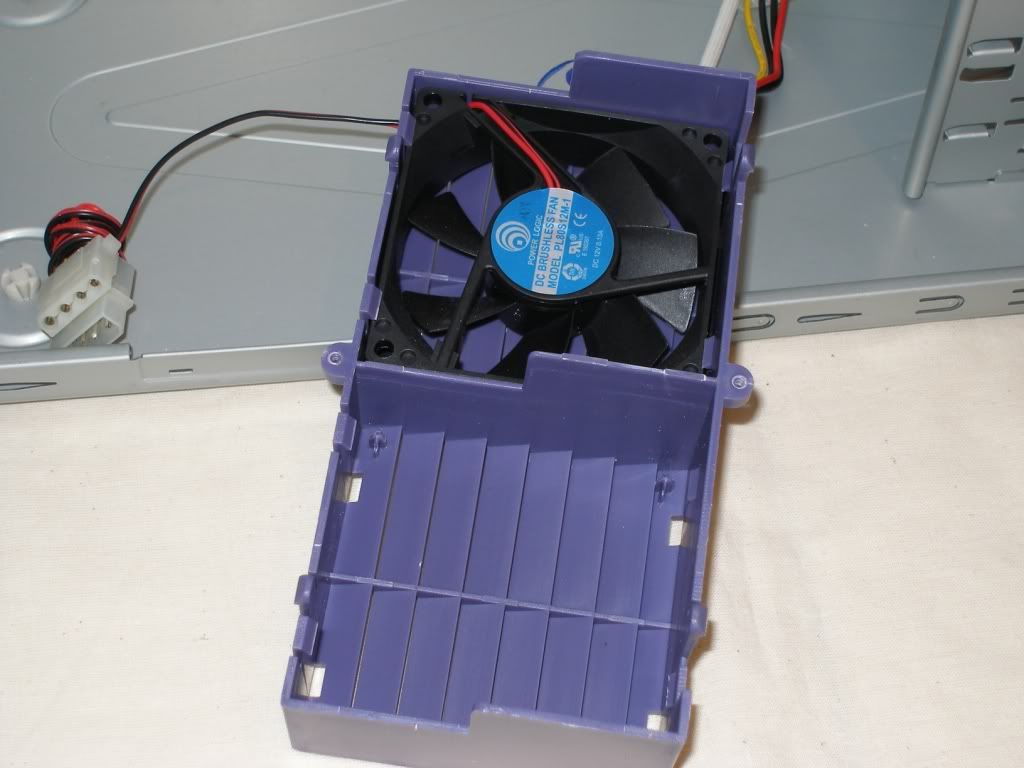 In goes the bling bling fans. After putting the UV LED fans in, it's just a simple refit back onto the back of the chassis. 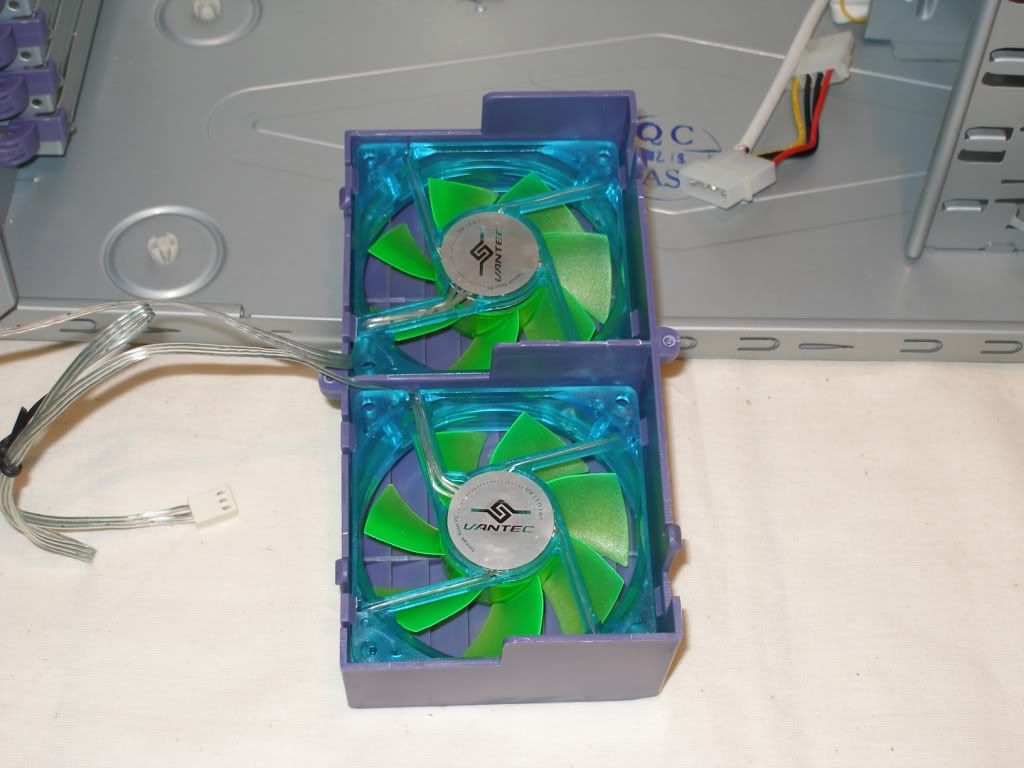 Time to put on the top panel. The case is slowly taking shape now. It's just a matter of putting the components back on after all that cutting, painting n polishing. 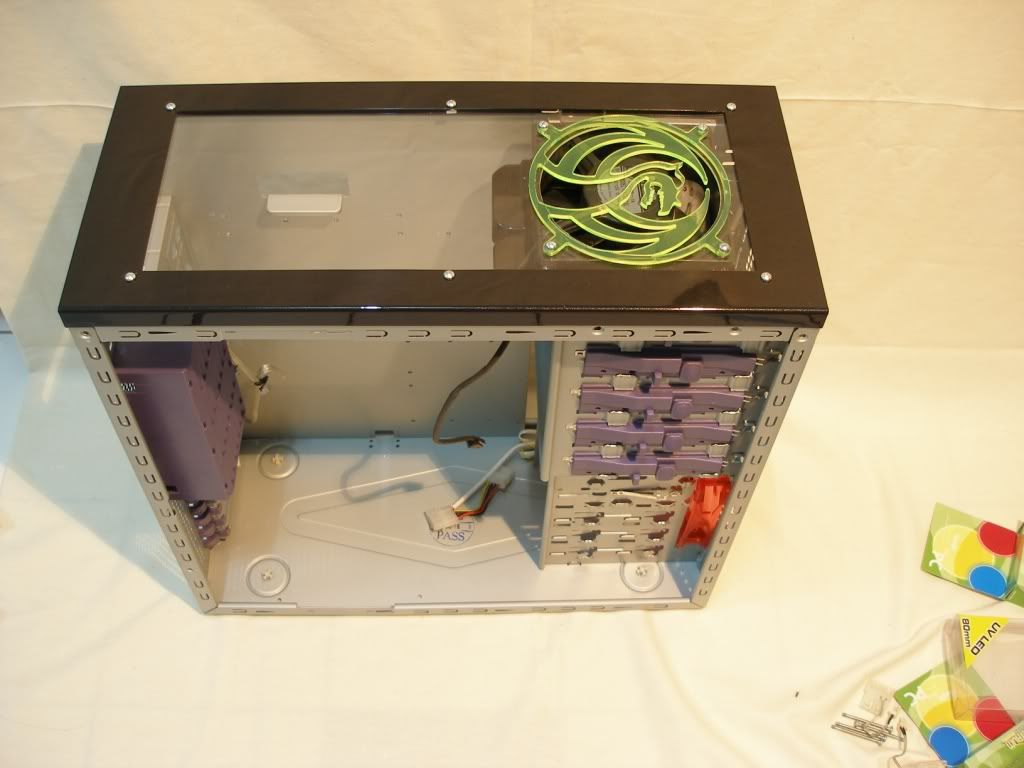 Time to fix back the side panel with a new green UV LED fan n put the plastic window back on. 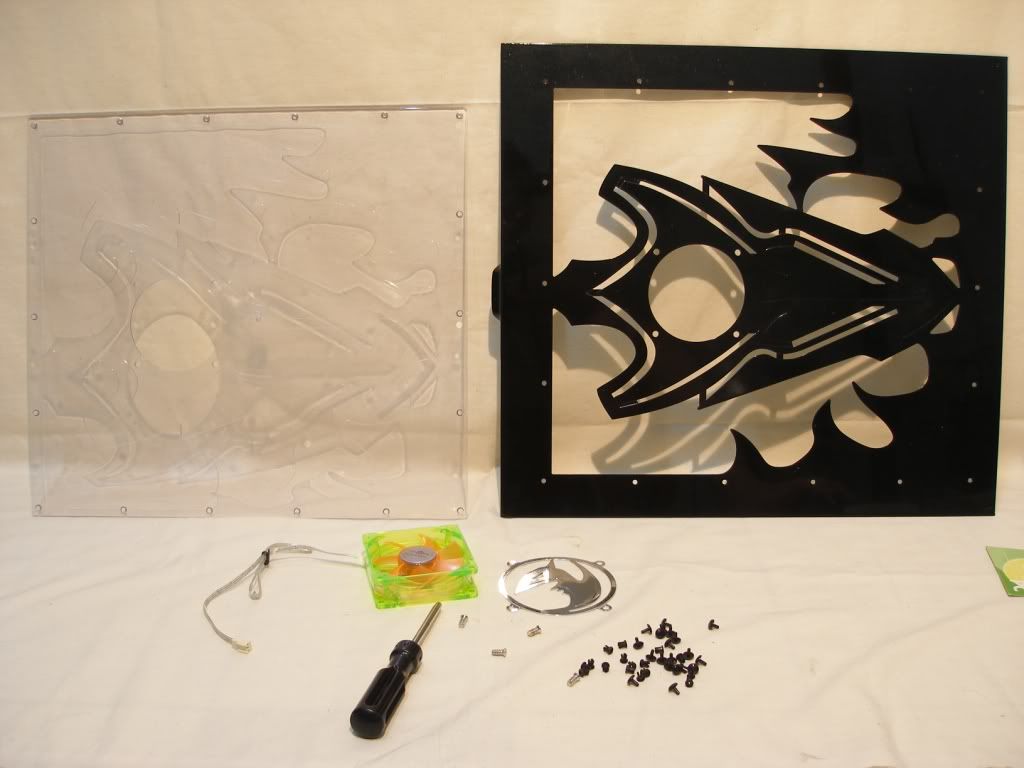 Side panel done. 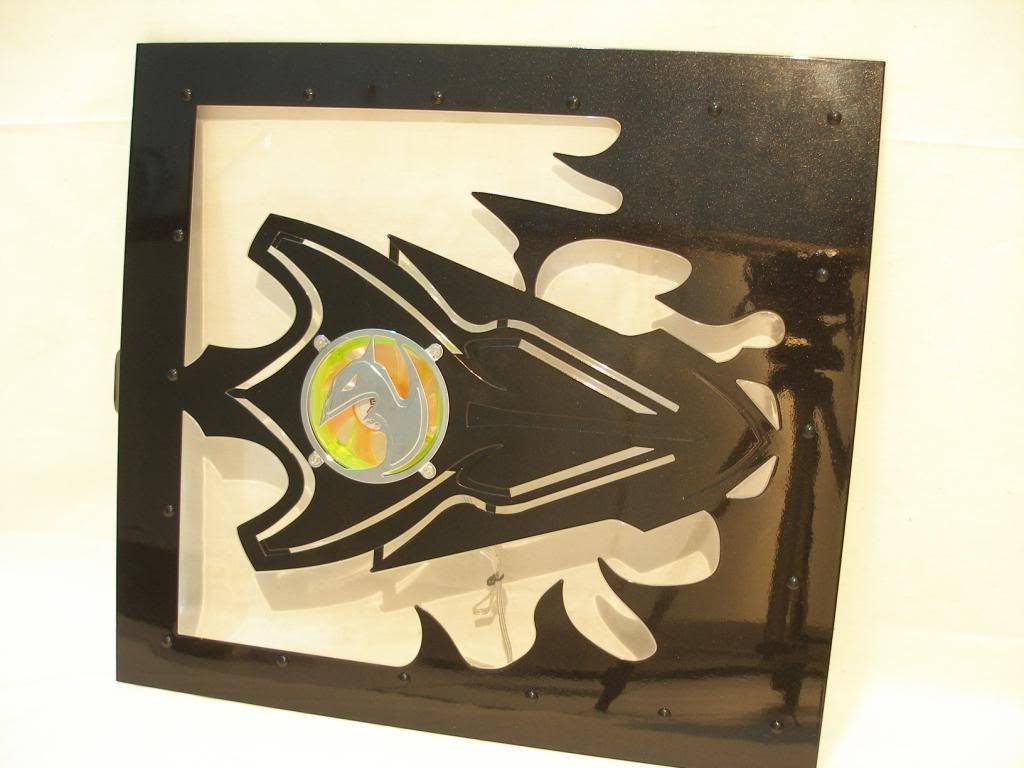 Now it's time to put together the Transformers face I had to disassemble for the painting work. All the pieces ready for reassembly. 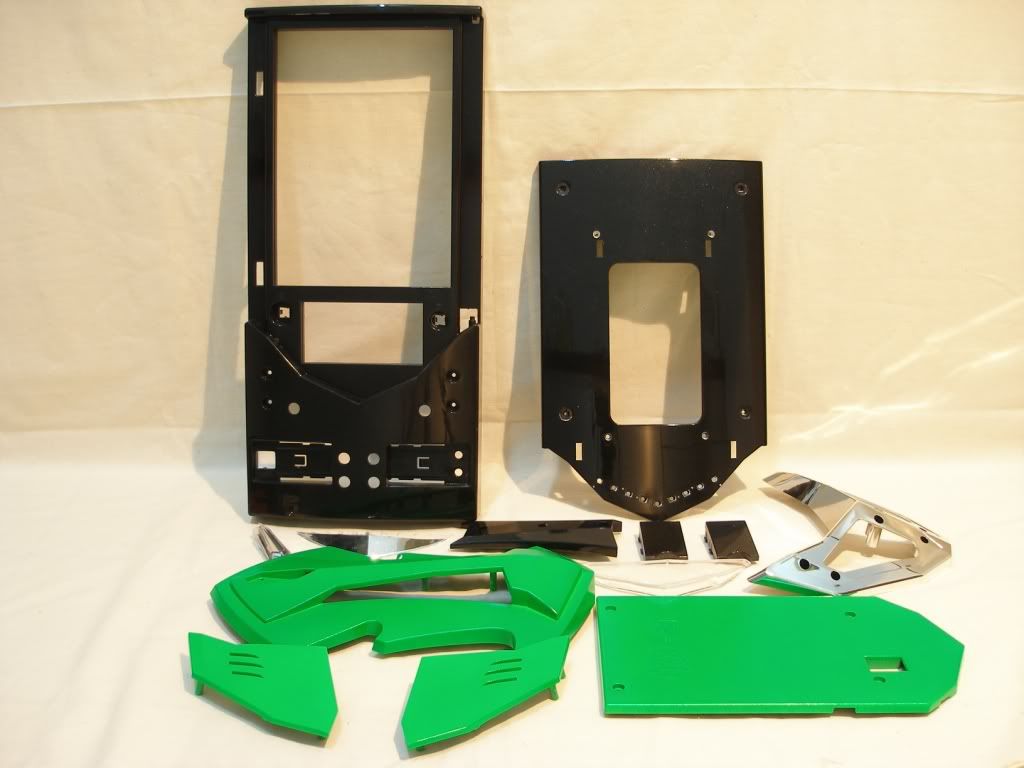 |
|
|
|
|
|
TSianho
|
Aug 29 2006, 08:52 AM
|
Cucimangkoklife
|
|
|
|
|
|
|
Mavik
|
Aug 29 2006, 11:12 AM
|
Patience is a virtue

|
If you painted the face purple, I would swear it will transform into a Decepticon. If you painted the face red, then I am sure it will turn into an Autobot  |
|
|
|
|
|
mADmAN
|
Aug 29 2006, 01:34 PM
|
|
|
IMHO, if ur gonna put bling bling fans at the exhaust, might as well cut out the grill at the plastic housing as well... otherwise u cant even see the fans man... kinda beats the point of changing it to those fans... the rest of the case is nice... love the color scheme  This post has been edited by mADmAN: Aug 29 2006, 01:35 PM This post has been edited by mADmAN: Aug 29 2006, 01:35 PM |
|
|
|
|
|
TSianho
|
Aug 29 2006, 01:41 PM
|
Cucimangkoklife
|
QUOTE(mADmAN @ Aug 29 2006, 01:34 PM) IMHO, if ur gonna put bling bling fans at the exhaust, might as well cut out the grill at the plastic housing as well... otherwise u cant even see the fans man... kinda beats the point of changing it to those fans... the rest of the case is nice... love the color scheme I didn't want the light from the fans to corrupt the UV look inside mar. Anyway, those rear fans light up the back nicely in the dark. It's for blinging up the rear area in the dark. U'll c what I mean when I update sumore later. |
|
|
|
|
|
Mavik
|
Aug 29 2006, 01:45 PM
|
Patience is a virtue
|
QUOTE(ianho @ Aug 29 2006, 01:41 PM) I didn't want the light from the fans to corrupt the UV look inside mar. Anyway, those rear fans light up the back nicely in the dark. It's for blinging up the rear area in the dark. U'll c what I mean when I update sumore later. It's like trying to create the Philips Ambilight effect haha Have a background light to enhance the entire look |
|
|
|
|
|
TSianho
|
Aug 29 2006, 07:55 PM
|
Cucimangkoklife
|
QUOTE(Mavik @ Aug 29 2006, 01:45 PM) It's like trying to create the Philips Ambilight effect haha Have a background light to enhance the entire look Hahhahaha. Yup, like Ambilight. Anyway, here's sum updates. It's now time to install the hardware. 1st thing I did was to install the Opteron 170 CPU n then the Corsair Cool waterblock. 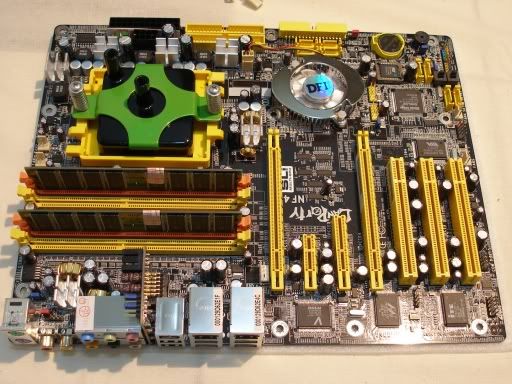 Next thing I did was to change the Chipset fan on the mobo as it's a well known issue on DFI mobos. So........... on went an Evercool fan. Also sleeved the fan wire in UV green. The fan has LEDs in it. 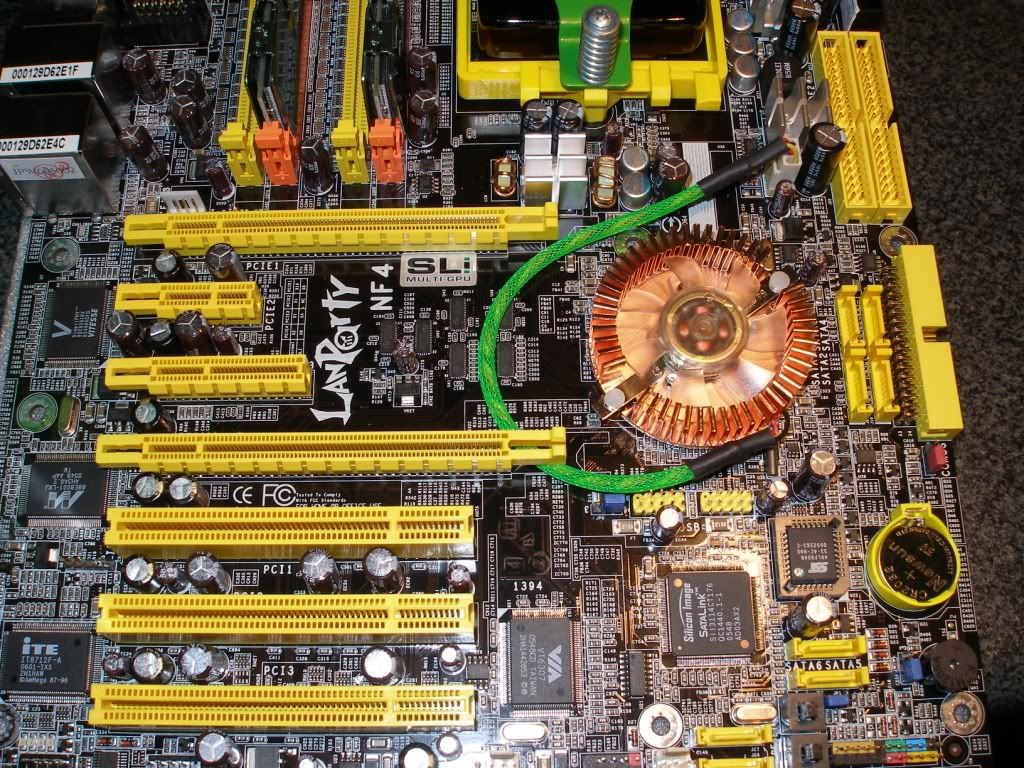 Then I installed the green aluminium RAM heatspreaders for more bling bling on the mobo. 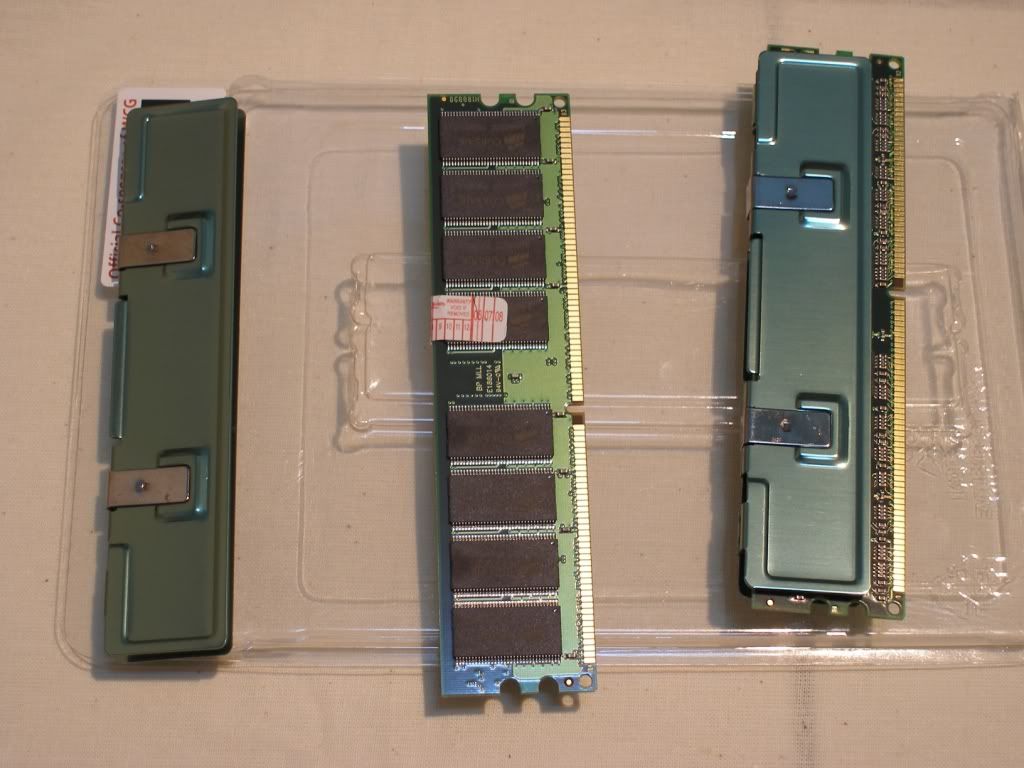 |
|
|
|
|
|
TSianho
|
Aug 29 2006, 09:49 PM
|
Cucimangkoklife
|
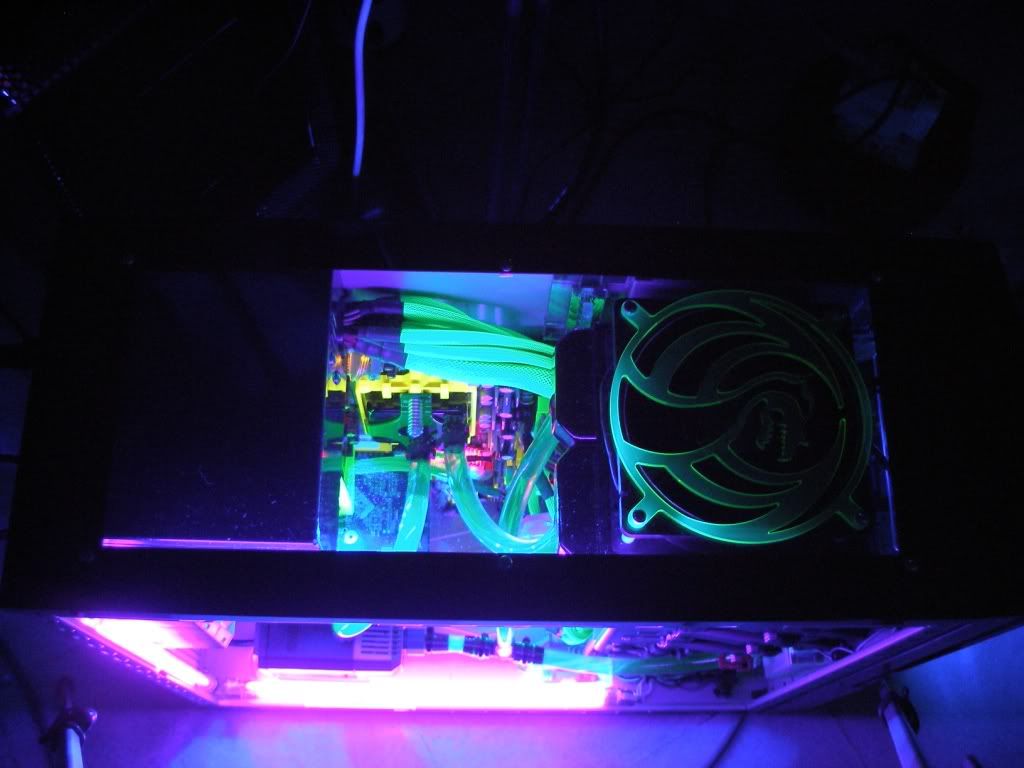
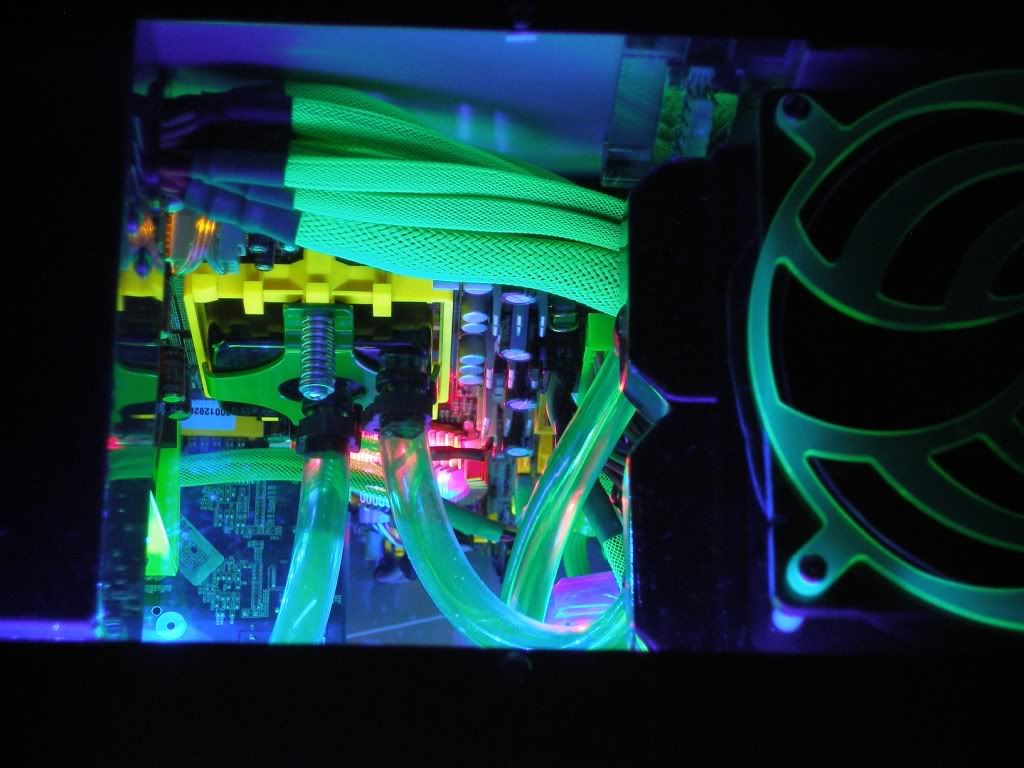
After settling the mobo, it's time to sleeve the PSU. It's a Fortron Epsilon 700W. Came with black sleeves n black molex. I changed the sleeves to UV green with UV green molex plugs, 24 pin mobo plug, floppy plugs. I forgot to take a pic of the finished PSU.  But u can c in the next few pix of it in the rig with the green wires n plugs.  Hardware all installed n ready for leak testing of water cooling system. Did any eagle eyed fellas here spot sum goodies in there made by electronics sifu allngap? Hehehe. Let me point it out. C that nice yellow RAM cooler? There's more, if u look carefully behind the radiator at the top, I also installed allngap's really nice multi color LED set. It's all controlled by a swtchbox which is installed in the ROM slot. There r 6 switches u can play with n it switches the LEDs from Red-blue-green. Then u can also mix colors ureself by flicking on blue n red to make purple for example, there's more combo colors like aqua n white too depending on which switches u use to mix the lights. Very very cool lighting system. U'll be able to c the light switches in later pix. 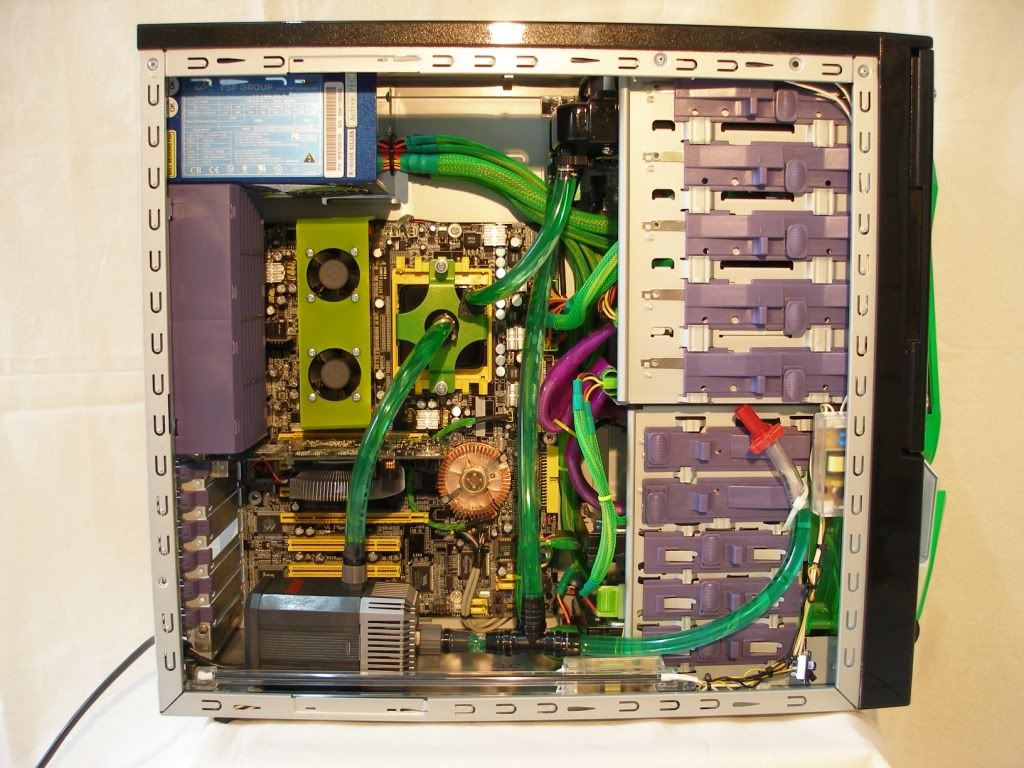 Watercooling system is leakproof after testing it for a few hours. Time to lock down the pump nicely to the chassis. Notice it's an Eheim pump. We're not using the Laing pump that comes with the kit coz Eheim pumps r more reliable than Laing IMHO. I myself haf experienced 2 failures with that particular Laing pump. With Hypoglossal we need the pump to be rock solid reliable as it's gonna be taken a long long way from home after completion. This rig's gonna be taken to Russia n it's gonna go tru sum extreme weather n all. So we sacrificed a lil bit of flow rate, for more reliability. 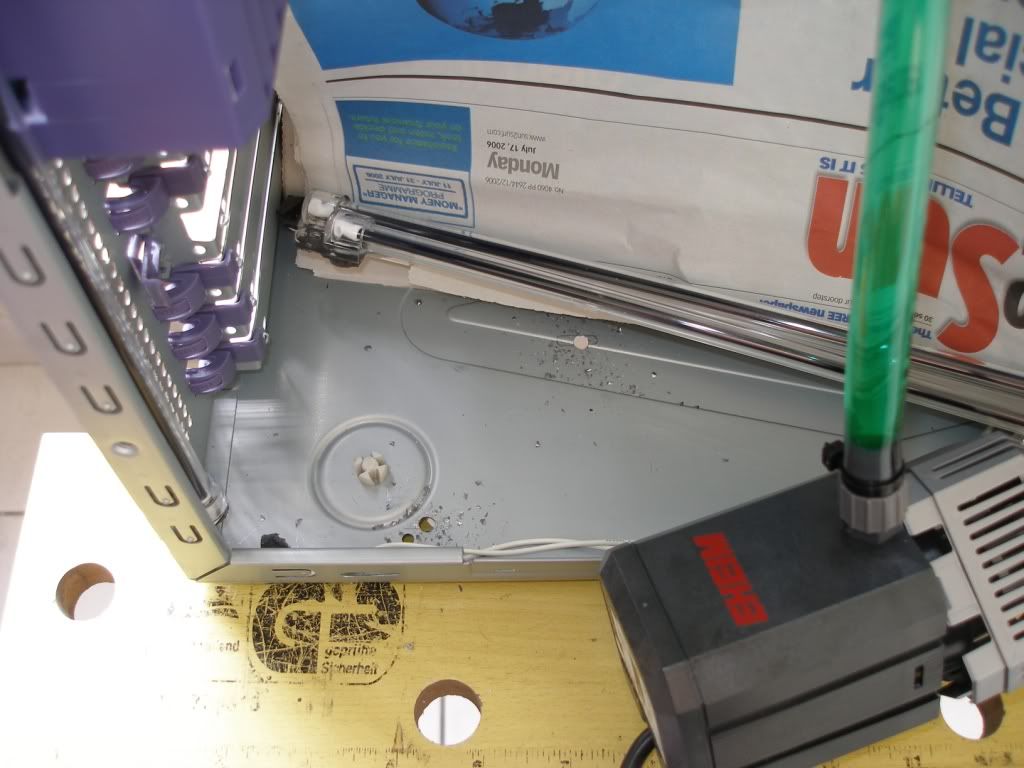 This post has been edited by ianho: Aug 29 2006, 10:01 PM This post has been edited by ianho: Aug 29 2006, 10:01 PM |
|
|
|
|
|
TSianho
|
Aug 29 2006, 10:10 PM
|
Cucimangkoklife
|
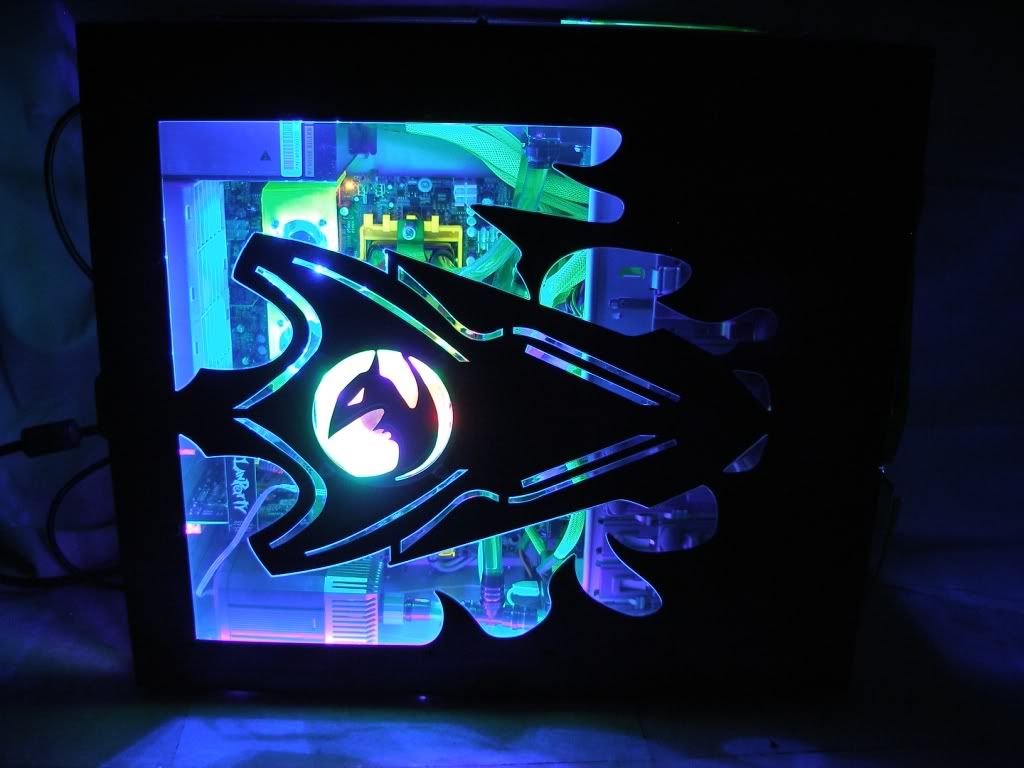
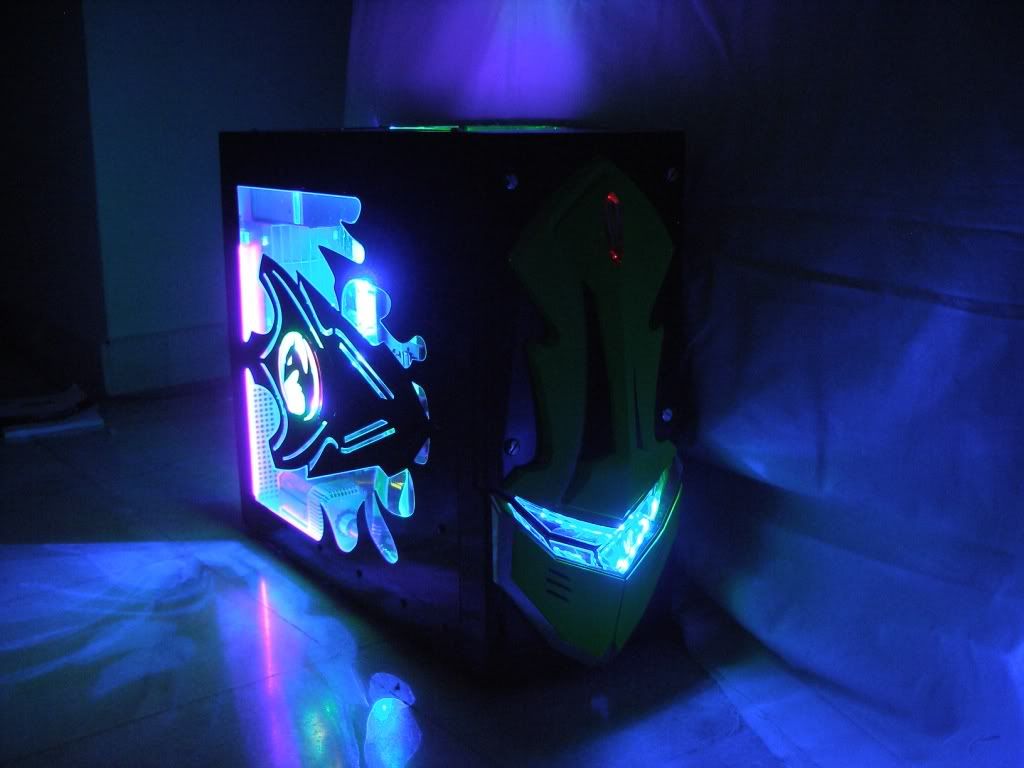
Here's a shot of the front slots. The allngap LED set switches r there right at the top. Then there's the Sunbeam Multi function panel. I set the Sunbeam to read the 2 HDD temps n monitor the front intake fan speed. 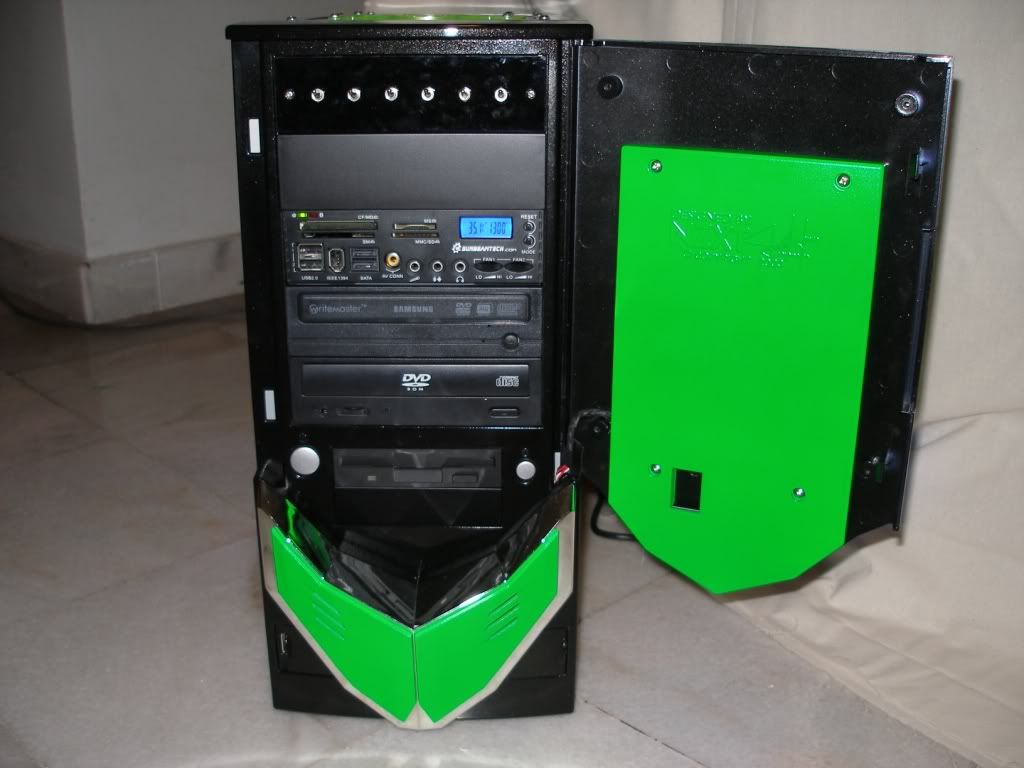 Everything is now installed. SLi is installed as well. Ready for 1st boot up with everything up n running. Houston...........we are GO for launch in 10,9,8,7,6,5,4,3,2,1............................... Wheeeeeeeeeeeeeeeeeeeeeeeeee 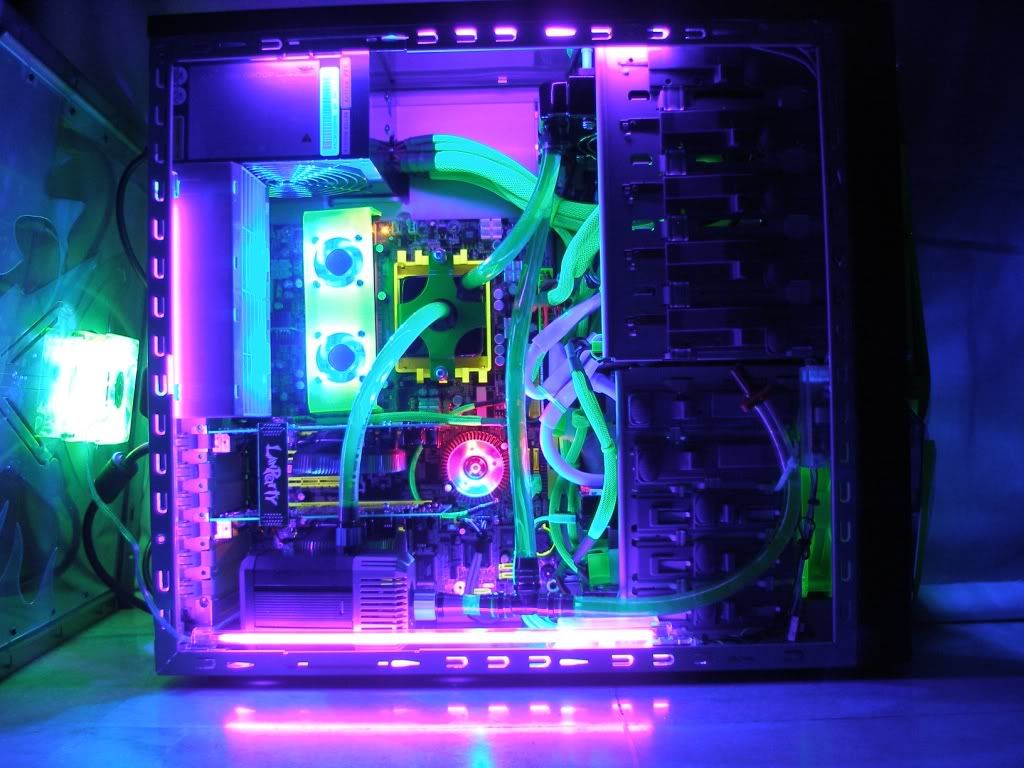 |
|
|
|
|
|
ImanAzlan
|
Aug 29 2006, 10:18 PM
|
|
|
Aww, the bling2 hurts my eyes  |
|
|
|
|
|
SUSAllnGap
|
Aug 29 2006, 10:19 PM
|
|
|
i tot he already brought his rig to Russia de ? and he did told me how surprise it was when you saw the edges on the acrylic for the back of the switch panels This post has been edited by AllnGap: Aug 29 2006, 10:19 PM |
|
|
|
|
|
TSianho
|
Aug 29 2006, 10:24 PM
|
Cucimangkoklife
|
|
|
|
|
|
|
z3r0717
|
Aug 29 2006, 10:41 PM
|
|
|
WAO... another great work by master ianho.. Salute!
|
|
|
|
|
|
eBola
|
Aug 29 2006, 10:42 PM
|
blah
|
not bad. you made a fugly case look pretty good. bravo!
|
|
|
|
|
|
TSianho
|
Aug 29 2006, 10:43 PM
|
Cucimangkoklife
|
|
|
|
|
|
|
SUSAllnGap
|
Aug 29 2006, 10:48 PM
|
|
|
aix......dint take shots with my lightings kar ?
nvm....got to wait for him to settle down everything first
|
|
|
|
|


 Quote
Quote


 0.0304sec
 0.78
0.78
 7 queries
 GZIP Disabled