Welcome Guest ( Log In | Register )

Bump Topic Topic Closed RSS Feed

Outline · [ Standard ] · Linear+

 Adrenaline™: Poison-Ivy™, Music Hard!Game Harder!!Boost Hardest!!!

views
     
TSAceCombat
post Sep 20 2013, 01:00 AM, updated 12y ago


Group Icon
Elite
5,434 posts

Joined: Dec 2006


Hi there, first of all, thank you for reading my project work log.

I’d like to say that it is not that simple, but very effective modification to reduce the overall temperature of the entire computer. It’s everything about temperature, as well as the look of the casing. But I almost voided all the hardware warranty for this modification, do it at your own risk.

Modder: KC “Ace™” Ong
Project title: Poison-Ivy™ (Ace’s Adrenaline™ Series)
Project theme color: Black & Military Green (Woodland style)
Budget: Very limited, only used parts.

Ok, before I started everything, I planned what hardware to get in order to have perfect color theme. Usually people did black and green theme with cables sleeved and coolant in a transparent reservoir, but not the hardware. For me, I wanted all hardware to have green and black color components. During hardware selection, what troubled me the most was selecting a suitable casing. At first, I wanted Fractal Design MIDI R2 for this project, but the entire Malaysia ran out of stock for this casing and it was seriously overpriced.

After that, I considered Corsair Obsidian 650D, Cooler Master CM690 III, Corsair Vengeance C70 and NZXT Phantom 410. First, my only requirement is, it must be able to put the 2x120mm radiator at the front of the casing (as intake instead of exhaust), but too bad, none of the cases above able to fulfill this requirement except the Corsair Vengeance C70. I really wanted to get the C70 at that time because I could mount the radiator in front without any modification. Not only that, the Corsair Vengeance C70 came with military green color!!! But…..plug and play without modification? Sorry, I wanted a casing that I must be able to do something to it!!!

From the list of the casing, 3 of them are squarish in design and look very dull. So end up, I went for NZXT Phantom 410 Black and Orange Special Edition, because I thought it could be modified to fulfill my requirement. Let’s find out what I wanted to do with the casing.

Simple, I want cold air intake only. I want the radiator to be cooled by using cold intake air instead of warm or hot exhaust air. While remain most of the functionalities of the casing (try not to disable or disconnect anything). You can find out the reasons in the Q&A section later. Let’s see the draft design of what I want to do with the casing.

user posted image
Front mounted a 240 radiator with push and pull configuration, remove the removable HDD cage to clear the radiator and the giant display card. The top exhaust fans will be mounted outside the top metal panel of the casing, so that it will have some distance to extract the heat in the processor and VRM cooler areas. The rest will be standard.


user posted image
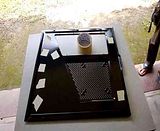
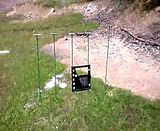
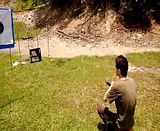
Meanwhile for the side panel, I’ll remain the original top window, while cut and enlarge the bottom part to put a transparent acrylic window to show the hardware inside the PC. The frame that separated the top and the bottom acrylic windows will be remained but I will trim it down from 25mm to 5mm only. This is to maximize the vision of the acrylic windows. Another cutting will be made beside the windows and the name of the project will be carved right there with Jokerman font. While the holes, I will make sure they are made by using real gun and real bullets. Well, military themed PC, how can it be without the real battlefield scars?

user posted image
Lastly, top metal panel, where two exhaust fans will be installed here. Nothing much to be done here, since the removable HDD cage will be removed, therefore I might not have enough place to slot in my SSDs. So, I can only put maximum of either 2 or 3 drives inside the casing. So, I have to plan somewhere else to put my SSDs. The top plate of the Phantom 410 had plenty of space on it. So, I came across with an idea, which is, securing both of the SSDs side by side. But the top plate has another plastic cover to close it up, solid cover, so it will be no cooling or ventilation at all for the SSDs. Due to this, I might need to create a fan shroud and guide some of the air from the exhaust fan to cool down the RAID drives. Let’s see what I can do to settle this problem.

Hardware: (Direct link to images only)
Intel Core i7 3770K, why?
That’s because I was using it before this project.
http://i95.photobucket.com/albums/l154/boy...0130906_015.jpg

Gigabyte G1.Sniper 3, why?
Because black PCB + green layout slots, suited my theme.
http://i95.photobucket.com/albums/l154/boy...0130906_022.jpg

Samsung 2x4GB generic ram, why?
That’s because generic green color PCB, and this one, with secret chipset.
http://i95.photobucket.com/albums/l154/boy...memory-0123.png

Asus GeForce GTX680 Direct CU-II Overclocked Edition, why?
I’m not going to WC the display card. Asus is tri-slot and good looking, and silence, too.
http://i95.photobucket.com/albums/l154/boy...0130828_025.jpg

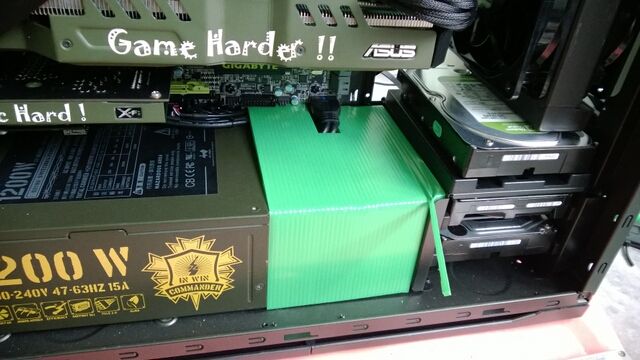
In Win Commander 1200W, why?
2 units of CWT made 600W inside with military green color in extended size. There’s no reason why I don’t use this!
http://i95.photobucket.com/albums/l154/boy...0130906_008.jpg


Swiftech H220 All In One Water Cooling Kit, why?
Not going to put external reservoir and pump, but still, I want to customize it, do I have other options?
http://i95.photobucket.com/albums/l154/boy...0130906_012.jpg

After long consideration, NZXT Phantom 410, why?
Not too big and not too small, able to fit in my small tiny little bedroom, cheapest among all the casing selection, also not the best looking, and not much modified Phantom 410 in Malaysia, yet.
http://i95.photobucket.com/albums/l154/boy...0130903_004.jpg

Creative X-Fi Titan Professional Audio Edition, why?
It has full size black in color PCB. It served me so well from my first Adrenaline™ project until now, good thing, made in Malaysia.
http://i95.photobucket.com/albums/l154/boy...0130906_025.jpg

Intel 34nm SSD 160GB Gen 2 RAID 0, why?
Due to limited budget, I’ve no choice but to go for SATA 2, but…..RAID 0….

Western D 1TB Green HDD, why?
Need that green color label, slower and cheaper, no choice.

Western D 1TB Black HDD, why?
Need that black color label, faster but more expensive, no choice.

Hitachi Deskstar 2TB HDD, why?
5960RPM smart drive, low working temperature and I didn’t want to sell this drive from my previous abandoned Adrenaline™ series project.
http://i95.photobucket.com/albums/l154/boy...0130906_033.jpg

Accessories:
Silverstone Aeroslot, why?
Black and at least they are ventilated slots, can cool down 0.001°C, maybe?

8 units Cooler Master Sickleflow Green LED, why?
“Rated” 90CFM, green LED with black blades and frame, the brightness is good enough.
http://i95.photobucket.com/albums/l154/boy...0130906_036.jpg

Thermalright High-Riser 07 (HR-07) Ram Cooler, why?
Do I need to explain this? They are pure sex!!
http://i95.photobucket.com/albums/l154/boy...0130906_004.jpg

Premochill Premoflex Advanced LRT White tube, why?
Premoflex is one of the best quality tubes in Water Cooling product. I’ve chosen white color for contrast vision.

Nucleartec UV Green Extreme tube, why?
Premochill ran out of stock for green color one, therefore, I opted OEM quality for my green tube.

Coollaboratory Liquid Ultra, why?
Best conductivity TIM I could find in Malaysia market for now, hard to clean but good performance.
http://i95.photobucket.com/albums/l154/boy...0130911_014.jpg

UV reactive Green and Black SATA Cables, why?
Well, needed for the color theme. With color combination, it is easier to differentiate the drives.

NZXT Premium cable starter kit, why?
Got bundle discount when buying Phantom 410, and I am lazy to sleeve the cables, pre-sleeved one serve me well.

Razer Blackwidow Ultimate 2013, why?
I bought it very cheap. Matte black with green backlit LED, suited the theme.

Roccat Kone
Wired and able to put to green LED to match the color theme, from my previous abandoned Adrenaline™ series project.


Thanks
AceCombat™
Alive With Adrenaline™


This post has been edited by AceCombat: Sep 20 2013, 05:06 AM
TSAceCombat
post Sep 20 2013, 01:01 AM


Group Icon
Elite
5,434 posts

Joined: Dec 2006


Working day:

Day 1: 1st September 2013, Sunday

While still deciding which casing to buy, I disassembled my abandoned Adrenaline™ series project that I kept in a store room. I got myself an Intel Core i7 3770K which able to do 4.5GHz @ 1.215vcore, quite a good chip for me. Since I had nothing better to do, I cleaned the leftover TIM (Oxidized IC7 Carat Diamond Thermal Interface Material) and thought about removing the IHS (Integrated Heat Spreader), to get better reading in temperature. As I said, I wanted to build a low temperature reading PC.

After that, quickly I walked back from my store room, and started to do something which I not supposed to do. Voiding the warranty!!!

Step 1: Find the box and the receipt to identify the processor
user posted image

To make sure which i7 box it belonged to, I searched the store room and found the box, retail unit with 3 years warranty, previously I bought this from my good friend, Kevin, a.k.a (also known as) “owikh84” the hardcore overclocker in Penang, Malaysia. (I know he admires me, secretly)

Step 2: Voiding the warranty!!
user posted image

Did I say 3 years warranty? Yes, now I could just throw away the receipt and the stock cooler of this processor. But wait, the warranty might still valid!!! Why….?

Step 3: Unlocked and unleashed!!!
user posted image

Right, Intel misleaded me, I unlocked and unleashed my i7 processor!!! They should not void my warranty. I just did what they asked me to do… 

Around 4.00P.M. , I went to Bukit Jambul shopping complex to search for a casing that suited for my project, and more importantly, I need ready stock!! I went to E-Tech and looked at Corsair Graphite 600T, it is one very fat casing, not a chance. Then, I went to Gadget Zone and looked at Cooler Master CM690 II Advanced White Edition, no side panel, internal is not as good as what were in my list, so, sorry!!
Next, my last hope, Swisspac Resources, not bad!! They had Vengeance C70 military green, ready stock, as well as Cooler Master CM690 III. Quickly I asked the sales person to take them down and show me the internal in detail, CM690 III has great built quality, but it is not spacious enough for my requirement. Actually the Corsair Vengeance C70 is big enough for my project, but the built quality is like a piece of 70gm A4 paper. So, I went back home disappointedly, and started surfing LYN to hunt for casing.
So, that’s it for day 1, it was fun delid-ing a RM1000++ processor, because you will need courage and patience and time and the right equipment to do this, try this at your own risk, either you will happy with the temperature, or you will need another RM1000++ to get your rig running again.

Thanks
AceCombat™
Alive With Adrenaline™


This post has been edited by AceCombat: Sep 20 2013, 05:07 AM
TSAceCombat
post Sep 20 2013, 01:01 AM


Group Icon
Elite
5,434 posts

Joined: Dec 2006


Day 2: 2nd of September 2013, Monday

I’ve decided which casing to buy, instead of waiting for the no ETA’s Fractal Design Arc MIDI R2, I went for NZXT Phantom 410. The reason already stated above, and I PM-ed few sellers in forum.lowyat.net, none of them had ready stock except for 2, so without delaying, I quickly banked in the money to the seller and waited for the casing to reach me next day, happily.

Then, again, I had some time left before my class started, I took out one of my secret weapon, 2 x 4GB DDR3 1333MHz CL9 Samsung generic green PCB memory that came with highly overclockable chipset, and sandwiched them with my long kept Thermalright High Riser 07 (HR-07) memory cooler.

This was how it looked like, from this:
user posted image

To this:
user posted image

Pretty cool, huh? I bought this ram cooler since 2007, and used them for years and they are still as good as new, with very minor oxidization.

user posted image

Alright, that’s it for day 2, I cleaned the dust of both ram and the cooler, pasted the thermal pad and installed the cooler for my ram, waiting to perform from 1333MHz all the way to 3000MHz……? Who knows? biggrin.gif


Day 3: 3rd of September 2013, Tuesday

Ok, got the casing from the seller, very excited!! Let’s take a look on my NZXT Phantom 410 Special Edition (Black + Orange). The Kangaroo courier company taken cares their parcel, the box was in perfect condition, impressive!!

user posted image

But I had much more important things to do today, so I put aside the casing into my store room. And, move on to my display card, the giant monster, Asus GeForce GTX680 Direct CU-II Overclocked Edition. One bad ass card!!

user posted image

Again, the reason why I chosen Asus GeForce GTX680 Direct CU-II Overclocked Edition already stated above, but seriously, for me, it is one very nice looking card, giant tri-slot cooler with 5 copper direct contact heat pipes on the small GK-104 core. The temperature and the noise produced are good considered that it is a stock cooler from Asus. At first, I really wanted to SLI them, but it will be overkilled. In the end, I sold one of them.
When I got the card with me, it was dusty and very dusty, so I had to dismantle the cooler and cleaned the dust and replaced the stock thermal paste for better temperature.

user posted image

Thanks
AceCombat™
Alive With Adrenaline™


This post has been edited by AceCombat: Sep 20 2013, 05:07 AM
TSAceCombat
post Sep 20 2013, 01:02 AM


Group Icon
Elite
5,434 posts

Joined: Dec 2006


First thing, I removed the fan shroud. This actually voided the warranty of the card, because I had to remove the red and the black trim at the center of the fan shroud to access to the 3 screws sitting underneath it. But I wanted to make the card as clean as possible, so, I didn’t really care about that. Removing the shroud will show the naked heat sink of the cooler, they are imba, one is bigger and one is slightly smaller.

user posted image

Look at that core contacted heat pipes, actually only ½ + 1 + ½ out of 5 contacted the core. I cleaned the stock thermal paste and replaced it with the best bang per buck Arctic Cooling MX-4. You may curious, why not the best conductivity and the best performance thermal paste that can be found in Malaysia, the Coollaboratory Liquid Metal Ultra? Simple, it can’t be used on aluminum surface. The Direct CU-II cooler came with copper direct heat pipe and aluminum separator, therefore, I couldn’t use the Liquid Ultra. At the same time, my good friend Kevin messaged me and told me he just killed his 7970 due to the Liquid Ultra leakage and caused a short circuit to the core or something, I was like “Great, I didn’t apply it!!”. But I did make sure I applied a thin layer of that MX-4 TIM and it will not leak out from the contact.

Then, I had to clean the dust that stuck on the fans and the heat sink, remove the 3 screws to take out the fan.
user posted image

The cooler is as good as a new one now.
Next, moving on to the fan shroud, since all the trims had been removed, suddenly I thought of, “Why not I just wrap some sticker on it?” For your information, I built plastic model car kit since I was a kid, my sticker wrapping skill is still acceptable, hahaha….

And yes, first thing to do before wrapping the fan shroud was to clean the entire remaining residue from the double sided tape under the Asus’ trim. I used BHP RON 95 petrol with double addictive added (rated 800ppm) to perform this operation. 
user posted image
The oily fan shroud must be cleaned with dish washer to make sure it is oil-less before sticker wrapping.

user posted image
Residue-less and as good as a new one, after washed it with GLO dish-washer, now, show-time!!!
Anyway, due to me had to make sure my hands were clean and oil-less, I didn’t take any picture when I was wrapping the fan shroud. Because not only oil, I also had to make sure that my hands were free of dust and sweat. So, sorry about the wrapping part but here was the end result.

user posted image

Military woodland green with original black from Asus, it matches my color theme perfectly. Not only that, by using a white glossy photo printing paper and double sided tape, I was able to make my own sticker using simple cutting. But, because of the fan shroud design, the wording placement must be put randomly, or else I couldn’t tighten the screw.

user posted image
End results:
Let’s game harder!!!

user posted image
After dismantled the monster card, to make sure I did not killed it during the cleaning, I need to put it back to the test bench to test it, and yes, it survived!!

user posted image
That’s it for day 3, what a busy day, but seeing the end result of the display card, it was awesome. Stay tuned, tomorrow is case mod day!!


Thanks
AceCombat™
Alive With Adrenaline™


This post has been edited by AceCombat: Sep 20 2013, 05:07 AM
TSAceCombat
post Sep 20 2013, 01:03 AM


Group Icon
Elite
5,434 posts

Joined: Dec 2006


Day 4: 4th September 2013, Wednesday

Alright, case mod day!! Finally I could start the modification according to the draft designs. First of all, I removed the side panel and inspected the casing’s condition. And…it had manufacturer defects straight out of the box. The motherboard tray had few very deep scratches. Please refer to the pictures for further details.

user posted image

They were located at the back of the motherboard tray, right above the PSU area. Two scratches and they were very deep.

user posted image
This was the deepest hole, just like someone poked the metal with very hard and sharp object.
Not only scratches, few screws were missing and a lot of plastic “legs” or “tighteners” were broken, too.

user posted image
Another deep scratch of the casing, this was located at ODD door area. Both black and orange plastic covers had the same scratch.

user posted image
Look at this!!! 4 legs were broken and the plastic panel still intact!! biggrin.gif
I was very disappointed with the quality control of NZXT, immediately I contacted NZXT HQ and issue my complaint. Because I knew that this had nothing to do with the seller or the courier, the box was in perfect condition when I collected it. NZXT HQ contacted NZXT Asia and responded my complaint in critical priority. They offered to exchange the casing for a brand new one for me. But this project was a rush one, so I told them I just need the replacement parts for the plastic cover instead of sending back the whole casing to NZXT (NZXT willing to bear the shipping cost and everything, bravo!!) Since I was planning to paint the casing, the defected areas on the casing were not a big deal for me. But the authorized reseller (I bought it from Dotatech IT) will deal with NZXT to get the replacement parts for me.


Ok, moving on, let’s rape the casing!!!
user posted image
Ok, all the removable parts have been taken out.

user posted image
NZXT Phantom 410, without top plate and the removable HDD cage. To begin my cutting, I had to remove all the rivets that secured the ODD and HDD bays. I did not use drill to remove the rivets because I wanted to maintain the same size of the rivets holes.

user posted image
Set and prepare to remove riveted areas.

user posted image
There you go, everything removed to prepare for painting. That’s it for today, freaking tired already.


Thanks
AceCombat™
Alive With Adrenaline™


This post has been edited by AceCombat: Sep 20 2013, 05:08 AM
TSAceCombat
post Sep 20 2013, 01:03 AM


Group Icon
Elite
5,434 posts

Joined: Dec 2006


Day 5: 5th September 2013, Thursday

Ok, I visited a small factory located somewhere near Jalan Patani to make my cutting, they were all my old friends who can let me operate the machine freely, but with one condition, no camera, I could only take photo of the end products. So, I could only show you the finished cutting product.

user posted image
I was waiting for my friend to finish his job before I could operate the machine. Let’s take a picture before I began.

user posted image
Simple and easy job, a square cut to clear even the thickest radiator available on the market. Push and pull configuration, 2x25mm fan width + the width of radiator. To be safe, I measured 110mm cutting for the ODD bay, so I left 60mm width to clear the radiator for future upgrade. The fan bracket at the front will be used to hook up my fan. After that simple cutting which took me around 10 minutes, then I brought this up and measure the drilling points.

user posted image
The casing has been modified to fit a radiator at the front as intake, but the original ODD bay came with 3 solid 5.25” covers. I had to remove them to get the cold air intake, but then, this door is blocking the way because it is solid and not ventilated. Ok, small matter, 120mm fan, so I drew a box with 120mm height and 120mm width to let the air feed into the intake fan.
Again, no camera allowed when I was drilling the cover, so I could only show the finished product. This took me an hour ++ to complete.

Intake holes, directly facing the intake, I measured an inch at every corner so that I wouldn’t get the screw holes drilled.
user posted image

Back view, it penetrated because I set the machine to drill it as one piece. See the screw holes? Good measurement, right? biggrin.gif

user posted image

Not only the door, the body of the front plastic cover also being drilled to provide air intake path to the second bottom fan at the radiator, although it helped just a little.

user posted image

The drilled “worms” of the orange plastic cover and I had to remove the panel to clean this.
user posted image


Ok, let me show you the measurement of the air intake holes. They were 4mm in diameter, not too big and not too small because during drilling, plastic would expand a little bit, maybe 0.01mm or maybe less, but please make sure that cooling is provided during the drilling so that it is not hot enough to melt the plastic, I didn’t use any lubricant during the drilling, I just used air compressor to blow it while drilling, it was more than sufficient.

Measurement:
The drilling diameter of intake holes

user posted image

The distance between holes
user posted image

The finished product of my cold air intake modification
user posted image


Thanks
AceCombat™
Alive With Adrenaline™


This post has been edited by AceCombat: Sep 20 2013, 05:08 AM
TSAceCombat
post Sep 20 2013, 01:04 AM


Group Icon
Elite
5,434 posts

Joined: Dec 2006


To give you an idea what I was using to make the cutting and the drilling.
user posted image

Next, after all the cutting and drilling done, went back to my place to test the fitting and the measurement.
First, I removed the stock Swiftech fans that I’m not going to use.
Removing the fans was very easy. But bear in mind that you better use back the provided screws to screw your replacement fans, because it will not hit the radiator and causes leakage. So, in case you are changing the fans of H220, just use back the provided screws.

user posted image

Ok, now, sandwiched the radiator with dual Cooler Master Sickleflow, see the clearance? I can upgrade to any thicker radiator as long as the thickness is not more than 60mm (110mm cutting – 50mm fans width), I have more than an inch extra after sandwiched the radiator.
user posted image

Next, checked the bottom clearance, it’s good, because the HDD cage has been removed to fit in the giant GTX680 and the radiator, so I left only 2 HDD bays to install my drives. But I have three units of 3.5” drives with me, so, let’s see whether it had enough space to fit in the third HDD drive or not.
user posted image

Plenty of space left. It should have no problem putting another HDD onto the cage.
user posted image

Awesome!!! It can be fitted without hitting the radiator, so all I need to do is secure the HDD on top of the cage, small matter.

Let’s see the front intake.
user posted image

Great, radiator and fans were both fitted according to my original plan. How about the bottom fan? Either install the fan on the radiator, or install the fan at the casing itself. Both of them would work the same way, providing cold air intake to the radiator. But I think I won’t install on the radiator because it would add up the weight and stress the top intake fan that fitted on the fan bracket.
Actually, the whole radiator and fans will be supported by the top intake fan only. While the bracket is hooked at the both side of the ODD bay, the metal of the bracket is strong enough but what about the plastic quality of Cooler Master Sickleflow? The vibration of the radiator and fans will definitely kill the plastic one day.
So, not to stress the fan anymore, I will put the fan on the casing intake area.

I would need to work out on something to secure the top HDD drive and maybe I could use the HDD as the bottom support for the radiator. I just need to add up the height for the third HDD to reach the bottom of the radiator. OK, WD Green, it’s your responsibility!! biggrin.gif

Alright, what a busy day, time to get some rest, continue tomorrow. I had continue working on the casing for few days non-stop already, ya? 


Thanks
AceCombat™
Alive With Adrenaline™


This post has been edited by AceCombat: Sep 20 2013, 05:08 AM
TSAceCombat
post Sep 20 2013, 01:04 AM


Group Icon
Elite
5,434 posts

Joined: Dec 2006


Day 6: 6th of September 2013, Friday

What a great day to kill my casing’s side panel. Since this is a military themed setup, I was thinking that, I needed something that people never did before. So, I rang up someone to service the gun in the armory and made an appointment to go to the firing range. I wanted to put some real bullet holes through the side panel.
user posted image

Ok, no joke, marked the side panel just like the draft, I need real bullet holes. Grabbed a Glock 34 with a fully loaded magazine (15 bullets), and walked toward the firing range.
user posted image
I believed that this moment was the worst nightmare of the side panel. Loaded, and firing!!!

PLEASE CLICK ON THE SPOILER, THEN CLICK THE IMAGE TO WATCH THE VIDEO.

» Click to show Spoiler - click again to hide... «


So, this was the result on that day, real bullet piercing holes.
user posted image

The reason why I asked to shoot from inside to outside is because I wanted the pierced metal to be at outside, yes I know that the inner holes look better but that effect can be done with sticker or simple drilling. So, I made it in the other way.

This is the rear panel.
user posted image

The voice in the video was not me, I had much more sexy voice than that guy, and I was busy registering myself in the office. But the videos proved that the side panel bullet holes were made by using real gun and real bullets. biggrin.gif

That’s it for today, will update the side panel work by tomorrow, time to go back and open my Poslaju parcel. Good night.


Thanks
AceCombat™
Alive With Adrenaline™


This post has been edited by AceCombat: Sep 20 2013, 05:09 AM
TSAceCombat
post Sep 20 2013, 01:05 AM


Group Icon
Elite
5,434 posts

Joined: Dec 2006


Day 7: 7th September 2013, Saturday

Ok, after the bullets shot, next day, I sent my side panel to my good friend Mohd Fadli a.k.a “Shepard” for modification. Due to I was running out of time, and I thought I was unable to complete the whole project within 14 days. So, I contacted him about few days ago and he accepted my request.

I wanted the transparent acrylic window at the bottom to be cut to larger size, a bit larger than the original size, while using the same trim provided by NZXT. Not only that, I wanted the distance between the two windows with only 5mm thick.
Next, there will be another transparent acrylic where the name of the project will be carved on it and bolted onto the panel.

user posted image

Just like the draft design, something like this. This image sent by “Shepard”, great job. With some closer look of the bullet holes.

user posted image

Measuring the new bottom window size, I wanted it to be as large as possible to display the hardware inside, so he tried to fulfill my requirement. The next cutting will be the drawing at the side.

user posted image
He updated me just after a while with the latest progress. So this will be the confirmed design of the side panel.
After that, he contacted me that he had issue clearing the frame due to that both of the windows were too close. This is the picture where he couldn’t clear the holes. (Red highlighted area), so I had to send him my original upper transparent acrylic window to measure precisely.


user posted image
I wanted the side panel to be rugged one, so I requested him to drill holes around the acrylic and the panel, so that I could put bolt and nuts to secure the windows. Just like the arch fender of Proton Satria GTi.
While waited for his latest update by 6pm like that. Boring, nothing to do, and I was thinking to lap my 3770K IHS, but….really lazy. I didn’t sleep well for almost a week due to this project.

Remember the Poslaju parcel that I mentioned yesterday? I ordered something from APES Malaysia and N.T Computer from the east coast.

user posted image
I finished the very last drop of my Liquid Ultra in my previous built long time ago. Therefore, I need to get a new one to apply it onto my processor’s die and the IHS.

user posted image
The tubes that I’m going to replace for my Swiftech H220 All-In-One water cooling kit. They are Premochill Premoflex Advanced LRT, white in color, and NuclearTec UV Green Extreme, green in color. I’ve chosen white color for one of the tube on purpose, to generate a striking contrast in the entire interior of the project. This would be the one and only white in color component for the entire PC. Why not black? The original tubes and the water pump that came with the H220 are both black in color, I wanted three different colors in the combination, if I choose to remain one of the black tubes, then the pump will be not so clearly visible due to the dull contrast.


Thanks
AceCombat™
Alive With Adrenaline™


This post has been edited by AceCombat: Sep 20 2013, 05:09 AM
TSAceCombat
post Sep 20 2013, 01:05 AM


Group Icon
Elite
5,434 posts

Joined: Dec 2006


Day 8: 8th September 2013, Sunday

Rainy day, I was feeling so lazy to start my work, but when I checked my phone, I received latest update from “Shepard” regarding my side panel. It worked much better than an alarm clock. Quickly I downloaded the images that sent from him and I got this.
user posted image
The acrylics of top and bottom windows have been installed!! Very nice, don’t you agree? Then what about the carving?

user posted image
Yeah, almost done!!! So basically you will have a rough idea of how it is going to be. The side panel will be ready by 12th September 2013 evening after all the perfect touch up by the carving master.

During the evening of the day, I started lapping the IHS of my i7-3770K.

user posted image
This was the IHS with some serious oxidization caused by IC7 Carat Diamond TIM. I was not happy with the oxidization, so I decided to begin the lapping with Grit 320 sandpaper. Wet lapping started with a piece of Grit 320 sandpaper.

user posted image
I used semi-dry lapping technique with water instead of dish washer. You can see that my 3770K IHS was concaved. This image has been taken with 5 minutes of lapping only. So, great, I think I’ll have another 1 to 2°C drop, or maybe more, in temperature reading.

Ok, after another 30 minutes of lapping, I had this with Grit 320.

user posted image
I will continue with Grit 400, Grit 800, Grit 1000, Grit 1200 and Grid 1500 or maybe until Grit 2000 on Wednesday. I took two days off to do my personal things.


Day 9: 11th September 2013, Wednesday

Ok, another rainy day to begin my work. On Sunday, my IHS was lapped to Grit 320, I chose to use Grit 320 as starter because of its roughness, and the grit of 320 is the best to start of the lapping work. Again, by using semi-wet technique, I was able to finish my lapping with Grit 400 in just 30 minutes. Here’s the result of the lapped IHS.

user posted image

Seriously, it has not much difference in between Grit 320 and Grit 400, but I had to do this as part of lapping procedure. Then I changed to Grit 800 directly to smoothen up the surface of the IHS. Again, another 40 minutes and I got this.

user posted image

Much better smoothness now, but still it was a rough one, because it was only Grit 800. I took some rest before I started the Grit 1000 journey. The rain was getting heavier and heavier. I couldn’t start my painting yet 

Ok, after rested for an hour, had my breakfast, I continued lapping it with Grit 1000. This took me an hour because Grit 1000, for me, is a critical one, here you have to fine lap to close the gap and smoothen the surface before you move on to Grit 1200, Grit 1500 and maybe Grit 2000. So, an hour work and I got this.

user posted image

Finally, it was flat and smooth, here’s another angle of the Grit 1000 lapping.

user posted image

Not bad, I like it!! But that’s it for today, as lapping the IHS alone was killing for my fingers, too thin to hold and move around the sandpapers. I cleaned the surface with toothpaste before I kept it into the processor protective plastic socket. No reason why I used toothpaste, just for fun 
I’ll only continue the lapping to Grit 1200, Grit 1500 and Grit 2000 only when I want to assemble my PC, to prevent oxidization on the IHS surface.

Update:
Around 7.30 p.m., my E-mail synchronization in my phone alerted me for new incoming E-mail. I read it and guess what, my side panel was ready since evening!! The carving master “Shepard” completed my side panel request and he told me personally, this was the worst nightmare request he ever received in his case mod life. I really thank him so much for making the military themed project into a reality. This project won’t be a perfect one without his assistance. Let’s take a look on what he did to the carving area, the “Poison-Ivy™” carving.

Specification:
The carving master: Mohd Fadli a.k.a “Shepard”
Designed by: KC “Ace™” Ong
Material: Acrylic
Color: Transparent
Thickness: 2mm
Font: Jokerman

user posted image

Bad ass craftsmanship, really impressive!! I guess you agree too, ya?
Again, thank you so much my friend, please check out his details in the credit section.


Thanks
AceCombat™
Alive With Adrenaline™


This post has been edited by AceCombat: Sep 20 2013, 05:09 AM
TSAceCombat
post Sep 20 2013, 01:06 AM


Group Icon
Elite
5,434 posts

Joined: Dec 2006


Day 10: 12th September 2013, Thursday

Today, I collected my side panel from “Shepard”, looking at that piece of beautiful art. I couldn’t wait any longer to start my painting. Let’s hope that there will be no rainy day this week. Removing all the acrylic parts from the side panel, I’d to make sure that they are very well kept. I have to go out to buy the needed painting materials later. I’m going to use the color of “Jeep Cherokee” green (Midnight Forest Green II) as my main color for the interior and the exterior , while simple flat black color for the orange trims of the Phantom 410. All the plastic parts inside the casing will be remain untouched, that is because it came in black color, good enough to match the color theme of black and green.

user posted image

The self-designed custom side panel. It loaded with bullet holes and battle scars. See the bolt and nuts that secured the acrylic windows? That’s what I was talking about few days ago. For some, it may be ugly, but for me, it is rugged looking.


Day 11: 14th September 2013, Saturday

Ok, let’s start to work again. It was a good day for my painting. I bought myself a matte finished car paint that being used by Jeep Cherokee. The Midnight Forest Green II. Great color matching for my military themed built. Because the pictures of the painting were so many, I’ll just post the finished products only.

Look at them!! It is dark green but it shines when I put under the sunlight.
user posted image

The black parts or areas of Phantom 410 were painted to Midnight Forest Green II while the orange parts were painted to flat black. Personally I think they are gorgeous, what say you?

user posted image
This is the closer look of the painting. Metallic-matte finishing, it looked like metallic paint but in fact they were matte. Please look at the following pictures for more details.

user posted image
The front 5.25” door had been installed back with the flat black back cover.

user posted image
The dark green and the flat black combination, they are not high in contrast.

user posted image
The opening mechanism has been installed. I just noticed that I made a mistake on the hole located at last column last row, damn!!! It was a huge mistake by me!!!

I did some final touch-up before the installation
user posted image

user posted image
I wanted to make sure no visible orange color anymore, so, another round of painting. That’s it for today, installation will be started by tomorrow.


Day 12: 15th September 2013, Sunday

Before I started my installation today, I remembered that I have to drill 4 holes on the removable HDD cage bracket to secure my third HDD. I did some measurement and drilling to solve the problem for my third HDD.

user posted image


Thanks
AceCombat™
Alive With Adrenaline™


This post has been edited by AceCombat: Sep 20 2013, 05:09 AM
TSAceCombat
post Sep 20 2013, 01:06 AM


Group Icon
Elite
5,434 posts

Joined: Dec 2006


The plastic cover will be mounted back to its original place, just with another HDD on top of it. The HDD can be removed easily if I decided to use back the removable HDD cage one day in the future, as the original mounting was not altered. Look at the following picture so that you can understand what I talking about the third HDD mounting.

user posted image

The clearance between the radiator and the third HDD is only 1.2mm measured by a precision caliper. Thanks NZXT for not making the plastic cover 1.2mm thicker. 

Ok, let’s begin the installation!! First of all, I made sure only black screws will be used for my project, and thanks again to NZXT for providing black screws only with the Phantom 410. The NZXT Premium Cable Starter Kit has good quality too, furthermore, they are all black!! Why not sleeve them to black and green? No, because the color of the sleeves will expose the cables too much. I preferred to make them all in black.

user posted image

The first step for my installation was put back all the removed cages. The first one was the riveted HDD cage and the second one was the 5.25” cage. But I did not use rivet to secure them, but I chose to use screws and motherboard stand-off to complete the task. The reason for me to do so was I wanted them to be removed again easily for the next upgrade. Motherboard stand-off is bigger to hold than a nut, for those hard-to-reach places, they worked perfectly.
I used those that are shorter one so it has no issue clearing the casing height.

user posted image

The 5.25” area with motherboard stand-off on original places

user posted image

Alright, done securing the removed parts, I started my installation.

I had issue during the second step, the motherboard installation. The Gigabyte G1.Sniper 3 motherboard is a XL-ATX motherboard, Phantom 410 supported XL-ATX but it blocked the exit of both 24-pin ATX power cable as well as the 6+8-pin PCIE power cables. So, before I install the motherboard, I have to make sure all the 3 cables are inside the casing. See what I mean?

user posted image

After done with the motherboard installation, on the third step, I installed my “unlocked & unleashed” Core i7-3770K into the processor socket. Then, I spread a thin layer of Coolaboratory Liquid Ultra onto the lapped IHS and left them aside, then I proceeded to step four, measuring the tube for my Swiftech H220.

user posted image

First thing to do in step four, was to drain the Swiftech H220, because the cooler is new one, I took a super clean water bottle and kept the coolant and reuse later. The coolant that came with the Swiftech H220 is slightly oily and light blue in color.

user posted image

The coolant was around 350ML only. After that, I put in the new Premochill Premoflex Advanced LRT white tube for the inlet and NuclearTec UV Green Extreme tube for the outlet. I wanted the white one to be longer at first but the flexibility of Premoflex was not that good compared to NuclearTec one. So it might hit my Thermalright HR07 ram cooler with its poor flexibility.

user posted image

The water block has been twisted 90° anti-clockwise to clear the barb fitting, if not, the inlet clamp will hit the ram cooler. After measurement, I assembled back everything and proceed to leak test. Leak test sometimes is quite risky, so I just installed the processor, the ram and the motherboard for the testing. See what I mean about the flexibility of Premoflex? The quality of Premoflex is superb compared to NuclearTec, solid and beautiful.

user posted image

Great, both of the tubes cleared the ram nicely, and no problem occurred during the leak test. During the testing, I refilled the coolant slowly and bleed the air out from the loop. The tubes were much shorter than the original one, therefore, I had a bit of the coolant left from the refill. I left the rig running for 30 minutes and I put back all the plastic parts for the front and top plastic panels.


user posted image

Ok, grill and intake and all the trims have been fixed back to its original place. Alright, time to go back, will continue tomorrow.

Thanks
AceCombat™
Alive With Adrenaline™


This post has been edited by AceCombat: Sep 20 2013, 05:10 AM
TSAceCombat
post Sep 20 2013, 01:07 AM


Group Icon
Elite
5,434 posts

Joined: Dec 2006


Day 13: 16th September 2013, Monday

I came to my store room 5.30A.M. in the morning to continue where I stopped yesterday. In step five, I installed the Asus GeForce GTX680 Direct CU-II into the first 16x PCIE lane, and double check everything before I close the top metal panel.

user posted image

So this is the bird view of my project. Next, step six, front intake fans installation. Four fans sandwiched the H220 radiator, while I need another fan to cool down the HDD area. Intake, anyone?

user posted image

Three HDDs will be cooled by a single fan, it sounds enough but the one located at the center of the fan will receive less air than others. I put the less heat generated Hitachi Deskstar 2TB at the middle while WD Green and Black on top and bottom respectively. The WD Green 1TB is the cheapest and slowest one, so I placed it just 1.2mm under the radiator, in case the plastic of the Sickleflow broken and the radiator fall down. 

Ok, after fans installation done, I wanted to try the fitting of my custom drilled intake hole. Let’s see how well it can be fitted.

user posted image

Is it awesome? For me, yes!!! Move on to step seven, sound card and PCIE WIFI + Bluetooth card installation. Just a simple step, done within a minute, and generally I left only cable management. The last and the hardest part of the entire project

user posted image

Last step, step eight, cable management
My requirement was only 24-pin, ATX and PCIE cables can be seen in the casing, the rest must be hidden. Although only two PCIE cables and one SATA cable connected to the power supply unit, but still I wanted to hide them
I came across with an idea, a simple PSU cover. I got myself a piece of hard art card in green and black color. I just wanted to make something like this.

user posted image

The art box must be able to clear the front USB 3.0 header connected to the motherboard as well as the metal popping out from the HDD cage. I did some measurement and cut them precisely because the art card can be damaged easily.

user posted image


After 3 trials and errors, finally I got myself a perfect one, it can be fitted firmly at the PSU area. The bottom right hand side is to clear the metal bar that popping out from the HDD cage.

user posted image
It was not flat as I had to clear the USB 3.0 fat cable. But it is good enough for me.

user posted image
Next, SATA cables area, actually it is fan shroud instead of cable hiding purpose, I made this shroud to guide the air into the display card area instead of blowing into the back of the casing.

Closer look on the 1.2mm clearance between the radiator and the HDD, as well as the SATA cables.
user posted image

PSU and motherboard bottom area.
user posted image


Thanks
AceCombat™
Alive With Adrenaline™


This post has been edited by AceCombat: Sep 20 2013, 05:10 AM
TSAceCombat
post Sep 20 2013, 01:07 AM


Group Icon
Elite
5,434 posts

Joined: Dec 2006


Processor , RAM and display card area.
user posted image
I had to attend a wedding dinner tonight and I’ll continue tomorrow.


Day 14: 17th September 2013
Finally!!!
The wait is over!!! (With camera flash to show the cables)
user posted image


Black sleeves are cool, they are almost invisible when the PC is not running.
user posted image


The black frame of the Sickleflow restricted the brightness of the green LED. Can you see my cables?
user posted image

Side naked view without final touch-up
user posted image

Removed all the protective plastic sheets of the side panel
user posted image

Front intake view
user posted image

Side view with bright room
user posted image

Reflection of acrylic
user posted image

The remote controller is actually outside the casing, just reflection.
user posted image


Thanks
AceCombat™
Alive With Adrenaline™


This post has been edited by AceCombat: Sep 20 2013, 05:10 AM
TSAceCombat
post Sep 20 2013, 01:08 AM


Group Icon
Elite
5,434 posts

Joined: Dec 2006


user posted image
Brightness of inside without side panel

user posted image
Brightness of inside with side panel


user posted image
Flash on!!!


user posted image
Flash off!!!


user posted image
Alone in the dark!!


user posted image
The carving of the Project's name


Thanks
AceCombat™
Alive With Adrenaline™


This post has been edited by AceCombat: Sep 20 2013, 05:11 AM
TSAceCombat
post Sep 20 2013, 03:42 AM


Group Icon
Elite
5,434 posts

Joined: Dec 2006


Credits:
New Fountain Engineering
36-F, Lorong Singgora, 10150, Penang
04-2286301
Thanks for provided me all the cutting and drilling machines.

Elite Tuition Centre
30, Lorong Singgora, 10150, Penang
016-4998398
Thanks for provided me a store room for free of charge

Line Cut Hair Saloon
Block 5, G-8, Taman Seri Damai, L/Raya Batu Lanchang, 11600, Penang
04-6588378
Thanks for bearing the entire postage fee for my items with your company account.

Kent Tek a.k.a “ktek
My personal computer guru
futurist88@hotmail.com
What can I say about this guy? To be honest, ktek was the one who taught me everything about computer hardware installation, overclocking, and windows installation and tweaking. Without him, I wouldn’t be a PC freak and this project would never be a reality. I owe my deepest gratitude to my guru, Kent Tek, for his continued support and valuable guidance throughout all stages of the project. KT, seriously, you have no idea how much I thank you, and involved me into the world of PC 7 years ago. But again, thank you, very very much… I hope you read this. 

Kevin Owi a.k.a “owikh84
The greatest overclocker in Penang
owikh84@hotmail.com
Kevin, thanks for helping me a lot in the project. Sorry to disturb you most of the time when you were busy. Your valuable experience and knowledge helped me a lot when choosing the suitable hardware. Thanks for your recommendation for the Swiftech H220 and Liquid Ultra, as well as bleeding the radiator.

Kelvin Chen a.k.a “kelvinchen
The hardcore memory tweaker in Penang
Kelvin, thanks for helping me a lot in this project too. You’ve given a lot of patience to me when I was asking about the RAM selection. And also, I’d like to thank you for offering me flashing the BIOS of my GTX680, you really made me “Game Harder!!” with my monster card now.


Mohd Fadli a.k.a “shepard
Shepard.4ever@gmail.com
012-4688580
Shepard, thanks for making me the gorgeous side panel. Sorry for requested this and that during that stage. But once again you’ve proven your skills. To all friends, Shepard can be contacted via the details above, he is accepting all possible and impossible orders, you name it, and he’ll do it. You can see some of his works in his thread here:

Link 1

Link 2

If you want to get special price, please let him know that I recommended you, or you’ve read the work log of Poison-Ivy™. He is a nice guy, but please, no more Jokerman font carving. Well, Shepard, you know what I mean? biggrin.gif

Again, it took me 14 working days to get this done, thanks everyone for your time reading this.


Thanks
AceCombat™
Alive With Adrenaline™


This post has been edited by AceCombat: Sep 20 2013, 05:12 AM
TSAceCombat
post Sep 20 2013, 03:43 AM


Group Icon
Elite
5,434 posts

Joined: Dec 2006


Thank you for your time reading this work log, hope my ideas can help you building a rig with Phantom 410.
Please do give me a credit if my ideas inspire you biggrin.gif

For more high resolution images, you can click here

http://s95.photobucket.com/user/boyzonezer...y?sort=6&page=1


Thanks
AceCombat™
Alive With Adrenaline™


This post has been edited by AceCombat: Sep 24 2013, 04:17 PM
TSAceCombat
post Sep 20 2013, 04:53 AM


Group Icon
Elite
5,434 posts

Joined: Dec 2006


Overall performance, my prime95 screenshot is not with me but the system is rock stable.
I've set 4.5GHz for my daily use only, it is more than enough for an internet surfing system.

Intel Core i7-3770K @ 4.5GHz @ 1.195vcore
Samsung Generic RAM @ 2600MHz @ 11-13-13-31-1T @ 1.65vdimm (All the way from 1333MHz) rclxs0.gif

Attached Image

Idle: (Penang ambient with no air cond)
Overall 30c

Load:
<65c

Crystal Diskmark for my SATA II SSD
Attached Image

This post has been edited by AceCombat: Sep 23 2013, 10:21 AM
mADmAN
post Sep 20 2013, 04:01 PM

10k Club
********
All Stars
10,530 posts

Joined: Nov 2004
From: Petaling Jaya & Mid Valley


PM Best price recaro tomcat biggrin.gif
TSAceCombat
post Sep 20 2013, 04:51 PM


Group Icon
Elite
5,434 posts

Joined: Dec 2006


You serious?
It's up for sales. biggrin.gif
gsan
post Sep 21 2013, 08:47 AM

Electrical RF Engineer
*******
Senior Member
2,471 posts

Joined: Jan 2003

which delid method you use? vice method? you also apply CLU in between IHS and the bare chip?
TSAceCombat
post Sep 21 2013, 08:52 AM


Group Icon
Elite
5,434 posts

Joined: Dec 2006


I can help u delid anytime, I have all the right tools with me biggrin.gif
Anyway, yes CLU, but the temperature has a bit problem, the difference between coolest and hottest core is around 10c sweat.gif

Gonna replace it with ordinary thermal paste and see how.
gsan
post Sep 21 2013, 05:14 PM

Electrical RF Engineer
*******
Senior Member
2,471 posts

Joined: Jan 2003

QUOTE(AceCombat @ Sep 21 2013, 08:52 AM)
I can help u delid anytime, I have all the right tools with me biggrin.gif
Anyway, yes CLU, but the temperature has a bit problem, the difference between coolest and hottest core is around 10c sweat.gif

Gonna replace it with ordinary thermal paste and see how.
*
from what I got from internet, CLU is placed in between IHS and bare chip. Then thermal paste is applied between the IHS and heatsink.

will find you on delid the proc but wait i get the CLU and good thermal paste first tongue.gif
JakeGFX
post Sep 21 2013, 06:27 PM

On my way
****
Senior Member
660 posts

Joined: Jan 2012


If you have the chance to fully wc the rig, how much are you willing to spend? yawn.gif
cstkl1
post Sep 21 2013, 08:21 PM

Look at all my stars!!
Group Icon
Elite
6,799 posts

Joined: Jan 2003

nice!

selamba tuition centre store room.

This post has been edited by cstkl1: Sep 21 2013, 08:22 PM
OC4/3
post Sep 22 2013, 01:17 AM

.
Group Icon
Elite
4,746 posts

Joined: Dec 2007
From: Speed rule


QUOTE(mADmAN @ Sep 20 2013, 04:01 PM)
PM Best price recaro tomcat biggrin.gif
*
Now only i know SR3 also have Tom cat version

Awesome work log and done in so timely manner thumbup.gif
No SSD meh??
Time to build a car with Signal Green paint to match liao laugh.gif
Ehh really no fan filter??

This post has been edited by OC4/3: Sep 22 2013, 01:18 AM
infernoaswen
post Sep 22 2013, 03:18 AM

(╯°□°)╯︵ ┻━┻)
*******
Senior Member
3,782 posts

Joined: Aug 2010
From: subang jaya


Looking awesome, like the idea of the side panel bullet holes drool.gif Even the poison-ivy on the side panel looks great. Overall how much did you spend on the side panel mod alone? laugh.gif
gxthelord
post Sep 22 2013, 10:23 AM

Tech Enthusiast
*******
Senior Member
2,313 posts

Joined: May 2009


user posted image

Ace Mei Mei want ask u, where to buy this ya? biggrin.gif Can't find it in Popular store o.. I also wanna learn your way to hide the bottom part of my casing. biggrin.gif
TSAceCombat
post Sep 22 2013, 09:07 PM


Group Icon
Elite
5,434 posts

Joined: Dec 2006


QUOTE(gsan @ Sep 21 2013, 05:14 PM)
from what I got from internet, CLU is placed in between IHS and bare chip. Then thermal paste is applied between the IHS and heatsink.

will find you on delid the proc but wait i get the CLU and good thermal paste first  tongue.gif
*
gsan Actually, why only care chip using CLU while it is not suitable for the contact between IHS and cooler?

QUOTE(JakeGFX @ Sep 21 2013, 06:27 PM)
If you have the chance to fully wc the rig, how much are you willing to spend? yawn.gif
*
Don't think so, as graphic card gets obsolete so fast and water block cannot be reused for newer card, therefore it is real waste of money, for me.

QUOTE(cstkl1 @ Sep 21 2013, 08:21 PM)
nice!

selamba tuition centre store room.
*
laugh.gif
This store room left abadoned for long time, just borrow and use it as my mini factory biggrin.gif
TSAceCombat
post Sep 22 2013, 09:10 PM


Group Icon
Elite
5,434 posts

Joined: Dec 2006


QUOTE(OC4/3 @ Sep 22 2013, 01:17 AM)
Now only i know SR3 also have Tom cat version

Awesome work log and done in so timely manner thumbup.gif
No SSD meh??
Time to build a car with Signal Green paint to match liao laugh.gif
Ehh really no fan filter??
*
It has SSD, see the hardware list.
And no fan filters for this PC, really need that.

QUOTE(infernoaswen @ Sep 22 2013, 03:18 AM)
Looking awesome, like the idea of the side panel bullet holes drool.gif Even the poison-ivy on the side panel looks great. Overall how much did you spend on the side panel mod alone?  laugh.gif
*
Total spending for side panel only ah? I got very special prize from the master biggrin.gif

QUOTE(gxthelord @ Sep 22 2013, 10:23 AM)
user posted image

Ace Mei Mei want ask u, where to buy this ya? biggrin.gif Can't find it in Popular store o.. I also wanna learn your way to hide the bottom part of my casing. biggrin.gif
*
Actually, best is u use card box to do, they are harder and can be painted to any color u want. My rig actually has no cable to hide there, cos is full modular psu. just saja put there nia. Use hard card box is easier, just cut and fold to a confirmed shape, paint it and no one knows it was a card box.
infernoaswen
post Sep 22 2013, 09:57 PM

(╯°□°)╯︵ ┻━┻)
*******
Senior Member
3,782 posts

Joined: Aug 2010
From: subang jaya


QUOTE(AceCombat @ Sep 22 2013, 09:10 PM)
It has SSD, see the hardware list.
And no fan filters for this PC, really need that.
Total spending for side panel only ah? I got very special prize from the master biggrin.gif
Actually, best is u use card box to do, they are harder and can be painted to any color u want. My rig actually has no cable to hide there, cos is full modular psu. just saja put there nia. Use hard card box is easier, just cut and fold to a confirmed shape, paint it and no one knows it was a card box.
*
yeap, side panel only laugh.gif estimate price range around? laugh.gif
gxthelord
post Sep 22 2013, 10:24 PM

Tech Enthusiast
*******
Senior Member
2,313 posts

Joined: May 2009


QUOTE(AceCombat @ Sep 22 2013, 09:10 PM)
It has SSD, see the hardware list.
And no fan filters for this PC, really need that.
Total spending for side panel only ah? I got very special prize from the master biggrin.gif
Actually, best is u use card box to do, they are harder and can be painted to any color u want. My rig actually has no cable to hide there, cos is full modular psu. just saja put there nia. Use hard card box is easier, just cut and fold to a confirmed shape, paint it and no one knows it was a card box.
*
ohhh~~ your this rig inspired me to not give up hiding the cables with Boxes! ^^ Cus mine is a casing with bad cable management (CM Elite 431 Plus) T_T
So I had to think a way to hide those cable as mine isn't modular like yours sad.gif got like xtra 5-6 cables
TSAceCombat
post Sep 22 2013, 10:48 PM


Group Icon
Elite
5,434 posts

Joined: Dec 2006


So, just use cardbox and cut it into any shape u wan biggrin.gif
huzzLEE_82
post Sep 26 2013, 10:21 AM

MHaF
******
Senior Member
1,301 posts

Joined: Feb 2010
From: FSN9 CenTToll


QUOTE(gxthelord @ Sep 22 2013, 10:23 AM)
user posted image

Ace Mei Mei want ask u, where to buy this ya? biggrin.gif Can't find it in Popular store o.. I also wanna learn your way to hide the bottom part of my casing. biggrin.gif
*
can find also in Tesco and Mydin...about rm6 perpiece

ktek
post Sep 26 2013, 12:35 PM

小喇叭
********
All Stars
13,210 posts

Joined: Jul 2006
well done Ace thumbup.gif
btw, the green theme is darker than image shown
StratOS
post Sep 26 2013, 02:32 PM

Berries~ Mmmm~
*********
All Stars
20,901 posts

Joined: Jan 2003
From: Miri, Sarawak


Tat UV Green sata cable macam from DFI X58 mobo only.. doh.gif

laugh.gif
TSAceCombat
post Sep 26 2013, 04:19 PM


Group Icon
Elite
5,434 posts

Joined: Dec 2006


QUOTE(ktek @ Sep 26 2013, 12:35 PM)
well done Ace thumbup.gif
btw, the green theme is darker than image shown
*
Yup, need your camera to capture precise color cry.gif

QUOTE(StratOS @ Sep 26 2013, 02:32 PM)
Tat UV Green sata cable macam from DFI X58 mobo only.. doh.gif

laugh.gif
*
Wrong, it's from my X48 UT laugh.gif
StratOS
post Sep 26 2013, 05:13 PM

Berries~ Mmmm~
*********
All Stars
20,901 posts

Joined: Jan 2003
From: Miri, Sarawak


QUOTE(AceCombat @ Sep 26 2013, 04:19 PM)
Yup, need your camera to capture precise color cry.gif
Wrong, it's from my X48 UT laugh.gif
*
i knew it.. close bro.. close.. hahaha..

i still got yellow, orange and some green new dfi sata cables laying around.. hahaha.. the UV colours are so striking.. laugh.gif
TSAceCombat
post Sep 26 2013, 08:28 PM


Group Icon
Elite
5,434 posts

Joined: Dec 2006


Want sell bo?
letze
post Sep 27 2013, 03:08 PM

~Beyond The Hourglass~
*****
Senior Member
933 posts

Joined: Aug 2010
From: City of Light


Very hard work project & produce worthy result. notworthy.gif

Seriously you should enter case modder competition in oversea LAN party icon_idea.gif


TSAceCombat
post Sep 27 2013, 06:37 PM


Group Icon
Elite
5,434 posts

Joined: Dec 2006


QUOTE(letze @ Sep 27 2013, 03:08 PM)
Very hard work project & produce worthy result.  notworthy.gif

Seriously you should enter case modder competition in oversea LAN party  icon_idea.gif
*
No la, my case mod skill is not that standard yet. My objective for this build was to make a practical cpu with cool temperature biggrin.gif
alexei
post Sep 29 2013, 09:36 PM

Biker Mice from Mars
******
Senior Member
1,879 posts

Joined: Jan 2003
From: Medan, ID
Glock = real?
TSAceCombat
post Sep 29 2013, 10:57 PM


Group Icon
Elite
5,434 posts

Joined: Dec 2006


Refer to the videos, then you will get your answer.
kherel77
post Sep 30 2013, 09:04 AM

Noobie
******
Senior Member
1,435 posts

Joined: Apr 2011
From: Blank Space


You should add this to your signature....

| Casing: NZXT Phantom 410 Military Modified Edition (Midnight Forest Green II) ---> Shot by Glock for few times | tongue.gif

Thumbs ups for that idea...keep modding yo...


alexei
post Sep 30 2013, 10:45 AM

Biker Mice from Mars
******
Senior Member
1,879 posts

Joined: Jan 2003
From: Medan, ID
QUOTE(AceCombat @ Sep 29 2013, 10:57 PM)
Refer to the videos, then you will get your answer.
*
How to get access to that? Kindly PM for links or info.
Just my FYI.
TSAceCombat
post Sep 30 2013, 03:12 PM


Group Icon
Elite
5,434 posts

Joined: Dec 2006


QUOTE(kherel77 @ Sep 30 2013, 09:04 AM)
You should add this to your signature....

| Casing: NZXT Phantom 410 Military Modified Edition (Midnight Forest Green II) ---> Shot by Glock for few times |  tongue.gif

Thumbs ups for that idea...keep modding yo...
*
laugh.gif
Thanks for the thinking bro laugh.gif

QUOTE(alexei @ Sep 30 2013, 10:45 AM)
How to get access to that? Kindly PM for links or info.
Just my FYI.
*
That's my own toy smile.gif
shepard
post Oct 4 2013, 11:04 PM

We shall overcome
*****
Senior Member
849 posts

Joined: May 2010
From: Penang Island


Hi Ace,

At last.. a very nice modded rig from Penangite rclxms.gif , glad that i could contribute even a small portion in this project. Keep em coming guys thumbup.gif
TSAceCombat
post Oct 5 2013, 09:25 AM


Group Icon
Elite
5,434 posts

Joined: Dec 2006


Bro Shepard,

Really thanks for your help that time or else I couldn't finish it on time for sure. And also, thanks again for your tolerance for that "cari pasal" work laugh.gif
YearOne
post Oct 5 2013, 03:27 PM

Casual
***
Junior Member
362 posts

Joined: Apr 2010
From: Kluang, Kajang, Serdang


Crazy la...
I look at your modding skill, ignite my interest to do modding also...
But not much budget.. T.T

Good work here..
TSAceCombat
post Oct 5 2013, 04:55 PM


Group Icon
Elite
5,434 posts

Joined: Dec 2006


Thanks,
Well, this is not what fancy mod, just a practical one laugh.gif
YearOne
post Oct 5 2013, 07:03 PM

Casual
***
Junior Member
362 posts

Joined: Apr 2010
From: Kluang, Kajang, Serdang


QUOTE(AceCombat @ Oct 5 2013, 04:55 PM)
Thanks,
Well, this is not what fancy mod, just a practical one laugh.gif
*
It was so great.. My rig before using XSPC kit were too messy..
And I don't do the pivot removal etc..
Now wonder how can you remove the pivot..
Later I got another case can try did as what you did..
Add on, does do the Proc scrubbing will conduct to lower temp reading?
As i run with 920 previously, Raystorm Block, the temp 60C idle & 90C full load..
TSAceCombat
post Oct 5 2013, 09:11 PM


Group Icon
Elite
5,434 posts

Joined: Dec 2006


QUOTE(YearOne @ Oct 5 2013, 07:03 PM)
It was so great.. My rig before using XSPC kit were too messy..
And I don't do the pivot removal etc..
Now wonder how can you remove the pivot..
Later I got another case can try did as what you did..
Add on, does do the Proc scrubbing will conduct to lower temp reading?
As i run with 920 previously, Raystorm Block, the temp 60C idle & 90C full load..
*
You don't really need to remove the rivet / pivot of the casing, I did that to make my jobs easier.
Yup, I got much better temperature after I removed the processor heat spreader but of course, it voided my manufacturer warranty. As for cable, it depends on how you manage it.
YearOne
post Oct 5 2013, 09:23 PM

Casual
***
Junior Member
362 posts

Joined: Apr 2010
From: Kluang, Kajang, Serdang


QUOTE(AceCombat @ Oct 5 2013, 09:11 PM)
You don't really need to remove the rivet / pivot of the casing, I did that to make my jobs easier.
Yup, I got much better temperature after I removed the processor heat spreader but of course, it voided my manufacturer warranty. As for cable, it depends on how you manage it.
*
Due to limited space in my case previously, some suggest to remove some part in the case..
Hahaha.. so how did you remove the heat spreader? just rub the processor like that?
TSAceCombat
post Oct 5 2013, 10:31 PM


Group Icon
Elite
5,434 posts

Joined: Dec 2006


Nope, u have to use some skill to do so -.-
Anyway, before you remove it, you may try to lap the processor first and see got improvement or not.

Or you can buy my service here.
https://forum.lowyat.net/index.php?showtopic=2971611&hl=
ntw
post Oct 5 2013, 11:25 PM

One Each At A Time
******
Senior Member
1,432 posts

Joined: Aug 2010
From: Ipoh mali~~~


QUOTE(AceCombat @ Sep 30 2013, 03:12 PM)
laugh.gif
Thanks for the thinking bro laugh.gif
That's my own toy smile.gif
*
gurl with gun = sexy!! drool.gif
TSAceCombat
post Oct 6 2013, 02:37 PM


Group Icon
Elite
5,434 posts

Joined: Dec 2006


Hehehehe....not me in the video biggrin.gif
chongxm
post Oct 7 2013, 05:28 PM

Enthusiast
*****
Senior Member
730 posts

Joined: Nov 2010
QUOTE(AceCombat @ Oct 6 2013, 02:37 PM)
Hehehehe....not me in the video biggrin.gif
*
whatt? samsung ram can oc that high? what model? izit every samsung ddr3 uni got oc potential? 1333 4gb made in korea can or not? i see market ppl selling 2nd hand rm80 rclxms.gif
TSAceCombat
post Oct 7 2013, 06:56 PM


Group Icon
Elite
5,434 posts

Joined: Dec 2006


Of cos not la laugh.gif
mine one is special selected kit.
Unseen83
post Oct 16 2013, 01:51 AM

TooFAT4U 2Handle!
*******
Senior Member
2,337 posts

Joined: Dec 2008
From: KING CANNEL JB


wow...
BuckRoger
post Oct 16 2013, 11:08 PM

Sakit Perut
*****
Senior Member
903 posts

Joined: Dec 2008
QUOTE(gxthelord @ Sep 22 2013, 10:23 AM)
user posted image

Ace Mei Mei want ask u, where to buy this ya? biggrin.gif Can't find it in Popular store o.. I also wanna learn your way to hide the bottom part of my casing. biggrin.gif
*
got mine at carrefour.. nice & cheap tongue.gif... thanks Ace for great idea!! thumbup.gif i cilok urs too tongue.gif
BuckRoger
post Oct 16 2013, 11:09 PM

Sakit Perut
*****
Senior Member
903 posts

Joined: Dec 2008

user posted image

mind to share where u get this rad?
zamx
post Oct 17 2013, 09:45 AM

New Member
*
Junior Member
28 posts

Joined: Jun 2011


ni swiftech h220
TSAceCombat
post Oct 17 2013, 10:39 AM


Group Icon
Elite
5,434 posts

Joined: Dec 2006


Yup, original H220 radiator, it is MCR220 with built in reservoir.
aLertz
post Oct 17 2013, 11:49 AM

Overconfidence is a flimsy shield
******
Senior Member
1,111 posts

Joined: Mar 2005
From: TaiPinG / Singapore


wow that is one epic casing....
good idea on the cardboard thing biggrin.gif

so total 3 intake(front) 3 exhaust(2 top, 1 back) fan?
bottom intake good or not?

This post has been edited by aLertz: Oct 17 2013, 11:59 AM
TSAceCombat
post Oct 17 2013, 01:58 PM


Group Icon
Elite
5,434 posts

Joined: Dec 2006


Nope, 4 fans on the radiator, 1 fan for harddisk, two top exhaust, and rear exhaust.
8 fans total:D
TSAceCombat
post Oct 29 2013, 11:32 PM


Group Icon
Elite
5,434 posts

Joined: Dec 2006


Upgraded a GTX780 and will upload pic soon biggrin.gif
gxthelord
post Nov 5 2013, 10:04 AM

Tech Enthusiast
*******
Senior Member
2,313 posts

Joined: May 2009


QUOTE(AceCombat @ Oct 29 2013, 11:32 PM)
Upgraded a GTX780 and will upload pic soon biggrin.gif
*
Ur mod has featured on NZXT page. biggrin.gif
NZXT FB
TSAceCombat
post Nov 5 2013, 10:32 AM


Group Icon
Elite
5,434 posts

Joined: Dec 2006


QUOTE(gxthelord @ Nov 5 2013, 10:04 AM)
Ur mod has featured on NZXT page. biggrin.gif
NZXT FB
*
Wow, thanks for the update, I wonder how did they know about the mod sweat.gif
gxthelord
post Nov 5 2013, 10:42 AM

Tech Enthusiast
*******
Senior Member
2,313 posts

Joined: May 2009


QUOTE(AceCombat @ Nov 5 2013, 10:32 AM)
Wow, thanks for the update, I wonder how did they know about the mod sweat.gif
*
maybe they came here and stalk lyn member also haha. smile.gif
TSAceCombat
post Nov 5 2013, 10:45 AM


Group Icon
Elite
5,434 posts

Joined: Dec 2006


QUOTE(gxthelord @ Nov 5 2013, 10:42 AM)
maybe they came here and stalk lyn member also haha. smile.gif
*
Possible, gonna upgrade my rig again, running GTX780 with Arctic Cooling F12 now, going to make a new PSU cover too, this one temporary one too ugly liao.
Thinking to make one with non-transparent acrylic. brows.gif
gxthelord
post Nov 5 2013, 10:48 AM

Tech Enthusiast
*******
Senior Member
2,313 posts

Joined: May 2009


QUOTE(AceCombat @ Nov 5 2013, 10:45 AM)
Possible, gonna upgrade my rig again, running GTX780 with Arctic Cooling F12 now, going to make a new PSU cover too, this one temporary one too ugly liao.
Thinking to make one with non-transparent acrylic. brows.gif
*
yeshh moar pics!!! biggrin.gif
TSAceCombat
post Nov 5 2013, 12:05 PM


Group Icon
Elite
5,434 posts

Joined: Dec 2006


QUOTE(gxthelord @ Nov 5 2013, 10:48 AM)
yeshh moar pics!!! biggrin.gif
*
Wait wait, money is not dry yet, hahaha~~~
How about yours?
gxthelord
post Nov 5 2013, 02:08 PM

Tech Enthusiast
*******
Senior Member
2,313 posts

Joined: May 2009


QUOTE(AceCombat @ Nov 5 2013, 12:05 PM)
Wait wait, money is not dry yet, hahaha~~~
How about yours?
*
haha my wallet is empty now.. waiting also. smile.gif Btw mind share why u use F12 instead of other fans ?
TSAceCombat
post Nov 5 2013, 03:44 PM


Group Icon
Elite
5,434 posts

Joined: Dec 2006


QUOTE(gxthelord @ Nov 5 2013, 02:08 PM)
haha my wallet is empty now.. waiting also. smile.gif Btw mind share why u use F12 instead of other fans ?
*
At first, I put Sickleflow, Green LED with semi transparent frame, good LED effect as they are not so bright but the noise is simply amazing sweat.gif
Then not much choice left for fans, and white blades are good to my casing contrast, since my theme is black and dark green, so white color is fine.

F12 is also quite noisy when putting 6 of them in the casing at full speed, they are good only when not running full speed.
ieatchickens
post Nov 26 2013, 03:18 PM

Getting Started
**
Junior Member
111 posts

Joined: Apr 2011
From: kuala lumpur


samsung ram jpg saved XD anyways congrats on such a beautiful build, i do envy that delidded proc but must jaga pressure from heatsink when on/off. Why intel onboard raid though? how you fix your TRIM ?


PC10700 @ 2600MHz (11-13-13-31-1T, 1.65vdimm)

This post has been edited by ieatchickens: Nov 26 2013, 03:19 PM
TSAceCombat
post Nov 26 2013, 10:53 PM


Group Icon
Elite
5,434 posts

Joined: Dec 2006


QUOTE(ieatchickens @ Nov 26 2013, 03:18 PM)
samsung ram jpg saved XD anyways congrats on such a beautiful build, i do envy that delidded proc but must jaga pressure from heatsink when on/off. Why intel onboard raid though? how you fix your TRIM ?
PC10700 @ 2600MHz (11-13-13-31-1T, 1.65vdimm)
*
That image is taken from internet one, not the real one i used in my pc right now laugh.gif
TRIM can be enabled by software, no big deal.
TSAceCombat
post Dec 10 2013, 11:01 PM


Group Icon
Elite
5,434 posts

Joined: Dec 2006


The rig is going to be modded again before 2014, stay tuned biggrin.gif
JakeGFX
post Dec 11 2013, 07:33 AM

On my way
****
Senior Member
660 posts

Joined: Jan 2012


I know this is kinda late of a reply from the last question I ask, if someone sponsor you to fully water-cool the build, would you? tongue.gif
TSAceCombat
post Dec 11 2013, 08:16 AM


Group Icon
Elite
5,434 posts

Joined: Dec 2006


Only if sponsored, else I'll stick to air cool as like i said, gpu waterblock is not universal laugh.gif
ktek
post Dec 11 2013, 08:24 AM

小喇叭
********
All Stars
13,210 posts

Joined: Jul 2006
QUOTE(AceCombat @ Nov 5 2013, 12:05 PM)
Wait wait, money is not dry yet, hahaha~~~
How about yours?
*

dry.gif u printing money?

2014 is kuda year
TSAceCombat
post Dec 11 2013, 10:08 PM


Group Icon
Elite
5,434 posts

Joined: Dec 2006


ktek
KT, I got very surprise and urgent news to tell you, when can TT?
I want to tell you face to face.
TSAceCombat
post Nov 1 2014, 09:54 AM


Group Icon
Elite
5,434 posts

Joined: Dec 2006


There was three forumers PM-ed me to reopen this thread for Q&A biggrin.gif
TSAceCombat
post Nov 2 2014, 11:35 AM


Group Icon
Elite
5,434 posts

Joined: Dec 2006


Slightly computer aided, more on human of course, this is an old type one biggrin.gif

Topic ClosedOptions
 

Change to:
| Lo-Fi Version
0.0647sec    0.42    6 queries    GZIP Disabled
Time is now: 17th December 2025 - 07:59 AM