Hi, mouser, digikey, etc send each part in separate plastic bag with a sticker/label with exact product specs and code numbers. Don't worry about this.
MichalD's electrolytics are low ESR. I don't know what digikey says, but you can also check the product specs (pdf) that comes directly from the manufacturer.
Replacing caps with bigger capacity ones isn't necessarily good or bad. It depends on the purpose of the capacitor.
For example the mains input caps (470uF 200V) can be replaced with bigger ones and basically all electrolytics can be replaced with bigger ones, if I remember correctly, since their purpose is to act as current "banks". Bigger ones can provide more current, or more correctly "current with less ripple". If this will actually make any difference, I don't really know. Also you have to consider the size, because bigger caps may not fit. Also, if you replace existinf caps with much higher capacity ones, maybe you have problems with the RC time constant.
In other caps like some high voltage ceramic ones, their value is carefully selected in relation to a resistance to form a snubber network to filter the higt voltage spikes created by the transformers. So you shouldn't change the value of these.
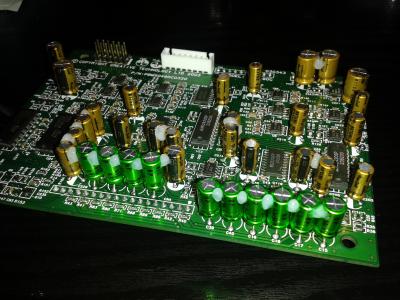
Also, every low voltage ceramic cap is connected in parallel with one electrolytic. This is a trick to have low ESR value, without using high quality low ESR caps. So theese ceramics don't need to be quality/expensive ones, but anyway.
My mouser parts list:
CODE
1x 450V 68uF -- https://eu.mouser.com/ProductDetail/647-UCY2W680MHD
4x 200V 470uF -- https://eu.mouser.com/ProductDetail/647-LGX2D471MELZ35
2x 100V 1000uF -- https://eu.mouser.com/ProductDetail/647-UHW2A102MHD
2x 100V 390uF -- https://eu.mouser.com/ProductDetail/647-UHW2A391MHD
5x 35V 220uF -- https://eu.mouser.com/ProductDetail/Panasonic/EEU-FR1V221
5x 35V 100uF -- https://eu.mouser.com/ProductDetail/Panasonic/EEU-FR1V101B
2x 25V 47uF -- https://eu.mouser.com/ProductDetail/Panasonic/EEU-FR1E470B
12x 100V 0.1uF -- https://eu.mouser.com/ProductDetail/581-AR211C104K4R
9x 100V 100pF -- https://eu.mouser.com/ProductDetail/581-AR211A101K4R
4x 500V 0.01uF -- https://eu.mouser.com/ProductDetail/581-SR217C103KAR
4x 100V 1uF -- https://eu.mouser.com/ProductDetail/810-FA26X7R2A10500
1x 1kV 47pF -- https://eu.mouser.com/ProductDetail/810-CC45SL3AD470JYNA
5x 1kV 470pF -- https://eu.mouser.com/ProductDetail/810-CK45-R3AD471K-NA
4x 1kV 220pF -- https://eu.mouser.com/ProductDetail/810-CK45-R3AD221K-NA
1x 1kV 3300pF -- https://eu.mouser.com/ProductDetail/810-CK45-B3AD332NNA
1x 1kV 4700pF -- https://eu.mouser.com/ProductDetail/810-CK45-B3AD472KYGA
4x 450VDC 0.1uF -- https://eu.mouser.com/ProductDetail/667-ECW-FD2W104JQ
1x 250Vac 470pF -- https://eu.mouser.com/ProductDetail/81-DE1B3RA471KA4BN1F
1x Optocoupler -- https://eu.mouser.com/ProductDetail/512-FOD817A
Also for the audio boards and for the control pod:
CODE
2x 50volts 1uF -- https://eu.mouser.com/ProductDetail/647-UES1H010MDM
35x 50volts 4.7uF -- https://eu.mouser.com/ProductDetail/647-UES1H4R7MEM
13x 50volts 22uF -- https://eu.mouser.com/ProductDetail/647-UFG1H220MEM
16x 50volts 2.2uF -- https://eu.mouser.com/ProductDetail/647-UFG1H2R2MDM
10x 25volts 100uF -- https://eu.mouser.com/ProductDetail/647-UFG1E101MPM
23x 50volts 10uF -- https://eu.mouser.com/ProductDetail/647-UFG1H100MDM
5x 25volts 47uF -- https://eu.mouser.com/ProductDetail/647-UFG1E470MEM
In some cases (in ceramic and audio caps) I ordered more than what is needed in case something goes wrong when soldering, etc.
Also for audio caps I used higher voltage caps, as long as I didn't have any problems with space/size.
I hope I didn't forget anything...
This post has been edited by nautilus7: Apr 10 2019, 09:42 AM 

 Jun 27 2018, 06:28 PM

 Quote
Quote


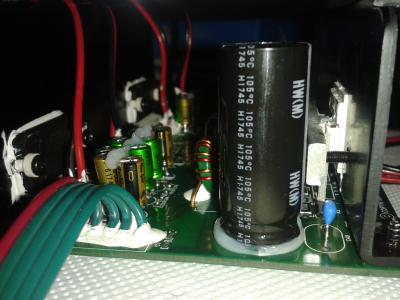


 . I like your red/black wiring, you have shorted the wires just for necessary length. Very nice!
 0.4016sec
 0.91
0.91
 7 queries
 GZIP Disabled