Welcome Guest ( Log In | Register )

Bump Topic Topic Closed RSS Feed

Outline · [ Standard ] · Linear+

 PROTON SAGA BLM, FL, FLX CLUB v43, Import tariff, makes proud rubbish owner

views
     
lhwj
post May 2 2013, 03:49 PM

New Member
*
Newbie
1 posts

Joined: Oct 2010
From: Penang


QUOTE(r3apers @ May 2 2013, 03:48 PM)
juz pull only lo... but 1st time sure need to kiaw a bit, but careful if not scared ur dashboard, as i already got few dot near the vent there...

Sponge? go buy from daiso, they got sell one type sponge is quite hard.. actually is for house windows sealer.. but i use to hold the tweeter and i stick so sum of my door frame...
*
Tengkiu notworthy.gif
lhwj
post May 2 2013, 03:58 PM

New Member
*
Newbie
1 posts

Joined: Oct 2010
From: Penang


QUOTE(r3apers @ May 2 2013, 03:52 PM)
no problem bro, one last thing becarefull on the clip, got metal and plastic clip... the metal clip its the most hard to take out.. i pull my centre dash until sweat like hell... dunno urs izzit as tight as mine only...
*
Already pulled out the centre dash yesterday, in fact now I''m dribing around with a huge gaping hole and the centre console missing besides the air cond controls laugh.gif

Yes the metal clips were very tight. but managed to pull out in the end. My fingers were quite sore after that though sweat.gif I hope the side air cond vents are easier.
lhwj
post May 3 2013, 05:03 PM

New Member
*
Newbie
1 posts

Joined: Oct 2010
From: Penang


QUOTE(dares @ May 3 2013, 12:50 PM)
davidke20 lhwj

On the topic of LC2K, I tried LC2K with my dad's car. Can't get used to it. I just press clutch pedal ->downshift -> brake -> rev up -> release clutch pedal.

Why the need to clutch 2 times again?
*
There are three distinct sections of the drivetrain in a manual tranny car:

1. Engine to clutch

2. Clutch to lay shaft of gearbox

3. Output shaft of gearbox (driven by lay shaft) to driving wheels

Sections 2 and 3 are linked via the dog clutches (nothing to do with the main clutch controlled by your left pedal) of each gear. So when you are sitting parked with the engine idling in neutral, the engine is driving sections 1 & 2 but not 3, because none of the dog clutches are engaged. Then when you step on the clutch, section 2 will continue to spin under its own momentum until friction slows it down (or if you attempt to shift into any gear). Then only section 1 will be spinning.

The whole idea of LC2K is to synchronise section 2 with the speed of section 3 to enable easier shifting and preventing wear and tear on the synchros. I'll use shifting from 5th to 3rd as an example.

Single Clutch steps: You're driving in 5th gear, and you want to downshift to third.

1. Release throttle and step on the clutch. This disengages section 1 from section 2 and 3.

2. Move the lever from 5th to neutral. Disengaging gear when the clutch is disengaged is easy and doesn't cause wear to the gearbox.

3. Shift from neutral to 3rd. When you attempt to shift into 3rd gear, the speed between the 3rd gear + output shaft (section 3) and the lay shaft (section 2, spinning under its own momentum, because the clutch is disengaged) is different, so the dog clutches won't engage. That's where the synchros come in. As you push the gear lever into 3rd, the synchros engage gradually, and cause section 2 to spin faster until it matches the speed of the section 3, then only can you engage the 3rd gear's dog clutch.

4. But now section 1 is slower than sections 2 and 3 (spinning together, because you've already engaged 3rd), because you've released the throttle so you need to step on the accelerator, rev match and...

5. Release clutch for a smooth gear change.

Compare this with LC2K:

1. Release throttle and step on the clutch.

2. Move the lever from 5th to neutral.

3. Here's the difference. Release the clutch, so that sections 1 and 2 are engaged and spinning together. As you are in neutral, section 3 is still spinning independently from sections 1 & 2.

4. Rev match so that the speed of sections 1 and 2 and matches with section 3.

5. Now all three sections are spinning at the same speed. Step on the clutch, this disconnects sections 1 & 2. Because sections 2 & 3 are now matched and synchronised, it's easy to move the gear lever into 3rd, there won't be much resistance as the synchros don't have to spin up section 2 as in step 3 in the single clutch shift.

6. The instant the 3rd gear's dog clutch is engaged, release the clutch.

There may be an extra step involved but this downshift (if done correctly) will be noticeably smoother than a single clutch downshift and you've saved wear and tear on your synchros.

Have you ever experienced difficulty engaging gears even though your clutch is pushed all the way to the floor? That's why you need LC2K. It's not strictly necessary in a gearbox with synchros, but it's good for the gearbox and makes driving a bit more enjoyable, even more so if your rev match in step 4 is done via heel and toe.


lhwj
post May 3 2013, 05:37 PM

New Member
*
Newbie
1 posts

Joined: Oct 2010
From: Penang


QUOTE(dares @ May 3 2013, 05:25 PM)
If I understand correctly, the second de-clutch is to spin the clutch and layshaft up to match the driveshaft right?
*
That's done AFTER first de-clutch, before the second de-clutch, while in neutral. The second de-clutch is merely to engage the 3rd gear's dog clutch, in fact I suspect that if step 4 is done perfectly you wouldn't even need to step on the clutch to shift into 3rd gear. Though I'm not brave enough to try clutchless shifting sweat.gif

Anyway, I think the gist of it is:

Single clutch downshift - engine rev match done manually via throttle, internal gearbox rev match (between sections 1 and 2) done separately via synchros

LC2K downshift - both engine rev match AND internal gearbox rev match done manually, together

This post has been edited by lhwj: May 3 2013, 05:38 PM
lhwj
post May 3 2013, 05:52 PM

New Member
*
Newbie
1 posts

Joined: Oct 2010
From: Penang


QUOTE(dares @ May 3 2013, 05:46 PM)
Oops sorry, I got konfius.

press clutch -> shift into neutral -> release clutch -> rev to spin flywheel, clutch and layshaft to match driveshaft -> press clutch again -> shift into gear -> release clutch

I was thinking the same thing, if "synced" precisely you won't even have to clutch the second time  laugh.gif
*
Korek thumbup.gif
lhwj
post May 5 2013, 09:22 PM

New Member
*
Newbie
1 posts

Joined: Oct 2010
From: Penang


QUOTE(dares @ May 5 2013, 05:43 PM)
First gaga spotted in my taman  wub.gif  which currently has an occupancy figure of exactly 6 houses (out of >50 units) rclxub.gif

» Click to show Spoiler - click again to hide... «

*
48 houses along my road, and my Gaga is the only one sad.gif

VW is especially popular with my neighbours, the one diagonally opposite has a Golf GTi, my right side neighbour has a new Beetle and a Passat CC while two doors to my left there's a previous gen Beetle and a Golf GTi. There are various other Golfs further away.

This post has been edited by lhwj: May 5 2013, 09:23 PM
lhwj
post May 7 2013, 01:57 PM

New Member
*
Newbie
1 posts

Joined: Oct 2010
From: Penang


To: iska

From: davidke20
QUOTE(davidke20)
Common knowledge for wheel alignment/chamber adjustment.


  1. if steering run 1 side, it is TOE lari, either in/ou. Can be adjust by loosen/tighten rod end to straighten wheel alignment. Usual price RM15/both side
  2. if steering no run but eat tayar abnormally, it is caster out. Traditional way is to change bush and regain center alignment, so the tayar will not kang-kang no more. If went through accident, workshop can use hydraulic jack to pump out/jack in the center alignment.
  3. if already got adjustable camber, realign will be RM15/side.


That's all. Other known ways to rip off consumer is to change stock camber screw to adjustable shaft. Cost of adjustable shaft is RM0.50 - RM3.50 depending on material used. General charges of application is RM35/side by the shops, so both side will be RM70! By adding adjustable camber does not solve the root cause of tayar kang-kang bcoz ur system still senget due to wear-tear. Bush still got free space and camber will lari again.

I used to fix my cambers/casters in Ipork at AKS or Shell petrol statio @ Jalan Datuk, but I haven't seen any in KL-Selangor. These pakar will never use adjustable camber, as they believe stock setup(so am I). I have adjustable camber in my ex-iswaga due to oversized disc brakes, so no choice. The most reliable+honest tayar guy I use is Ah Hee from Bkt Kemuning Teo Brothers Toyo Tyre. The last time they found out iswaga chamber rosak, they replaced it FOR FREE!!! Only charge me a minimal labor cost for adjustment RM15x2sides.

Hope this help notworthy.gif

lhwj
post May 12 2013, 11:22 PM

New Member
*
Newbie
1 posts

Joined: Oct 2010
From: Penang


QUOTE(redshark_999 @ May 12 2013, 10:47 PM)
user posted image[url=http://img227.imageshack.us/img227/576/savefuelwoodaccelerator.jpg]
Fuel Saver[SIZE=7][COLOR=red]
*
That's very dangerous doh.gif Sometimes you need to floor the throttle in an emergency to avoid an accident. Especially while on single lane trunk roads, while overtaking you need all available power from the engine.

What if the wood dislodges and goes under the brake pedal? doh.gif

This post has been edited by lhwj: May 13 2013, 10:41 AM
lhwj
post May 13 2013, 02:53 PM

New Member
*
Newbie
1 posts

Joined: Oct 2010
From: Penang


QUOTE(billy520 @ May 13 2013, 02:02 PM)
marhaihai

i spent 1 hour of my sunday morning installing this alone... damn this is tough with no help at all.  mad.gif not sure if i did it correctly but here goes the picture.

[attachmentid=3436011]

so as you can see, the top 2 bolt+nut on each side, i used the washer on the inside of the nut to prevent any damage to the car part... i did not put it on the bolt facing front as i do not want to screw up the parts of the car body. whereas on the RSB, i feel the steel is much more solid to withstand the force without washer on it. i rather don screw up the car because if screw up, might wont get to install anything there edi and i can always buy another RSB from marhaihai  nod.gif so end of story is should i get washer and put there?

as for the below, you see traces of green stuff there, its sticky tack. no one hold or lift the washer from the bottom 2 bolt for me so i put sticky tack to hold the washer up. so my question is that was it installed correctly? actually what does the 2 bolt below hold?some parts of the car? which part?
*
My bolts are installed the other way round, bolt in passenger compartment, nut and washer in the boot hmm.gif

The two bolts at the bottom is just another reinforcement point.
lhwj
post May 13 2013, 02:55 PM

New Member
*
Newbie
1 posts

Joined: Oct 2010
From: Penang


QUOTE(iskazulka @ May 13 2013, 02:46 PM)
what if got bumps when climbing hills like near my housing area?
KL housing area banyak speed bumps wor.
*
Same here. I don't slow down for bumps especially going uphill whistling.gif
lhwj
post May 13 2013, 03:09 PM

New Member
*
Newbie
1 posts

Joined: Oct 2010
From: Penang


QUOTE(iskazulka @ May 13 2013, 03:00 PM)
R U "The Flying Cainis" meh?
*
Hu sey ayam Cainis? Ayam Mahresian yiu noe whistling.gif

QUOTE(dares @ May 13 2013, 03:01 PM)
Encountering bumps on uphill climbs is one of the reasons I miss the CVT  sad.gif
*
I still haven't gotten the chance to test a CVT on an uphill climb yawn.gif

QUOTE(billy520 @ May 13 2013, 03:04 PM)
it should makes no difference which way as long as we tightened it via BRUTE FORCE? LOLz... i have it on the inside cos i dont want excess bolt pointing out and potentially hook some stuff especially clothing which i often keep there...
*
You're right, the orientation of the bolt shouldn't make a difference. But there's the black plastic sheet which prevents you from reaching the nut properly if your nut is facing the passenger compartment? And the excess end of the bolt could puncture the back of your seat? hmm.gif

This post has been edited by lhwj: May 13 2013, 03:12 PM
lhwj
post May 13 2013, 03:21 PM

New Member
*
Newbie
1 posts

Joined: Oct 2010
From: Penang


QUOTE(iskazulka @ May 13 2013, 03:15 PM)
do not worry. unker eqmal's car kan ada  brows.gif
*
Next taim wen ayam kambing KL for TT ayam gonna test drib the first FLX CVT I see brows.gif
lhwj
post May 14 2013, 04:13 PM

New Member
*
Newbie
1 posts

Joined: Oct 2010
From: Penang


QUOTE(billy520 @ May 14 2013, 04:08 PM)
so for the front, the 3 nuts we removing from each side, 2 is connected to absorber and 1 is the bonet cover right? how come the 2 nut for the absorber so super tight? i can barely loosen it...thats y till now i not yet install the FSB...
*
Use wrench with a longer handle. Also, better use close socket wrench instead of open wrench.
lhwj
post May 14 2013, 04:15 PM

New Member
*
Newbie
1 posts

Joined: Oct 2010
From: Penang


QUOTE(TitanRev @ May 14 2013, 02:58 PM)
I like how I can put my stuff nicely in between the bars and back plastic so it won't fly around inside the boot when I drive.  thumbup.gif 
*
Meh, I just chuck them underneath with the spare tyre tongue.gif
lhwj
post May 14 2013, 07:10 PM

New Member
*
Newbie
1 posts

Joined: Oct 2010
From: Penang


QUOTE(drfeelgood @ May 14 2013, 07:06 PM)
Nice! is that an Ultra Racing Strut Bar?  but .i thought, when u buy it, they fix it for you? how much is it?

does it take up your boot space?
*
Quite of us here have the same thing. No it's 3Max, free installation at factory. Doesn't take up boot space unlike the UR one.
lhwj
post May 15 2013, 11:04 AM

New Member
*
Newbie
1 posts

Joined: Oct 2010
From: Penang


QUOTE(eqmal197 @ May 15 2013, 11:00 AM)
morning

apa cerita?
*
Waiting to try this for my 60k service either this or next week.


Attached thumbnail(s)
Attached Image
lhwj
post May 15 2013, 11:20 AM

New Member
*
Newbie
1 posts

Joined: Oct 2010
From: Penang


QUOTE(billy520 @ May 15 2013, 11:16 AM)
u conform ar...TESCO brand o... sweat.gif  sweat.gif  sweat.gif
*
Read this tered

QUOTE(iskazulka @ May 15 2013, 11:17 AM)
apa itu cornering lights?
*
The lights directly below the turn indicators.

user posted image
lhwj
post May 15 2013, 11:28 AM

New Member
*
Newbie
1 posts

Joined: Oct 2010
From: Penang


QUOTE(dares @ May 15 2013, 11:25 AM)
That car looks exactly like my dad's.....down to the 13" rims and yellow-ed foglamps  rclxub.gif
*
Was a random image taken from Google. Daddy's putting it up for sale icon_question.gif
lhwj
post May 15 2013, 10:50 PM

New Member
*
Newbie
1 posts

Joined: Oct 2010
From: Penang


QUOTE(outsider @ May 15 2013, 10:42 PM)
wanna ask sifu here

have anyone of your flx car can hear the wind blowing when driving around 80+ km/hour?
some more it like the sound proof worse than my previous proton iswara.. am i too sensitive or it really got something wrong?
can i ask them to warranty on it?
*
This car has absolutely no soundproofing whistling.gif Either blast your radio loud or go all out and install insuflex everywhere rclxms.gif
lhwj
post May 16 2013, 02:15 AM

New Member
*
Newbie
1 posts

Joined: Oct 2010
From: Penang


QUOTE(drfeelgood @ May 15 2013, 11:16 PM)
hmm i dunno why they(Proton) claim the Flx Cvt can save fuel more than the manual. I am using manual, still on stock alloy 14s, changed to Falken Ziex Ze912s(only upgrade from Silverstone M3s)  but I normally hit 348 kms on around 75% petrol usage. 50/50.

today I hit 368.4kms on 27 litres of Shell Fuelsave95. Mind you the tank still has 13 litres( and 8 litres usable fuel).

So it is around 13.45km/L which to me is very good.

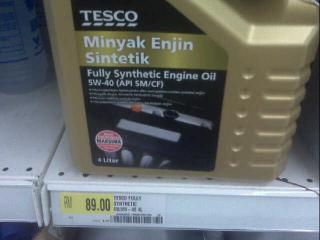
Oh yeah I am currently on Syntium1000 fully Synthethic is that helps?
*
CVT can be more efficient than manual because:

1. The engine can always be revving at the most efficient speed, while for fixed ratio gearboxes the engine typically doesn't stay in the efficient powerband a lot of the time.

2. There is no interruption while accelerating. Even the fastest manual shifters will still have a spilt second when the engine is not driving the wheels between shifts.

3. If you drive a manual properly, you would rev match a lot. Pressing the throttle in neutral or with the clutch disengaged is just wasting fuel.

There are some points for manual driving:

- When accelerating, if you are too slow you waste fuel by not covering ground fast enough, too fast and you also waste fuel by spraying an unnecessarily rich mixture which does not translate into acceleration. I believe there are two different ways which people feel the throttle, first is press to a fixed point immediately and wait for the revs to catch up, the second is to gently ease up the revs while pressing the pedal. The latter is definitely more efficient. Change up when you feel the engine has reached its sweet spot.

- When to shift up? I personally don't think there's a fixed point such as 2,000 RPM. It depends on the traffic situation and road condition. For example if traffic is moving slowly then I shift up really early, by 40 km/h I'm already in 4th gear (gentle acceleration) (bear in mind your Getrag has taller ratios than my Aichi Pockai). If it's an open road ahead then I tend to drag gears a little longer, because if I shift too early, the engine will be well below the efficient torque band, which brings us to the next point...

- Use the correct gear for the correct condition. Ever ridden a multi-speed bicycle? Your car engine feels exactly the same as when you're pedaling a bike. I think people who have spent a lot of time cycling are more efficient manual drivers as they understand the principles of gearing. The first thing to know is that lower RPM does not necessarily mean better efficiency. The low RPM = efficient rule only applies if you're cruising at a constant speed or accelerating *very* gently on flat ground or going downhill. For going uphill, you probably already know that you need to rev higher by using a lower ratio. For example, climbing up a moderate slope at 40 km/h in 4th gear which on my gearbox will give me about 2,000 RPM. With that ratio, you probably have to open the throttle quite a bit to maintain that speed, so a lot of fuel is pumped into the engine but the ratio is too high and you may feel the engine struggle to maintain that speed. However if you climb the same slope at 40 km/h but in 3rd gear, your revs will be closer to 3,000 RPM and you don't have to open the throttle as much as you did in 4th gear, so it's actually more efficient even though your engine revs are higher.

Also other points regardless of gearbox:

- Anticipate the traffic in front of you. Look beyond the car directly in front and observe the traffic flow. My favourite way to measure how well you do this is to watch the brake lights of the car in front and count how many times they brake compared to how many times you brake. I find that generally, for every 5 or 6 times the car in front brakes, I only brake once. Remember that braking converts your car kinetic energy into heat and every time you brake, you have to accelerate and burn fuel to regain your speed. Therefore a driver who brakes minimally is an efficient driver. You must use your brakes when necessary, such as coming to a stop but generally, drive in a manner which minimises braking. In heavy traffic, accelerate gently. Don't attempt to block vehicles cutting in front of you. If you see a red light in front, lift off the throttle and coast.

- The most efficient cruising speed is around 80-90 km/h. Any faster and your engine will be wasting power unnecessarily on overcoming drag from air resistance. Following this rule I managed to hit 546 km on about 34L, gogoman86 who has done 600+ km on a tank will probably tell you the same too.

- If your time is flexible, avoid traffic jams. It's a 20 km drive to office for me every day. In the mornings if I leave at 7 or 8 am, it takes an hour to get to office. However after 9 am the time is reduced to less than half an hour. As for coming home, the earliest time I leave office is 7 pm, because before that various places will be congested. I can leave at about 6+, but I choose to stay to 7+ just to beat the jam.

- Watch the air cond thermostat. The colder your setting, the more often the compressor has to run and more fuel will be burnt. For me, the warmest temperature and blower speed 1 will suffice at night and early morning, during mid-day blower speed 2 and thermostat somewhere in the middle. Also I wait for the engine to warm up first by driving a few kilometres before turning the air-cond. The engine is thirsty when cold and there's no need to add additional load then.

- Generally engine oil has negligible difference on consumption. Been on 15w50 from new until 50,000 km, then switched to 10w30 but I don't think that has improved my consumption. My previous 546 km on a tank and also 20 km/L achieved on a midnight run with davidke20 were on 15w50.

- There's only a certain amount you can do to improve your consumption. When I lived in PJ I could consistently hit below 8L/100 km and get 400-450 km a tank (sometimes more, especially with trips to KLIA), however here in Penang I normally get about 8-8.5L/100km due traffic lights every few hundred metres. I've tried really hard, following all the points mentioned above and going as far as switching off the engine at traffic lights (manual stop-start) but it's still very hard to get below 8L/100 km on this Island. The Campro engine is thirsty by nature and initially available only with poor gearbox choices, but now with the CVT and Getrag manual you guys are better off than us stuck with the older gearbox. So don't feel overly frustrated if your figures are not looking good, apply all the points above and if you're really fed up, sell the Gaga and buy a BiBa / Mirage / secondhand Sawi.

- If you haven't already done so, go sign up for an account at www.fuelly.com so that you can log and analyse your consumption over time.


3 Pages < 1 2 3 >Top
Topic ClosedOptions
 

Change to:
| Lo-Fi Version
0.0685sec    0.83    7 queries    GZIP Disabled
Time is now: 10th December 2025 - 09:40 PM