Welcome Guest ( Log In | Register )

8 Pages < 1 2 3 4 5 > » Bottom

Outline · [ Standard ] · Linear+

 Project Unequal ≠, Light modded Corsair Carbide 400R

views
     
TSunequalteck
post Apr 4 2013, 06:04 PM

Custom member title
*******
Senior Member
2,690 posts

Joined: Dec 2008
From: Kota Kinabalu Current: Wangsa Maju


QUOTE(diaBoliQu3 @ Apr 4 2013, 02:39 PM)
I only can read the text at OCN, but the image are not load. Damn this internet. doh.gif I'm not remember the price. Hehe... I'm thinking of getting Switch 810 at first but somehow, I prefer the Shinobi XL minimalism as I'm a minimal freak, and I was badly poisoned by CyntrixTech Shinobi XL build.

But when to think of it again, I should have pick White Switch 810. sweat.gif
*
yea switch 810 comes with a lot of useful features. if really no more improving space with 400R, that would be my next casing rclxms.gif

QUOTE(usop8290 @ Apr 4 2013, 03:17 PM)
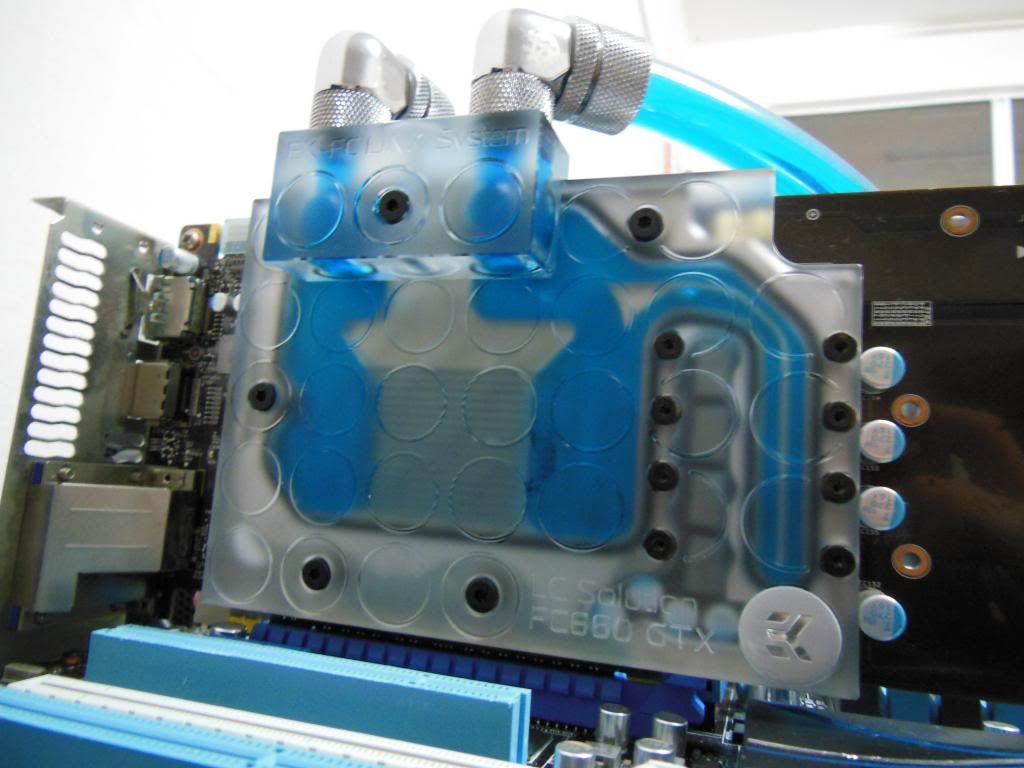
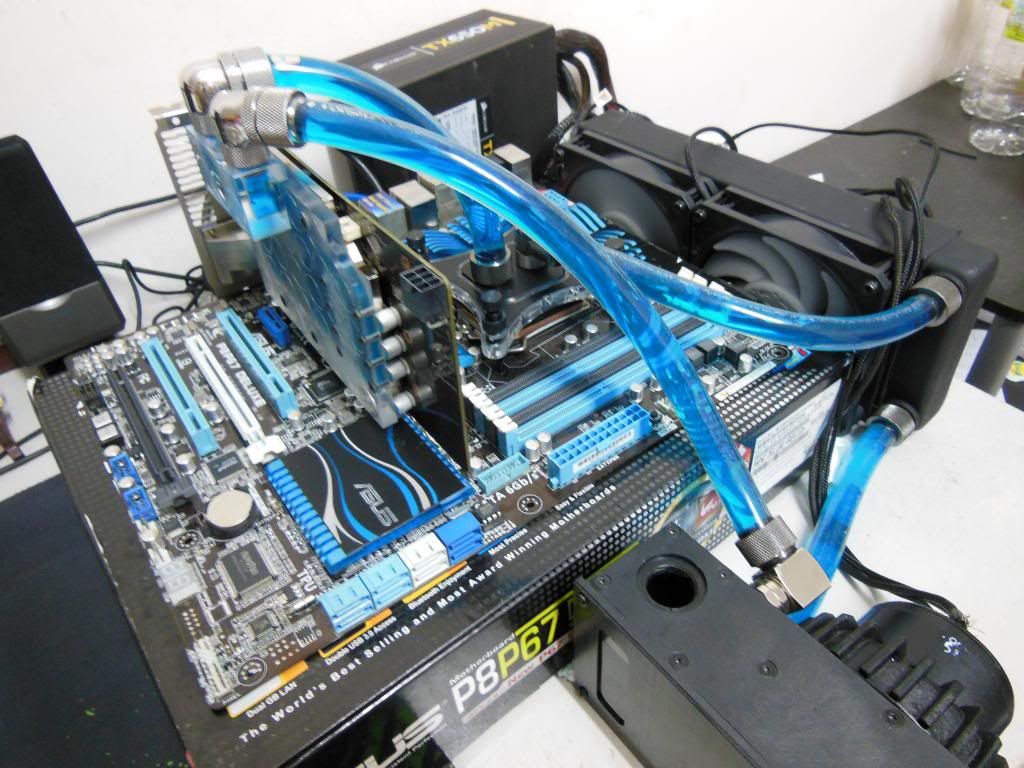
nice color scheme bro  thumbup.gif

btw please update the tubing picture after 2 weeks of use..just want to see how its perform..might grab it later whistling.gif   laugh.gif
*
thanks smile.gif i think this one should can tahan more than that. if not i will suicide for sure.
2 weeks later will post up the tubing picture again

This post has been edited by unequalteck: Apr 4 2013, 06:04 PM
TSunequalteck
post May 1 2013, 01:44 PM

Custom member title
*******
Senior Member
2,690 posts

Joined: Dec 2008
From: Kota Kinabalu Current: Wangsa Maju


draining my system, ready to pack and bring them naik kapal terbang!
and after 4 weeks usage,
user posted image
TOP : XSPC kit stock tubing
BOTTOM : Primochill Advance LRT

now temporary using enermax ELC120
user posted image
torino
post May 1 2013, 02:50 PM

><
*****
Senior Member
978 posts

Joined: Jul 2010
From: Sitiawan, Perak


QUOTE(unequalteck @ Apr 4 2013, 02:22 PM)
teaser!
user posted image

joking, these are not mine. photo taken from APES

tried to take out casing top panel, just to install the rad with pull config but still failed.
as i mentioned before i need to move the rad slightly to the left so that there is no clearance issue, so it's hard to secure the fan and install the rad,
will considering make a shroud and install the fan outside OR custom made an aluminium rad bracket

primochill sysprep
user posted image
it claims that it can make your loop cleaner, no harm trying.
follow the instructions and run the loop
user posted image

filling in the loop with EK-Koolant UV blue after long wait
running the leak test
user posted image

get it done
user posted image

much cleaner than previous lousy xspc kit stock tubing
user posted image
user posted image
*
its a beauty... thumbup.gif
TSunequalteck
post May 21 2013, 06:59 PM

Custom member title
*******
Senior Member
2,690 posts

Joined: Dec 2008
From: Kota Kinabalu Current: Wangsa Maju


QUOTE(torino @ May 1 2013, 02:50 PM)
its a beauty... thumbup.gif
*
thanks thanks notworthy.gif
TSunequalteck
post May 21 2013, 07:18 PM

Custom member title
*******
Senior Member
2,690 posts

Joined: Dec 2008
From: Kota Kinabalu Current: Wangsa Maju


a small update here
EK-FC660 GTX
user posted image

full cover for kepler GK106? it's not worth i know, but the price not much difference with universal block, so why not?

removed MSI twin frozr cooler and put on this!
user posted image

casing out of service, put everything on mobo box first
user posted image

running
user posted image

and this is where the leaking happen, first time installing the gpu WB and didn't put on the o-ring into the FC link
coolant spill all over my mobo, pci-e slot and ram slot all kena coolant.
left it dry for 3 days and turn it back on! now everything working well rclxms.gif

This post has been edited by unequalteck: May 21 2013, 07:20 PM
TSunequalteck
post Jun 10 2013, 07:40 PM

Custom member title
*******
Senior Member
2,690 posts

Joined: Dec 2008
From: Kota Kinabalu Current: Wangsa Maju


continue the work progress
3mm twin led from XSPC quality really bad
have to solder a new LED
user posted image

user posted image

thanks to the person who give me this acrylic sheet for free! notworthy.gif
user posted image

PSU cover incoming
user posted image

rivet HDD cage, not so WC friendly casing
user posted image

user posted image

de-rivet success by using screwdriver and hammer. thanks to irenmodz for guiding
user posted image

user posted image
TSunequalteck
post Jun 10 2013, 07:40 PM

Custom member title
*******
Senior Member
2,690 posts

Joined: Dec 2008
From: Kota Kinabalu Current: Wangsa Maju


next, going to cut off the 5.25" bay bottom as it blocking the rad
user posted image

user posted image

user posted image

user posted image

and the cutting disc broken before i can finish that little cutting
user posted image

thanks to infernoaswen and honeydewboy aka alex wong for bringing me diamond cutting disc
done the cutting!
user posted image

fit nicely!
user posted image

figuring how to place the res and pump
user posted image
TSunequalteck
post Jun 10 2013, 07:41 PM

Custom member title
*******
Senior Member
2,690 posts

Joined: Dec 2008
From: Kota Kinabalu Current: Wangsa Maju


user posted image

thanks to onnjeyyon and xiong91 for suggesting a better idea
to rest the reservoir on the acrylic
user posted image

use some leftover acrylic to make a mount for the front radiator
user posted image

another rad arrived!
user posted image

GTS240 is a very thin rad!
user posted image

epoxy for sticking the psu cover. no acrylic bender so terpaksa use stick
user posted image

user posted image

done joining 2 acrylic together! now ready to put matte black sticker on it
user posted image

TSunequalteck
post Jun 10 2013, 07:42 PM

Custom member title
*******
Senior Member
2,690 posts

Joined: Dec 2008
From: Kota Kinabalu Current: Wangsa Maju


get it done after 3 attempts. not so easy for first timer.
still got a lot tiny bubble around sad.gif
the tiny hole is to show the PSU label but it seems failed in the end sad.gif
user posted image

ready for leak test
user posted image

user posted image

a small drain port behind
user posted image

siap! i know the res is misaligned, but no choice. made some mistake
user posted image

i think it consider completed. MAYBE will add on a fill port, but not so soon.
and high res pictures coming next week, sorry for bad pic quality.

This post has been edited by unequalteck: Jun 10 2013, 07:43 PM
pristine
post Jun 10 2013, 07:51 PM

junkie
*******
Senior Member
2,808 posts

Joined: Jan 2009
From: Subang Jaya


omg. damn ganas use hammer and screwdriver. use drill and an m3/m4 (depending on rivet size) bit next time. haha.
TSunequalteck
post Jun 10 2013, 09:05 PM

Custom member title
*******
Senior Member
2,690 posts

Joined: Dec 2008
From: Kota Kinabalu Current: Wangsa Maju


QUOTE(pristine @ Jun 10 2013, 07:51 PM)
omg. damn ganas use hammer and screwdriver. use drill and an m3/m4 (depending on rivet size) bit next time. haha.
*
lol nvm since all the rivet come out d. no more trouble hahaha
nohal
post Jun 10 2013, 09:59 PM

Gorrila MXE
*******
Senior Member
2,001 posts

Joined: Apr 2007
From: Shah Alam, Selangor
QUOTE(pristine @ Jun 10 2013, 07:51 PM)
omg. damn ganas use hammer and screwdriver. use drill and an m3/m4 (depending on rivet size) bit next time. haha.
*
QUOTE(unequalteck @ Jun 10 2013, 09:05 PM)
lol nvm since all the rivet come out d. no more trouble hahaha
*
I used hammer and a paint scrapper. Kong! Kong! Kong! on that day. biggrin.gif

TS, Nice build! Really like to see you adjust that res mounting, You've put all your hard work, not worth it to stop there. biggrin.gif
TSunequalteck
post Jun 10 2013, 10:54 PM

Custom member title
*******
Senior Member
2,690 posts

Joined: Dec 2008
From: Kota Kinabalu Current: Wangsa Maju


QUOTE(nohal @ Jun 10 2013, 09:59 PM)
I used hammer and a paint scrapper. Kong! Kong! Kong! on that day. biggrin.gif

TS, Nice build! Really like to see you adjust that res mounting, You've put all your hard work, not worth it to stop there. biggrin.gif
*
haha thanks man! res adjust already. see if time allow me to continue or not lol. they said engineer life is horrible
nohal
post Jun 10 2013, 11:07 PM

Gorrila MXE
*******
Senior Member
2,001 posts

Joined: Apr 2007
From: Shah Alam, Selangor
QUOTE(unequalteck @ Jun 10 2013, 10:54 PM)
haha thanks man! res adjust already. see if time allow me to continue or not lol. they said engineer life is horrible
*
You're working as an engineer or studying as an engineering student?
TSunequalteck
post Jun 10 2013, 11:16 PM

Custom member title
*******
Senior Member
2,690 posts

Joined: Dec 2008
From: Kota Kinabalu Current: Wangsa Maju


QUOTE(nohal @ Jun 10 2013, 11:07 PM)
You're working as an engineer or studying as an engineering student?
*
last month was a student. next week gonna be slave engineer huhu
nohal
post Jun 10 2013, 11:39 PM

Gorrila MXE
*******
Senior Member
2,001 posts

Joined: Apr 2007
From: Shah Alam, Selangor
QUOTE(unequalteck @ Jun 10 2013, 11:16 PM)
last month was a student. next week gonna be slave engineer huhu
*
Congratulation and good luck. I'm two semesters away from being slave engineer. tongue.gif

Anyway, nice build and don't forget to post some nice pictures.
infernoaswen
post Jun 11 2013, 01:31 AM

(╯°□°)╯︵ ┻━┻)
*******
Senior Member
3,782 posts

Joined: Aug 2010
From: subang jaya


engineer summoned me? oh wai...awesome build...now that you are going to start working already maybe we can see a quad sli gtx titan soon? hahaha

Anyways how tight is the psu cover? Maybe can add 1 3mm white led right beside the psu label? That might light up the psu label if you wanted to show it biggrin.gif
TSunequalteck
post Jun 11 2013, 12:28 PM

Custom member title
*******
Senior Member
2,690 posts

Joined: Dec 2008
From: Kota Kinabalu Current: Wangsa Maju


QUOTE(nohal @ Jun 10 2013, 11:39 PM)
Congratulation and good luck. I'm two semesters away from being slave engineer. tongue.gif

Anyway, nice build and don't forget to post some nice pictures.
*
Haha no problem! And I tell u the life of becoming slave also hahaha

QUOTE(infernoaswen @ Jun 11 2013, 01:31 AM)
engineer summoned me? oh wai...awesome build...now that you are going to start working already maybe we can see a quad sli gtx titan soon? hahaha

Anyways how tight is the psu cover? Maybe can add 1 3mm white led right beside the psu label? That might light up the psu label if you wanted to show it biggrin.gif
*
Working no more ptptn support no more time for part-time job. Every month need to calculate. No more space for led strip, and I'm using transparent acrylic so look not nice. So the PSU label is a fail haha
nohal
post Jun 11 2013, 03:48 PM

Gorrila MXE
*******
Senior Member
2,001 posts

Joined: Apr 2007
From: Shah Alam, Selangor
QUOTE(unequalteck @ Jun 11 2013, 12:28 PM)
Haha no problem! And I tell u the life of becoming slave also hahaha
Working no more ptptn support no more time for part-time job. Every month need to calculate. No more space for led strip, and I'm using transparent acrylic so look not nice. So the PSU label is a fail haha
*
I'll keep you in touch, collecting information regarding engineering life.
TSunequalteck
post Jun 14 2013, 04:00 PM

Custom member title
*******
Senior Member
2,690 posts

Joined: Dec 2008
From: Kota Kinabalu Current: Wangsa Maju


i thought i can stop, but the CPU temperature giving me headache.
at last decided to reloop everything, and once i open my CPU waterblock, disaster.
i found some tissue stain inside stuck in the jet plate.

here are some more clear pictures. but ignore the bubble at PSU cover. i fed up already sticking that haha
user posted image

user posted image

user posted image

user posted image

user posted image

user posted image

user posted image

8 Pages < 1 2 3 4 5 > » Top
 

Change to:
| Lo-Fi Version
0.0236sec    0.61    5 queries    GZIP Disabled
Time is now: 18th December 2025 - 04:05 AM