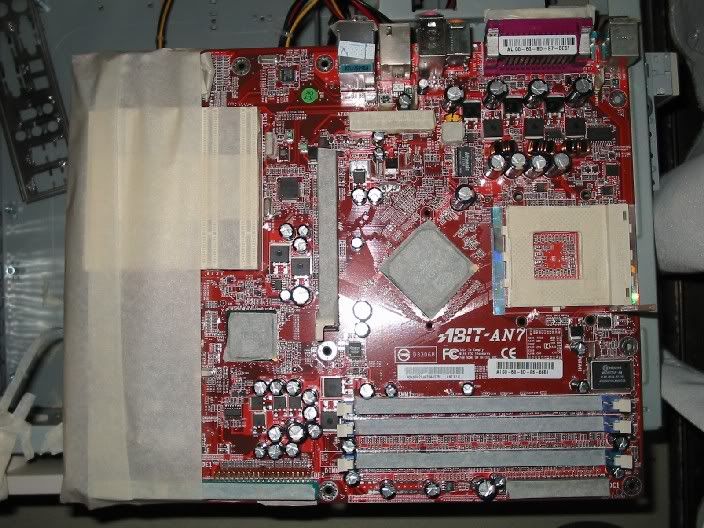
Ok... now come the serios part which is insulating the slocket and slug area.
Objective 2: The Socket and Center Slug.The tools:
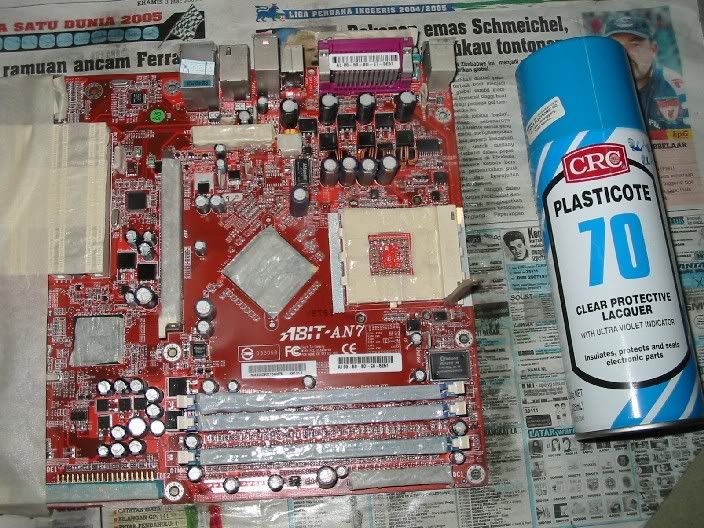
1. BRUSH ON Liquid Electrical Tape (Ace Hardware Ikano: Thanks arj for the recomendation) = RM20.90
2. Syringe (errrr you can get it at certain pharmacy or doctor friend

)
* The Liquid Electrical Tape is used to replace conformal coating laquer. = F.0.C
3. CRC dielectric grease (I've got it at brothers car accessories Melaka) = RM 7.50
4. Clossed Cell rubber (any brand will do, i've got it at and air cond parts shop for RM 5 per 1'x4'x 3/8" and RM 4.80 per 1' x 4' x 1/4" neoprene is hard to come by and expensive @ must import) They called it "Insulating Sheet".
5. NT cutter = err... dunno got one in my house.
6. Ruller/measuring stick (steel)= can't remember how much cause ledi have.
Cost = RM 38.20
The steps:
1. Use the syringe to "suck" the electrical tape from the can and fix it around the socket and inside the center slug. Be extra carefull and fast because this liquid harden within minutes, i've coated only two layers and left it to fix for 3 hours. Approximate time taken : applying 20 minutes, drying 3~4 hours. Move the lever in and out from time to time to ensure it doesn't stuck.
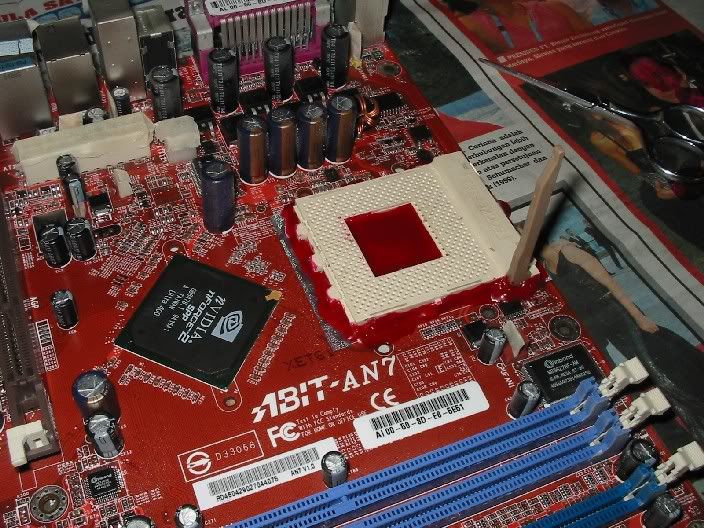
2. After that few hours of fixing and drying, the tape will solidfy and harden, test it by touching it with your fingers. If it still lembik or soft leave it to dry some more. Next is to squirt one tube of CRC dielectric grease on the socket and press it in the holes with your fingers. (Don't squirt the tube in one go, do it little by little bit by bit)
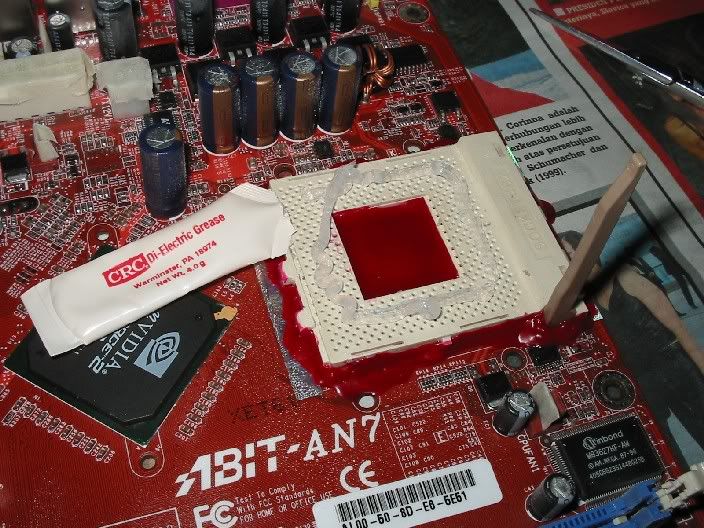
Keep pressing/pushing the dielectric grease and move the socket lever in and out till you can see the grease pond in the socket hole (meaning no matter how hard you try to push the grease it just stay there.) I've used the whole tube. Approximate time taken 10 minutes.
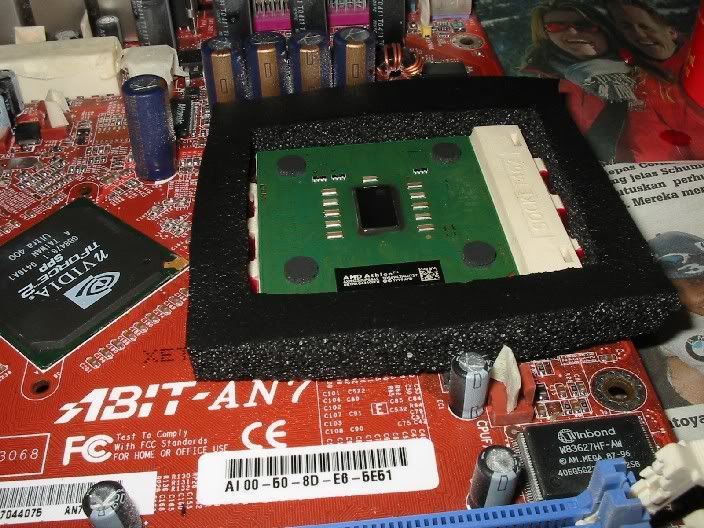
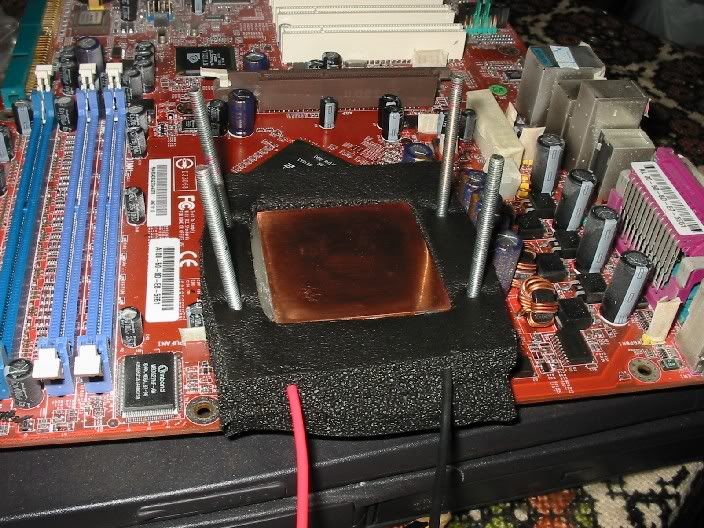
3. Now came the "use your immagination and creativity part". The closed cell rubber either neoprene brand or any brand. Just make sure it is clossed cell rubber!!!. Since mine come in sheet, i've to measure and cut it appropriately according to the sizes of the socket, center slug and later the cold plate+TEC assembly. Approximate time 15 minutes ...till forever (if you've no cutting skills.)
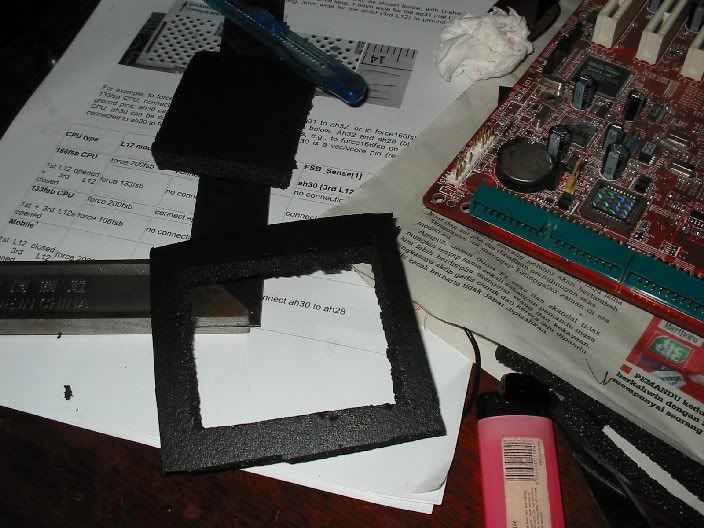
I'm using a normal NT cutter to cut, a steel ruler to marks and measure the cutting are and a lighter to lit my ciggarete

.
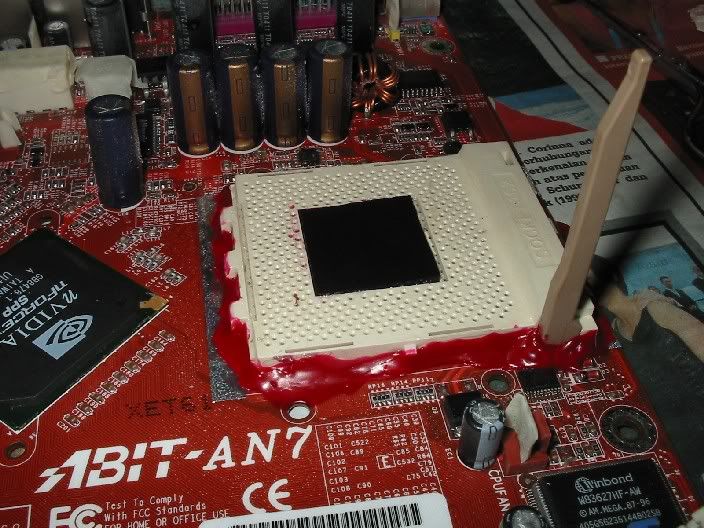
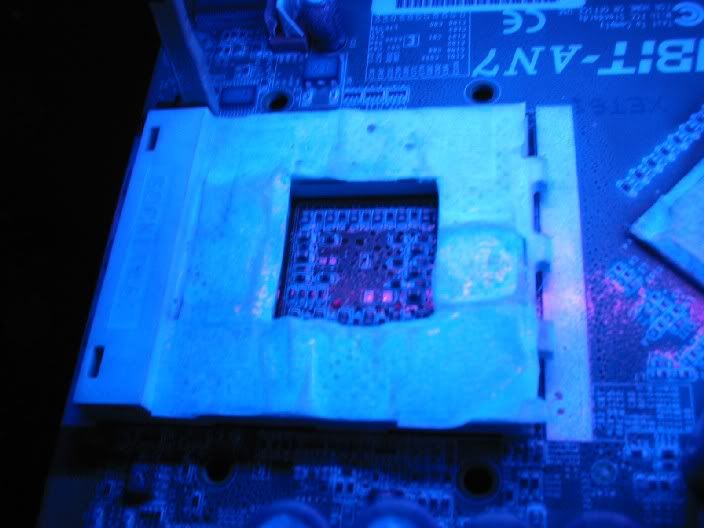
4. Insert a square 1/8" think rubber into the center slug.
Prettty straight forward approximate time 5 ~ 10 seconds.
5. O.K. next is inserting your cpu... err if you wanna do the L12 wire mod do so before this step. Place the cpu gingerly on to the socket and gently swivel it while pushing in. (remember the holes on the socket is filled with dielectric grease thus quite some force is required to push the cpu in) Do so GENTLY but with force. You'll get the idea. Approximate time 5 minutes.
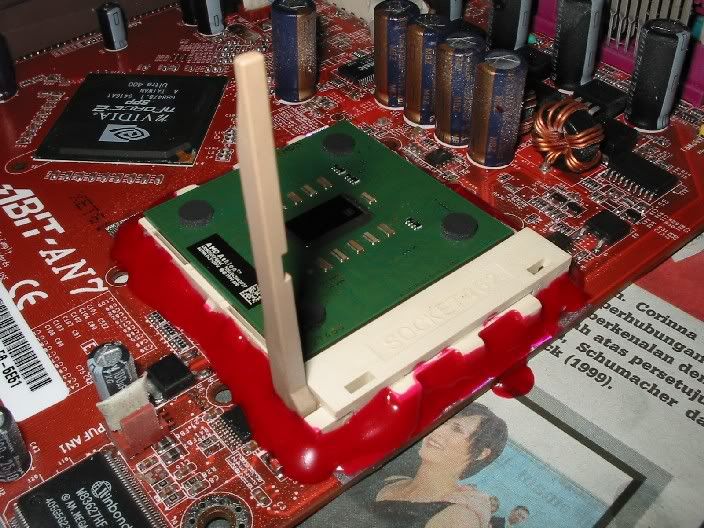
6. Next pust the lever down and fix the prepared insulating sheet around the socket. Straight forward oso, time taken = 2 minutes.
Well i guess that about it then, the mobo is fully insulated.
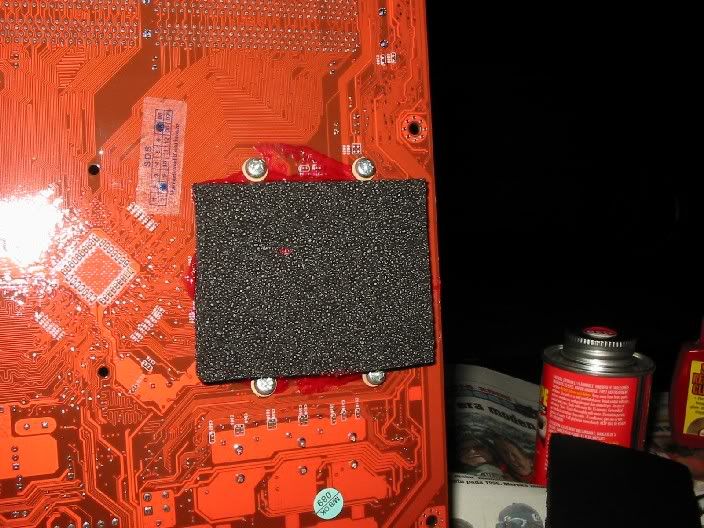
7. Ok one more
the back side story... i've already coated the back side with plasticote 80 but for added assuarance i've brush a layer of electrical tape on the socket pin and stick an isulating sheet on that area. Though some mat salleh said it is unncecessary.. but i'm no mat salleh.
continued...
This post has been edited by amok: Mar 13 2005, 03:54 AM 

 Mar 11 2005, 11:05 PM, updated 20y ago

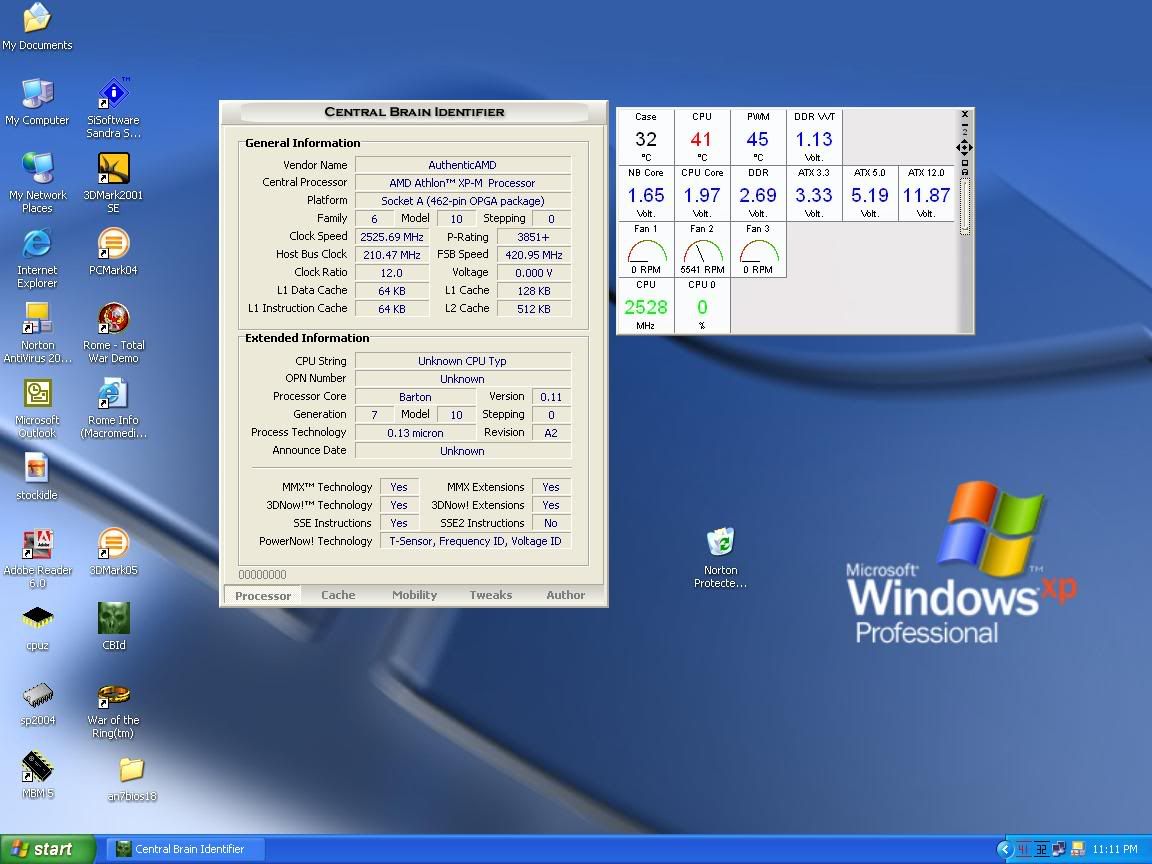
 and confirm the corverage.
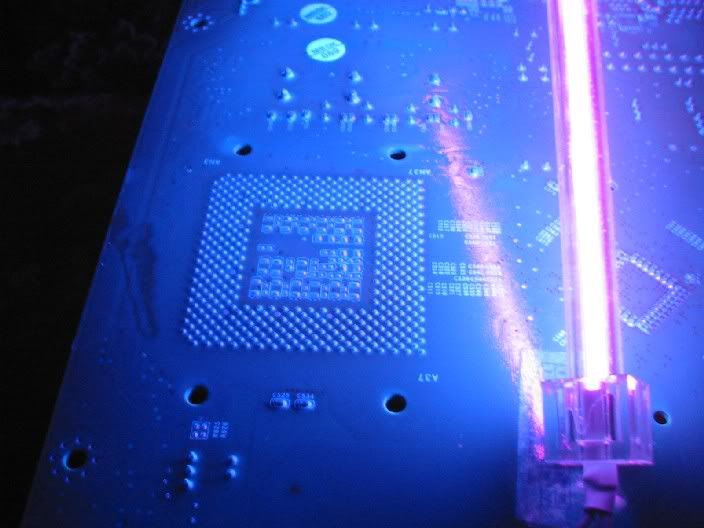
 Quote
Quote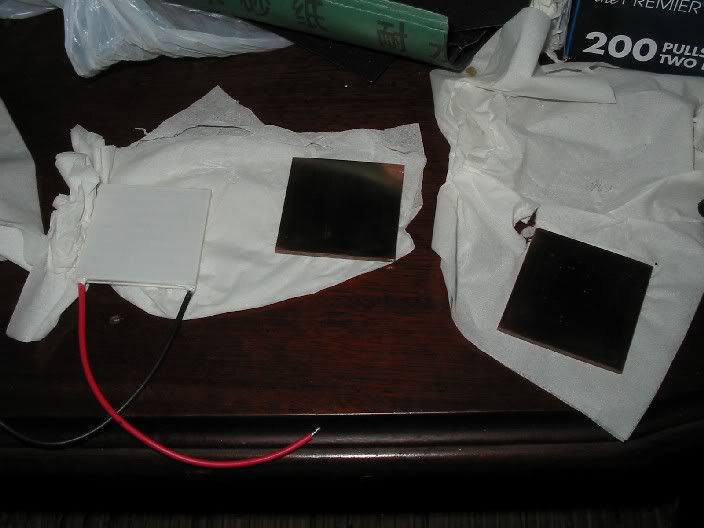
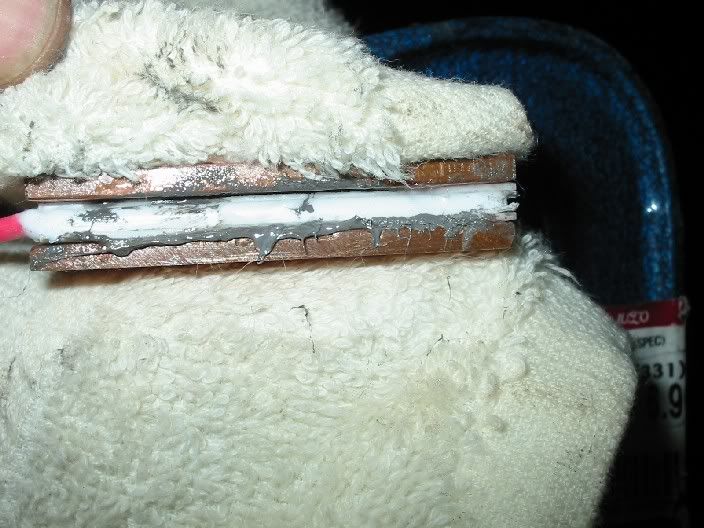


 thank you, thank you, thank you... i've forgot to mention. I'll edit the post. Yes i've put AS5 in between the hot side and the w/block. I'll also put it on the proc (but should have been ASCeramique). The TIM is still curing right now. thank you again.


 , glad you enjoyed reading it.


 0.0171sec
 0.62
0.62
 6 queries
 GZIP Disabled