Welcome Guest ( Log In | Register )

Bump Topic Topic Closed RSS Feed

Outline · [ Standard ] · Linear+

Discussion LYN Football Jersey Talk, Please read page 1 first for infos/R&Rs

views
     
TSschmeichel7
post Jan 8 2010, 02:51 AM

The JERSEYMAN
Group Icon
Elite
2,475 posts

Joined: Jan 2003
From: Shah Alam


I've written a DIY guide at my-fjc forum on how to apply the delicate retro namesets from Wiggy Sports (www.wiggysports.co.uk). They are a challenge to apply and some employees at al-ikhsan might refuse to apply them for you because of it's nature (very delicate and hard to apply, and also the glue is not so strong).

Enjoy:

How to apply the delicate retro namesets from Wiggy Sports (www.wiggysports.co.uk)


Guys...

I know that most of you guys are very familiar with the retro namesets supplied by Wiggy Sports (www.wiggysports.co.uk). They are well known to be very delicate and are very hard to apply. It also does not have a very solid glue as well... Sometimes they can be very fragile, hard to handle and is a bit troublesome to apply. Reason is because the letters and numbers are supplied loosely (not bonded onto a plastic film like the ones supplied by some sellers from Hong Kong).

Due to the nature of the retro namesets from Wiggy, some workers at some stores in Malaysia like Al-Ikhsan decline to apply them for some customers. I understand this because it is very tedious and tricky to apply them...

But you can actually DIY (do it yourself) and apply them properly and correctly.. It's not that hard if you know how to.

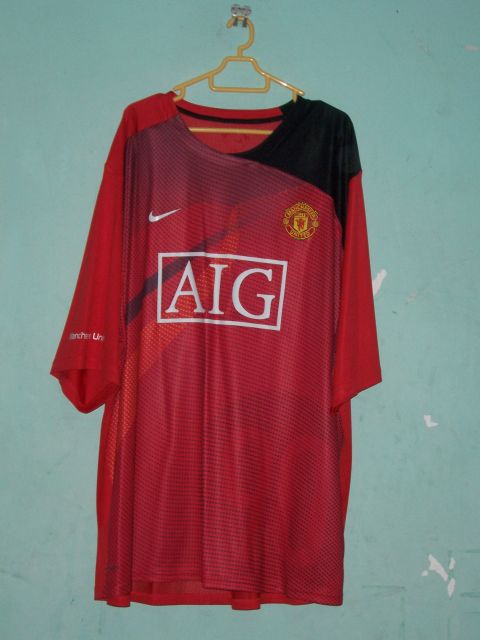
Recently I was asked by a good friend of mine (Keith) to apply 2 retro namesets on his jerseys (Man United 2000-2002 home and Man United UCL 2 Star). It is a challenge that I am willing to take, although it's been a while since I've applied the retro namesets from wiggy... So while doing so, I took some photos and wrote a simple guide for those who want to know the easiest way to apply retro namesets from wiggy (and also to ensure that the namesets bond strongly as well).

Here we go......

1. To apply the Wiggy namesets.. the best way is to not use the masking tape... instead.. you have to put the jersey on top of the ironing board and then later arrange them...

Since the ironing board has 2 sides, one is the front end or narrow point and another is the back end or square shape point (where normally you put your iron on), we will insert the jersey on the back end (the opposite way or backwards):

user posted image
Place your jersey on your ironing board using the backward way...


Reason? So that you will provide maximum coverage area between the ironing board and the jersey's surface. Make sense right? More coverage, more space to arrange the loose wiggy letters with it's outline later..

*Ignore the looks of my trusted ironing board.. The stains you see are not blood, but some colours that bleeded out from some jerseys I ironed.. A lot of red huh? Not surprising since I am a fan of a team that wears red a lot... hihi..

2. Next step is to arrange the letters first..

For the delicate letters, the ones that are a headache and nightmare to apply are the ones with those thin outlines.. How worst could it get if the ones that we are going to apply are the umbro styled letters for the Man United UCL 2 star jersey....

Normally, all letters are pre-arranged according to it's order inside a small square plastic packet. For example, in a plastic packet that contains the name 'BECKHAM', the first letter on top will be the letter 'B', then 'E', then 'C' and so on...

user posted image
The letters inside the small compact square plastic packet


Now... how to remove the delicate letters with it's outline safely from it's plastic packet? The trick here is to use the plastic paper cover located beneath each letter. If you remove the letters directly using your fingers, trust me.. you will make the soft soggy outlines surrounding the letters bended or folded... And it is tedious to reshape it back later.

So... use the paper cover beneath the letters to lift out the letters gently from it's plastic packet:

user posted image
Gently.. remove the letters one by one from it's plastic packet using the paper cover beneath it..


So you are lifting the letters from it's packet using the paper cover.

Once the letter and it's paper cover is completely outside the plastic packet and onto the jersey's surface.. you will then need to gently lift out the paper cover away from the letter.. leaving the letter and it's outline layer completely on top of your jersey's surface:

user posted image
Gently remove and lift out the paper cover that was beneath the letter and it's outline


If you follow the steps shown above (using the paper cover to lift the letters+outline on to the jersey and then to lift out the paper cover), you will ensure that the loose and delicate letters with it's outline are not folded, bended and are placed solidly on top of your jersey. I think the staff and workers at Al-Ikhsan or Real One should follow this method.

OK.. once you've manage to move out all the letters with it's outline intact from the plastic packet on to the jersey's surface.. you have to remove out the small delicate outline shapes that are loose and located inside the letters..

Some letters like A, B, D, O, P, Q, R have that extra outline layer that is located inside the letters. These outline layers are delicate and can accidentally move if you apply them one shot. My advice is to remove them (separate them) first....

For example, for the nameset BECKHAM. the letters A and B have these small loose inside outlines so we remove them out first:

user posted image
Remove the small loose inside outlines that are located inside the letter 'B'

user posted image
Remove the small loose inside outlines that are located inside the letter 'A'


To be continued...

This post has been edited by schmeichel7: Jan 8 2010, 11:09 AM
TSschmeichel7
post Jan 8 2010, 02:51 AM

The JERSEYMAN
Group Icon
Elite
2,475 posts

Joined: Jan 2003
From: Shah Alam


Continued..


user posted image
Put these small loose inside outlines from the letters 'B' and 'A' aside first..


Trust me.. you should do this.. I've had bad experiences before.. where the small loose inside outline moved when I tried to press all the letters at one shot with all it's outline.. Bad experience..

After you've moved out all the small loose inside outlines... you can use your skills and creativity to align and arrange the letters:

user posted image


My tips on this is to ensure that the letters looks nicely arranged from afar.. Ensure that the gaps of each letter are equal and each letters are arranged nicely.

Once you've finished arranging the letters and you're satisfied with it's arrangement, you can start to iron press them directly. Don't worry.. it won't melt... But you have to ensure that your iron is set at medium heat (2 dots or 1 half dots). And another thing to do to ensure that you won't melt or ruin them if you iron them directly is to spray some water.. When there is water, not only it reduces the chances of you ruining them but also to help encourage some bonding of it's not so strong glue.

So.. before you start to iron them directly... spray some water first directly to the letters:

user posted image
Spray some water directly on top of the letters. Reason so that it won't melt or ruin when you iron them directly


Then... carefully iron press them gently directly using your iron. PLEASE MAKE SURE THAT YOUR IRON IS NOT SET TO MAX HEAT (3 dots). Or else..you might ruin the namesets.. Especially if you didn't sprinkle some water on top of it... I've experienced this before... very bad experience..

So carefully iron press them gently and directly using your iron:

user posted image


You don't have to press them.. a gentle iron is just to ensure that the letters and it's outline are glued temporarily.. But trust me, this alone IS NOT ENOUGH.. because the glue of the letters are not so strong.. It needs extra heat and pressure.. that we will deal later.

After you've ironed the letters, you can then insert back the small loose inside outlines that we temporarily isolated earlier. But be careful! When you want to insert them back.. ensure that the area where the glue exists is placed correctly facing below. Because the shape is the same no matter how you flip it top or bottom, there is a risk that you might accidentally placed the small outline layer wrongly, where the glued area is facing on top.. and then you iron it.. You will then screw it!

So.. ensure that the area where you can safely iron on top of it, is facing on top before you place it back:

user posted image
Make sure this layer is facing up when you place back the outline inside the letter

user posted image
Make sure this layer is facing down when you place back the outline inside the letter

user posted image
Place the small loose inside outline inside the letter 'B'

Iron press it gently and carefully.. Remember to use 2 dots and to sprinkle some water first.

Then.. you need to find a plain cloth (do not use a coloured cloth like a kain pelekat.. or else the colour might bleed on to the letters/numbers) and cover the area where the letters were ironed gently previously:

user posted image
Cover the letters using a plain cloth


For the example above, I borrowed again my wife's telekung (prayers veil)... hehe.. Then once you've covered it completely, set your iron to MAXIMUM HEAT (3 dots). Then, press FIRMLY on top of the letters for 8-10 seconds:

user posted image
Press firmly the letters with maximum ironing heat


You can also squeeze the letters by using both hands.. One hand is pressing your iron and another is pressing your ironing board beneath it, Trust me you need this extra squeeze because the glue is not so strong. Ensure that you've covered the letters with the plain cloth so that you will not burn or melt the letters..

With this super extra squeeze.. the bonding of the letters are very good and solid:

user posted image
The letters after being squeezed and pressed firmly


To be continued..

This post has been edited by schmeichel7: Jan 8 2010, 03:35 AM
TSschmeichel7
post Jan 8 2010, 02:51 AM

The JERSEYMAN
Group Icon
Elite
2,475 posts

Joined: Jan 2003
From: Shah Alam


Continued..

You've completed the 1st part of this activity.. Now you need to apply the number..

The method for applying the number is exactly the same.. Except that you don't have to isolate and remove any small loose inside outline since the numbers are normally huge and larger compared to the letters.. But still, follow the same steps shown earlier for the letters...

Again, the retro numbers from wiggy are also packed and sealed inside a plastic packet just like the letters. And just like the letters, beneath the number where the glue area is, there is a paper cover covering it:

user posted image
The retro number 7 inside it's sealed plastic packet and with it's paper cover beneath it


Same as the letters, use the paper cover beneath the number to lift out the number from the plastic packet.. Do not use your finger to directly move out the number, because you might ruin (bend or fold) the delicate outline around the number:

user posted image
Use the paper cover beneath the number to move the number out from it's plastic packet


Then, arrange the number to it's correct alignment and position.

After you're satisfied with it's placement... set back the iron's temperature back to 2 dots (medium heat). Sprinkle some water. Then iron the number directly.. press gently to ensure some bond exists:

user posted image
Iron the number gently and ensure that it's sprinkled with some water


As you noticed in the photo above, the number 7 is not solid but a bit soggy.. This is because the number was folded and bent earlier when it was still in it's plastic packet. If this happens, don't worry, you can fix it by ironing it.. The ironing process not only bonds the number to the jersey's surface but also smooths the surface of the soggy number.

Once done, cover the number with a plain cloth:

user posted image


Then... again, set the iron to maximum heat and squeeze the number (iron press FIRMLY on top of the covered number using one hand and press the ironing board beneath it using another hand). Squeeze for 8-10 seconds... Use as much pressure as you can.. just don't break the ironing board ya hehe:

user posted image
Iron press firmly on top of the number using one hand, press beneath the ironing board using another hand


Finally.. to ensure that the glue is bonded, flip your jersey inside out:

user posted image


Then iron press the area where the nameset sits... You can use maximum heat on your iron since if marks are left.. it's inside your jersey:

user posted image


Let it cool for a while...

Walla... final results:

user posted image
Man United UCL 2 Star with BECKHAM 7


Here is another jersey that I applied for Keith:

user posted image
Man United 2000-2002 Home Jersey with BECKHAM 7 and AXA Charity Shield patches


Coincidentally, for both jerseys.. I almost arranged the letters BECKHAM using the same alignment and arrangement.. Strangely.... as if it was factory manufactured hehe:

user posted image
There's only 2 BECKHAMs


How does it feel to DIY your jersey?.............. Awesome.

This post has been edited by schmeichel7: Jan 8 2010, 02:52 AM
nimrod2
post Jan 8 2010, 02:59 AM

the imba one
*******
Senior Member
2,521 posts

Joined: Jan 2006
From: UrbanSubangJaya


excellent guide there dude thumbup.gif
TSschmeichel7
post Jan 8 2010, 03:39 AM

The JERSEYMAN
Group Icon
Elite
2,475 posts

Joined: Jan 2003
From: Shah Alam


Thanks nimrod...

For those who want to order any retro namesets from wiggy:

user posted image


You can purchase them from www.wiggysports.co.uk. Payment is made via paypal and they can deliver the namesets to you by using Royal Mail (either normal Airmail or Registered Mail).

user posted image
One of jerseyman's previous orders from Wiggy Sports

user posted image
England retro namesets previously purchased and ordered from Wiggy Sports (chcher, do you remember them? hehehe..)

dragonrock
post Jan 8 2010, 07:33 AM

New Member
*
Junior Member
4 posts

Joined: Jun 2009
user posted image

user posted image

user posted image
Makakeke
post Jan 8 2010, 09:23 AM

Casual
***
Junior Member
310 posts

Joined: Jan 2007
Good guide there jerseyman!

The 1 star and the 2 star shirt has a very fragile cloth material though, I've burnt a hole in my 1 star before while ironing the nameset on it, traumatized until now. And I agree about the extra step of ironing with extra heat. Those namesets have really weak glue.
ckimy
post Jan 8 2010, 09:41 AM

New Member
*
Newbie
3 posts

Joined: Sep 2008
From: Singapore / Johor Bahru


QUOTE(redyap @ Jan 8 2010, 12:12 AM)
hi bro, when you become to get interested AC Milan jersey?? Because of Beckham?? haha....
you better get it through KITBAG..... brows.gif
*
cos of beckham only brows.gif

QUOTE(schmeichel7 @ Jan 8 2010, 02:51 AM)
» Click to show Spoiler - click again to hide... «


How does it feel to DIY your jersey?.............. Awesome.
*
nice guide there, bro jerseyman thumbup.gif
redyap
post Jan 8 2010, 11:32 AM

New Member
*
Junior Member
4 posts

Joined: Jul 2009


QUOTE(ckimy @ Jan 8 2010, 09:41 AM)
cos of beckham only  brows.gif
nice guide there, bro jerseyman  thumbup.gif
*
hey bro, wanna share share??
i plan to get away 1.... brows.gif

ckimy
post Jan 8 2010, 11:58 AM

New Member
*
Newbie
3 posts

Joined: Sep 2008
From: Singapore / Johor Bahru


QUOTE(redyap @ Jan 8 2010, 11:32 AM)
hey bro, wanna share share??
i plan to get away 1.... brows.gif
*
share wat?

where u wan buy from? blink.gif
redyap
post Jan 8 2010, 12:00 PM

New Member
*
Junior Member
4 posts

Joined: Jul 2009


share postage...hehe... AC MIlan away..
ckimy
post Jan 8 2010, 12:51 PM

New Member
*
Newbie
3 posts

Joined: Sep 2008
From: Singapore / Johor Bahru


QUOTE(redyap @ Jan 8 2010, 12:00 PM)
share postage...hehe... AC MIlan away..
*
u mean from milan store or kitbag?

i got no budget on this month liao T_T

jus got my 07/08 away few days ago...
redyap
post Jan 8 2010, 01:00 PM

New Member
*
Junior Member
4 posts

Joined: Jul 2009


sure from kitbag lo....naybe subside....
ic, there is good le, you get 07/08 finally... remember to update your hauls
ic3rock
post Jan 8 2010, 01:17 PM

AkuNooB
*******
Senior Member
3,586 posts

Joined: Apr 2009
From: Singapore / Kuching


QUOTE(ckimy @ Jan 8 2010, 12:51 PM)
u mean from milan store or kitbag?

i got no budget on this month liao T_T

jus got my 07/08 away few days ago...
*
Then wait for next month, whistling.gif
nimrod2
post Jan 8 2010, 01:33 PM

the imba one
*******
Senior Member
2,521 posts

Joined: Jan 2006
From: UrbanSubangJaya


saw this famous car on the road about a week or two ago.

my gf got take the pic i think.

u know who's the owner ah?
ic3rock
post Jan 8 2010, 01:39 PM

AkuNooB
*******
Senior Member
3,586 posts

Joined: Apr 2009
From: Singapore / Kuching


This pic is a lyn forumer pm me and sent to me, i not sure he is the owner of the car anot, but he did asked where i get the previous pic. Then anyone give commend on it anot not..
giotto
post Jan 8 2010, 02:41 PM

Look at all my stars!!
*******
Senior Member
3,051 posts

Joined: Apr 2006
Far East,
I notice you have the Portsmouth 3rd kit too. The one with jobsite frontal sponsor.
TSschmeichel7
post Jan 8 2010, 04:07 PM

The JERSEYMAN
Group Icon
Elite
2,475 posts

Joined: Jan 2003
From: Shah Alam


QUOTE(giotto @ Jan 8 2010, 02:41 PM)
Far East,
I notice you have the Portsmouth 3rd kit too. The one with jobsite frontal sponsor.
*
Yeah.. I grab one since it was quite cheap at kitbag.

Anyway................. as usual. Every January in each year, Nike will always launch a new training/polo t-shirt range for United and other nike sponsored teams like Arsenal, Barca, Inter etc etc..

This is the new Jan 2010 training jersey range for United:

user posted image user posted image

user posted image user posted image

user posted image

The new Jan 2010 polo t-shirt range for United:

user posted image user posted image

My verdict: Poor design. Surprisingly this year's new year training kit and t-shirt polo range is a huge let down because normally they are better than the early season (mid year) training kit and t-shirt polo range. Example of good new year training kit designs were the Jan 2009 and Jan 2007. Jan 2008 wasn't bad either.

Here are the best 3 new year training kit range by Nike for United:

user posted image
Man United's new year training kit for January 2009

user posted image
Man United's new year training kit for January 2008

user posted image
Man United's new year training kit for January 2007


*These new year training kit range always appears on January every year.. They are the 2nd round of nike training kit range after the 1st range was launched along together with the team's new replica kit on every new season (mid year).

And we can see that nike is using Dri-Fit technology for the football kit apparel. So I guess the new replica jerseys for World Cup 2010 and next season (2010/11) might follow suit as well....


Man U fan
post Jan 8 2010, 04:52 PM

New Member
*
Newbie
0 posts

Joined: Jan 2010


hey could please help me. i need to know if this jersey is real or fake.


Added on January 8, 2010, 5:01 pmhey can anyone help me i need to know if my jersey is real or fake
here is a pic.

This post has been edited by Man U fan: Jan 8 2010, 05:31 PM


Attached thumbnail(s)
Attached Image Attached Image Attached Image
Makakeke
post Jan 8 2010, 05:25 PM

Casual
***
Junior Member
310 posts

Joined: Jan 2007
QUOTE(Man U fan @ Jan 8 2010, 04:52 PM)
hey could please help me. i need to know if this jersey is real or fake.


Added on January 8, 2010, 5:01 pmhey can anyone help me i need to know if my jersey is real or fake
here is a pic.
*
Hi bro, we need more pics. Tag number, sizing label, inner washing tag, etc..

BTW, if you're really a United fan, i suggest you change your nickname smile.gif

Topic ClosedOptions
 

Change to:
| Lo-Fi Version
0.0297sec    0.63    6 queries    GZIP Disabled
Time is now: 28th November 2025 - 03:05 PM