Welcome Guest ( Log In | Register )

Outline · [ Standard ] · Linear+

 Project: B&W Temjin 07, Watercooled Silvertone TJ-07 in B&W

views
     
TSr4st4m4n
post Aug 17 2009, 01:03 AM, updated 16y ago

Getting Started
**
Junior Member
156 posts

Joined: Aug 2007
From: Damansara


The project

The title says it all: my project is to build a watercooled Silvertone TJ-07 and I'd like to keep as much as possible everything black and white.
This is my first ever case mod and also my first ever water cooled PC, so it is quite a challenge. But hey, there is always a first time.

My goal is to have a nice and clean system and try to keep the modding at a minimum. I don't like the *bling* and since I have no modding experience, I won't go for extensive modifications (at least for now). This is also the reason why I chose the TJ-07 as it has lots of room and can be used for water cooling with little modifications.

The purpose of this worklog is more to get help and suggestions from more experienced forumers rather than really share my knowledge, since I have pretty much everything to learn. But I hope at the end, this worklog will help inexperienced users and maybe help them to take the jump into building their own project.

The Hardware

For the rig, I am reusing the components I have currently as I have a limited budget and pretty much everything is going for the purchase of the case, the water cooling components, the tools and other bits needed in the project.

SYSTEM
CPU: Intel Quad Core Q6600
Mobo: GA-X48-DQ6
RAM: 2x1GB Ballistix tracers DDR2-800 4-4-4-12
GC: Sapphire HD 4870
HDD: WD Velociraptor 150 GB (system) + WD Green 500GB (data)
PSU: Corsair TX 850W
Case: Silvertone TJ-07 Black with window

I am planning to get a new GC and mobo with black PCB to fit with the theme, but I'll wait for a worthy upgrade, like the ATI 5870 and either the Core i5 or the 32nm Core i7.

Water cooling (ordered)
(1) Heatkiller 3.0 LT LGA775
(1) Heatkiller LGA775 back plate
(1) swiftech MCP655 vario (5 speed control)
(1) Swiftech MCR320-QP Triple 120mm Radiator
(3) Scythe 120x25mm SlipStream SY1225SL12H - 88 CFM
(10) feet of 7/16" ID (5/8" OD) tygoon Tubing
(1) EK-Multioption RES 250 rev.2
(1) Swiftech MCW-60R GPU waterblock
(8) 1/2" DTEK High Flow Chrome barbs

I welcome any comment on the WC stuff, but since it is already ordered, I cannot change it anymore. Having done a lot of search, I think it should perform quite well though.

The Tools

As I said, it's my first case mod, and since I work as a software developer, I have never really had the need to buy tools other than the ones required to build furniture from IKEA. So currently, my tools are quite ... limited rolleyes.gif

user posted image

The worst is that most of the junk in that box will be useless for this build. The only really useful tools are the short (worn out) philips screwdriver and the "T" shape (worn out) multi head screwdriver.

It's not easy to actually works with so little tool so I'll probably get some more as the project requires. But meanwhile it is interesting as you have to make your brain work hard to find solutions to problems which would be solved in 1 minute with the right tool. Surely not the fastest way, but it is a lot more fun tongue.gif

The Goals

My main goal is to have fun. I have always been fiddling with my computer, being it on the software side or on the hardware side. I have done some soft and hard mods on it, but never got into the whole case mod project. Same goes for water cooling. I have been reading a lot on the subject but never take the plunge. It seems a lot more fun that air cooling though (just slap the cooler and be done with it), that's why I decided to go water on this project.

In term of end result, I would definitely want to have something which some close to the murderbox (http://www.murderbox.com/gallery.html) and it is when seeing the gorgeous builds of Charles H. that it made me wants to build my own TJ-07. But seeing how awesome are this TJ-07, even if I end up with a build looking half as good as the murderbox, I will be more than satisfied.

Ok, enough talk and let's start with the project.

15 august 2009

I got the case today. Prior to the start of the project, I had a lot of hesitations as to which case I would use. After seeing the TJ-07 from up close, it erased all my doubts. This case is really gorgeous and there is a lot of room for all the WC gears.

click on the pictures for higher resolution

user posted imageuser posted image

Something I don't really like about the black TJ-07, it is it's shiny aluminum interior. So one thing was clear in my mind from the start, I have to paint the interior, and I decided that a flat back would fit nicely with the black brushed aluminum exterior.

So first thing to do, is to take the case apart.

user posted image

This case is not only beautiful, but also very practical. Unlike most cases, almost everything is held by screws rather than rivets, which make it very easy to deconstruct for painting. The only thing which is held by rivets are the parts of the motherboard tray and the rails of the motherboard tray.

So now I already encountered my first interrogation in this project: how should I paint the inside of the case ?

1) My first thought was to have it powder coated. It will definitely looks good but the problem is to find a place that can do it for an affordable price.
2) I can have it professionally spray painted, should be easier to find for a better price than the powder coating
3) I can spray paint it myself. The problem is I have never painted anything. But this solution has the advantage of being a lot more fun than having it made by someone else wink.gif

16 august 2009

So the idea of painting the interior myself grew up on me. After some "painting 101" reading on the Internet, I decided to go to the hardware shop and grab a can of primer, a can of flat back, a can of rubbing alcohol to clean the surfaces before applying the primer and some 2000 grid sand paper.

user posted image

Oh and while I was there, I also decided to start my collection of "real" tool:

user posted image

Ok, that's still a bit light biggrin.gif
But it will make a big difference for me as I had a hard time with some of the screws yesterday, since my screwdrivers head were all worn out.

Ok, so as I said, I have never painted anything in my life, so rather than go straight for the interior of the case and possibly screw things up, I am going to do some testing first.

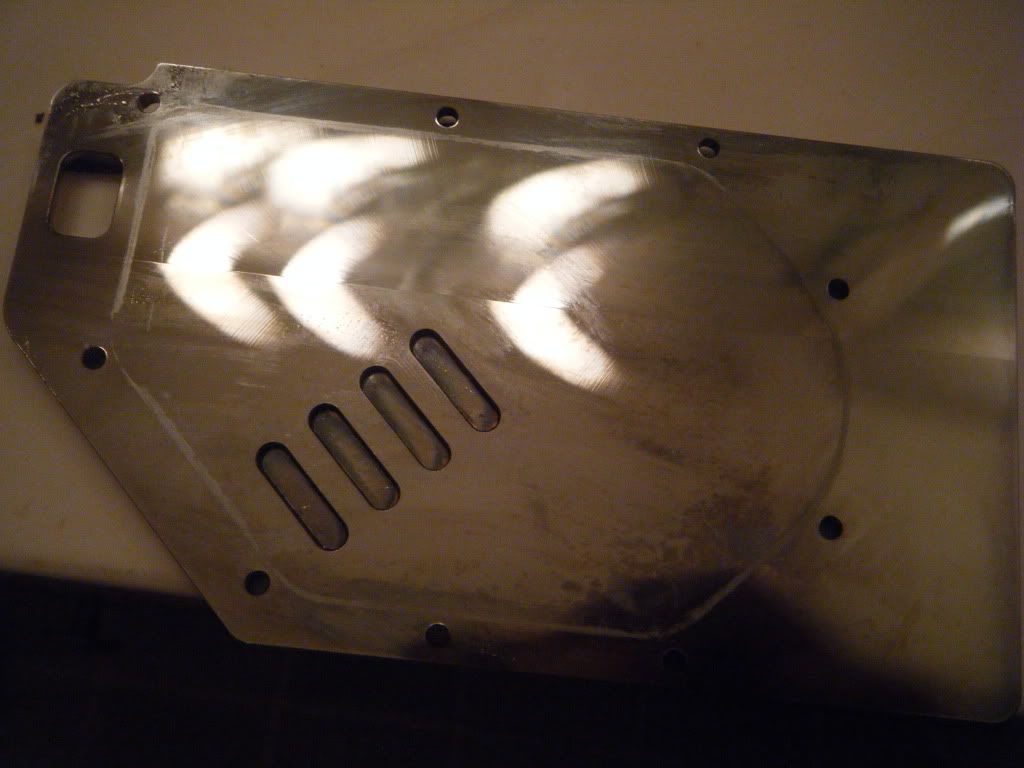
My victim will be the hard drive cage (when I told you my painting skills were questionable at best)

user posted image

I chose the HDD cage for two reason:
1) There are two in the TJ-07 and with the WC gears, I will have at best only place for one of them in the case.
2) I might have to relocate the HDD in the 5.25 bay because of the radiator taking most of the space at the bottom of the case. So I might not use the HDD cage at all and buy some 5.25 to 3.5 adapters. Although after a quick look at it, I might be able to fit the the HDD cage into the 5.25 with some slight modification.

For the result, either my painting skills will suck badely, and I still have the spare HDD cage if I need it. Or the painting will turn half good and the HDD cage being in a spot not really visible, I might still be able to use the painted one. Or the painting turns out good enough to use the painted cage and it will give me confidence to do the rest of the interior.

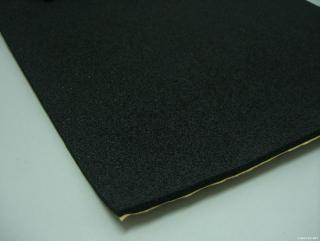
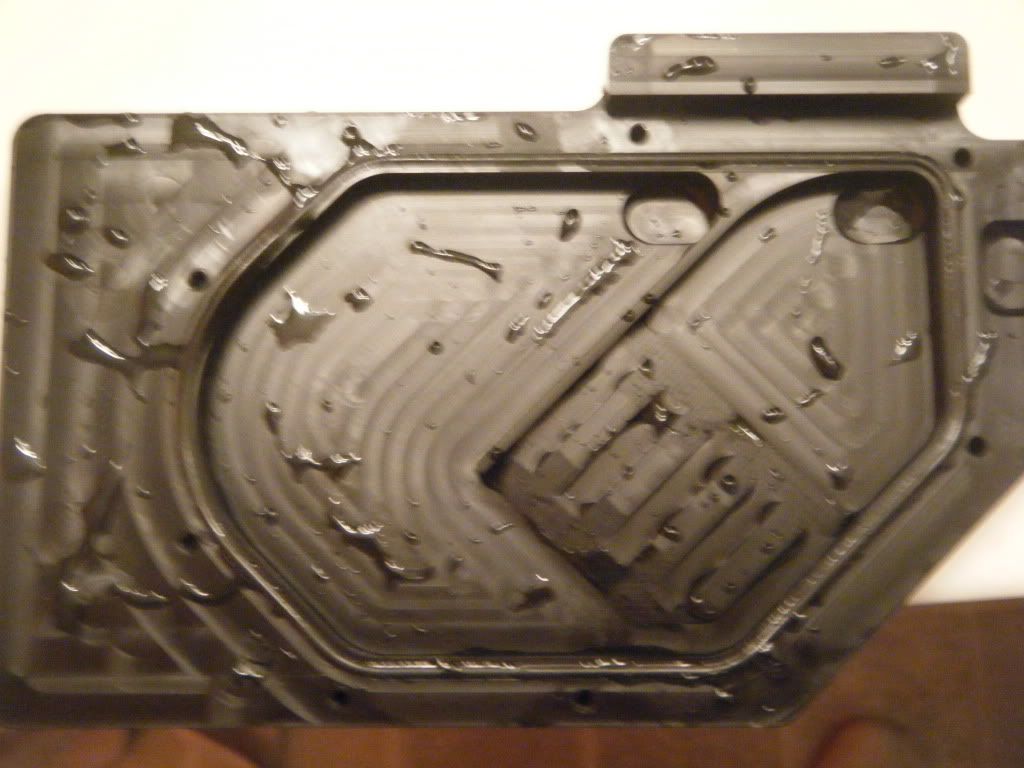
So first I have to wet sand the HDD cage:

user posted image

And this what it looks like up close after cleaning:

user posted image

I just sanded it slightly to ensure the primer and the paint would stick properly to the bare aluminum. I might have been able to just apply the primer without sanding, but from what I read, even if the end result may look okay, chances that it will chip easily and not last over time.

Next was to setup my spray boot (any resemblance with a plastic table cover with newspaper is purely coincidental rolleyes.gif )

user posted image

Then I wanted to apply the primer, but realized it was night already. I think it will be better if I spray during day time as I will be less likely to make mistake.

So that's it for now. I'll probably apply the primer and the paint tomorrow and will keep you updated on the result.

Meanwhile, I welcome any comments or suggestions on my project.
I am still not sure whether I will paint the interior myself. I guess I'll have to wait to see the result of the HDD cage. So if anyone knows a place in PJ where I can have the interior powder coated or spray painted, please let me know. wink.gif

I am already in the process to get a quotation for spray paint, but I would definitely want to have several quotations to have more choice.

17 august 2009

see post no 3: http://forum.lowyat.net/index.php?showtopi...post&p=27995884

18 august 2009

http://forum.lowyat.net/index.php?act=ST&f...0#entry28030588

21 august 2009

http://forum.lowyat.net/index.php?showtopi...post&p=28098768

22 august 2009

http://forum.lowyat.net/index.php?showtopi...post&p=28118838

24 august 2009

http://forum.lowyat.net/index.php?showtopi...post&p=28169449

25 august 2009

http://forum.lowyat.net/index.php?showtopi...post&p=28193583

27 august 2009

http://forum.lowyat.net/index.php?showtopi...post&p=28246423
http://forum.lowyat.net/index.php?showtopi...post&p=28246780

28-31 august 2009

http://forum.lowyat.net/index.php?showtopi...post&p=28325470
http://forum.lowyat.net/index.php?showtopi...post&p=28325502

12 september 2009

http://forum.lowyat.net/index.php?showtopi...post&p=28593654

This post has been edited by r4st4m4n: Oct 8 2009, 01:01 AM
lun1986
post Aug 17 2009, 09:38 AM

Enthusiast
*****
Senior Member
939 posts

Joined: Jan 2007
wait ur wc setup
TSr4st4m4n
post Aug 17 2009, 12:35 PM

Getting Started
**
Junior Member
156 posts

Joined: Aug 2007
From: Damansara


17 august 2009

Today, I have painted the HDD cage.

After 3 (thin) layer of primer:

user posted imageuser posted image

And after 4-5 thin layer of paint:

user posted imageuser posted image

I'm quite happy with the result. The first layer of primer was not that great as I tried to apply too much paint and from to close. There was 2-3 spots with too much paint. So I waited ~30 min and sanded very lightly these spots to ensure they were flat. After that, I applied very thin layer of primer/paint and waited ~10 min between two applications. I have waited about ~30 min between the last application of primer and the first of paint.

Since the result is quite good, I think I'm going to paint the whole interior myself. So, the rest of the week will be for sanding and painting. It will keep me busy while waiting for the WC stuff to arrive.


This post has been edited by r4st4m4n: Aug 17 2009, 06:33 PM
yuktsi14
post Aug 17 2009, 02:31 PM

Gloomy Sunday
*******
Senior Member
2,585 posts

Joined: Mar 2008
From: Sibu, Sarawak


it is a waste to paint the alu parts

kilowatt
post Aug 17 2009, 05:31 PM

AysNdj
*****
Senior Member
717 posts

Joined: Nov 2007
From: meLaka-kaYheLL


murderbox is killing me vmad.gif mad.gif cry.gif ...

btw gud luck on ur mod thumbup.gif ....waiting for update nod.gif ..
suicideroach
post Aug 17 2009, 05:47 PM

kiss mah a^^
******
Senior Member
1,494 posts

Joined: Dec 2005
From: Wangsa Maju


flat back or fade black? tongue.gif
TSr4st4m4n
post Aug 17 2009, 06:37 PM

Getting Started
**
Junior Member
156 posts

Joined: Aug 2007
From: Damansara


QUOTE(yuktsi14 @ Aug 17 2009, 02:31 PM)
it is a waste to paint the alu parts
*
I personally don't like the shiny aluminum since I am going for a clean "stealth" look. But I guess it all comes down to personal preferences. smile.gif

QUOTE(kilowatt @ Aug 17 2009, 05:31 PM)
murderbox is killing me  vmad.gif  mad.gif  cry.gif ...

btw gud luck on ur mod  thumbup.gif ....waiting for update  nod.gif ..
*
Lol. Thanks.

QUOTE(suicideroach @ Aug 17 2009, 05:47 PM)
flat back or fade black? tongue.gif
*
Flat black, that's what written on the can anyways wink.gif

UPDATE: see post no 3: http://forum.lowyat.net/index.php?showtopi...post&p=27995884

This post has been edited by r4st4m4n: Aug 17 2009, 06:37 PM
swmung
post Aug 17 2009, 06:57 PM

Getting Started
**
Junior Member
73 posts

Joined: Dec 2006
From: Cheras cheras cheras !!!!


bro,after spray alu surface still have those brush effect anot ??
TSr4st4m4n
post Aug 17 2009, 07:44 PM

Getting Started
**
Junior Member
156 posts

Joined: Aug 2007
From: Damansara


QUOTE(swmung @ Aug 17 2009, 06:57 PM)
bro,after spray alu surface still have those brush effect anot ??
*
No, the brush effect disappear with the paint. When looking up close, there is actually a slight "orange skin" texture due to the spray painting:

user posted imageuser posted image

That would be bad if I'd go for a shiny/mirror black finish. But since I am going for a flat black, it actually helps to give the "stealth" effect to the paint (the flatter the paint job is, the shinier it looks).
k3lvinng007
post Aug 17 2009, 08:02 PM

Casual
***
Junior Member
311 posts

Joined: Mar 2009


nice paint job bro...
AlexLee277
post Aug 17 2009, 10:56 PM

Dihujani kenangan masa lalu
*******
Senior Member
4,221 posts

Joined: Dec 2007
From: Somewhere on Earth


wow... 1st time already so nice..
see my project... all project also got runied paintjob.. cry.gif
overclockalbert
post Aug 17 2009, 11:50 PM

Regular
******
Senior Member
1,058 posts

Joined: Apr 2006
From: Penang , Malaysia


if all flat black will be nice.
compare to uncle's all alu
TSr4st4m4n
post Aug 18 2009, 12:07 AM

Getting Started
**
Junior Member
156 posts

Joined: Aug 2007
From: Damansara


QUOTE(k3lvinng007 @ Aug 17 2009, 08:02 PM)
nice paint job bro...
*
Thank you.

QUOTE(AlexLee277 @ Aug 17 2009, 10:56 PM)
wow... 1st time already so nice..
see my project... all project also got runied paintjob.. cry.gif
*
Yeah, I saw your thread when I was looking for information about case painting. The paint job on the case when you got was so horrible, it is almost impossible to fix it smile.gif
I think you did a good job when taken that into consideration wink.gif

I think for the front panel, maybe you applied too much paint. I tried to apply very thin layers. So thin that even after the 2nd layer of primer, I could still see the metal through at some points. Same for the paint, after 2nd application, I still could see the primer through at some spot. The result is generally better when you apply more thin layers versus less thick layers.

QUOTE(overclockalbert @ Aug 17 2009, 11:50 PM)
if all flat black will be nice.
compare to uncle's all alu
*
Thanks.

But I have only done one (not so important) piece. So I guess I will be able to say the paint job is a success only once I will have painted all the important panels wink.gif

This post has been edited by r4st4m4n: Aug 18 2009, 12:12 AM
tjay_tj
post Aug 18 2009, 05:15 PM

retire
******
Senior Member
1,140 posts

Joined: May 2008
it is pain for me to see this case open out for modding... laugh.gif

good painting skills u have there...
hope to see it finished soon rclxms.gif
monsh
post Aug 18 2009, 05:49 PM

Let's Change The World !
*******
Senior Member
4,196 posts

Joined: Oct 2007


good luck bro ! looking forward for ur project ^^,
AlexLee277
post Aug 18 2009, 06:33 PM

Dihujani kenangan masa lalu
*******
Senior Member
4,221 posts

Joined: Dec 2007
From: Somewhere on Earth


waiting for ur update
monsh
post Aug 18 2009, 06:41 PM

Let's Change The World !
*******
Senior Member
4,196 posts

Joined: Oct 2007


bro bout d defects , at least its waaayyy better result compared to m2n-e >><"
TSr4st4m4n
post Aug 18 2009, 07:16 PM

Getting Started
**
Junior Member
156 posts

Joined: Aug 2007
From: Damansara


QUOTE(tjay_tj @ Aug 18 2009, 05:15 PM)
it is pain for me to see this case open out for modding...  laugh.gif

good painting skills u have there...
hope to see it finished soon  rclxms.gif
*
QUOTE(monsh @ Aug 18 2009, 05:49 PM)
good luck bro ! looking forward for ur project ^^,
*
QUOTE(AlexLee277 @ Aug 18 2009, 06:33 PM)
waiting for ur update
*
QUOTE(monsh @ Aug 18 2009, 06:41 PM)
bro bout d defects , at least its waaayyy better result compared to m2n-e >><"
*
Thanks guys smile.gif

18 august 2009

I haven't had time to do much yesterday evening as I was busy working, so not a big update for today. However, it's a good news as before to be fully confident to paint the case interior myself, I wanted to some "scratch resistance" testing on the HDD cage. I was worry that the paint would chip easily.

So after 24 hours of drying, I tried to scratch the paint with a screwdriver ... shakehead.gif
It kinda hurt my heart to do that, but I had to be sure the paint wouldn't chip easily. I did it on a part of the HDD cage that will not be visible at all (it will be hiddent under the HDD):

user posted imageuser posted image

First, I tried to scratch the paint with my nail and I can put as much pressure as I want, it won't leave any mark. Then I use the screwdriver.
The long scratch you can see at the bottom is when I applied a "normal" pressure to screwdriver, and as you can see, it does leave a slight mark, but you can't see the bare metal under at all, you can't even see the primer.
As final test I tried to put a "very strong" pressure on the screwdriver (upper mark on the picture) and event then the paint didn't chip nor I can see the bare metal.

It actually looks worse on the picture than it is in reality because of the macro mode.

I am now totally confident that I can handle the paint job and that the paint will last over time, so tonight I'll sand as much as possible. I might have the time to sand everything, but I prefer to take my time anyway wink.gif

This post has been edited by r4st4m4n: Aug 18 2009, 07:17 PM
monsh
post Aug 18 2009, 10:22 PM

Let's Change The World !
*******
Senior Member
4,196 posts

Joined: Oct 2007


its a good thing though .
i did black interior on mine , but sadly screwing in d nuts tightly will chip off d paint but not in big sizes , juz small2 behind d nut ^^,
so no biggie bro . go for it !!
zoslan
post Aug 18 2009, 11:03 PM

Getting Started
**
Junior Member
246 posts

Joined: Aug 2008
From: Kuching , sarawak


NICEEE...more pic bro..waiting for the nextt tongue.gif gud luck
monsh
post Aug 19 2009, 12:09 AM

Let's Change The World !
*******
Senior Member
4,196 posts

Joined: Oct 2007


gambateh TS !!
yuktsi14
post Aug 19 2009, 09:39 PM

Gloomy Sunday
*******
Senior Member
2,585 posts

Joined: Mar 2008
From: Sibu, Sarawak


do you sand it between 2 aplication?
can you please post the whole process(very detail) of your paint job?
like it very very much
TSr4st4m4n
post Aug 20 2009, 12:30 AM

Getting Started
**
Junior Member
156 posts

Joined: Aug 2007
From: Damansara


QUOTE(yuktsi14 @ Aug 19 2009, 09:39 PM)
do you sand it between 2 aplication?
can you please post the whole process(very detail) of your paint job?
like it very very much
*
Thanks.

Below is what I do:
1) Sanding with 2000 grid sand paper. I use a piece of wood as sand block, and I finish by hand the part not accessible with the sand block.
2) I use an alcohol based cleaner to remove any sanding dust and oil/grease from the surface
3) I apply 3 thin layers of primer, about 10 min interval between each application (3 layers is what it takes so I don't see at all the bare metal)
4) I wait about 30 min after the third layer of primer
5) I apply 5 thin layers of paint , about 10 min intervals between each application
6) I let it dry at least 24 hours before to manipulate it by hand. But you need to count 48 hours to consider fully dry.

Note:
- I start directly with 2000 grid because I'm painting bare metal. If there was paint, I think you'd need to start with a lower grid (300-400) to remove the paint and then go progressively go higher in the grid to get a smooth surface
- If you go for a shiny mirror finish, I think you would need to sand slightly between the primer and the paint, and also after the paint to remove the slight "orange peel" texture due to the spray painting. You would also need to apply a clear coat at the end.

Concerning the update on my project, I have sanded and painted more parts today.

user posted imageuser posted image


This post has been edited by r4st4m4n: Aug 20 2009, 12:35 AM
monsh
post Aug 20 2009, 03:16 AM

Let's Change The World !
*******
Senior Member
4,196 posts

Joined: Oct 2007


haha yeap
but actually juz use like 1000grit on primer to get rough surface .
actually even using 1000grit oso not really can see wan .
den juz spray wif watever color u intend .
make sure its very thin layer and apply 3-4 times to get perfectly nice finishing ^^,
zoslan
post Aug 20 2009, 04:26 AM

Getting Started
**
Junior Member
246 posts

Joined: Aug 2008
From: Kuching , sarawak


Nice work bro..cant wait for more updates...always love TJ07 but not the time to koyak my pocket..hehehhe...one day tongue.gif
verdict
post Aug 20 2009, 05:39 AM

Time is Flying By
*******
Senior Member
2,458 posts

Joined: Apr 2008
From: M A N C A V E


Wahh good job TS!

luve the fade black colour!

thumbup.gif thumbup.gif thumbup.gif
monsh
post Aug 20 2009, 05:41 AM

Let's Change The World !
*******
Senior Member
4,196 posts

Joined: Oct 2007


its not fade black la .
its matte black or flat black @ hitam mati .
yuktsi14
post Aug 20 2009, 03:39 PM

Gloomy Sunday
*******
Senior Member
2,585 posts

Joined: Mar 2008
From: Sibu, Sarawak


QUOTE(r4st4m4n @ Aug 20 2009, 12:30 AM)
Thanks.

Below is what I do:
1) Sanding with 2000 grid sand paper. I use a piece of wood as sand block, and I finish by hand the part not accessible with the sand block.
2) I use an alcohol based cleaner to remove any sanding dust and oil/grease from the surface
3) I apply 3 thin layers of primer, about 10 min interval between each application (3 layers is what it takes so I don't see at all the bare metal)
4) I wait about 30 min after the third layer of primer
5) I apply 5 thin layers of paint , about 10 min intervals between each application
6) I let it dry at least 24 hours before to manipulate it by hand. But you need to count 48 hours to consider fully dry.

Note:
- I start directly with 2000 grid because I'm painting bare metal. If there was paint, I think you'd need to start with a lower grid (300-400) to remove the paint and then go progressively go higher in the grid to get a smooth surface
- If you go for a shiny mirror finish, I think you would need to sand slightly between the primer and the paint, and also after the paint to remove the slight "orange peel" texture due to the spray painting. You would also need to apply a clear coat at the end.

Concerning the update on my project, I have sanded and painted more parts today.
» Click to show Spoiler - click again to hide... «
can i know the color code of your paint and also the brand?
how much is the primer?
i saw the primer selling at ACE is very expensive

This post has been edited by yuktsi14: Aug 20 2009, 03:40 PM
TSr4st4m4n
post Aug 20 2009, 04:36 PM

Getting Started
**
Junior Member
156 posts

Joined: Aug 2007
From: Damansara


Primer: Anchor spray paint no 5" => I was a bit worry at the beginning as it is not written primer on it, the only difference with the gray paint is the code and a "P" next to the code. But it seems to do the trick.
Paint: "Toa spray: flat back (not sure if the code is 29 or 21)"

user posted image

Each can cost around RM 5-6 smile.gif

Today I did a big mistake though. Yesterday I bought more paint and mistaken the "black" with the "flat black". Result I have to repaint what I did today as I only realized too late, once I started the use the new can I just bought cry.gif

This post has been edited by r4st4m4n: Aug 20 2009, 04:38 PM
acther
post Aug 20 2009, 04:44 PM

Casual
***
Junior Member
317 posts

Joined: Jan 2009
why dont u just throw to a coating shop n get the coating done in a day or 2 with just only under rm200, saving all the complicated work lol
TSr4st4m4n
post Aug 20 2009, 04:56 PM

Getting Started
**
Junior Member
156 posts

Joined: Aug 2007
From: Damansara


QUOTE(acther @ Aug 20 2009, 04:44 PM)
why dont u just throw to a coating shop n get the coating done in a day or 2 with just only under rm200, saving all the complicated work lol
*
Because it's a lot more fun to do it by myself wink.gif
monsh
post Aug 20 2009, 05:27 PM

Let's Change The World !
*******
Senior Member
4,196 posts

Joined: Oct 2007


its a thing called fun n experience rite .
wat's d fun of modding if u let others do it for u .

antonio
post Aug 21 2009, 02:12 AM

AMD Phenom II & Intel i7 Overclocker
Group Icon
VIP
4,032 posts

Joined: Jan 2003
From: MSR Headquaters
TJ07 ???? shocking.gif shocking.gif sweat.gif

You got nothing else to do??? shakehead.gif shakehead.gif blink.gif
monsh
post Aug 21 2009, 03:38 AM

Let's Change The World !
*******
Senior Member
4,196 posts

Joined: Oct 2007


wat's wrong wif modding TJ07 ?
i did mine full black interior + laser cut side panel .
TS if u want laser cut tell me ^^,
antonio
post Aug 21 2009, 09:35 AM

AMD Phenom II & Intel i7 Overclocker
Group Icon
VIP
4,032 posts

Joined: Jan 2003
From: MSR Headquaters
QUOTE(monsh @ Aug 21 2009, 03:38 AM)
wat's wrong wif modding TJ07 ?
i did mine full black interior + laser cut side panel .
TS if u want laser cut tell me ^^,
*
shocking.gif Nothing wrong..... shocking.gif shocking.gif Nothing wrong indeed sweat.gif

btw, PM sent whistling.gif


TSr4st4m4n
post Aug 21 2009, 12:22 PM

Getting Started
**
Junior Member
156 posts

Joined: Aug 2007
From: Damansara


QUOTE(antonio @ Aug 21 2009, 02:12 AM)
TJ07 ????  shocking.gif  shocking.gif  sweat.gif

You got nothing else to do???  shakehead.gif  shakehead.gif  blink.gif
*
Hehe, when I'm not having a satay-TT session with you and the rest of the MSR crew, No. I don't have anything better to do tongue.gif


QUOTE(monsh @ Aug 21 2009, 03:38 AM)
wat's wrong wif modding TJ07 ?
i did mine full black interior + laser cut side panel .
TS if u want laser cut tell me ^^,
*
May I know how you painted it ? Yourself or in a shop ?

I have painted almost everything I need, except the motherboard tray (I will post pix later). But the motherboard tray is actually chromed, not brushed aluminum. There is another chromed part I have painted which is the PSU bracket, and after checking, the paint chip easily unlike when I paint the brushed aluminum.

So now I'm stuck. From what I've read on the Net, I'd need "self etching primer" which is a special primer that reacts with the metal and grip firmly. The problem is last time when I asked 2 - 3 shops about it, I clearly saw that they didn't have a clue as what it is. I tried to look for it on the Internet but could not find any supplier in Malaysia, except for professional stuff where you need to buy 4-5L and need a spray gun :/

Anyone knows where I can find "(self) etching primer" in spray can ?

I will try to find that tomorrow, if I can't find it, I might have to go to an auto paint shop and ask them to prime the motherboard tray ...

This post has been edited by r4st4m4n: Aug 21 2009, 12:25 PM
monsh
post Aug 21 2009, 02:49 PM

Let's Change The World !
*******
Senior Member
4,196 posts

Joined: Oct 2007


haha im not sure .
i dont spray everything bro .
some of d parts i just use carbon fibre sticker to bring out d details ^^,
mobo tray i use carbon fibre sticker .
its better cause it looks as if d background is carbon fiber .

TSr4st4m4n
post Aug 21 2009, 03:10 PM

Getting Started
**
Junior Member
156 posts

Joined: Aug 2007
From: Damansara


QUOTE(monsh @ Aug 21 2009, 02:49 PM)
haha im not sure .
i dont spray everything bro .
some of d parts i just use carbon fibre sticker to bring out d details ^^,
mobo tray i use carbon fibre sticker .
its better cause it looks as if d background is carbon fiber .
*
I see. Not a bad idea indeed. I might steal your idea if I don't find etching primer tongue.gif

21 august 2009

So this is what I have been up to this week:

user posted imageuser posted image

I have to say I'm quite happy with the result. After my mistake with wrong black yesterday, I just sprayed two coats of "flat black" over the coat of "shiny black" and it did the trick. No need to sand and repaint the middle plate.

So too illustrate my problem with the chromed piece, below are some pictures:

user posted imageuser posted image

On the left, it is the PSU bracket which was chromed. I tried to scratch the paint with a screwdriver, and it chip very easily as you can see on the picture ... So I am a bit worry for the motherboard tray (picture on the left). The plate where the PCI brackets attached is in brushed aluminum, so no problem. But the motherboard backplate is chromed with a mirror finished. So if I use the same process as PSU bracket, the paint will definitely chip after I slide in/out the tray few time sad.gif

I will try to find a solution to this problem this WE. If I don't, I might just paint the brushed aluminum part and left the chromed as it is so I can continue the build. Once I'll finish the first revision, it give me time to search and find a better solution for revision 2 smile.gif

lichyetan
post Aug 21 2009, 04:28 PM

*****
*******
Senior Member
2,295 posts

Joined: Jan 2005
From: Penang


send the crucial parts go powder coat... lol...

diy is fun, i also diy mine 1/2 way... but due to daily work and only able to paint it in weekend, i decide give up and sent my stacker to powder coat.. in the end, i just paint the mobo tray parts... but the mechanism dont need slide as the stacker tray is screwed onto the casing instead of pulling and pushing...

ps: powder coat are stronger and harder to chip off... let the decision to TS, either take the challenge or like me, scared of wasted work if chipped of, decide to sent it to powder coat for the parts that need to take on and off constantly.

This post has been edited by lichyetan: Aug 21 2009, 04:31 PM
TSr4st4m4n
post Aug 21 2009, 04:45 PM

Getting Started
**
Junior Member
156 posts

Joined: Aug 2007
From: Damansara


QUOTE(lichyetan @ Aug 21 2009, 04:28 PM)
send the crucial parts go powder coat... lol...

diy is fun, i also diy mine 1/2 way... but due to daily work and only able to paint it in weekend, i decide give up and sent my stacker to powder coat.. in the end, i just paint the mobo tray parts... but the mechanism dont need slide as the stacker tray is screwed onto the casing instead of pulling and pushing...

ps: powder coat are stronger and harder to chip off... let the decision to TS, either take the challenge or like me, scared of wasted work if chipped of, decide to sent it to powder coat for the parts that need to take on and off constantly.
*
May I know where you did the powder coating ? How much did it cost ?

EDIT: nvm, I found your thread and read the answers.

This post has been edited by r4st4m4n: Aug 21 2009, 04:47 PM
monsh
post Aug 21 2009, 07:21 PM

Let's Change The World !
*******
Senior Member
4,196 posts

Joined: Oct 2007


y not try my style ? carbon fibre sticker .
its quite nice to see dat its not entirely pure flat black .
at least there's some pattern in d design . ^^,
it kinda bring out d loveliness of mobo when use carbon fibre .
TSr4st4m4n
post Aug 21 2009, 07:58 PM

Getting Started
**
Junior Member
156 posts

Joined: Aug 2007
From: Damansara


QUOTE(monsh @ Aug 21 2009, 07:21 PM)
y not try my style ? carbon fibre sticker .
its quite nice to see dat its not entirely pure flat black .
at least there's some pattern in d design . ^^,
it kinda bring out d loveliness of mobo when use carbon fibre .
*
I might try that. I guess you bought the carbon fiber sticker in automotive parts shop / automotive parts department of a supermarket, isn't it ?
monsh
post Aug 21 2009, 08:15 PM

Let's Change The World !
*******
Senior Member
4,196 posts

Joined: Oct 2007


yeap .
Brothers to be exact .
its cheap though .
only around RM28 for around 2 meters in length i think .
but its promising ^^,

TSr4st4m4n
post Aug 22 2009, 02:06 PM

Getting Started
**
Junior Member
156 posts

Joined: Aug 2007
From: Damansara


22 august 2009

Big update today brows.gif

user posted image

Got all the WC stuff today. Thanks clawhammer for the very fast delivery thumbup.gif

Yesterday I also got this in the mail

user posted image

I can start on the PSU sleeving: Thanks as well to niclasteoh for the fast sending wink.gif

I also wants to have fans with white blades and black frame for my build, but couldn't find at a reasonable price, so I bought this:

user posted image

Tamiya flat white paint. Cheap alternative but it should work as well as original fans laugh.gif

And finally I decided to pass the mobo tray to an auto paint shop so he have it primed and painted. There is just nowhere I can find "self etching primer" and after some thought, I really wants the tray to be painted in the same color as the rest of the interior.

Alright, so I got lot of toy to play with this WE, now I'm not sure what to do first rclxub.gif
I think I'm gonna sleeve the PSU, but my first attempts to remove the pin for the ATX plug with staplers where not successful ... It is harder than it looks, so I might finally have to buy some sleeving tools.
monsh
post Aug 22 2009, 02:54 PM

Let's Change The World !
*******
Senior Member
4,196 posts

Joined: Oct 2007


haha good stuffs .
is dat mcr320-qp ?
y not go for thermochill PA120.3 instead ?
TSr4st4m4n
post Aug 22 2009, 03:41 PM

Getting Started
**
Junior Member
156 posts

Joined: Aug 2007
From: Damansara


QUOTE(monsh @ Aug 22 2009, 02:54 PM)
haha good stuffs .
is dat mcr320-qp ?
y not go for thermochill PA120.3 instead ?
*
Yes, it is a mcr320-qp. And I didn't take the thermochill because there is not much difference in performance, but there is a very big difference in price wink.gif
monsh
post Aug 22 2009, 06:02 PM

Let's Change The World !
*******
Senior Member
4,196 posts

Joined: Oct 2007


ow ok ^^,
so its almost similar to mine xcept dat im running on Dtek Fuzion V2 and laing D5 while ur laing D5 .
boy u shud have used Laing DDC-2 + XSPC top + ek res 250 sure u get good Hmax on it >.<"
TSr4st4m4n
post Aug 22 2009, 08:56 PM

Getting Started
**
Junior Member
156 posts

Joined: Aug 2007
From: Damansara


QUOTE(monsh @ Aug 22 2009, 06:02 PM)
ow ok ^^,
so its almost similar to mine xcept dat im running on Dtek Fuzion V2 and laing D5 while ur laing D5 .
boy u shud have used Laing DDC-2 + XSPC top + ek res 250 sure u get good Hmax on it >.<"
*
But know the the D5 got the primochill typhoon III res/top. Check out the flow you are getting with 1 D5 used in a dual loop: http://skinneelabs.com/Pumps/D5/TyphoonIII...chill-TIII.html flex.gif

This post has been edited by r4st4m4n: Aug 22 2009, 08:57 PM
lichyetan
post Aug 22 2009, 09:05 PM

*****
*******
Senior Member
2,295 posts

Joined: Jan 2005
From: Penang


QUOTE(r4st4m4n @ Aug 22 2009, 03:41 PM)
Yes, it is a mcr320-qp. And I didn't take the thermochill because there is not much difference in performance, but there is a very big difference in price wink.gif
*
ya bro, the difference of performance is not much, but in terms of money they are huge.

you can buy almost 2 mcr320qp with the price of the thermochill... smile.gif the swiftech radiator are best bang per buck radiator available...

looking forward for ur built, nice wc gadgets u got there...


monsh
post Aug 22 2009, 11:18 PM

Let's Change The World !
*******
Senior Member
4,196 posts

Joined: Oct 2007


hahaha .
see dat's d difference between enthusiast and normal user .
enthusiast will count every single degree drop on WC setup bro .
so it doesnt really matter if RM500 gonna drop another 4-5C ^^,

lichyetan
post Aug 22 2009, 11:31 PM

*****
*******
Senior Member
2,295 posts

Joined: Jan 2005
From: Penang


QUOTE(monsh @ Aug 22 2009, 11:18 PM)
hahaha .
see dat's d difference between enthusiast and normal user .
enthusiast will count every single degree drop on WC setup bro .
so it doesnt really matter if RM500 gonna drop another 4-5C ^^,
*
i also hope to get Thermochill or even the new BI RX series... but i dont have the $$$ to burnt...

i guess all wc'er already consider hardcore PC OC'er, since most ppl wont invest 1k in cooling... smile.gif
TSr4st4m4n
post Aug 23 2009, 12:10 AM

Getting Started
**
Junior Member
156 posts

Joined: Aug 2007
From: Damansara


QUOTE(monsh @ Aug 22 2009, 11:18 PM)
hahaha .
see dat's d difference between enthusiast and normal user .
enthusiast will count every single degree drop on WC setup bro .
so it doesnt really matter if RM500 gonna drop another 4-5C ^^,
*
Actually in that case it is more like RM 500 for 0.5-1C:

user posted image

Image taken from here: http://martinsliquidlab.i4memory.com/Swift...320-Review.html

Where the thermochill really shines compares to the MCR, it is when using low RPM fans and quiet oriented system. With mid to high RPM fans, there is very little difference. smile.gif

At the end, you are probably better off buying two MCSR 320 than one PA 120.3 in terms of performance. Although it will obviously take more space and be more restrictive.

This post has been edited by r4st4m4n: Aug 23 2009, 12:22 AM
monsh
post Aug 23 2009, 03:14 AM

Let's Change The World !
*******
Senior Member
4,196 posts

Joined: Oct 2007


guess ur right >.<"
haha biggrin.gif
i think i want make superior loop la after diz .
i want make res>pump>CPU WB>PA120.3>pump>NB WB>MCR320-QP>RES

hahaha biggrin.gif
wonder wat's d result of dat .

btw someone showed me the link of d laing D5 top last time .
it is very promising but i donno , i think i'd stick wif laing DDC-2 since its compact and easier to manage ^^,

after all , we dont want to get those bulky look stuffs in casing rite .
even my setting rite now oso quite cramped up at d bottom TJ07 part .
mADmAN
post Aug 23 2009, 06:11 AM

10k Club
********
All Stars
10,530 posts

Joined: Nov 2004
From: Petaling Jaya & Mid Valley


white blade and black framed fans...and u bought tamiya white paint..

errr....

u do realize u could remove the blades from the frame and spray paint them right?

ull get an even better weight balance for the blades and itll most likely look better.
TSr4st4m4n
post Aug 23 2009, 02:02 PM

Getting Started
**
Junior Member
156 posts

Joined: Aug 2007
From: Damansara


QUOTE(mADmAN @ Aug 23 2009, 06:11 AM)
white blade and black framed fans...and u bought tamiya white paint..

errr....

u do realize u could remove the blades from the frame and spray paint them right?

ull get an even better weight balance for the blades and itll most likely look better.
*
Hmm actually is good you talk about it because my idea completely failed laugh.gif

the tamiya paint is too thick:
1) it leaves paint brush marks clearly visible and give a cheap look (might also be my paint brush skill not that great laugh.gif )
2) as you mentioned, I am a bit worry as the thickness of the paint seems to add quite some weight.

You can remove the fan blades from the frame ? I didn't know actually. I will look into that. thanks for the tip wink.gif
clawhammer
post Aug 23 2009, 02:13 PM

///M
Group Icon
VIP
8,788 posts

Joined: Jan 2003
From: Kuala Lumpur


Ya, those expensive radiators would costs a bomb (including the new SR-1) and temp differences isn't really a lot though. Anyway, that's a really nice work log and I'll look forward to see how the end result would be.

* r4st4m4n is on a killing spree!

mADmAN
post Aug 23 2009, 04:18 PM

10k Club
********
All Stars
10,530 posts

Joined: Nov 2004
From: Petaling Jaya & Mid Valley


QUOTE(r4st4m4n @ Aug 23 2009, 02:02 PM)
You can remove the fan blades from the frame ? I didn't know actually. I will look into that. thanks for the tip wink.gif
*
might wanna check THIS
monsh
post Aug 23 2009, 07:02 PM

Let's Change The World !
*******
Senior Member
4,196 posts

Joined: Oct 2007


have anyone ever tried using different blade and stick on another fan ?
might awnna try use silverstone white color fan and use d fans on other fan .
color combination shud be nice !
TSr4st4m4n
post Aug 23 2009, 08:06 PM

Getting Started
**
Junior Member
156 posts

Joined: Aug 2007
From: Damansara


QUOTE(mADmAN @ Aug 23 2009, 04:18 PM)
might wanna check THIS
*
Thanks ! I'm going to try it smile.gif

QUOTE(monsh @ Aug 23 2009, 07:02 PM)
have anyone ever tried using different blade and stick on another fan ?
might awnna try use silverstone white color fan and use d fans on other fan .
color combination shud be nice !
*
Not a bad idea. But generally fans are designed for a matching blade and motor. So I am bit worry by mixing two different references it may adverse effects like becoming noiser and/or lowering the CFM ...
monsh
post Aug 23 2009, 08:13 PM

Let's Change The World !
*******
Senior Member
4,196 posts

Joined: Oct 2007


its no harm to try bro .
cause i see that those silverstone high CFM fans are using many blades .
who knows it might work even better wif other fans .
heh biggrin.gif
juz an opinion though .
TSr4st4m4n
post Aug 24 2009, 09:49 PM

Getting Started
**
Junior Member
156 posts

Joined: Aug 2007
From: Damansara


24 august 2009

I haven't done much this WE as I didn't have the motherboard tray. I started to put back the case together (without mobo tray), and I can tell you that with the black interior, it looks gorgeous. But I'll post pix only once I get back the mobo tray to manage the suspense tongue.gif

I have also battled for 2 days with my PSU trying to remove the ATX pins. I tried the staple solution thought here and there, but I don't know why, I couldn't make it work. I didn't even remove one single pin using this technique. So I spent some time trying to figure another way to do it and I found a very easy and cheap way to do it. I won't post it here but I have have made a post there: http://forum.lowyat.net/index.php?showtopi...post&p=28145278
This way is like 100 times easier than the staple way (at least it is for me tongue.gif)

I have also flushed the radiator after battling to find distilled water (if you follow the WC thread on LYN you'll know what I am talking about).

I also started on the cable sleeving. I started by sleeving and mounting in parallel the fans that I will use for the radiator:

user posted image

But I am not happy with the result. The sleeving I got is too transparent. As you can see on the picture, we can easily see the wires through.

So after two trips to Jln Pasar yesterday and today, I finally found something much better:

user posted image

This is 2mm diameter cable sleeving. I found it at melectron shop (40 jalan pasar, one of the shop next to the shopping center). Luckily for me, the only color they had was white.

They also have 2.5 and 3.5mm, but these sizes feel more like plastic tube (a bit like a heatshrink, but without the shrink laugh.gif). This 2mm however feels more like a cloth, is slightly extensible and it is just perfect for sleeving ATX and PCI-E cables: it fits like a glove.

So I started to sleeve the ATX cables:

user posted imageuser posted image

As you can see I just made one ... 22 to do laugh.gif

Oh and one more thing, I tried to remove the blades of my fans to spray paint them like mADmAN suggested. However, when I removed the sticker there is no plug hiding any washer/o-ring holding the blade. It means I cannot remove them. I think the silverstone fans are press fitted unlike the one in the tutorials.

But not willing to give up, I decided to use masking tape to mask the frame. It takes a bit of time to do it right, but I think it should work. I have already painted the fan:

user posted image

It is drying as I type, but I think the result should be okay. The fan I painted is actually my "testing" fan that I cleaned up after trying the Tamiya paint. I didn't want to use the fans that will in the case as I was not sure of the result. I will let it dry 24h and see tomorrow, but the first impression is good.

So to conclude, I'm quite happy as of now. Sunday I didn't have a cable sleeving which was pleasing me and also failed on the tamiya painting of the fans. My mood was quite down are these are the two main elements supposed to bring some contrast in the case with their white color. Without it, I felt like it would just look like a regular case ...

With these two problems solved now, I'm fully motivated to finish this project. The only small let down today was that I called the shop and my mobo tray will only be ready by tomorrow noon, but it is not a big issue as I am busy with the cable sleeving tonight.

Still, I am impatient to get back the mobo tray so I can start on the WC setup brows.gif
monsh
post Aug 24 2009, 10:40 PM

Let's Change The World !
*******
Senior Member
4,196 posts

Joined: Oct 2007


bro how much does d sleeve cost ?
d 2mm wan ?
care to PM me .
been looking for super thick one cause my single sleeving also was like yours
its very transparent .
TSr4st4m4n
post Aug 24 2009, 11:58 PM

Getting Started
**
Junior Member
156 posts

Joined: Aug 2007
From: Damansara


QUOTE(monsh @ Aug 24 2009, 10:40 PM)
bro how much does d sleeve cost ?
d 2mm wan ?
care to PM me .
been looking for super thick one cause my single sleeving also was like yours
its very transparent .
*
It is very cheap. The price when buying 1m is RM 1.60 I think. But since I bought 35m, I got it for RM 1.00 / m thumbup.gif
clawhammer
post Aug 25 2009, 01:15 AM

///M
Group Icon
VIP
8,788 posts

Joined: Jan 2003
From: Kuala Lumpur


Wow Martin, this is neat! I can't wait to see more stuffs coming from you.
monsh
post Aug 25 2009, 03:30 AM

Let's Change The World !
*******
Senior Member
4,196 posts

Joined: Oct 2007


DAMN !
which shop isit ?
is it very thick ?
please update fast with a few results plz .
is it very flexible ?
when bend can see through or not ?
TSr4st4m4n
post Aug 25 2009, 01:14 PM

Getting Started
**
Junior Member
156 posts

Joined: Aug 2007
From: Damansara


QUOTE(monsh @ Aug 25 2009, 03:30 AM)
DAMN !
which shop isit ?


melectron, 40 jalan pasar: one of the shop next to the shopping center

QUOTE(monsh @ Aug 25 2009, 03:30 AM)
is it very thick ?
please update fast with a few results plz .
is it very flexible ?
when bend can see through or not ?
*
No, it isn't thick. Just enough so you can't see through even when bended. And it is fairly flexible. I'll take a pic later once I have done the ATX plug.

kilowatt
post Aug 25 2009, 05:35 PM

AysNdj
*****
Senior Member
717 posts

Joined: Nov 2007
From: meLaka-kaYheLL


» Click to show Spoiler - click again to hide... «


badass custom WC set rclxm9.gif ....argghh!! when can i get those thing cry.gif ....

btw nice mod bro...still look forward for an update thumbup.gif ..
monsh
post Aug 25 2009, 06:22 PM

Let's Change The World !
*******
Senior Member
4,196 posts

Joined: Oct 2007


yeah u better do !
we poor ppl been looking for cheap sleeving comparable to murdermod wan >.<"
fast2 do ur 24pin and get back to us !
wanna see d result when d 24pin atx bended and straight .
wanna see if those wires visible or not ^^,
clawhammer
post Aug 25 2009, 06:31 PM

///M
Group Icon
VIP
8,788 posts

Joined: Jan 2003
From: Kuala Lumpur


I'm using the cheap sleevings but since I coloured the wires black, I can't see it even after it's bent.
TSr4st4m4n
post Aug 25 2009, 07:00 PM

Getting Started
**
Junior Member
156 posts

Joined: Aug 2007
From: Damansara


25 august 2009

I have finally finished the 24 pin ATX. I was a bit struggling at the beginning. I tought it would be a good idea to make the sleeving as tight as possible, but then I realised that once I would bend the cable, the sleeving was coming of the heatshrink because there was no room for movement ...

Anyway here it is:

user posted imageuser posted imageuser posted image

I have started with the 8 pin ATX and now that I have the right technique, it is quite fast. After that I also want to do 2 PCi-E cables. I am also thinking to do the SATA, but I may keep it for revision 2.

I also unmasked the fan I painted yesterday and it looks great:

user posted imageuser posted image

I just need to be a bit more careful with the masking as there is one or two white spot on the frame. But this fan was just a test so it's no biggy.

Oh and I also got my mobo tray from painting.

user posted imageuser posted image

Let me know what do you think about the TJ-07 with back interior brows.gif

Personally, I dig it rclxms.gif
mADmAN
post Aug 25 2009, 07:20 PM

10k Club
********
All Stars
10,530 posts

Joined: Nov 2004
From: Petaling Jaya & Mid Valley


y are the rear beams still silver?

should get that done too to make it more uniform. right now it looks like an oddity thats out of place.
monsh
post Aug 25 2009, 07:30 PM

Let's Change The World !
*******
Senior Member
4,196 posts

Joined: Oct 2007


its darn good !
will go jalan pasar get d sleeving .
btw u shud spray paint d beam bro .
its odd to have it like dat .
different color suddenly .
heh biggrin.gif
TSr4st4m4n
post Aug 25 2009, 09:54 PM

Getting Started
**
Junior Member
156 posts

Joined: Aug 2007
From: Damansara


QUOTE(mADmAN @ Aug 25 2009, 07:20 PM)
y are the rear beams still silver?

should get that done too to make it more uniform. right now it looks like an oddity thats out of place.
*
QUOTE(monsh @ Aug 25 2009, 07:30 PM)
its darn good !
will go jalan pasar get d sleeving .
btw u shud spray paint d beam bro .
its odd to have it like dat .
different color suddenly .
heh biggrin.gif
*
I'm still undecided for the beam. I didn't paint them because they take a lot of beating when opening/closing the panels and I am worry that the paint will rapidly be scratched and don't look nice. Besides, once the case is close you don't really see the beams anymore. 90% of the beam is covered by the side and back panels.

This picture was taken before I painted the back panels, but you can see what I mean:

user posted image

So I think I leave it like that for now and see later if I want to paint or not.

This post has been edited by r4st4m4n: Aug 25 2009, 09:56 PM
monsh
post Aug 25 2009, 09:59 PM

Let's Change The World !
*******
Senior Member
4,196 posts

Joined: Oct 2007


oww ok its up to you .
but i did mine and it was ok not much problem anyway , just small peel off at d screw area dat's it ^^,
will be covered wif screw anyway .
TSr4st4m4n
post Aug 25 2009, 10:03 PM

Getting Started
**
Junior Member
156 posts

Joined: Aug 2007
From: Damansara


QUOTE(monsh @ Aug 25 2009, 09:59 PM)
oww ok its up to you .
but i did mine and it was ok not much problem anyway , just small peel off at d screw area dat's it ^^,
will be covered wif screw anyway .
*
Oh you did. No scratch due to sliding in/out the side panels ? That's what was worry me the most. smile.gif
monsh
post Aug 25 2009, 11:03 PM

Let's Change The World !
*******
Senior Member
4,196 posts

Joined: Oct 2007


sliding wont do effect on d beam wan la .
railing yes , but railing n mobo tray i use carbon sticker ^^,
clawhammer
post Aug 26 2009, 10:54 AM

///M
Group Icon
VIP
8,788 posts

Joined: Jan 2003
From: Kuala Lumpur


Wow Martin, you're just unstoppable. Great work there biggrin.gif Do you help people sleeve their PSU also? laugh.gif
TSr4st4m4n
post Aug 26 2009, 11:25 AM

Getting Started
**
Junior Member
156 posts

Joined: Aug 2007
From: Damansara


QUOTE(clawhammer @ Aug 26 2009, 10:54 AM)
Wow Martin, you're just unstoppable. Great work there biggrin.gif Do you help people sleeve their PSU also? laugh.gif
*
Frankly, it is a PITA laugh.gif

Although now that I have the experience, it is much easier. I sleeved the 8 pin PSU in about 30+ min last night.

Not sure I want to do it again once I've done mine ... although for you, I'm sure we could find some kind of "trading agreement" brows.gif
monsh
post Aug 26 2009, 02:02 PM

Let's Change The World !
*******
Senior Member
4,196 posts

Joined: Oct 2007


dude , end diz fast .
we want to see d result !
dro
post Aug 26 2009, 03:56 PM

N00B1E5
****
Senior Member
558 posts

Joined: Jun 2006
From: KL Sentral - Segamat


The case mod scenario on LYN has vastly improved....no doubt about that
It takes guts to attempt something at this scale
Especially when you have no prior knowledge/experience with it
That much i respect smile.gif

Kudos on the great job so far
Looking forward to see your progress and overall design
There are a lot of TJ07 out there, so the benchmark is pretty high
Nevertheless, great job there r4st4m4n
TSr4st4m4n
post Aug 26 2009, 09:18 PM

Getting Started
**
Junior Member
156 posts

Joined: Aug 2007
From: Damansara


QUOTE(monsh @ Aug 26 2009, 02:02 PM)
dude , end diz fast .
we want to see d result !
*
I'm also impatient to see the end result. But I don't want to rush things either wink.gif

QUOTE(dro @ Aug 26 2009, 03:56 PM)
The case mod scenario on LYN has vastly improved....no doubt about that
It takes guts to attempt something at this scale
Especially when you have no prior knowledge/experience with it
That much i respect  smile.gif

Kudos on the great job so far
Looking forward to see your progress and overall design
There are a lot of TJ07 out there, so the benchmark is pretty high
Nevertheless, great job there  r4st4m4n
*
Thanks man smile.gif
monsh
post Aug 26 2009, 11:23 PM

Let's Change The World !
*******
Senior Member
4,196 posts

Joined: Oct 2007


gaga quick quick !
wantutrifor5
post Aug 27 2009, 04:19 PM

Regular
******
Senior Member
1,191 posts

Joined: Jan 2003
From: trg


man, update man..... hehehehe, want to c WC setup
TSr4st4m4n
post Aug 27 2009, 08:14 PM

Getting Started
**
Junior Member
156 posts

Joined: Aug 2007
From: Damansara


QUOTE(wantutrifor5 @ Aug 27 2009, 04:19 PM)
man, update man..... hehehehe, want to c WC setup
*
I'm too very itching to start on WC setup ... but I have to wait to finish everything else. The WC will be one of the last thing to be done as I don't want to hook everything up, and then realize I have to remove everything because I forgot something wink.gif
The good news is I am almost done with the preparation work and should be starting the WC setup by tomorrow night or the day after rclxms.gif

27 august 2009

So today I have, started on the mobo and mobo tray modding.

First the mobo: GA-X48-DQ6

user posted imageuser posted image

First thing is I need to remove the "Carzycool" backplate so I can attach the CPU block plate. I wanted to take the picture above but when I lifted the mobo after I took the 2nd picture above, I found a capacitor had fallen blink.gif

user posted image

I don't know how come it felt. I believe it was already not holding strong previously ... But luckily I have a good soldering iron, so I have soldered the capacitor back.

user posted image

Well, the soldering join is not pretty, but the connection seems to be okay after I tested with a multimeter. I guess if the mobo doesn't boot later, I'll know why laugh.gif

After this not so good start, I can attack the crazycool. First I had to remove the heatsink:

user posted imageuser posted image

If you check on Internet, you will find that you need two small screws provided with the mobo to be able to reattach the heatsink at the level of the northbridge without the plate. The thing is I bought this mobo 2nd hand, and of course I don't have the screws doh.gif

But no problem, the part of the craycool plate that covers the northbridge don't bother me, it is the part covering the back of the GPU that disturb. That's where my cute little metal saw comes handy. Few minutes, some mechanic oil and elbow oil later:

user posted imageuser posted image

Mobo modding done, nothing will disturb the CPU backplate anymore biggrin.gif

* I have more updates but I cannot post pics anymore :/ . Pls someone add a reply so I can continue wink.gif *

This post has been edited by r4st4m4n: Aug 27 2009, 08:15 PM
mADmAN
post Aug 27 2009, 08:22 PM

10k Club
********
All Stars
10,530 posts

Joined: Nov 2004
From: Petaling Jaya & Mid Valley


if u need to do multiple posts in a row....

click the user posted image button and...

user posted image
TSr4st4m4n
post Aug 27 2009, 08:34 PM

Getting Started
**
Junior Member
156 posts

Joined: Aug 2007
From: Damansara


QUOTE(mADmAN @ Aug 27 2009, 08:22 PM)
if u need to do multiple posts in a row....

click the button and...

*
Oh I didn't pay attention to this box. Thanks wink.gif

27 august 2009 (Cont)

Now the mobo tray turn. I have to pierce some hole for cable management and also two holes for the reservoir holder. I have borrowed a friend's drill and went out to buy a 25mm holesaw and a metal file. Oh and on the way I stopped by modernopc to buy few accessories:

user posted image

It took some time to mod the mobo tray as I didn't want to make hole where I shouldn't. Like the wise man said "Measure twice, cut once" wink.gif

Before:

user posted image

After

user posted image

I have tested with the mobo and sleeved ATX cables and it looks great ... but I won't show you until I'm done. That would be like seeing the end of a movie in the middle of it, you'd lose all the suspense tongue.gif

Oh and I finally decided the paint the beam in black. After looking at the case, it looks indeed a bit awkward.

Tonight's good news is I have very little to do before to start on the real (re)building of the comp as all the preparation work are almost done. rclxms.gif
I just need to sleeve the PCI-E PSU calbes tonight, wait for the beam to dry and it will be okay. I have few others things to do to achieve the overall look of the mod, but I can do it during the leak testing of the WC system.

BTW, anyone would know a good address around PJ to find all kind of nuts/bolts/screws ?

I'd need some 12mm length x 2mm diameter x M3 thread screws to hold the HDD cage and I also want to replace all the M3/M4 screws holding the HDD/DVD ROM by black one, but I'm not sure where to find that. I have already looked around in hardware shops but they have a very limited choice ...

This post has been edited by r4st4m4n: Aug 27 2009, 08:39 PM
rsangel
post Aug 27 2009, 10:30 PM

No Smoking pls @_@
******
Senior Member
1,487 posts

Joined: Dec 2006
From: Ja Bee


Nice mobotray cutting ....

monsh
post Aug 27 2009, 11:14 PM

Let's Change The World !
*******
Senior Member
4,196 posts

Joined: Oct 2007


nais weih !
cepat2 update sommore !
soon ppl will start doin own casing .
fast fast !
lichyetan
post Aug 28 2009, 12:29 AM

*****
*******
Senior Member
2,295 posts

Joined: Jan 2005
From: Penang


» Click to show Spoiler - click again to hide... «
try a shop over at PJS 11 nearby sunway college there... the shop lot there, got one of them got carry all kind of screws... opposite a radiator shop... forgot the road name... go scout there and see...
mADmAN
post Aug 28 2009, 12:44 AM

10k Club
********
All Stars
10,530 posts

Joined: Nov 2004
From: Petaling Jaya & Mid Valley


hmm.gif

since ur into cuttin n wat not...hows about cutting a hole on the mobo tray for access to a CPU cooler's backplate? just like most of the cases these days has....

since ur using watercooling that means ull definitely have the backplate and at least in the future u wont have to remove the mobo to remove the backplate if u have to.


also looks like u got urself some u-channel to cover the hole's edges...whered u get that and how much?
monsh
post Aug 28 2009, 12:47 AM

Let's Change The World !
*******
Senior Member
4,196 posts

Joined: Oct 2007


dat's a good idea .
clearance behind CPU plate .
TSr4st4m4n
post Aug 28 2009, 01:08 AM

Getting Started
**
Junior Member
156 posts

Joined: Aug 2007
From: Damansara


QUOTE(rsangel @ Aug 27 2009, 10:30 PM)
Nice mobotray cutting ....
*
Thanks. I was not sure whether using a holesaw would work well, but I'm quite happy of the result smile.gif


QUOTE(monsh @ Aug 27 2009, 11:14 PM)
nais weih !
cepat2 update sommore !
soon ppl will start doin own casing .
fast fast !
*
Thank you. I'm working as fast as I can already wink.gif


QUOTE(lichyetan @ Aug 28 2009, 12:29 AM)
try a shop over at PJS 11 nearby sunway college there... the shop lot there, got one of them got carry all kind of screws... opposite a radiator shop... forgot the road name... go scout there and se
Thanks. I will go and try to find it.

QUOTE(mADmAN @ Aug 28 2009, 12:44 AM)
hmm.gif

since ur into cuttin n wat not...hows about cutting a hole on the mobo tray for access to a CPU cooler's backplate? just like most of the cases these days has....

since ur using watercooling that means ull definitely have the backplate and at least in the future u wont have to remove the mobo to remove the backplate if u have to.
also looks like u got urself some u-channel to cover the hole's edges...whered u get that and how much?
*
I have been thinking about that but the only tool I have to do it is a drill and a 25mm holesaw. It was a bit tricky already to do the oval holes on the mobo tray as I had pierce two hole next to each others and then use the file to finish the oval.
Making a nice square for the CPU would be quite difficult I think and I don't want to take the chance to ruin the mobo tray. To do it properly I need a dremel and it will be in my shopping list for the next revision wink.gif

Besides, once the the CPU backplate is in place and due to the way it is fixed, it won't fall off the motherboard even if I remove the block. I only need to remove the mobo from the tray if I need to change the backplate (meaning I change the CPU block) AND the backplate is not compatible with the new block ... So it won't happen often and not before at least quite some time. So I think it is okay for this time smile.gif

This post has been edited by r4st4m4n: Aug 28 2009, 01:10 AM
monsh
post Aug 28 2009, 04:50 PM

Let's Change The World !
*******
Senior Member
4,196 posts

Joined: Oct 2007


go for it .
doesnt matter .
we want final result !
TSr4st4m4n
post Aug 28 2009, 06:21 PM

Getting Started
**
Junior Member
156 posts

Joined: Aug 2007
From: Damansara


QUOTE(mADmAN @ Aug 28 2009, 12:44 AM)
[...]
also looks like u got urself some u-channel to cover the hole's edges...whered u get that and how much?
*
BTW, I forgot to tell you I got the edge protector there: http://forum.lowyat.net/topic/327972
monsh
post Aug 28 2009, 08:48 PM

Let's Change The World !
*******
Senior Member
4,196 posts

Joined: Oct 2007


envy is a good word for perfection !
TSr4st4m4n
post Aug 31 2009, 01:01 AM

Getting Started
**
Junior Member
156 posts

Joined: Aug 2007
From: Damansara


Sorry guys, I haven't posted update for 2 days because I didn't have much time and also because I have been a bit lazy tongue.gif
But it doesn't mean I haven't been modding ... I'll post a complete update tomorrow.

To make you waiting, here are some poison brows.gif


» Click to show Spoiler - click again to hide... «

monsh
post Aug 31 2009, 02:23 AM

Let's Change The World !
*******
Senior Member
4,196 posts

Joined: Oct 2007


sweet brother sweet !
COME ON !!!!!
TSr4st4m4n
post Aug 31 2009, 05:36 PM

Getting Started
**
Junior Member
156 posts

Joined: Aug 2007
From: Damansara


Some more teaser ... brows.gif

Same settings, no air-cond, case closes

AIR Cooling: (Thermaltake Big Typhoon VX)

user posted image


WATER Cooling:

user posted image

-15*C ... shocking.gif whistling.gif rclxms.gif thumbup.gif rclxm9.gif tongue.gif

Soon will post update on the build. It is 90% done ... but for the moment I am playing with my new toy tongue.gif

This post has been edited by r4st4m4n: Aug 31 2009, 05:46 PM
ianho
post Aug 31 2009, 07:53 PM

Cucimangkoklife
Group Icon
VIP
15,705 posts

Joined: Mar 2005
From: Tg. Rambutan
If u wanna solder the capacitor back nicely, u will need some flux paste. Slap some on n u'll be able to solder it nice n flat like nothing happened.
TSr4st4m4n
post Aug 31 2009, 09:32 PM

Getting Started
**
Junior Member
156 posts

Joined: Aug 2007
From: Damansara


QUOTE(ianho @ Aug 31 2009, 07:53 PM)
If u wanna solder the capacitor back nicely, u will need some flux paste. Slap some on n u'll be able to solder it nice n flat like nothing happened.
*
Thanks for the advice. I'll check that out smile.gif

28-31 august 2009

Ok, so here is the promise update wink.gif

So on Friday, I started with the WC setup. First I have mounted the CPU water block:

user posted image

Then the GPU block:

user posted imageuser posted imageuser posted image

To cool the RAM and mofstet of the GPU, I am using the stock cooling plate. It does the job well and gives some support to maintain the PCB straight.

Then I started to look into the positioning of the radiator and pump.

For the radiator I first thought I would just let it lie on itself on the bottom of the case with some double sided foam tape so it doesn't move. However, with the weight of the fans once mounted, the radiator tend to tip over the side where the fans are. Luckily last time I went to hardware shop, I found this L-brackets.

user posted image

After painting and fixing, it makes perfect bracket for the radiator:

user posted image

I encountered another problem once I started to position the pump. I thought the inlet was on top and the outlet the one centered on the side. I was wrong as once I read the manual it shows it was the other way around.

user posted image

That was a problem as how I planned to setup the tubing, I needed the inlet on top and the outlet on the side. Otherwise I would have to make some impossible bends with the tubing and it risked to kink.

After a bit of thinking and one more trip to the hardware shop, I found the perfect L-bracket. After some painting this how it looks like.

user posted image

After fixing the pump on it, the inlet/outlet are oriented how I want them (I also sleeved the pump power cable while waiting for the paint to dry):

user posted image

After having made the brackets, I could positioned the rad and the pump at the bottom of case. I am using some double sided foam tape to avoid any moves, and the foam also plays a role of sound/vibration absorber.

Then I did the plumbing work. I didn't imagine but this is quite a PITA laugh.gif
You have to "guesstimate" the right length of tubing and to pass the tubing over the barbs is not easy because I am using 7/16'' ID tubing over 1/2'' barbs. But the good thing is after that, even an earthquake won't make the tube come out from the barb nod.gif .
It was quite difficult I think also because I am using a TJ-07, and once the PSU + pump + rad is in the bottom section, it is quite cramped so it's not easy to access.

But eventually I managed to do it and ran some leak testing over last night.

This post has been edited by r4st4m4n: Aug 31 2009, 09:34 PM
TSr4st4m4n
post Aug 31 2009, 09:34 PM

Getting Started
**
Junior Member
156 posts

Joined: Aug 2007
From: Damansara


28-31 august 2009 (Cont)

So today I've finalized the installation.

I bought some brackets to put the HDD in the 5.25 bay:

user posted imageuser posted image

I have also painted to the brand new DVD ROM I bought (I only had an IDE DVD ROM and IDE sucks for cable management). No way I left this ugly piece of aluminum in the case wink.gif

user posted imageuser posted image

Ok and here is some picture after a bit of fight to get the proper cable management smile.gif

user posted imageuser posted image

The only thing left is to paint in white the fans blade. Once it is done, I'll take some better pictures and some pictures of the back of the case so you can see where is the pump wink.gif

There are few other things I'd like to do but I think it's not bad for a first revision. I'll probably wait a bit to do the rest as I already spent 2 weeks without my main PC, and I start to miss it tongue.gif

Let me know what ya think guys wink.gif

Oh a and a game for, from the first picture, guess where is the DVD ROM tongue.gif

» Click to show Spoiler - click again to hide... «


This post has been edited by r4st4m4n: Aug 31 2009, 10:27 PM
dro
post Sep 1 2009, 05:02 AM

N00B1E5
****
Senior Member
558 posts

Joined: Jun 2006
From: KL Sentral - Segamat


how much for the bay converters?
renesisx
post Sep 1 2009, 05:19 AM

[ K C G ]
*****
Senior Member
959 posts

Joined: Aug 2006
From: Gombak,Malaysia Status: Its Complicated


let me guess, u r dvd-rom is at the 3rd slot from top..am i right? tongue.gif brows.gif
namiedagreat
post Sep 1 2009, 05:59 AM

Getting Started
**
Junior Member
89 posts

Joined: Dec 2007


nice job bro....

rclxms.gif

really inspire newbie modder like me....^^
monsh
post Sep 1 2009, 07:00 AM

Let's Change The World !
*******
Senior Member
4,196 posts

Joined: Oct 2007


very nice , but wat's d setting on d loop ?
looks a bit odd .
normally ppl do pump>>waterblock>>radiator>>reservoir
how's ur loop ?
TSr4st4m4n
post Sep 1 2009, 12:17 PM

Getting Started
**
Junior Member
156 posts

Joined: Aug 2007
From: Damansara


QUOTE(dro @ Sep 1 2009, 05:02 AM)
how much for the bay converters?
*
RM 5 biggrin.gif

I found them at All IT @ LY. It is near the fans / CPU heatsink.


QUOTE(renesisx @ Sep 1 2009, 05:19 AM)
let me guess, u r dvd-rom is at the 3rd slot from top..am i right? tongue.gif brows.gif
*
You was not allowed to watch the 2nd picture tongue.gif

But my stealthy DVD ROM front looks good, doesn't it ? wink.gif


QUOTE(namiedagreat @ Sep 1 2009, 05:59 AM)
nice job bro....

rclxms.gif

really inspire newbie modder like me....^^
*
Thanks.

QUOTE(monsh @ Sep 1 2009, 07:00 AM)
very nice , but wat's d setting on d loop ?
looks a bit odd .
normally ppl do pump>>waterblock>>radiator>>reservoir
how's ur loop ?
*
res > pump > radiator > GPU > CPU > res

The order of the components doesn't matter temp wise. The only important thing is to have the res before the pump so it doesn't starve. I did my loop so it has the shortest possible tubing and to have the cleanest look possible (ie, no tubing crossing each others, ...)

monsh
post Sep 1 2009, 07:31 PM

Let's Change The World !
*******
Senior Member
4,196 posts

Joined: Oct 2007


haha guess ur right .
mine running res>rad>pump>CPU>NB>res
gain 2-3C bcos diz kinda loop .
but at least it looks neat now .
TSr4st4m4n
post Sep 1 2009, 08:34 PM

Getting Started
**
Junior Member
156 posts

Joined: Aug 2007
From: Damansara


QUOTE(monsh @ Sep 1 2009, 07:31 PM)
haha guess ur right .
mine running res>rad>pump>CPU>NB>res
gain 2-3C bcos diz kinda loop .
but at least it looks neat now .
*
You gained 2-3C ? blink.gif

How was your loop before ?

It's weird because I have been reading a lot on xtremesystems and it seems all agree that the order of the loop doesn't matter ... hmm.gif

It seems from the testing certain members have made, that you may improve by less than 1 degree depending of the order. For example now I have the GPU before the CPU, so if I put the CPU before the GPU, I may gain slightly on the CPU temp but then I will lose on the GPU temp.

Are you sure it is due to the order of the loop ? Have you tried to remount the block before to reorder the loop ? Such difference could be simply because the block was not well seated on the first place smile.gif
Eoma
post Sep 1 2009, 11:02 PM

- ,. -
Group Icon
Elite
4,603 posts

Joined: Jan 2003
From: PJ


Kudos bro, i think you did a very good job; 1st try no less. The black interior sure is sexxay. rclxms.gif
Co-incidentally, you made me want to re-visit my cacing cabling on my TJ07. blush.gif
clawhammer
post Sep 2 2009, 01:38 AM

///M
Group Icon
VIP
8,788 posts

Joined: Jan 2003
From: Kuala Lumpur


Wow Martin, that's a very nice rig and congratulations on the great mod. I think I should buy you Starbucks coffee so you can teach me how to go about it laugh.gif Yes, the order of the loop does not matter and you are also right that the reservoir should go to the pump so the pump will get enough water biggrin.gif

I have to say it's just a wonderful TJ-07 you have there. GODLIKE rig!
monsh
post Sep 2 2009, 02:51 AM

Let's Change The World !
*******
Senior Member
4,196 posts

Joined: Oct 2007


yea dat's y i said .
maybe cause mine goin rad>pump . water flow not high enough to pump to water block >.<"
kakimasam
post Sep 2 2009, 04:12 AM

New Member
*
Junior Member
35 posts

Joined: Sep 2008
From: Kota Damansara


two thumbs up for a very nice DIY modding. will pm u soon if i need any help.hehe
reiben05
post Sep 2 2009, 06:04 AM

American Muscle
******
Senior Member
1,800 posts

Joined: Dec 2008
From: unknown


very nice mod u got there =).. was wandering, where can u get those paints u were using?? what brand/model.. (srry noobie here in painting xD)
clawhammer
post Sep 2 2009, 11:03 AM

///M
Group Icon
VIP
8,788 posts

Joined: Jan 2003
From: Kuala Lumpur


QUOTE(reiben05 @ Sep 2 2009, 06:04 AM)
very nice mod u got there =).. was wandering, where can u get those paints u were using?? what brand/model.. (srry noobie here in painting xD)
*
They are normal "Anchor" branded paints which you can get from Hardware shops around RM6 - 7 per can biggrin.gif
TSr4st4m4n
post Sep 2 2009, 12:44 PM

Getting Started
**
Junior Member
156 posts

Joined: Aug 2007
From: Damansara


QUOTE(clawhammer @ Sep 2 2009, 01:38 AM)
Wow Martin, that's a very nice rig and congratulations on the great mod. I think I should buy you Starbucks coffee so you can teach me how to go about it laugh.gif Yes, the order of the loop does not matter and you are also right that the reservoir should go to the pump so the pump will get enough water biggrin.gif

I have to say it's just a wonderful TJ-07 you have there. GODLIKE rig!
*
It is also thanks to you I could build this rig since you provided all the WC gears smile.gif

Anytime for a Starbuck bro wink.gif


QUOTE(monsh @ Sep 2 2009, 02:51 AM)
yea dat's y i said .
maybe cause mine goin rad>pump . water flow not high enough to pump to water block >.<"
*
It can't be that. The flow of the water is the same throughout the loop because it is a closed loop. Think about a train that would make all around an oval of a stadium. Once you start to move one wagon, all will move together. There can't be any wagon faster than others.

Well okay, it's a lousy comparison, but you get it laugh.gif

QUOTE(kakimasam @ Sep 2 2009, 04:12 AM)
two thumbs up for a very nice DIY modding. will pm u soon if i need any help.hehe
*
Thank smile.gif

Sure no problem, PM me if you have any question and I'll do my best to reply.

QUOTE(reiben05 @ Sep 2 2009, 06:04 AM)
very nice mod u got there =).. was wandering, where can u get those paints u were using?? what brand/model.. (srry noobie here in painting xD)
*
What he says vvvv laugh.gif

QUOTE(clawhammer @ Sep 2 2009, 11:03 AM)
They are normal "Anchor" branded paints which you can get from Hardware shops around RM6 - 7 per can biggrin.gif
*
I have to motivate myself to paint the fans. Bu I have left a bit my work aside for this last 2 weeks, so now I have to kick some tail to get back on track laugh.gif

This post has been edited by r4st4m4n: Sep 2 2009, 12:46 PM
monsh
post Sep 2 2009, 02:13 PM

Let's Change The World !
*******
Senior Member
4,196 posts

Joined: Oct 2007


donno la .
but dat's wat happens .
later will check back things again when got time .
reiben05
post Sep 3 2009, 04:02 PM

American Muscle
******
Senior Member
1,800 posts

Joined: Dec 2008
From: unknown


hmm i just bought some anchor spray.. its metallic black xD.. u think i should get some primer too, couldn't find any just now? also.. maybe i should change the colour =X.. metallic black doesnt give the full black feeling.. but a bit sparklish.. tested on my spare HDD cage haha
TSr4st4m4n
post Sep 3 2009, 09:40 PM

Getting Started
**
Junior Member
156 posts

Joined: Aug 2007
From: Damansara


QUOTE(reiben05 @ Sep 3 2009, 04:02 PM)
hmm i just bought some anchor spray.. its metallic black xD.. u think i should get some primer too, couldn't find any just now? also.. maybe i should change the colour =X.. metallic black doesnt give the full black feeling.. but a bit sparklish.. tested on my spare HDD cage haha
*
Yes, I think it is worth to prime before to paint. The end result may looks the same right after spraying, but with primer, the paint will hold better in the long term. It will also avoid the paint to chip easily.

The anchor primer can looks exactly like the paint. Just look for the no5 with a gray cap. the only difference on the can with the gray paint is the number and a small "P" for primer next to the no 5.

This post has been edited by r4st4m4n: Sep 3 2009, 09:41 PM
Doom
post Sep 4 2009, 10:54 AM

Doom"s here >_<"
*******
Senior Member
4,496 posts

Joined: Apr 2005
From: KL


for me everything is superb apart from the color of the mobo ... it just doesnt blend in well with ur stealth concept .. .. hmm.gif


clawhammer
post Sep 4 2009, 12:14 PM

///M
Group Icon
VIP
8,788 posts

Joined: Jan 2003
From: Kuala Lumpur


QUOTE(Doom @ Sep 4 2009, 10:54 AM)
for me everything is superb apart from the color of the mobo ... it just doesnt blend in well with ur stealth concept .. .. hmm.gif
*
Thread starter might have RM3,000 extra cash to spend on a new mobo and CPU so perhaps he'll get the EVGA Classified (which is black + red) biggrin.gif
monsh
post Sep 4 2009, 04:55 PM

Let's Change The World !
*******
Senior Member
4,196 posts

Joined: Oct 2007


too much money + too much time ?
damn i hope i have those kinda stuffs .
anyway , u shud make a middleplate made of acrylic to cover those holes .
at least it'll make it look better .
reflective ^^,
TSr4st4m4n
post Sep 4 2009, 04:59 PM

Getting Started
**
Junior Member
156 posts

Joined: Aug 2007
From: Damansara


QUOTE(Doom @ Sep 4 2009, 10:54 AM)
for me everything is superb apart from the color of the mobo ... it just doesnt blend in well with ur stealth concept .. .. hmm.gif
*
As I stated in the first post, I am reusing the hardware I already have. I've spent close to RM 4k on WC + case + mod stuff, and my budget being limited, I couldn't spend another RM 3K on an i7 plaftorm ... well except if you want to sponsor me tongue.gif

Besides, I usually go for best bang for the bucks when I purchase hardware. Therefore I will change the mobo and GC to a black PCB when there is a worthy upgrade: probably HD5870 for the GC and not too sure for the mobo. I was thinking maybe i5, but the fact the P55 only offers 2x8 PCI lanes for Xfire/SLI bothers me ... So I might wait for 32nm Westmere next year as I don't feel like spending RM 3k on i7 platform when it won't change a thing for the use I have = gaming mainly.

Maybe I'll buy a 2nd hand x48 mobo with black PCB if I find a good bargain, otherwise it will have to wait.

QUOTE(monsh @ Sep 4 2009, 04:55 PM)
too much money + too much time ?
damn i hope i have those kinda stuffs .


I maybe have a bit too much time, but if I had too much money, I would have change the GC + mobo + CPU + RAM together tongue.gif


QUOTE(monsh @ Sep 4 2009, 04:55 PM)
anyway , u shud make a middleplate made of acrylic to cover those holes .
at least it'll make it look better .
reflective ^^,
*
Funny you mention that as I just received this today:

Attached Image

I was also thinking about acrylic but it is difficult for me as I don't have the right tool to cut it shall I need to make adjustment. So, this sound absorber stuff should look nice and much easier to cut myself smile.gif

This post has been edited by r4st4m4n: Sep 4 2009, 05:10 PM
reiben05
post Sep 5 2009, 01:26 AM

American Muscle
******
Senior Member
1,800 posts

Joined: Dec 2008
From: unknown


how many layers would i need to apply on my DVD-R, mobo tray, case side panel+top+bottom+internal and HDD cage? i have a silverstone logo in frontal part of my case.. how to avoid spraying that xD?? the case i have atm is pretty bad in shape.. scratchess and pretty dirty.. might as well paint it as well, i already sadded it.. and i can't find any primer ._., maybe its sold out.. must wait for re-stock later.. i wonder if i can wait that long..

This post has been edited by reiben05: Sep 5 2009, 01:27 AM
TSr4st4m4n
post Sep 5 2009, 05:43 PM

Getting Started
**
Junior Member
156 posts

Joined: Aug 2007
From: Damansara


QUOTE(reiben05 @ Sep 5 2009, 01:26 AM)
how many layers would i need to apply on my DVD-R, mobo tray, case side panel+top+bottom+internal and HDD cage? i have a silverstone logo in frontal part  of my case.. how to avoid spraying that xD?? the case i have atm is pretty bad in shape.. scratchess and pretty dirty.. might as well paint it as well, i already sadded it.. and i can't find any primer ._., maybe its sold out.. must wait for re-stock later.. i wonder if i can wait that long..
*
The number of layers depends of how you apply the paint.

In my case, I applied 3 coats of primer and about 5-6 coats of paint. But my coats were very thin. When I applied the primer, you could still see a little bit the part through the 2 first coats. That's why i applied a 3rd layer so that the part is covered properly everywhere. For the paint same. The paint was completely covering the part only after the 3rd coat. I generally applied 2 or 3 more after that to ensure of the durability.

If your case as deep scratches, you can apply a 2-3 coats of primer, then sand it again with a high grid sand paper (1500 - 2000). This first primer layers will fill the scratches and give the surfaces flat. Then you can reapply 1-2 coast of primer just to cover any metal that would have been uncovered during the 2nd sanding and then go ahead with the paint.

But if you go for a shiny finish, it is generally advised to sand again between primer and paint. And again sand lightly between the paint and the clear coat. It is particularly worth it for the outside of the case.
monsh
post Sep 5 2009, 07:56 PM

Let's Change The World !
*******
Senior Member
4,196 posts

Joined: Oct 2007


well dat's a sad case bro .
a good acrylic cover would make it look darn nice i would say .
im using it and its quite reflective on d clear surface .
it would definitely look beaut compared to sound insulator >.<"
reiben05
post Sep 5 2009, 11:30 PM

American Muscle
******
Senior Member
1,800 posts

Joined: Dec 2008
From: unknown


user posted image
user posted image
user posted image
user posted image

i dont mean to hijack ur thread.. but this is my first time spraying.. xD.. was thinking.. is this ok??.. i didnt use any primer because it ran out of stock at my place.. only sanding with 2000 grit.. after sanding, wipe the dust/wash it and wipe it out =X..

this pic was taken yesterday.. painted another layer on my mobo tray + side panel..
i guess the paint gave me a reflective layer on the case xD

only did 1 layer on the HDD cage..is this enough?

user posted image

tada xD.. i got bored lolz

This post has been edited by reiben05: Sep 5 2009, 11:33 PM
TSr4st4m4n
post Sep 5 2009, 11:37 PM

Getting Started
**
Junior Member
156 posts

Joined: Aug 2007
From: Damansara


QUOTE(monsh @ Sep 5 2009, 07:56 PM)
well dat's a sad case bro .
a good acrylic cover would make it look darn nice i would say .
im using it and its quite reflective on d clear surface .
it would definitely look beaut compared to sound insulator >.<"
*
Where did you make the acrylic cover ? How did you pierce the holes for the cables and tubing ?


QUOTE(reiben05 @ Sep 5 2009, 11:30 PM)
i dont mean to hijack ur thread.. but this is my first time spraying.. xD.. was thinking.. is this ok??.. i didnt use any primer because it ran out of stock at my place.. only sanding with 2000 grit.. after sanding, wipe the dust/wash it and wipe it out =X..

this pic was taken yesterday.. painted another layer on my mobo tray + side panel..
i guess the paint gave me a reflective layer on the case xD

only did 1 layer on the HDD cage..is this enough?

ada xD.. i got bored lolz
*
Looks good mate smile.gif
reiben05
post Sep 5 2009, 11:58 PM

American Muscle
******
Senior Member
1,800 posts

Joined: Dec 2008
From: unknown


QUOTE(r4st4m4n @ Sep 5 2009, 11:37 PM)
Where did you make the acrylic cover ? How did you pierce the holes for the cables and tubing ?
Looks good mate smile.gif
*
hehe thnx =).. btw may i ask something?..
is it possible to use plexi glass instead of acrylic on the side panel's cases??
and does anyone have any experience in using saw holes xD?? either on metal/acrylic/wood/etcetc
monsh
post Sep 6 2009, 05:31 AM

Let's Change The World !
*******
Senior Member
4,196 posts

Joined: Oct 2007


y not , plexi glass could be used as well ^^,
and yes i used hole saw for d tube ^^,
25mm sized hole saw .
d design is simple can just use drill to drill d edge and use saw to finish d job ^^,
use piler first to make it even and then use sand paper sand it for finishing ^^,

and i use double sided tape to hold it in place ^^,
its simple yet elegant bro .
u shud try it ^^,
TSr4st4m4n
post Sep 6 2009, 02:46 PM

Getting Started
**
Junior Member
156 posts

Joined: Aug 2007
From: Damansara


QUOTE(monsh @ Sep 6 2009, 05:31 AM)
y not , plexi glass could be used as well ^^,
and yes i used hole saw for d tube ^^,
25mm sized hole saw .
d design is simple can just use drill to drill d edge and use saw to finish d job ^^,
use piler first to make it even and then use sand paper sand it for finishing ^^,

and i use double sided tape to hold it in place ^^,
its simple yet elegant bro .
u shud try it ^^,
*
Do you have a picture of your PC with the acrylic plate ?
reiben05
post Sep 6 2009, 06:22 PM

American Muscle
******
Senior Member
1,800 posts

Joined: Dec 2008
From: unknown


biggrin.gif.. but where can i find saw-hole attachement =/ , they dont sell it here.. same as plexi glass.. i only need a small measurement , 380mmx300mm xD
TSr4st4m4n
post Sep 6 2009, 08:10 PM

Getting Started
**
Junior Member
156 posts

Joined: Aug 2007
From: Damansara


QUOTE(reiben05 @ Sep 6 2009, 06:22 PM)
biggrin.gif.. but where can i find saw-hole attachement =/ , they dont sell it here.. same as plexi glass.. i only need a small measurement , 380mmx300mm xD
*
You should be able to find hole saw in pretty much any hardware shop wink.gif
reiben05
post Sep 7 2009, 02:25 AM

American Muscle
******
Senior Member
1,800 posts

Joined: Dec 2008
From: unknown


QUOTE(r4st4m4n @ Sep 6 2009, 08:10 PM)
You should be able to find hole saw in pretty much any hardware shop wink.gif
*
any ideas how much it'll cost ._.
clawhammer
post Sep 7 2009, 02:33 AM

///M
Group Icon
VIP
8,788 posts

Joined: Jan 2003
From: Kuala Lumpur


Wow, everyone's painting their case now eh? biggrin.gif Thanks to Martin the guru with his excellent paint job and mod! I wanted to paint my PC-A77 but it's full of rivets. Darn!
monsh
post Sep 7 2009, 04:16 AM

Let's Change The World !
*******
Senior Member
4,196 posts

Joined: Oct 2007


well im very lazy to take pic .
(a very good reason for not having a decent camera)
haha biggrin.gif
TSr4st4m4n
post Sep 7 2009, 01:49 PM

Getting Started
**
Junior Member
156 posts

Joined: Aug 2007
From: Damansara


QUOTE(reiben05 @ Sep 7 2009, 02:25 AM)
any ideas how much it'll cost ._.
*
Depends of the quality. But generally to cut through aluminum, you don't need good quality as it is rather soft. I think I bought mine around RM 20 - 25.


QUOTE(clawhammer @ Sep 7 2009, 02:33 AM)
Wow, everyone's painting their case now eh? biggrin.gif Thanks to Martin the guru with his excellent paint job and mod! I wanted to paint my PC-A77 but it's full of rivets. Darn!
*
Lol. You can always remove the rivets by drilling them, then putting back new one wink.gif

QUOTE(monsh @ Sep 7 2009, 04:16 AM)
well im very lazy to take pic .
(a very good reason for not having a decent camera)
haha biggrin.gif
*
No camera with your phone ? smile.gif
clawhammer
post Sep 7 2009, 01:55 PM

///M
Group Icon
VIP
8,788 posts

Joined: Jan 2003
From: Kuala Lumpur


It'll take a lot of hard work to remove rivets, spraying then re-installing them but it's certainly something I need to do if I were to paint it black like yours biggrin.gif
monsh
post Sep 7 2009, 05:20 PM

Let's Change The World !
*******
Senior Member
4,196 posts

Joined: Oct 2007


with the blings turned on and a cosy gloomy room i have , d picture becomes very blur , even for a 3.2MP SE phone >.<"
reiben05
post Sep 8 2009, 01:08 PM

American Muscle
******
Senior Member
1,800 posts

Joined: Dec 2008
From: unknown


QUOTE(r4st4m4n @ Sep 7 2009, 01:49 PM)
Depends of the quality. But generally to cut through aluminum, you don't need good quality as it is rather soft. I think I bought mine around RM 20 - 25.
*
just went to the hardware shop.. the largest saw holes i can find is only around 60-80mm.. sigh*.. can't find any plexi glass neither.. how do those people in other extreme forums mod their pc will all sorts of crazy shit anyways =/.. jigsaw cost around 500 sleep.gif for a good one.. 250 for a decent one.. 50 for cap ayam xD
monsh
post Sep 8 2009, 09:10 PM

Let's Change The World !
*******
Senior Member
4,196 posts

Joined: Oct 2007


haha >.<"
i tot u want holesaw for tubing .
for tubing its either 20mm or 25mm .
20mm would be a nice fit ^^,
25mm if u wanna insert rubber for securing sharp edge .
dro
post Sep 8 2009, 10:02 PM

N00B1E5
****
Senior Member
558 posts

Joined: Jun 2006
From: KL Sentral - Segamat


QUOTE(clawhammer @ Sep 7 2009, 02:33 AM)
Wow, everyone's painting their case now eh? biggrin.gif Thanks to Martin the guru with his excellent paint job and mod! I wanted to paint my PC-A77 but it's full of rivets. Darn!
*
tj07 sudahhhhh
reiben05
post Sep 8 2009, 10:04 PM

American Muscle
******
Senior Member
1,800 posts

Joined: Dec 2008
From: unknown


QUOTE(monsh @ Sep 8 2009, 09:10 PM)
haha >.<"
i tot u want holesaw for tubing .
for tubing its either 20mm or 25mm .
20mm would be a nice fit ^^,
25mm if u wanna insert rubber for securing sharp edge .
*
lol sleep.gif.. i saw those modders in mcptech.. all crazy one ._., they got 120mm-140mm saw holes.. made their side panel like mirror..xD
sherren
post Sep 9 2009, 03:58 AM

Retired
******
Senior Member
1,298 posts

Joined: May 2005
From: Penang Island


Very nice work, great to see some great modders keep commin biggrin.gif
monsh
post Sep 9 2009, 05:42 AM

Let's Change The World !
*******
Senior Member
4,196 posts

Joined: Oct 2007


converting side panels into mirror is crazy work i think .
mishandling would cause scratches .
dowan dat dowan dat ~
interior black enuf liao ^^,
TSr4st4m4n
post Sep 12 2009, 07:30 PM

Getting Started
**
Junior Member
156 posts

Joined: Aug 2007
From: Damansara


Probably one of the last update: I finally painted and installed the fans.

Masking the fans was quite time consuming and boring. But I am quite happy with the results. Below are the fans after painting and sleeving.

user posted image

And I've taken few more pictures of the finished rig smile.gif


user posted image
user posted image
user posted image
user posted image
user posted image

This post has been edited by r4st4m4n: Sep 12 2009, 07:30 PM
rublik
post Sep 12 2009, 07:51 PM

Getting Started
**
Junior Member
286 posts

Joined: Jun 2008
From: Muar, Johor


Everything looks superb except for the yellow fan fire and the clusters of cable behind the casing
TSr4st4m4n
post Sep 12 2009, 08:12 PM

Getting Started
**
Junior Member
156 posts

Joined: Aug 2007
From: Damansara


QUOTE(rublik @ Sep 12 2009, 07:51 PM)
Everything looks superb except for the yellow fan fire and the clusters of cable behind the casing
*
Yup, I don't like the cluster of cable too. I have to take a notch out of the middle plate, behind the mobo rail so I can pass the cables directly from the bottom of the case to the back of the mobo tray.
But for that I need a dremel ... :/
rublik
post Sep 12 2009, 09:02 PM

Getting Started
**
Junior Member
286 posts

Joined: Jun 2008
From: Muar, Johor


U can sleeve it white and combine with the other cables
LilRazor
post Sep 12 2009, 10:04 PM

Casual
***
Junior Member
432 posts

Joined: Feb 2009
wow very nice =D but if only ur mobo was black and white it would be perfect =D
TSr4st4m4n
post Sep 12 2009, 11:28 PM

Getting Started
**
Junior Member
156 posts

Joined: Aug 2007
From: Damansara


QUOTE(rublik @ Sep 12 2009, 09:02 PM)
U can sleeve it white and combine with the other cables
*
Oh yeah, the yellow wire is because I forgot to put it nicely after I undervolted the rads fan. tongue.gif

I olso have to sleeve the power switch/led wires of the case.

For those of you who are using the Scythe Slipstream fans, I would recommend to undervolt them at 5V.

I am using the 1600 RPM ones (high) and once hooked up to the rad they were quite noisy. It is actually no the fan itself which is noisy, but because they are pushing lot of CFM, the air through the rad is doing quite some noise. Somemore, with my tj-07, once I closed the case, the grill at the bottom was also adding some noise as the fan are closed to it and again because of the turbulence created.

I am not a silence freak, but the noise was quite loud. Not a problem when gaming, but when just browsing, I don't need that much cooling and that much noise.

So I have undervolted them to 5V (just use a fan header to molex adapter and hook the + of the fan to the 5V of the molex instead of 12V).
Now they are running a 1050 RPM @ 5V and they are a lot (and I mean A LOT) quieter.

I was a bit worry that the temp would be a lot higher (although max CPU@57*c and max GPU@50+*C I had some room to spare). But the temp have actually barely changed. There is max +1*C on the CPU when running P95, and 1-2*C on the GPU when running ATI tool rclxms.gif

Below is some 40min running P95 and ATI tool together for maximum heat generated (I have GPU + CPU on the same loop), rad fans at 5V / 1050 RPM.

user posted image

Very acceptable temperatures versus noise level which is like 10 times better than before. Now, the most noisy component in my rig during gamin are the GC caps which whistle during high load laugh.gif

I have also started to see what it would take to get to 3.6GHz from 3.2GHz. My CPU is a dude, I need to pump 1.54V idle / 1.49V load (CPU-z readings) to pass 30 min OCCT stress test shakehead.gif

But even with the fan at 5V the temps are still acceptable at max 70*C (that's the max I am willing to go anyways). But I am not sure whether I will leave run it at this voltage as this doesn't really change anything in everyday use and everything is running much hotter (including my room laugh.gif).

Now I am thinking to solder a switch to have the possibility to switch the fans from 5V to 12V when gaming. But I am not sure it is very good for the PSU hmm.gif

QUOTE(LilRazor @ Sep 12 2009, 10:04 PM)
wow very nice =D but if only ur mobo was black and white it would be perfect =D
*
I agree. I will definitely buy black PCB GC and mobo for my next upgrades wink.gif
dro
post Sep 12 2009, 11:50 PM

N00B1E5
****
Senior Member
558 posts

Joined: Jun 2006
From: KL Sentral - Segamat


mind showing the behind mobo tray & bottom part of the case where your psu and rad are located? smile.gif

i think the noise is coming from your high density rad fins
but proc + gc max out at 60'C and 50'C is impressive for your setup bro

i trully value your thread as you have stated the place where you got your materials
thumbup.gif thumbup.gif thumbup.gif

::EDIT::

on a lighter note, i think you can still use your gc
just fabricate a PCB cover from acrylic wink.gif

so...which board will complete your B&W color theme bro? nod.gif

This post has been edited by dro: Sep 12 2009, 11:52 PM
TSr4st4m4n
post Sep 13 2009, 12:15 AM

Getting Started
**
Junior Member
156 posts

Joined: Aug 2007
From: Damansara


QUOTE(dro @ Sep 12 2009, 11:50 PM)
mind showing the behind mobo tray & bottom part of the case where your psu and rad are located? smile.gif


Here you go:

user posted image
user posted image


QUOTE(dro @ Sep 12 2009, 11:50 PM)
i think the noise is coming from your high density rad fins
but proc + gc  max out at 60'C and 50'C is impressive for your setup bro

i trully value your thread as you have stated the place where you got your materials
thumbup.gif thumbup.gif thumbup.gif


Yup, the noise was because of the fins as I tested the fan "alone" and they were not noisy at all. But now @5V, it is barely noticeable. smile.gif


QUOTE(dro @ Sep 12 2009, 11:50 PM)
::EDIT::

on a lighter note, i think you can still use your gc
just fabricate a PCB cover from acrylic wink.gif

so...which board will complete your B&W color theme bro?  nod.gif
*
Not a bad idea. Although I would have to make a notch in the acrylic plate as the bottom of the RAM slots is really close to the GC PCB on this board.

Not sure yet for the mobo. As I said in a post earlier, I was maybe thinking of an i5 + P55, but the fact the P55 only allows 2 x PCI-E x8 for crossfire/SLI bothers me. I don't upgrade the mobo often, so I rather take one that is future proof. I could upgrade to i7, but I am not really interested in spending RM3k "only" to get a black PCB mobo. So I might wait for the 32nm westmere supposed to launch Q1 next year or if I find a good bargain for a 2nd hand x48 mobo with black PCB, I might go for it.

clawhammer
post Sep 13 2009, 03:38 PM

///M
Group Icon
VIP
8,788 posts

Joined: Jan 2003
From: Kuala Lumpur


I guess even your back panel cables are well managed there biggrin.gif Mine is like total crap but I really love that white sleeving of yours. Can I spend you coffee and you help me do it for my power supply? laugh.gif
TSr4st4m4n
post Sep 13 2009, 04:44 PM

Getting Started
**
Junior Member
156 posts

Joined: Aug 2007
From: Damansara


QUOTE(clawhammer @ Sep 13 2009, 03:38 PM)
I guess even your back panel cables are well managed there biggrin.gif Mine is like total crap but I really love that white sleeving of yours. Can I spend you coffee and you help me do it for my power supply? laugh.gif
*
Yes, sure smile.gif

The only problem I foresee is we need to have a heatgun or hair dryer for the heatshrink ... I think Starbuck staff will start to freak out if we use it inside the coffe shop laugh.gif

PM me, so we can decide a date and place wink.gif
dro
post Sep 13 2009, 06:15 PM

N00B1E5
****
Senior Member
558 posts

Joined: Jun 2006
From: KL Sentral - Segamat


is it possible to cut a hole route your cables at the space behind the mobo tray?
prolly 5mm X 25mm thumbup.gif

TSr4st4m4n
post Sep 13 2009, 07:09 PM

Getting Started
**
Junior Member
156 posts

Joined: Aug 2007
From: Damansara


QUOTE(dro @ Sep 13 2009, 06:15 PM)
is it possible to cut a hole route your cables at the space behind the mobo tray?
prolly 5mm X 25mm thumbup.gif
*
That's what I want to do but I need a dremel to do it properly ...
shawnlut
post Sep 14 2009, 12:42 AM

±±±±±±
*****
Senior Member
837 posts

Joined: Oct 2007
From: Penang


Very nice paint job done on your casing & fans... thumbup.gif
Fantastic white sleeving... rclxms.gif
Any decision to change your mobo to black color mobo like Asus ROG & etc to suit your color theme ???
TSr4st4m4n
post Sep 14 2009, 08:27 AM

Getting Started
**
Junior Member
156 posts

Joined: Aug 2007
From: Damansara


QUOTE(shawnlut @ Sep 14 2009, 12:42 AM)
Very nice paint job done on your casing & fans...  thumbup.gif
Fantastic white sleeving...  rclxms.gif
Any decision to change your mobo to black color mobo like Asus ROG & etc to suit your color theme ???
*
See the end of my post wink.gif : http://forum.lowyat.net/index.php?showtopi...post&p=28599109
reiben05
post Sep 15 2009, 08:09 PM

American Muscle
******
Senior Member
1,800 posts

Joined: Dec 2008
From: unknown


QUOTE(r4st4m4n @ Sep 13 2009, 12:15 AM)
Here you go:

user posted image
user posted image
Yup, the noise was because of the fins as I tested the fan "alone" and they were not noisy at all. But now @5V, it is barely noticeable. smile.gif
Not a bad idea. Although I would have to make a notch in the acrylic plate as the bottom of the RAM slots is really close to the GC PCB on this board.

Not sure yet for the mobo. As I said in a post earlier, I was maybe thinking of an i5 + P55, but the fact the P55 only allows 2 x PCI-E x8 for crossfire/SLI bothers me. I don't upgrade the mobo often, so I rather take one that is future proof. I could upgrade to i7, but I am not really interested in spending RM3k "only" to get a black PCB mobo. So I might wait for the 32nm westmere supposed to launch Q1 next year or if I find a good bargain for a 2nd hand x48 mobo with black PCB, I might go for it.
*
omg.. D:
chanws8
post Sep 22 2009, 03:45 AM

ИΞШB!Ξ
*******
Senior Member
2,165 posts

Joined: Aug 2006
From: P4ИD0R4


@TS
Wow~~ Your modding is sooo impressive, good job man... rclxms.gif thumbup.gif


How much it charged for the powder coated on mobo tray?

This post has been edited by chanws8: Sep 22 2009, 03:54 AM
TSr4st4m4n
post Sep 22 2009, 01:22 PM

Getting Started
**
Junior Member
156 posts

Joined: Aug 2007
From: Damansara


QUOTE(chanws8 @ Sep 22 2009, 03:45 AM)
@TS
Wow~~ Your modding is sooo impressive, good job man...  rclxms.gif  thumbup.gif
How much it charged for the powder coated on mobo tray?
*
It's not powder coated, it is just painted. It cost me RM 70. The problem was that the mobo tray was chromed and therefore they had to used special chemical for the primer or the pain wouldn't stick.
chanws8
post Sep 22 2009, 06:04 PM

ИΞШB!Ξ
*******
Senior Member
2,165 posts

Joined: Aug 2006
From: P4ИD0R4


QUOTE(r4st4m4n @ Sep 22 2009, 01:22 PM)
It's not powder coated, it is just painted. It cost me RM 70. The problem was that the mobo tray was chromed and therefore they had to used special chemical for the primer or the pain wouldn't stick.
*
The paint will waer off easily on the screw hole surrounding area after screwed? hmm.gif
TSr4st4m4n
post Sep 22 2009, 07:14 PM

Getting Started
**
Junior Member
156 posts

Joined: Aug 2007
From: Damansara


QUOTE(chanws8 @ Sep 22 2009, 06:04 PM)
The paint will waer off easily on the screw hole surrounding area after screwed?  hmm.gif
*
Not easily but yes, it will wear off if you over tighten them. You have to be a bit careful when putting it together. But even if it wears a bit, this is hidden behind the screw (obviously) so it's not a big issue either wink.gif
chanws8
post Sep 22 2009, 08:03 PM

ИΞШB!Ξ
*******
Senior Member
2,165 posts

Joined: Aug 2006
From: P4ИD0R4


QUOTE(r4st4m4n @ Sep 22 2009, 07:14 PM)
Not easily but yes, it will wear off if you over tighten them. You have to be a bit careful when putting it together. But even if it wears a bit, this is hidden behind the screw (obviously) so it's not a big issue either wink.gif
*
Icic...Do u think powder coat will have this kind of wear off problem? hmm.gif
Because i'm planning to do powder coat for my casing...
TSr4st4m4n
post Sep 22 2009, 08:51 PM

Getting Started
**
Junior Member
156 posts

Joined: Aug 2007
From: Damansara


QUOTE(chanws8 @ Sep 22 2009, 08:03 PM)
Icic...Do u think powder coat will have this kind of wear off problem?  hmm.gif
Because i'm planning to do powder coat for my casing...
*
No, I think powder coat should be much stronger. Although i haven't really seen any powder case in real life, so I'm just telling what I heard.
rublik
post Sep 24 2009, 07:51 PM

Getting Started
**
Junior Member
286 posts

Joined: Jun 2008
From: Muar, Johor


QUOTE(chanws8 @ Sep 22 2009, 08:03 PM)
Icic...Do u think powder coat will have this kind of wear off problem?  hmm.gif
Because i'm planning to do powder coat for my casing...
*
Powder coating is for sure better
kInOzAwA
post Oct 7 2009, 02:56 PM

LYN Ninja
*******
Senior Member
2,889 posts

Joined: Jul 2006
From: Intranet & Internet

nice modding Martin... after seeing the picture of yours, it gives me an idea on how should i do for the waterpump... biggrin.gif
TSr4st4m4n
post Oct 16 2009, 06:17 PM

Getting Started
**
Junior Member
156 posts

Joined: Aug 2007
From: Damansara


Update Coming Soon brows.gif

» Click to show Spoiler - click again to hide... «


mfcm
post Oct 17 2009, 01:05 PM

Look at all my stars!!
*******
Senior Member
2,765 posts

Joined: Nov 2005
From: **Hornbills**


wow nice gfx drool.gif fast2 pix it up
TSr4st4m4n
post Oct 17 2009, 04:16 PM

Getting Started
**
Junior Member
156 posts

Joined: Aug 2007
From: Damansara


Well actually there a few of problems I have to solve first.

1) The card is looooooooong and it hits my res so I need to drill new holes in the motherboard tray for the res holders.
2) I need to redo the loop since I have to remove the GPU block from the holder graphic card which implies to purge the loop. I could just do a simple switch of card but
3) I my tube became cloudy since I first installed the loop. I'm not sure to what it is due, either algae or some residue left in the rad. Either way, I have to take apart completely the loop, check inside the blocks, clean it and hook everything again. Another problem is I don't have enough tube left to redo the tubing so I need to buy/order ...

.. the joys of water cooling laugh.gif

So for the moment I have put the card in my old air cooled C2D rig as I wanted to test the card before to remove the stock cooler anyway.

Will post some pix later about the problem 1 and 3 above.
DarkNite
post Oct 18 2009, 03:39 PM

ФĻĐ ИΞШB!Ξ
********
All Stars
11,058 posts

Joined: Jun 2008
Wow VERY nice modded you got there!

No offense but I want to learn, isn't it too many fans since you already water cooled it?
kInOzAwA
post Oct 18 2009, 08:55 PM

LYN Ninja
*******
Senior Member
2,889 posts

Joined: Jul 2006
From: Intranet & Internet

go martin go.. it's a joy to see what you've done to your mod case smile.gif
reiben05
post Oct 18 2009, 11:33 PM

American Muscle
******
Senior Member
1,800 posts

Joined: Dec 2008
From: unknown


damn... lol.. i was about to get that too >.<
kInOzAwA
post Oct 19 2009, 03:17 AM

LYN Ninja
*******
Senior Member
2,889 posts

Joined: Jul 2006
From: Intranet & Internet

QUOTE(reiben05 @ Oct 18 2009, 11:33 PM)
damn... lol..  i was about to get that too >.<
*
if you get that i smell something fishy that ur gc will be put on sale.. hahaha biggrin.gif
TSr4st4m4n
post Oct 19 2009, 04:37 PM

Getting Started
**
Junior Member
156 posts

Joined: Aug 2007
From: Damansara


All right, time for an update unfortunately, the news are not so good.

Here is just a quick summary of all the sh*t that happened laugh.gif

1) The graphic card was too long and hit the res. Therefore I had to drill new holes in the motherboard tray.
2) My loop was full of algae so I had to remove everything, take apart all the blocks and the pump and clean everything.
3) Since I was eager to play with this baby, I hooked it up to my E4300 rig. I've also installed NFS shift to test it in game. It was working but the result were not that great, with FPS dipping in the low 20s at the start of the grid 1680x1050 2xAA, 16xAF and when I check 5870 reviews, I see they get min FPS in the high 30s at 2560x1600 16xCFAA 16x AF hmm.gif
4) I'm thinking, maybe because of the early drivers. I check for the newest driver on AMD website (I was using the one provided on the CD) and find out there is no driver for Win XP (yeah, I know ... I'm kinda die hard XP fan laugh.gif), only for Vista or Win 7. So I'm thinking it may be because the drivers are not optimized for XP.
5) Take out my Velociraptor from my main rig, install Vista on it in my old rig. Install the newest drivers, about the same results in NFS.
6) I'm thinking I have only 2GB of RAM, maybe it is not enough for Vista. One trip to digital mall later I got myself 4GB of Kingston HyperX. Install it, still same ... :/
7) I check CPU usage in NFS, I see both cores almost at 100%. So I take out the Q6600 from my main rig, install it on my old rig. It helps a bit as the min FPS is a bit smoother, but average still about the same, not what I could expect from a 5870. Turns out NFS only use 2 cores anyways, but 4 cores helped as the OS processes could run on the 2 other cores, hence the slightly better min FPS.
8) I'm thinking, maybe the P35 chipset can't handle the 5870, so I rebuild my loop. During the build, I have been thinking about WCing the 5870 with my MCW 60 but there is a small VRM to cool and I don't have a sink that would fit and also I had 2 or 3 weird crashes towards the end.
9) So after spending the best part of my WE to clean and rebuild my loop (CPU only), I finally finishes. Install the card, install the drivers, reboot and then starts to install others drivers on Vista but the PC starts to crash randomly ...
10) I think, it may be due to a bad Vista install (I just switch the HDD from my old to new rig without reinstalling) so I decide to make a clean Vista install. then I reinstall the VGA drivers and there it is even worst. As soon as I log in the desktop freezes, I see many artifacts and the PC crashes every 30 seconds sad.gif
11) Put back the 5870 into my old rig under XP and same, I got crashes and artifacts all over the screen.


Conclusion: after 2 vista installations, switching of CPU, of RAM, of OS, taking apart my WC loop, cleaning it and putting everything back together and countless drivers uninstall and reinstall the card is more or less dead ... cry.gif

I have already brought back the card to the shop (AOnePlus in digital mall), the have tested it with the same results so they are doing a 1-to-1 exchange thumbup.gif
... except that I have to wait until tomorrow since they only had mine in stock but I don't care, as long as I'm getting a new one nod.gif

So I'm still not sure why I was getting bad results in NFS in the first place, but now I think that the card might have been bad from the beginning, except that it was not showing it. After few hours of gaming / usage the problem started to really show until the card is now unusable.

Below is the picture of the rig once I put back everything together (CPU only loop) and before I realized the card was dead:

user posted image


Added on October 19, 2009, 4:39 pm
QUOTE(DarkNite @ Oct 18 2009, 03:39 PM)
Wow VERY nice modded you got there!

No offense but I want to learn, isn't it too many fans since you already water cooled it?
*
Thanks. The fan are there more for the look than functionality. I did feel the top of the case became hot when there was not the 120mm fan at the top. Adding them avoid that the heat gets trapped.

This post has been edited by r4st4m4n: Oct 19 2009, 04:45 PM
soundaddict
post Oct 21 2009, 08:25 PM

Getting Started
**
Junior Member
180 posts

Joined: Apr 2008
From: day light dreamer

mind to show ure hdd cage from the front..

edited..
cos i got no idea how to mount the cage in the bay..

This post has been edited by soundaddict: Oct 21 2009, 08:27 PM
reiben05
post Oct 21 2009, 09:27 PM

American Muscle
******
Senior Member
1,800 posts

Joined: Dec 2008
From: unknown


sucks bro D:, so ur HD5870 died just after u bought it =X??
kInOzAwA
post Oct 21 2009, 10:36 PM

LYN Ninja
*******
Senior Member
2,889 posts

Joined: Jul 2006
From: Intranet & Internet

no worry since TS said he already got 1 to 1 exchange over the GC... biggrin.gif
TSr4st4m4n
post Oct 22 2009, 04:24 PM

Getting Started
**
Junior Member
156 posts

Joined: Aug 2007
From: Damansara


QUOTE(soundaddict @ Oct 21 2009, 08:25 PM)
mind to show ure hdd cage from the front..

edited..
cos i got no idea how to mount the cage in the bay..
*
My HDD are in the 5.25' bay, I bought some adapters and painted them in black (RM 5 for the pair at All IT LY):

user posted image


QUOTE(reiben05 @ Oct 21 2009, 09:27 PM)
sucks bro D:, so ur HD5870 died just after u bought it =X??
*
QUOTE(kInOzAwA @ Oct 21 2009, 10:36 PM)
no worry since TS said he already got 1 to 1 exchange over the GC... biggrin.gif
*
Yup, that's right. Already received the replacement unit. And it works great brows.gif

3dmark Vantage HD 5870@stock - Q6600@3.6GHz

user posted image

Crysis Warhead benchmark:

CODE
DirectX 9.0c ENTHUSIAST 3X @ Map: ambush @ 0 1680 x 1050 AA 0x
==> Framerate [ Min: 23.62 Max: 62.36 Avg: 49.58 ]

DirectX 9.0c ENTHUSIAST 3X @ Map: ambush @ 0 1680 x 1050 AA 2x
==> Framerate [ Min: 24.49 Max: 52.13 Avg: 42.92 ]

DirectX 10 ENTHUSIAST 3X @ Map: ambush @ 0 1680 x 1050 AA 0x
==> Framerate [ Min: 28.99 Max: 49.42 Avg: 40.77 ]

DirectX 10 ENTHUSIAST 3X @ Map: ambush @ 0 1680 x 1050 AA 2x
==> Framerate [ Min: 26.16 Max: 44.04 Avg: 35.58 ]


For the moment, I leave the stock cooler as I have been scared enough by the first one. I'll probably get a full cover block for this card once I feel more comfortable that the card is 100% stable smile.gif

I also want to upgrade my monitor as 1680x1050 is almost too easy for this card laugh.gif

One thing that sucks though is NFS shift. Those idiots @ EA programmed the game so that it runs nicely only on NVIDIA card due to PhysX killing the framerate if you have an ATI mad.gif
My FPS dips below the 20s in some case and there are lot of micro stuttering which kills the game play. I guess a Quad core @ 3.6GHz and a 5870 just doesn't meet the min. requirements for this game rolleyes.gif

This post has been edited by r4st4m4n: Oct 22 2009, 04:31 PM
tjay_tj
post Oct 22 2009, 08:07 PM

retire
******
Senior Member
1,140 posts

Joined: May 2008
guess u had to get the patch for the nfs shift ( doh.gif if u got the ahem version whistling.gif ), the 5870 is the best card ever and should have that kind of performance.
or wait till ati release new driver for the card.
1st working driver arent that great laugh.gif
TSr4st4m4n
post Oct 22 2009, 09:13 PM

Getting Started
**
Junior Member
156 posts

Joined: Aug 2007
From: Damansara


QUOTE(tjay_tj @ Oct 22 2009, 08:07 PM)
guess u had to get the patch for the nfs shift ( doh.gif if u got the ahem version whistling.gif ), the 5870 is the best card ever and should have that kind of performance.
or wait till ati release new driver for the card.
1st working driver arent that great  laugh.gif
*
I haven't tried the patch but from what I've read people have problems with the patch too. I'm gonna try it though, it can't hurt ...

And yeah, I'm eagerly waiting for the first official driver ... 22nd of October and still no 9.10 out sad.gif

But from what I've read, it's not sure whether ATI can fix the problem with driver as it seems to be a problem from the game with the PhysX drivers, which ATI do not have control ... :/


Added on October 23, 2009, 1:03 amActually, after installing the patch, It is much better. Not perfect though as there are still some tracks were there are micro stuttering but at least it is playable now.

This post has been edited by r4st4m4n: Oct 23 2009, 01:03 AM
tjay_tj
post Oct 23 2009, 12:16 PM

retire
******
Senior Member
1,140 posts

Joined: May 2008
good to heard that u're getting better result.
it hurt to buy something so expensive but give shoddy result. smile.gif
TSr4st4m4n
post Oct 23 2009, 01:04 PM

Getting Started
**
Junior Member
156 posts

Joined: Aug 2007
From: Damansara


BTW, thanks for the tip tj wink.gif

And Wooot, Catalyst 9.10 finally out ... trying them right away rclxm9.gif rclxms.gif
tjay_tj
post Oct 23 2009, 01:16 PM

retire
******
Senior Member
1,140 posts

Joined: May 2008
at the right time rclxms.gif
reiben05
post Oct 23 2009, 02:43 PM

American Muscle
******
Senior Member
1,800 posts

Joined: Dec 2008
From: unknown


QUOTE(r4st4m4n @ Oct 22 2009, 04:24 PM)
My HDD are in the 5.25' bay, I bought some adapters and painted them in black (RM 5 for the pair at All IT LY):

user posted image
Yup, that's right. Already received the replacement unit. And it works great  brows.gif

3dmark Vantage HD 5870@stock - Q6600@3.6GHz

user posted image

Crysis Warhead benchmark:

CODE
DirectX 9.0c ENTHUSIAST 3X @ Map: ambush @ 0 1680 x 1050 AA 0x
==> Framerate [ Min: 23.62 Max: 62.36 Avg: 49.58 ]

DirectX 9.0c ENTHUSIAST 3X @ Map: ambush @ 0 1680 x 1050 AA 2x
==> Framerate [ Min: 24.49 Max: 52.13 Avg: 42.92 ]

DirectX 10 ENTHUSIAST 3X @ Map: ambush @ 0 1680 x 1050 AA 0x
==> Framerate [ Min: 28.99 Max: 49.42 Avg: 40.77 ]

DirectX 10 ENTHUSIAST 3X @ Map: ambush @ 0 1680 x 1050 AA 2x
==> Framerate [ Min: 26.16 Max: 44.04 Avg: 35.58 ]


For the moment, I leave the stock cooler as I have been scared enough by the first one. I'll probably get a full cover block for this card once I feel more comfortable that the card is 100% stable smile.gif

I also want to upgrade my monitor as 1680x1050 is almost too easy for this card  laugh.gif

One thing that sucks though is NFS shift. Those idiots @ EA programmed the game so that it runs nicely only on NVIDIA card due to PhysX killing the framerate if you have an ATI  mad.gif
My FPS dips below the 20s in some case and there are lot of micro stuttering which kills the game play. I guess a Quad core @ 3.6GHz and a 5870 just doesn't meet the min. requirements for this game  rolleyes.gif
*
those are nice frames.. i get 35 for crysis D:, bro, maybe u should change to i7 and see how the card performs


Added on October 23, 2009, 2:43 pm
QUOTE(r4st4m4n @ Oct 22 2009, 04:24 PM)
My HDD are in the 5.25' bay, I bought some adapters and painted them in black (RM 5 for the pair at All IT LY):

user posted image
Yup, that's right. Already received the replacement unit. And it works great  brows.gif

3dmark Vantage HD 5870@stock - Q6600@3.6GHz

user posted image

Crysis Warhead benchmark:

CODE
DirectX 9.0c ENTHUSIAST 3X @ Map: ambush @ 0 1680 x 1050 AA 0x
==> Framerate [ Min: 23.62 Max: 62.36 Avg: 49.58 ]

DirectX 9.0c ENTHUSIAST 3X @ Map: ambush @ 0 1680 x 1050 AA 2x
==> Framerate [ Min: 24.49 Max: 52.13 Avg: 42.92 ]

DirectX 10 ENTHUSIAST 3X @ Map: ambush @ 0 1680 x 1050 AA 0x
==> Framerate [ Min: 28.99 Max: 49.42 Avg: 40.77 ]

DirectX 10 ENTHUSIAST 3X @ Map: ambush @ 0 1680 x 1050 AA 2x
==> Framerate [ Min: 26.16 Max: 44.04 Avg: 35.58 ]


For the moment, I leave the stock cooler as I have been scared enough by the first one. I'll probably get a full cover block for this card once I feel more comfortable that the card is 100% stable smile.gif

I also want to upgrade my monitor as 1680x1050 is almost too easy for this card  laugh.gif

One thing that sucks though is NFS shift. Those idiots @ EA programmed the game so that it runs nicely only on NVIDIA card due to PhysX killing the framerate if you have an ATI  mad.gif
My FPS dips below the 20s in some case and there are lot of micro stuttering which kills the game play. I guess a Quad core @ 3.6GHz and a 5870 just doesn't meet the min. requirements for this game  rolleyes.gif
*
those are nice frames.. i get 35 for crysis D:, bro, maybe u should change to i7 and see how the card performs


This post has been edited by reiben05: Oct 23 2009, 02:43 PM
TSr4st4m4n
post Oct 23 2009, 04:04 PM

Getting Started
**
Junior Member
156 posts

Joined: Aug 2007
From: Damansara


QUOTE(reiben05 @ Oct 23 2009, 02:43 PM)
those are nice frames.. i get 35 for crysis D:, bro, maybe u should change to i7 and see how the card performs
*
Well, I don't think it would change something. It would definitely grow my "Vantage e-peen" but I don't care laugh.gif

In game, I would probably not notice any difference, probably only ~0.5FPS in selected games ... I think I'll wait for the 32nm i9 scheduled for Q1 next year for a mobo / CPU upgrade wink.gif


Added on October 23, 2009, 6:06 pmCorrection: NFS SHIFT is still rubbish. It seems to depend of the track. Some I get a steady 60FPS (V-sync on) and some the FPS will dips below 20s and look like a slideshow vmad.gif

This post has been edited by r4st4m4n: Oct 23 2009, 06:07 PM
reiben05
post Oct 23 2009, 09:41 PM

American Muscle
******
Senior Member
1,800 posts

Joined: Dec 2008
From: unknown


QUOTE(r4st4m4n @ Oct 23 2009, 04:04 PM)
Well, I don't think it would change something. It would definitely grow my "Vantage e-peen" but I don't care laugh.gif

In game, I would probably not notice any difference, probably only ~0.5FPS in selected games ... I think I'll wait for the 32nm i9 scheduled for Q1 next year for a mobo / CPU upgrade wink.gif


Added on October 23, 2009, 6:06 pmCorrection: NFS SHIFT is still rubbish. It seems to depend of the track. Some I get a steady 60FPS (V-sync on) and some the FPS will dips below 20s and look like a slideshow  vmad.gif
*
u know theres a hack to enable physx while using an ATI card D:.. maybe u should grab a 9600GT and try it.. it should help if its physx problem
TSr4st4m4n
post Oct 24 2009, 03:46 PM

Getting Started
**
Junior Member
156 posts

Joined: Aug 2007
From: Damansara


QUOTE(reiben05 @ Oct 23 2009, 09:41 PM)
u know theres a hack to enable physx while using an ATI card D:.. maybe u should grab a 9600GT and try it.. it should help if its physx problem
*
I've been thinking about that. But
1) I am not sure it will fix the problem, I need to some research to see if anyone is doing it.
2) Nvidia already try once to block it and although a workaround as been found this time, I am a bit worry that next time Nvidia manage to block it for good.
3) I am hoping that DX11 physics will send Nvidia PhysX to oblivion tongue.gif

Although I'd be interested to see if it works. Anyone who lend me a Nvidia card for testing ? tongue.gif

EDIT: me think I have a Quadro in my work PC which is actually a 8600GT, I wonder if I could use that for physx ... ?


Added on October 24, 2009, 7:48 pmI can't use a Quadro Card for Physx ... However I can fool the system by editing the INF and have the OS think I installed a 8600 GT instead of a Quadro. The problem now is that Vista doesn't allow to use 2 different VGA if they don't use the same drivers => not possible to have ATI and Nvidia working side by side. So now I have to install Win 7 if I want to try the hack ... :/

This post has been edited by r4st4m4n: Oct 24 2009, 07:48 PM
reiben05
post Oct 24 2009, 08:54 PM

American Muscle
******
Senior Member
1,800 posts

Joined: Dec 2008
From: unknown


QUOTE(r4st4m4n @ Oct 24 2009, 03:46 PM)
I've been thinking about that. But
1) I am not sure it will fix the problem, I need to some research to see if anyone is doing it.
2) Nvidia already try once to block it and although a workaround as been found this time, I am a bit worry that next time Nvidia manage to block it for good.
3) I am hoping that DX11 physics will send Nvidia PhysX to oblivion  tongue.gif

Although I'd be interested to see if it works. Anyone who lend me a Nvidia card for testing ? tongue.gif

EDIT: me think I have a Quadro in my work PC which is actually a 8600GT, I wonder if I could use that for physx ... ?


Added on October 24, 2009, 7:48 pmI can't use a Quadro Card for Physx ... However I can fool the system by editing the INF and have the OS think I installed a 8600 GT instead of a Quadro. The problem now is that Vista doesn't allow to use 2 different VGA if they don't use the same drivers => not possible to have ATI and Nvidia working side by side. So now I have to install Win 7 if I want to try the hack ... :/
*
yeah thats the problem.. u need win7 =/.. the 8600gt could do physx btw..
TSr4st4m4n
post Oct 24 2009, 09:43 PM

Getting Started
**
Junior Member
156 posts

Joined: Aug 2007
From: Damansara


QUOTE(reiben05 @ Oct 24 2009, 08:54 PM)
yeah thats the problem.. u need win7 =/.. the 8600gt could do physx btw..
*
I've just finished installing 7 biggrin.gif

I'm installing the drivers and need also to test NFS before the PhysX hack ... will keep you updated wink.gif
TSr4st4m4n
post Oct 24 2009, 11:12 PM

Getting Started
**
Junior Member
156 posts

Joined: Aug 2007
From: Damansara


It seems the PhysX hack work as I am getting 1500pts more in Vantage due to the physics test being a lot better. However, the FPS still sucks in NFS cry.gif

It doesn't seem to even run slightly better than before ... I guess I'll just have to wait for EA games to release a patch for ATI.
reiben05
post Oct 24 2009, 11:57 PM

American Muscle
******
Senior Member
1,800 posts

Joined: Dec 2008
From: unknown


QUOTE(r4st4m4n @ Oct 24 2009, 11:12 PM)
It seems the PhysX hack work as I am getting 1500pts more in Vantage due to the physics test being a lot better. However, the FPS still sucks in NFS cry.gif

It doesn't seem to even run slightly better than before ... I guess I'll just have to wait for EA games to release a patch for ATI.
*
lol.. D: good work on the physx thingy.. hmm can't believe u are still getting fps dips on NFS =_=...
kevink82
post Nov 3 2009, 07:06 PM

Regular
******
Senior Member
1,134 posts

Joined: Apr 2008


nice case mod! for ur hd5870 did u try rename the .exe to grid.exe? its a temp fix atm if u r getting low frame rate. nfs uses software physx its just few games nowdays r "programed" to run faster on nvidia cause they provide funding for the game, ati just sits on its butt and let the game comes out ; ;
TSr4st4m4n
post Nov 3 2009, 08:49 PM

Getting Started
**
Junior Member
156 posts

Joined: Aug 2007
From: Damansara


QUOTE(kevink82 @ Nov 3 2009, 07:06 PM)
nice case mod! for ur hd5870 did u try rename the .exe to grid.exe? its a temp fix atm if u r getting low frame rate. nfs uses software physx its just few games nowdays r "programed" to run faster on nvidia cause they provide funding for the game, ati just sits on its butt and let the game comes out ; ;
*
Thanks for the advice. Unfortunately I tried and it didn't seem to help. I just have to wait and hope EA release a patch ...


This post has been edited by r4st4m4n: Nov 10 2009, 09:28 PM
TSr4st4m4n
post Nov 10 2009, 09:29 PM

Getting Started
**
Junior Member
156 posts

Joined: Aug 2007
From: Damansara


New update brows.gif

user posted image
user posted image
user posted image

Picture of the block installed coming soon as well as results smile.gif
kInOzAwA
post Nov 11 2009, 02:20 PM

LYN Ninja
*******
Senior Member
2,889 posts

Joined: Jul 2006
From: Intranet & Internet

nice full WB martin.. when fit with the compression fittings + 45 degree rotary compression, the looks is just wonderful and neat... biggrin.gif
TSr4st4m4n
post Nov 11 2009, 03:01 PM

Getting Started
**
Junior Member
156 posts

Joined: Aug 2007
From: Damansara


Yup, the compression fittings are next on my WCing shopping list, but I want to upgrade my monitor first.

Here are some pictures of the card in the case. The high flow fitting and metalic worm clamp give a kind of industrial look which is not bad either wink.gif

user posted image
user posted image
user posted image

I haven't had much time to test the OCing. But I did a quick testing @ 1.2V Vgpu and can push the clock to 1015 (gpu) / 1250 (GDDR5) and it seems stable as I could run Vantage and 2x3 loops of Crysis Warhead benchmark + ~1h30 of rfactor. I might be able to push even further at this voltage, But more important I still have plenty of room to push the voltage up to 1.35V rclxms.gif


Win 7 - CCC 9.10 - HD5870@stock - Q6600@3.6GHz
Attached Image


Win 7 - CCC 9.10 - HD5870@1015-1250 - vgpu 1.2V - Q6600@3.6GHz
Attached Image


At 1015/1250 I've already got +1K points in Vantage P score, not bad at all drool.gif

This post has been edited by r4st4m4n: Nov 11 2009, 04:03 PM
clawhammer
post Nov 11 2009, 03:17 PM

///M
Group Icon
VIP
8,788 posts

Joined: Jan 2003
From: Kuala Lumpur


Beautiful setup and overclock there Martin biggrin.gif I like your sleeving a lot laugh.gif
kevink82
post Nov 11 2009, 07:58 PM

Regular
******
Senior Member
1,134 posts

Joined: Apr 2008


Sexy block think mine is the same keke, 9.12 catalyst coming soon tested beta results on hardocp and nfs shift is 20% faster ! Looks like our money is well spent tongue.gif
TSr4st4m4n
post Nov 11 2009, 09:40 PM

Getting Started
**
Junior Member
156 posts

Joined: Aug 2007
From: Damansara


QUOTE(kevink82 @ Nov 11 2009, 07:58 PM)
Sexy block think mine is the same keke, 9.12 catalyst coming soon tested beta results on hardocp and nfs shift is 20% faster ! Looks like our money is well spent tongue.gif
*
Same block ? Do you mind posting your config and some GPU-z screen while loading so I can compare your temp ?

9.12 improves NFS shift by 20% drool.gif I got to download these drivers fast then. I have been waiting for some good NFS drivers for ages ... smile.gif

This post has been edited by r4st4m4n: Nov 11 2009, 09:41 PM
LittleLinnet
post Nov 11 2009, 11:25 PM

Iophobia
*******
Senior Member
3,593 posts

Joined: Feb 2005
From: ***Penang***
i think the only little flaw would be the bottom of the motherboard there
if the header wire and sensor wire is sleeved/hidden then it would be totally perfect

kevink82
post Nov 12 2009, 07:47 AM

Regular
******
Senior Member
1,134 posts

Joined: Apr 2008


keke my blocks still with clawhammer tongue.gif waiting for other parts and burn a huge hole in my pocket cry.gif

TSr4st4m4n
post Nov 12 2009, 09:49 AM

Getting Started
**
Junior Member
156 posts

Joined: Aug 2007
From: Damansara


QUOTE(LittleLinnet @ Nov 11 2009, 11:25 PM)
i think the only little flaw would be the bottom of the motherboard there
if the header wire and sensor wire is sleeved/hidden then it would be totally perfect
*
Yup, me too it's bothering me these ugly wires. I have to get a dremel from reiben to cut a hole in the middle plate to hide all these wires. I think what is putting me off is just that I need to take the whole case apart to do that and I'm kind of lazy / don't have too much time on my hands at the moment. But it will come wink.gif
reiben05
post Nov 12 2009, 11:05 PM

American Muscle
******
Senior Member
1,800 posts

Joined: Dec 2008
From: unknown


btw r4st4m4n, u using EK or BitsPower GPU block for ur hd5870?? does it come with rotaratory fittings??
TSr4st4m4n
post Nov 13 2009, 12:00 AM

Getting Started
**
Junior Member
156 posts

Joined: Aug 2007
From: Damansara


QUOTE(reiben05 @ Nov 12 2009, 11:05 PM)
btw r4st4m4n, u using EK or BitsPower GPU block for ur hd5870?? does it come with rotaratory fittings??
*
It's an EK (FC5870, you can see the pictures of the block few posts earlier) and It doesn't come with any fitting, only 2 plugs. I am using D-tek high flow fitting ATM.
reiben05
post Nov 13 2009, 07:17 AM

American Muscle
******
Senior Member
1,800 posts

Joined: Dec 2008
From: unknown


QUOTE(r4st4m4n @ Nov 13 2009, 12:00 AM)
It's an EK (FC5870, you can see the pictures of the block few posts earlier) and It doesn't come with any fitting, only 2 plugs. I am using D-tek high flow fitting ATM.
*
hmmm im planning on getting a bitspower one, and i think it comes with 90/rotaratory fittings biggrin.gif
TSr4st4m4n
post Nov 14 2009, 02:21 PM

Getting Started
**
Junior Member
156 posts

Joined: Aug 2007
From: Damansara


QUOTE(reiben05 @ Nov 13 2009, 07:17 AM)
hmmm im planning on getting a bitspower one, and i think it comes with 90/rotaratory fittings biggrin.gif
*
I would stay away from bitspower. Their design for the 5850/5870 block sucks:

user posted image
user posted image

And the temps seems to be awful compared to the EK or Swiftech block:

user posted image

You can read the posts regarding bitspower block starting from there: http://www.xtremesystems.org/forums/showpo...7&postcount=395

That's only one user's opinion though, so it may not be true for everybody, but still the internal of the block looks poorly designed ...

You can check how performs the other block few pages earlier in the same thread.

This post has been edited by r4st4m4n: Nov 14 2009, 02:22 PM
rudeCAravan
post Nov 15 2009, 10:12 AM

New Member
*
Junior Member
43 posts

Joined: Nov 2008
boss...mind if asking??? at the page where u put the pic of wc gear that u just bought,,,,,,its the tube sir...making me wondering.....if im going for custom made wc setup,,, u know...there is one kind of tube where it has white stripes...like the one goes to your cooking gas cylinder...can i use that?
kevink82
post Nov 15 2009, 10:23 AM

Regular
******
Senior Member
1,134 posts

Joined: Apr 2008


i think it is best if u use the tubings forumers are selling as they can bend better without kinks.
kInOzAwA
post Nov 15 2009, 10:33 AM

LYN Ninja
*******
Senior Member
2,889 posts

Joined: Jul 2006
From: Intranet & Internet

QUOTE(rudeCAravan @ Nov 15 2009, 10:12 AM)
boss...mind if asking??? at the page where u put the pic of wc gear that u just bought,,,,,,its the tube sir...making me wondering.....if im going for custom made wc setup,,, u know...there is one kind of tube where it has white stripes...like the one goes to your cooking gas cylinder...can i use that?
*
normally these your gas' tube is much thicker and not easily to bend. It's also not as soft as a proper wc tubing used for pc. Later, you'll find that it kinks and not worth at all.. Anyway, what is important to look on its size ratio either it's suit your barb size or not. smile.gif
TSr4st4m4n
post Nov 15 2009, 02:50 PM

Getting Started
**
Junior Member
156 posts

Joined: Aug 2007
From: Damansara


QUOTE(rudeCAravan @ Nov 15 2009, 10:12 AM)
boss...mind if asking??? at the page where u put the pic of wc gear that u just bought,,,,,,its the tube sir...making me wondering.....if im going for custom made wc setup,,, u know...there is one kind of tube where it has white stripes...like the one goes to your cooking gas cylinder...can i use that?
*
QUOTE(kevink82 @ Nov 15 2009, 10:23 AM)
i think it is best if u use the tubings forumers are selling as they can bend better without kinks.
*
QUOTE(kInOzAwA @ Nov 15 2009, 10:33 AM)
normally these your gas' tube is much thicker and not easily to bend. It's also not as soft as a proper wc tubing used for pc. Later, you'll find that it kinks and not worth at all.. Anyway, what is important to look on its size ratio either it's suit your barb size or not.  smile.gif
*
Yup, both are right. If you buy tubing made for WCing, it is much easier to route in your case and their diameter matches the standards used in WCing. They are also tested to make sure that they do not react with the liquid and therefore do not cause any chemical reaction with your block (corrosion, deposit, ...)l.

And frankly, the tube is the cheapest component in the loop. You can find Duralene tubing for RM 10 / foot and you generally needs not more than 8 feet for the loop depending of the case and how your route the tubing. So it is always better to pay a little extra compared to classic gardening hose, and to be sure your tubing won't affect the others expensive components like the blocks and pump. wink.gif
kInOzAwA
post Nov 15 2009, 02:58 PM

LYN Ninja
*******
Senior Member
2,889 posts

Joined: Jul 2006
From: Intranet & Internet

martin, i heard that you're suffered the algae issue inside your tubing when using a spritzer's distilled water. Is it has been resolved yet?
reiben05
post Nov 15 2009, 08:32 PM

American Muscle
******
Senior Member
1,800 posts

Joined: Dec 2008
From: unknown


QUOTE(kevink82 @ Nov 12 2009, 07:47 AM)
keke my blocks still with clawhammer tongue.gif waiting for other parts and burn a huge hole in my pocket  cry.gif
*
o.O what block did u ordered??

QUOTE(r4st4m4n @ Nov 15 2009, 02:50 PM)
Yup, both are right. If you buy tubing made for WCing, it is much easier to route in your case and their diameter matches the standards used in WCing. They are also tested to make sure that they do not react with the liquid and therefore do not cause any chemical reaction with your block (corrosion, deposit, ...)l.

And frankly, the tube is the cheapest component in the loop. You can find Duralene tubing for RM 10 / foot and you generally needs not more than 8 feet for the loop depending of the case and how your route the tubing. So it is always better to pay a little extra compared to classic gardening hose, and to be sure your tubing won't affect the others expensive components like the blocks and pump. wink.gif
*
lol, my uncle told me last time, he bought Tygon tubings from kedai aquarium.. rofl..
TSr4st4m4n
post Nov 15 2009, 08:49 PM

Getting Started
**
Junior Member
156 posts

Joined: Aug 2007
From: Damansara


QUOTE(kInOzAwA @ Nov 15 2009, 02:58 PM)
martin, i heard that you're suffered the algae issue inside your tubing when using a spritzer's distilled water. Is it has been resolved yet?
*
Oh yeah, forgot to post new pix about that.

When I drained my loop for the EK block, I realized that I started to get AGAIN algae in my loop. It was only about 3 weeks since I cleaned my loop and this time I used the anti-algae that bryanyeo87 is selling (DraconisThermoX thinkgy) ... :/

So I changed again the tubing and this time I've put like 5 times the recommended usage (I think around 20+ drops in 1.5L vs the 3-4 drops in 1L recommended ). I am still using the spritzer distilled water but bought new 1.5L bottle. I'm not sure if it mattered but last time I used a 5L bottle (non opened) that I had for few months. Plus this time I made sure to bleed the loop correctly by shaking the case. Last time I didn't shake the case and I had some pockets of air coming out after 1-2 weeks so I had to open the res to top-up. This time I only had to top up the loop once after running the loop few hours and I should no have to open the res again to top up. I hope it will prevent any contamination.

So if my loop get contaminated again, I guess I'll buy some well-known anti-algae product like PT Nuke but I really hope that this time it will be okay ... unsure.gif


reiben05
post Nov 15 2009, 09:03 PM

American Muscle
******
Senior Member
1,800 posts

Joined: Dec 2008
From: unknown


QUOTE(r4st4m4n @ Nov 14 2009, 02:21 PM)
I would stay away from bitspower. Their design for the  5850/5870 block sucks:

user posted image
user posted image

And the temps seems to be awful compared to the EK or Swiftech block:

user posted image

You can read the posts regarding bitspower block starting from there: http://www.xtremesystems.org/forums/showpo...7&postcount=395

That's only one user's opinion though, so it may not be true for everybody, but still the internal of the block looks poorly designed ...

You can check how performs the other block few pages earlier in the same thread.
*
hmm the distance from the core to the heatsink is thicker than the other blocks, and the interior design is a bit bad, thats what the people were commenting..but the bitspower ones look very nice =(.. especially the silver/black sparkled ones and they come free with 90" rotaratory fittings.. hmmm
TSr4st4m4n
post Nov 15 2009, 10:02 PM

Getting Started
**
Junior Member
156 posts

Joined: Aug 2007
From: Damansara


QUOTE(reiben05 @ Nov 15 2009, 09:03 PM)
hmm the distance from the core to the heatsink is thicker than the other blocks, and the interior design is a bit bad, thats what the people were commenting..but the bitspower ones look very nice =(.. especially the silver/black sparkled ones and they come free with 90" rotaratory fittings.. hmmm
*
Agreed it does look nice smile.gif
I personally go for performance first and look in second, that's why I chose EKWB. But you may have other priority wink.gif

To be fair, the temperature are still better than the stock cooler, just not what we could expect from a WB.

EDIT: hmm wait, is he using a water chiller for the VGA ? From the picture, we can see a COOL IT window with a "chiller A" temp. If the water is chilled for the VGA too, then we can say the temperature are really bad ...

This post has been edited by r4st4m4n: Nov 15 2009, 10:05 PM
kInOzAwA
post Nov 15 2009, 10:08 PM

LYN Ninja
*******
Senior Member
2,889 posts

Joined: Jul 2006
From: Intranet & Internet

martin, if the EKWB's full WB performance-wise compared to your previous Swiftech MCW-60 GPU WB, how much the temps difference between each?
TSr4st4m4n
post Nov 15 2009, 10:17 PM

Getting Started
**
Junior Member
156 posts

Joined: Aug 2007
From: Damansara


QUOTE(kInOzAwA @ Nov 15 2009, 10:08 PM)
martin, if the EKWB's full WB performance-wise compared to your previous Swiftech MCW-60 GPU WB, how much the temps difference between each?
*
I can't say as I haven't installed the MCW-60 on the HD 5870. I wanted too, but realized that it would be difficult to stick sinks on the smaller chip on the card. I didn't want to take any risk of overheating so I have waited to receive the full cover WB before to WCed the card.

You can probably expect better temp because you are not getting the heat from the other components, and also the MCW-60 ha better design for cooling (pin matrix) at the expense of more restriction. But these card do require good cooling on the mosfets, particularly when overclocking, and a few degrees less on the GPU generally don't get you a big difference in clocks. So I think overall the full cover WB is a better option. It also avoid the need for a fan blowing on the memory/mosfets.

This post has been edited by r4st4m4n: Nov 15 2009, 10:21 PM
reiben05
post Nov 15 2009, 11:11 PM

American Muscle
******
Senior Member
1,800 posts

Joined: Dec 2008
From: unknown


QUOTE(r4st4m4n @ Nov 15 2009, 10:02 PM)
Agreed it does look nice smile.gif
I personally go for performance first and look in second, that's why I chose EKWB. But you may have other priority wink.gif

To be fair, the temperature are still better than the stock cooler, just not what we could expect from a WB.

EDIT: hmm wait, is he using a water chiller for the VGA ? From the picture, we can see a COOL IT window with a "chiller A" temp. If the water is chilled for the VGA too, then we can say the temperature are really bad ...
*
lol.. its CoolIt alrite sleep.gif"

whats a chiller o_O??
TSr4st4m4n
post Nov 16 2009, 12:06 AM

Getting Started
**
Junior Member
156 posts

Joined: Aug 2007
From: Damansara


QUOTE(reiben05 @ Nov 15 2009, 11:11 PM)
lol.. its CoolIt alrite sleep.gif"

whats a chiller o_O??
*
=> Water chiller. He says in his post "[...]and my water stays at 20C [...]" + in his signature he has "Dual Freezone Elite" which are water chiller. So when taking into consideration that the water is at 20*C, the block is performing pretty badly. Meaning in Malaysia with a classic WC system, the block might perform just on par with the stock cooler ... :/

This post has been edited by r4st4m4n: Nov 16 2009, 12:07 AM
kInOzAwA
post Dec 14 2009, 02:55 AM

LYN Ninja
*******
Senior Member
2,889 posts

Joined: Jul 2006
From: Intranet & Internet

any updates martin? it took so long you didn't post anything here biggrin.gif
TSr4st4m4n
post Dec 14 2009, 12:19 PM

Getting Started
**
Junior Member
156 posts

Joined: Aug 2007
From: Damansara


QUOTE(kInOzAwA @ Dec 14 2009, 02:55 AM)
any updates martin? it took so long you didn't post anything here biggrin.gif
*
Nope, no major update since the water block. I am running happily at 1010/1250 (GPU/mem) with the GPU@1.2V. I think it can run 1020~1025 stable at this voltage but I backed up few Mhz for 24/7 usage. At 1010, It is rock stable even after hours of Crysis/NFS Shift/Dirt 2 rclxms.gif

I've actually wanted to see how far I could go but didn't have much time for that. And 1+Ghz @ 1.2V is probably the sweet spot as the very quick testing I did showed little clock improvement with more volts. wink.gif
lichyetan
post Dec 14 2009, 12:53 PM

*****
*******
Senior Member
2,295 posts

Joined: Jan 2005
From: Penang


one major cons for PT Nuke, if overdose, corrosion might occur...

last time my loop with overdosed PT nuke, effect of corrosion start to occur after few months... so, if using PT nuke, my recommendation is not to overdose...

few drop is poison enough to kill algaes, over dose has other side effects...
kInOzAwA
post Dec 14 2009, 02:01 PM

LYN Ninja
*******
Senior Member
2,889 posts

Joined: Jul 2006
From: Intranet & Internet

QUOTE(r4st4m4n @ Dec 14 2009, 12:19 PM)
Nope, no major update since the water block. I am running happily at 1010/1250 (GPU/mem) with the GPU@1.2V. I think it can run 1020~1025 stable at this voltage but I backed up few Mhz for 24/7 usage. At 1010, It is rock stable even after hours of Crysis/NFS Shift/Dirt 2  rclxms.gif

I've actually wanted to see how far I could go but didn't have much time for that. And 1+Ghz @ 1.2V is probably the sweet spot as the very quick testing I did showed little clock improvement with more volts. wink.gif
*
maybe you can try to make your Heatkiller 3.0 LT to Heatkiller 3.0 LT+. It will drop your temp a bit more... More or less stagnant with the stock Swiftech XT. biggrin.gif
TSr4st4m4n
post Dec 14 2009, 02:28 PM

Getting Started
**
Junior Member
156 posts

Joined: Aug 2007
From: Damansara


QUOTE(lichyetan @ Dec 14 2009, 12:53 PM)
one major cons for PT Nuke, if overdose, corrosion might occur...

last time my loop with overdosed PT nuke, effect of corrosion start to occur after few months... so, if using PT nuke, my recommendation is not to overdose...

few drop is poison enough to kill algaes, over dose has other side effects...
*
Thanks for the advice, i didn't know that.

My tube have again become a bit cloudy, but not as bad as last time. Now I am starting to wonder if it is really algae since my res stays completely clear. So I'm thinking it might be some residue of flux from the rad. Because the tube "absorbs" stuff unlike the res, that might be why I see it on the tube but not on the res. I'm going to wait a little while to see if it settles like that and I'm probably going to switch to white tubing ...


QUOTE(kInOzAwA @ Dec 14 2009, 02:01 PM)
maybe you can try to make your Heatkiller 3.0 LT to Heatkiller 3.0 LT+. It will drop your temp a bit more... More or less stagnant with the stock Swiftech XT.  biggrin.gif
*
Yup, I saw the "LT+" trick on xtremesystems. But I'm quite happy with my temp so I don't think it is worth it because of the added restriction which might defeat the gain from the mod. smile.gif
clawhammer
post Dec 17 2009, 12:07 PM

///M
Group Icon
VIP
8,788 posts

Joined: Jan 2003
From: Kuala Lumpur


Yeah, some white/black tubings with compression fittings is what you'll need biggrin.gif
lichyetan
post Dec 17 2009, 11:54 PM

*****
*******
Senior Member
2,295 posts

Joined: Jan 2005
From: Penang


QUOTE(r4st4m4n @ Dec 14 2009, 02:28 PM)
Thanks for the advice, i didn't know that.

My tube have again become a bit cloudy, but not as bad as last time. Now I am starting to wonder if it is really algae since my res stays completely clear. So I'm thinking it might be some residue of flux from the rad. Because the tube "absorbs" stuff unlike the res, that might be why I see it on the tube but not on the res. I'm going to wait a little while to see if it settles like that and I'm probably going to switch to white tubing ...
Yup, I saw the "LT+" trick on xtremesystems. But I'm quite happy with my temp so I don't think it is worth it because of the added restriction which might defeat the gain from the mod. smile.gif
*
tht's one of the reason i use coolants... if i use clear tubes, i cheat myself acting as i dunno my tubing is clouded since the coolants color cover up the cloudings already...

only problem is when drain the loop, it the time to face the truth... doh.gif
kevink82
post Dec 19 2009, 01:38 PM

Regular
******
Senior Member
1,134 posts

Joined: Apr 2008


i still like ur rig the best and i might upgrade to a tj07 lol, did u get 9.12 catalyst? it fix a few problems and runs very smooth for me.
TSr4st4m4n
post Dec 19 2009, 03:16 PM

Getting Started
**
Junior Member
156 posts

Joined: Aug 2007
From: Damansara


QUOTE(kevink82 @ Dec 19 2009, 01:38 PM)
i still like ur rig the best and i might upgrade to a tj07 lol, did u get 9.12 catalyst? it fix a few problems and runs very smooth for me.
*
Thanks smile.gif

I'd say go for it. The TJ-07 is definitively worth the money.

My NFS shift issue has been fixed with the 1.2 patch already. And I just realized yesterday the 9.12 were out so I haven't really tested them yet wink.gif
clawhammer
post Dec 19 2009, 03:23 PM

///M
Group Icon
VIP
8,788 posts

Joined: Jan 2003
From: Kuala Lumpur


The problem is the newer version of TJ-07 seems to have a big hole on the mobo tray and even after you've mounted the board, there's still some extra hole visible. I wonder why is that? sad.gif
kevink82
post Dec 19 2009, 03:52 PM

Regular
******
Senior Member
1,134 posts

Joined: Apr 2008


maybe install a black steel board to cover the hole? keke idk but ill probably left it silver this time i find i like shinny alu.
tesla_rage
post Dec 19 2009, 05:13 PM

Gundam 00
******
Senior Member
1,357 posts

Joined: Jan 2003
From: Bukit Jelutong, Shah Alam


QUOTE(clawhammer @ Dec 19 2009, 03:23 PM)
The problem is the newer version of TJ-07 seems to have a big hole on the mobo tray and even after you've mounted the board, there's still some extra hole visible. I wonder why is that? sad.gif
*
Its for XEON bracket smile.gif Its stated in the manual.

The hole wont be so visible when you have put on the side panel on the other side. The side panel is completely black.
kInOzAwA
post Dec 19 2009, 06:46 PM

LYN Ninja
*******
Senior Member
2,889 posts

Joined: Jul 2006
From: Intranet & Internet

QUOTE(kevink82 @ Dec 19 2009, 01:38 PM)
i still like ur rig the best and i might upgrade to a tj07 lol, did u get 9.12 catalyst? it fix a few problems and runs very smooth for me.
*
hahahah same here.. will going to tj07 because of expandable quad radiator... laugh.gif
then did another version of million dollar pc on 'em. rclxms.gif

QUOTE(r4st4m4n @ Dec 19 2009, 03:16 PM)
Thanks smile.gif

I'd say go for it. The TJ-07 is definitively worth the money.

My NFS shift issue has been fixed with the 1.2 patch already. And I just realized yesterday the 9.12 were out so I haven't really tested them yet wink.gif
*
absolutely worth the money and it looks good when did like what you did thumbup.gif


QUOTE(clawhammer @ Dec 19 2009, 03:23 PM)
The problem is the newer version of TJ-07 seems to have a big hole on the mobo tray and even after you've mounted the board, there's still some extra hole visible. I wonder why is that? sad.gif
*
convert to BTX then... wub.gif sweat.gif
mfcm
post Dec 19 2009, 06:52 PM

Look at all my stars!!
*******
Senior Member
2,765 posts

Joined: Nov 2005
From: **Hornbills**


QUOTE(kInOzAwA @ Dec 19 2009, 06:46 PM)
hahahah same here.. will going to tj07 because of expandable quad radiator... laugh.gif
then did another version of million dollar pc on 'em.  rclxms.gif
absolutely worth the money and it looks good when did like what you did  thumbup.gif
convert to BTX then...  wub.gif  sweat.gif
*
i dont think if convert to BTX will solve the prob..coz the hole on the mobo tray..when convert to BTX u jus change the mobo tray upsidedown..the hole still there tongue.gif visible even after mount the mobo
kevink82
post Dec 19 2009, 06:53 PM

Regular
******
Senior Member
1,134 posts

Joined: Apr 2008


damn those btx for tj-07 is 69 usd + shipping to malaysia ; ; can buy other stuff already....... that is if it arrives in 1 piece and unscratch.
mfcm
post Dec 19 2009, 06:57 PM

Look at all my stars!!
*******
Senior Member
2,765 posts

Joined: Nov 2005
From: **Hornbills**


QUOTE(kevink82 @ Dec 19 2009, 06:53 PM)
damn those btx for tj-07 is 69 usd + shipping to malaysia ; ; can buy other stuff already....... that is if it arrives in 1 piece and unscratch.
*
hehe DIY la bro..FOC tongue.gif how?can look ianho worklog brows.gif curi idea cikit laugh.gif
kInOzAwA
post Dec 19 2009, 07:27 PM

LYN Ninja
*******
Senior Member
2,889 posts

Joined: Jul 2006
From: Intranet & Internet

QUOTE(mfcm @ Dec 19 2009, 06:52 PM)
i dont think if convert to BTX will solve the prob..coz the hole on the mobo tray..when convert to BTX u jus change the mobo tray upsidedown..the hole still there tongue.gif visible even after mount the mobo
*
just cover something there with so-called sound absorber tongue.gif
clawhammer
post Dec 20 2009, 12:12 AM

///M
Group Icon
VIP
8,788 posts

Joined: Jan 2003
From: Kuala Lumpur


QUOTE(tesla_rage @ Dec 19 2009, 05:13 PM)
Its for XEON bracket smile.gif Its stated in the manual.

The hole wont be so visible when you have put on the side panel on the other side. The side panel is completely black.
*
Maybe you can sell to me at RM700 since it has a bigger hole which spoils it a little? biggrin.gif


Change to:
| Lo-Fi Version
0.1174sec    0.61    6 queries    GZIP Disabled
Time is now: 1st December 2025 - 09:56 AM