Welcome Guest ( Log In | Register )

Bump Topic Topic Closed RSS Feed

Outline · [ Standard ] · Linear+

 Car Detailing, How I did mine....

views
     
tomatoes
post Dec 22 2010, 08:20 PM

New Member
*
Junior Member
4 posts

Joined: Aug 2007
QUOTE(m|ng @ Dec 22 2010, 03:37 PM)
Thanks for the tips guys.
btw, any torch light that is effective in looking for swirls?

I dont have space for a halogen light  sweat.gif

KC did mention that LED torches are pretty effective.

Anyone tried Eveready Dolphin lights?
*
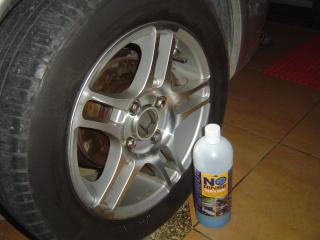
I think u better go buy the cheap rechargeable china made led torch light it can help u look for the hologram more easily, anyway this is just my opinion and it works for me.

tomatoes
post Dec 22 2010, 11:07 PM

New Member
*
Junior Member
4 posts

Joined: Aug 2007
bro KC do u have the opti bond tyre gel and the optimum carwash, can u pm me about the price. thx

tomatoes
post Dec 23 2010, 09:38 PM

New Member
*
Junior Member
4 posts

Joined: Aug 2007
just want to share some things with ur guys, i have a bosch ROB and the velco plate is already peel off and make its unusable with excessive of vibration.
Attached Image

mean while in order to change the plate u have to prepare the hex key set
Attached Image

unscrew the 4 screw that hold the plate to the ROB with hex key
Attached Image


once the plate is change and fasten the screw and basically the reborn of the ROB is complete
Attached Image

thx.....

This post has been edited by tomatoes: Dec 23 2010, 09:49 PM
tomatoes
post Dec 24 2010, 08:39 AM

New Member
*
Junior Member
4 posts

Joined: Aug 2007
QUOTE(msk @ Dec 24 2010, 06:23 AM)
Wow. great job, you really hardcore, wonder can change to bigger smaller plates? biggrin.gif

WTS: Premium car detailing products http://forum.lowyat.net/index.php?showtopic=1562657&hl=
*
this one i dont know but it is not that tough to change the original plate.
tomatoes
post Dec 24 2010, 09:00 PM

New Member
*
Junior Member
4 posts

Joined: Aug 2007
at here i want to thanks bro KC for bringing me the most easier way to wash the car and below is just the benefit and ease of use of the ONR, here is just a small write up for the rims cleaning process with ONR.
Attached Image
This is a ten year old car and this brake dust is accumulate from 3 weeks drive. As u can see the rims is cover with brake dust badly until the original colour is changed from silver to brown black.

my method of cleaning is very easy, first i will spray some premix ONR solution (1 Ounces to 1 Gallon of water) from spray bottle, then wipe with a clean cloth, here a comparison picture.
Attached Image

The cleaning process of all the wheels just took me around 10 minutes and my car park is free from wet and most important it is the rims clean in a safe way ( although it is not important for me my rims is in bad shape)
Attached Image

Here is the cloth after the rims wash, and all the brake dust is stick to the cloth and i just use some car wash cleaning solution to clean the cloth.Attached Image

This post has been edited by tomatoes: Dec 24 2010, 09:20 PM
tomatoes
post Dec 25 2010, 06:27 PM

New Member
*
Junior Member
4 posts

Joined: Aug 2007
QUOTE(prempenang @ Dec 25 2010, 06:25 PM)
any where can buy the lc pad in penang?
any reco on where to buy the bossch rob in penang?
*
u can find bro MSK i think he can help u
tomatoes
post Dec 27 2010, 10:16 PM

New Member
*
Junior Member
4 posts

Joined: Aug 2007
During yesterday free time, i have spend some of the time to do the scratch touch up for my family car. The tools needed for this job are:
Sanding paper
ONR mixture for
rubbing compound
the touch up paint
the wax & silicone removal

this is the picture of the damage
Attached Image
Attached Image

as shown in the picture the scar already fill with the touch up paint by some other fellow and i am not satisfy with it and today i will try DIY.

First wash the area with ONR mixture and then i wet sand the affected area by using 1000G, 2500G,3000G with ONR ad lube.

Attached Image

then wipe dry and remove the sanding marks by some rubbing compound. after the sanding marks is remove then i use the Wax & silicone removal to wipe the area clean the area, the purpose of using this is to ensure that the surface is well prepare for the touch up paint to bond better.
Attached Image
this is the picture that the touch up paint is applied, i will leave it cure for one day then i will compound again this is the after picture
Attached Image

result:
although it is not totally like new but i am happy that the diy is better then the job done others.
tomatoes
post Dec 28 2010, 02:23 PM

New Member
*
Junior Member
4 posts

Joined: Aug 2007
thx for ur advice kc i will try to use ur ways next time on the other side of the wheel arch

This post has been edited by tomatoes: Dec 28 2010, 02:24 PM
tomatoes
post Jan 22 2011, 07:55 AM

New Member
*
Junior Member
4 posts

Joined: Aug 2007
it hurt deep i think it is very hard to cure it for 100% u can make it less obvious by compounding it or wetsanding then polish but i think u need to apply touch up paint.
tomatoes
post Mar 3 2011, 10:13 PM

New Member
*
Junior Member
4 posts

Joined: Aug 2007
QUOTE(DeanKueh @ Feb 26 2011, 08:15 PM)
I read on the internet saying that we can use WD-40 to remove the tar stains from the car.. will it damage the paint on the car? i know it will remove the wax though.
*
it is hard to say whether it is harmful or not but i did not use the wd40, imo i think the safer way is to use the clay, but for the wheel arch and lower door area i use the osren tar spot removal, this product clean all the stubborn tar spot

This post has been edited by tomatoes: Mar 3 2011, 10:14 PM

Topic ClosedOptions
 

Change to:
| Lo-Fi Version
0.0217sec    0.57    7 queries    GZIP Disabled
Time is now: 12th December 2025 - 06:28 AM