

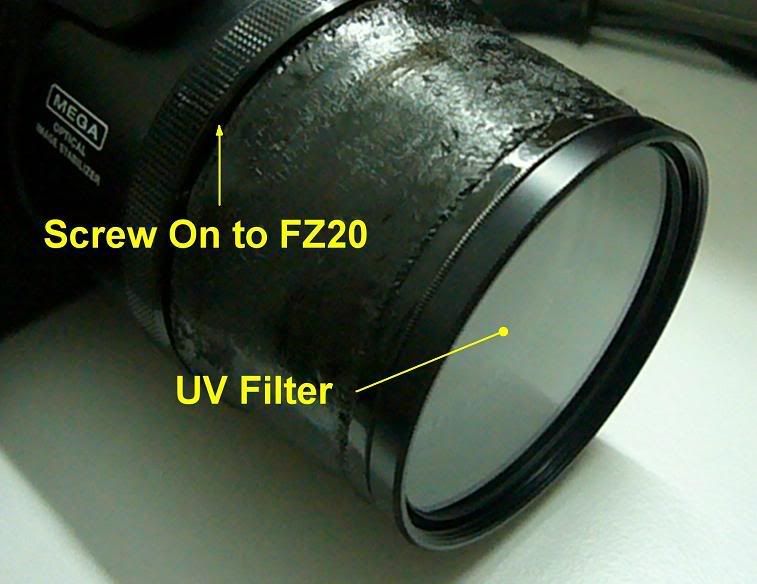
Here is the final thing:
This post has been edited by xxx2299: Jan 12 2008, 08:01 AM
DIY: Panasonic Lumix FZ20, 62mm Filter Adaptor
|
|
 Jan 12 2008, 07:59 AM, updated 18y ago Jan 12 2008, 07:59 AM, updated 18y ago
Show posts by this member only | Post
#1
|

Junior Member
169 posts Joined: Oct 2005 |
Because i miss the boat, i could not get a commercial adaptor, so decided to DIY myself.
Here is the final thing: This post has been edited by xxx2299: Jan 12 2008, 08:01 AM |
|
|
|
|
|
Jan 12 2008, 07:59 AM
Show posts by this member only | Post
#2
|
|
Junior Member
169 posts Joined: Oct 2005 |
material:
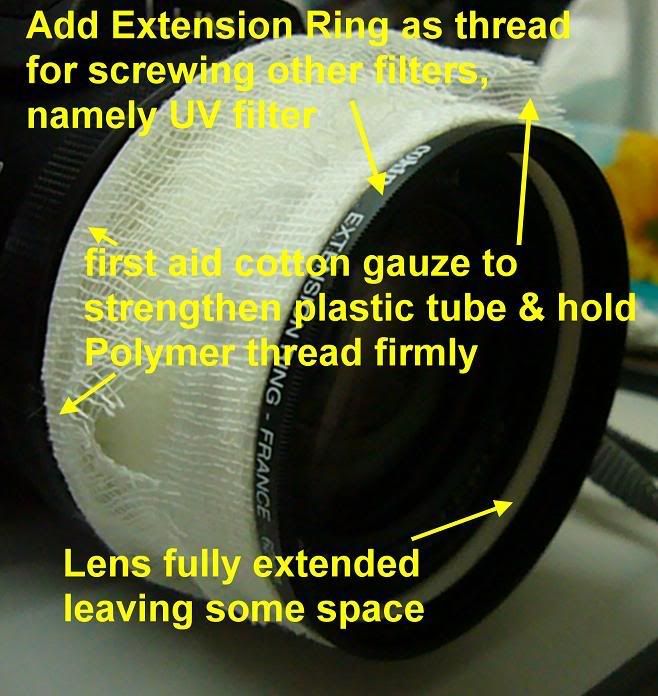
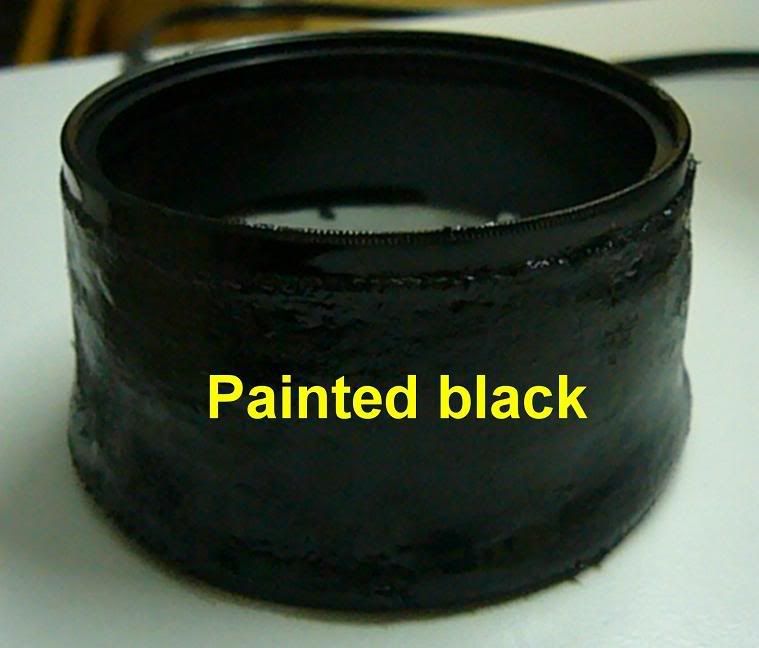
1 x Selley polymer repair system 1 x black paint (spray can) 1 x super glue (optional) 1 x 2 ton epoxy (optional) some first aid cotton gauze roll some grease some tape and not forgetting 62mm UV filter DIY steps: 1. use black paint spray can cover as adaptor drum (just nice at 61mm diameter to fit nicely on the outer lens body of FZ20) 2. cut away the top part of spray can cover, leaving a hollow cylinder (about 25mm long) 3. stick tape on the front part of manual focus ring (the part with 3 screws exposed after removing the front adaptor ring cover). apply a thick layer about 0.5mm (to prevent polymer sticking on to this surface) 4. apply some grease on the tape and ring thread on the FZ20 body (to prevent polymer sticking on to these surface) 5. place hollow spray can cylinder onto the FZ20 body just before covering the thread on the body 6. apply Selley polymer repair system along the FZ20 body thread and spray can cylinder (this will become the threaded ring to later screw and unscrew the adaptor) 7. after about 20~30 minutes of apply Selley polymer repair system, the polymer becomes quite hard but still can be cut by a blade. cut the polymer ring in 2 equal parts to so as to remove it from the FZ20 body. (I find it almost impossible to remove it by unscrewing) 8. put the 2 part polymer ring back together with the spray can cylinder and screw it back to the FZ20, then stick the 3 parts together with tape temporarily. 9. leave the thing to cure for 24 hours. 10. apply super glue/2 ton epoxy to permanently stick the 2 part polymer ring and the spray can cylinder together. (be careful to make sure the cylinder is straight out, not slunting to one side) 11. (do this step if you think the plastic spray can cylinder is too soft) rough the outer surface of the spray can cylinder. Cover the ourter surface of spray can cylinder with cotton gauze and apply 2 ton epoxy over it. leave it cure for 24 hours 12. spray the entire adaptor black in and out. 13. finally, glue the UV filter permanently onto the spray can cylinder (or use the extra Selley polymer repair system to make another thread for the filter but very difficult) |
|
|
Jan 12 2008, 08:03 AM
Show posts by this member only | Post
#3
|
|
Junior Member
169 posts Joined: Oct 2005 |
just some progress photos:
1. 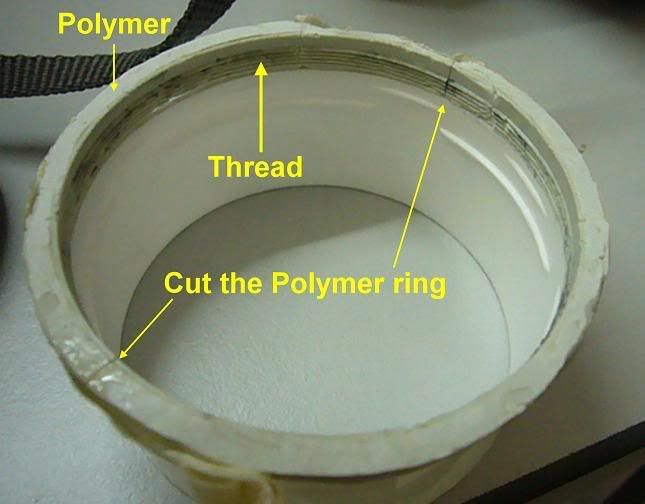 |
|
|
Jan 12 2008, 08:04 AM
Show posts by this member only | Post
#4
|
|
Junior Member
169 posts Joined: Oct 2005 |
2.
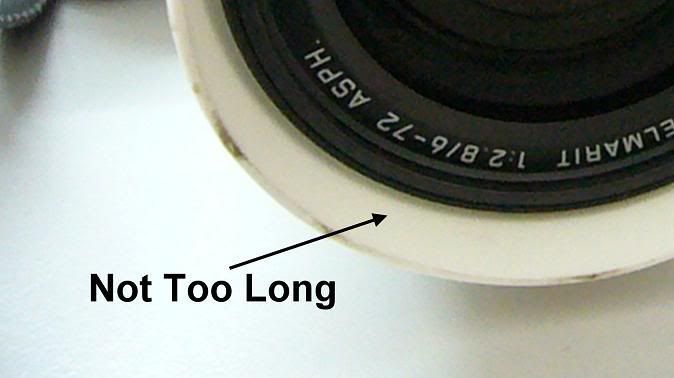 3.  |
|
|
Jan 12 2008, 08:05 AM
Show posts by this member only | Post
#5
|
|
Junior Member
169 posts Joined: Oct 2005 |
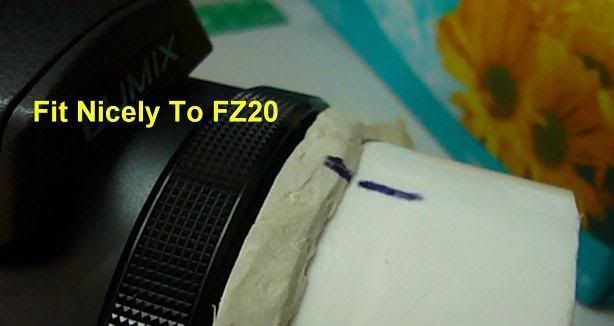
4.
 5.  |
|
|
Jan 12 2008, 08:06 AM
Show posts by this member only | Post
#6
|
|
Junior Member
169 posts Joined: Oct 2005 |
6.
 7. |
|
|
|
|
|
Jan 12 2008, 08:23 AM
Show posts by this member only | Post
#7
|

Senior Member
1,659 posts Joined: Feb 2005 |
-Deleted- ...
This post has been edited by vincent_ng86: Jan 12 2008, 08:24 AM |
|
|
Jan 12 2008, 09:05 AM
Show posts by this member only | Post
#8
|

Elite
4,744 posts Joined: Jan 2003 From: Kuala Lumpur |
Mods should pin this. Good read, good tutorial
 |
|
|
Jan 12 2008, 09:07 AM
Show posts by this member only | Post
#9
|

Junior Member
252 posts Joined: Jul 2006 From: UK Bristol |
dam pro man...
|
|
|
Jan 12 2008, 11:47 AM
|

Senior Member
1,298 posts Joined: May 2005 From: Penang Island |
One Word : GANAS work man
 really save $$ , it will look better if u can get the outer part smoothly surface  |
|
|
Jan 13 2008, 10:51 AM
|
|
Junior Member
169 posts Joined: Oct 2005 |
Thank you all for your viewing & support.
if got time, will: - smooth out the surface - shorten the length of the adaptor |
|
|
Feb 15 2008, 11:27 AM
|

Junior Member
254 posts Joined: Jan 2003 From: Selangor... |
omg. you got real good skill ^^
if you do read chinese check this up. the famous mr chan customized fz10/fz20 lens adapter. http://vipweb.url.com.tw/mschen3/fz10fz20.htm or in english http://www.cs.mtu.edu/~shene/DigiCam/User-...an-Adapter.html |
|
|
May 16 2008, 09:54 AM
|

Junior Member
70 posts Joined: Mar 2006 From: Kulim, Kedah |
if u touch up a bit will be like ori one...
nice bro..... |
|
|
May 21 2008, 11:49 PM
|
|
Junior Member
254 posts Joined: Jan 2003 From: Selangor... |
revisit your thread to admire your work
 just for argument sake.... it is fine with filter, but when u use additional tele or wide lens i think it is hard to get it optically-centred. |
|
|
May 23 2008, 06:22 PM
|
|
Junior Member
169 posts Joined: Oct 2005 |
Yup, I guarantee it will not be optically-centred.
but, i hv got to live with it; since i only use UV filter and very very seldom +4 closeup. I tried to smooth out the surface the other day, but no improvement. may need to put on thinking cap later ... when i got the time... |
| Change to: |  0.0171sec 0.0171sec
 0.34 0.34
 5 queries 5 queries
 GZIP Disabled GZIP Disabled
Time is now: 25th November 2025 - 03:55 PM |
 Quote
Quote