

 May 6 2023, 01:24 AM, updated 3y ago

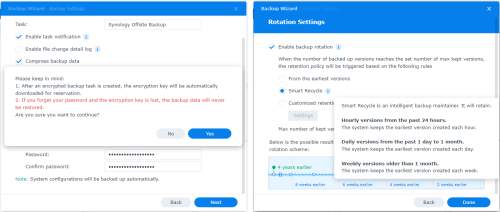
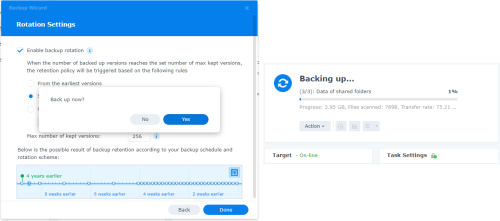
This is the review of DS423+ and I also going to set it as a remote off-site backup, or vault as Synology named it, at my relatives house and they also will use it as their cloud storage and also connect back to my DS1522+ as their remote off-site backup. If you and someone else also using Synology NAS, both of you can use each other storage space as off-site backup and there's also security in place that will not let the other party from accessing your data without the password that you set for the backup. It is also an incremental backup so only the new changes made will need to upload into the off-site vault, no need to upload the entire backup every time. Remember, having your data that can be edited or deleted is not a backup, that's a storage. A proper backup strategy is such as 3-2-1 backup rules, in addition to your storage data you also have other 2 backup copies and one of it is stored off-site.
HARDWARE
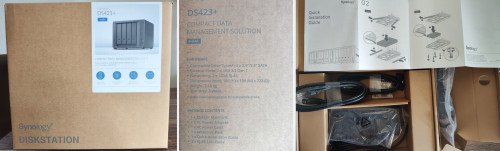
As usual with Synology packaging, it comes in brown box and the white sticker indicating the model. On the side there are printed information of this NAS hardware and the package content. Inside, beside the NAS itself, there's power adapter and it's cable, 2 CAT5e cables, screws, keys to lock drive tray and Quick Installation Guide. Same stuff with most of their other NAS.
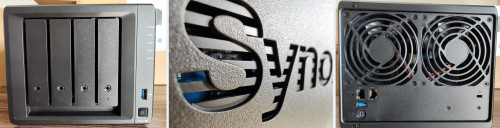
The NAS itself, it's look exactly the same with their other plus series 4 bays models, the only indicator is the model number below the power button. Also below each drive tray there's number indicating the drive slot, easy to miss as it was rather inconspicuous. There's a USB port in the front for easy file transfer with external drive. On the right cutout at the Synology name, can see the motherboard inside, such design will give good airflow.
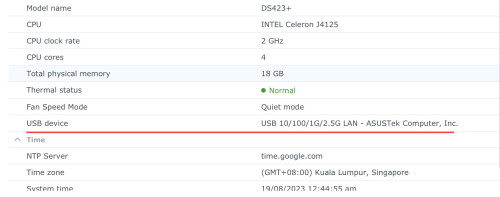
At the back, 2 LAN ports with Gigabit speed each, additional USB port, power in and Kensington lock. The difference with DS920+ is there's no eSATA port that is used to connect to expansion unit.
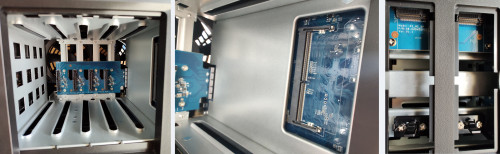
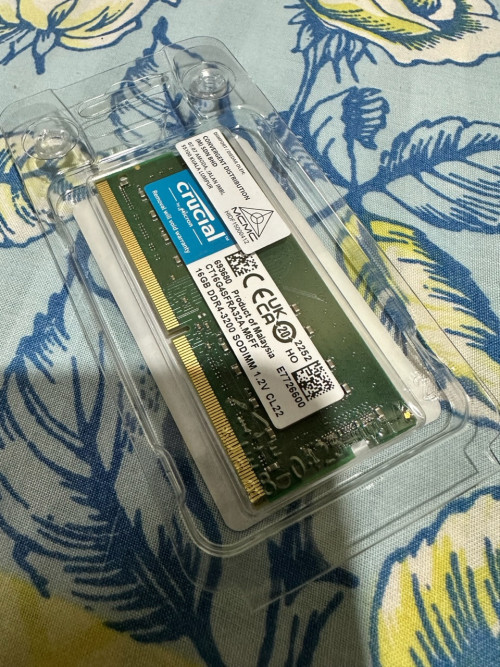
Inside the NAS, same design with other 4 bays model, there's SATA port with power, single empty DDR4 slot for expandability, the other 2GB RAM is soldered. Bottom of the NAS there's 2 slots for adding m.2 NVME SSD. As with DS923+ model, the m.2 SSD not only limited for use as cache, it can also be used as storage pool now. But I'm not sure if it's still only accept Synology own m.2 SSD for storage pool. It also can't store the OS in m.2 pool, it need to have at least 1 SATA HDD/SSD drive to install the OS and boot from it.
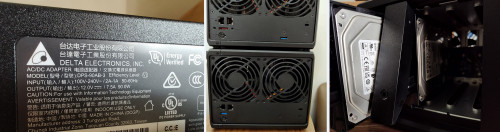
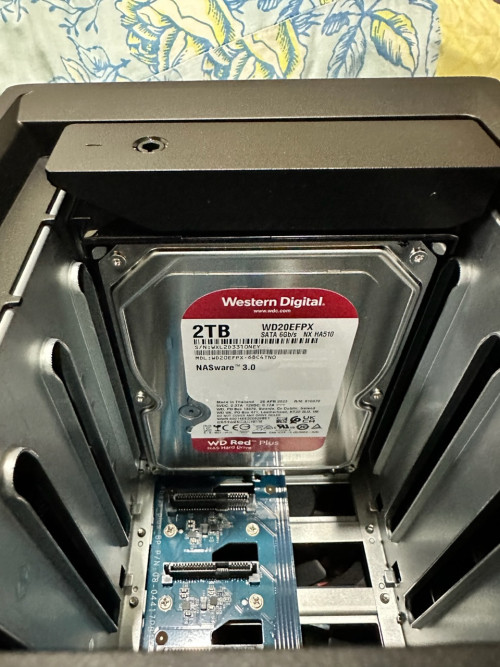
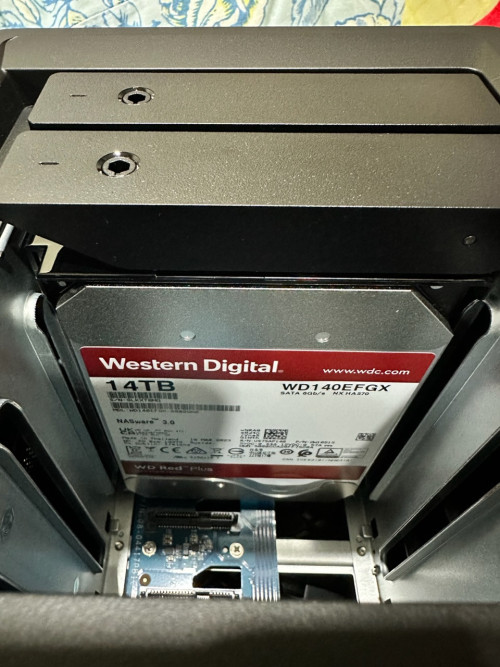
The power adapter output is slightly lower than the one that comes with DS920+, 90w vs 100w. Compared to DS920+, there's no eSATA port and the USB port placement is different. For now in goes the 2 4TB HDD that I will configure to use as SHR RAID, giving me 4TB of space with redundancy. In future by adding 2 more 4TB HDD, it will have a total of 12TB space with redundancy and no need to change the RAID type next time. Whereas if I use RAID-1 now, in future when I add 2 more 4TB HDD and want to have 12TB space, I need to wipe the RAID-1 and all the data in it before can create RAID-5 with the 4 HDD.
INITIALIZING
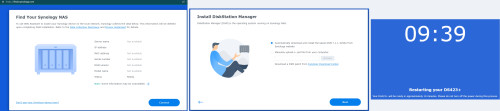
Once the NAS has boot up and connected to the network, I find it by going to https://finds.synology.com and the browser will detect the new NAS. Press Connect and it will ask to automatically download and install the latest DSM or manually upload from computer. I choose download option and in few minutes it finish download and start the installation process. It took about 10 minutes lo complete the whole process of installing and initializing the new OS and it's apps.

Once completed, it will show the welcome screen. First thing to do is give a name for the NAS and create an admin account with strong password that at least 14 characters. By creating the account it will disable the default admin account in DSM that is named "admin". It will also ask to choose what to do once there are DSM and packages updates available. For better security, at least choose the recommended setting, automatically install important DSM and package updates.

It will then ask to create a Synology account or sign in if you already have it. This is different than the admin account that was created for the NAS, this is for connecting to Synology server for some online functions. Bear in mind that if you want to use Secure SignIn or QuickConnect or Active Insight, you need to have a Synology account. It will also backup the NAS settings to Synology server if you have Synology account.
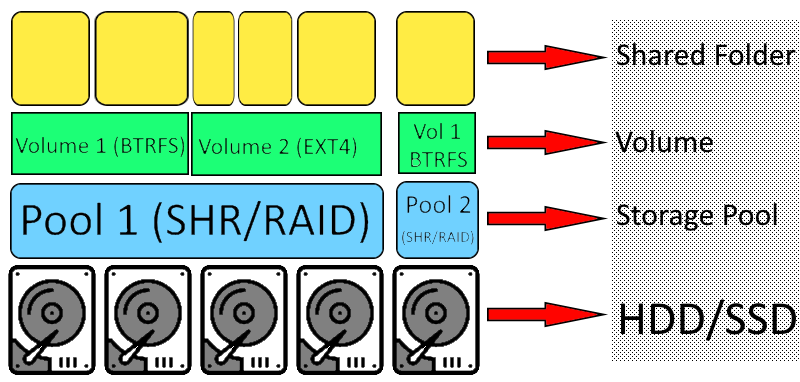
Once completed, it will load the dashboard, or the home screen. As with any newly initialize NAS, it don't have storage pool and volume configured yet so that's the first thing to do.
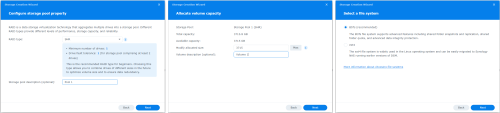
Going into the Storage Manager, I'll create SHR type of RAID as in future when need to add more HDD and expand the RAID, no need to wipe the current RAID. For now since I'm using two 4TB HDD, SHR will set it as mirror of each HDD, just like RAID-1. When next time more HDD being added to the pool, SHR will arrange it to be more like a RAID-5.
For volume, you can allocate less than the maximum if want to create more than 1 volume.
For file system, better to use the recommended BTRFS as it can do snapshots and replication, think of it like an undo button but this is for the files in NAS. It also will perform data integrity checking every time it read any file. It also can perform auto self-heal for any data corruption if the pool have 2 or more drives and also using SHR or RAID 1/5/6.

The first photo above show Package Centre, here is the place to manage installed apps and also to install new app. Newly initialized DS423+ have very little apps installed, 9 to be exact. Secure SignIn Service is an important service for the NAS security. You can use it for passwordless sign-in to NAS by installing the app on your phone, when want to sign-in the app will prompt for approval. When some hackers or bots try to sign-in the prompt serve as warning that your NAS are being targeted. If don't want to use passwordless sign-in, Secure SignIn app can also be used as 2-Factor Authentication (2FA) for approval or generate 6 digits OTP, after sign-in with password then the app will prompt for approval or generate 6 digits OTP. Secure SignIn Service need QuickQonnect service to be enabled because the app need to contact back the NAS to inform about the approval.
Other apps to install that might be useful for starting your own personal cloud service are Drive, Photos, Calendar, Contacts and Note Station. With your own personal cloud server, your data all saved locally and don't need to worry some big corporate use your data for machine learning or profiling. Plus all these apps are totally free to use. If you want to go more further also can set own mail server, chat server, WebDAV server and many more. There's also open source and apps that maintained by third party developers.
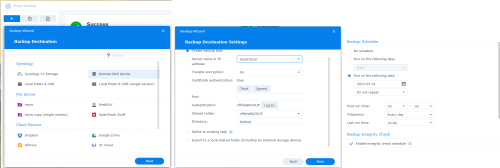
Coming back to what I want to accomplish as a remote off-site backup, the apps I need to install are Hyper Backup and Hyper Backup Vault. Hyper Backup is for creating and managing the backup while Hyper Backup Vault is for handling data from other Synology NAS. If the NAS only upload the backup to remote off-site and not act as vault then no need to install Hyper Backup Vault. For my case, both NAS will upload and also act as vault so I need to install both apps.
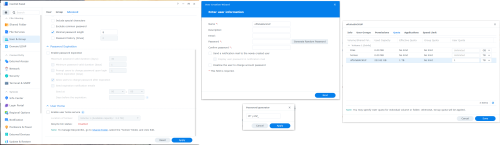
For the off-site backup purpose, I will create a user account that will be used to sign-in remotely into the DS423+ and it can only access the folder for saving the vault, the account will not have access to other folders. By default DSM didn't enabled user home service, if you want all the user to have their own Home folder, you need to enable it at Advance settings in User & Group. As for my off-site backup, I'll create a shared folder for the vault.
Next, I'll create a user account in DS423+ that will be used by DS1522+ to access the vault. With DSM 7, Synology also have added the function to generate random password but as you can see in the image above, it only generate 8 characters as that's the default minimal password length. To make it longer, you need to change the minimal length in User & Group > Advance. National Institute of Standards and Technology (NIST) recommend to have at least 12 to 14 characters length but if can go for longer will be even better. The password should be mix of uppercase and lowercase letters, numbers and special symbols. It should also not have memorable keyboard paths, not based on your personal information and is different than any other passwords that you use.
Beside limiting the folders that each user can access, it can also set the quota limit that each user can use for each shared folder. This is useful when you don't want a user hogging more data space than he/she is allowed. The image above is after I already done the backup, I set the limit to 1TB quota and the account have used 222.82GB of space.
Another thing to note, by default DSM doesn't enable Firewall. You can enable it at Control Panel > Security > Firewall. You can customize it such as block IP not from Malaysia. Auto Block is auto enable and the default block is after 10 attempts in 5 minutes, you can change it to suit your preference. Below it there's option to enable Denial-of-Service (DoS) Protection.
 Quote
Quote


 0.0289sec
 1.48
1.48
 5 queries
 GZIP Disabled