

 Jul 16 2022, 01:23 PM
QUOTE(code10 @ Jun 21 2022, 03:05 PM)
Hi All,
I just thought of sharing tank drawings I’ve made previously. They are done in freehand. I think doing freehand drawings develop confidence.
I’m showing the process of which how the drawing is made, from the beginning to the end, using attached photos as references.
The entire drawing wasn’t that difficult, if you apply the simple techniques/steps. Just give it some time and have some patience when drawing.
The stationary that I’m using are pretty basic and affordable. All easily available at local stationary shop. You don’t need hi-tech electronic tablet/high-end computer to start drawing. As least, this is true for my case.
Anyway, the items I'm using:
1. Felt tip pens (0.2mm and 0.4mm nib) black. Artline brand.
2. Mechanical pencil 0.5mm. 2B lead.
3. A3 size multi-purpose paper. I preferred this size as it give me more room to expand when drawing my subject.
Drawing process
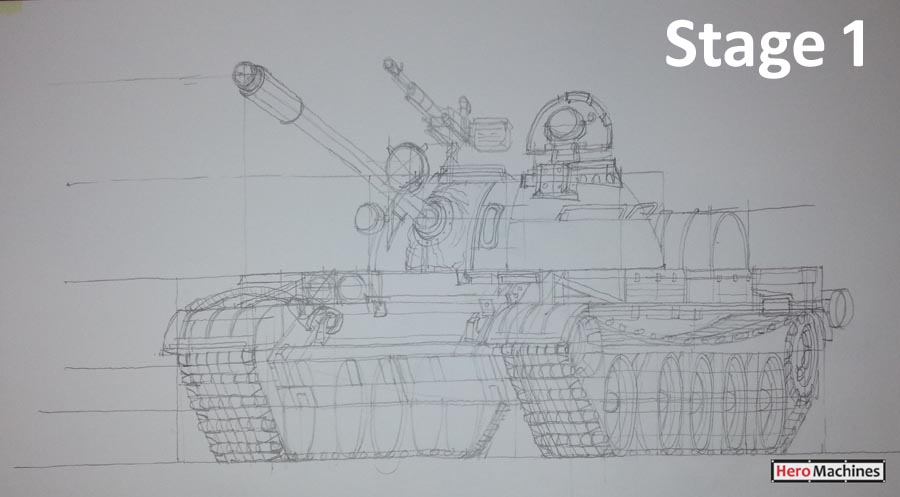
Drawing a "skeletal" of the subject. Which is a tank, in this case. Pencil lines can be easily corrected if mistakes are made. When drawing your lines, keep your hand steady, do it slowly if you need to. Control your lines.
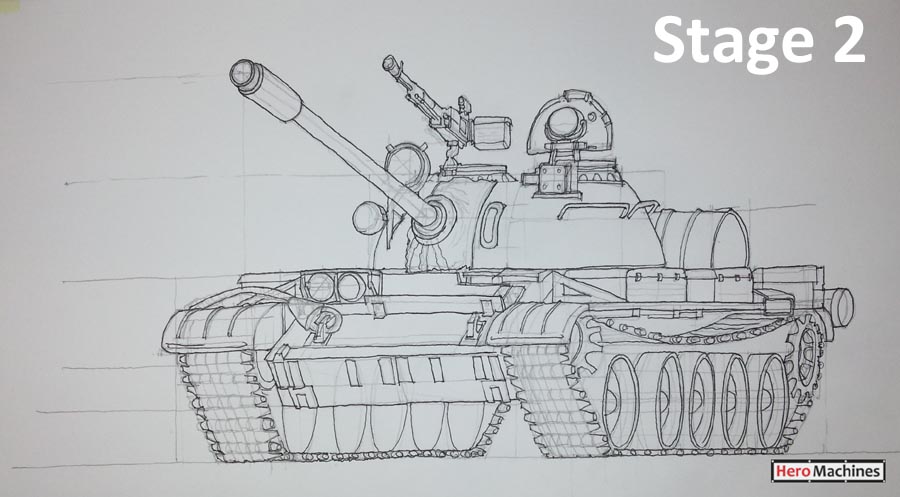
Outline the pencil lines with felt tip pen. Use 0.4mm pen for outline (profile), while 0.2mm for object lines. This makes the drawing clearer, and indicate what is at the front, middle and at the back.
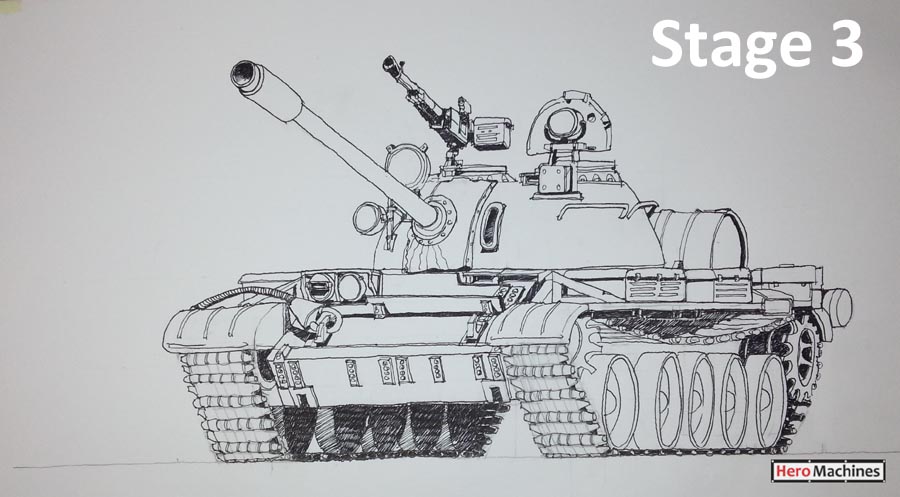
Use the felt tip pen to hatch/darken the areas under shade or shadow, like wheel, tracks, hull, and other area below the tank.
Additionally, use a mechanical pencil to continue hatching/darken the areas under shade or shadow. Pencil lines aren't as heavy as ink lines.
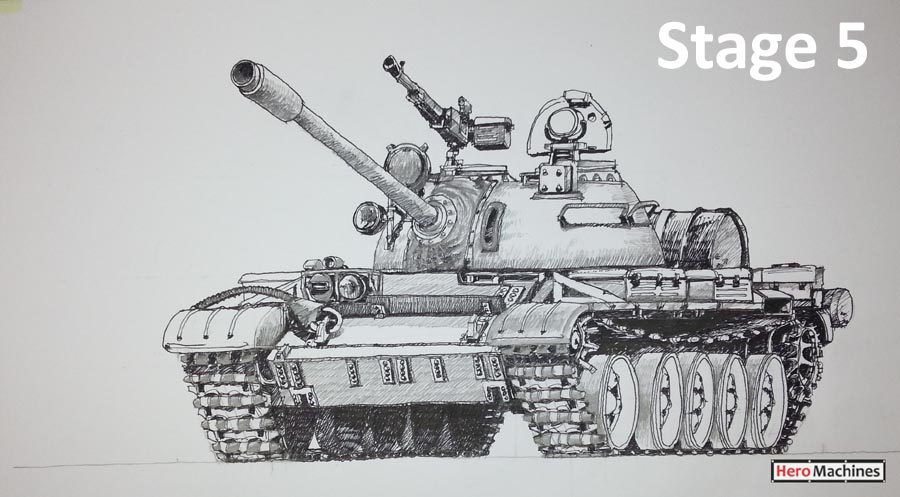
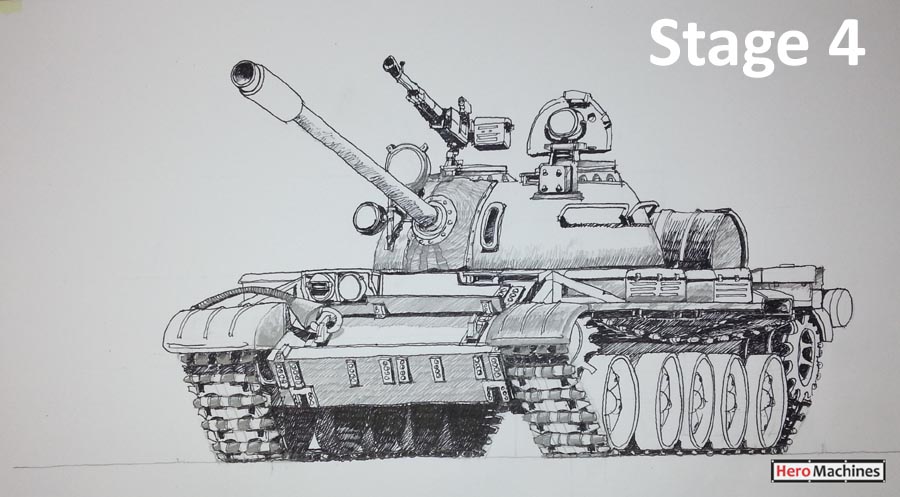
Continue adding gradual layers of pencil lines and pen lines. This is to create more visual depth and 3D to the tank drawing. Tank details such as nuts, handles, hinges, brackets, lamps, etc. are highlighted.
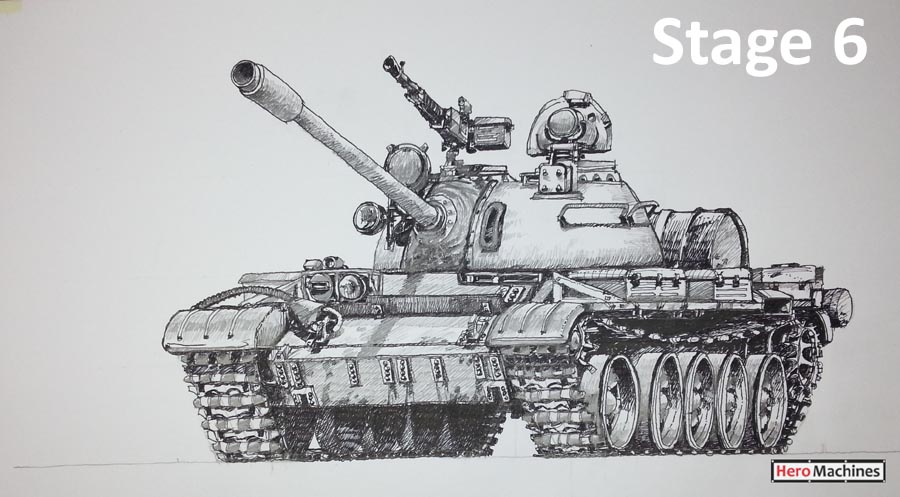
Use pencil lines to "scratch" your drawing to create markings/graphics, impression of dirt, weathering, wear & tear marking, etc. to the tank.
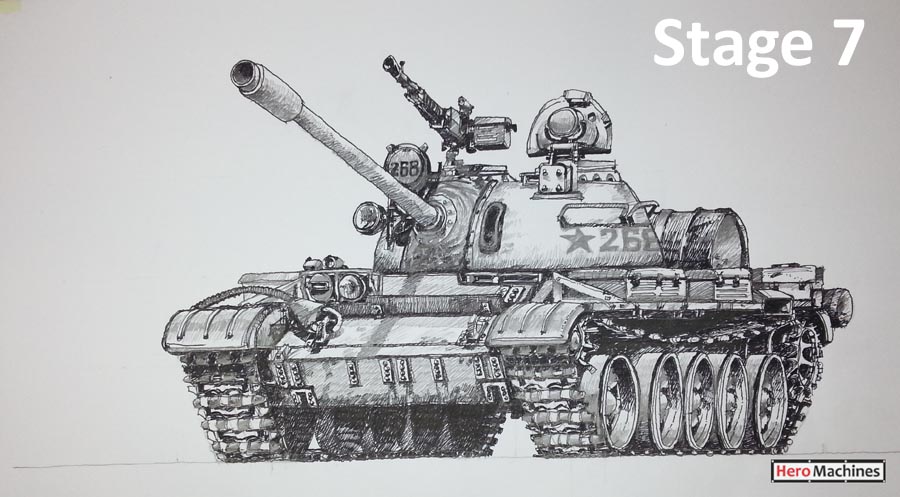
A felt tip pen can be used to create similar but deeper impression. Use it sparingly though.
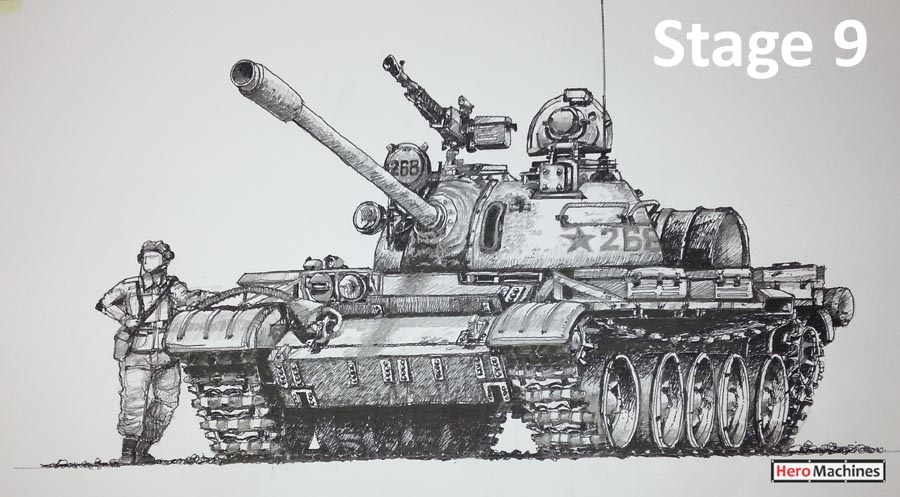
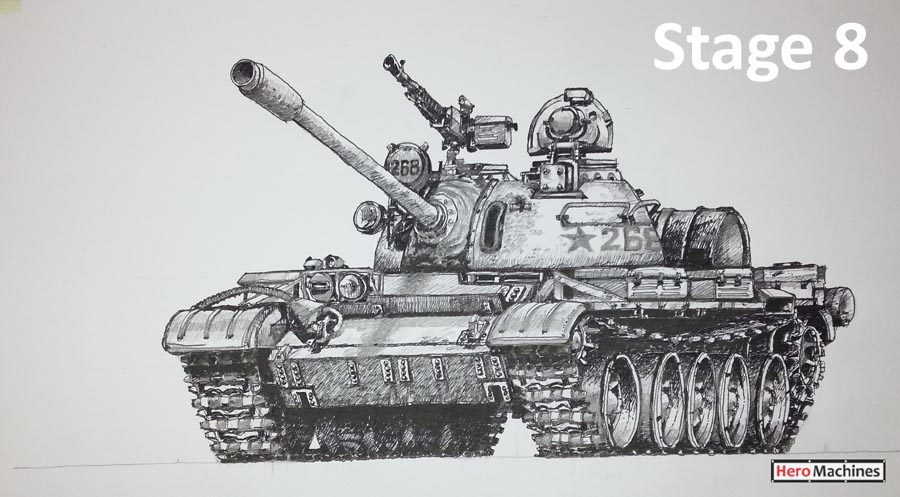
Adding final touch to the drawing, by giving it a human figure, antenna, ground line, etc. This gives an impression of scale and a bit of realism to the drawing.
This thread is done on the fly. and if I have missed out a few things by accident, please let me know. My drawings aren't perfect and I'm still learning to draw by doing it. Practice doesn't always make perfect, but I think it makes improvement.
Lastly, I’ll provide a link of a Y/T video of how the entire drawing is made, for those who are keen to know more about the drawing.
If you have any comments/questions……please don't hesitate to highlight or ask. I'll answer them the best I can.
Cheers!

TS do you use acid/sulphur free paper or ink? Otherwise would be a waste if the paper fell apart or yellowed after a whileI just thought of sharing tank drawings I’ve made previously. They are done in freehand. I think doing freehand drawings develop confidence.
I’m showing the process of which how the drawing is made, from the beginning to the end, using attached photos as references.
The entire drawing wasn’t that difficult, if you apply the simple techniques/steps. Just give it some time and have some patience when drawing.
The stationary that I’m using are pretty basic and affordable. All easily available at local stationary shop. You don’t need hi-tech electronic tablet/high-end computer to start drawing. As least, this is true for my case.
Anyway, the items I'm using:
1. Felt tip pens (0.2mm and 0.4mm nib) black. Artline brand.
2. Mechanical pencil 0.5mm. 2B lead.
3. A3 size multi-purpose paper. I preferred this size as it give me more room to expand when drawing my subject.
Drawing process
Drawing a "skeletal" of the subject. Which is a tank, in this case. Pencil lines can be easily corrected if mistakes are made. When drawing your lines, keep your hand steady, do it slowly if you need to. Control your lines.
Outline the pencil lines with felt tip pen. Use 0.4mm pen for outline (profile), while 0.2mm for object lines. This makes the drawing clearer, and indicate what is at the front, middle and at the back.
Use the felt tip pen to hatch/darken the areas under shade or shadow, like wheel, tracks, hull, and other area below the tank.
Additionally, use a mechanical pencil to continue hatching/darken the areas under shade or shadow. Pencil lines aren't as heavy as ink lines.
Continue adding gradual layers of pencil lines and pen lines. This is to create more visual depth and 3D to the tank drawing. Tank details such as nuts, handles, hinges, brackets, lamps, etc. are highlighted.
Use pencil lines to "scratch" your drawing to create markings/graphics, impression of dirt, weathering, wear & tear marking, etc. to the tank.
A felt tip pen can be used to create similar but deeper impression. Use it sparingly though.
Adding final touch to the drawing, by giving it a human figure, antenna, ground line, etc. This gives an impression of scale and a bit of realism to the drawing.
This thread is done on the fly. and if I have missed out a few things by accident, please let me know. My drawings aren't perfect and I'm still learning to draw by doing it. Practice doesn't always make perfect, but I think it makes improvement.
Lastly, I’ll provide a link of a Y/T video of how the entire drawing is made, for those who are keen to know more about the drawing.
If you have any comments/questions……please don't hesitate to highlight or ask. I'll answer them the best I can.
Cheers!
 Quote
Quote 0.0129sec
 0.53
0.53
 6 queries
 GZIP Disabled