Welcome Guest ( Log In | Register )

Outline · [ Standard ] · Linear+

 Journey of me DIY stove cabinet

views
     
TSamduser
post Apr 25 2021, 08:36 PM, updated 5y ago

Look at all my stars!!
*******
Senior Member
5,542 posts

Joined: Dec 2006


My old stove cabinet is getting old and rotten due to exposure to weathers and water at my condo yard, so i decided to try out building a simple floating cabinet on my own, get some hands on experience and write down my journey here, maybe next time i can renovate some of part of my new house too tongue.gif

i will be starting from scratch from design to assembly, but the wood i will ask the seller to cut it for me as well since i dont have the necessary tools for that

the idea i had in mind is:
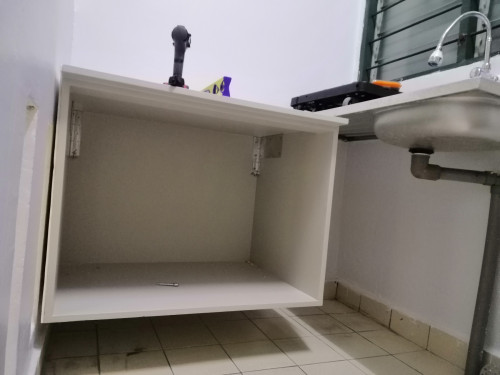
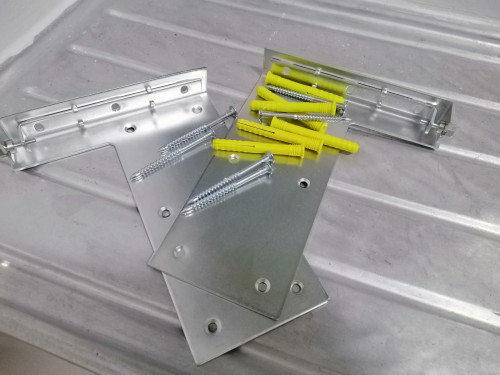
- should be floating cabinet
- cabinet made of wood, but at the same time should be sturdy and water/weather resistant

Design
the design part i use Sketchup Free, dont need to download any thing as it is a web app, the functionalities is not top notch, but cant complain much since it is free which is perfect for people like me who dont really do design much or make earning from designing
whoever want to try the app can access through here: https://www.sketchup.com/products/sketchup-for-web

user posted image

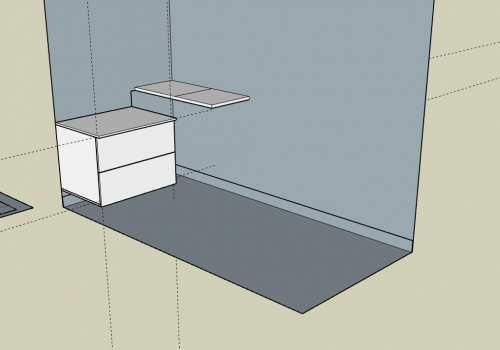
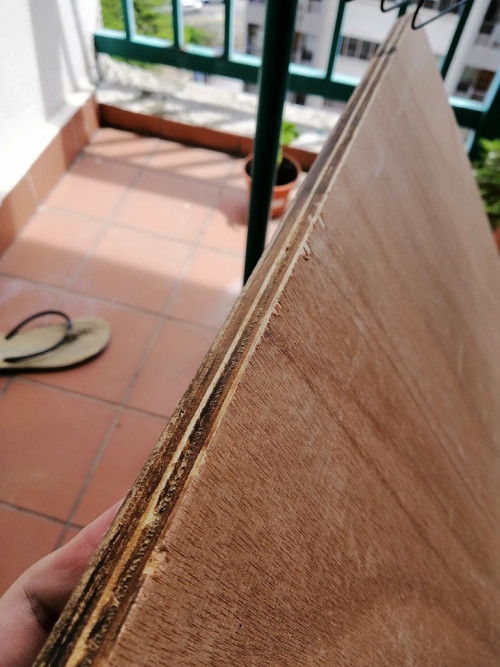
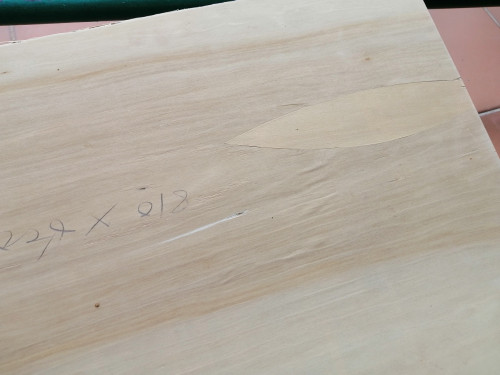
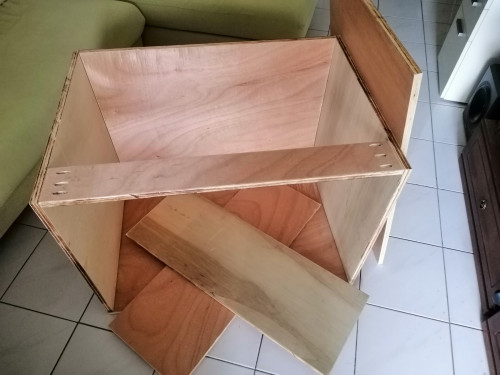
so i get all the measurement i needed, time to choose the materials, for this i choose plywood with 18mm thickness and thanks for ar188 for supplying the plywood and provide cutting service for me too
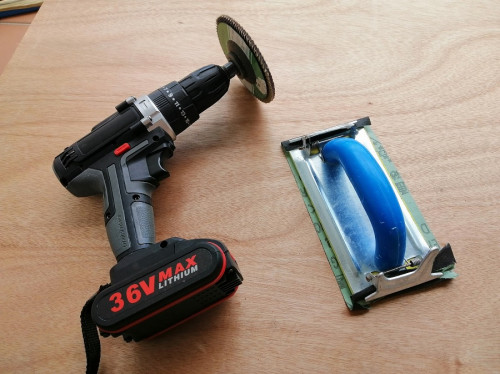
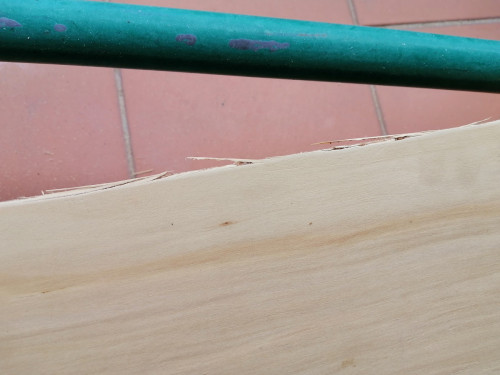
Smoothen the Wood
there are some chipping on the plywood sheet, this is expected since transporting it will damage the surface and sometime the cutting blade not sharp then will left some rough edges, but nevermind, time to use 320 grit sandpaper and my sanding disk with rotary drill to smoothen out the edge


user posted image

user posted image

user posted image

user posted image

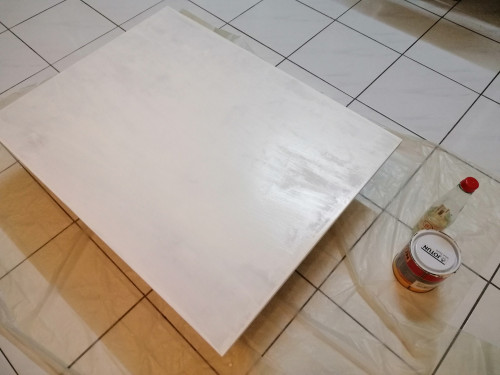
that's all for today, the next step is to apply primer for first layer of protection, maybe will do that tomorrow if got time

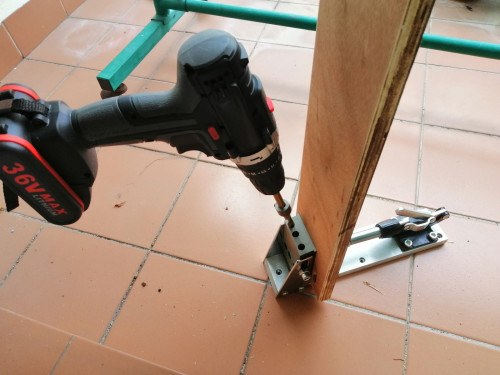
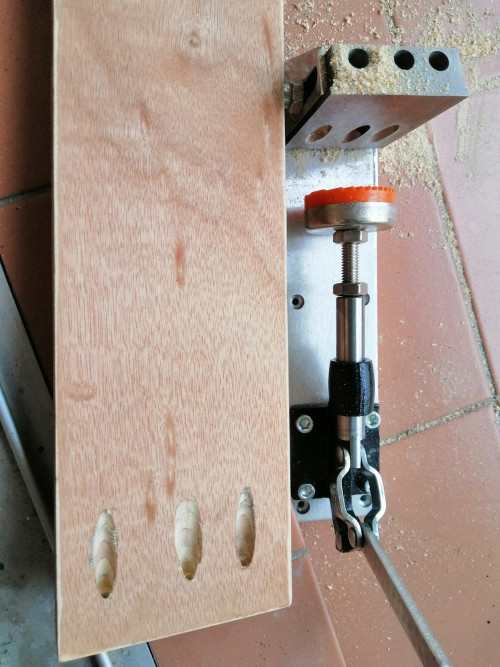
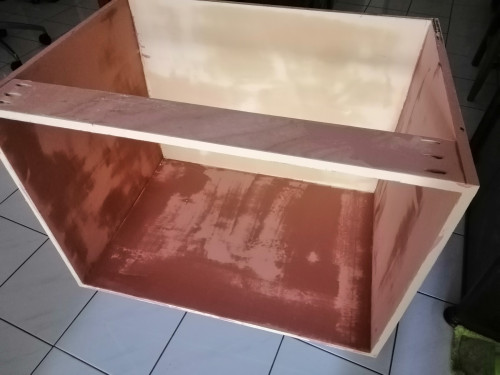
STEP 2 Drilling Pocket Holes for Assembly

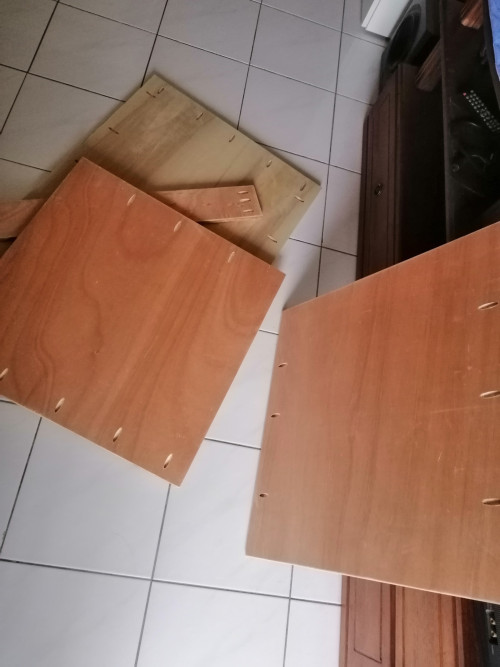
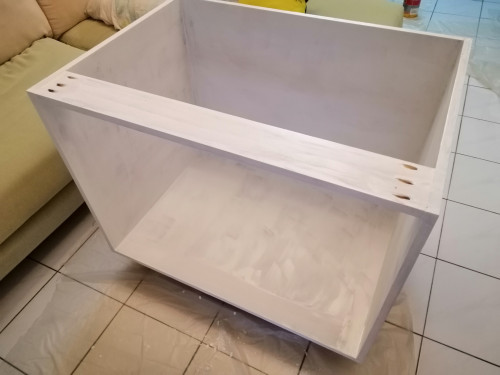
STEP 3 Carcass Assembly

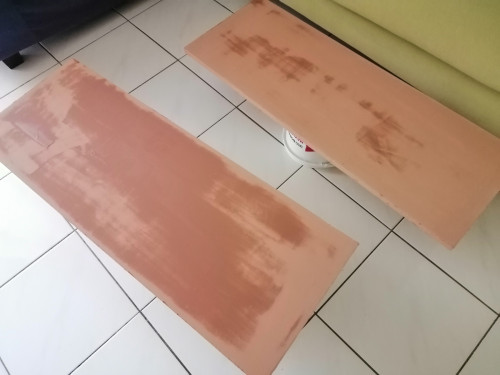
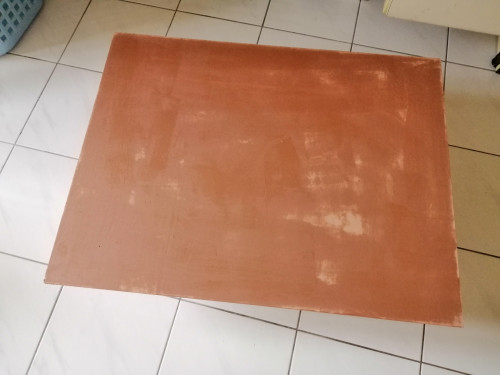
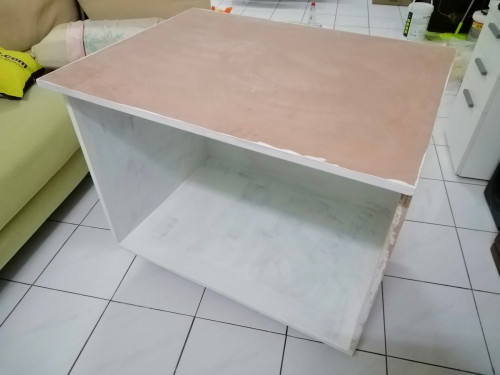
STEP 4 Gap Fillings & Smoothen surfaces

STEP 5 Assembly & primed surface for final top coat

STEP 6 Painted top coat & installation

This post has been edited by amduser: May 20 2021, 07:41 PM
raceengine
post Apr 25 2021, 08:52 PM

New Member
*
Junior Member
37 posts

Joined: Oct 2005
From: Bandar Baru Bangi


bookmarked! Good luck and all the best ts cheers.gif
SUSceo684
post Apr 26 2021, 10:10 AM

Component Burner
********
All Stars
11,667 posts

Joined: Jan 2003
From: Klang/Subang


Sounds good, I just made mine out from ikea table top :lol


Attached thumbnail(s)
Attached Image
TSamduser
post Apr 26 2021, 06:24 PM

Look at all my stars!!
*******
Senior Member
5,542 posts

Joined: Dec 2006


Pocket Holes
Try out pocket hole with the pocket hole jig, did some adjustment on a piece of support that is not visible at final product, just remember that i forget to get the 90 degree clamp during my last visit to Mr DIY doh.gif doh.gif doh.gif guess tomorrow will make a quick shopping trip during lunch time

user posted image

user posted image

My drill doesn't seems to have enough torque to drill the pocket hole, or the drill bits keep grinding with the jig and overheat the drill bit hmm.gif gonna fully charge the battery see if it improve, will have a lot of drilling work tomorrow

video guide to pocket hole (not by me)


This post has been edited by amduser: Apr 26 2021, 06:26 PM
TSamduser
post Apr 26 2021, 06:44 PM

Look at all my stars!!
*******
Senior Member
5,542 posts

Joined: Dec 2006


one thing i noticed when i collect the plywood is that the entire cabinet might be too heavy for me to lift it alone (i stay alone) and since it is heavy i'm not sure if sleeve anchor can hold the weight or not this thing seems to weight more than 30 kg cry.gif

if it is too heavy maybe i will just use 4 furniture standoff instead of doing a floating cabinet hmm.gif
SUSceo684
post Apr 26 2021, 08:12 PM

Component Burner
********
All Stars
11,667 posts

Joined: Jan 2003
From: Klang/Subang


QUOTE(amduser @ Apr 26 2021, 06:44 PM)
one thing i noticed when i collect the plywood is that the entire cabinet might be too heavy for me to lift it alone (i stay alone) and since it is heavy i'm not sure if sleeve anchor can hold the weight or not this thing seems to weight more than 30 kg  cry.gif

if it is too heavy maybe i will just use 4 furniture standoff instead of doing a floating cabinet hmm.gif
*
One sleeve anchor alone (refer https://forum.lowyat.net/index.php?showtopi...post&p=99790616 ) can support 50kg (even derated rated load of angmoh spec by half for china made stuff);
So if you gonna use a few of them no problem at all..the effective weight it can support is good enough if you use 4 or 5 pcs.
TSamduser
post Apr 26 2021, 09:34 PM

Look at all my stars!!
*******
Senior Member
5,542 posts

Joined: Dec 2006


QUOTE(ceo684 @ Apr 26 2021, 08:12 PM)
One sleeve anchor alone (refer https://forum.lowyat.net/index.php?showtopi...post&p=99790616 ) can support 50kg (even derated rated load of angmoh spec by half for china made stuff);
So if you gonna use a few of them no problem at all..the effective weight it can support is good enough if you use 4 or 5 pcs.
*
that's what i found also from ang moh site, but not sure our local made is from where, let's just hope everything goes well when the times come biggrin.gif
SUSceo684
post Apr 26 2021, 09:44 PM

Component Burner
********
All Stars
11,667 posts

Joined: Jan 2003
From: Klang/Subang


QUOTE(amduser @ Apr 26 2021, 09:34 PM)
that's what i found also from ang moh site, but not sure our local made is from where, let's just hope everything goes well when the times come biggrin.gif
*
More likely china made unless you buy atas spec ones from Hilti or RS components, hence I've already cut the load rating by 50% to be sure laugh.gif
No worries for few pcs M10 sleeve anchor it's pretty much bulletproof and overspec liao for home use. Even ikea kitchen cabinet mounting rail, many many 2" screws distributed the total weight so its not a big load for any one screw. The only thing I'd say it may be better to use drop-in anchor as compared to sleeve anchor, cos if you don't do this everyday you may not be able to strike it hard enough to open the gripping "skirt" fully, if the skirt opened halfway it cannot pull out from the hole-but because it didn't open skirt fully it will be suicide mission if it keep rotating in there (cannot tighten properly). Drop in anchor cost a couple bucks more but it won't have suicide mission problem (more "rescuable").

This post has been edited by ceo684: Apr 26 2021, 09:45 PM
TSamduser
post Apr 28 2021, 06:14 PM

Look at all my stars!!
*******
Senior Member
5,542 posts

Joined: Dec 2006


Moar pocket holes!! took me a while to drill them, my drill keep shutdown halfway while drilling, i guess is either the drill overheat or the battery doesn't provide enough power hmm.gif

user posted image

anyway i finally managed to complete the frame, i think i'm using the wrong pocket screws, hardwood plywood should be using fine thread screw but i'm using coarse thread instead, the screw actually pushing apart the 2 pieces of wood before gripping, leaving some small gap here and there

user posted image
i wont say i'm 100% satisfied, but i think i give myself a 7/10 score tongue.gif

this is how it will look like when complete, of couse it is not painted yet, still havent decide on what color to paint, time to order a stainless steel drawer from taobao, it will have 2 pullout drawer with soft close
user posted image

next step should be another round of smoothening the surface and filling gaps

This post has been edited by amduser: Apr 28 2021, 06:21 PM
TSamduser
post Apr 29 2021, 03:24 PM

Look at all my stars!!
*******
Senior Member
5,542 posts

Joined: Dec 2006


Step 4 Gap Fillings & Smoothen surfaces

Able to progress more since today is holiday, used wood putty to smoothen out the rough surface of plywood, i dont care about the wood pattern and plywood doesn't have nice pattern so might as well just cover it

i actually used putty from different brand, thus the color difference, the watermark on the surface is the sign that the putty hasn't complete dry to touch

actually is best not to dilute with too much water, the wood will absorb the water and start to raise, i suspect part of the plywood already started to raise, hope it is okay
user posted image

user posted image

user posted image

gotta let it dry overnight and maybe tomorrow can flip over and smoothen the other side

my house is super smelly now puke.gif
TSamduser
post May 5 2021, 09:42 PM

Look at all my stars!!
*******
Senior Member
5,542 posts

Joined: Dec 2006


Dont have much time to work on the cabinet pass few days, the surface is smoothen as much as possible and primed

one of the drawer panel after a layer of prime
user posted image

the bottom of countertop
user posted image

the carcass
user posted image

with the countertop installed, pic is taken before the countertop is primed
user posted image

at the same time ordered this set of stainless steel drawer, the price is not cheap though
user posted image
using sea shipping for this, the shipping fees is half the price of the item shakehead.gif hope it doesn't take forever to arrive
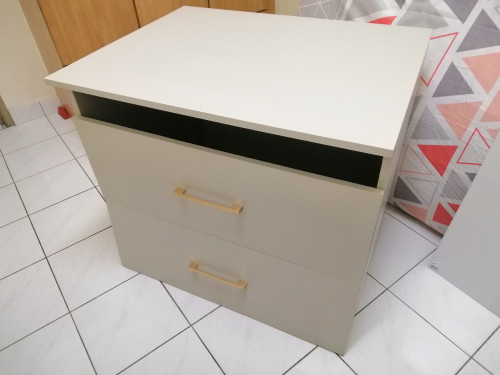
This post has been edited by amduser: May 5 2021, 09:45 PM
TSamduser
post May 20 2021, 07:39 PM

Look at all my stars!!
*******
Senior Member
5,542 posts

Joined: Dec 2006


Finally painted, renovate my wet kitchen aka yard, and installed the cabinet

i install the cabinet slightly higher than planned so that it is easier to clean the bottom next time, but end up the the old style gas stove + the increased height is a bit too tall for ergonomic laugh.gif

user posted image

user posted image

i'm using this thing bought from taobao to hang the cabinet, it is very sturdy and i even sit on top of it to test it out tongue.gif

user posted image

after installed i found that the corner of the wall is not built to exact right angle, and end up there is a lot of gap at the left side, i put in a lot of foam board and acrylic sealer to cover it up

now i still need to wait for the drawer to arrive, probably end of this month or beginning of next month will receive it

This post has been edited by amduser: May 20 2021, 07:40 PM


Change to:
| Lo-Fi Version
0.0258sec    0.31    6 queries    GZIP Disabled
Time is now: 22nd December 2025 - 04:34 AM