Very interested.. But don't have resource for forged fire.. Saw lot of diy video but still dont try to make it.. Always wanted to try make Damascus knife..
Very interested.. But don't have resource for forged fire.. Saw lot of diy video but still dont try to make it.. Always wanted to try make Damascus knife..
forging, hardening, tempering, etc - much more advanced techniques. creatin damascus - even more harder. its one of the pinnacle of forging.
even sifus regularly run into difficulties doin it ;0
start wid stock removal method first & build towards it.
Still just a dream for someday.. Too busy with life commitments .. Even so still want to try to forge something..
same here. lol.
thats why wanna do a very relaxed 'come when u can, as u can' approach for this co-op.
dun want to take away too much time from real life. no big time/capital resources required. treat it like a fun hobby to de-stress with. work on it a little bit here & there over a long period. thats wat i do.
that being said - its surprising how much can get done in 40 mins. its probably due to my years of experience/having made all the mistakes there was... but learning from it. its leveled up skills a LOT.
in 40 mins - i can cut my billet to desired knife shape, do quick bevel & attach a quickly shaped pinned handle/drill through handle to make a bushcraft ready knife for batoning & rough use. same thing wudda taken me 4 - 6 months when i first started.
now, in 3 hours & despite my very bare bones set up - i can create a fully functional knife with a polished mirror surface, chisel ground edge that can shave with + a intricately designed burned wood handle or leather/paracord wrap it. & i dun even have dedicated knife making tools, just basic tools. can even make nice leather sheaths too in bout 20 - 30 mins... prob can halve that time once get more practice in.
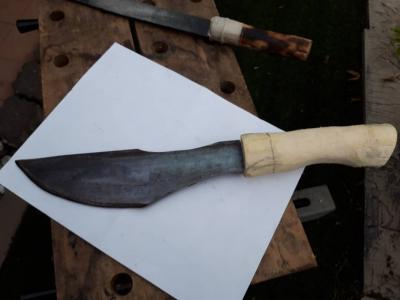
the pix in my OP took under 1 hour for the state u see. flat bar + rambutan tree branch.
anyways, no pressure
all welcome. comelah if got time/hands itchin to create sumtin... we keep it chill & relaxed.
janji got a nice looking piece of created steel art that u'll be proud of at the end of an hour... as long as the design not too
Awesome. I've met one bro working in cyberjaya that have the same hobby as yours. He specialized in small knife making iinm. But nevertheless great hobby if you have the passion.
Good for you ts.. But im from terengganu.. Cannot tt ;(
sad, sad.. if nearby can come & make sumtin.
upside tho - got lot of old skool knife makers in ur neck of the woods.
i learnt how to make goloks & duku chandong frm a terenganu cikgu.
unfortunately my sifu passed bout 20 years back - else i pass u his details. he was an old skool forger - like the type u want. used lorry spring steels to make knives. sumtimes make damascus keris.
anyways, ask around. for sure got sum1 willing to reccomend/point u 2 sum1 who still forges. prob within 1 km distance frm ur place too.
g'luck! hope to see u post ur beauties sumtime down the line
Awesome. I've met one bro working in cyberjaya that have the same hobby as yours. He specialized in small knife making iinm. But nevertheless great hobby if you have the passion.
great!
actually, got quite a lot of ppl who make knives & EVEN MORE who r interested to do so also in msia.
i hope to bring these folks 2gether & co-op together.
i'm particulalrly focusin on total noobs/slightly xperienced peeps as i'm in a position to help them make things since i got the materials & tools to get them started.
they dun need to outlay any $. i can provide most of the things they need. just need interest & time.
more experienced/dedicated knife makers though will def have waaaay superior equipment than me. they r also welcome by all means to come & share their knowledge. cyberjaya bro must be quite high level since he specialises in small knives.
sama-sama kita create
how bout u, ukapaka? got interest? made nytin b4?
i luv 2 see wat other home knife makers have created & how their set ups look. can get ideas/improve mine.
I have a few knives.. from kukri to flips, to fixed blade to axes, swords (maybe ~20+, often branded though not all Chris Reeve's la) etc made with various steel.... which I need someone to sharpen. I dont need a mirror finish, just to have it professionally sharpened to better then factory edge (cause sometimes it comes dull as a politician..).
I have a few knives.. from kukri to flips, to fixed blade to axes, swords (maybe ~20+, often branded though not all Chris Reeve's la) etc made with various steel.... which I need someone to sharpen. I dont need a mirror finish, just to have it professionally sharpened to better then factory edge (cause sometimes it comes dull as a politician..).
nice collection!... if got pix, even nicer
ah, the age old dilemma of putting/sharpening an edge.
for immediate gratification - u can try these guys:
seem to have lot of happy customers in their FB page.
but, if u wanna learn urself how its done/experiment - come on over.
we can talk shop bout the diff edges, grinds, finishes, sharpening angle & how each individual steel alloy's HRC affects the final outcome. can play with my variety of whetstones, sandpaper & finishing buffers on grinders.
i have put differing edges to many a blades over the years with a variety of tools. made the requisite mistakes too. so know firsthand the 'dangers' of putting the wrong bevel & eventual grind... luckily, with experience - also figured out how to overcome this hurdles too. best to start of with tools and finish with hand using a leather strop.
i'm currently perfecting my chisel grind. its somewhats keeps in line with my initial japanese sword making roots as well as greatly compliments the rough & tough bushcraft knives i make these days.
honestly, its a lifelong learning/experimening thing. have seen 'experts' screw up edges coz they were unfamiliar with the bevel. sumtimes it permanently affects/changes the profile of the knife. ex: putting a full hollow grind on a convex grind. so, i can put an edge on a knife that u can shave reasonably well with - but it is dependent on the underlying bevel/knife HRC. i learnt that from trying to sharpen my pure tungsten carbide knife. that was a trying week
it has to be understood too that certain knives cannot be edged further beyond the day they were made, without drastic change in bevel, appearance and edge geometry. doing so would effectively reduced its 'lifespan' by removing milimeters from its edge during sharpening - this effectively 'shrinks' the knife.
i'm happy to explain if u ever wanna talk bout it further (my replies will take a long time tho coz i'm still allowed oni 3 posts a day) or meet up straight.
so to that end, consider this an invite - u'r most welcome to come over & talk shop/experiment if keen.
their starting rate is RM 1.50 per inch. <-- THis is very good price, are they any good?
seem to have lot of happy customers in their FB page.
but, if u wanna learn urself how its done/experiment - come on over. <-- Hence my problem, had to give up too many hobbies as it is due to lack of time
i have put differing edges to many a blades over the years with a variety of tools. made the requisite mistakes too. so know firsthand the 'dangers' of putting the wrong bevel & eventual grind... luckily, with experience - also figured out how to overcome this hurdles too. best to start of with tools and finish with hand using a leather strop.
i'm currently perfecting my chisel grind. its somewhats keeps in line with my initial japanese sword making roots as well as greatly compliments the rough & tough bushcraft knives i make these days. <-- I have a few japanese kitchen knife (made in japan), picked them up at those small little japanese knife shop whenever i dropped by Japan, not big commercial brands
honestly, its a lifelong learning/experimening thing. have seen 'experts' screw up edges coz they were unfamiliar with the bevel. sumtimes it permanently affects/changes the profile of the knife. ex: putting a full hollow grind on a convex grind. so, i can put an edge on a knife that u can shave reasonably well with - but it is dependent on the underlying bevel/knife HRC. <-- THIS is my concern, anyone can put a edge to a knife, but if its done by totally changing the grind.. then I'll probably prefer to keep a dull knife..
their starting rate is RM 1.50 per inch. <-- THis is very good price, are they any good? >> i cant say. never used them.
but, if u wanna learn urself how its done/experiment - come on over. <-- Hence my problem, had to give up too many hobbies as it is due to lack of time >> lol. yup, join the club. when the collection gets big = space to display & maintenance becomes an issue.
key reason why i gave away like 90% of my hard earned collection - now i just make what i want when i want. no more payin huge $$$ for knives 4 me anymore.
i'm currently perfecting my chisel grind. its somewhats keeps in line with my initial japanese sword making roots as well as greatly compliments the rough & tough bushcraft knives i make these days. <-- I have a few japanese kitchen knife (made in japan), picked them up at those small little japanese knife shop whenever i dropped by Japan, not big commercial brands >> hmmm... those dont sound like they use chisel grinds to me... all my jap/sushi knives are def hollow, flat or high flat grind... no chisel at all ... yours are true chisel?
honestly, its a lifelong learning/experimening thing. have seen 'experts' screw up edges coz they were unfamiliar with the bevel. sumtimes it permanently affects/changes the profile of the knife. ex: putting a full hollow grind on a convex grind. so, i can put an edge on a knife that u can shave reasonably well with - but it is dependent on the underlying bevel/knife HRC. <-- THIS is my concern, anyone can put a edge to a knife, but if its done by totally changing the grind.. then I'll probably prefer to keep a dull knife.. >> 2 things > (1) for those new to edged tools/smithing/knife aficionados - it has to be said that not everyone can put an edge on a knife - at least not a razors edge. this would be up to the individuals skill & tools, the knife's HRC & even the edge geometry up to a point. i worry this over simplification might result in those reading these posts wasting their time trying to sharpen 'unsharpenable' knives like i did in my early days of trying to sharpen those cheapo alumunium taiwanese machetes - they cannot be sharpened beyond a terribly dull edge. not all knives, regardless how much time/skill used, can be 'sharpened' or retain its edge even when slicing something as thick as cardboard.
(2) seems like u have 3 options >
1) try buat sendiri. study the knife thoroughly and decide what grind is best suited for it. i have all sharpening tools other than a belt sander.
2) try the above service. if so - suggest meet em up first & actually look at their collection of finished work & see what watches the grinds of ur tools. chances are if u dun see any grinds that match urs - probably they cant do it. even experts are clueless & will just do their best when faced with a unusual/unfamiliar grind. i spoilt the edge of a urasuki and a few asym semi convex grinds this way, despite the sharpener being a master sharpener of more than 40 years.
3) retain blades as is - sad to see a knife not live up to its potential... but to gamble sharpening it at the risk of permenant damage - thats a tough choice
1) thats not my vid/channel. i added a link to a vid that best-suited my working method/final creation to show others how to replicate my results. i will do so for most of my projects. it'll help others to recreate my results & pay homage to my fellow crafters. so to clarify - not my channel ya... no time to edit videos... i spend my (limited) time makin knives & dreamin of makin knives
2) koff koff.. the usual questions.. 1) have u made anytin b4? 2) keen to try if not?
lol.
in my next few posts, i'll elaborate on the knife making options available. most of the pm's to me cant difeerentiate between stock removal style and forging style. these have further sub-sets within them.
i'll find sum nice vids & post. hopefully ever1 gets a better idea of the differences/requirements. the version i'm reccomending is the super easy & more relaxed/forgiving one.
next is stock removal style using power tools - this is the style i use most frequently now.
u will need an angle grinder with cutting & grinding disc & a drill usually. can skip the drill if gonna paracord wrap the handle or do a burn through.
as my first attempt above at embedding vids rosak, i redo for the posts below. here goes;
QUOTE
right, lets get started.
first, a vid to broadly explain the 2 major differences >
this will aid in understanding the requirements and challenges of each.
later posts will delve deeper into the minutia. enjoy!
------- now, we move on to the first of the stock removal methods.
below video is the most hardcore version of stock removal.
just need piece of steel, hack saw & file. thats it to start.
if the steel u use does not require heat treat (like mine) - even better/faster finish.
based on size of ur knife design & steel thickness - can be done in 3 - 5 hours.
the whole process is very zen...
-----
next is stock removal style using power tools - this is the style i use most frequently now.
u will need an angle grinder with cutting & grinding disc & a drill usually. can skip the drill if gonna paracord wrap the handle or do a burn through.
it will cut knife making time down tremendously. anywhere from 60 - 90% faster.
results will also be more uniform, especially if using a belt sander/grinder.
now everything is neatly in 1 post wid embedded codes. senang nampak
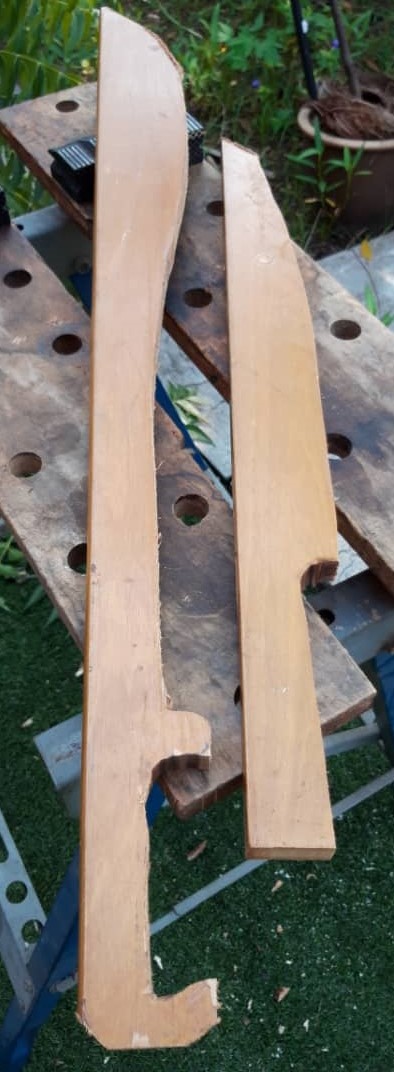
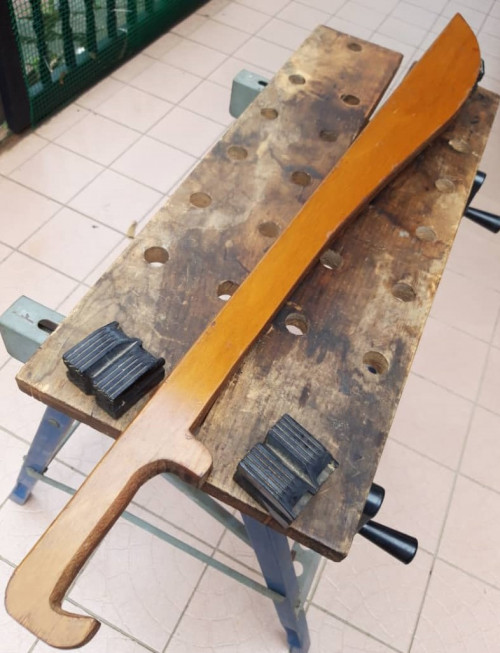
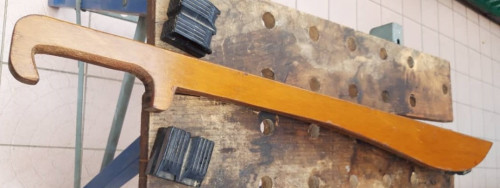
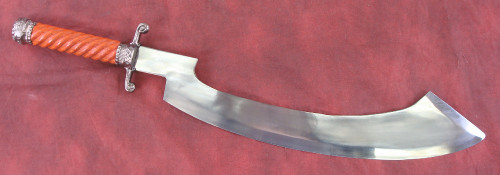
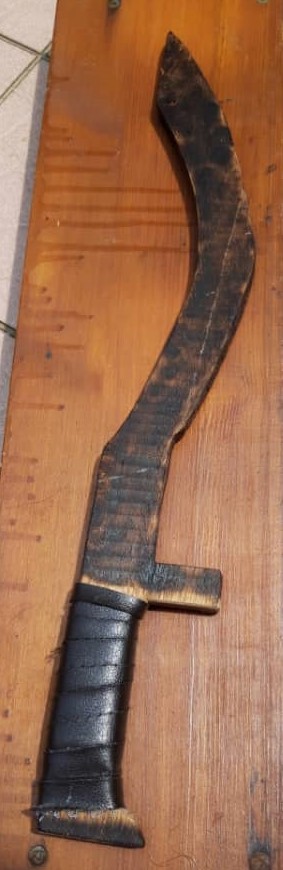
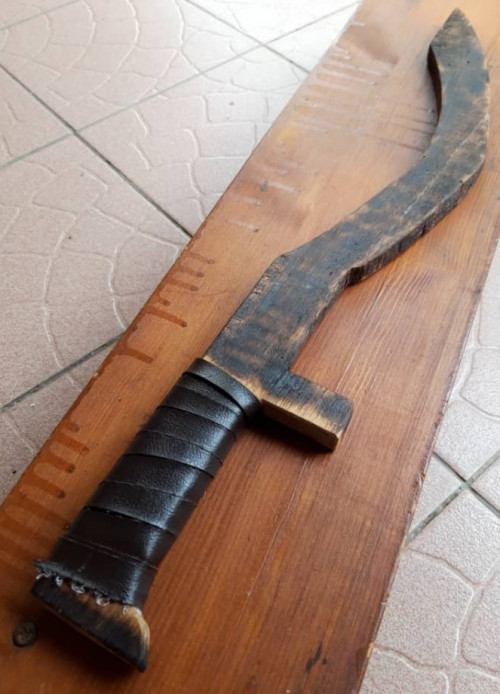
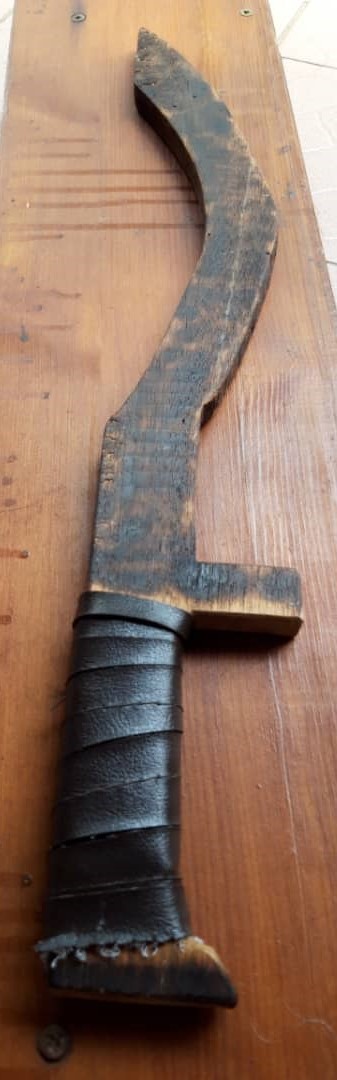
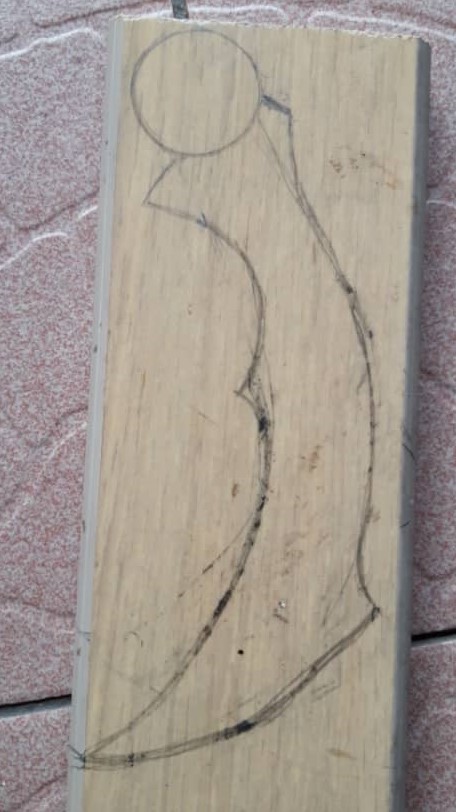
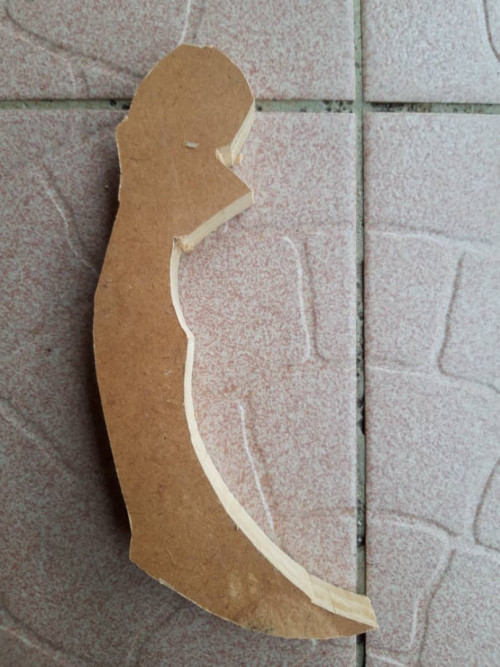
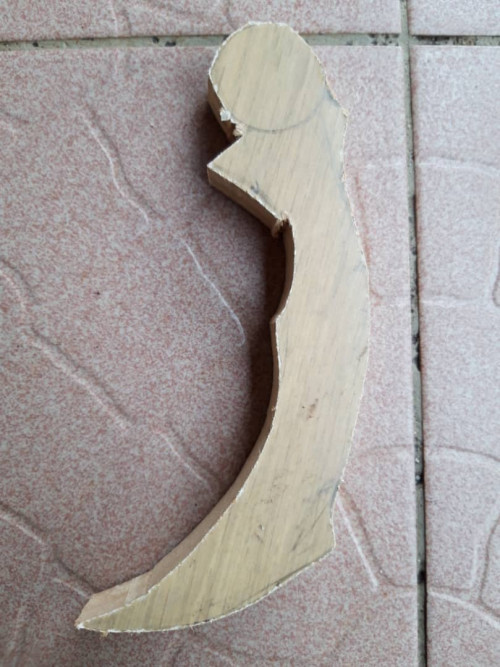
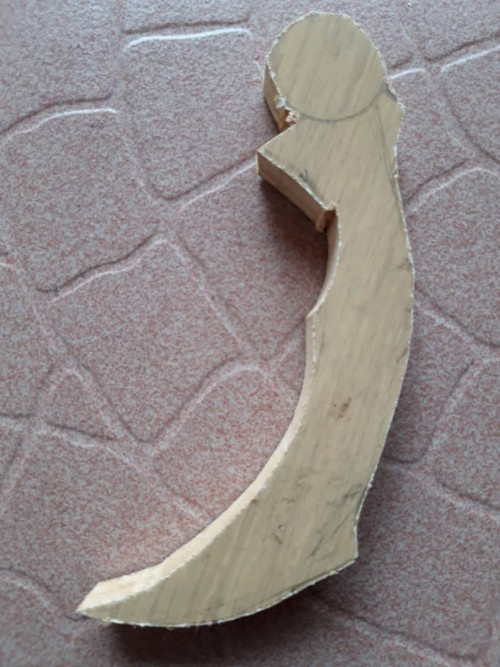
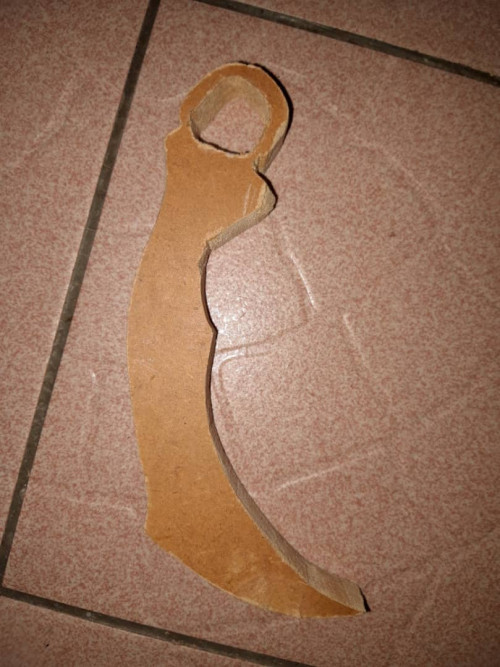
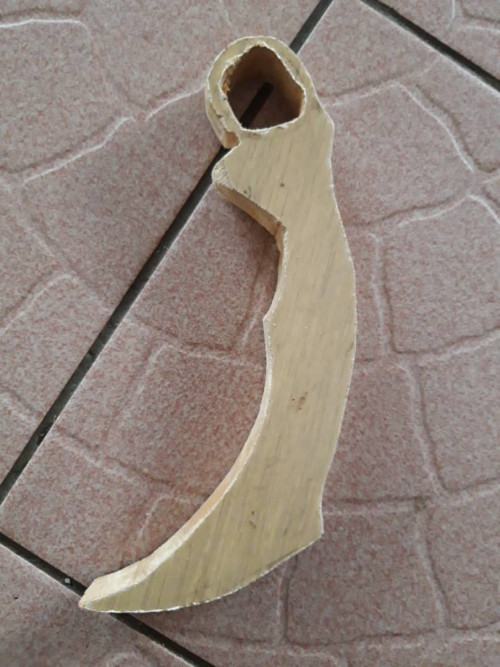
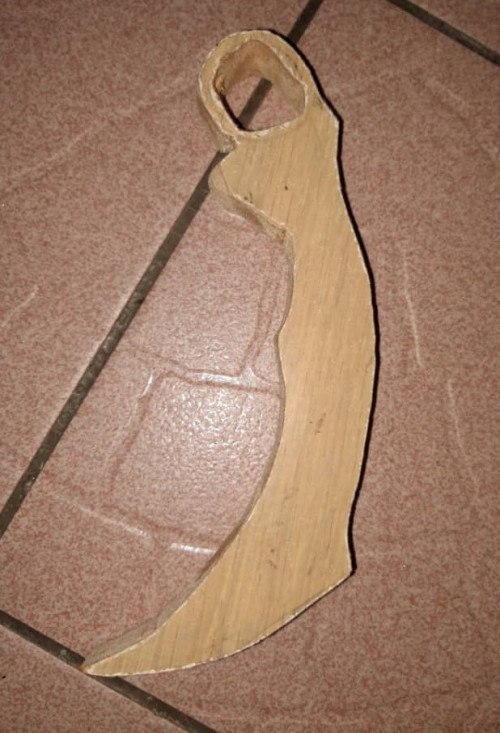
today, i gonna make the wooden khopesh as prototype for a future steel one. should be done in 40 mins. will post pix later today.
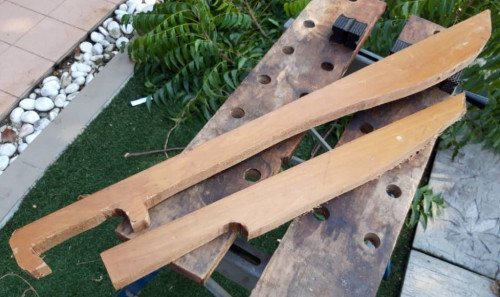
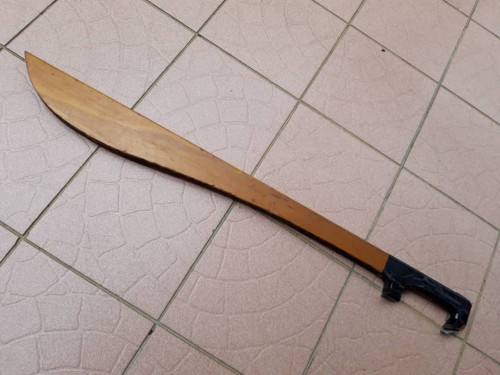
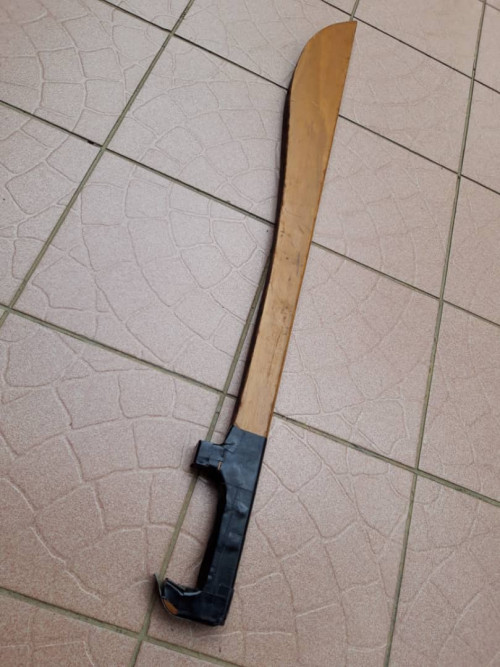
pix enclosed below. more pix 2moro if clearer skies - today too overcast for good shots.
took 7 mins to cut, 20 to planar & file down crevices & surface, 2 mins to burn treat & seal wood (also gives a richer darker colour) + 1 min to cincai pleather wrap handle. all in = 30 mins to completion.
tools used = saw, wood rasp, spokeshave, lighter.
material = scrap balsa wood from shipping crate. very lightweight
as usual, this is the rough/prelim version. i'll revisit down the line to make modifications - might thicken the handle, then rewrap wid pleather or string, as well as maybe hone the edge to a sharper point.
for those wanting to recreate what i did, here's a good video. his khopesh is more detail oriented that my rough cut version >
... & those who wanna make the genuine thing, here u go >
there are 2 main known types - classical forging & modernised forging.
most smiths, realistically, use a combination of both techniques to best effect.
i will start of with the most hard core version - forging without the use of power tools or machines. this is the most grueling of the forging arts.
while i luv & respect all things/types of forging, smiths who practice this style have my particular admiration. i hope to one day be a smith who only makes things in this style. there is something about the simplicity of it that is very peaceful & zen to me. it greatly appeals to the soul.
first video depicts the making of a bill hook... though in the broadest sense - this is not a functional bill hook. the 'bill' part is more ornamental than anything. anyway, its a scandanavian style one versus the more popular ones with actual functional cutting 'bills'... regardless its a work of beauty & is one of the most relaxing videos ever. i watch it to destress. enjoy;
... & here's another smith doing it in the same manner... fire, tongs, hammers, a file & an iron will... end result = a good and rough & tough bushcraft kukri
... of coz gotta mention the ubiquitions katana if we're talking old skool forging... prob the most reconisable type of sword.. def got a few fans here no doubt... brings back fond memories of making them.. good times
so havin met my daily post limit today, tomorrow we delve into the midlevel realm of forging styles - the meeting of modern machinery & old skool pounding of hot metal. i got plenty of fave vids on it.
no need to pay obscene prices for beautiful knives/swords, etc... we make ourselves. stock removal method first. then try actual forging.
just need interest & elbow grease - can create (almost) anything.
holla if interested. i'm in kelana jaya area.
any skill level is welcome. learn slow & build a tight knit smithing community together.
come wannabe and future smiths!
Gosh! That sounds perfect, CRAFT_COACH, but as for now - unfortunately - just videos for me. But thanks for the offer and your posts anyway. I hope that in future I could join you as I've always wanted to try something like this. I made some wooden swords for my nephews in the past (fantasy-ish european ones), now I'm probably going to make a khopesh replica for our little lady who is going through Ancient Egypt (because of mummys, mostly) phase.
Subscribed to this thread, so I'll be waiting for your updates! Keep going!
thank you so much!
its greatly heartening to see these posts inspiring others
i started down this part myself decades ago after drawing inspiration from others' creations.
of coz, as life got in the way & priorities changed - this fascinating art took a back seat... but with the advent of the internet & fantastic shows like 'forged in fire'... that old itch begun anew
i'm glad its restarted your enthusiasm for crafting. hope to see your inspired creations & in turn be inspired by them. its an old saying, but a particularly true one for this subject matter; "steel sharpens steel"
lookin forward to seeing your 'beauty' posted here eventually.
am sure your little miss will be the belle of the nile with her lovingly crafted khopesh. thats great parenting ... you would have created something for her that she can proudly & fondly reminisce about many years from now.
as always - open invite. come whenever. i love to collaborate. the more the merrier. hope to see you & collaborate together in the (near) future. tc & keep crafting (& posting result pix here), dan1el86!
... & here's another smith doing it in the same manner... fire, tongs, hammers, a file & an iron will... end result = a good and rough & tough bushcraft kukri
and in my next post...
reposted above video again coz didnt appear correctly in initial post. these are the steps to make a no frills kukri knife, old skool style
... though its a shame having to waste a post redoing this, guess i can use the opportunity to talk about the kukri @ khukuri design
kukris are highly recommended for those doing lot of chopping work in confined spaces
its curved fat belly geometry makes it perfect for making precise heavy deep slices wid minimal force
think of it as a deep cutting axe in a sleek blade form. thats basically what it is
i have chopped huge swathes of trees and bamboo groves with my kukris
learnt early on that less is more wid a kukri in terms of weight & thickness
they shud be weighed to ensure can chop efficiently for a few hours, wid the least strain to shoulder & forearms
let the blades' fat belly design do the work, instead of mass & brute force
basically: lesser weight = lesser power needed to lift it up/swing it forward curving wider mid belly + tapered convex or flat grind = deeper targeted cuts & better edge retention
over time, i've experimented & learnt to play wid the belly placement to better suit it for a particular function - slicer, cutter, chopper, batoner, general purpose, etc.
all r good ... just depends how/what ur using it for
anyways, since this post is bout old skool forging, am including a bonus vid below on old skool forging of kukris done the TRADITIONAL way in nepal... might wanna mute ur volme tho >
today we venture into the midpoint of old skool forging (no power tools) meets modernised forging/smithing (very heavy reliance on power tools).
in this midpoint method, you will definitely see lots of angle grinder usage... its a heaven sent tool that cuts metal, grinds edges & sands/polishes surfaces, all in one.
if there is 1 tool i'd recommend new smiths to get first - it'd be the angle grinder. of are the more commonly known
super versatile, cheap & easy to use. go for a 100 mm disc type @ m10 thread version & get a cutting + grinding disc to start off first.
with that said, i move on to today's video that epitomises old skool forging meets new tech.
its another personal fave of mine as the master craftsman uses purely old skool methods, right up until the near end where he uses an angle grinder to bevel & edge the knife.
this knife type is known as the 'indian araval' @ indian billhooks. they vary greatly in size, shape & length.
it can be found throughout asia, latin america & parts of europe, where its also referred to as a 'brush axe'.
these billhooks also stick to the more commonly known definition of what a billhook design subjectively is; perhaps a 'hook tip thats shaped like a bird's bill'.
the smith is using a coal powered forge + a manual hand crank blower to produce 4 beautiful workhorse knives. though its not shown, he's probably using a 'burn through' method to attach the knife blade to the handle with a 'bracing collar'. i doubt he's pinning it. enjoy!
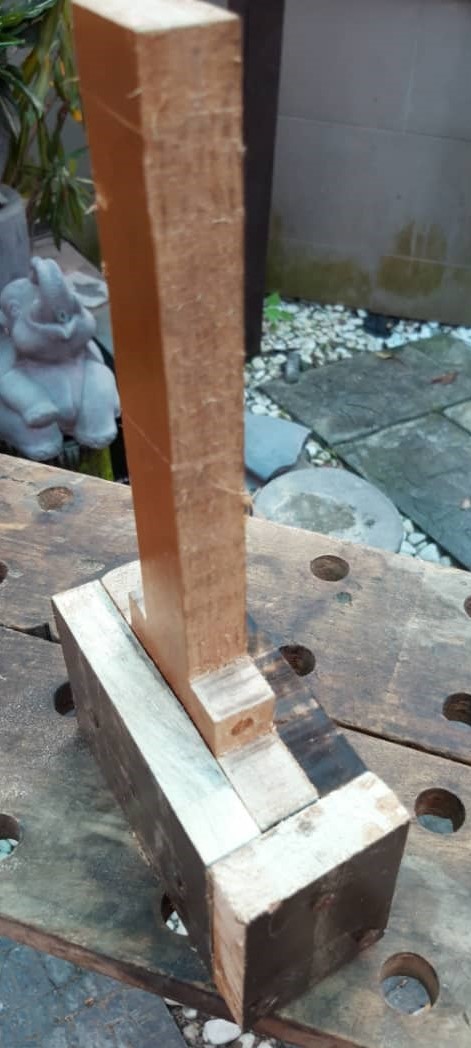
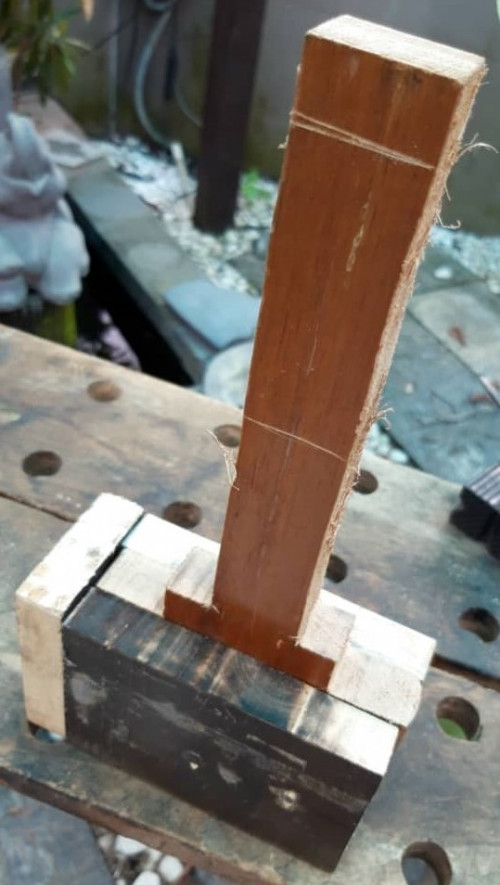
whats is a mallet for? - use it when need to knock something gently/without marring surface or finish/when need to distribute impact force over a wide area. vid below details further:
i use the many types i have usually to nudge handles into rat tail tangs, for chiseling, etc. it has MANY uses. cracking walnuts on xmas is also fun too
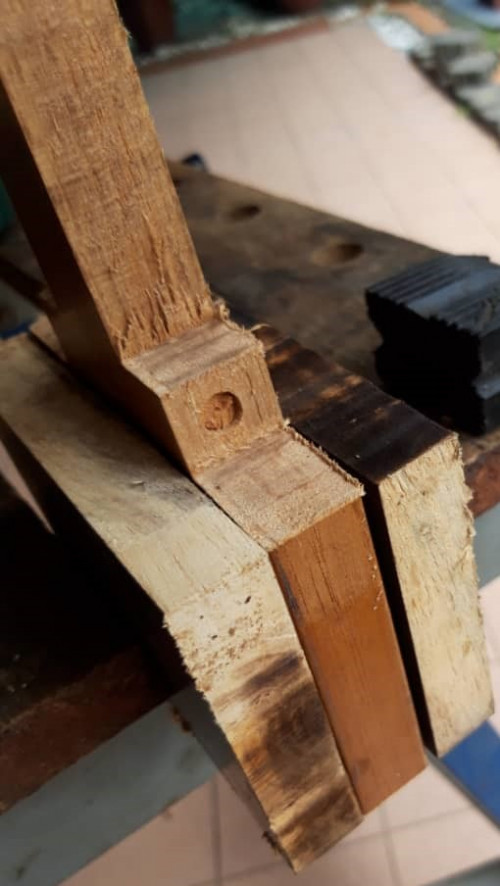
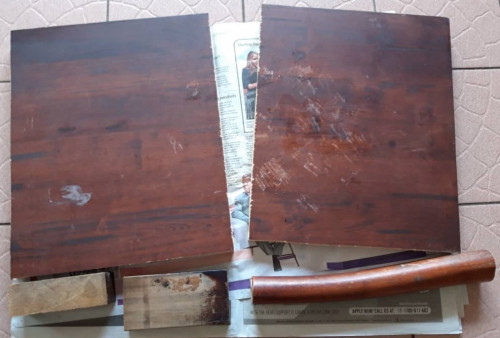
this simple diagram below is the blueprint for my mallet;
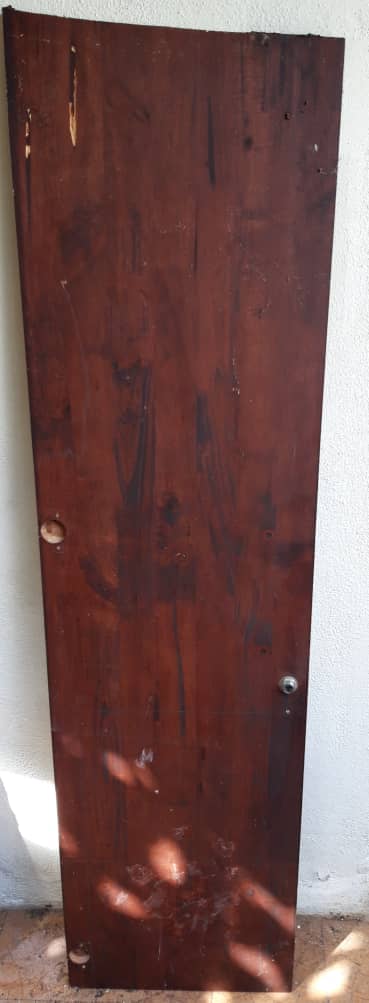
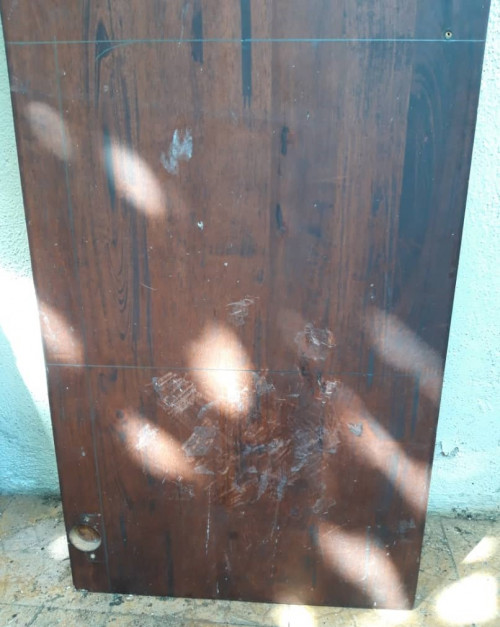
wood material: reclaimed scrap wood. the base is upcycled medium hard wood from a bedpost. the 2 attached side wood pieces are upcycled hard wood from a cupboard. all free & easily found - just walk around your neighborhood or any house undergoing construction. there will be a huge amount of abandoned wood waiting/hoping to be reclaimed & made into something beautiful.
if i had to link a vid that most closely resembles my eventual mallet build, it'd have to be this;
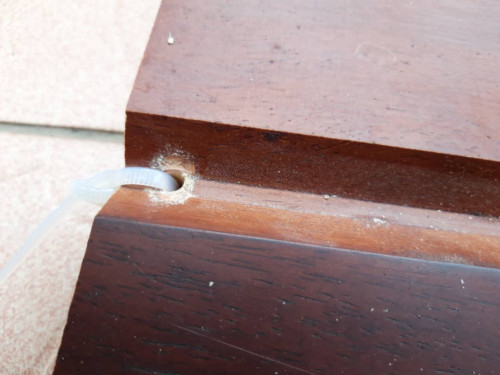
he uses a similar 3 wood layer build like mine for the striking surface, instead of the more common 1 big chunk of wood style. both are great.
tools used for building my mallet: saw, hammer, wood rasp, sandpaper(s), 3 nails. thats all needed to recreate what i did.
i will test mine over the week & determine what other tweaks/experiments wanna do with it... regardless, its a very handy tool to have around & even safe in kids hands. so get started on ur own mjornirs, folks!
... and now, back to our continuing journey into the midpoint of where old skool forging (no power tools) meets modernised forging/smithing (very heavy reliance on power tools).
in today's video, we see another master craftsman making yet another traditional knife by fusing traditional forging methods with modern day power tools.
where the previous indian smith only used an angle grinder, this nepalese smith additionally uses a buzz saw, bench grinder and drill too to create one gorgeous kukri knife.
i bet the air intake blower for the forge is powered by electricity too.
this shows a marked increase in reliance of power tools & consequently, a more 'polished' end product.
do also note the handle material - thats buffalo horn. tough stuff.
.. and the journey continues, with today's video featuring our very own malaysian smiths!
the smiths in question are the excellent parang bidor folks.
in this video, we see all the modern tools used by the nepalese smith, in addition to the 'power hammer' - a very serious piece of equipment. it can effectively shorten 8 grueling hours of pounding metal to mere minutes!
personally, the owning of a power hammer is what differentiates a hobbyist/pro vs a serious crafter intent on mass production for me. many top level pros dont own/use a power hammer... but in my experience, those who do own a power hammer are serious experts who can mass produce huge numbers of their creations.
the show 'FORGED IN FIRE' is also a perfect example of this midpoint method of old skool forging aided by power tools. you will see them using 'big blue' (the nickname given to the inhouse power hammer), in addition to a myriad of other tools as they race to finish their creations. i will go into details on the power tools used in a much later post after covering the basics.
as an aside & to give credit where its due = the bidor parangs are truly stellar things. quality blades with good sharpness, edge retention, quick to resharpen & not too overtly brittle.
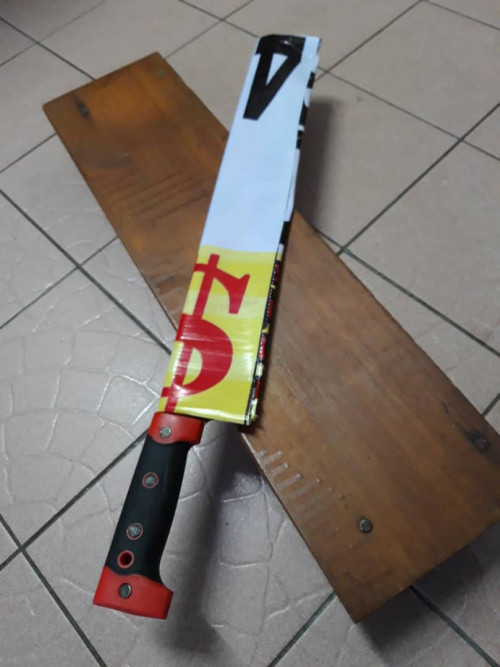
here's a bonus vid showing the making process & a bidor parang being put through a decent field test.
the only issue i ever had with them were the rough, casting made plastic handles - blisters fast & starts rattling after a few years of wear & tear. never had an issue with the blades themselves.
i'd heartily recommenced these parangs for camping needs & general household chores. you get the same performance of a rm 400 or more branded knife for a mere rm 22 - 28. talk about the deal of a century (coincidentally, the knife may well last that long with the proper tlc).
one parang bidor should easily last 8 - 20 years with very hard use or 2 - 3 generations with occasional use & basic upkeep. numbers derived based on my experience. when i do chip/break a blade - i just reprofile it & get another few decades of use from these supreme workhorse of knives.
while the bidor parangs have its own charming rough & tough aesthetics - in terms of functionality, its unsurpassed by other pricier options.
further bonus - no hesitation or guilt of putting if through the ringer as there's no beautiful surface/finish to be marred by rough use. i always grimace when having to put a beautifully finished knife through its paces - thats never an issue with bidor parangs
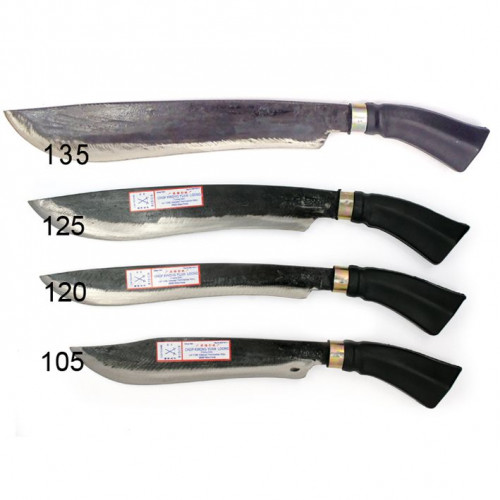
do choose a size that best fits ur needs though - i constantly wish i had brought my smaller versions when having to do close quarter work. the extra length affects the swinging angle/precision. based on ur needs - less just might be more. they rate them along '125', '135', etc classifications that denote length.
so, if you want a ridiculously cheap workhorse of a knife - get a bidor parang. available in most/all hardware shops here... thai neighbours, please get urselves aranyiks ya. another brilliant cheap & supremely functional workhorse line of knives. i will touch on the aranyik lines & others much further down the line.
today, we head to vietnam to watch a xa gac forged by utilising old skool methods aided by modern tools.
the new modern tool seen in this video is the electrical planer used to shape the handle.
it quickly turns any branch or piece of wood into a faceted handle in short time, as opposed to using a drawknife or other such manual shaping tool. i will detail further on planers, drawknifes, etc in a much later post down the line.
do also note that ingeniously modified belt sander - it even has a drill head attachment!
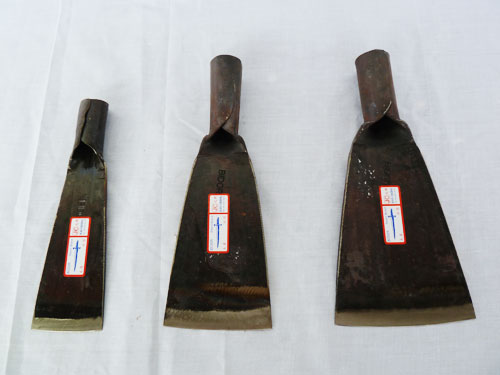
the xa gac is basically 2 hander machete thats similar in design to the malaysian oil palm chisel. the difference is that its more tapered forward to be a chopper/slasher & one of its longer side edge is sharpened, as opposed to the top tip as in a oil palm chisel.
its long pole handle allows arcing momentum to be built when swinging it. couple this with the thick heavy blade, the xa gac delivers forceful chops to clear heavy brush.
it was rather strenuous to use for long periods. great core & cardio workout though. lol
i greatly appreciate the ingenuity showed by this smith. in addition to modifying his tools, he also demonstrates some very novel techniques & showcases some rarely seen ones too. lot to learn from here for any wannabe/future smiths. repeat viewing is encouraged as his technique is stellar. enjoy!
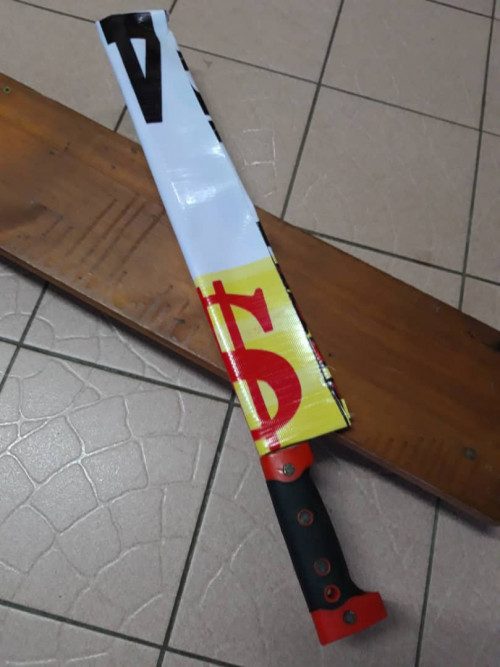
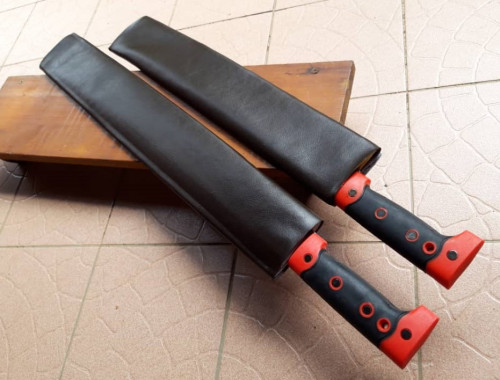
today's weekend quick project is gonna focus on making light custom leather sheaths for some of my machetes.
these will be lightweight versions designed to protect the machetes & allow them to be transported/wedged inside a belt without risk of injury to the carrier.
its a very fast project, so pix will be up very shortly, or as soon as there's decent light to shoot good pix.
yesterday's took about 6 minutes to make the 'cocoon' inner layer from ah long poster. i use the posters coz its upcycling junk, is free, benefits the environment & the material makes a strong base casing to wrap the leather around. its tough, yet pliable.
then, the leather or pleather - derived from discarded sofas dumped in neighborhoods - is tightly wrapped around the ah long poster casing.
i then mark off the desired length after ensuring there's about 1.5 inch overlap & proceed to cut the leather.
i additionally cut a short strip to seal the bottom of the sheath. marking & cutting took 6 minutes.
all thats left now is to stick & seal the bottom part of the sheath with the cut strip first, then wrap the cut leather around the 'cocoon' tightly & stick the overlapping ends.
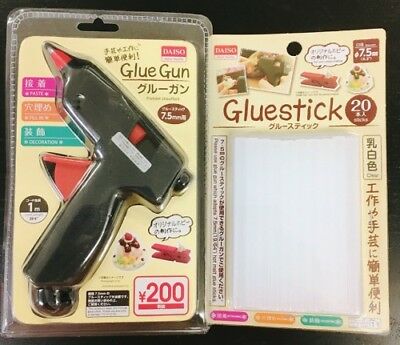
i use a glue gun + glue stick for this. both are easily found in daiso for rm 5 each. looks like this:
the entire sticking process took 7 minutes. so, all in, it took 19 minutes & your leather sheath is now complete!
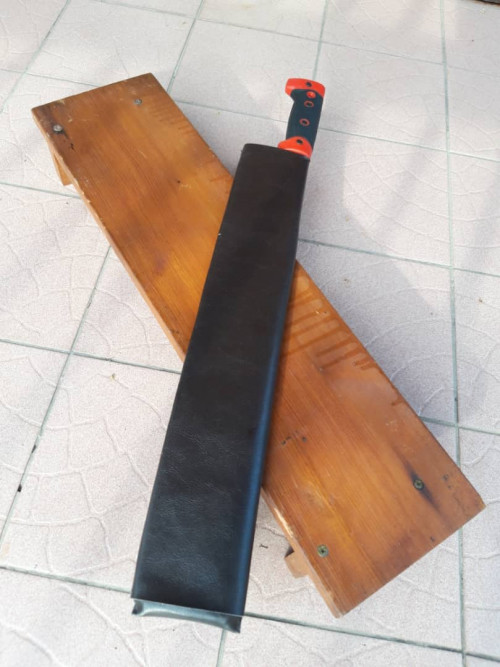
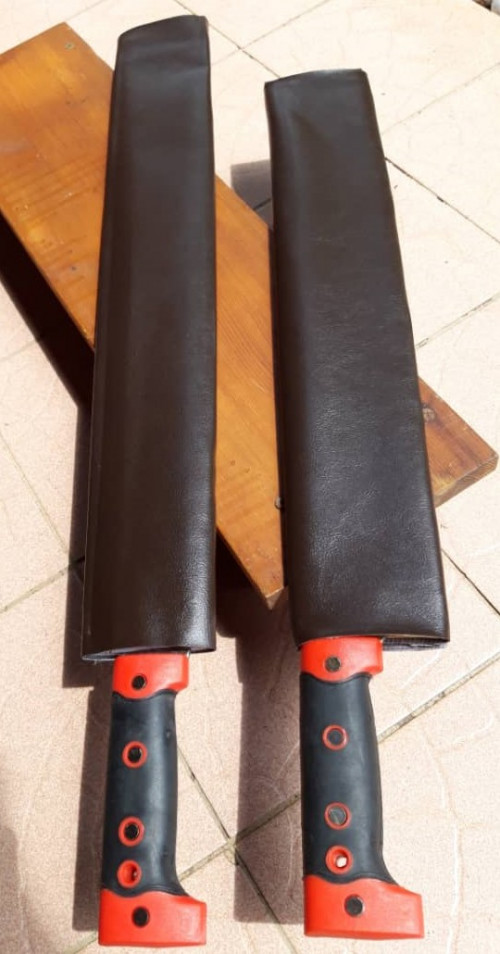
i usually like to leave the completed leather sheath with the knife inserted inside a vice wedged between wood for a whole night. this helps mould the shape & better form fits the sheath to the knife through extended compression. no vice? just place a piece of wood on top of the sheath & place heavy things on top of the wood - same effect. it will 'roti canai' the sheath.
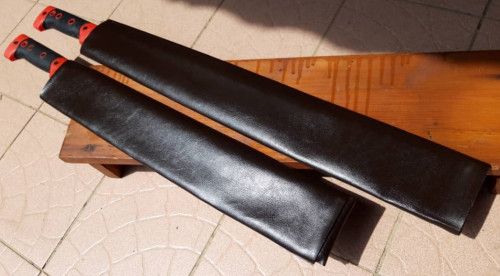
i brush the sheath with oil the next day & dry under bright sun for a whole day. this helps dry, stiffen & seal the leather further. polish with a final application of oil to add another moisture repelling layer & you now have a shiny, but tough light leather sheath!
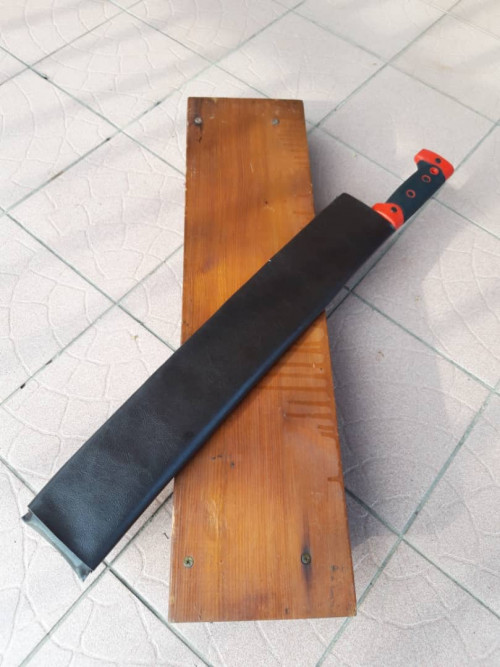
the second sheath was made in about 16 mins, even though its a longer blade.
wish could add vid links to showcase my method, but there just isnt any - my speedy light leather sheaths are too unique. no similar vids unfortunately.
other than the blade length, the additional difference between the 2 is yesterday's sheath had a feeder line at the bottom. today's doesnt.
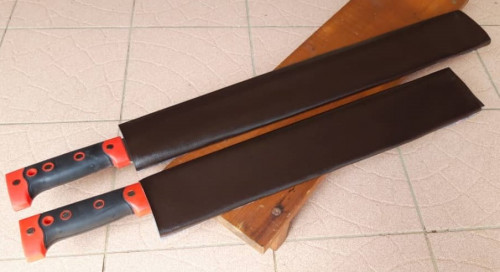
whats a sheath feeder line?... its when i make a small opening at the bottom part of the sealing strip of the sheath to allow a piece of rope or lanyard through. this string allows the bottom part of the sheath to be firmly fastened to your leg & stops it from flapping/banging around your leg or caught in undergrowth. particularly useful when waterfall rappelling or horse riding. pix shows sheath with feeder line on left and sans on right.
the above sheaths were put in a vice for a few hours & polished with oil too btw. they are snug fit & shiny now.
on an aside, if you ever find your leather is too soft, fully soak in water & dry in hot sun - its becomes super hard!
its a way how leather armour was made in ancient times... do note though that this method may well ruin your leather too if not done right. its also called 'leather wet forming' & these vids show the technique:
and this
leather working is another skill that most crafters eventually master. wood working, steel working & leather working all go hand in hand when it comes to modern knife making - so do give it a go & grow your skills!
any interested in visiting me can try their hand on any or all 3 of the above skills. all tools & equipment to get started will be provided
btw, using the last post of the day to list the tools needed/used for making my sheaths: ah long poster, recycled leather/pleather, glue stick & glue gun (can skip & melt glue stick over candle too).
tomorrow's posts will resume the continuing journey of the evolution of smithing & the intersection of old skool blacksmithing converging with the use of modern power tools.
i would like to take the opportunity to draw some attentions to another local malaysian smith.
this adventurous crafters' creations verve towards unique & fantastical elements. his designs & accents show a very creative aesthetic flair & he's definitely most familiar with the art of steel working. wonderful to see that he has mastered some of the fine aspects of crafting in the 4 years he's been part time blademsithing. well done
& this video showcases a highlight montage of most of his works:
some of his videos particularly appeal to me because he uses the same scalloping/faux hammer forge scale method for texturing that i love to do too. examples can be seen here:
a truly very creative individual who deserves to have his unique creations highlighted. keep up the creative work
and in our continuing journey, here's another great example of old skool bladesmithing aided along by modern tools.
we go to taiwan today in this video to watch wu sifu make old bombs into artistic bombs. lol.
in addition to all the modern tools already mentioned in past posts, the additional new tool used today would be the oxy cutter used to quickly cut steel down to manageable pieces.
here's another longer, more detailed behind the scenes vid of what goes on in the factory floor.
do also note the nice manual powered shearer used to trim the knives to desired shapes.
moving on, the below video demonstrates how an oxy cutter cuts steel
& this video shows how a knife maker cuts steel with a plasma cutter. he's making what is known as a 'blank'
both are great fast steel cutting options. main difference is one uses flame to cut steel, while the other uses electrical current arcing through a gas medium. both require great practice too.
below is a good vid that compares both:
the above cutters are more often used by stock removal crafters to cut blanks from ready made billets. i'll detail about this style further down the line.
in today's post, we see the usage of many new powered modern tools to aid smiths!
in this vid below, we are introduced to, in sequence, the band saw, the belt sander, the drill press, a polishing wheel mounted on a lathe machine & a drill modded to act like a dremel rotary tool:
as there are lots of new tools used here & each plays a pivotal role, i will go into detail about each in a daily post starting tomorrow.
for now - enjoy how this crafter made his beatiful dimple textured knife with the aid of modern tools!
This post has been edited by CRAFT_COACH: Nov 21 2019, 11:40 AM
here's a breakdown on the types of band saw blades available & their respective uses (for wood, metal, etc)
& lastly, we have a video of diy band saw for all you diy experts out there. time to put those old bicycle wheels to good use:
all these posts on band saws has me motivated/itching to go play with mine. since the weekend draws near....
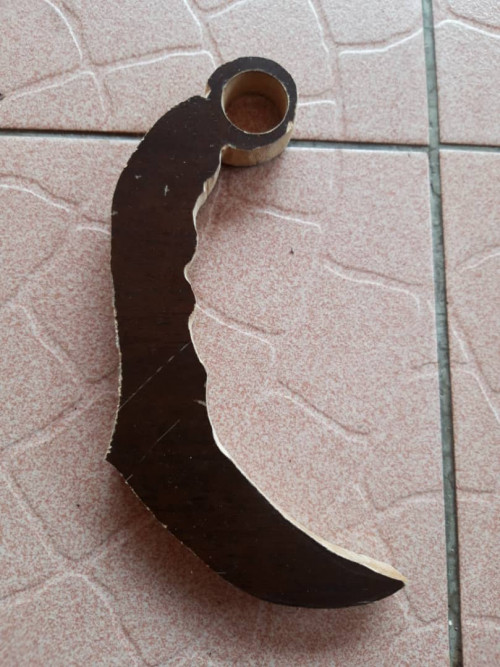
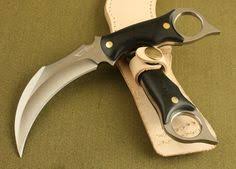
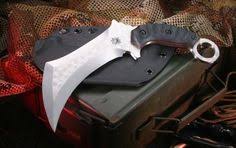
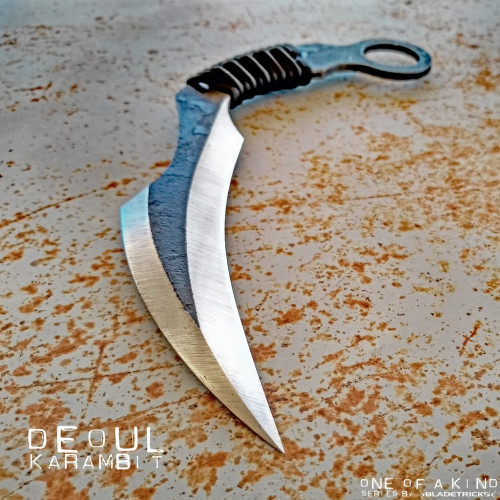
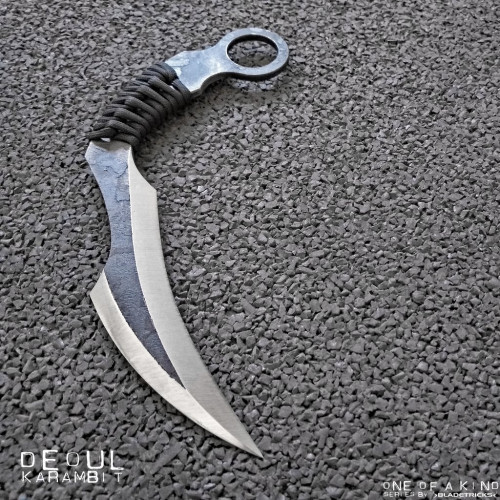
... think i'll fire it up & go make something tomorrow. been mulling making a unique type of karambit for some time now... so its a strong possibility that it will be on tomorrows' quick speedy project agenda - i might make a wooden prototype tomorrow. we'll see.
i made another wooden karambit yesterday. will post pix & detail about it later.
for now though, will be continuing on detailing the 5 power tools mentioned in the previous wu sifu video. here's no 2 on the list - the belt sander.
as it relates to knife making, you use this very essential piece of equipment for cleaning up knife blanks, beveling, edging & texturing blades, as well as shaping & texturing handles. they are just as commonly referred to as 'belt grinders', 'bench sanders' as well as 'belt sanders'... all 3 refer to the same tool... but do note - they are totally different from bench grinders. thats a different tool & will be detailed upon in much later posts.
here's master craftsman (& forged in fire alumni!) walter again, providing info about the belt sander & its uses
and in the below vid we have a different version. there are many types. below is a portable version. in my experience, its rare to see these types used for knife making. they still get the job done though, so use em if u got em
there's even a new version these days where you can buy it as an angle grinder attachment. naturally, its connected to & powered by an angle grinder. they are woefully under powered with a very narrow sanding strip. this results in overheated angle grinders and taking too much time to actually do realistic heavy grinding
it might be better off just using an angle grinder with a heavy grinding disc, followed by a flap disc, rather than using an angle grinder attached belt sander for knife making.
& lastly, we have a video of a diy version for all who want to make their own. plenty of vids available online to choose from. here's my top pick:
today we touch on the third power tool mentioned in the previous wu sifu video - the drill press.
as it relates to knife making, you use a drill press basically to drill into wood & steel. thats it. with a little ingenuity, you can even turn it into a milling machine - thats another modern tool & i'll delve into it in much later videos.
for now, here's master craftsman (& forged in fire alumni!) walter again, providing info about the drill press
and in the below vid, we have him again talking about the different versions available
though a drill is used rather minimally overall in knifemaking - it plays a very critical role. this is particularly so for those making full tang knives & other tang types that require the use of pins to hold the tang and scale (handle material) together.
so, while a drill is a critically needed tool... a drill press? not so much. especially for my needs.
personally, i never felt the pressing need to use or own a drill press. i've always found workarounds & other ways to get around from using it. its not mission critical for me personally.
but, it would definitely aid in more faster, precise drilling & allow for easier drilling of thicker materials. to that end, attached is a diy version for all who want to save some $ by making their own. plenty of vids available online to choose from. here's my top pick:
today we touch on the 4th power tool mentioned in the previous wu sifu video - the lathe machine.
as it relates to knife making, i generally use this machine to shape wood into handles with a uniform, circular shape. its particularly useful when making long wood handles for spears or polearms.
for now, here's master craftsman (& forged in fire alumni!) walter again, providing info about the lathe machine.
personally, i have never had the need to use the lathe machine as walter does above. my needs are different & my use is more to this way below
its not a critically needed tool for me. i've always found workarounds & other ways to get around from using it.
but, it would definitely aid in mass producing perfectly shaped round handles & in the other uses walter mentions above. to that end, attached is a diy version for those keen to make their own
as far as diy builds go, building your own lathe machine is actually one of the easier ones. i just use a drill with some modifications to serve as my lathe machine stand in. my jig is more like this, but simpler
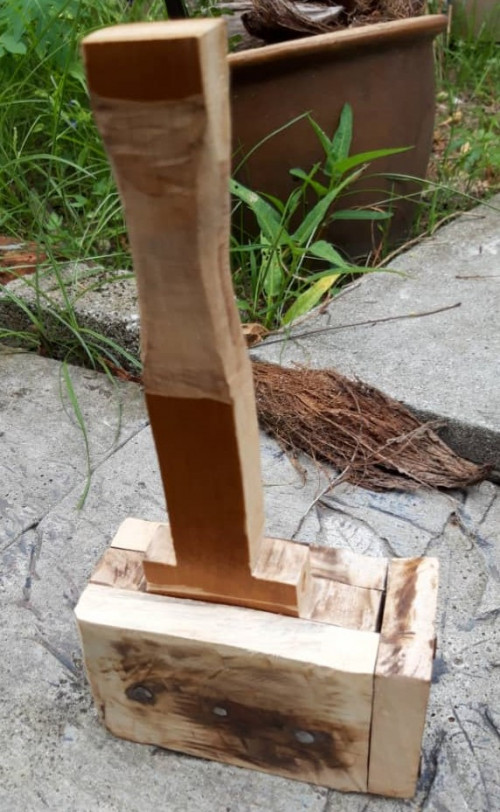
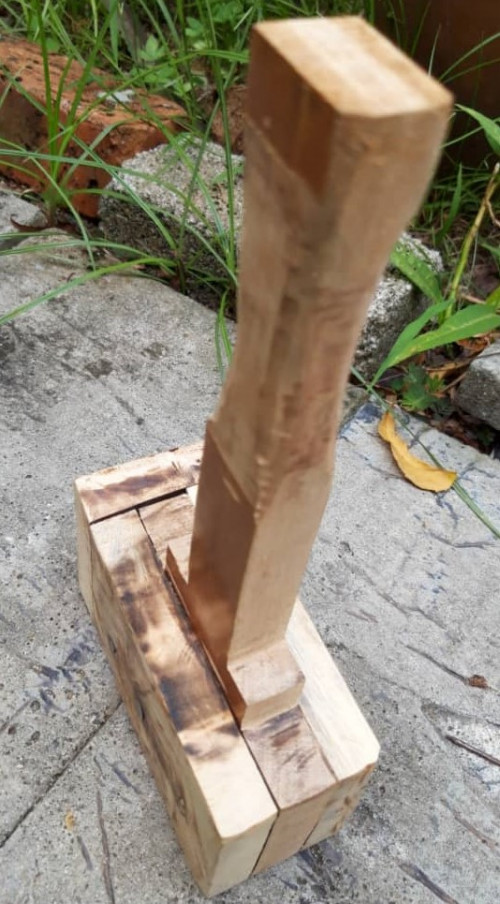
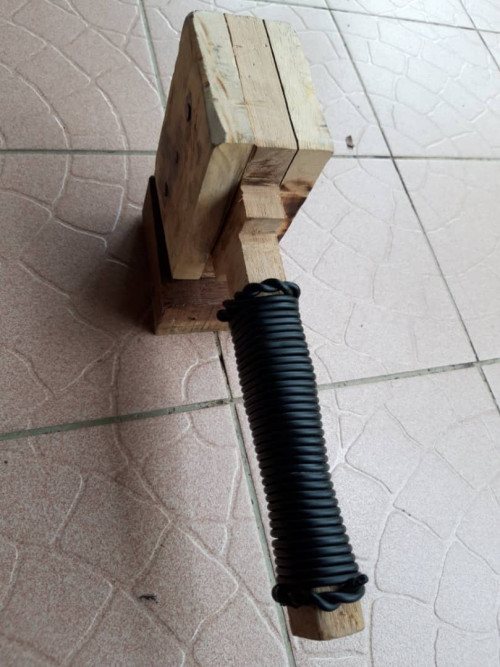
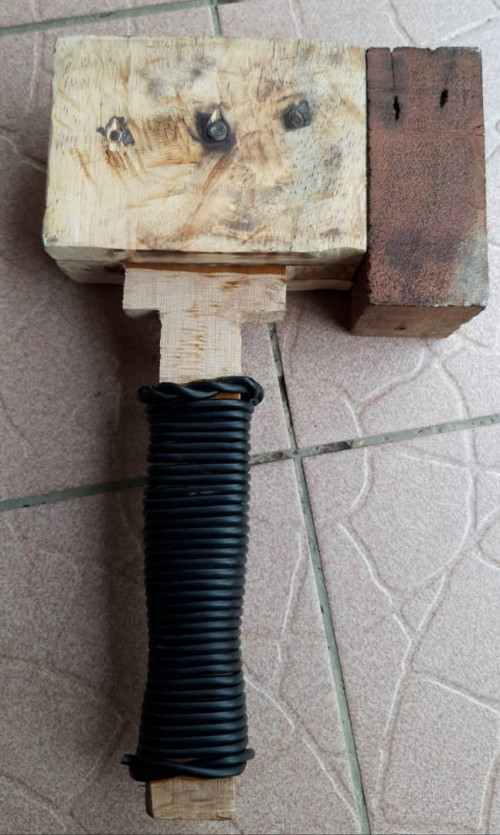
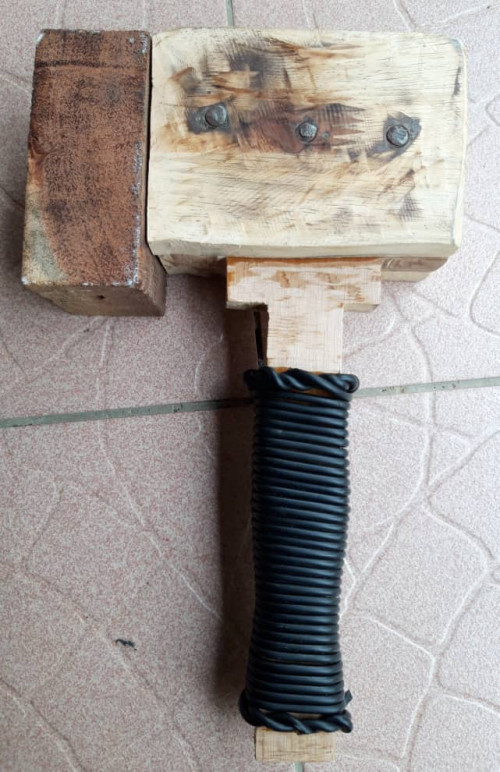
but as it was gloomy weather throughout the day - skipped posting till could get some decent pix.
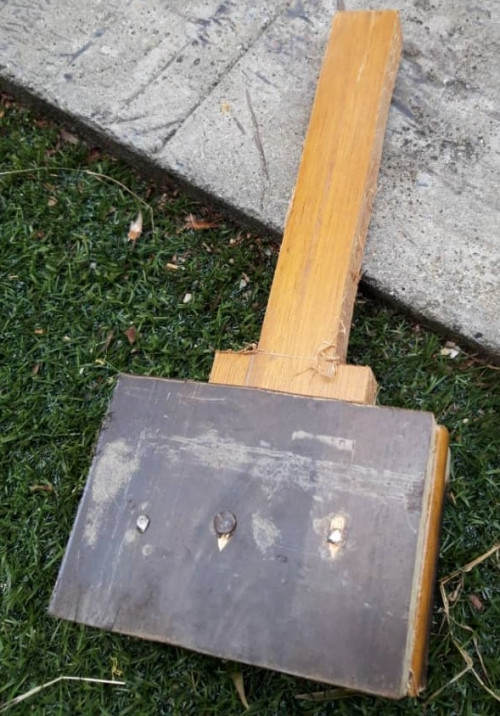
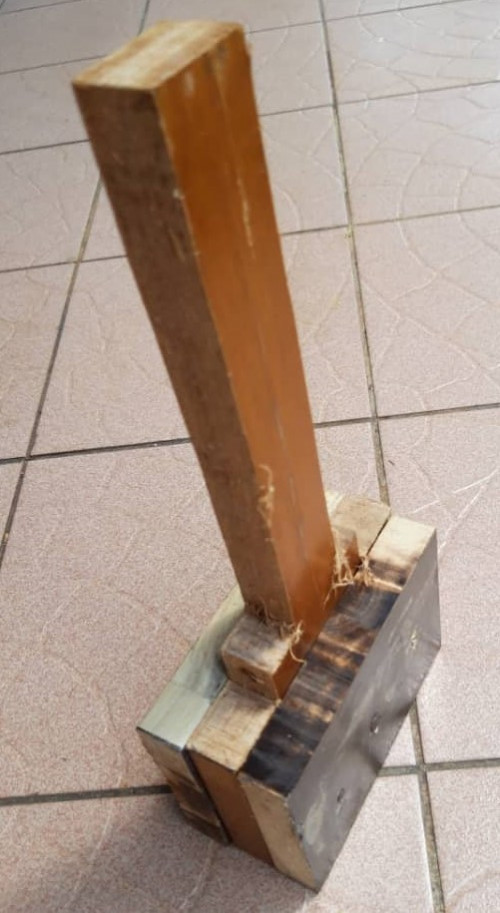
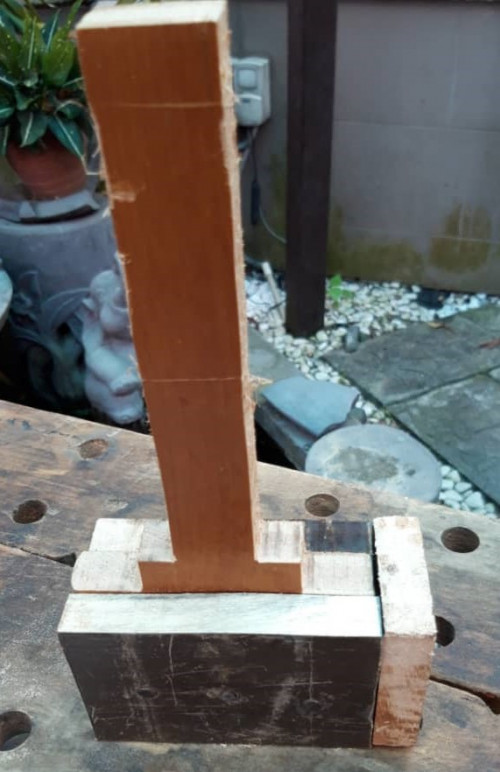
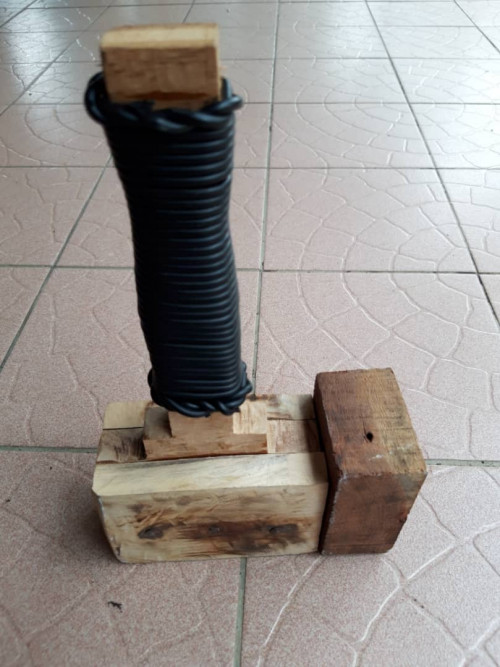
first was the modification of the previously made mallet
after using it for a few weeks, felt i needed a more robust front wedge to allow for better tamping of materials on wider surfaces. so added a thicker wedge of heavy wood on 1 side to make it more heavy duty.
it has to be noted that the more wider the surface - the more even the force can be distributed. good for instances when you have to tamp things down, like heavy carpets, without damaging the surface.
additionally, i also wrapped the handle with rubber cord for better gripping & traction.
i'll prob use it a few more weeks & work the kinks out, before eventually finishing & 'beautifying' the exterior once i feel no further modifications are necessary.
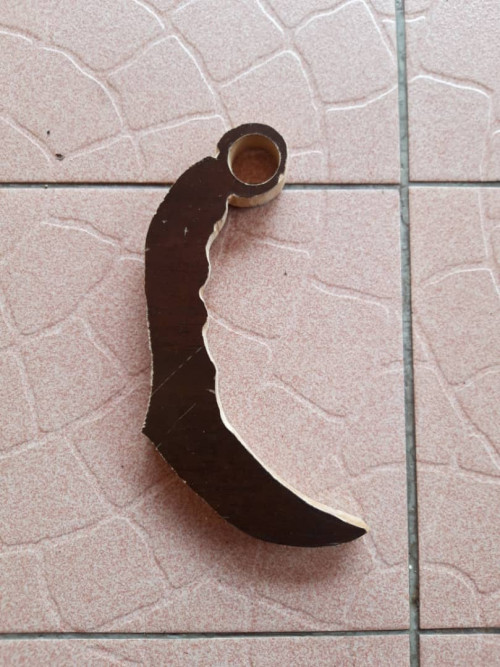
i haven't fine finished either with tapering or texturing the handles. just made quick 40 min versions/blanks with scrap wood for now. fine work later.
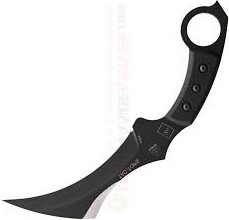
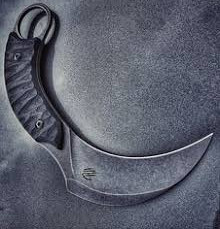
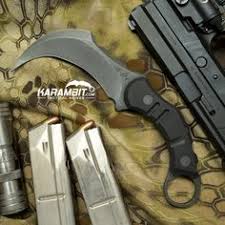
still feel more tweaks needed to the design. feels very much like other metal karambits. nothing unique.
so, think my next one is going to be really off the design charts - it'll probably have crazy angles/shape.
the tools i used > drill with hole maker bit, jigsaw with bandsaw modification, file.
wood material > recycled plywood for the first karambit & recycled hardwood for 2nd one.
here's a vid showing how i made mine:
this vid shows how to texturise/thicken handles though. its a more 'finished' version of mine:
today we touch on the 5th and last power tool mentioned in the previous video featuring the 5 power tools - the dremel tool.
to be honest though - its actually a drill modded to act as a dremel. use em if u got em... else mod em till ur fine wid em
another thing i noticed - i seem to be wrongly referring to the wu sifu video. ITS NOT THAT VIDEO. its the one after that using the 5 tools. please note.
moving on, the dremel is a great lil tool. its greatly aids fine detailing and precision work. it usually/generally is referred to as a 'rotary tool'.
as it relates to knife making, i generally use this machine to sand/shape wood handles, engrave steel & texturise metal and wood. it also has many other unique uses, all mostly focus on detailing, but since it has a tonne of attachments - u prob can use this multi tool for whatever u intend with the right attachment.
for now, here's master craftsman (& forged in fire alumni!) walter again, providing info about this tool
walter, as always, makes things easier for me by having to skip detailed explanations. gotta appreciate all he does for the smithing community
check out this vid to see the super fine detailed work possible with a dremel
& ogle at this video to see the tonnes of accessories & attachments available
to make up for last week's no weekend quick project - i will be doin something special this week.
it will definitely be unique. both, the actual end creation & process to make it will be very distinctive & off the beaten part.
i'm looking forward to it. will try to showcase some very unique methods to create a very unique end tool to all who follow these posts/forum.
it might be (probably is) a literal first documented process in world history of what i'm doing & the way its done, as try as i might, i cant find any documentation/video/online reference for what i'm about to do... too unique. probably a world first. stay tuned!
This is for all guys or girls whom is interested in the art craft in the area of making steel knife, sword, keris, katana, steel items, wood work, making small home furniture, any artwork decoration using power tools...
Feel free to PM me your telephone number and we will add you to tour watsapp group....
Both myself and craft coach s based in Petaling Jaya, Selangor,
however for those based in other states in Malaysia is also welcome to join our watsapp group for more interactive discussion.
my welcome & thanks to postmaster. appreciate you handling the social media side of things
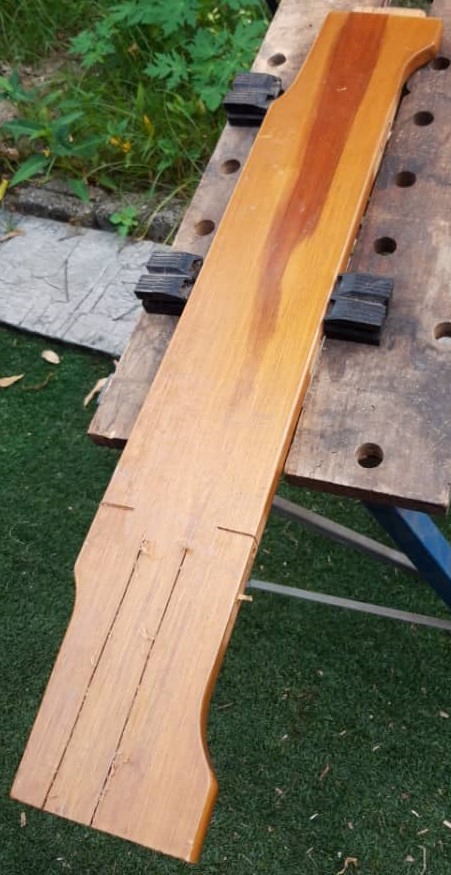
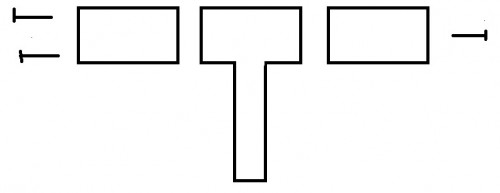
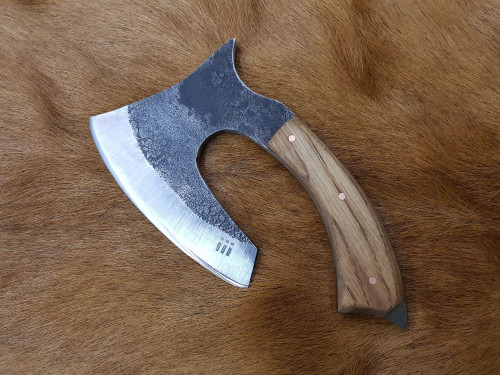
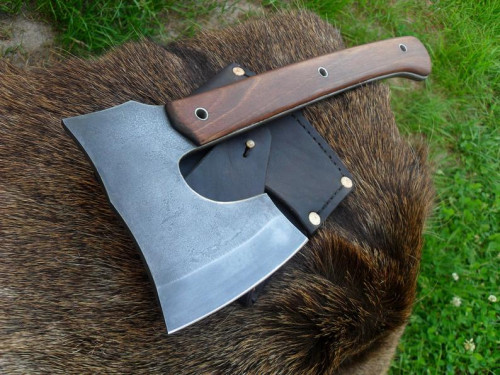
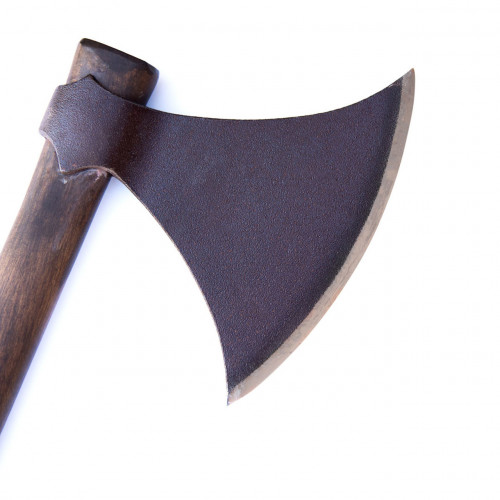
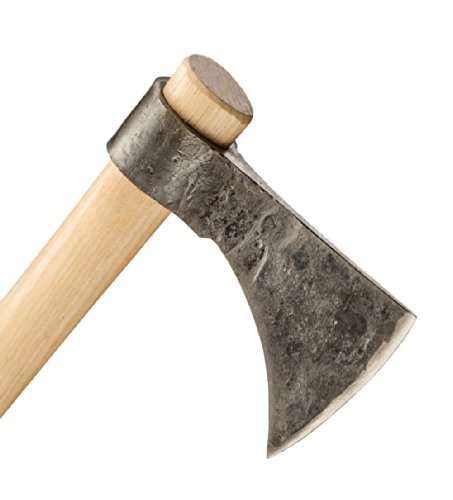
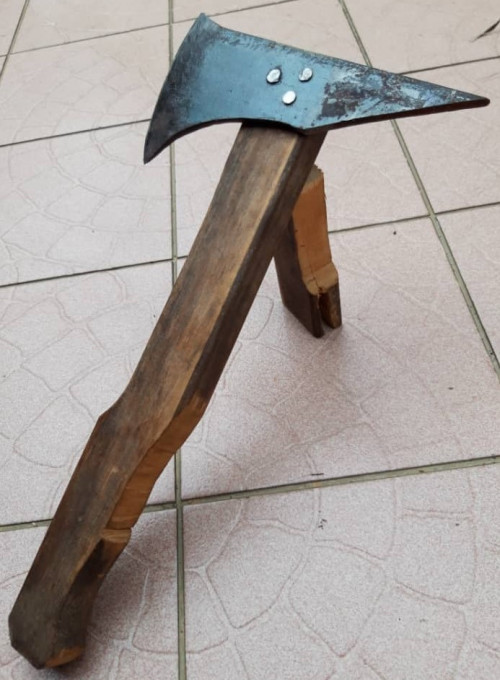
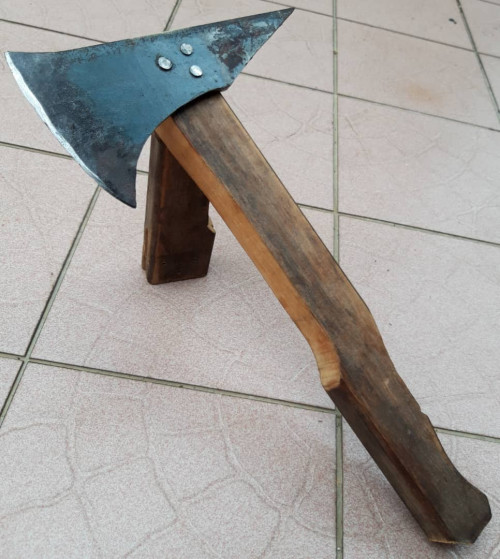
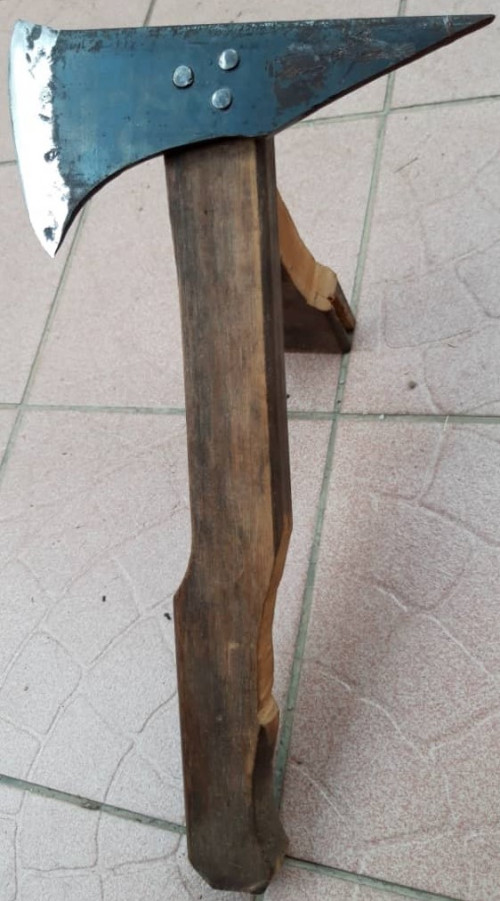
let me present the making process of a 'side hatchet' @ 'side axe', as its also sometimes known as.
whats a side hatchet? > its a tool where an axe head is affixed to the side of a handle, rather than between like this
or through the hole made by the drift
or using the reach around method of lengthening metal to form a connected enclosure to fit the hande like this
what is it used for? mainly this
to explain the above - this tool is usually made with a chisel grind. meaning only one side of the cutting edge is sharpened while the other is left full flat.
as such, it allows the user to make very clean 'straight' cuts into the wood like the video above
anyways, lets get started with the making process of mine...
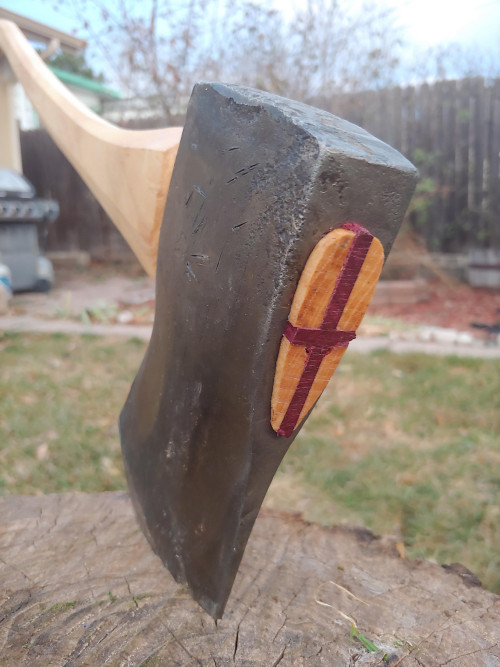
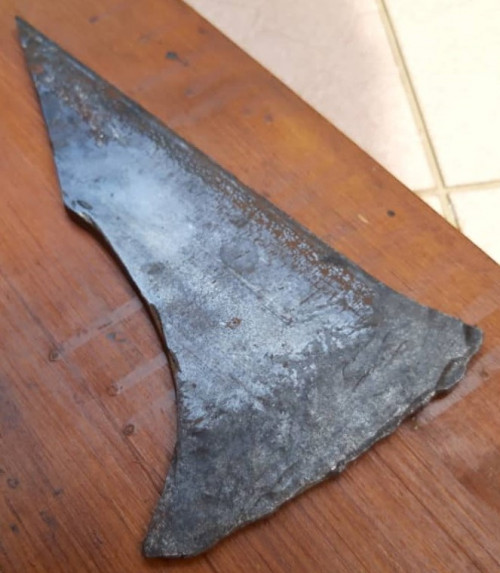
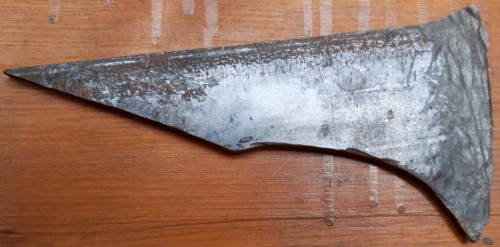
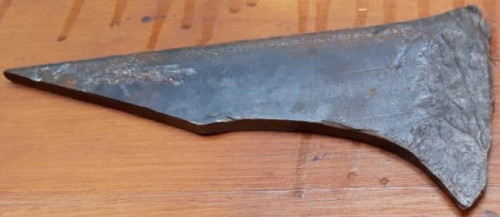
this is an axe head i made. material is lc steel. after cutting the rough shape, i cold forged the edge.
whats 'cold forged', 'cold forging' or 'cold peening? this
and this
basically its forging/shaping steel without fire by repeatedly hammering until it thins/flattens out to your desired shape. this method has great merits & i regularly use it.
i used the cold forging method to flatten my axe edge to make it broader and better hone it to a thinner point. this results in a reinforced edge thats strong due to the metal being compressed & also lesser overall grinding. if u notice the edge in the pix above - you'll see indentations. these were made using a ball peen hammer, ergo the term 'cold peening'.
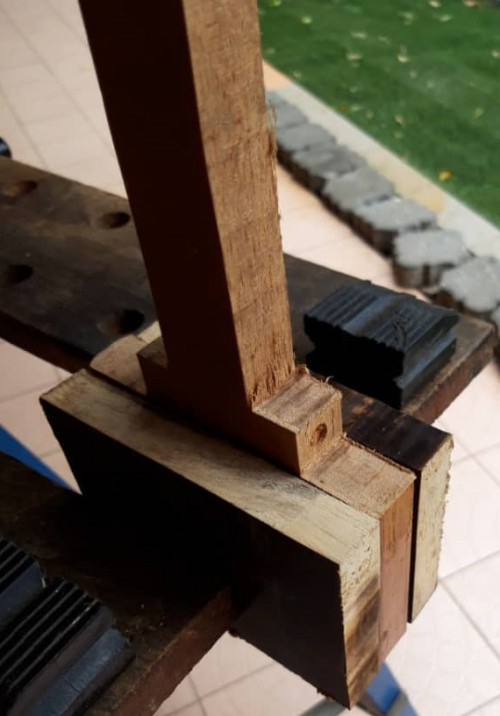
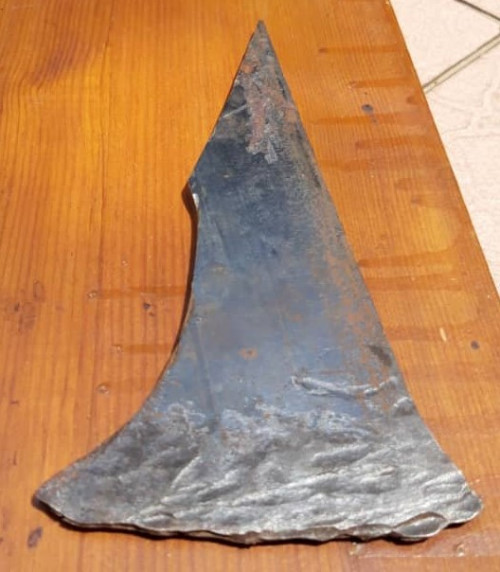
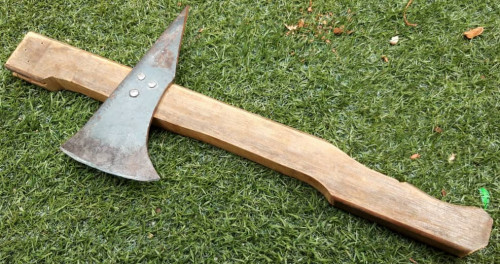
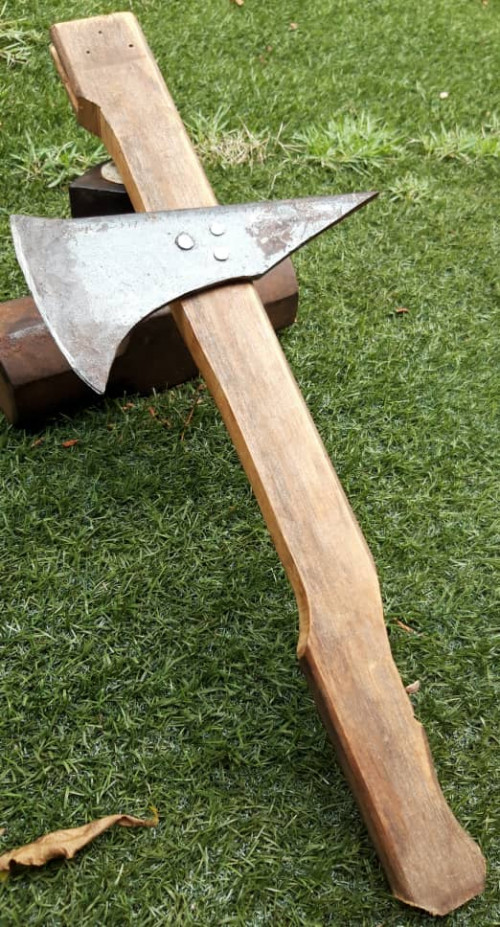
i next drilled the axe head and attached it a quickly shaped wood handle. again, i used the 'cold peening' method to attach the axe head to the wood handle with 3 steel nails. the either ends of the nails are peened flat. this serves to firmly secure the axe head & handle together. i then proceeded to bevel an edge with a grinder.
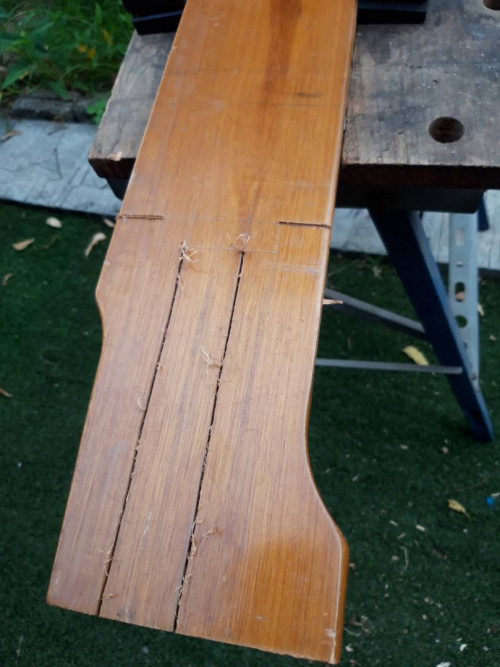
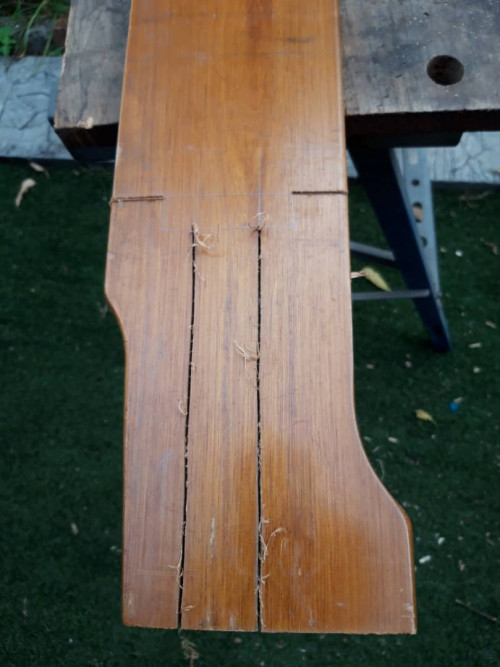
this was followed by cutting off the excess wood from the top of the handle.
i next gave the axe a sabre grind to complete the process and peened the edge.
done. i will revisit this down the line to greatly reshape the handle for better ergonomics and fine tune the axe head for better aesthetics.
and with that - its done!... a world first - a rarely seen side axe created by using the cold forging & edge peening method. it would have been even more unique if i proceeded with the chisel grind i had originally intended for the axe head - but its nearly impossible to do a chisel grind if you are also going to cold forge an edge. it would be too uneven to be an actual chisel grind due to the imperfections caused by the dented/dimpled metal.
as its xmas & new year in the coming & following week - i will be too busy to make any follow up posts for the next 2 weeks or so. will pick up again after that. merry xmas & happy new year to all!
hope to see many new crafters emerge in the coming year. i & the postmater will play our part & be a good welcome wagon to any who want to join us
This post has been edited by CRAFT_COACH: Dec 21 2019, 05:43 PM
I enjoy watching master craftmen in their natural habitat. Those videos gives a sort of satisfying feeling. Not really into forging and smiting, but admire those who have a passion and working at it.
I enjoy watching master craftmen in their natural habitat. Those videos gives a sort of satisfying feeling. Not really into forging and smiting, but admire those who have a passion and working at it.
Kudos!
thank you!
same here.
its greatly soothing for my 'soul' too.
in addition to their natural environment, something about nature & crafting just goes so well too. i rather work in nature than a high tech workshop any day.
to me, this is the richest person i know >
those who 'get it' - will get what my above statement means.
this weekend's project is, i guess, gonna be off the beaten path.
previously my projects were very tools/knife making centric
this time, i will utilise the same wood/steel working techniques & principles to make something thats more 'accessible' and appealing to general sentiments.
in this new year, i would like to demonstrate & have everyone to understand that the same skills required to make wooden or steel tools, can also be put forth towards creating useful everyday products to even niche things like making your own cpu casing, modding remote control or replica models/toys, fabricating/restoring automobile parts, as well as even creating your own outdoor bbq grill, pasta press, etc.
you can take the same skills honed from learning crafting & apply it to whatever your desired area is. it does not only have to focus on tools/knife making. the same core concepts can easily be applied to other areas to make what you personally desire.
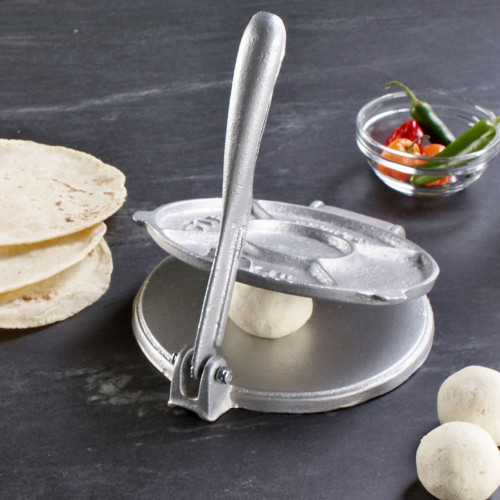
to that end - i will be making a taco press tomorrow!
... hopefully, i will be posting some action shots of it being actually used the day after too.
This post has been edited by CRAFT_COACH: Jan 17 2020, 06:37 PM
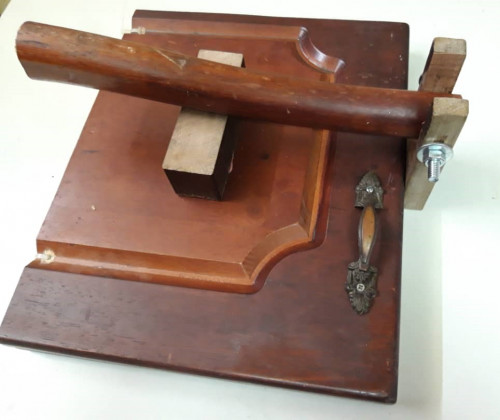
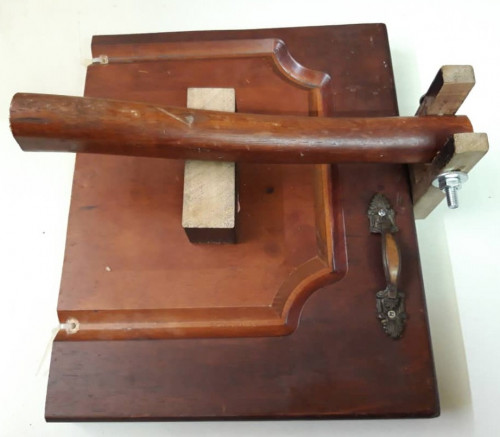
its use is pretty self explanatory - u use it to flatten balls of dough.
just in case, here's a video of its use
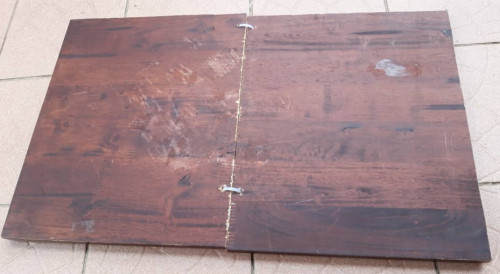
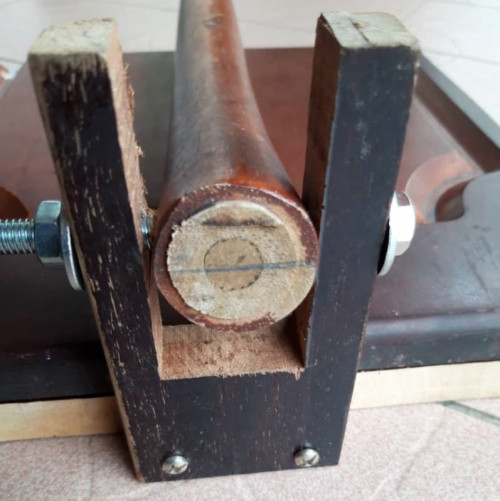
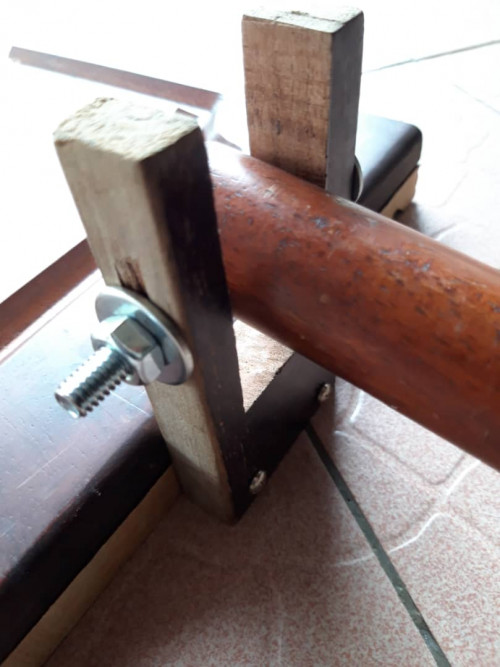
now, here's a dui video version of what i wanted to make... or close enough. obviously, i made changes to mine to suit my needs/complement my resources
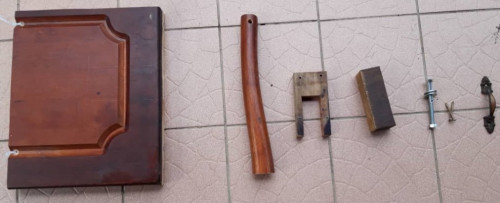
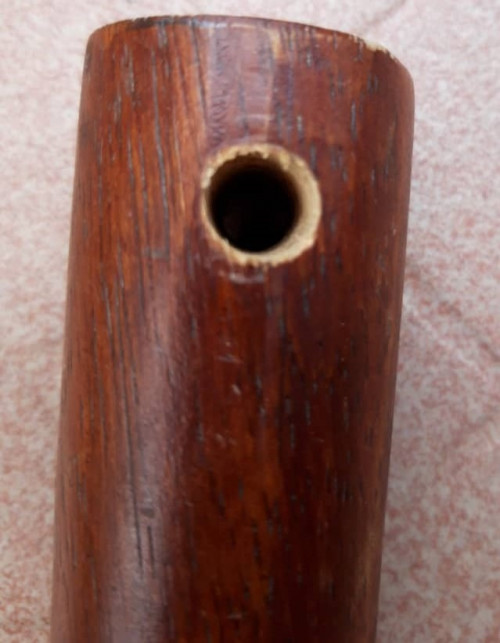
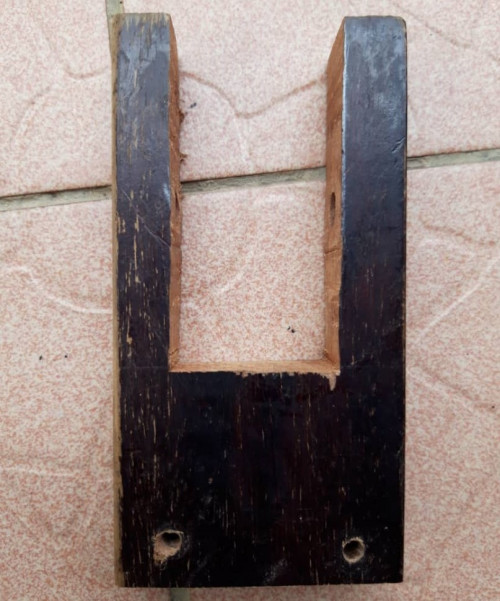
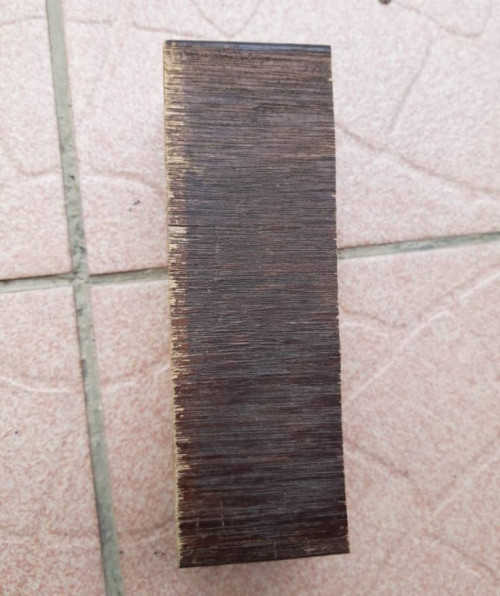
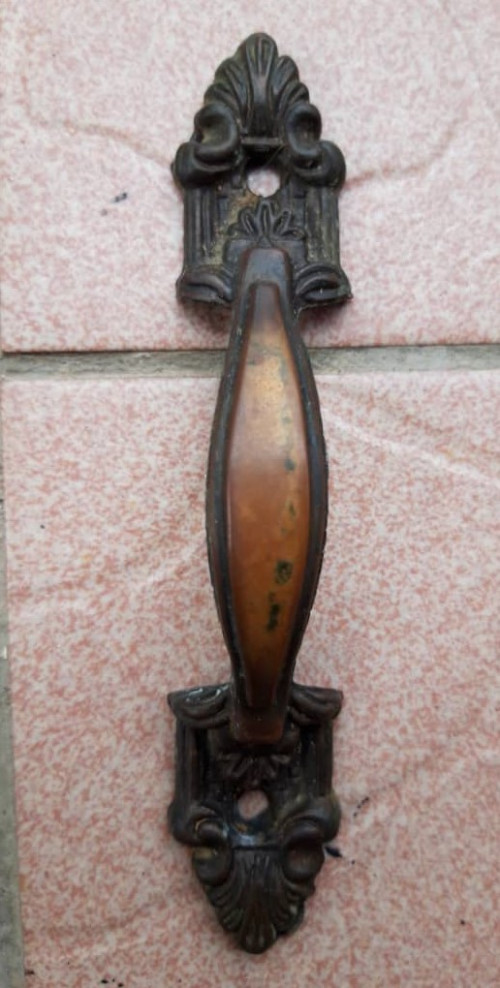
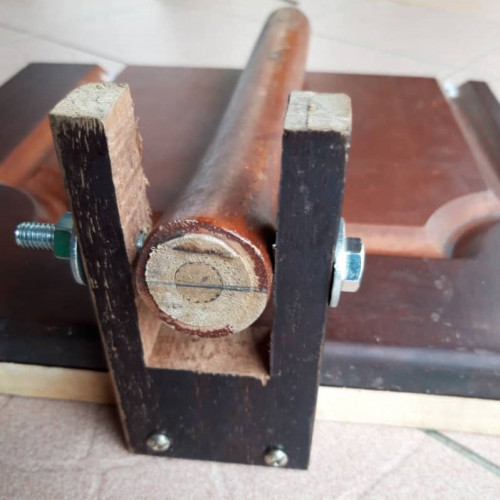
a close up of the clamping lever mechanism. pls note how i combined/joined everything
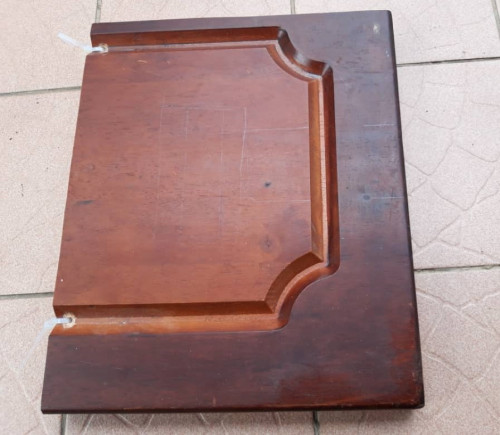
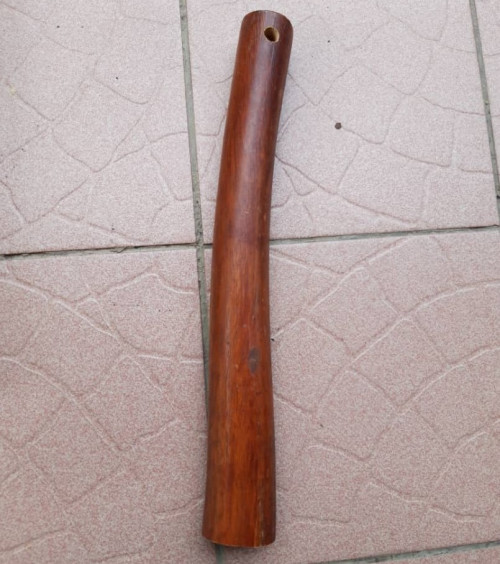
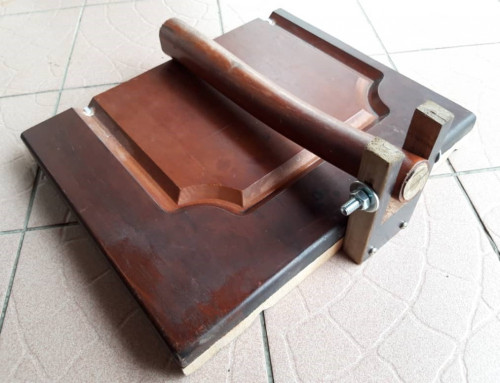
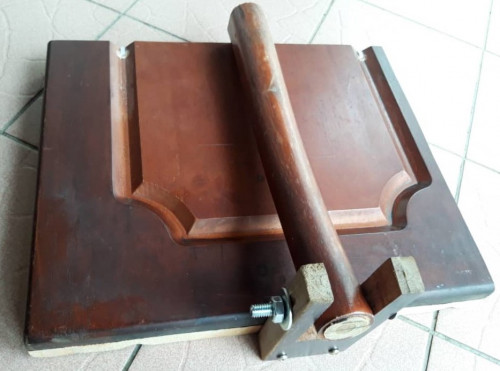
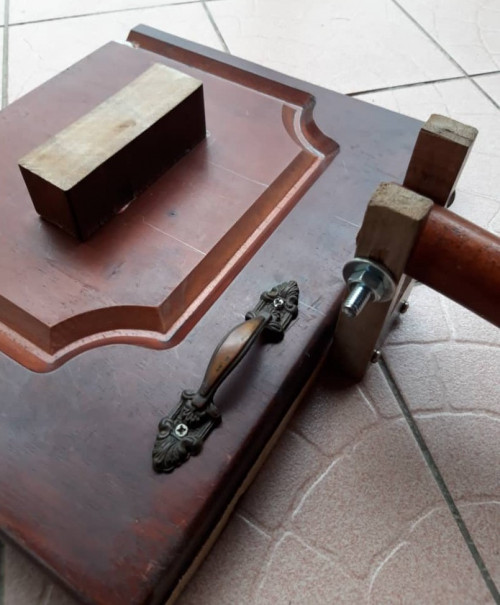
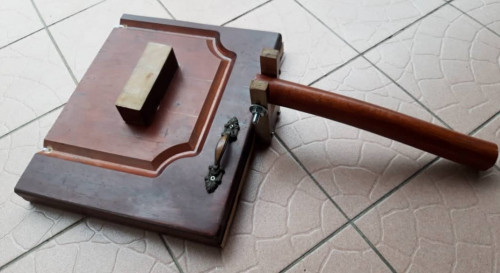
with the addition of a piece of wood that was glued to the frame to act as a pressing wedge and the repurposed handle to allow easy gripping, the taco press is now complete!
glamour shots in good lighting. lol
& done!
though no part of this press will actually make contact with dough/raw ingredients - prior to assembly, i nevertheless quick soaked & scrubbed it all down thoroughly with hot water and hyrdrochloric acid, then further spray misted strong vinegar & rubbed it thoroughly into all exposed areas.
now that the (enjoyable) hard work's done - am looking forward tomorrow to doing a monday nite mexican feast. i'll be making tacos, fajitas & quesadillas... eventually, i will make naan and chapatis with it, followed by pirogis, ravioli, pita, etc. as cny is drawing near - def will be used to make pau, gyoza & wantan wrappers too. looking forward to seeing perfectly uniform & round flattened pieces of dough in the varied permutations of doughs to come
in closing, it was another fun & fulfilling project. hope all reading appreciate that one can do so much more beyond making tools/knives by learning crafting - its all the same base skills. how one chooses to use it/evolve after learning the base skills is up to them. this time i used it for culinary pursuits. next time - maybe modding my own gaming pc casing or fabricating a car gasket... the possibilities are endless with crafting skills.
so, if u found this project appealing - go make ur own, folks!
dunno how...? come learn
This post has been edited by CRAFT_COACH: Jan 19 2020, 09:18 AM
I've been wanting to learn to make knife, i wonder if you still open for classes lepas PKP?.
I'm a model kit builder, mainly gundam. I use box cutter a lot and frankly, I cut myself quite often. I'm interested in kiridashi for now as my go to knife, wonder if I could learn few things from you to make this knife? Thank you.
hi!
I've been wanting to learn to make knife, i wonder if you still open for classes lepas PKP?. > i am indeed & all are welcome.
I'm a model kit builder, mainly gundam. I use box cutter a lot and frankly, I cut myself quite often. > ouch. pls look into perhaps getting some anti cut gloves. they r super cheap & useful > https://shopee.com.my/1-PAIR-Anti-cut-Outdo...9183.2793325682
I'm interested in kiridashi for now as my go to knife, wonder if I could learn few things from you to make this knife? Thank you. > no issues. its one of the easiest knife types to make. once mco officially lifts (& the necessary safety cool off period) - we can def make one (or a few types/sizes).
i have a few made - they range from looking like kunai to chisels to throwing knifes. i even make em with old butter knifes (which usually do not hold an edge well). they r surprising sharp with the correct edge. i use mine for tree grafting, etc.
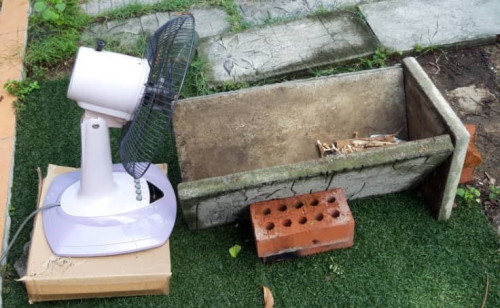
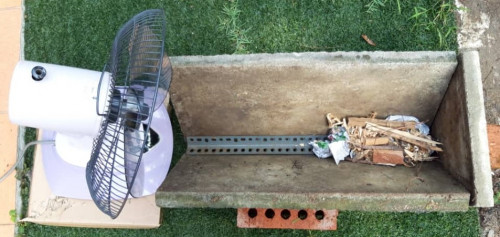
... no problem. just switch it out with something else.
ex: no fan? use hair dryer or bellow or vacum cleaner blower. anything that generates decent air a continuous rate
cement/cinder blokes can be exchanged with brick, metal sheeting or any material that can serve as forge walls without being melted or burned up.
just use whatever is lying around ur house. every setup will be unique based on what u got. as long got rough forge enclosure & air flow - ur all set to forge.
during mco - the sales of survival knives, machetes & camp choppers skyrocketed
... i wonder whats the correlation
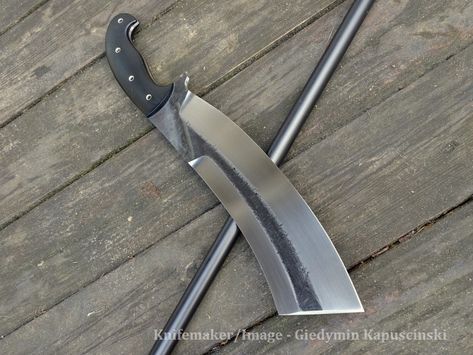
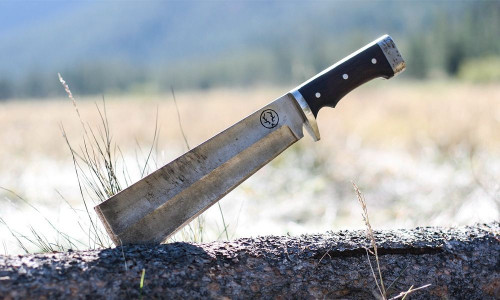
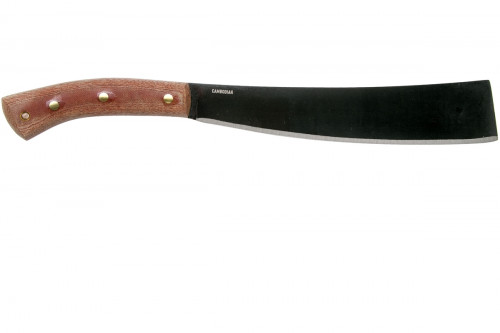
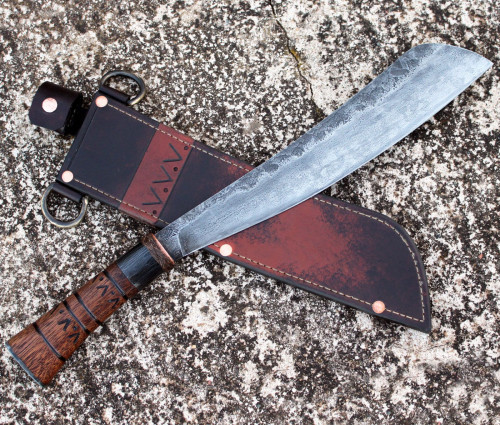
anyhoo, to the uninitiated - camp choppers are exactly that - thick spined, usually with a decent tapered convex edge, blade curvature ranging from straight to slightly eyebrow curved.
its used predominantly for wood work associated with daily camp routines - feathering, batoning, breaking down wood, etc
... well, at least that what i use them for. lol
its not particularly suited for heavy tree chopping or delicate light work like whittling wood into fancy designs... u could in a pinch, but its gonna come at a cost of great physical exertion/injury/blade destruction.
it behaves & should be treated more like a light hatchet. i treat em like good ol HTCs (heavy terrain choppers). ideal weight should be 400 grm to under 600 grm. length would be subjective - anywhere from 320 mm to 380 mm for me. any longer would be machete territory for me personally.
there are modern/tactical looking camp choppers & the traditional looking ones. the short goloks of malaysia would be prime example of a 'traditional' looking camp chopper.
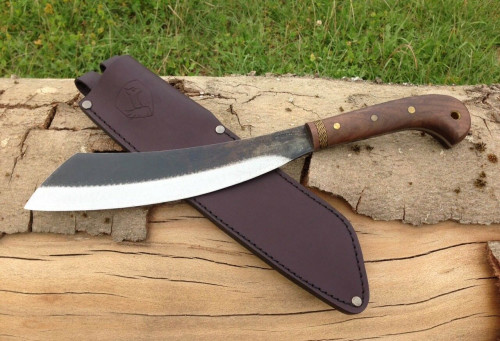
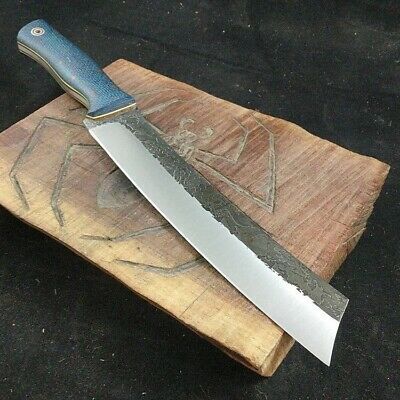
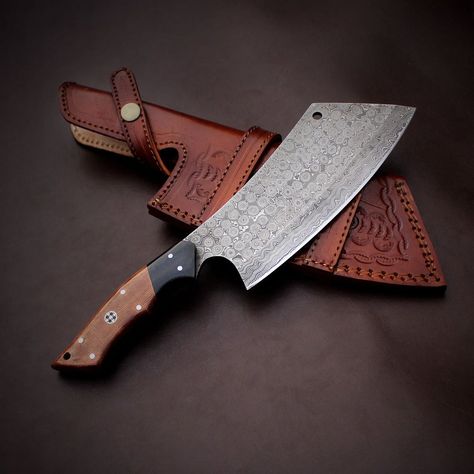
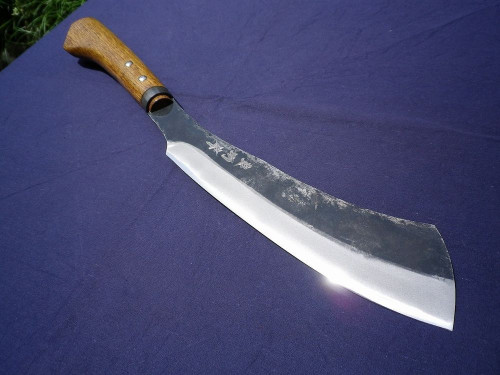
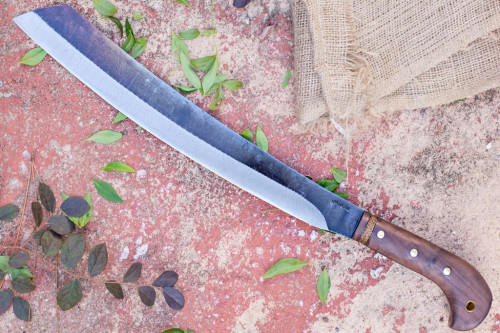
so without further ado, i will dedicate this week to appreciating this fine specimen of a knife that bring joy to bushcrafters everywhere:
here's the 5 beauties of today, with the first one being malaysia's own representative; 'the golok' followed by other lesser known non-generic types of camp choppers:


 Oct 19 2019, 12:39 AM, updated 5y ago


 Quote
Quote

 .. Even so still want to try to forge something..


 ... yours are true chisel?
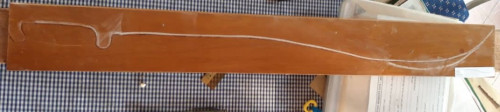


 0.0639sec
 0.31
0.31
 6 queries
 GZIP Disabled