QUOTE(brapa? @ Oct 8 2018, 11:06 PM)
I see, ok. Ya, later they do what they think i want hahaIf i use the simplest & cheapest design, maybe just order the wood, then order 2 legs with holes for screws. Then Bring home & screw them myself ? Yet to check if 6' can fit into car onot .. Seems like this simple bench not so simple, need to transport things here there 
2. 23" height (floor to sitting), this would be for a counter and not dining table rite? Dining table chairs are usually 18" from floor to seating (it too tall, the person sitting would need to hunch over their plates to eat)
Yup, its a counter so the bench need to raise. I tried sitting with different heights & the higher it goes, the more syok it feels as it gives me a commanding view of the dining table & out to the balcony. But my wife did mention its so high confused.gif I guess i will retry again & see..
Yeah, same with my wife. Women have shorter bodies hence higher might not be better for them. Having a commanding view versus position to eat is very different. Even with my height, I feel its uncomfortable when I use my bench for eating. Drinking coffee is ok but not for eating. Maybe look at designing it shorter and if you still feel a need to make it higher can later add a cushion seat on the wood.3. No measurement on width of wood or bench
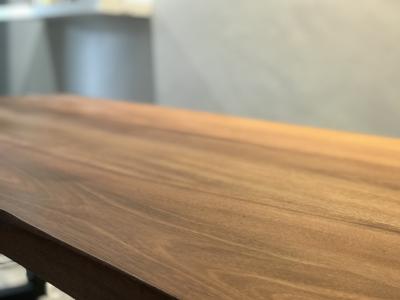
At 1st i was thinking of 1' but most articles talk about 14 - 16". So maybe go for 14" then, can lie on it & use as day sleeping 'bed' ahahaa. Can 2" thick support 4 people ?
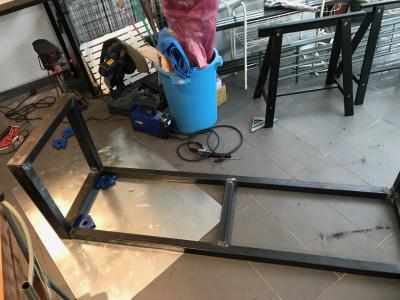
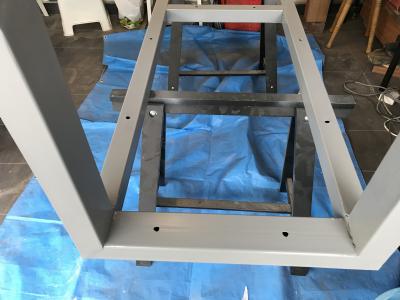
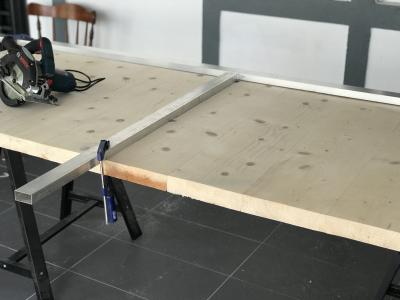
14" is minimum for width. 12" at the top also means 12" base - this could be too narrow causing the chair not too be stable. I was concern as well if my wood bench could support the weight of 4 people (4 x 75 kg average weight per person = 300 kg total weight) hence I designed the metal frame to provide additional support strength4. Currently no clear design how the wood is fixed to the metal frame (e.g. screwed in, locked in, dropped in?)
If possible want to keep it simple & cheap, so probably just screw the leg to the underneath of the wood.. What is locked in ? I saw yours is dropped in.
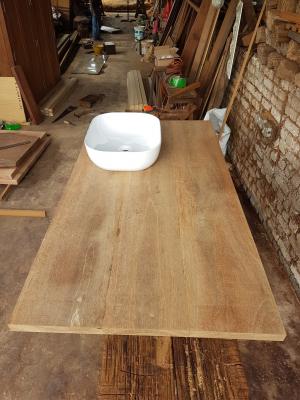
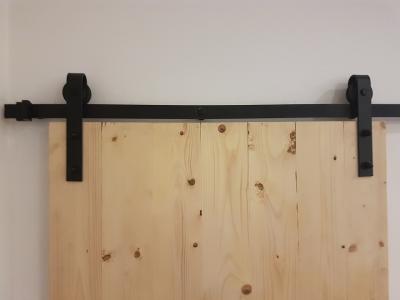
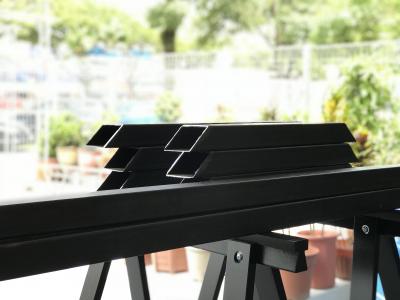
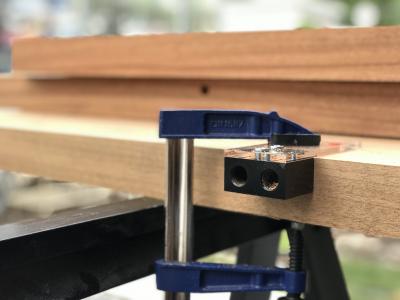
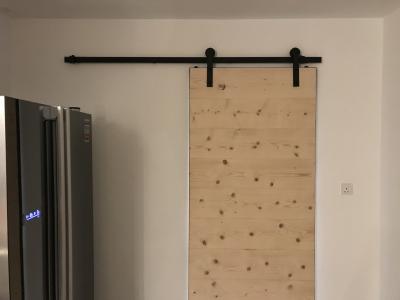
If you want to drill in the legs to the underneath, then probably need to pre-drill the wood so it doesn't crack when you screw into the wood (this is also dependent on the wood type you choose). Locked in was another idea I have whereby you have a frame for the wood to slot in at the end. Essentially your bench legs are two rectangles sitting on top of each other - they are welded together. Larger rectangle is the legs while the smaller rectangle is equivalent to the thickness of the wood. I decided to finally use a drop in frame for my wood to sit on. The frame provided additional strength and later if I choose to, I can just lift up the wood and change to a different type. My wood bench is not screwed into the metal frame.5. What type of metal? Metal, mild steel flat bar, stainless steel?
Stainless would be woooo.. so nice. If too expensive, maybe mild steel flat bar. Hope it can hold 4 people. But then those square hollow bar looks better.
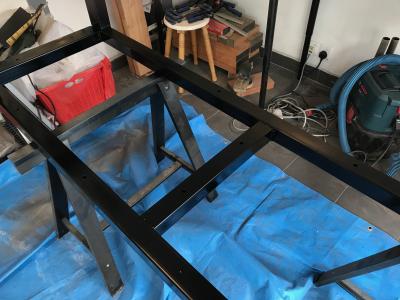
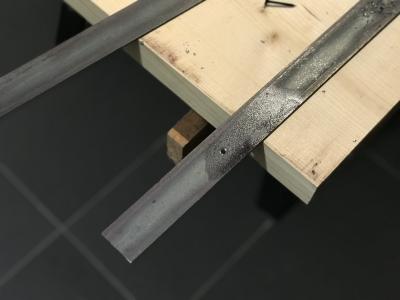
Depends on house design, preference, etc. Stainless steel is bright and shiny. Mild steel flat bar is very strong but also very heavy. Your dimensions are about the same as mine. My entire bench weights around 18 - 22 kg. Can easily hold 4 pax. Take note with mild steel will have rust when in contact within 30 mins of air. Have to quickly clean it of rust and apply it with a clear aerosol spray to protect it from oxidation. I liked the raw mild steel look in contrast with wood. Gives it a very industrial + wood natural look6. Foot rest - one or 2 bar across? Thickness / Width of metal?
Yoour question caught me, i guess i really need to do 3d drawing to visualise. At 1st i thought 1 bar to save cost, but to connect the bar to the 2 stands need a 'crossing' in the stand to hold the bar so its not simple also. Hmm..
Should the foot rest screw to the legs or soldered ? If screw, it will be easier for me to transport it back from the workshop.
Here's my little secret - I actually designed the size of my bench so it could be easily transported.  If you have access to a 4WD pick-up then no issues with transportation. Single welded piece is stronger than screws. I guess you could designed it with screws / fasteners but would need at least x2 thicker screws + spring washers to give it strength
 7. Just a note, your wood is 8' (approx). This would make the bench quite heavy to move.
Oh, its 6', always got people complaining about my writing hahaa.
Better do it on computer so no arguments about measurement later with the carpenter / metal fabricator 8. Edges of metal, rounded or square
This also havent thought. Meaning the 4 right angles of the legs ? Maybe a bit rounded in order not to scratche the floor
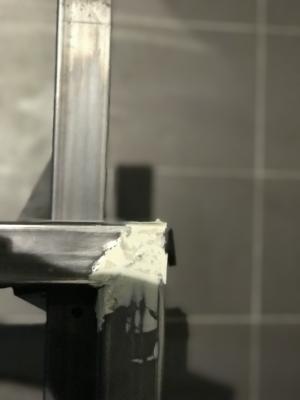
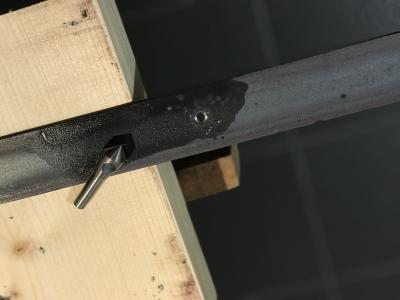
Depends on what type of floor you have. I actually have felt floor protectors under the mild steel legs to prevent floor scratches. Its quite heavy that its easier to drag than to lift up. FYI. 9. It would be easier if you found the wood and give it to the metal fabricator. So they can make sure the metal fit directly to the wood (sometimes wood warp and might not be straight).
If i use the simplest & cheapest design, maybe just order the wood, then order 2 legs with holes for screws. Then Bring home & screw them myself ? Yet to check if 6' can fit into car onot .. Seems like this simple bench not so simple, need to transport things here there blink.gif
It's not hard, just need to think and plan in more detail that's all. Once you do manage to do this, you will feel a strong sense of accomplishment. Plus the total cost for me was ridiculously cheap compared to the same bench dimensions shops outside were charging.This post has been edited by bigred: Oct 9 2018, 12:58 PM 

 Aug 24 2017, 12:17 AM, updated 7y ago


 Quote
Quote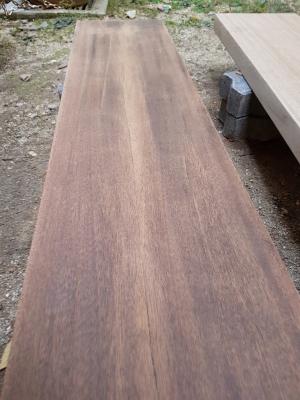


 oh well customer is the boss so we just listen..


 I guess i will retry again & see..


 0.1118sec
 0.54
0.54
 6 queries
 GZIP Disabled