

 Feb 1 2016, 12:00 PM, updated 10y ago

Today I am doing some housekeeping on my PC and saw the pictures thus posting them before deleting them.
So basically this is a simple project, I have been living in my master bedroom and getting bored with the same old same old. I had RM1k to spare. My room is about 21ft x 11ft ~ 230sq ft. I thought about flooring and started a hunt.
I chose vinyl flooring, there is also laminate, wood, etc. There is also 2mm, 3mm, clip ons. You can google all the differences and do a survey on your needs. Basically I opted for a 3mm vinyl flooring because;
- its cheaper
- easy to clean
- easy to install *over the tiles*
- I will not have termite problems
Where did I source my vinyl floor?. It is quite easily available in Malaysia. Been in the market for sometime. If you have the time, you can request quote, compare etc. I just went around Puchong only and bumped across Dynaloc.
www.dynaloc.com.my
It was a hard find but its like those factory shoplots storing and distributing them, not a showroom kind of place. Mostly while I was there, lots of retailers came and went. I told them I wanted to DIY and there were very kind and patient explaining all my questions, even for a 230sq ft request.
They also have a installation guide & video guide for DIYers;
installation guide - http://www.dynaloc.com.my/index.php?ws=pages&pages_id=7309
video guide - http://www.dynaloc.com.my/index.php?ws=video
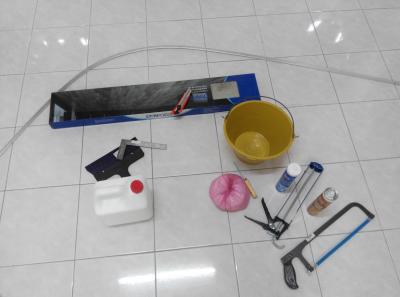
I spent RM900 for
- 10 boxes of Vinyl Planks *Seriously heavy stuff*
- 2 bottles of waterbased adhesive (1bottle is about 200sq ft)
- Sealants
- Metal Trim (to give a nice finish at borders where vinyl meets tiles)
From the Hardware Shop
- Blade
- Pail
- Scraper
- White Cement
- L-Ruler and metal ruler
Picture: Items bought
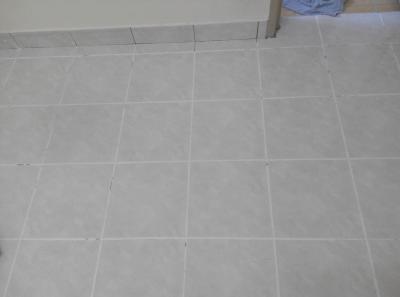
Picture: Work area before start

Prep work - (overnight + 1 day)
=========
1. Need to keep the Vinyl flooring boxes in the room over night for the planks to get used to the temperature, the planks are like flexible rubber, it can contract and expand.
2. Since this installation is over tiles, we need to level the seams in between the tiles with white cement. If you do not do this, over time, the planks will slightly sink into the grooves in between the tiles, even with a 3mm. If it sinks, then u can actually see some boxy tile patterns over the vinyl floor.
- Applying white cement over tiles grooves is really hard work and time consuming. I eventually tied the scraper to a long pole and did a mass white cement application all over the room instead of per groove. I let it dry and scraped the excess off the tiles. I had to clean the room well after the white cement and ensure no cement coat layer was there over the tiles.
Picture: Applying white Cement over grooves
Install day - 1 day
===========
1. Make sure tiles are cement free and grooves are almost all filled with cement.
2. Plan your flooring work plan on how to lay the planks
- you can try to test apply dry run and cut them to fit first, **if you not sure there is enough of planks**
- you can apply from middle out if you have some pattern in mind **refer to the dynaloc installation guide**
- you can apply the long part of the plank to the long part of the wall and work your way to the other side
- you can work from the inside part to the exit door
**Just have a work plan, and if are not sure, you can talk to the dynaloc guys on your methods**
3. Pour the water based adhesive over the tiles and make a thin film. ** see dynaloc video for how to **
- The glue will be initially white in color and once it dries, it will be slightly transparent
Picture: Applying water based adhesive (some parts have turned transparent, some are still white)

4. Apply vinyl planks over the glue. Make sure they are tight and close together when you do it. **Refer to video**
- While applying the planks, we can still slightly move and guide the planks to bend a little.
- Once it sticks, do not pull them out and reapply. So advice is to put the planks gently into place first and them press them on the glue hard.
- Its easy to cut and snap the plank, give a slight cut with a blade, and snap the plank. You will need a L-Ruler/metal ruler to draw and cut.
I did not apply borders because I already have a white tiled border. Overall satisfied with the RM1k finish.
Picture : Finished product

 Quote
Quote


 0.0140sec
 0.34
0.34
 7 queries
 GZIP Disabled