Damn I don't have 800 grit sandpaper so I used a 600 grit one instead, but sadly scratch marks still there. Is it because I sand it too hard?
btw this is getting too much off topic, there's a thread specific for asking about modelling skills
Ok, i think i will share a little bit with snapfit... something i just learn recently when i started doing my snapfit kits.
One of the main challenge of snapfitted kit is the task of removing nip marks, without leaving any visible leftover mark. This is especially challenging when doing colored parts; especially blue n red, n other darker colors. One can sand under the nip mark is flat, but is during the cutting process, any damage on the plastic will leave a white spot on the plastic which is almost impossible to remove 100%. So be very careful!
» Click to show Spoiler - click again to hide... «
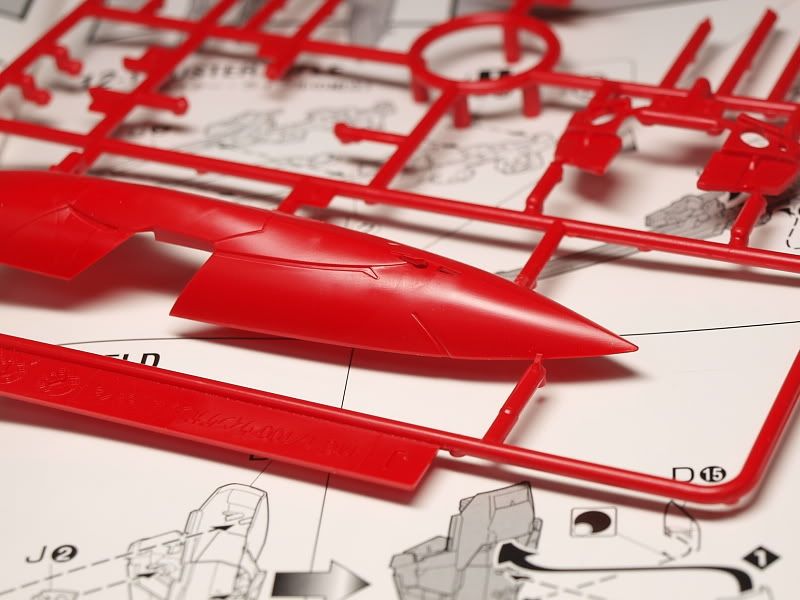
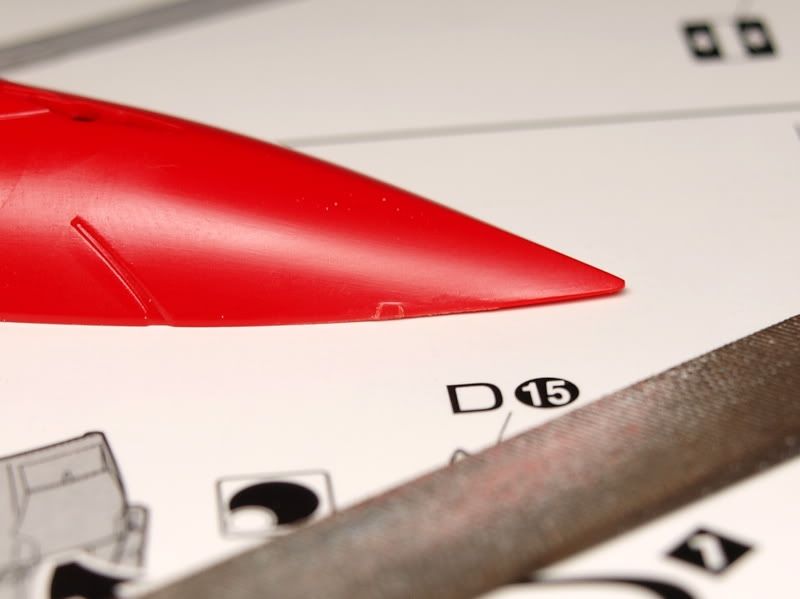
Part on the runner.
» Click to show Spoiler - click again to hide... «
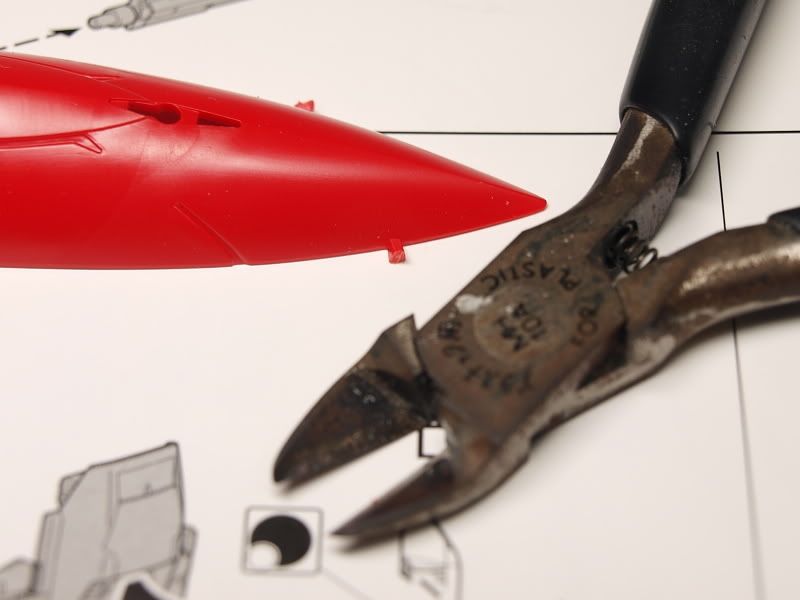
Cut it from the runner with a side cutter. Remember to leave some extra nip. This is because no matter how sharp your side cutter is, the cutting action somehow will have some force pressing onto the plastic. This will, especially parts with darker color like red n blue n grey, The force might damage the plastic n leave white spot.
» Click to show Spoiler - click again to hide... «
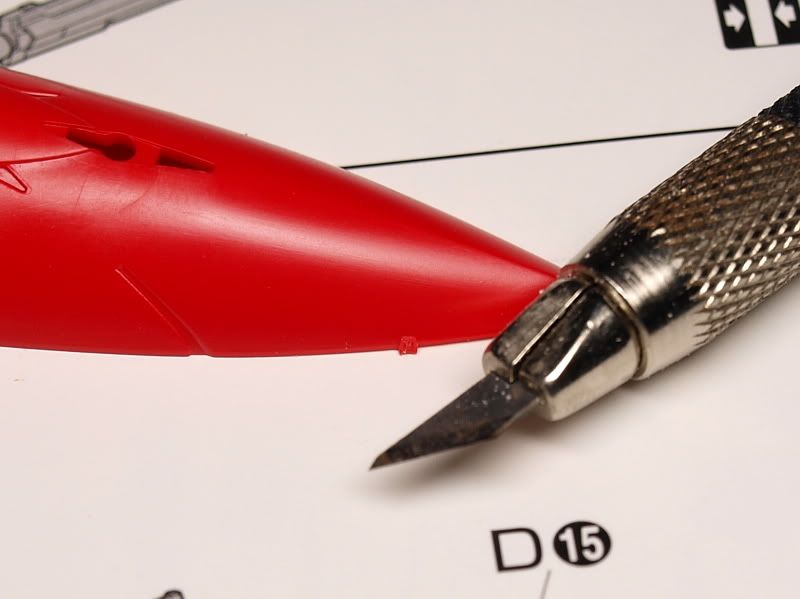
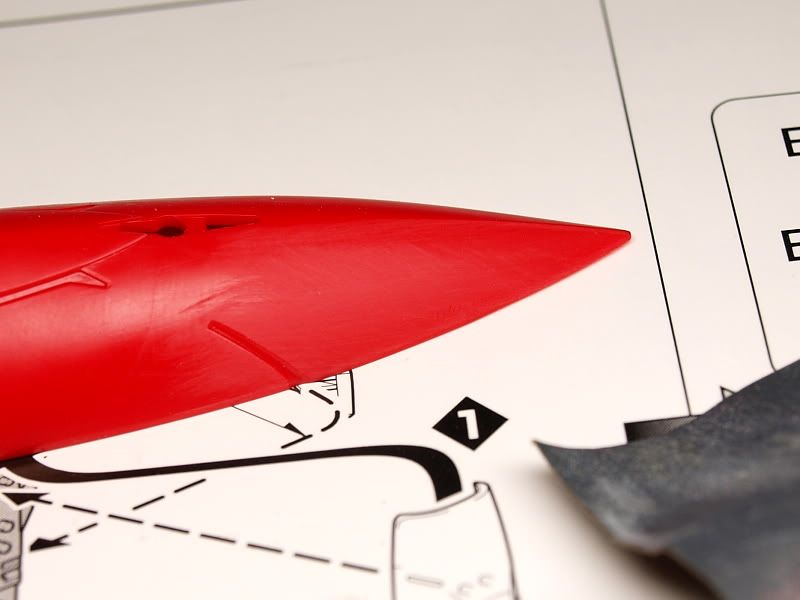
Then, use a sharp knife to slowly "slice" the nip, bit by bit. With this, no pressure will be put onto the plastic. When the nip mark is short enough, mebbe 0.5mm, we can start doing sanding.
» Click to show Spoiler - click again to hide... «
My personal habit is start with a file. This is sometimes dangerous because file can be very erosive n it sands down plastic very fast. As a result, if not careful, u might just over sand the whole thing n leave some very deep scratch mark onto the plastic. Here, i file it down until it's almost near the part. u can still see the shape of the nip. notice the white or light color around the nip? this is plastic damage n turn white. but no worry, it's only skin deep n can be easily removed by sand paper.
» Click to show Spoiler - click again to hide... «
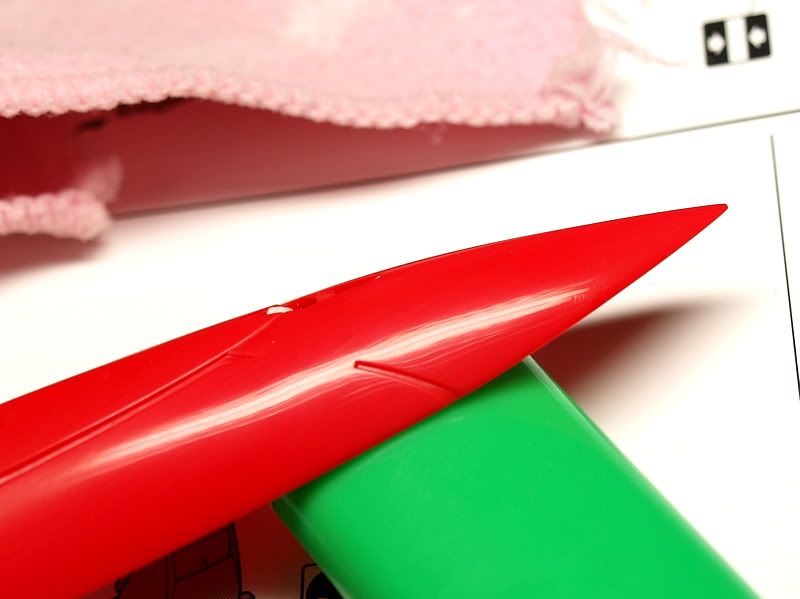
Sand paper sanding. i start with 800, end with 1,200 grit. This is because i will be finishing with flat coat. IF u wanna do gloss coat, at least end with 2,000 grit n above. For curvy surface, i strongly recommend to use those 3M sanding sponge, the one state "microfine".
Now we can still see some scratches.
» Click to show Spoiler - click again to hide... «
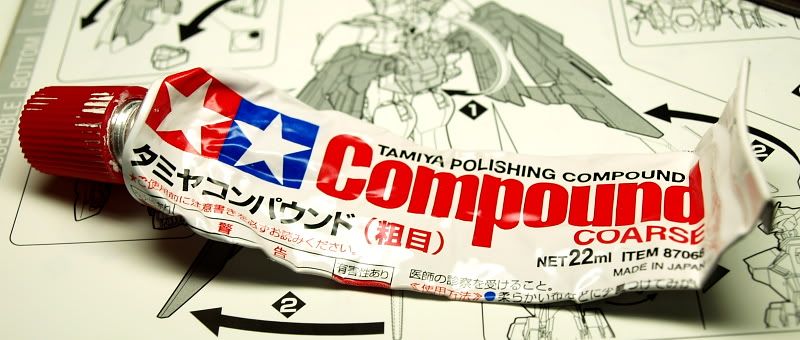
Next i use Tamiya compound Coarse (Pic below) to compound it. Actually i do not need to do this because my final finishing is flat. This is just to show an example for those who wants to do gloss or semi gloss.
Besides compound, if u think it's expensive (around RM15 one tube), u can also use nail polisher. Use the finest one, those used for last step polishing or they call it "buff" type.
Other than that, u can even use those CD recovery fluid. The liquid u use, when your DVD has fine scratches, to wipe on the CD/DVD. IT works.
» Click to show Spoiler - click again to hide... «
******************************************************************************************************************************
Compared to the pic above, u can see the glossiness of original Bandai plastic. After compound, it's much glossier, something like those HD version.


 Feb 3 2014, 07:06 PM


 Quote
Quote


 , the gum side face outside not stick on the plastic.


 0.0474sec
 0.50
0.50
 7 queries
 GZIP Disabled