Welcome Guest ( Log In | Register )

Outline · [ Standard ] · Linear+

 [Worklog] Icute Casing, New update. Enjoy

views
     
TSzzzz52
post Mar 26 2006, 11:10 PM, updated 17y ago

Weeeeeeeeee
******
Senior Member
1,177 posts

Joined: Apr 2005
From: Sg petani Kedah

Like to share with you all my work in process. Bored with the last mod. yawn.gif yawn.gif

Old Mod.
user posted image user posted image


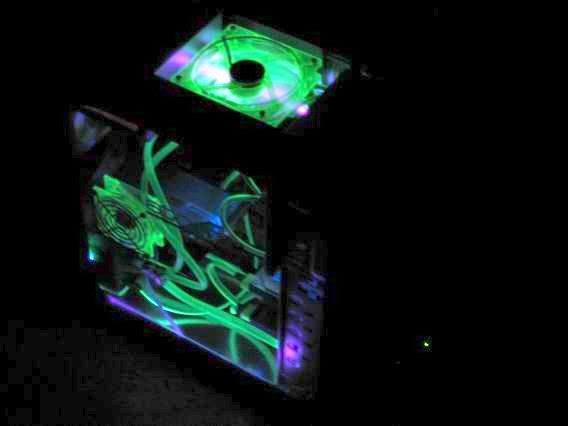
I started my new mod on 17/3/06 (Fri). I'm working 5 1/2 days week so only doing in the weekend. cry.gif cry.gif

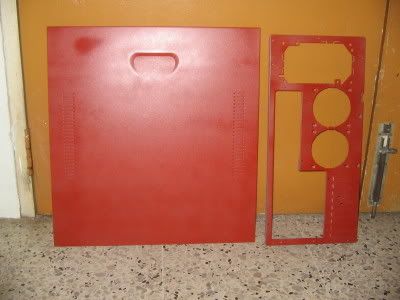
For this new mod, I will be trying to do a mirror shine finish, still unsure which color to go for? unsure.gif unsure.gif

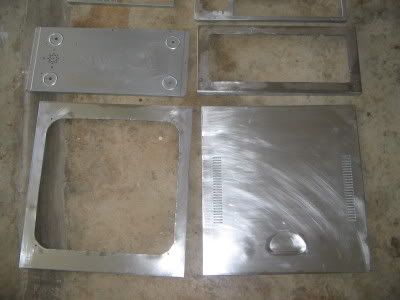
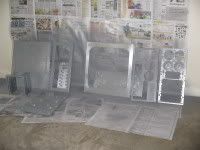
Firstly, all the components and the arcylic panels have to disassemble.

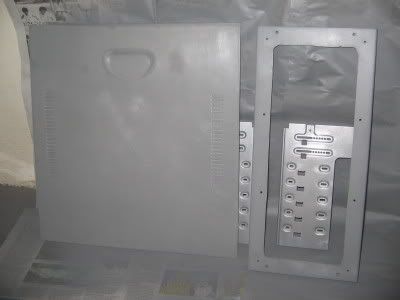
After that, I take apart the whole casing and strip and sand the old paint until the the bare metal surface. This was really hardwork rclxub.gif .

I used a drill and drill out all the rivets. This was the easy part thumbup.gif
Next came the stripping part. I got a paint stripper for RM 7 from the hardware shop near my place. user posted image
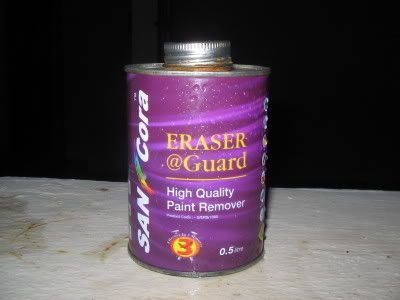
This is my first time using a paint stripper, I apply it without any hand protection. sweat.gif sweat.gif Bad idea, the chemical got onto my arms and legs and it burn and itch like hell rclxm9.gif rclxm9.gif . After that i took out the rubber gloves and apply the chemical very carefully sweat.gif .
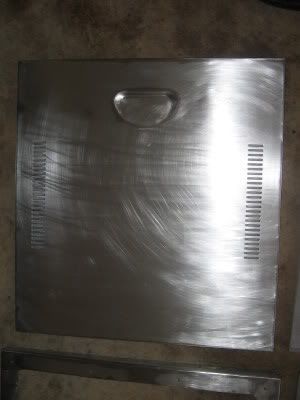
Using a scrapper and water, i remove the paint from every part of the casing. 3 layers in all, (original beige, blue then the sliver). ohmy.gif
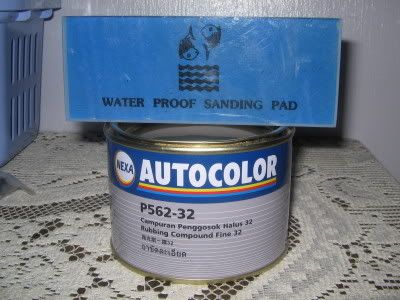
After getting the paint removed, I sand the surface with grit 180 sandpaper, follow by grit 320. Rinse, dry and ready for action icon_rolleyes.gif icon_rolleyes.gif

The whole process took me the whole weekend sweat.gif sweat.gif

user posted image user posted image user posted image

Will continue the worklog and upload the pics later tonight if i got the time flex.gif flex.gif

This post has been edited by zzzz52: Sep 28 2006, 10:02 PM
kingmaker_20
post Mar 26 2006, 11:14 PM

" t3H 1337(tm)"
*******
Senior Member
3,159 posts

Joined: Dec 2004
From: >Taiping,Perak<


QUOTE(zzzz52 @ Mar 26 2006, 11:10 PM)
Like to share with you all my work in process. Bored with the last mod

Old Mod.
I started my new mod on 17/3/06 (Fri).
First, I take apart the whole casing and strip and sand the old paint until the the bare metal surface.

I used a drill and drill out all the rivets.
*
Old mod quite simple......let se what's going to happen to this case.
ikan_semilang
post Mar 26 2006, 11:43 PM

Look at all my stars!!
*******
Senior Member
4,504 posts

Joined: Jan 2003
From: Setapak


Isn't easy using paint stripper for take out the paint?
TSzzzz52
post Mar 27 2006, 10:37 AM

Weeeeeeeeee
******
Senior Member
1,177 posts

Joined: Apr 2005
From: Sg petani Kedah

To be continue, actually i have finish spraying the primer layers.

Pics coming up..........
TSzzzz52
post Mar 27 2006, 10:39 AM

Weeeeeeeeee
******
Senior Member
1,177 posts

Joined: Apr 2005
From: Sg petani Kedah

QUOTE(ikan_semilang @ Mar 26 2006, 11:43 PM)
Isn't easy using paint stripper for take out the paint?
*
Thanks, I'm using it. If not i think very very susah to strip the paint rclxub.gif rclxub.gif
But have to be careful when using it........ sweat.gif sweat.gif
Gamer
post Mar 27 2006, 11:10 AM

Be Original
*******
Senior Member
3,366 posts

Joined: Jan 2003
From: Sarawak, Sibu


the old mod also very nice, anyway can't wait to see the new mod. nice job.
mADmAN
post Mar 27 2006, 11:15 AM

10k Club
********
All Stars
10,530 posts

Joined: Nov 2004
From: Petaling Jaya & Mid Valley


once done pls put a beore and after pic of ur case.... wanna compare which is nicer coz the first mod is already really good....

hope u can outdo urself wit this one thumbup.gif
TSzzzz52
post Mar 27 2006, 08:49 PM

Weeeeeeeeee
******
Senior Member
1,177 posts

Joined: Apr 2005
From: Sg petani Kedah

As stated b4, the parts after spraying with primer. I used anchor brand paint no. 5 (Grey undercoat). 2 cans cost me RM9

The zinc coated surface was really hard for the paint to stick to it. But any how i spray 3 thin layers and lightly sand the painted surface with grit 600.

Below is the parts after painting 3 coats and before sanding
user posted image user posted image

This post has been edited by zzzz52: Mar 27 2006, 08:51 PM
TSzzzz52
post Mar 27 2006, 08:59 PM

Weeeeeeeeee
******
Senior Member
1,177 posts

Joined: Apr 2005
From: Sg petani Kedah

After finishing the 2 cans of spray, i went out to get my third can of primer, but doh.gif doh.gif it was sold out, talking about my luck. I cannot wait for the new stock to arrive and cause its sunday, most shops r closed.
So i settle for a can of anti-rust primer (no.19).
Finally i continue spraying another 2 coats of primer and everything is done for the undercoat.
user posted image

This post has been edited by zzzz52: Mar 27 2006, 09:54 PM
TSzzzz52
post Mar 27 2006, 09:17 PM

Weeeeeeeeee
******
Senior Member
1,177 posts

Joined: Apr 2005
From: Sg petani Kedah

Today, i went to the shop to choose what color i want. I tried going for dark blue(no. 34) but it was not dark enough.

So, after going through the color chart i settle for black (no. 30). As if my luck was already bad, it made a turn for the worse......... mad.gif mad.gif doh.gif doh.gif again...again OUT OF STOCK. Only 2moro will arrive. cry.gif
Haih, guess i have to wait until 2moro

Anyhow, i got a can of rubbing compound (neza rubbing compound)RM6.50 and a sanding block RM9.
user posted image

Not sure of this rubbing compound is suitable?? Can anyone help?? thumbup.gif
Guys, feel free to give any suggestion for the color choice, still not 100% sure!! rclxms.gif rclxms.gif

This post has been edited by zzzz52: Mar 27 2006, 09:53 PM
TSzzzz52
post Mar 27 2006, 09:31 PM

Weeeeeeeeee
******
Senior Member
1,177 posts

Joined: Apr 2005
From: Sg petani Kedah

BTW, this is whats happening to my CPU. sweat.gif sweat.gif (Naked and dangerous...... cool.gif cool.gif ) Have to stay like this until my casing is completed
user posted image

This post has been edited by zzzz52: Mar 28 2006, 12:43 PM
superdav007
post Mar 28 2006, 12:27 AM

Regular
******
Senior Member
1,072 posts

Joined: Nov 2004
From: K.L
QUOTE(zzzz52 @ Mar 27 2006, 09:31 PM)
BTW, this is whats happening to my CPU.  sweat.gif  sweat.gif (Naked and dangerous...... cool.gif  cool.gif )

user posted image
*
just dun spill water onto it..haha sweat.gif
radioactive
post Mar 28 2006, 12:39 AM

Regular
******
Senior Member
1,857 posts

Joined: Dec 2005
Jus tie it on to the side of the computer table...space the mobo wif some papers...at least some1 wun step on it...

Bout ur rubbing compound..i think its ok...i had been using it
exkay
post Mar 28 2006, 01:08 AM

Hired Gunman
*******
Senior Member
3,657 posts

Joined: Jan 2003
From: My Room


u're risking your harddisk ler.. why not just lie it flat?
TSzzzz52
post Mar 28 2006, 09:47 AM

Weeeeeeeeee
******
Senior Member
1,177 posts

Joined: Apr 2005
From: Sg petani Kedah

QUOTE(exkay @ Mar 28 2006, 01:08 AM)
u're risking your harddisk ler.. why not just lie it flat?
*
Yaloh, the hard disk is dangerous, but i already used tape to tape it on the box.
Initially, i tried to stack the two harddisk but was worry that both will overheat.

Thanks for the help rclxms.gif rclxms.gif
Vervain
post Mar 28 2006, 11:19 AM

Scathach
*******
Senior Member
5,464 posts

Joined: Mar 2005
better don't stack the hard disk la. have a bad experience before. your naked pc arouses me haha. try to mod the PSU to fit in the casing. since you have a windowed casing
caaron
post Mar 28 2006, 04:46 PM

Always to Assist
****
Senior Member
515 posts

Joined: Nov 2005


u did it on your own. nice casing. i help my friend spray. the theme of the casing is bumblebee.
ianho
post Apr 1 2006, 07:06 PM

Cucimangkoklife
Group Icon
VIP
15,705 posts

Joined: Mar 2005
From: Tg. Rambutan
All Worklogs bumped to the top for easy reference by all.


siauann
post Apr 2 2006, 07:35 PM

Music-Movies-Coffee
*******
Senior Member
3,375 posts

Joined: May 2005
From: MeeRee


how do u strip off all the casing?
TSzzzz52
post Apr 3 2006, 10:16 AM

Weeeeeeeeee
******
Senior Member
1,177 posts

Joined: Apr 2005
From: Sg petani Kedah

As stated in the above post, i used a drill to drill out all the rivet.
radioactive
post Apr 4 2006, 01:02 AM

Regular
******
Senior Member
1,857 posts

Joined: Dec 2005
QUOTE(zzzz52 @ Apr 3 2006, 10:16 AM)
As stated in the above post, i used a drill to drill out all the rivet.
*
If u dun have 1...u can always take extra risk and use a chipper "N" hammer combination. tongue.gif
TSzzzz52
post Apr 4 2006, 09:32 AM

Weeeeeeeeee
******
Senior Member
1,177 posts

Joined: Apr 2005
From: Sg petani Kedah

QUOTE(radioactive @ Apr 4 2006, 01:02 AM)
If u dun have 1...u can always take extra risk and use a chipper "N" hammer combination. tongue.gif
*
Very dangerous lor like this, this is big big risk. sweat.gif

Hahahahaha rclxms.gif rclxms.gif
TSzzzz52
post Apr 4 2006, 09:39 AM

Weeeeeeeeee
******
Senior Member
1,177 posts

Joined: Apr 2005
From: Sg petani Kedah

Some updates.

On sunday, i finally finish spraying the colour coat. Forgot how many layers i sprayed. I chose black(no. 30) colour. Used 8 cans of spray. thumbup.gif

user posted image user posted image

My whole porch was fill with spray dust, my mum complain the whole day. vmad.gif vmad.gif

Anyway, i will wait another 2 weeks B4 attempting to rub it to a shine. yawn.gif
Will be the first time using rubbing compound, hope it will work. cool.gif cool.gif
manutd304
post Apr 4 2006, 09:46 AM

Getting Started
**
Junior Member
229 posts

Joined: Nov 2004


HOw much u bought the water collent system?

BTW your computer table is the same as mine icon_rolleyes.gif
From ikea rite thumbup.gif
TSzzzz52
post Apr 4 2006, 04:22 PM

Weeeeeeeeee
******
Senior Member
1,177 posts

Joined: Apr 2005
From: Sg petani Kedah

QUOTE(manutd304 @ Apr 4 2006, 09:46 AM)
HOw much u bought the water collent system?

BTW your computer table is the same as mine  icon_rolleyes.gif
From ikea rite  thumbup.gif
*
Ya, from ikea.

The water cooling is TT big water. I bought it at RM370. (still expensive that time)
easternC
post Apr 4 2006, 10:39 PM

Getting Started
**
Junior Member
62 posts

Joined: Aug 2005
From: even i don't know where


erm when the casing dah dibuka kesemuanya, how to pasang balik? use revert? where can find one aaA?
TSzzzz52
post Apr 4 2006, 11:15 PM

Weeeeeeeeee
******
Senior Member
1,177 posts

Joined: Apr 2005
From: Sg petani Kedah

QUOTE(easternC @ Apr 4 2006, 10:39 PM)
erm when the casing dah dibuka kesemuanya, how to pasang balik? use revert? where can find one aaA?
*
Using rivet lar. Using screw also can. Rivet easy to find only, any hardware shop got sell one.
radioactive
post Apr 5 2006, 12:40 AM

Regular
******
Senior Member
1,857 posts

Joined: Dec 2005
QUOTE(zzzz52 @ Apr 4 2006, 11:15 PM)
Using rivet lar. Using screw also can. Rivet easy to find only, any hardware shop got sell one.
*
But u nid a rivet gun oso...bigger is better but pricier. Price range unknown la..i got 1 heavy duty and standard type...so not bothering to take a better look.
easternC
post Apr 5 2006, 08:24 AM

Getting Started
**
Junior Member
62 posts

Joined: Aug 2005
From: even i don't know where


yeah~ i think it will be nicer look if using rivet rather than screw because screw will screw up the look... hehhe no looking so original... so how much it cost for the rivet gun?

ouh bout the mod, cant wait for the next update... huhu only weekend update? erm how much does this all thing cost u?
TSzzzz52
post Apr 5 2006, 04:29 PM

Weeeeeeeeee
******
Senior Member
1,177 posts

Joined: Apr 2005
From: Sg petani Kedah

QUOTE(easternC @ Apr 5 2006, 08:24 AM)
yeah~ i think it will be nicer look if using rivet rather than screw because screw will screw up the look... hehhe no looking so original... so how much it cost for the rivet gun?

ouh bout the mod, cant wait for the next update... huhu only weekend update? erm how much does this all thing cost u?
*
Yalor, planning on using rivet. A rivet gun very cheap only, can get it below RM20. drool.gif

Haven't count the cost yet, n doing it little by little cause recently my work place got a lot of problem, busy lor. rclxub.gif rclxub.gif

But anyway will start rubbing the paint to a shine. Planning also some slight mod inside the case (suspended HD, Railing to hide the cables, Flooring to hide cables.....)
Me also can't wait. wink.gif wink.gif

Thanks for all the reply... thumbup.gif thumbup.gif
TSzzzz52
post Apr 15 2006, 12:45 PM

Weeeeeeeeee
******
Senior Member
1,177 posts

Joined: Apr 2005
From: Sg petani Kedah

Last week started to wet sand the paint to achieve mirror shine, but then disaster strike, I think i didn't sand in between coats cause i have to sand until the bare metal to get rid of all the orange peel effect.

Now have to spray another few coatings of paint n wait for it to dry. doh.gif doh.gif
koie
post May 22 2006, 05:58 PM

Casual
***
Validating
461 posts

Joined: May 2006
From: Wangsa Maju


what tool u using to cut the curve?
TSzzzz52
post Sep 9 2006, 10:29 AM

Weeeeeeeeee
******
Senior Member
1,177 posts

Joined: Apr 2005
From: Sg petani Kedah

Sorry all for not updating this worklog.

Now here is a few of my ongoing mod. Haven't finish it yet. rclxub.gif rclxub.gif
The side panel
user posted image
Top view
user posted image
Power Supply
user posted image
Inside bottom
user posted image
Overall view
user posted image
Front without the plastic bezel
user posted image
Rubbing the window panel
user posted image

More updates will be coming............... whistling.gif whistling.gif
LanEVOchris
post Sep 9 2006, 10:57 AM

Enthusiast
*****
Senior Member
861 posts

Joined: Oct 2005


Dude wat happened to ur wc kit?
TSzzzz52
post Sep 9 2006, 11:39 AM

Weeeeeeeeee
******
Senior Member
1,177 posts

Joined: Apr 2005
From: Sg petani Kedah

QUOTE(LanEVOchris @ Sep 9 2006, 10:57 AM)
Dude wat happened to ur wc kit?
*
Sold already.


sHawTY
post Sep 9 2006, 11:52 AM

Frequent Reporter
********
All Stars
14,909 posts

Joined: Jul 2005

U use stockings to rub your side panel? sweat.gif
TSzzzz52
post Sep 9 2006, 12:25 PM

Weeeeeeeeee
******
Senior Member
1,177 posts

Joined: Apr 2005
From: Sg petani Kedah

No lar, use it to apply the rubbing compound only. Got polishing cloth.
SUSAcey
post Sep 9 2006, 02:29 PM

หมัด เท้า เข่า ศอก
*******
Senior Member
3,622 posts

Joined: Jan 2003


How u gonna put it back? Screws as well? Or rivets again....

Edit: Late post didnt notice got more posts d. Btw, how does a rivet gun look like?

This post has been edited by Acey: Sep 9 2006, 02:31 PM
TSzzzz52
post Sep 9 2006, 03:03 PM

Weeeeeeeeee
******
Senior Member
1,177 posts

Joined: Apr 2005
From: Sg petani Kedah

There are many types, its almost like a staple gun
SUSAcey
post Sep 9 2006, 03:10 PM

หมัด เท้า เข่า ศอก
*******
Senior Member
3,622 posts

Joined: Jan 2003


Die, I plan for American Apathy to be black internally and externally now everyone who do black in and out also finish the case faster than my AA. Helat later cakap i copycat laugh.gif laugh.gif
TSzzzz52
post Sep 9 2006, 03:19 PM

Weeeeeeeeee
******
Senior Member
1,177 posts

Joined: Apr 2005
From: Sg petani Kedah

Modding is personal wan lar, I personally chose black cause clean n simple. Don't like all the fancy colors.

After finishing your mod, i can summore look at yours n learn new things. notworthy.gif

Cheers cool.gif cool.gif
SUSAcey
post Sep 9 2006, 03:24 PM

หมัด เท้า เข่า ศอก
*******
Senior Member
3,622 posts

Joined: Jan 2003


Hahaha i was just joking lar... at least when i look at other modders' black internal i have a rough image of how mine's gonna look as well and can make early changes if something comes to mind. Good luck with ur mod, hope to learn how to put the rivets back from ur worklog thumbup.gif
ayu
post Sep 9 2006, 06:31 PM

~Great Seller~Excellent service~
******
Senior Member
1,298 posts

Joined: Jul 2006
From: KLANG TELOK PULAI


Hello, thread starter, can i know do u modding this i cute casing ?
sHawTY
post Sep 9 2006, 06:48 PM

Frequent Reporter
********
All Stars
14,909 posts

Joined: Jul 2005

QUOTE(ayu @ Sep 9 2006, 06:31 PM)
Hello, thread starter, can i know do u  modding this i cute  casing ?
*
Yes...
Yes he did...

Why bro?
Interested on modding you're pc?

Go send to the god of case modding: IANHO... laugh.gif

He'll turn a beast to a beauty... wink.gif
Mooneyes
post Sep 9 2006, 08:02 PM

Time heals
*******
Senior Member
2,731 posts

Joined: Dec 2005
From: Hell


if me i dun wan my pc to be pretty...wan the ganas ganas 1...like IANHO's king kong laugh.gif
Hayase
post Sep 9 2006, 08:35 PM

Getting Started
**
Junior Member
114 posts

Joined: Aug 2006
From: Multimedia University


QUOTE(Mooneyes @ Sep 9 2006, 09:02 PM)
if me i dun wan my pc to be pretty...wan the ganas ganas 1...like IANHO's king kong laugh.gif
*
LOL i also want LIKE IANHO's King Kong 1...esspeacially the CARD vmad.gif
TSzzzz52
post Sep 25 2006, 06:04 PM

Weeeeeeeeee
******
Senior Member
1,177 posts

Joined: Apr 2005
From: Sg petani Kedah

Wooooooooooooooooo..................... Almost finish, will upload pics tonight.

Finally.......
TSzzzz52
post Sep 26 2006, 11:59 AM

Weeeeeeeeee
******
Senior Member
1,177 posts

Joined: Apr 2005
From: Sg petani Kedah

I will describe all the parts that i have modded.

Cut a blow hole from 8cm to 12cm
user posted image
Another view after installing the fan.
user posted image

Same for the back of the casing. 8cm-12cm
user posted image

DIY round IDE cable
user posted image

Spray paint the casing black internally and externally.
Look at the mirror shine. (See the reflection) shocking.gif shocking.gif
user posted image

More to come.
Doom
post Sep 26 2006, 12:59 PM

Doom"s here >_<"
*******
Senior Member
4,496 posts

Joined: Apr 2005
From: KL


Just one suggestion why dont u have the whole case fan area cut out

grab a piece of acrylic and cut the 12cm fan hole

Screw the acrylic back to the case with nut and bolt or rivert it ....

make sure to paint the acrylic black or just get a one in black color....

Applicable to both front and back blowhole ......it would make ur mod to perfection ....
mADmAN
post Sep 26 2006, 01:11 PM

10k Club
********
All Stars
10,530 posts

Joined: Nov 2004
From: Petaling Jaya & Mid Valley


shocking.gif the horror!!! the horror!!!!!!!!! laugh.gif

dude.. .the IDE cables is really bad la wei... dun use electrical tape man... either use proper sleeves/tube, get proper rounded ide cables, or fold them.

other than that... looking good so far.

EDIT: n i agree with Doom. that would cover up the leftover holes... at least no cockroach or cicak can enter ur case biggrin.gif

This post has been edited by mADmAN: Sep 26 2006, 01:12 PM
TSzzzz52
post Sep 26 2006, 02:10 PM

Weeeeeeeeee
******
Senior Member
1,177 posts

Joined: Apr 2005
From: Sg petani Kedah

Thanks guys. I know the ide cable is not prefect. Was in a rush, Going to take out the electrical tape n use cable tie to tie up the tubing.

For the Blow hole, have to wait lar. No time now liao.

This post has been edited by zzzz52: Sep 26 2006, 02:17 PM
TSzzzz52
post Sep 26 2006, 02:48 PM

Weeeeeeeeee
******
Senior Member
1,177 posts

Joined: Apr 2005
From: Sg petani Kedah

Front Bezel. Took out the old arcylic n redo a new one. Change the Power LED to blue color. Polished the front plastic frame to mirror shine.

Nice arr the blue effect rclxms.gif rclxms.gif
somemore the second bay i mount the UV CCFL controller into it.
user posted image
user posted image

Slap a arcylic on the bottom to have a shining effect n hide the cables below.
Also install a uv CCFL at the bottom.
user posted image

Modded the PSU with a window, redo the wiring to have a modular effect n install 2 blue LED inside. But 1 of the LED is dim, going to change it. Also painted the PSU black.
As you can see one of the connectors is opened.
user posted image
user posted image
user posted image

Install the UV CCFL in the casing.
I have also cut 2 pcs of angle aluminium to run my wires along it.
All wires r also extended to reach the neccessary places.
user posted image
Extended the GC power cables.(Haven't sleeved the section to the floppy. Shorting problem with the floppy drive)
user posted image
A close up.
user posted image

This post has been edited by zzzz52: Sep 26 2006, 09:19 PM
TSzzzz52
post Sep 26 2006, 02:49 PM

Weeeeeeeeee
******
Senior Member
1,177 posts

Joined: Apr 2005
From: Sg petani Kedah

Redo the side panel. Spray n polish to mirror shine. Added 2 bolt to attach the arcylic.
user posted image

Messy cables. Have to tidy it up
user posted image

An overall view of the casing.
user posted image


TSzzzz52
post Sep 26 2006, 02:52 PM

Weeeeeeeeee
******
Senior Member
1,177 posts

Joined: Apr 2005
From: Sg petani Kedah

Some final finishing work will be done.

1. Touch up
2. Change LED in PSU
3. Sleeve remaining wires.
4. tidy up wires behind the drive cage
5. cleaning n polishing.
6. Front fixture for fan controller.

Will post up the final pics when all r finish.

This post has been edited by zzzz52: Sep 26 2006, 09:18 PM
battousai_yiting
post Sep 26 2006, 06:25 PM

Enthusiast
*****
Senior Member
705 posts

Joined: Jan 2003
From: Kuala Lumpur


wow not bad this your first time ???

where you get the tools ??? you bought them ???

i got one cacat casing now as well planning to mod it but not sure whether want to invest in the tools or not
mADmAN
post Sep 26 2006, 07:02 PM

10k Club
********
All Stars
10,530 posts

Joined: Nov 2004
From: Petaling Jaya & Mid Valley


QUOTE(battousai_yiting @ Sep 26 2006, 06:25 PM)
wow not bad this your first time ???

where you get the tools ??? you bought them ???

i got one cacat casing now as well planning to mod it but not sure whether want to invest in the tools or not
*
u should take a look at the first page of the thread and see what it was like BEFORE this mod.

@zzzz52
bro...interested in ur PSU mod la... can give more details on the modular thingy? especially the connectors u used... been looking for those but cant find it anywhere near me.

EDIT: if its not too much trouble mebbe can take pix of the internals and external as well?? if u do then thanks... but if u dont...its okie... i understand cry.gif


laugh.gif

This post has been edited by mADmAN: Sep 26 2006, 07:11 PM
sherren
post Sep 26 2006, 08:46 PM

Retired
******
Senior Member
1,298 posts

Joined: May 2005
From: Penang Island


Wow It Looks Nice rclxms.gif i like ur front panel
TSzzzz52
post Sep 26 2006, 09:10 PM

Weeeeeeeeee
******
Senior Member
1,177 posts

Joined: Apr 2005
From: Sg petani Kedah

QUOTE(battousai_yiting @ Sep 26 2006, 06:25 PM)
wow not bad this your first time ???

where you get the tools ??? you bought them ???

i got one cacat casing now as well planning to mod it but not sure whether want to invest in the tools or not
*
I also used a rotary tool.

QUOTE(mADmAN @ Sep 26 2006, 07:02 PM)
u should take a look at the first page of the thread and see what it was like BEFORE this mod.

@zzzz52
bro...interested in ur PSU mod la... can give more details on the modular thingy? especially the connectors u used... been looking for those but cant find it anywhere near me.

EDIT: if its not too much trouble mebbe can take pix of the internals and external as well?? if u do then thanks... but if u dont...its okie... i understand cry.gif
laugh.gif
*
What internal n external do you mean?? rclxub.gif

The connectors i think easy to find lar. I bought it at a electronics components shop. I took a sample to them n they somemore ask me wan 2,3 or 4 pins. I bought 4 pins one. It's also quite cheap, i think it was RM5 for a pair (male n female). rclxms.gif rclxms.gif

QUOTE(sherren @ Sep 26 2006, 08:46 PM)
Wow It Looks Nice rclxms.gif  i like ur front panel
*
Thanks thumbup.gif thumbup.gif
mADmAN
post Sep 26 2006, 09:31 PM

10k Club
********
All Stars
10,530 posts

Joined: Nov 2004
From: Petaling Jaya & Mid Valley


any idea what the connector is called? and wanna see how u did the internals for the connector of ur PSU.. but like i said la..if its too much trouble then its ok...
Doom
post Sep 26 2006, 10:01 PM

Doom"s here >_<"
*******
Senior Member
4,496 posts

Joined: Apr 2005
From: KL


Just curious why dont u have ur sleeve color change to red ... it would match the color of the PCB board for both mobo and gc.....

since u visited the eletronic shop... i would recommend u to grab some molex connector for custom cable for ur HDD that is kind of a lot there....

u could custom the length so that it has least exessive cable... it make it cleaner .....

further more with the zip tie base u could have some wires stay close to the case rather than hanging around ....

just suggestion only ....
TSzzzz52
post Sep 26 2006, 10:10 PM

Weeeeeeeeee
******
Senior Member
1,177 posts

Joined: Apr 2005
From: Sg petani Kedah

QUOTE(mADmAN @ Sep 26 2006, 09:31 PM)
any idea what the connector is called? and wanna see how u did the internals for the connector of ur PSU.. but like i said la..if its too much trouble then its ok...
*
user posted image
I don't know the name of the connector. I think its call a power connector. U can find the name in RSmalaysia.

I will take the internal shot's of the PSU this Weekend cause changing the dead LED inside the PSU.

Thanks
SUSAcey
post Sep 27 2006, 01:19 AM

หมัด เท้า เข่า ศอก
*******
Senior Member
3,622 posts

Joined: Jan 2003


eh, where u bought the "screws" for ur front panel?
TSzzzz52
post Sep 27 2006, 08:06 AM

Weeeeeeeeee
******
Senior Member
1,177 posts

Joined: Apr 2005
From: Sg petani Kedah

QUOTE(Acey @ Sep 27 2006, 01:19 AM)
eh, where u bought the "screws" for ur front panel?
*
The screws r cap screws (hex screws). I bought it from hardware shop. I went to those bigger ones cause those smaller ones doesn't carry any.

I was finding for chrome one, but cannot get. Seems that it must be custom chrome.
Vervain
post Sep 27 2006, 10:43 AM

Scathach
*******
Senior Member
5,464 posts

Joined: Mar 2005
wow. nice mod. but you're running on single channel for your pc?
TSzzzz52
post Sep 27 2006, 03:01 PM

Weeeeeeeeee
******
Senior Member
1,177 posts

Joined: Apr 2005
From: Sg petani Kedah

No it's dual channel. This board the ram is put side by side for dual channel.
sHawTY
post Sep 28 2006, 12:41 AM

Frequent Reporter
********
All Stars
14,909 posts

Joined: Jul 2005

No today updates? blink.gif
TSzzzz52
post Sep 28 2006, 08:04 AM

Weeeeeeeeee
******
Senior Member
1,177 posts

Joined: Apr 2005
From: Sg petani Kedah

Nothing really to add. Normally i do most of the work during weekends.
TSzzzz52
post Sep 28 2006, 10:02 PM

Weeeeeeeeee
******
Senior Member
1,177 posts

Joined: Apr 2005
From: Sg petani Kedah

Some updates.
user posted image

With the UV light on
user posted image
user posted image
sherren
post Sep 29 2006, 04:38 PM

Retired
******
Senior Member
1,298 posts

Joined: May 2005
From: Penang Island


hey your front panel bezel's that screw u use the hex screws , is it for show or to screw the bezel to the front panel?
jinkinz
post Sep 29 2006, 05:44 PM

♥HIEK!my name is BOXXY!♥
******
Senior Member
1,162 posts

Joined: Aug 2005
From: museum of kopitiam


hey i like ur old mod..
very cool ..
like matrix..

miraged
post Sep 29 2006, 05:58 PM

Casual
***
Junior Member
405 posts

Joined: Jan 2005


QUOTE(zzzz52 @ Sep 28 2006, 10:02 PM)
Some updates.
user posted image

With the UV light on
*
hahaha... x800GTO....or XT.... looks like that GC smile.gif
TSzzzz52
post Sep 29 2006, 06:11 PM

Weeeeeeeeee
******
Senior Member
1,177 posts

Joined: Apr 2005
From: Sg petani Kedah

QUOTE(sherren @ Sep 29 2006, 04:38 PM)
hey your front panel bezel's that screw u use the hex screws , is it for show or to screw the bezel to the front panel?
*
Its for screwing on the Front panel. Initially looking for chrome, but cannot find.

QUOTE(jinkinz @ Sep 29 2006, 05:44 PM)
hey i like ur old mod..
very cool ..
like matrix..
*
No more liao, now blaaaaaaaaaack

QUOTE(miraged @ Sep 29 2006, 05:58 PM)
hahaha... x800GTO....or XT.... looks like that GC smile.gif
*
Thats the XT thumbup.gif thumbup.gif

siemens
post Oct 1 2006, 08:45 PM

Getting Started
**
Junior Member
248 posts

Joined: Jul 2006
From: Subang Jaya

wonderfull!!!!!!!!!!!!!!!
sHawTY
post Oct 2 2006, 09:48 PM

Frequent Reporter
********
All Stars
14,909 posts

Joined: Jul 2005

Nice mod there zzz52... wink.gif

But i really think that u should reallocate the place you put the UV tubes... sweat.gif

Should hide it...
Not by letting it hang like that... laugh.gif
mADmAN
post Oct 2 2006, 09:52 PM

10k Club
********
All Stars
10,530 posts

Joined: Nov 2004
From: Petaling Jaya & Mid Valley


for me i think the UV tubes are alright...but i think u should place them on the outside and not on the mobo tray side... itll shine better on ur UV reactive stuff and make them glow better too....

now looks really dark...


oh and shy wanna ask... PSU pix? sweat.gif
TSzzzz52
post Oct 3 2006, 08:03 AM

Weeeeeeeeee
******
Senior Member
1,177 posts

Joined: Apr 2005
From: Sg petani Kedah

QUOTE(mADmAN @ Oct 2 2006, 09:52 PM)
for me i think the UV tubes are alright...but i think u should place them on the outside and not on the mobo tray side... itll shine better on ur UV reactive stuff and make them glow better too....

now looks really dark...
oh and shy wanna ask... PSU pix? sweat.gif
*
PSU didn't have time to do. Real sorry man, but i'm going to open it. Really busy last weekend. rclxub.gif rclxub.gif Will try to mod it this week.

I won't FFK one. Just need some time.

I'm ordering New UV CCFL already. Waiting for it to arrive. Then only relocate it.

Thanks for everyone's comment. thumbup.gif thumbup.gif
Vervain
post Oct 3 2006, 11:20 AM

Scathach
*******
Senior Member
5,464 posts

Joined: Mar 2005
one top one bottom. if possible. all 4 edges fill with UV CCFL. that should light up the case.
davidhomestudio
post Oct 5 2006, 10:42 PM

Getting Started
**
Junior Member
256 posts

Joined: Jul 2006
From: Melaka


i think u change ur processor fan... to a UV fan... or water cooling it... the processor part very dark...
teresatan
post Oct 6 2006, 10:09 AM

New Member
*
Junior Member
7 posts

Joined: Sep 2006
From: Cat City, Kuching


Certain parts look quite dark. looks like not enough uv item.
juz my tot.
rainingzero
post Oct 6 2006, 09:38 PM

I miss my student life~
*******
Senior Member
2,497 posts

Joined: Jan 2006
From: Selangor


maybe it's ur camera settings???coolermaster Uv fans right??the fan actually able to produce bright glow under UV light, maybe it's ur camera that make it looks dimmer....

and as maDmaN said, the Uv ccfl need to relocate..overall nice job man!! rclxms.gif
TSzzzz52
post Oct 6 2006, 10:29 PM

Weeeeeeeeee
******
Senior Member
1,177 posts

Joined: Apr 2005
From: Sg petani Kedah

I agree that it is quite dark, cause the light already very dimm. Already bought new one, waiting for it to arrive. Will post it when completed. Thanks all.


Added on April 17, 2007, 9:37 pmwanna bump it up for a friend


Added on April 17, 2007, 9:38 pmwanna bump it up for a friend

This post has been edited by zzzz52: Apr 17 2007, 09:38 PM
ianho
post Jun 11 2007, 06:11 AM

Cucimangkoklife
Group Icon
VIP
15,705 posts

Joined: Mar 2005
From: Tg. Rambutan
All finished or active worklogs bumped to avoid deletion.
acijess
post Nov 12 2008, 12:15 AM

New Member
*
Junior Member
15 posts

Joined: Nov 2004
wow ..... this is so time consuming and a lot to do .... but it;s worthy
good job
ahmeduk88
post Nov 14 2008, 10:35 AM

Getting Started
**
Junior Member
162 posts

Joined: Sep 2008
From: I came from that direction.


hye TS, can i ask u sumthing? is the u-channel (black rubber thingy) used as the border for the windows available in most hardware shops? the window looks neat and tidy.
BuLaNaR
post Nov 17 2008, 09:16 AM

penyair sepi
*****
Senior Member
777 posts

Joined: Sep 2007
From: bandar baru bangi


wow,nice lah bro...keep up the gud work...gambatte
latias93
post Nov 19 2008, 01:17 PM

Peminat Setia Exists
******
Senior Member
1,270 posts

Joined: Nov 2008
From: Soviet State of Sarawak Status: Exiled


No need to paint the casing also nevermind.. give it the metallic future government computer look xD
khoo011
post Nov 19 2008, 02:24 PM

Casual
***
Junior Member
326 posts

Joined: Nov 2004


nice work TS..keep on..
chchyong89
post Nov 21 2008, 05:48 PM

shittie mittie
******
Senior Member
1,293 posts

Joined: Mar 2005
From: Ladang


i have something to ask also, what is the rubber to prevent cut called? where can get it?
By the way, your casing just aweful..
sexy93
post Dec 7 2008, 05:35 PM

Casual
***
Junior Member
304 posts

Joined: May 2008
From: Here to there!


nice...
simplyelly
post Jan 15 2009, 10:36 PM

Getting Started
**
Junior Member
77 posts

Joined: Jan 2009


nice job done....

FREE BUMP!!!
TSzzzz52
post May 5 2009, 04:20 PM

Weeeeeeeeee
******
Senior Member
1,177 posts

Joined: Apr 2005
From: Sg petani Kedah

The rubber to prevent cut ( i think you are refering to the u channel rubber) it can be pick up for electrical shop.


Added on May 5, 2009, 4:21 pmStop modding for a while liao, just bought a ATCS 840, not going to mod it, just wanna tidy it and add some bling......

This post has been edited by zzzz52: May 5 2009, 04:21 PM
aBc!!
post May 5 2009, 08:57 PM

Feel Good~
*****
Senior Member
844 posts

Joined: Aug 2007
From: land below the wind (KK<--->KL)


Love ur moding style . thumbup.gif
TSzzzz52
post May 5 2009, 10:16 PM

Weeeeeeeeee
******
Senior Member
1,177 posts

Joined: Apr 2005
From: Sg petani Kedah

What style may that be? Any comments about it.


Added on May 5, 2009, 11:06 pmuser posted image
user posted image

This is how the Casing Looks like now........ rclxms.gif rclxub.gif rclxub.gif

This post has been edited by zzzz52: May 5 2009, 11:06 PM
lun1986
post May 6 2009, 03:48 PM

Enthusiast
*****
Senior Member
939 posts

Joined: Jan 2007
bro,the rubber u use on the window izzit u rubber channel ??
where u get from ?
chaics85
post May 6 2009, 10:03 PM

On my way
****
Senior Member
698 posts

Joined: Mar 2008
From: Oil town @ Miri
QUOTE(lun1986 @ May 6 2009, 03:48 PM)
bro,the rubber u use on the window izzit u rubber channel ??
where u get from ?
*
u can go HERE to buy that thing..

nice mod TS.. thumbup.gif


Change to:
| Lo-Fi Version
0.0341sec    0.58    5 queries    GZIP Disabled
Time is now: 21st December 2025 - 10:38 PM