

Plez dont make the pc bling-bling,
keep it simple and clean... use black/silver bolt/screw and just stick to the normal grill....
Worklog: Project Ch3@psk8!, A new beginning.
Worklog: Project Ch3@psk8!, A new beginning.
|
|
 Feb 9 2006, 09:57 PM Feb 9 2006, 09:57 PM
|
 
Senior Member
3,466 posts Joined: Jan 2003 From: PJ, Malaysia |
Plez dont make the pc bling-bling,
keep it simple and clean... use black/silver bolt/screw and just stick to the normal grill.... |
|
|
|
|
|
Feb 9 2006, 11:46 PM
|

VIP
15,705 posts Joined: Mar 2005 From: Tg. Rambutan |
QUOTE(evilnickwong @ Feb 9 2006, 08:02 PM) Don't spoil it with that blingy-shuriken grill. The grills gonna b in matt black. Not chrome as in the pics coz I havent sprayed them yet. They'll b like this after I spray them.  Use the normal wire grill and maybe spray that matt black as well. Or if you don't need the finger protection, why not just go bare? Less impedence anyway. Use the normal wire grill and maybe spray that matt black as well. Or if you don't need the finger protection, why not just go bare? Less impedence anyway.  Great job on the paint btw.   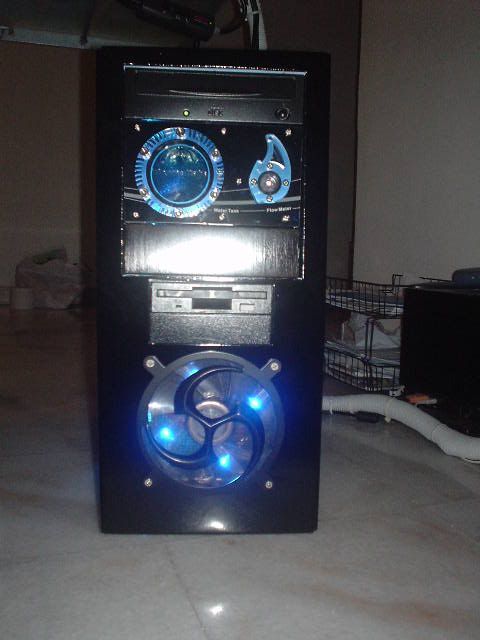 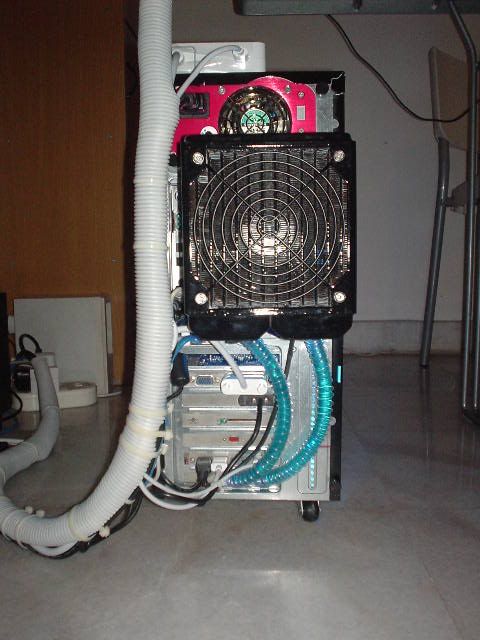 QUOTE(tuckers_201 @ Feb 9 2006, 08:07 PM) want to ask something lah..how u put the plei glass...means how u hold it in place Read the explanation that I gave just a few posts b4 this.QUOTE(ikan_semilang @ Feb 9 2006, 09:43 PM) Agree and find it at motorcycle or car accs shop. Wah! That's too Ah Beng for me.    QUOTE(mADmAN @ Feb 9 2006, 09:51 PM) errr..is that ur infamous pantyhose filter i see?? how did u get it to stick man? Yes bro. That's my infamous sexy filter. By special request, here's a few pics to explain how I made n use it.Buy this mesh from Hardware store. 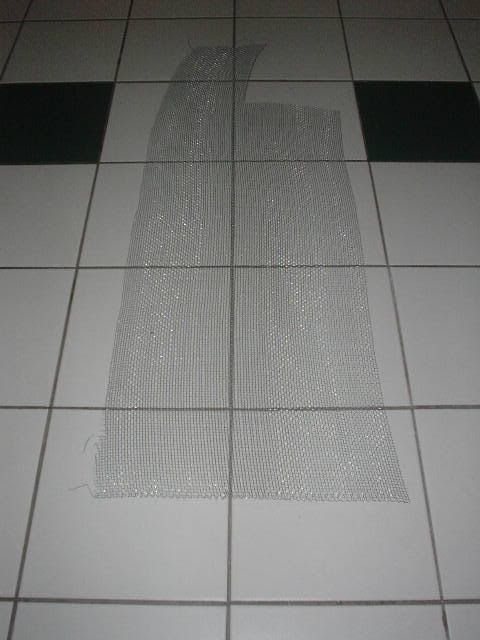 Cut the mesh a bit bigger than 120mm square. Then wrap the pantyhose around the mesh tightly. U can hook the pantyhose around the jagged edges of the mesh. Like this................. 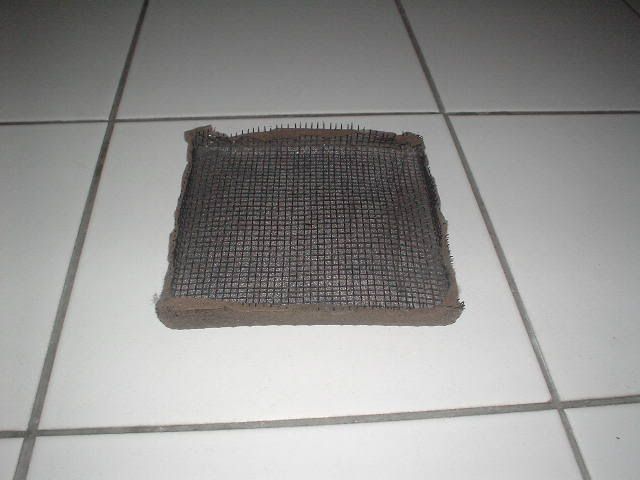 To mount on fan just bend the edges of mesh around the fan frame like this........... 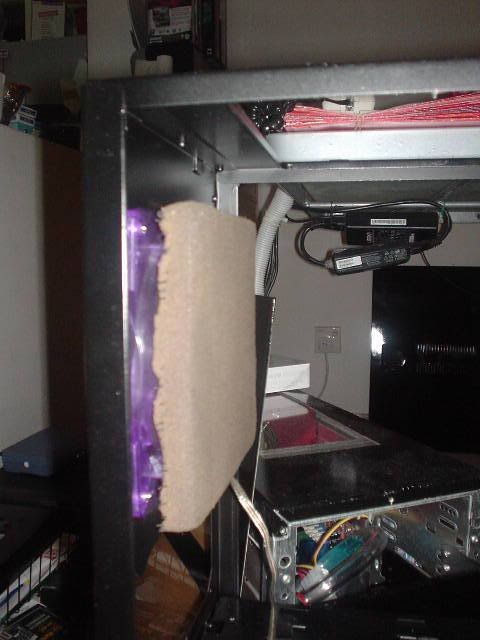 Capische? Now go n make sum 4 ureself or belanja me mamak at Padang Kota n I'll make sum for u.This post has been edited by ianho: Feb 9 2006, 11:48 PM |
|
|
Feb 10 2006, 01:09 AM
|

All Stars
10,530 posts Joined: Nov 2004 From: Petaling Jaya & Mid Valley |
cool...thanks man.... very capische
as for the screws...get the ones in the top left corner of the pic that ikan posted... the shorter one... i think the black ones will blend nicely with ur case... |
|
|
Feb 10 2006, 01:40 AM
|
|
VIP
15,705 posts Joined: Mar 2005 From: Tg. Rambutan |
QUOTE(mADmAN @ Feb 10 2006, 01:09 AM) cool...thanks man.... very capische Those fine thread screws will b a major pain to screw into the fan holes man. May try them later once everything is in. All these tiny lil details will b sorted as I go along. Need to get everything inside the case 1st.as for the screws...get the ones in the top left corner of the pic that ikan posted... the shorter one... i think the black ones will blend nicely with ur case... |
|
|
Feb 10 2006, 07:56 AM
|

Senior Member
1,737 posts Joined: Jan 2003 |
Thanks for the reply with regards to the kitchen cabinets.... Nice idea.
I'm sure your "significant other" will be glad to know that you're using panty hose in a purely PC manner too.... Perhaps some garter belts to suspend the harddrives? Great job btw... |
|
|
Feb 10 2006, 10:42 AM
|
|
VIP
15,705 posts Joined: Mar 2005 From: Tg. Rambutan |
Yeeeeeeeeha. It's finally done after an all night job. Installed everything inside. Still got a few minor things to sort out like the lighting n cable management n so on. Will update as I progress. For now it's leak testing time.
 |
|
|
|
|
|
Feb 10 2006, 10:51 AM
|

Senior Member
4,504 posts Joined: Jan 2003 From: Setapak |
Nice. Need to rivet your top panel. No picture at in front?
This post has been edited by ikan_semilang: Feb 10 2006, 10:51 AM |
|
|
Feb 10 2006, 11:08 AM
|
|
VIP
15,705 posts Joined: Mar 2005 From: Tg. Rambutan |
QUOTE(ikan_semilang @ Feb 10 2006, 10:51 AM) Nice. Need to rivet your top panel. No picture at in front? The top not covered properly yet coz I'm still leak testing. Later oni will put on all the panels properly. More pics will come later. Now damn tired. Haf a nap 1st. |
|
|
Feb 10 2006, 11:20 AM
|

Senior Member
2,696 posts Joined: Jan 2003 From: Butterworth,Penang Status: Available |
QUOTE(ianho @ Feb 10 2006, 10:42 AM) Yeeeeeeeeha. It's finally done after an all night job. Installed everything inside. Still got a few minor things to sort out like the lighting n cable management n so on. Will update as I progress. For now it's leak testing time. wah...ur water pump wil be heave job  |
|
|
Feb 10 2006, 12:09 PM
|
|
All Stars
10,530 posts Joined: Nov 2004 From: Petaling Jaya & Mid Valley |
QUOTE(ianho @ Feb 10 2006, 01:40 AM) Those fine thread screws will b a major pain to screw into the fan holes man. May try them later once everything is in. All these tiny lil details will b sorted as I go along. Need to get everything inside the case 1st. not asking u to screw the fan using those... i mean the screws should be used for ur side window instead of using double sided tape. small black ones will go nicely with ur case. |
|
|
Feb 10 2006, 12:40 PM
|

VIP
23,414 posts Joined: Jan 2003 From: Taipei |
QUOTE(kelvin_hata @ Feb 10 2006, 11:20 AM) wah...ur water pump wil be heave job Yeah man....too much verticals. |
|
|
Feb 10 2006, 01:17 PM
|

Senior Member
3,705 posts Joined: Sep 2004 From: Malaysia |
wow, that's nice
the paint is it the normal one RM10< ?? |
|
|
Feb 10 2006, 01:20 PM
|

Senior Member
827 posts Joined: Mar 2005 From: SuBanG JaYa,USJ |
good job bro...even its cheap it still looks cool.haha this should be a xpensive one.
|
|
|
|
|
|
Feb 10 2006, 01:30 PM
|

VIP
9,495 posts Joined: Dec 2004 |
I feel it looks really nice now, eventhough you say there's no proper cable management yet.
However, i think the biggest concern now is your pump. Don't you think there may be a need to upgrade your pump now? |
|
|
Feb 10 2006, 04:26 PM
|
|
Senior Member
2,696 posts Joined: Jan 2003 From: Butterworth,Penang Status: Available |
QUOTE(sniper on the roof @ Feb 10 2006, 12:40 PM) Yeah man....too much verticals. too high (is vy hard to pump the water from bottom to top...)This post has been edited by kelvin_hata: Feb 10 2006, 04:27 PM |
|
|
Feb 11 2006, 01:16 AM
|
|
VIP
15,705 posts Joined: Mar 2005 From: Tg. Rambutan |
QUOTE(mADmAN @ Feb 10 2006, 12:09 PM) not asking u to screw the fan using those... i mean the screws should be used for ur side window instead of using double sided tape. small black ones will go nicely with ur case. Dont like screws on the side panel. I'm the clean look kinda person lar. Anyway the side window looks brilliant now. Will update in a while. Camera batts recharging. Took so many pix for worklog until the batts pokai. QUOTE(Sphenix @ Feb 10 2006, 01:17 PM) wow, that's nice Yeap the paint is the normal spray paint. Arrow brand. Outside case is gloss black, inside chassis is matt black. the paint is it the normal one RM10< ?? As for all u guys worried bout the pump. The leak test went well 1st time up. I just ran the system n everything's working fine now. I've also Prime tortured the thing to c the temps. Well, the height didn't seem to affect the temps at all. I got the exact same peak temp of 37C on Prime Max CPU test as b4. After all, the MCP350 pump is specced at 13 foot head max pressure so I highly doubt that a 2 foot tall case is gonna be any hard work at all. The temps r exactly the same as b4 so I'm fine with it. I noticed a really big improvement with system temps in this case. System temps is now only few degrees higher than CPU temp. Last time was about 10C higher than CPU temps. I reckon the big spacious case n huge air ventilation helped a whole bunch. Updates coming in about an hour. Playing with a dual lighting system now. Will update once I'm done. Also cleaning up the messy, messy wires. This post has been edited by ianho: Feb 11 2006, 01:19 AM |
|
|
Feb 11 2006, 01:25 AM
|
|
VIP
9,495 posts Joined: Dec 2004 |
ur nocturnal you know that
nocturnal..... |
|
|
Feb 11 2006, 02:45 AM
|
|
VIP
15,705 posts Joined: Mar 2005 From: Tg. Rambutan |
QUOTE(pizzaboy @ Feb 11 2006, 01:25 AM) ur nocturnal you know that Whahahaha. I'm normal lar. U fellas r the 1's who r abnormal, y sleep at night when u can do so much in peace n quiet. nocturnal..... Night time is when I get my inspirations n ideas n full concentration. The only things I hafta do in the day is sourcing for the parts n all the cutting n drilling n filing. Or else the neighbours gonna thnk they live in a factory. This post has been edited by ianho: Feb 11 2006, 02:46 AM |
|
|
Feb 11 2006, 03:54 AM
|
|
VIP
15,705 posts Joined: Mar 2005 From: Tg. Rambutan |
OK. Everything is done for now. I'm extremely happy the way my dual lighting went. Anyway, here's what I've done.
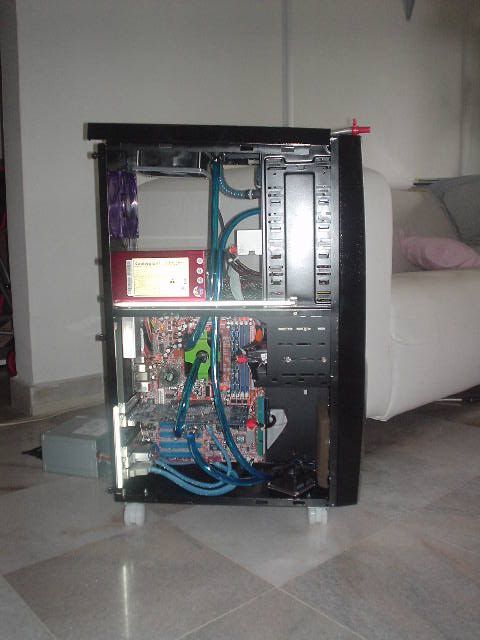
Enermax charge us an arm n a leg for this PSU but look at the wires.  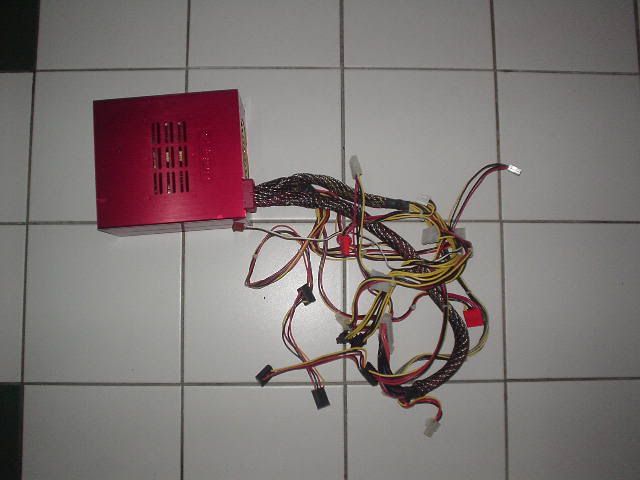 I bought sum Black Vantec sleeves but the kit only provides enuf heatshrink for 3 wires. Gonna buy sumore heatshrink so I can completely sleeve all wires including those messy USB n Firewire wires at the bottom of the case. They're currently blue coz last time I sleeved them blue for my old case.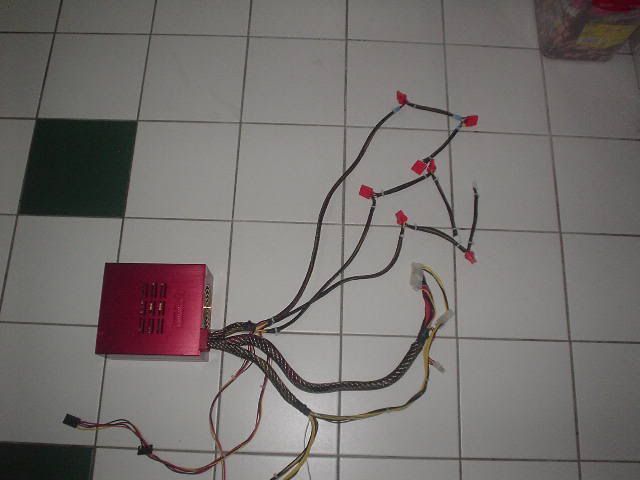 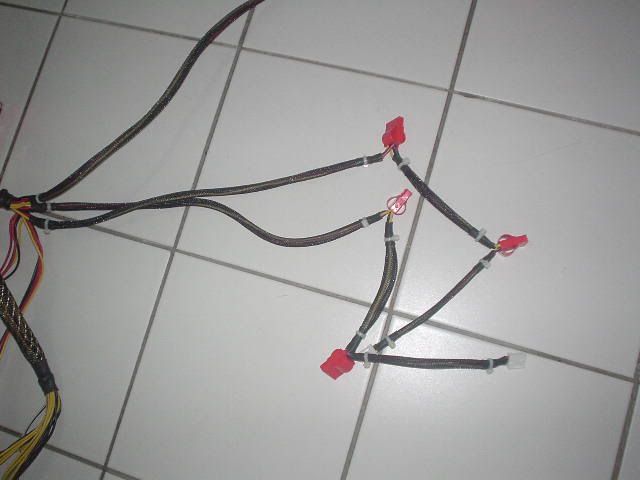 This is how the front looks like. Check out that gloss on the side panel. Can't imagine the shine in 2 weeks time when I polish it. It's a royal pain to keep clean though. Finger print magnet man. I actually took a whole ton of pics for this update then realised that the pics all turned out damn ugly coz got my finger prints all over it. Had to delete all pics, wipe down the whole case, retake pics again. Haha. 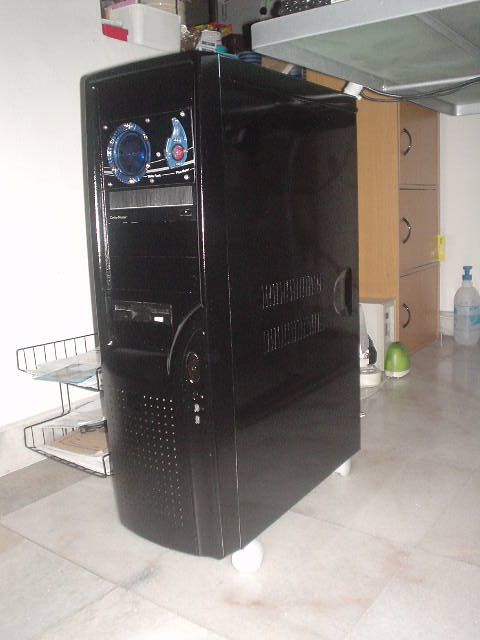 Need to do my external cable management all over again coz it was just right for my old case. The ACD's power pack is hangin coz it used to sit on top of the old case. Hafta put it on the table now. Also note how tall the case is. It sits just right under my glass table. I hafta pull it out n put it where it is now coz the table will block the radiator's outflow of hot air. Besides, I dont want all that hot air under the table which will make the temps unbearable for me especially during this hot weather. 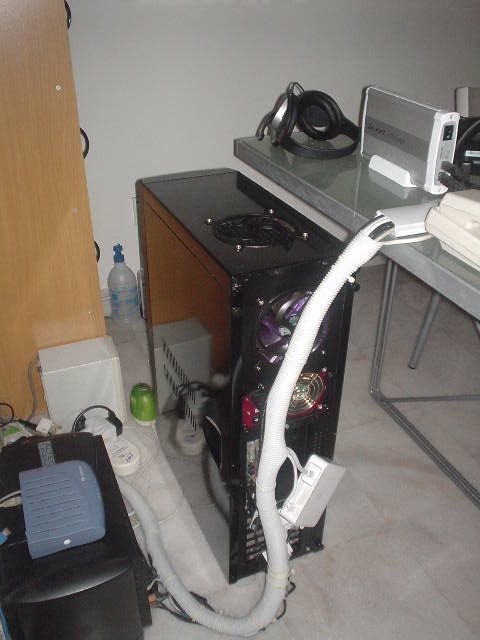 This is how the back looks like in the dark. 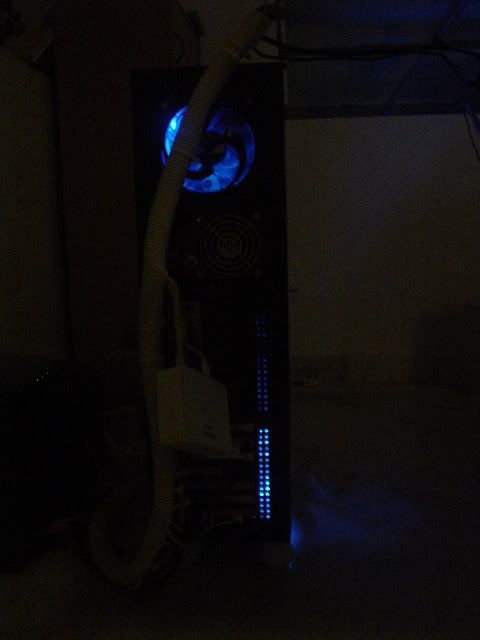 Decided on the Sunbeam 3D Blade fan grill for my radiator. Sprayed it matt black. 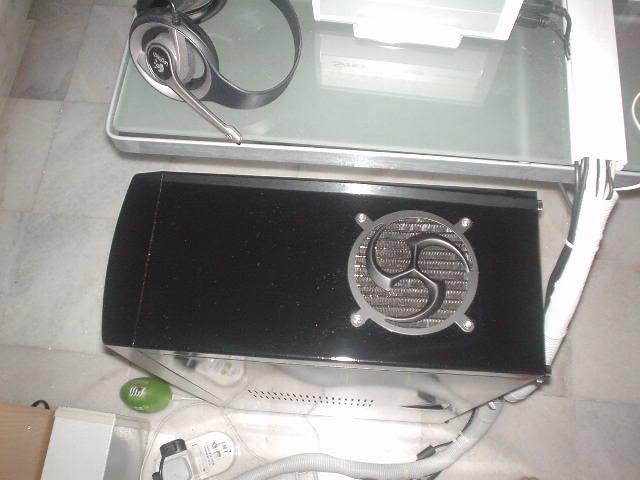 Side pic. C those blue wires right at the bottom? That's the next thing I need to do. Sleeve them all in black for stealth look so that it appears to haf no wires. 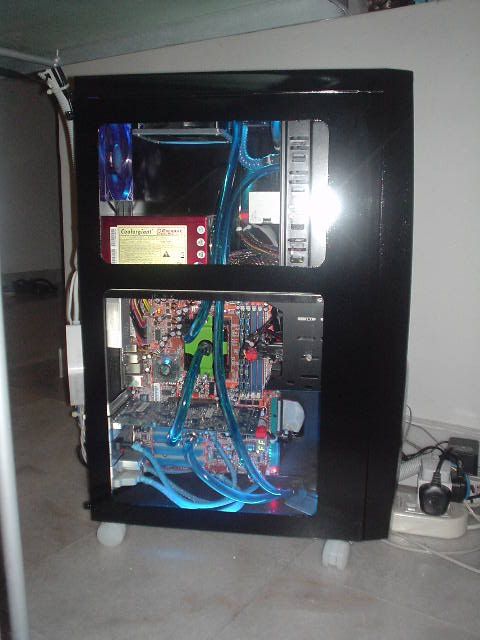 |
|
|
Feb 11 2006, 03:54 AM
|
|
VIP
15,705 posts Joined: Mar 2005 From: Tg. Rambutan |
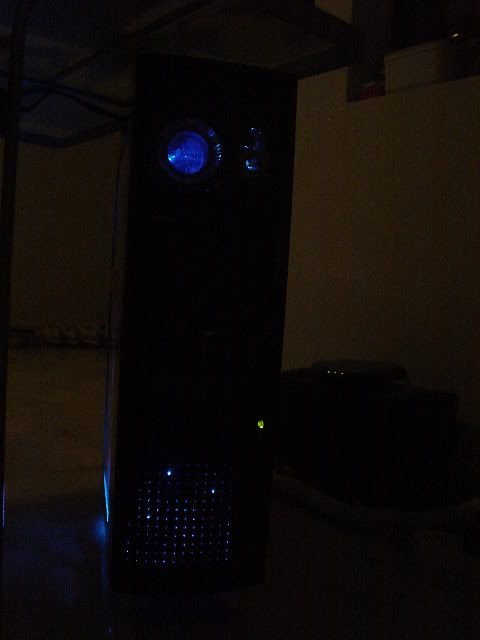
This is how the front bezel looks like in the dark. Nice understated look, not too flashy. Just sum light peeking out tru the vent holes at the bottom n also from the water tank at the top.
 Now to my dual CCFL lighting. I installed 2 types, white n blue. Here's how it looks like with just the blue CCFL on. 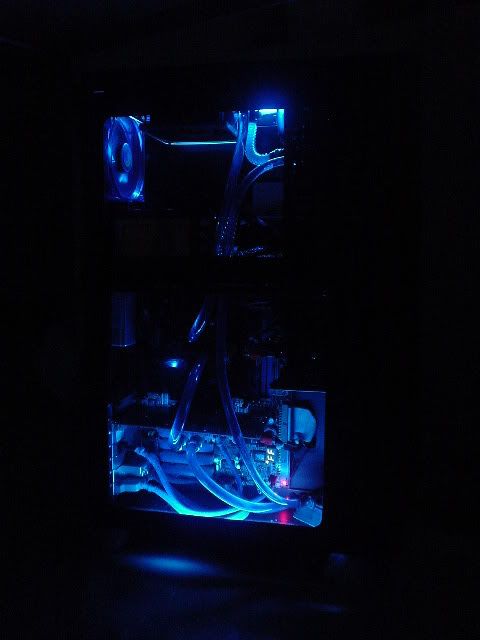 With just white CCFL on. 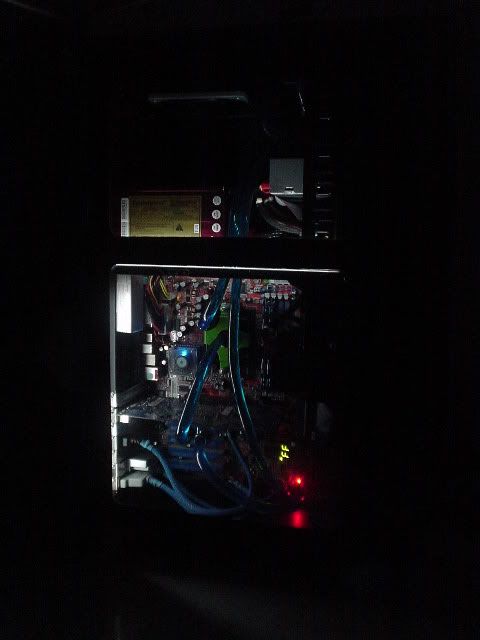 This is my favorite, the combo. This is when I turn on both the white n blue CCFL 2gether.  |
| Change to: |  0.0246sec 0.0246sec
 0.50 0.50
 6 queries 6 queries
 GZIP Disabled GZIP Disabled
Time is now: 19th December 2025 - 03:02 AM |
 Quote
Quote