Welcome Guest ( Log In | Register )

Outline · [ Standard ] · Linear+

 DIY Aluminium Casing for Guitar Multi-Effects

views
     
TSMetalZone
post Jan 8 2006, 01:49 AM, updated 16y ago

Look at all my stars!!
*******
Senior Member
2,515 posts

Joined: Jan 2003
From: Ipoh/KL


The cardbox box for my Korg ToneWorks AX1500G was getting somewhat worn from lugging it around to church, events, camps for the past 3 years. Since I always had a hard case for my electric guitar, i decided to make a simple aluminium case for my multi-effects too.

This issin't my usual precision work, so the workmanship is a little shabby. Coz I was doing it in a rush to finish it before I get back to KL. It only took me less than one and a half days to make it, thanks to some help from my dad.

Materials used: 1mm thick aluminium sheet, 25mm wide aluminium L-bracket, 12.5mm wide aluminium L-bracket, 2X hinges, 2X pull down latch, bostik super steel epoxy, rivets (i only used rivets in conjunction with epoxy, no screws) and some superglue (to hold some parts together temporarily), 1 inch thick black foam, 1X plastic handle, 8X corner edging.

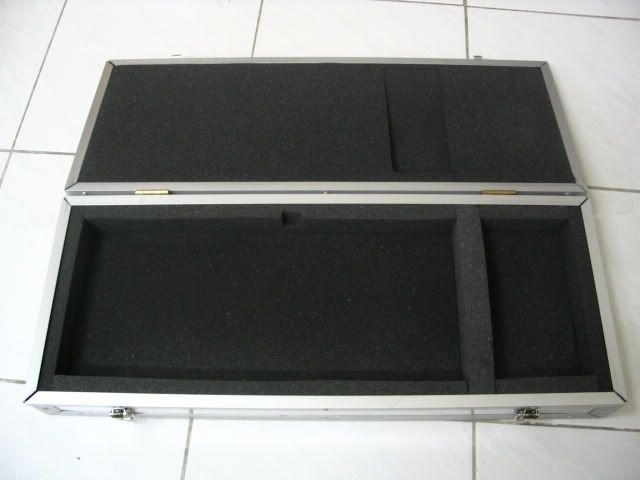
1. First of all, plan what you want to do. The end product is only as good as how well you planned it. Measure the size of the equipment you want to make a case for. Consider how much strength you need for the case. When planning the dimensions, be sure to take in account of the thickness of the padding or foam that you intend to use. Decide on how do you want to divide the casing where it will open up (look at my pictures as an example). Remember to consider the sizes and types of aluminium L-brackets available to you and how you are going to piece them together. Take in account of the material thickness (eg. the thickness of the aluminium sheet or plywood). I can't stress enough on the planning stage. Planning is just as important as actually building it. If you can, design it in AutoCAD (I use AutoCAD whenever I'm designing anything, including modding) or any CAD program or draw it on paper. Then, calculate how much materials you need and proceed to buy them. Buy a little extra in case you make a mistake.

2. Draw out the pieces which you intend to cut on the materials. Draw accurately! Use a proper ruler and set square or the L-ruler. Remember to take in account even the 1 mm wide cut line made by the jigsaw or dremel. Cut the aluminium sheet or plywood according to the dimensions that you specified in planning. For the L-brackets, same thing. Just that you have to also cut a 45 degree angle for the corners where it will meet another piece. Use a file or some sandpaper to smoothen out the rough cuts.

3. So you got all the parts? It's time to piece them together. Some examples which you could use to attach them together: Rivets, screws, epoxy glue. I used both rivets and epoxy glue in my case. Now its time to drill the holes for the rivets/screws. Measure and mark the locations where you want to drill the holes. Always use a block of wood at the back when you are drilling through so that the hole doesnt get warped or become pear shaped. You can either drill through both the L-bracket and the aluminiums sheet or plywood at the same time, or drill through them seperately. If you do drill through them seperately, you need to be very accurate with your drilling to make sure everything lines up perfectly. If you choose to drill through both together, remember to mark both pieces with a pencil so that you know which piece matches which side. Be sure to use the right drill bit size to fit the size of the rivets that you may be using. It should be slightly larger than the size of the rivets.

4. Some people aren't familiar with how rivets work, so anyway here's basically how you do it. First you need a riveter. You can buy a relatively cheap hand riveter from a hardware shop together with some rivets. The head of the riveter has different interchangeable sizes to match the diameter of the rivets. When choosing rivets, choose according to what you need. You dont need humongous rivets for small joints like these. On each rivet, there's two sides; One side with a larger diameter and a ball at the end, and one side with a long smaller diameter shaft. The side with the ball is where you insert into the hole where you intend to rivet, whereas the other shaft is where you insert into the riveter. To rivet a joint, put the appropriate sides into their respective holes as explained previously, and pull the lever of the handle. You most probably need to release the handle and pull the second time. You will come to a point where it stops, pull the handle even harder and the shaft will snap off leaving the ball end of the rivet on the other side of the joint. Do it correctly and you should have a nice rivet joint. If you do make a mistake and need to remove a rivet, just drill through the rivet and it should come off.

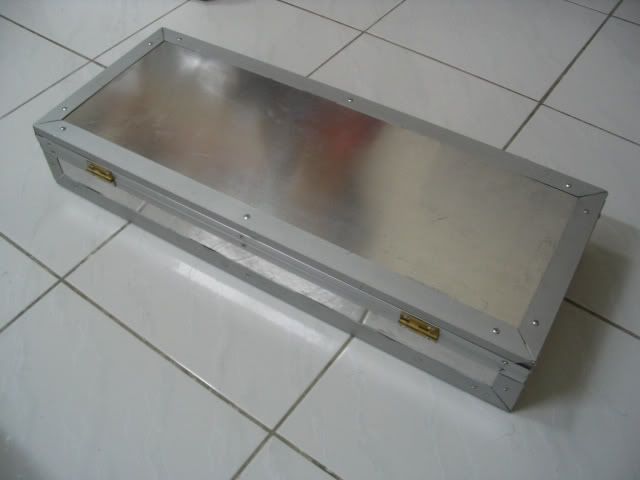
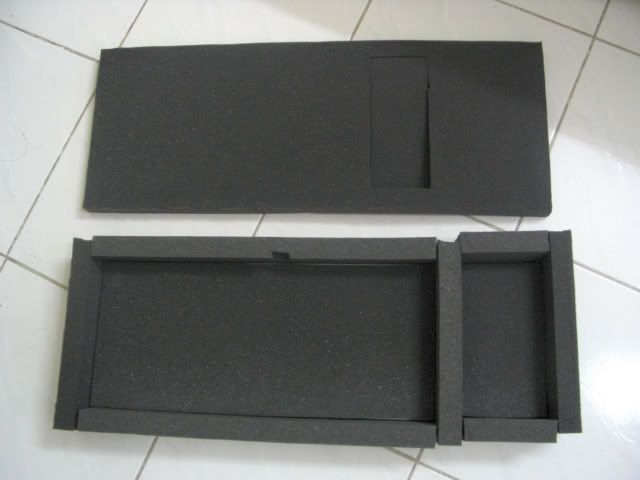
5. The remaining steps with the hinges and latches should be self-explained. For the foam, try to design them so that you can just fit them in like the way I did. Cut it with a sharp and long blade or knife to get a clean cut.

Thats about it for the tutorial I guess. Good luck!

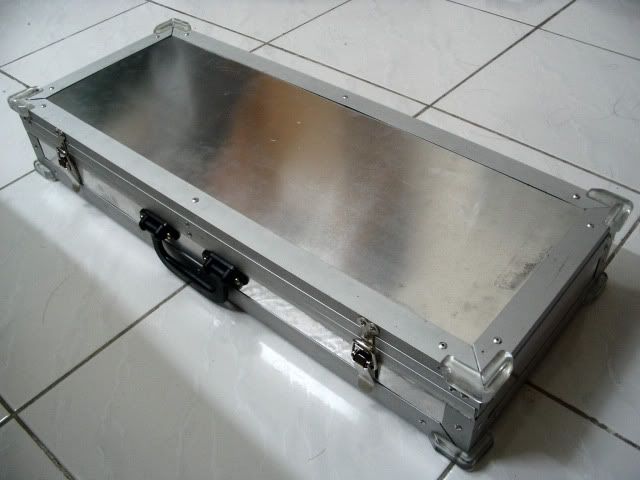
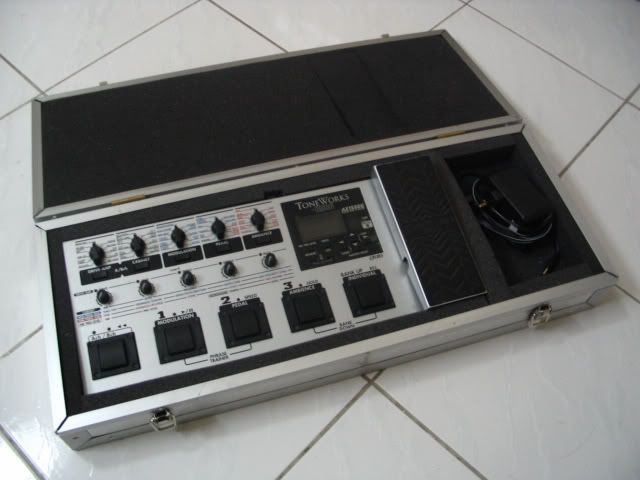
After adding the handle and corner edges/feet.
user posted image

user posted image

user posted image

user posted image

user posted image

user posted image

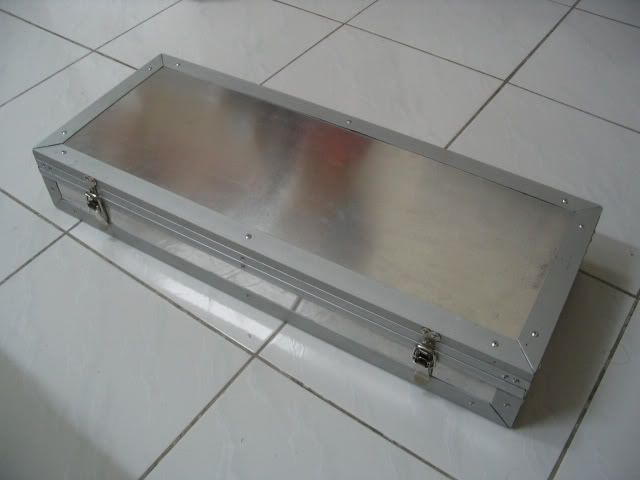
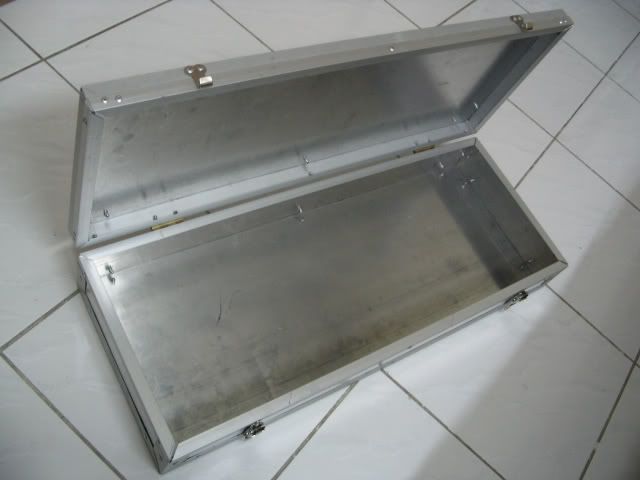
Without the foam put in
user posted image

The parts of the foam. No glue required. Just fit them in like a jigsaw puzzle.
user posted image

This post has been edited by MetalZone: Jan 18 2006, 11:26 PM
Pix
post Jan 8 2006, 08:14 AM

Tube Glower Phreak
Group Icon
VIP
2,918 posts

Joined: Nov 2004
From: Deliciously Pointless To: Jaw-Dropping Absurd


really really good work dude !! I'll put that in the equipement database, because I feel like it wink.gif
blacktrix
post Jan 8 2006, 08:39 AM

Scott Pilgrim Vs The World!
Group Icon
VIP
13,063 posts

Joined: Jan 2003
From: Toronto
Sweet case dude!!! Looks really professional grade!
neuvas
post Jan 8 2006, 08:59 AM

Look at all my stars!!
*******
Senior Member
2,323 posts

Joined: Jan 2003
From: Bangi/Serdang/OP Bentley Music


a job well done..!

any plans to start Metalzone's Road Case business.. Theres a big market who knows... whistling.gif
led_zep_freak
post Jan 8 2006, 12:24 PM

Look at all my stars!!
*******
Senior Member
5,231 posts

Joined: Jan 2005
From: Pea Jay


QUOTE(neuvas @ Jan 8 2006, 08:59 AM)
a job well done..!

any plans to start Metalzone's Road Case business.. Theres a big market who knows... whistling.gif
*
I'ill be the first customer, coz I WANT ONE! thumbup.gif

Really, nice job Metalzone! thumbup.gif thumbup.gif
chapree
post Jan 8 2006, 01:10 PM

I used to stuff for LYN Editorial and troll at LYN Forums
Group Icon
Elite
2,046 posts

Joined: Jan 2003
From: On a chair, facing the screen


Yeah man, I think lotsa pple want to buy your case.

MetalZone Custom Case :: Won't Hurt Your Pocket, But Can Kill Your Friend. Oh yeah thumbup.gif
xnobys
post Jan 8 2006, 02:59 PM

See me, Feel me, Hear me, You just ruined me...
******
Senior Member
1,220 posts

Joined: Jun 2005
From: Slavestate

MetalZone,

how much did you forked out to build the DIY case?
what about the weight of the case, roughly?

metalhead
post Jan 8 2006, 03:15 PM

Regular
******
Senior Member
1,672 posts

Joined: Jan 2003


wow that's really impressive thumbup.gif .... it's looks very kool and the workmanship is like of a professional ....
TSMetalZone
post Jan 8 2006, 03:39 PM

Look at all my stars!!
*******
Senior Member
2,515 posts

Joined: Jan 2003
From: Ipoh/KL


QUOTE(xnobys @ Jan 8 2006, 02:59 PM)
MetalZone,

how much did you forked out to build the DIY case?
what about the weight of the case, roughly?
*
Weighs about 1 kg plus i think... lol... i'm not good at estimating weight.

Here's a rough price breakdown...
14 feet of 25mm wide aluminium L-bracket (approx 0.4mm thick): RM18
12 feet of 12.5mm wide aluminium L-bracket (approx 0.7mm thick): RM16
aluminium sheet (i have an entire 4x8 feet 1mm thick alu sheet, so heres approx how much i used): RM20
2X latches (chromed steel i think. stainless steel ones cost 3 times more.): RM11 (RM5.50 each)
2X brass hinges: RM3.60 (RM1.80 each)
approx 2x2 feet of 1 inch thick black foam: RM8

Total: RM76.60 (not including rivets and epoxy which i already had)

yeah. quite expensive for DIY work in a way. well, guitar hard cases arent cheap either. last time mine cost me RM200 after discount.
TSMetalZone
post Jan 8 2006, 03:44 PM

Look at all my stars!!
*******
Senior Member
2,515 posts

Joined: Jan 2003
From: Ipoh/KL


QUOTE(neuvas @ Jan 8 2006, 08:59 AM)
a job well done..!

any plans to start Metalzone's Road Case business.. Theres a big market who knows... whistling.gif
*
QUOTE(led_zep_freak @ Jan 8 2006, 12:24 PM)
I'ill be the first customer, coz I WANT ONE!  thumbup.gif

Really, nice job Metalzone! thumbup.gif  thumbup.gif
*
LOL... i wish i could... but I'm lacking time to build more of these. and it aint gonna be cheap if u count in the workmanship. coz if i'm gonna make any of it for sale, i have to give my best workmanship or else it wont be satisfactory. the workmanship on this one issint what i myself would call good hehe =P . its not that its flimsy or anything, its just that i didnt really take the time to cut the L-brackets nicely to make everything a perfect fit with no gaps. but as long as it can take the thrashing and keep its contents safe, i'm happy.

I'll post more pics in a while. my camera went out of batt yesterday.

Thanks for the comments all...

Update: added 3 pics on the first post

This post has been edited by MetalZone: Jan 8 2006, 04:15 PM
tytons
post Jan 8 2006, 09:30 PM

Look at all my stars!!
*******
Senior Member
2,823 posts

Joined: Jan 2003


nice workmanship man...now if u can spray the middle part black n the outer part leave it to silver...wah...nice nice..looks like those case ppl normally carry around edi...

This post has been edited by tytons: Jan 8 2006, 09:32 PM
blacktrix
post Jan 8 2006, 11:21 PM

Scott Pilgrim Vs The World!
Group Icon
VIP
13,063 posts

Joined: Jan 2003
From: Toronto
Damn....tempting me to build my own coffin case for my pedals!!!
TSMetalZone
post Jan 9 2006, 02:28 PM

Look at all my stars!!
*******
Senior Member
2,515 posts

Joined: Jan 2003
From: Ipoh/KL


QUOTE(blacktrix @ Jan 8 2006, 11:21 PM)
Damn....tempting me to build my own coffin case for my pedals!!!
*
heheh... thats what this thread was created for... to give some inspiration to u guys to make ur own hard case for ur precious equipment.
echobrainproject
post Jan 11 2006, 10:30 AM

Look at all my stars!!
Group Icon
Moderator
4,765 posts

Joined: Jan 2003
From: Kuala Lumpur


hey, looks like my old pedalboard casing. just that mine has wooden finish on it. cool stuff there!
MoNnY
post Jan 11 2006, 11:30 AM

Ooooo... Now I know how to change this
*******
Senior Member
4,423 posts

Joined: Jan 2003
From: Subang Jaya


wow.. can put tutorial how we can make one ourselfs ?
haha
aLpHa da eViLz
post Jan 12 2006, 11:54 AM

Getting Started
**
Junior Member
168 posts

Joined: Sep 2004
From: aMpaNg JaYa / BiNtuLu


Wah... can make one for guitars also?
modD
post Jan 12 2006, 01:14 PM

the forest whispers my name
*****
Senior Member
942 posts

Joined: Jan 2003
From: hell


NICE DUDE!!!

you could add some rusty effects, some stenciling, and you'll get the box to Metallica's original Live Sh1t: Binge & Purge VHS!

user posted image

This post has been edited by modD: Jan 12 2006, 01:19 PM
Criptonox89
post Jan 12 2006, 05:37 PM

Look at all my stars!!
*******
Senior Member
2,792 posts

Joined: Jun 2005


good job man~!!

stick some stickers on that would make it looks more attractive!!
sean392
post Jan 12 2006, 08:16 PM

Hirano Aya-Tard
*******
Senior Member
6,339 posts

Joined: Jan 2003


WHOA!!!!

"ahem, sir, do you take orders? i would certainly like to have one.... its just that i dont have enough equipment to put it in there.... but if u make one for my guitar, YUM!!!" hahahahahaha

great stuff there man!!!! its a real beauty
TSMetalZone
post Jan 13 2006, 12:16 AM

Look at all my stars!!
*******
Senior Member
2,515 posts

Joined: Jan 2003
From: Ipoh/KL


haha... thx for the comments. i'm just too lazy to furnish it up with anything else. coz it's gonna be carried around often and bumped here and there anyway.

QUOTE(sean392 @ Jan 12 2006, 08:16 PM)
WHOA!!!!

"ahem, sir, do you take orders? i would certainly like to have one.... its just that i dont have enough equipment to put it in there.... but if u make one for my guitar, YUM!!!" hahahahahaha

great stuff there man!!!! its a real beauty
*
hmm... if I were to make for the size of a whole guitar, you better just buy a ready made hard case. Coz the materials alone would cost more than a 100 bucks plus i would have to use thicker aluminium L brackets etc to be able to sustain the length and size of the box. On the other hand, a guitar hard case costs typically around RM200 and above.


Anyway, for those who asked for a tutorial. I'll write a basic tutorial later.
In planning, its quite simple actually, but it was harder than i thought when it came to the part where i had to drill holes and rivet them. A big headache to hold those pieces together and drill thru them especially when the box starts to take shape.

This post has been edited by MetalZone: Jan 13 2006, 12:22 AM

2 Pages  1 2 >Top
 

Change to:
| Lo-Fi Version
0.0178sec    0.72    5 queries    GZIP Disabled
Time is now: 23rd December 2025 - 05:09 AM