

p.s. IM NOT PERVERT!

before

after

dun drool ok, guys??

any comment of my first ever healing image?

Project Image Healing
|
|
 Dec 27 2005, 06:05 PM, updated 20y ago Dec 27 2005, 06:05 PM, updated 20y ago
Return to original view | Post
#1
|

Elite
2,707 posts Joined: Feb 2005 From: KL |
today, i download images and the images was like this, omg, spoiled image!! so i decided to heal the picture using photoshop 7.0
p.s. IM NOT PERVERT! before after dun drool ok, guys?? any comment of my first ever healing image? |
|
|
|
|
|
Dec 28 2005, 11:33 AM
Return to original view | Post
#2
|
|
Elite
2,707 posts Joined: Feb 2005 From: KL |
another one done today, this one much harder, took me 1 and half hour to get it satisfactory
  |
|
|
Dec 29 2005, 11:11 PM
Return to original view | Post
#3
|
|
Elite
2,707 posts Joined: Feb 2005 From: KL |
errr, actually there is a couple of tools that is handy while healing broken images:
1. Clone stamp tool (use the most) 2. Healing tool (sometimes handy, but not everytime) 3. Marquee tool (normally use with feather option) 4. Lasso tool (also use with feather option) 5. Blur tool (not often) first, use clone stamp tool to heal the broken part by selecting good pixels around the broken part, brush at 3-5px liddat. Redraw the broken part several times until satisfactory (zoom in and out to compare). then u might use blur tool or heal tool to further smoothen the pixels, but not everytime very successful, so u might undo it. finally ur healing part will still looks weird (bcoz originaly is broken anyway), then u might use lasso tool (i use polygonal) or marquee tool with 5-10px feather select the good pixels besides the heal part, then ctrl-c and ctrl-v to copy to new layer, then select the new layer and move it to the heal part, then it will look more natural. adjust the layer opacity if u wan, then merge the layer with the original picture. after copy-paste-merge job for several times until u feel good with the pic and the healing job done by safe the file (either safe for web or wat)! |
|
|
Dec 30 2005, 03:36 PM
Return to original view | Post
#4
|
|
Elite
2,707 posts Joined: Feb 2005 From: KL |
step by step tutorial
im just showing part of the image  originally is like this, probably a scanned image but bad binding or wat, argh spoil my mood >.< 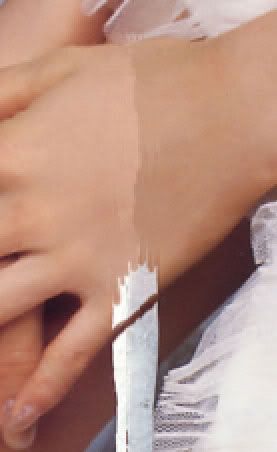  then, i use clone stamp tool to repair the white part (alt-click the good area, then fill up the broken area), note that left and right in different tone.... =.=". woot, looks weird! hv to blend the "sempadan" together and make it smooth 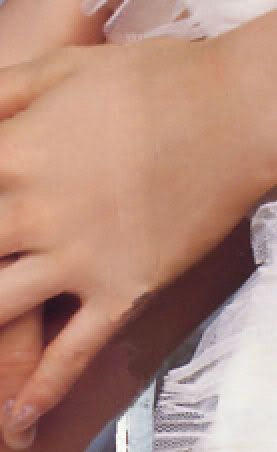 then i use heal tool to blur the line. just alt-click the good area and start heal across the "sempadan". now looks better but yet, looks unnatural also  now is the magic part, use lasso tool with 3-10px (desired) feather, select pixels besides the unnatural part, then copy-paste to a new layer, then select it and move it to cover the unnatural part. u might adjust the opacity of the layer to make it natural. do this several times until u satisfy wif it. haha, now looks more natural (although still feel abit flatten oso) |
|
|
Dec 30 2005, 03:37 PM
Return to original view | Post
#5
|
|
Elite
2,707 posts Joined: Feb 2005 From: KL |
so this is the final result:
 before  after |
| Change to: |  0.0141sec 0.0141sec
 0.28 0.28
 6 queries 6 queries
 GZIP Disabled GZIP Disabled
Time is now: 26th November 2025 - 06:22 PM |
 Quote
Quote