Welcome Guest ( Log In | Register )

Outline · [ Standard ] · Linear+

 Back to the Basic Group Build Event

views
     
nazrul90
post Apr 17 2012, 08:46 PM

Getting Started
**
Junior Member
294 posts

Joined: Sep 2009
im also!

enter my HG 00 Gundam 7 Sword/G Inspection ver. for Snapfit category


Added on April 17, 2012, 9:17 pmsince any Bandai kit allowed for competition, can i submit my Omegamon Reboot kit too?

This post has been edited by nazrul90: Apr 17 2012, 09:17 PM
nazrul90
post Apr 18 2012, 03:48 PM

Getting Started
**
Junior Member
294 posts

Joined: Sep 2009
ummm, for snapfit category do top coat and custom decal allowed?
nazrul90
post Apr 19 2012, 11:25 PM

Getting Started
**
Junior Member
294 posts

Joined: Sep 2009
already start mine

WIP removing nub marks and sanding

user posted image
» Click to show Spoiler - click again to hide... «

nazrul90
post Apr 21 2012, 02:49 AM

Getting Started
**
Junior Member
294 posts

Joined: Sep 2009
QUOTE(steph13 @ Apr 21 2012, 02:36 AM)
weathering allowed?
*
i dont think its allowed hmm.gif
after all

QUOTE
- Judging:
40% fundamental ground work (nip mark, cleanliness, panel line, decal/stickers etc)
40% Presentation: action pose, angle, title photo etc. Tips: do anything that u think will impress the judge. Eg, u can even have a brief story, n make it into a movie poster style, with very dynamic action pose.
20% photography.
nazrul90
post Apr 23 2012, 05:12 PM

Getting Started
**
Junior Member
294 posts

Joined: Sep 2009
QUOTE(rayloke @ Apr 23 2012, 04:20 PM)
And also let us estimate how much shelf space we need to negotiate with Litt Tak for their shelf space during mid year competition display.
*
does that mean all kits that entering in this GB will be display at Litt Tak?
nazrul90
post Apr 23 2012, 05:32 PM

Getting Started
**
Junior Member
294 posts

Joined: Sep 2009
QUOTE(ascentic @ Apr 23 2012, 05:31 PM)
I think he means those kit that win will be display at LITT TAK mid year challenge.  hmm.gif
*
it is? hmm.gif
nazrul90
post Apr 23 2012, 07:35 PM

Getting Started
**
Junior Member
294 posts

Joined: Sep 2009
QUOTE(Khai62 @ Apr 23 2012, 07:26 PM)
Im join the snapfit category then. Malas nak disassemble to paint those unpainted parts.  rclxub.gif
Khai62 - HG Age-2 Double Bullet 
already have some plan for this one laugh.gif
*
why dont enter OOB for your recently done Banshee?
nazrul90
post Apr 25 2012, 12:11 AM

Getting Started
**
Junior Member
294 posts

Joined: Sep 2009
QUOTE(ra2zy @ Apr 25 2012, 12:01 AM)
oic.. ok.. but do u know in pla-zone forum which section can we post our completed kit thread?
*
refer to Rayloke 's siggy
nazrul90
post Apr 26 2012, 05:42 PM

Getting Started
**
Junior Member
294 posts

Joined: Sep 2009
QUOTE(rayloke @ Apr 26 2012, 05:25 PM)
cry.gif  cry.gif  cry.gif

doing dry transfer on wing ka's shield.Already cracking like mad.... after transfer, i hand itchy use cotton bud to lightly press the decal to make it adhere better.... then all the parts that's "floating above the panel line/ longkong was pressed down... crack even more.....
Learn hard lesson... want to cry now. just to remind everyone dont repeat my noob attempt.....

user posted image
*
even my Wing Zero Custom i dont dare to put any decals because of curvy surface
nazrul90
post Apr 26 2012, 07:25 PM

Getting Started
**
Junior Member
294 posts

Joined: Sep 2009
@VincC454 do editing with photoshop(brightness,contrast) allowed?
like this one i took

» Click to show Spoiler - click again to hide... «

nazrul90
post Apr 26 2012, 09:15 PM

Getting Started
**
Junior Member
294 posts

Joined: Sep 2009
umm, im using Ikea lamp table.. maybe i will get another one since you said still got lighting problem

anyway today progress,hope will finish within this weekend
» Click to show Spoiler - click again to hide... «


nazrul90
post Apr 29 2012, 02:25 AM

Getting Started
**
Junior Member
294 posts

Joined: Sep 2009
rayloke, i want enter another one for Snapfit category tongue.gif
HGUC Guntank

This post has been edited by nazrul90: Apr 29 2012, 02:25 AM
nazrul90
post Apr 30 2012, 04:51 PM

Getting Started
**
Junior Member
294 posts

Joined: Sep 2009
QUOTE(rayloke @ Apr 30 2012, 03:47 PM)
Ok, i think i will share a little bit with snapfit... something i just learn recently when i started doing my snapfit kits.
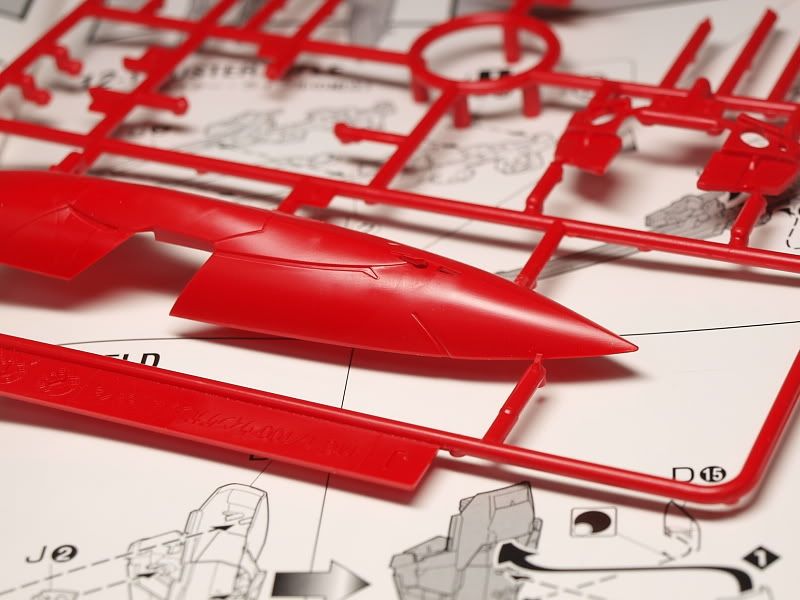
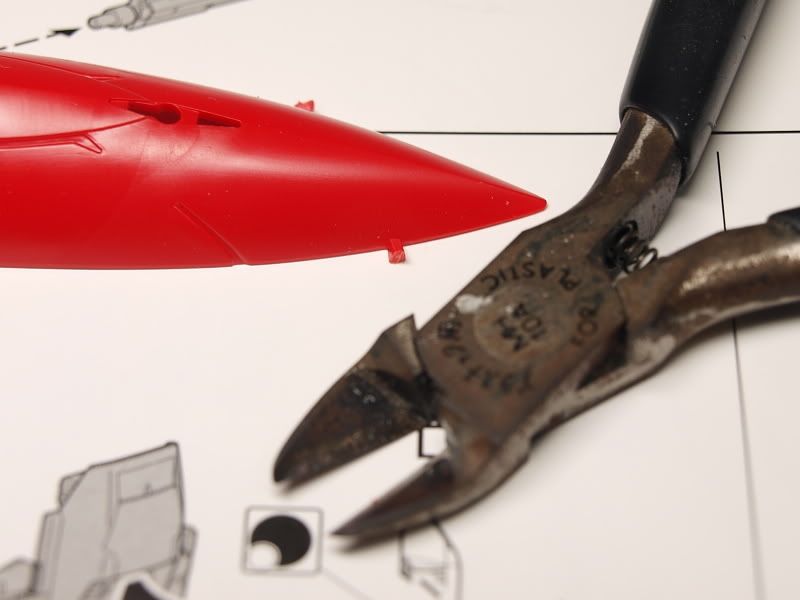
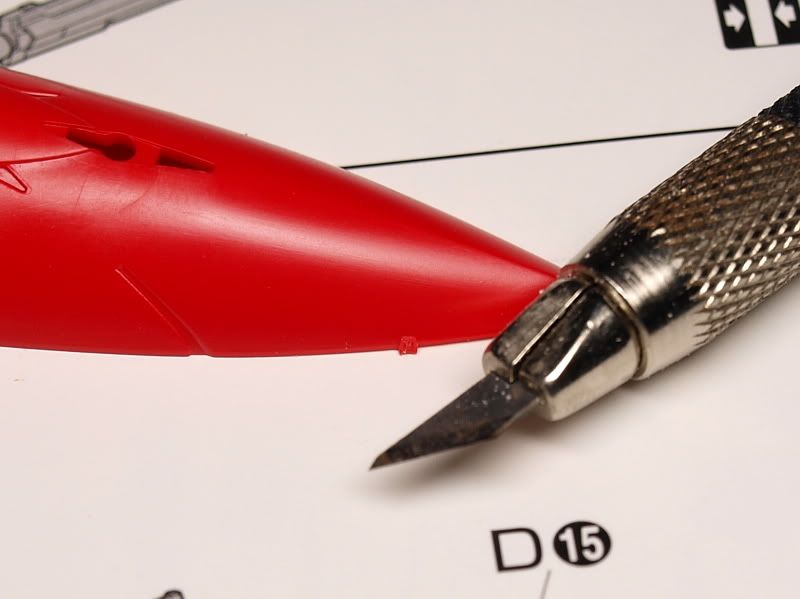
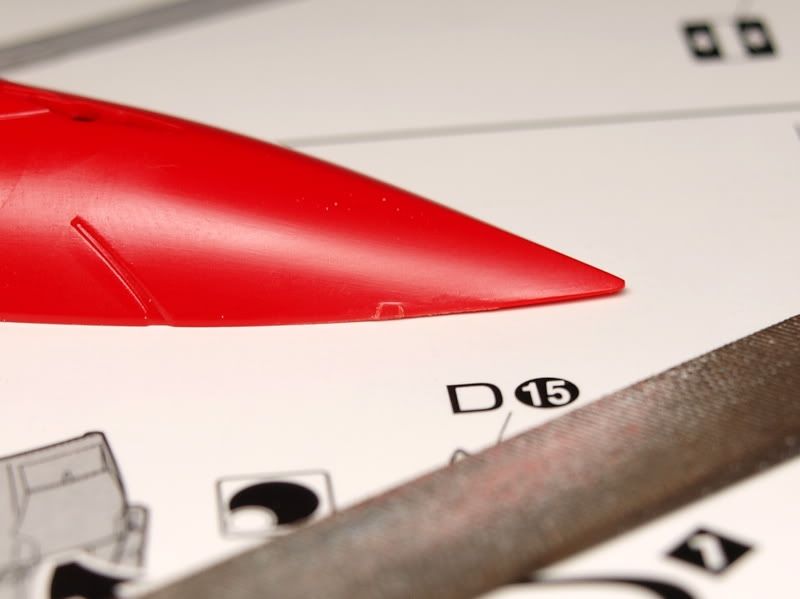
One of the main challenge of snapfitted kit is the task of removing nip marks, without leaving any visible leftover mark. This is especially challenging when doing colored parts; especially blue n red, n other darker colors. One can sand under the nip mark is flat, but is during the cutting process, any damage on the plastic will leave a white spot on the plastic which is almost impossible to remove 100%. So be very careful!
» Click to show Spoiler - click again to hide... «

Part on the runner.

» Click to show Spoiler - click again to hide... «

Cut it from the runner with a side cutter. Remember to leave some extra nip. This is because no matter how sharp your side cutter is, the cutting action somehow will have some force pressing onto the plastic. This will, especially parts with darker color like red n blue n grey, The force might damage the plastic n leave white spot.

» Click to show Spoiler - click again to hide... «

Then, use a sharp knife to slowly "slice" the nip, bit by bit. With this, no pressure will be put onto the plastic. When the nip mark is short enough, mebbe 0.5mm, we can start doing sanding.

» Click to show Spoiler - click again to hide... «

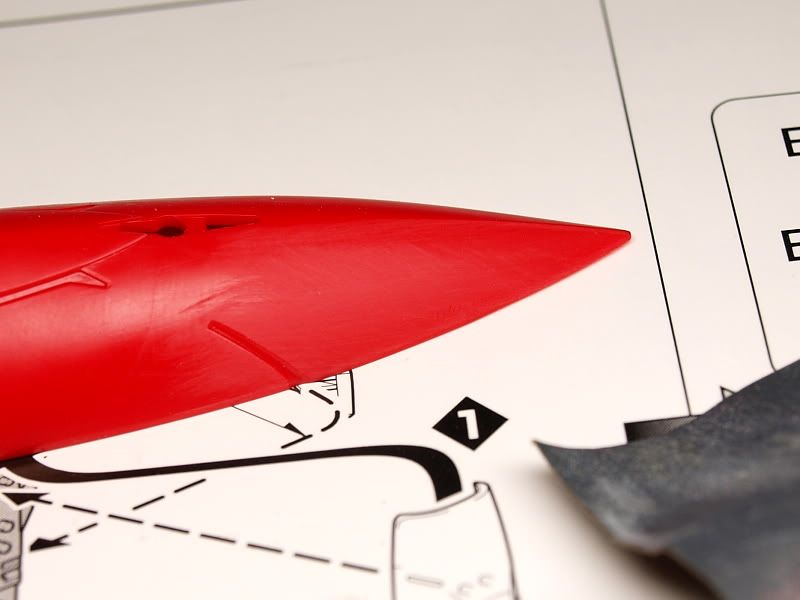
My personal habit is start with a file. This is sometimes dangerous because file can be very erosive n it sands down plastic very fast. As a result, if not careful, u might just over sand the whole thing n leave some very deep scratch mark onto the plastic. Here, i file it down until it's almost near the part. u can still see the shape of the nip. notice the white or light color around the nip? this is plastic damage n turn white. but no worry, it's only skin deep n can be easily removed by sand paper.

» Click to show Spoiler - click again to hide... «

Sand paper sanding. i start with 800, end with 1,200 grit. This is because i will be finishing with flat coat. IF u wanna do gloss coat, at least end with 2,000 grit n above. For curvy surface, i strongly recommend to use those 3M sanding sponge, the one state "microfine".

Now we can still see some scratches.
» Click to show Spoiler - click again to hide... «

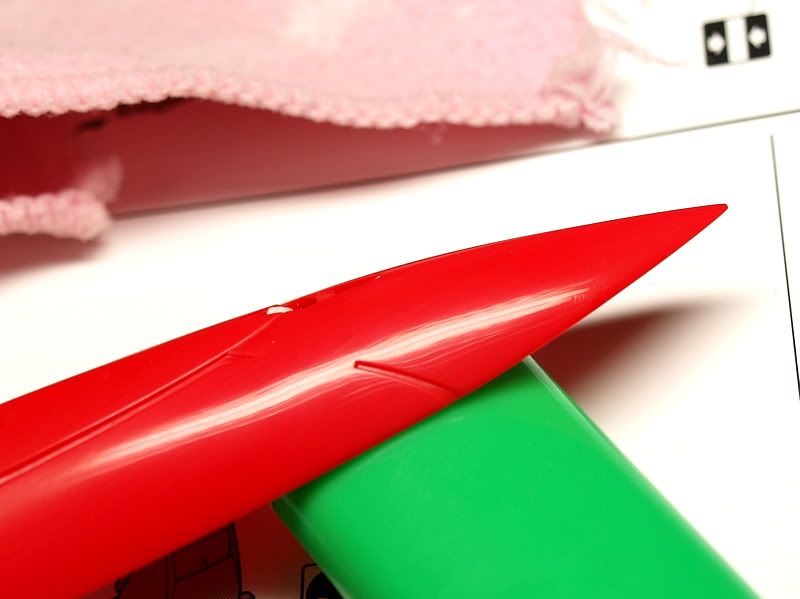
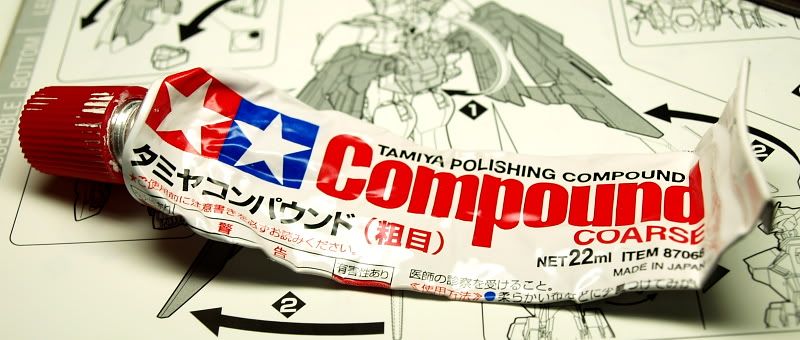
Next i use Tamiya compound Coarse (Pic below) to compound it. Actually i do not need to do this because my final finishing is flat. This is just to show an example for those who wants to do gloss or semi gloss.

Besides compound, if u think it's expensive (around RM15 one tube), u can also use nail polisher. Use the finest one, those used for last step polishing or they call it "buff" type.

Other than that, u can even use those CD recovery fluid. The liquid u use, when your DVD has fine scratches, to wipe on the CD/DVD. IT works.
» Click to show Spoiler - click again to hide... «

******************************************************************************************************************************

Compared to the pic above, u can see the glossiness of original Bandai plastic. After compound, it's much glossier, something like those HD version.
*
wow i really do like this but
i sand starting with 400,600,800 and 1000 grid sandpaper.. i also use the polishing compound as finishing although i dont have the polishing cloth(dont look good but later im going to flat top coat so its okay) biggrin.gif

nazrul90
post May 4 2012, 02:20 AM

Getting Started
**
Junior Member
294 posts

Joined: Sep 2009
user posted image

ah, finally done topcoat the kit
nazrul90
post May 4 2012, 03:05 AM

Getting Started
**
Junior Member
294 posts

Joined: Sep 2009
QUOTE(gunpla student @ May 4 2012, 02:38 AM)
rclxms.gif

oh crap, i can't even recog this is a mg or fg.  tongue.gif

nice paint job bro
*
umm, if you talk about red 00, it is not painted coz the kit itself is originally red
but i really do some minor painting on some parts
nazrul90
post May 4 2012, 01:00 PM

Getting Started
**
Junior Member
294 posts

Joined: Sep 2009
QUOTE(rayloke @ May 4 2012, 11:31 AM)
This is nice!!! drool.gif Honestly, i think some decal will make it even better, hope it's not too late.... (Huhu i m a decal fetish freak!!!)
Whoa! We r getting more n more good stuff coming!!!!!
*
i really do got the water slide decal for this kit but i screwed most of the decals(1st time apply water slide) cry.gif so i decided not to use it
the kit top coated already so cant apply decal anymore sad.gif
nazrul90
post May 4 2012, 06:09 PM

Getting Started
**
Junior Member
294 posts

Joined: Sep 2009
QUOTE(shauno @ May 4 2012, 03:45 PM)
this is what i have planned for the swords. gonna attempt a chrome finish. can't really see it on the photo, but if you look hard enough, you can see my camera tongue.gif lets see if i can pull it off! biggrin.gif
user posted image
*
how do you managed to get those chrome effect? mind sharing?

nazrul90
post May 5 2012, 08:00 PM

Getting Started
**
Junior Member
294 posts

Joined: Sep 2009
QUOTE(gunpla student @ May 5 2012, 03:18 AM)
I know how you feel about the first trial on water slide decals bro. The pain. T_T
*
fail because its too small to cut plus i dont have Mr.Mark Setter sad.gif

QUOTE(ascentic @ May 5 2012, 03:32 PM)
I think it's Magic Powder that he is using smile.gif

Step 1:
Sand the parts till smooth. Paint the parts glosy black. Wait to Dry.

Step 2:
Take some magic powder, and use some fabric to polish it on the parts.

Am I right? whistling.gif
*
noob here, what is magic powder?
nazrul90
post May 5 2012, 11:09 PM

Getting Started
**
Junior Member
294 posts

Joined: Sep 2009
ah i guess that is a powder form of polishing compound
nazrul90
post May 7 2012, 11:25 AM

Getting Started
**
Junior Member
294 posts

Joined: Sep 2009
haha i dont yet take photos
testing some light box right now

2 Pages  1 2 >Top
 

Change to:
| Lo-Fi Version
0.0437sec    0.31    7 queries    GZIP Disabled
Time is now: 29th March 2024 - 09:33 AM