

these are all my mods, so just enjoy !!!
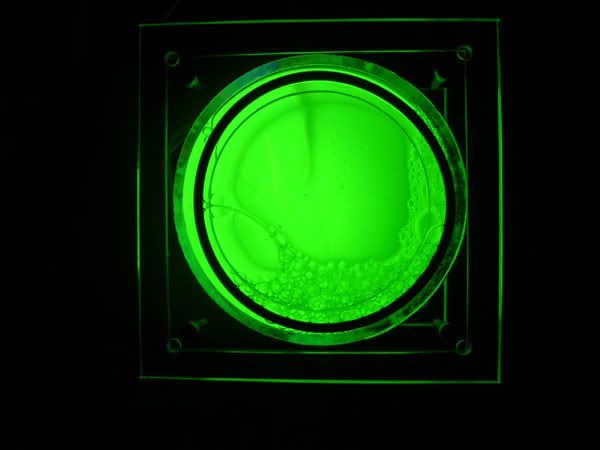
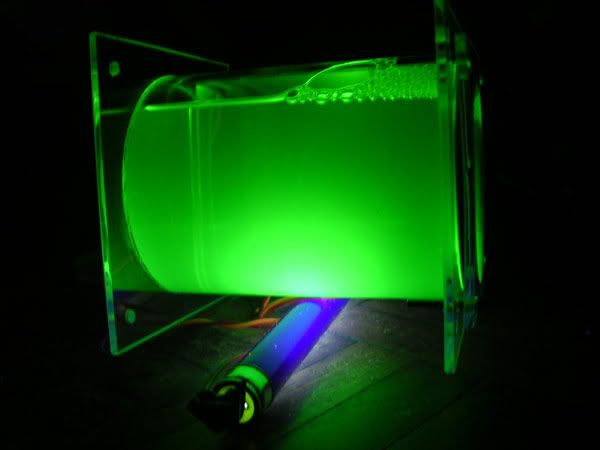
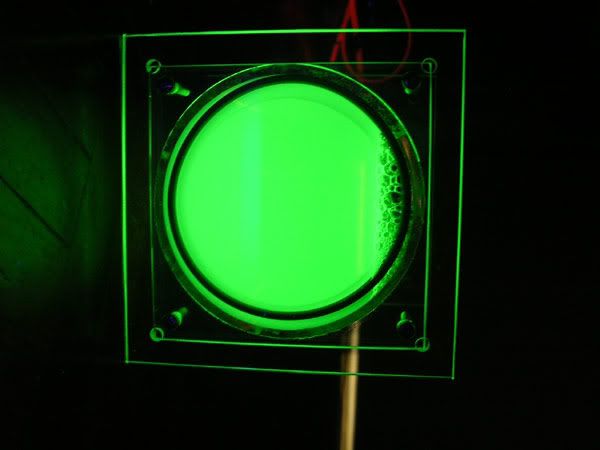
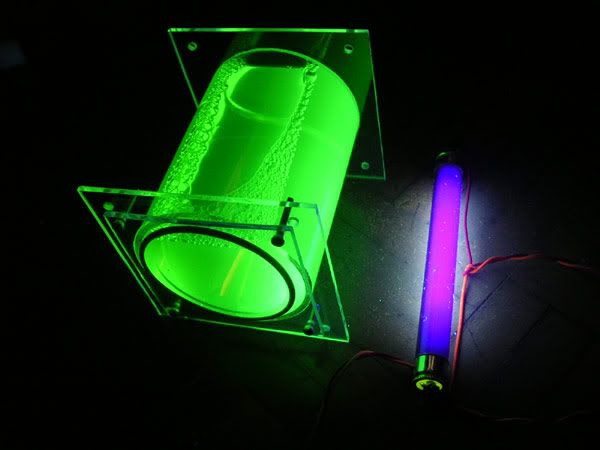
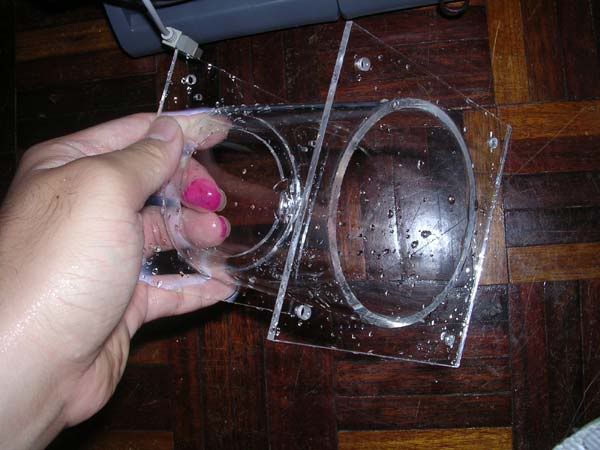
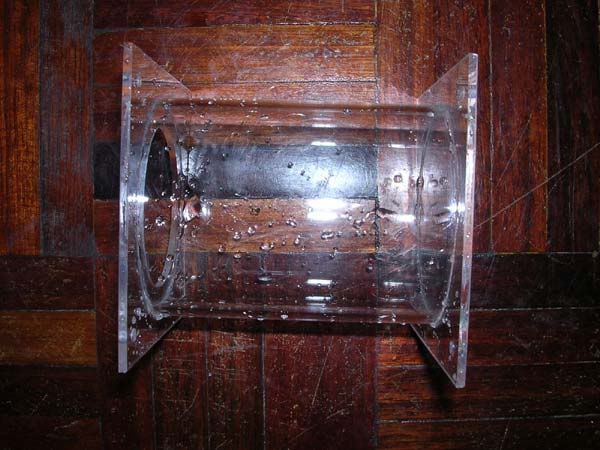
round acrylic reservoir
This post has been edited by AllnGap: Jun 30 2007, 08:05 AM
AG's Gallery, everything is inside !, update: some nice fans at pg 6
|
|
 Dec 1 2005, 01:32 AM, updated 19y ago Dec 1 2005, 01:32 AM, updated 19y ago
Show posts by this member only | Post
#1
|
 
Senior Member
4,561 posts Joined: Jan 2003 From: Penangites |
these are some of my previous moddings.....mostly on LEDs, Luxeons, fans, charcter LCD, acrylic and stuff like that.
these are all my mods, so just enjoy !!! round acrylic reservoir This post has been edited by AllnGap: Jun 30 2007, 08:05 AM |
|
|
|
|
|
Dec 1 2005, 01:33 AM
Show posts by this member only | Post
#2
|
|
Senior Member
4,561 posts Joined: Jan 2003 From: Penangites |
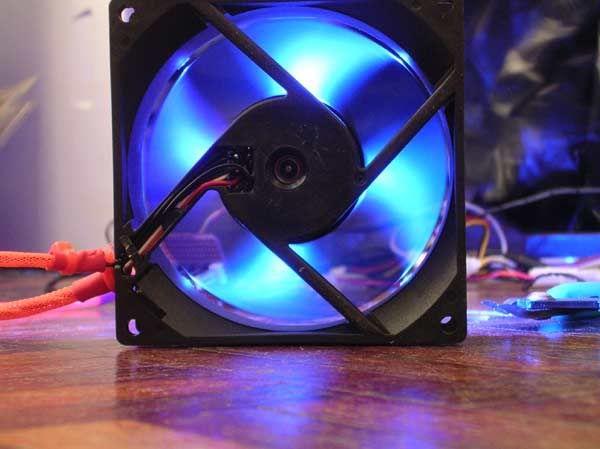
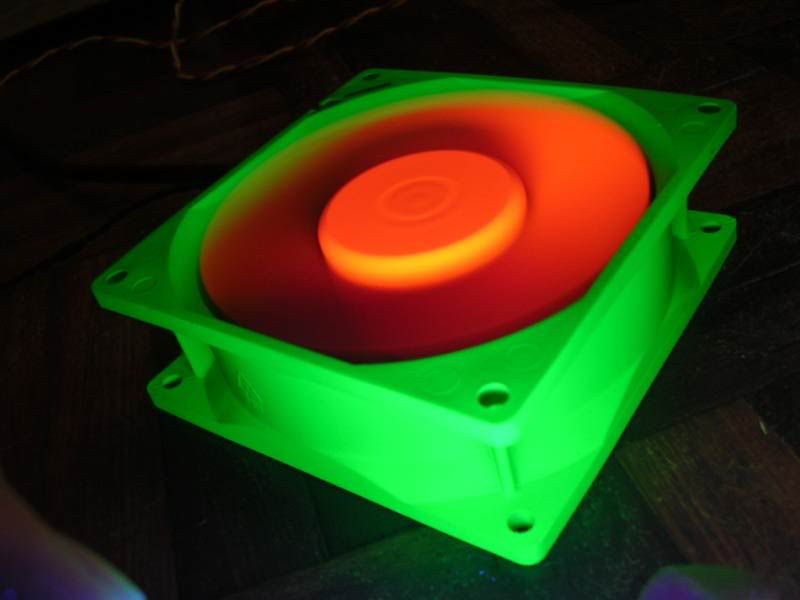
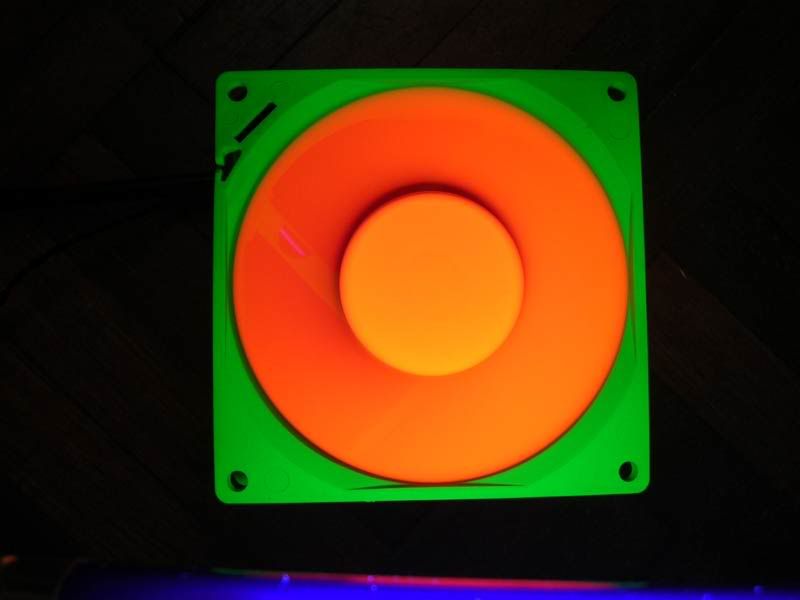
92mm fan.....got bored with the colour already......
   |
|
|
Dec 1 2005, 01:33 AM
Show posts by this member only | Post
#3
|
|
Senior Member
4,561 posts Joined: Jan 2003 From: Penangites |
multi-colour LED mod on my enermax
    |
|
|
Dec 1 2005, 01:34 AM
Show posts by this member only | Post
#4
|
|
Senior Member
4,561 posts Joined: Jan 2003 From: Penangites |
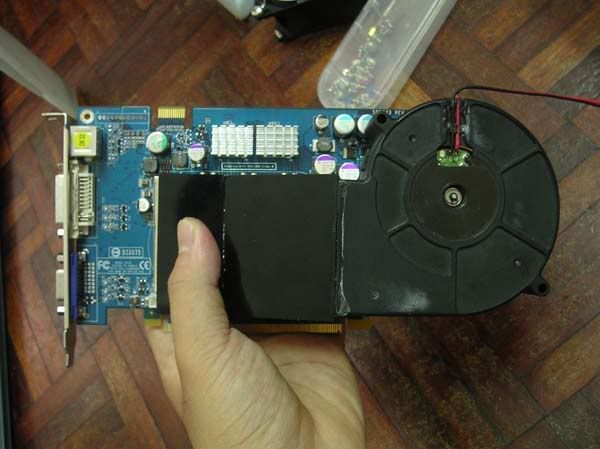
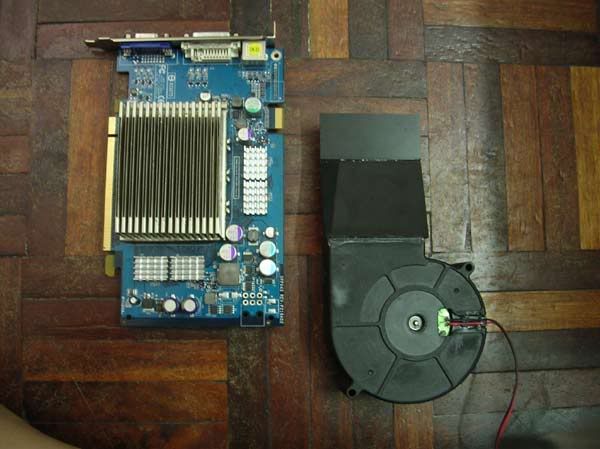
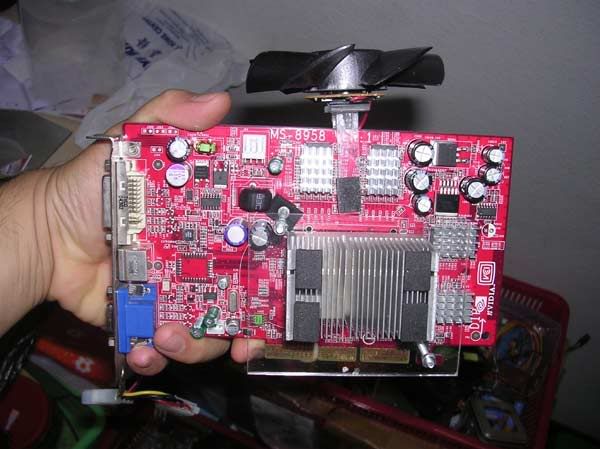
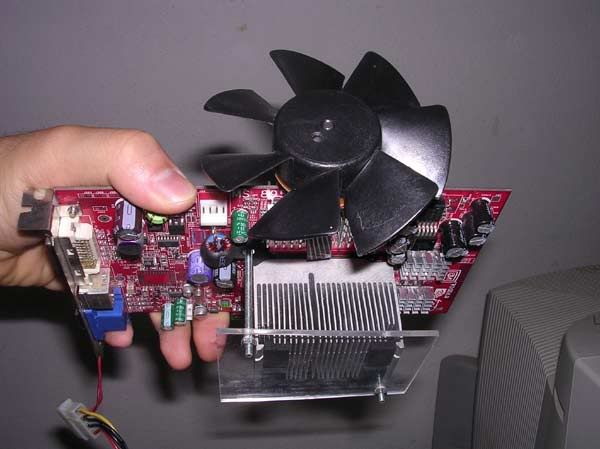
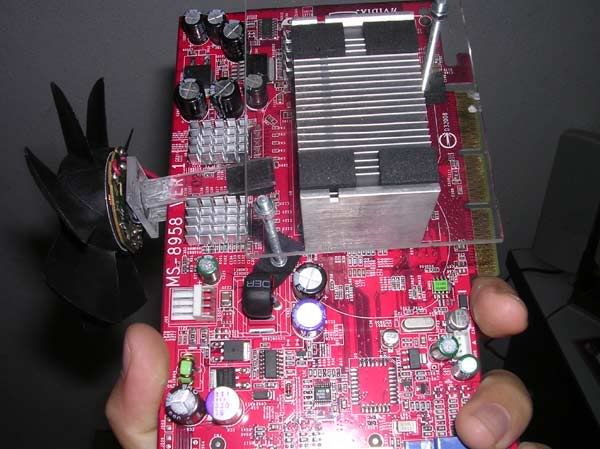
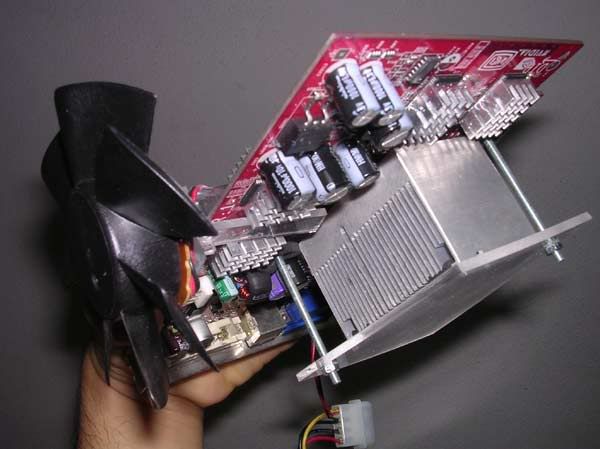
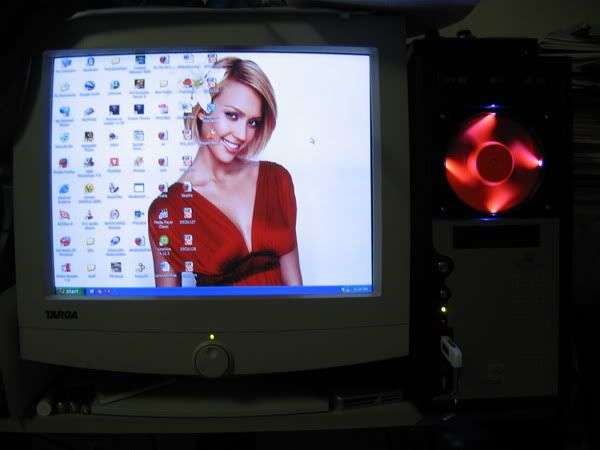
6600GT cooling mod
        |
|
|
Dec 1 2005, 01:35 AM
Show posts by this member only | Post
#5
|
|
Senior Member
4,561 posts Joined: Jan 2003 From: Penangites |
custom made acrylic ram cooler with SMD LEDs, pushed 19cfm in total
       |
|
|
Dec 1 2005, 01:36 AM
Show posts by this member only | Post
#6
|
|
Senior Member
4,561 posts Joined: Jan 2003 From: Penangites |
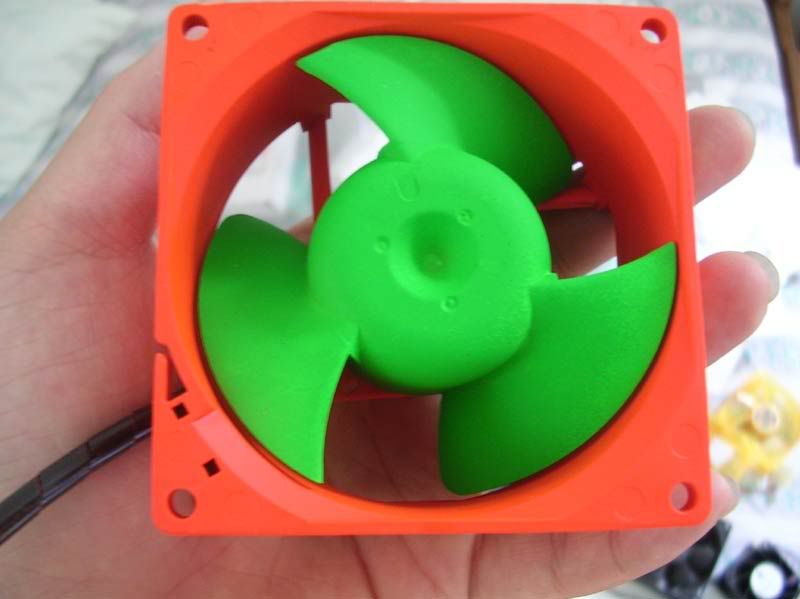
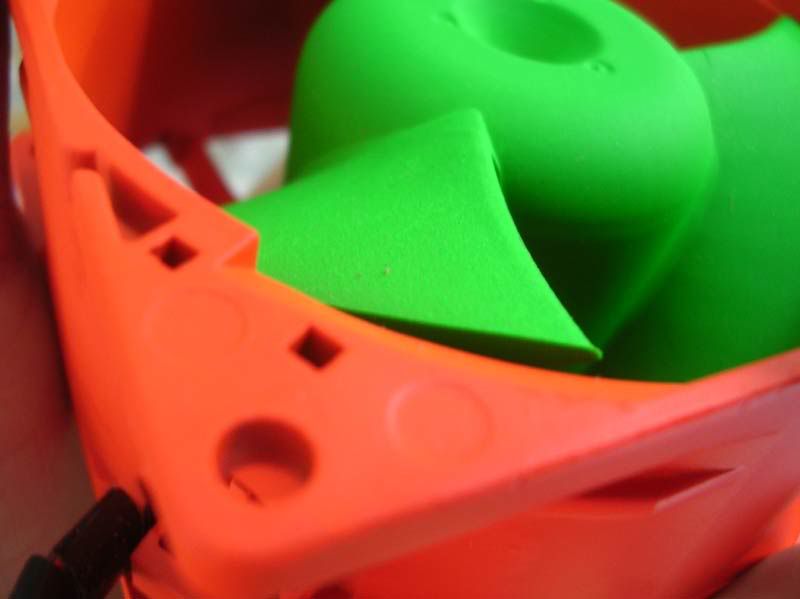
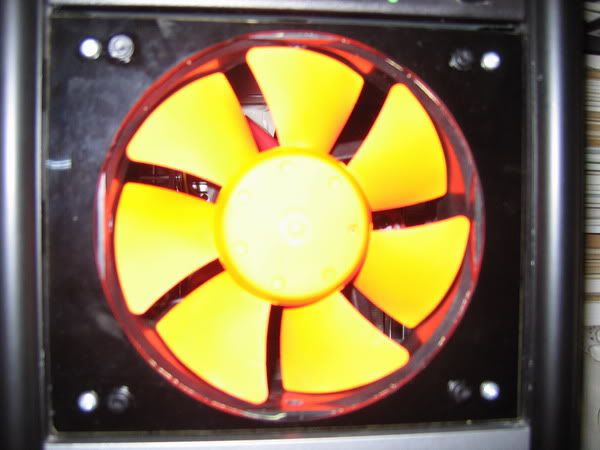
orange nazi fan
          |
|
|
|
|
|
Dec 1 2005, 01:37 AM
Show posts by this member only | Post
#7
|
|
Senior Member
4,561 posts Joined: Jan 2003 From: Penangites |
PSU multi-colour LED mod
        |
|
|
Dec 1 2005, 01:37 AM
Show posts by this member only | Post
#8
|
|
Senior Member
4,561 posts Joined: Jan 2003 From: Penangites |
ram cooler UV reactive edition.
    |
|
|
Dec 1 2005, 01:38 AM
Show posts by this member only | Post
#9
|
|
Senior Member
4,561 posts Joined: Jan 2003 From: Penangites |
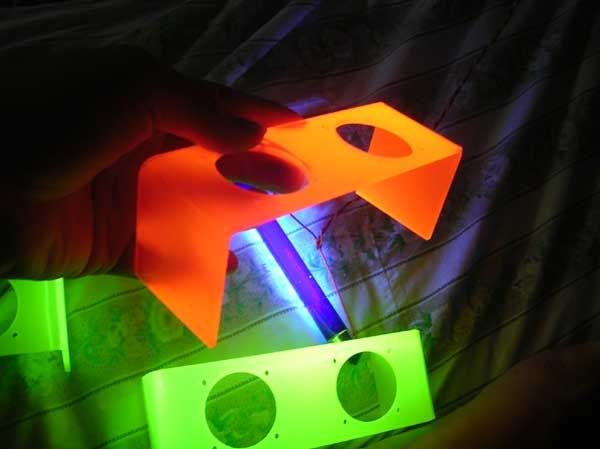
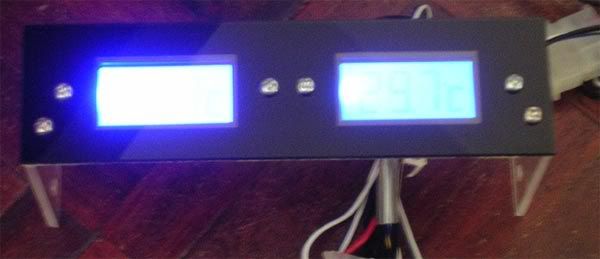
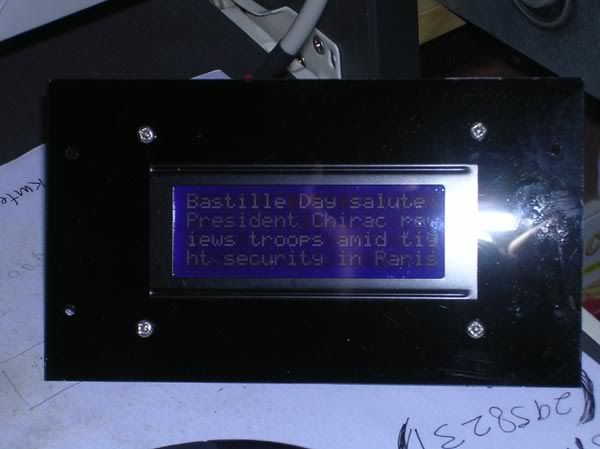
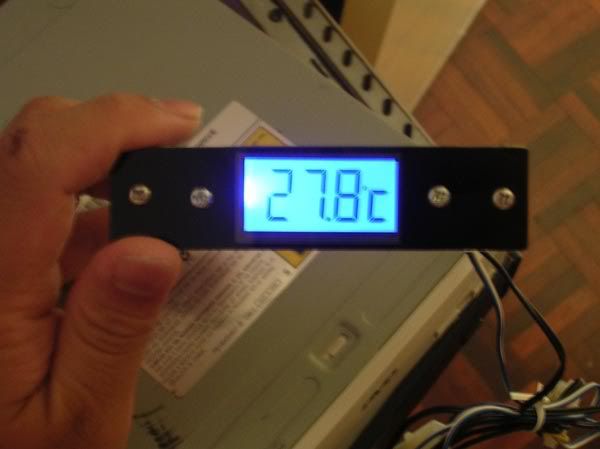
character LCD and temperature sensor bracket for CDROM that i built
   |
|
|
Dec 1 2005, 01:39 AM
|
|
Senior Member
4,561 posts Joined: Jan 2003 From: Penangites |
92mm LED fan for my friend's casing
    |
|
|
Dec 1 2005, 01:40 AM
|
|
Senior Member
4,561 posts Joined: Jan 2003 From: Penangites |
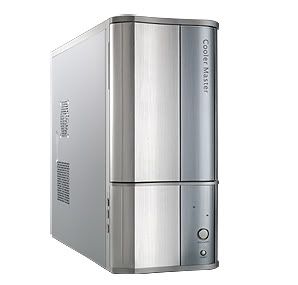
some mods on Cavilier casing.
         |
|
|
Dec 1 2005, 01:41 AM
|
|
Senior Member
4,561 posts Joined: Jan 2003 From: Penangites |
          |
|
|
Dec 1 2005, 01:42 AM
|
|
Senior Member
4,561 posts Joined: Jan 2003 From: Penangites |
          |
|
|
|
|
|
Dec 1 2005, 01:44 AM
|
|
Senior Member
4,561 posts Joined: Jan 2003 From: Penangites |
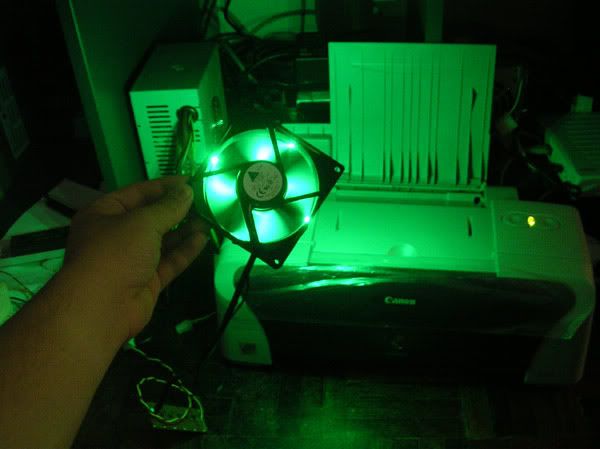
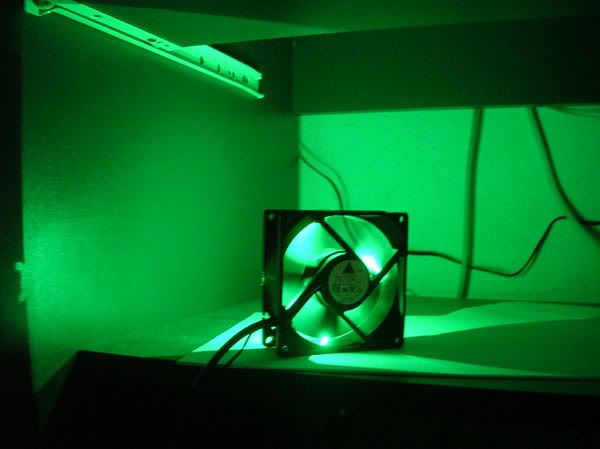
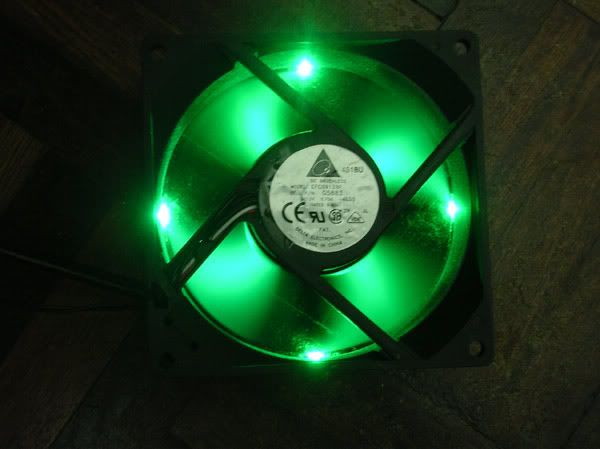
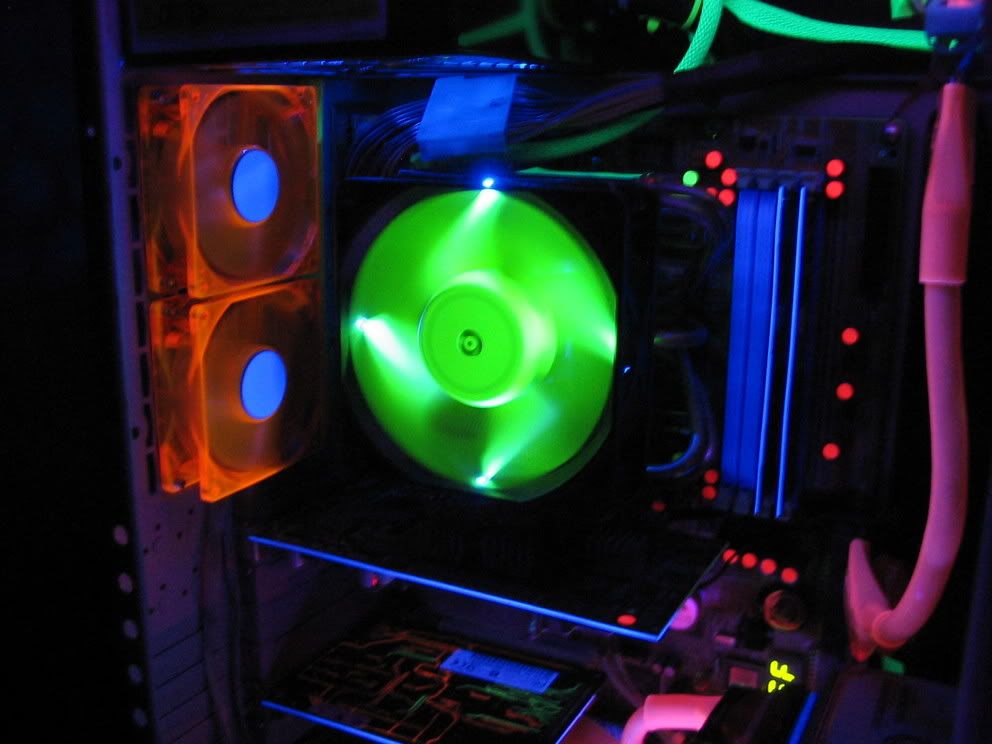
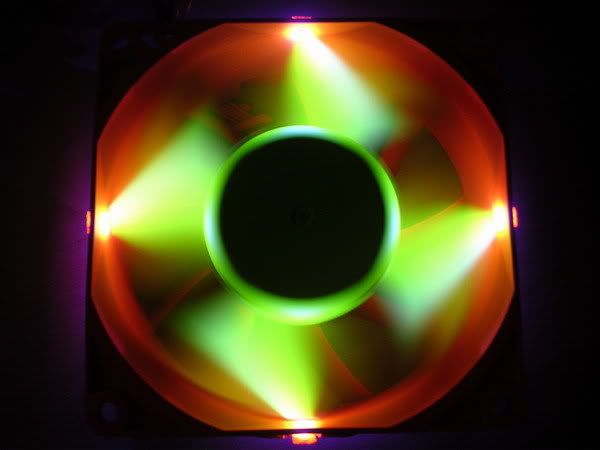
green LED fan
    |
|
|
Dec 1 2005, 01:44 AM
|
|
Senior Member
4,561 posts Joined: Jan 2003 From: Penangites |
6600 GT mods
   |
|
|
Dec 1 2005, 01:45 AM
|
|
Senior Member
4,561 posts Joined: Jan 2003 From: Penangites |
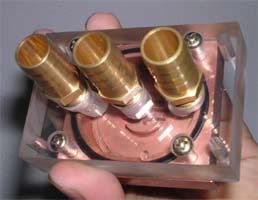
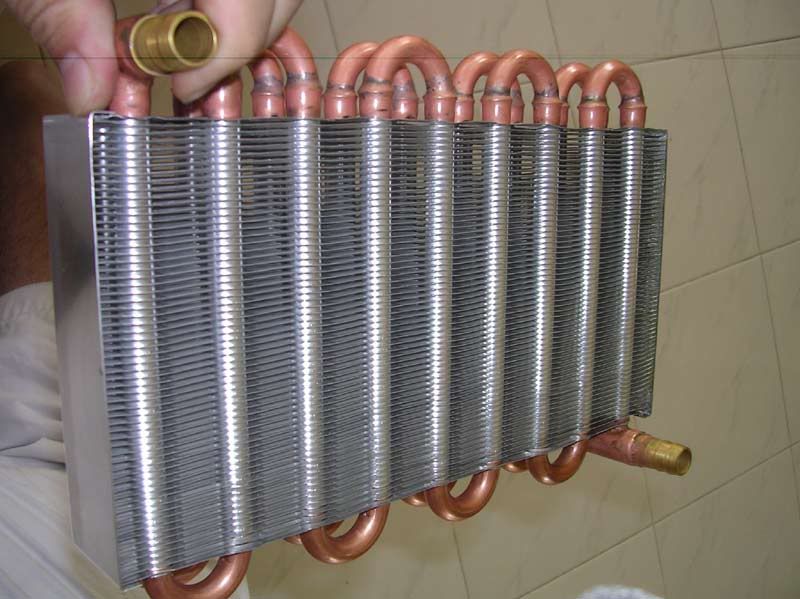
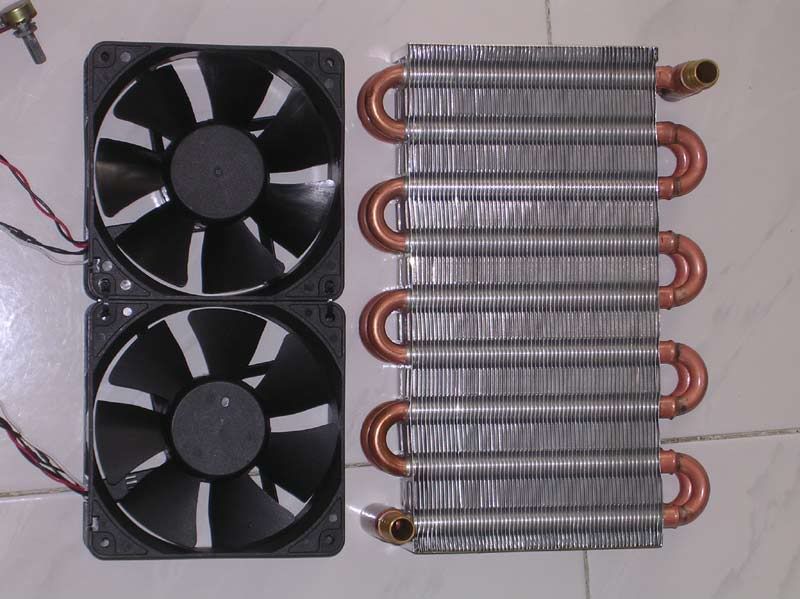
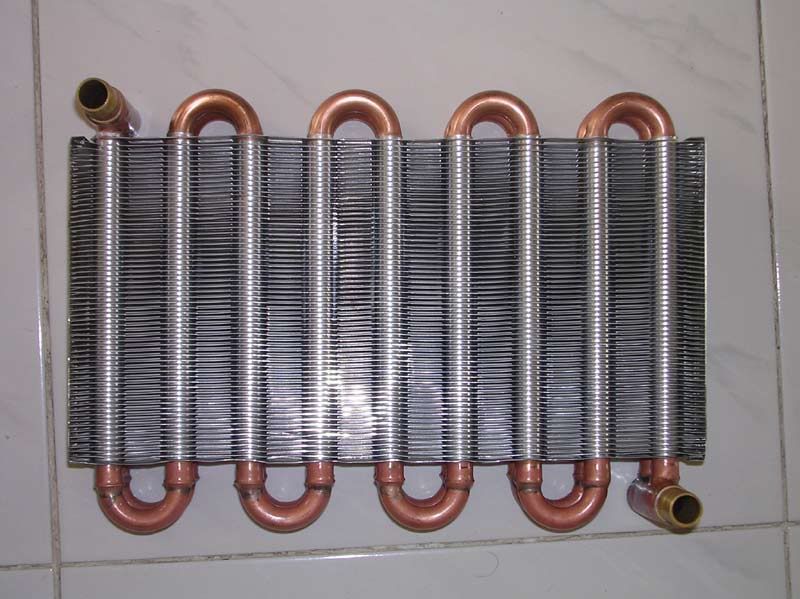
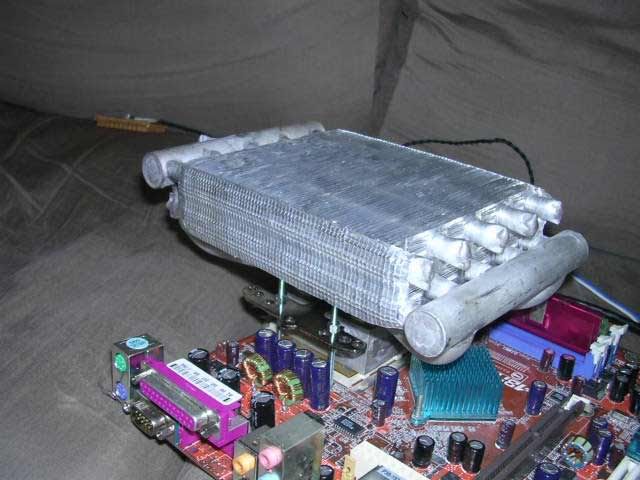
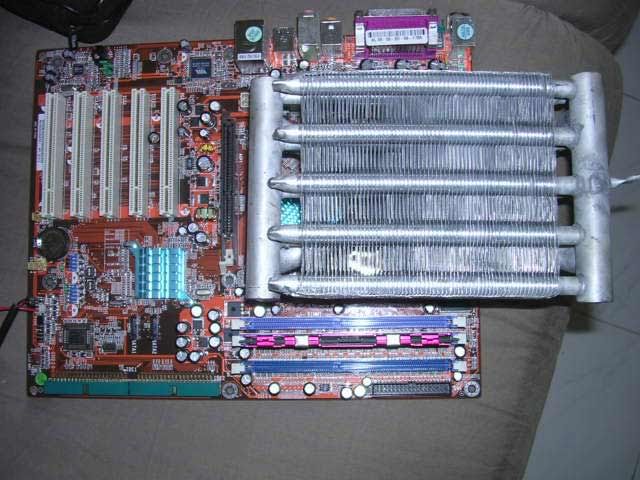
custom made watercooling sets.
    |
|
|
Dec 1 2005, 01:46 AM
|
|
Senior Member
4,561 posts Joined: Jan 2003 From: Penangites |
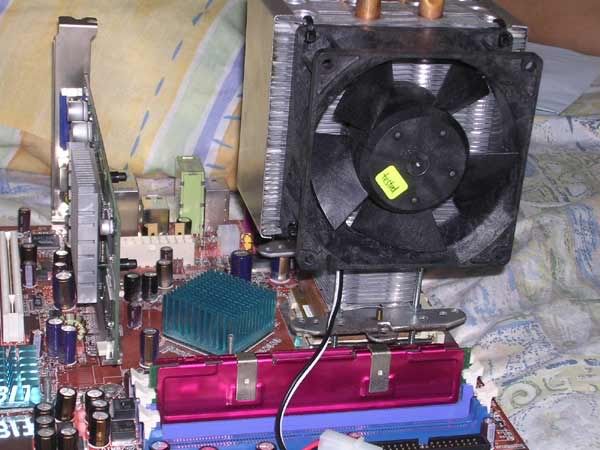
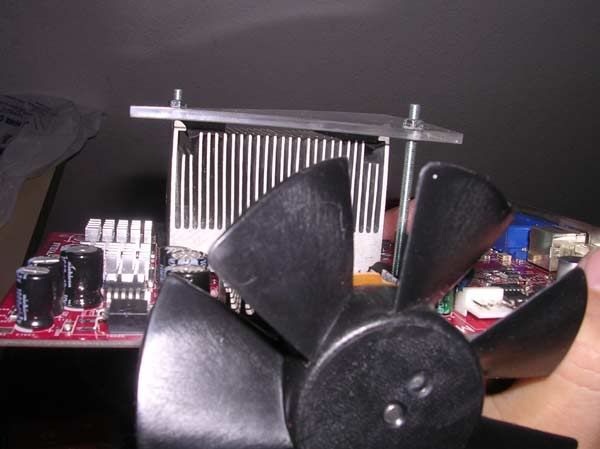
my " testbed " heatpipe cooler that failed
  |
|
|
Dec 1 2005, 01:46 AM
|
|
Senior Member
4,561 posts Joined: Jan 2003 From: Penangites |
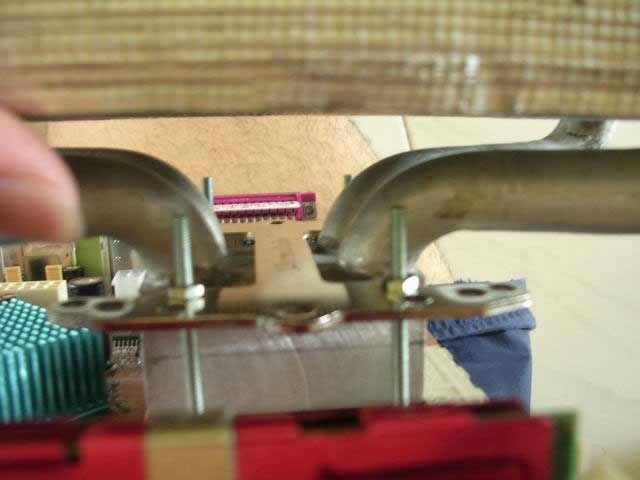
another prototype
    |
|
|
Dec 1 2005, 01:47 AM
|
|
Senior Member
4,561 posts Joined: Jan 2003 From: Penangites |
another modded 92mm fan
      |
|
|
Dec 1 2005, 01:48 AM
|
|
Senior Member
4,561 posts Joined: Jan 2003 From: Penangites |
92mm panaflo on FX - 5700 n half cut AMD stock heatsink
     This post has been edited by AllnGap: Dec 1 2005, 01:48 AM |
|
|
Dec 1 2005, 01:49 AM
|
|
Senior Member
4,561 posts Joined: Jan 2003 From: Penangites |
my modded fan on LittleLinnet's PC
   |
|
|
Dec 1 2005, 01:50 AM
|
|
Senior Member
4,561 posts Joined: Jan 2003 From: Penangites |
character LCD mod
     character LCD and ram cooler for my other friend 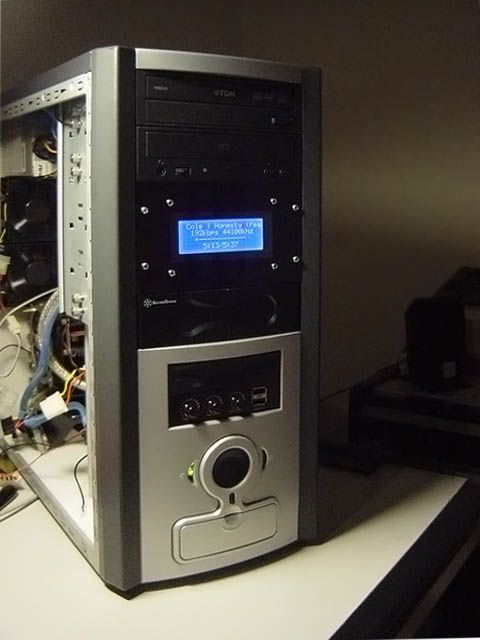 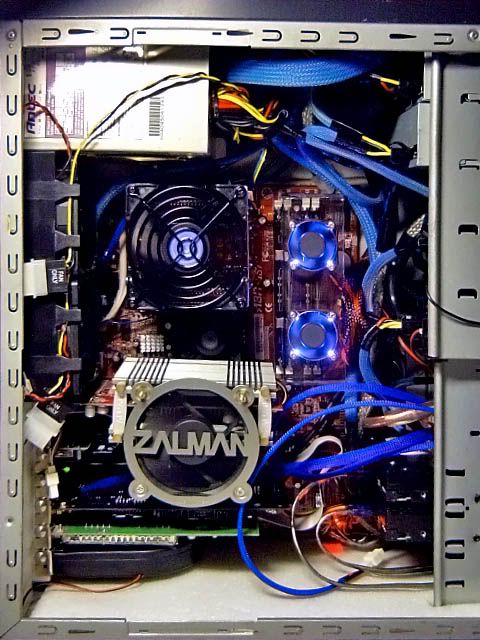 |
|
|
Dec 1 2005, 01:51 AM
|
|
Senior Member
4,561 posts Joined: Jan 2003 From: Penangites |
ram cooler metal edition.
        |
|
|
Dec 1 2005, 01:52 AM
|
|
Senior Member
4,561 posts Joined: Jan 2003 From: Penangites |
ram cooler white LED edition
     |
|
|
Dec 1 2005, 01:52 AM
|
|
Senior Member
4,561 posts Joined: Jan 2003 From: Penangites |
80mm Delta FF with blue SMD LEDs
    |
|
|
Dec 1 2005, 02:08 AM
|
|
Senior Member
4,561 posts Joined: Jan 2003 From: Penangites |
Delta 80*80*38 tri-blade
  Delta 80*80*38 tri-blade 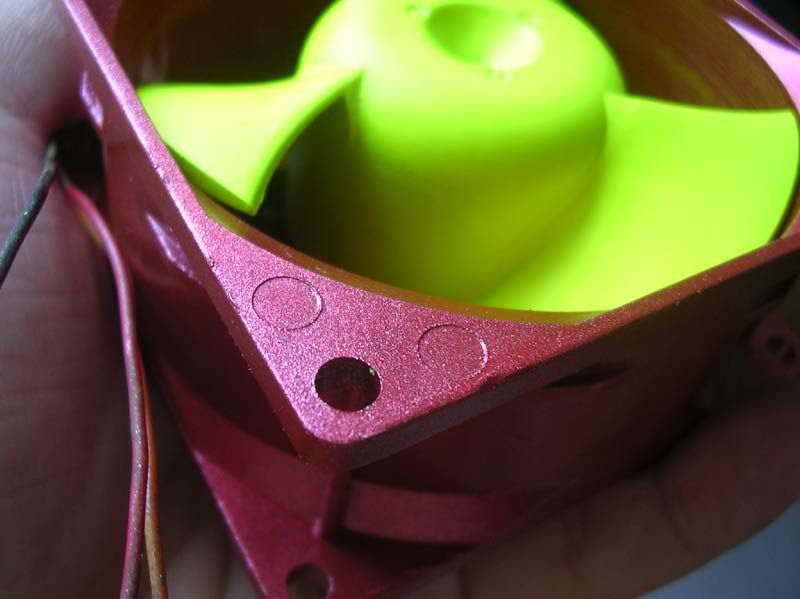 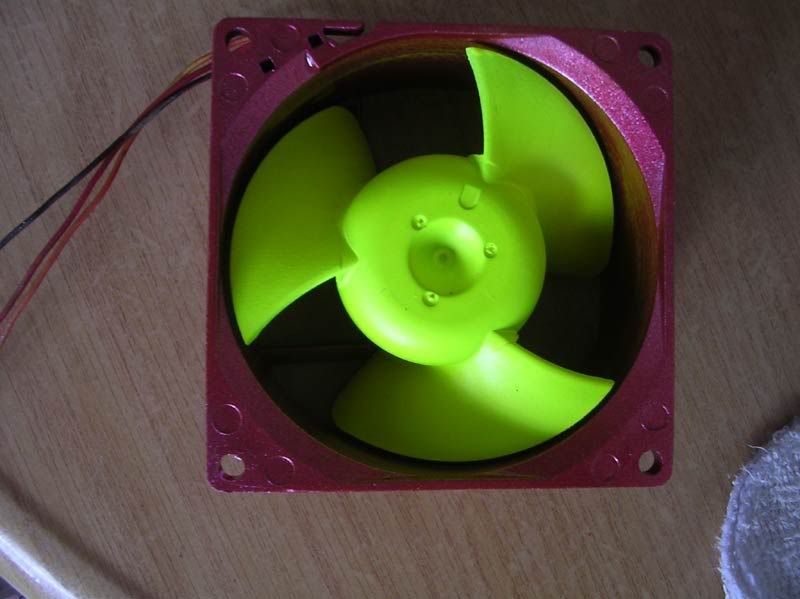 TT Smart case fan 80mm to UV version 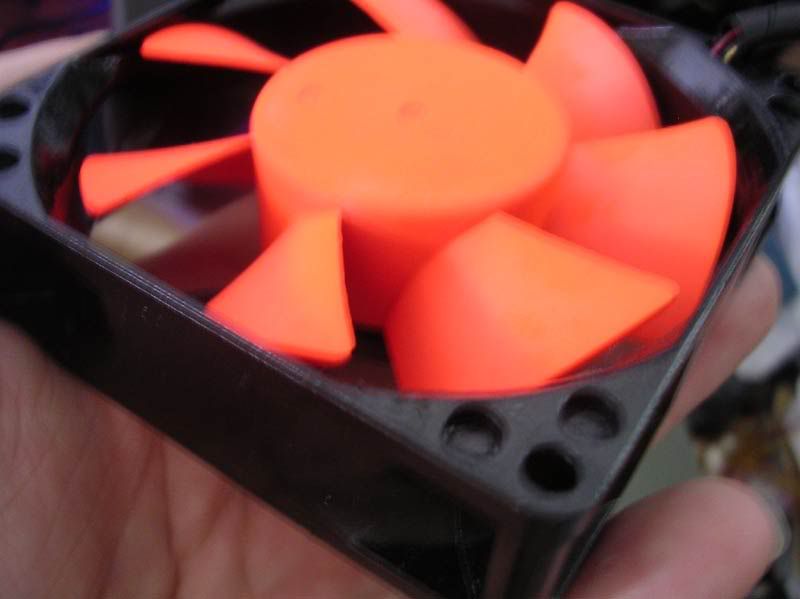 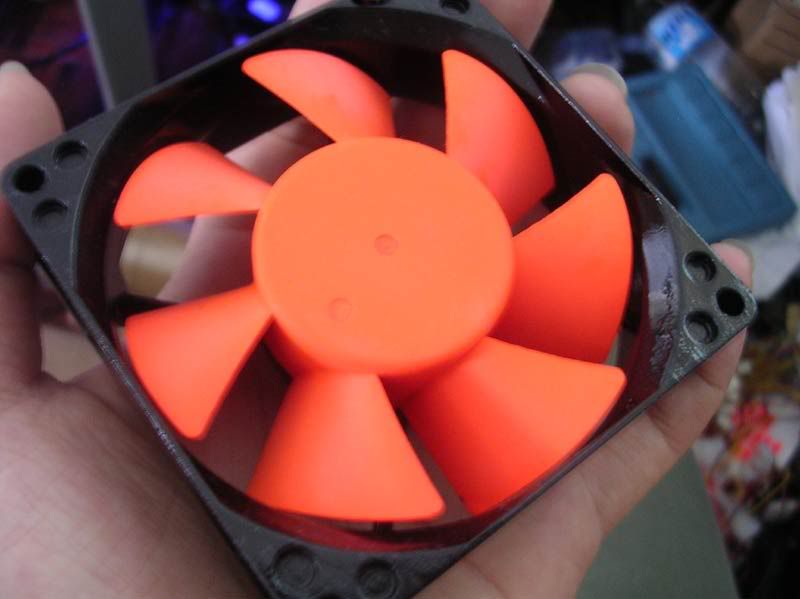 120mm ICUTE 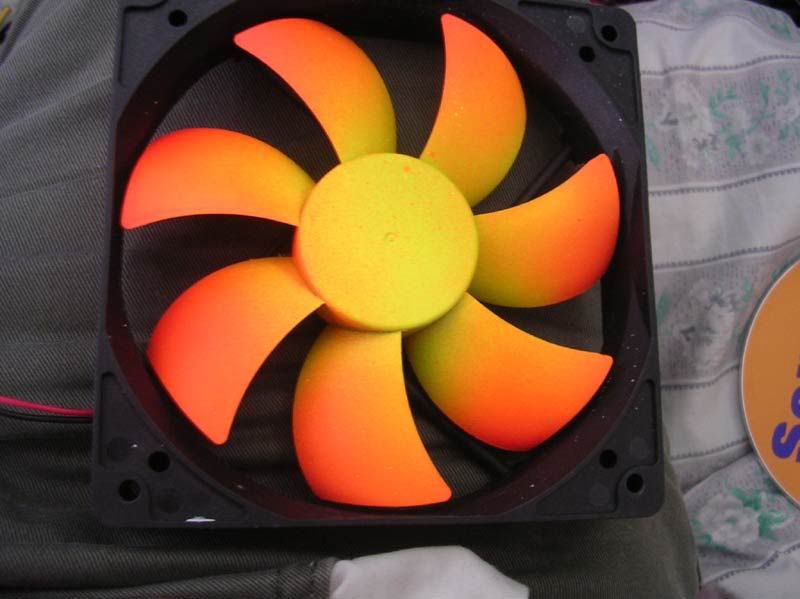 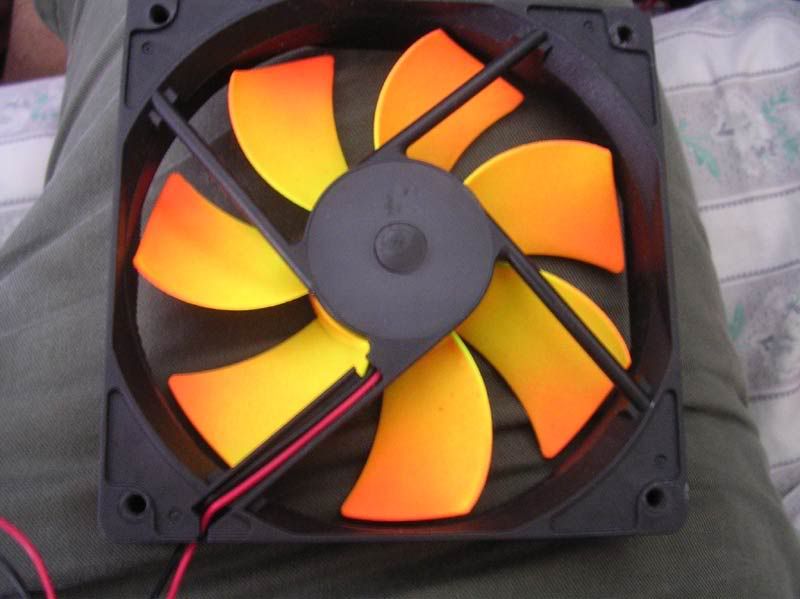 |
|
|
Dec 1 2005, 02:27 AM
|
|
Senior Member
4,561 posts Joined: Jan 2003 From: Penangites |
|
|
|
Dec 1 2005, 02:32 AM
|
|
Senior Member
4,561 posts Joined: Jan 2003 From: Penangites |
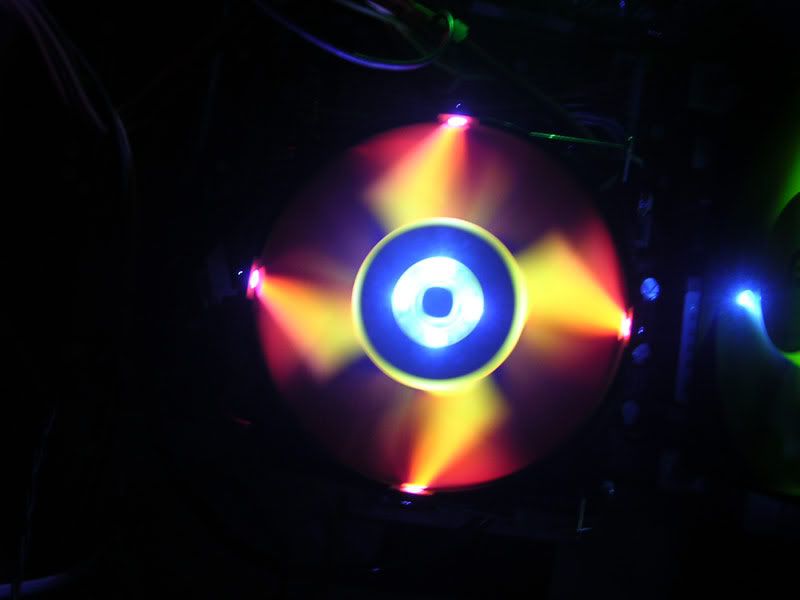
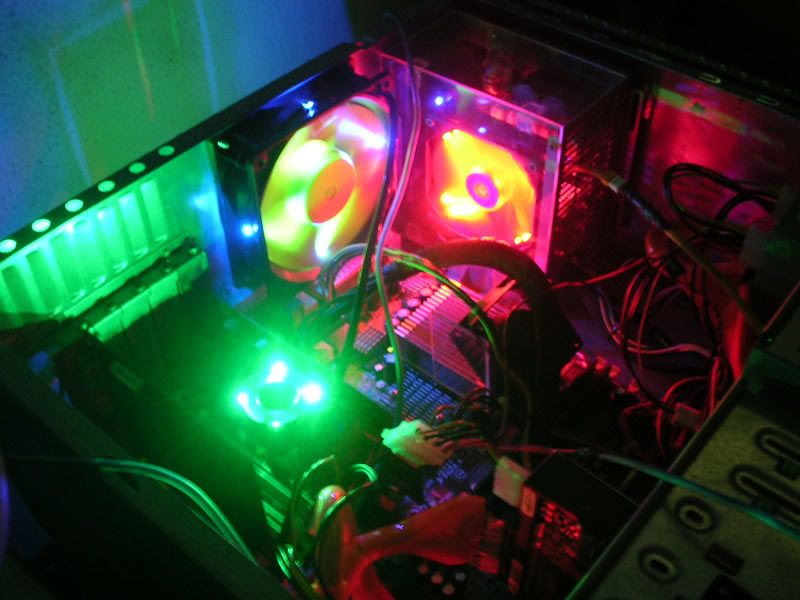
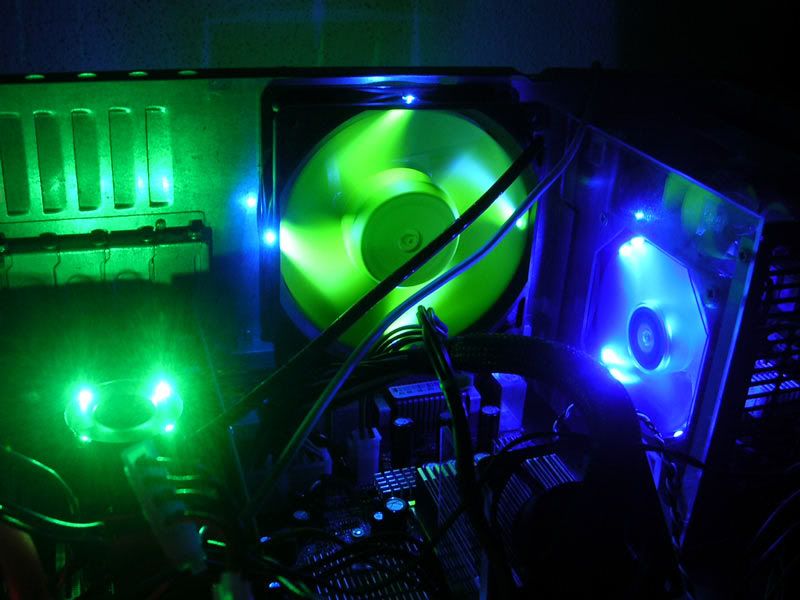
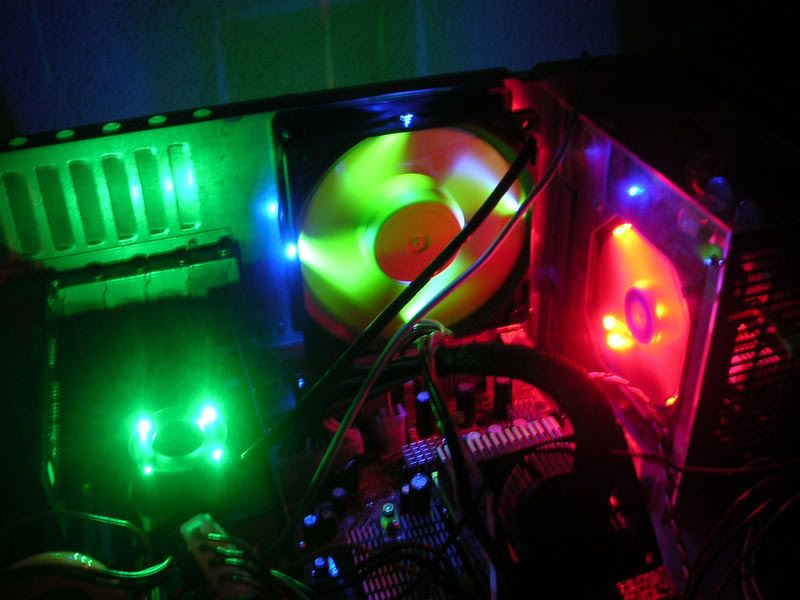
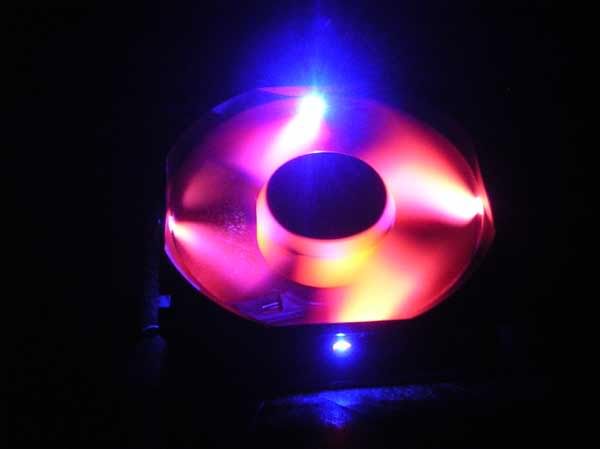
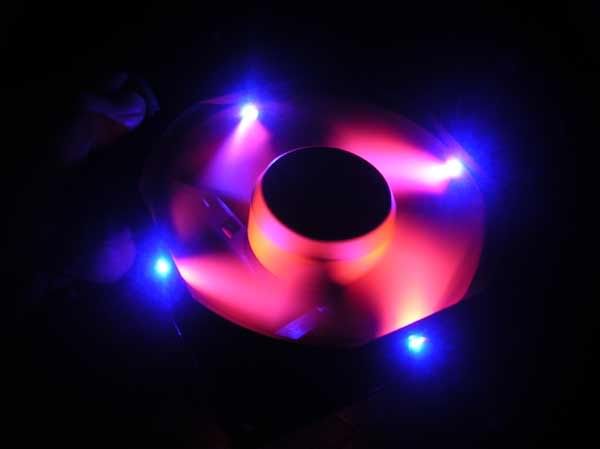
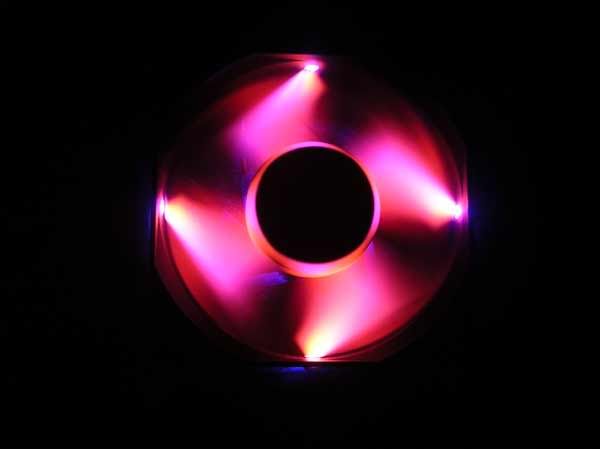
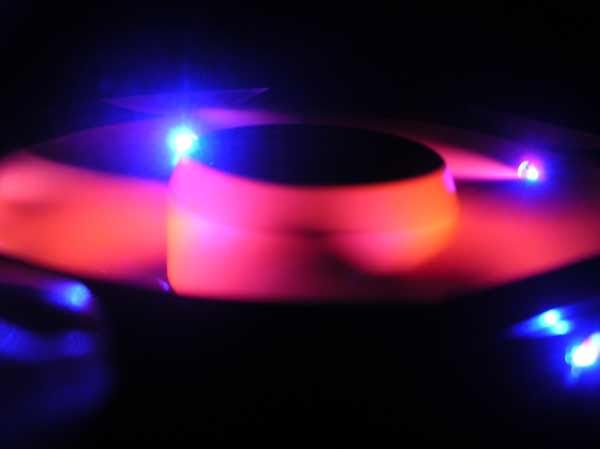
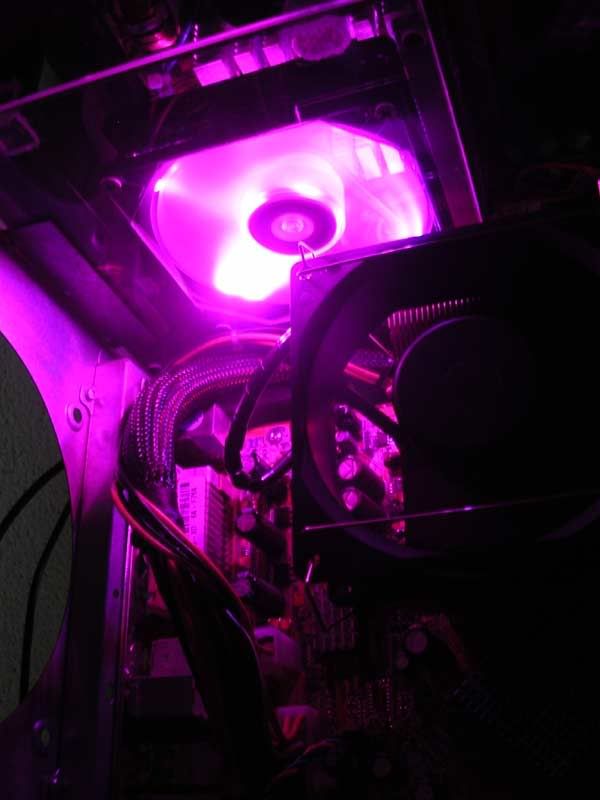
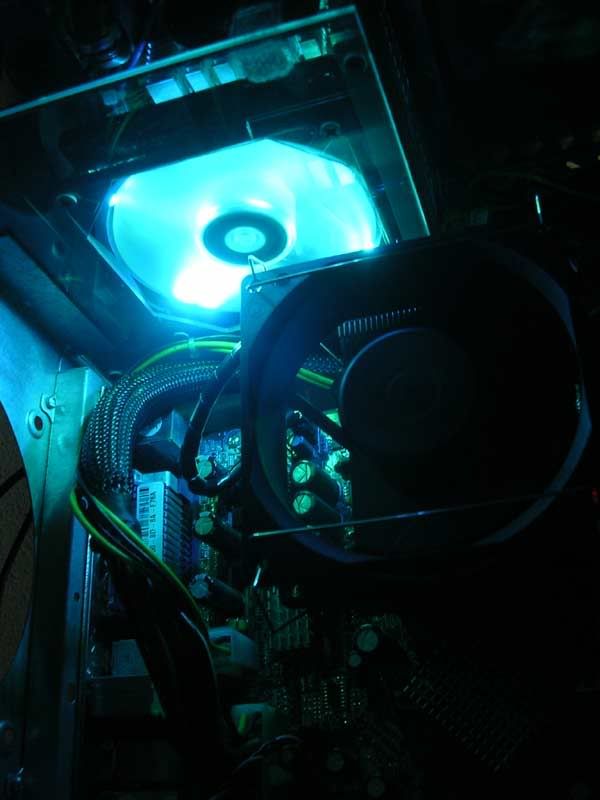
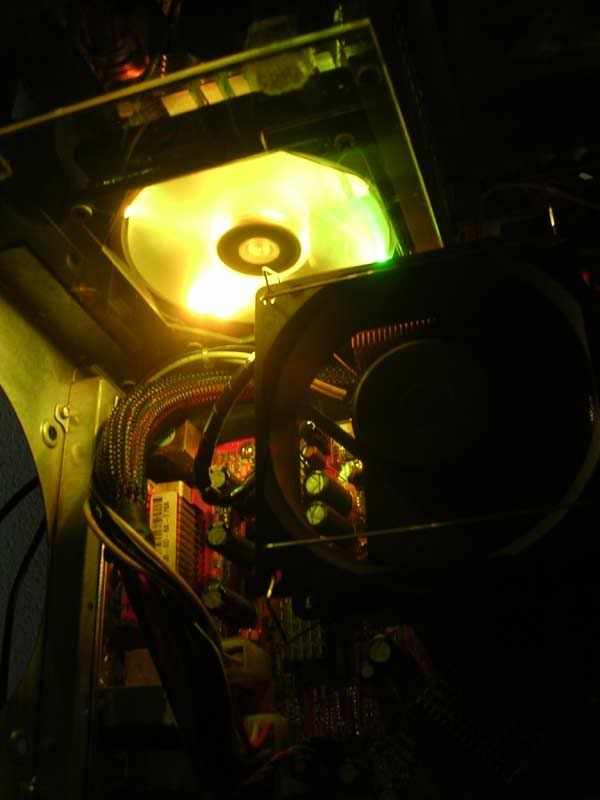
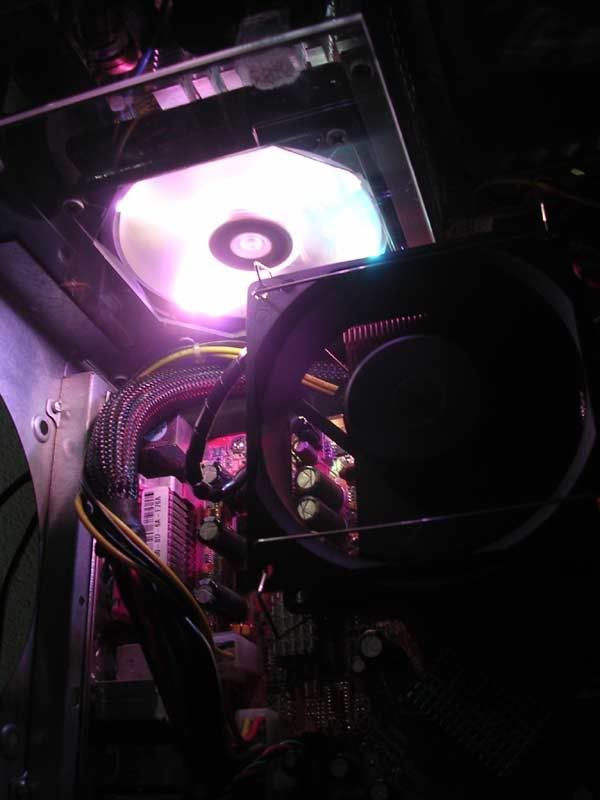
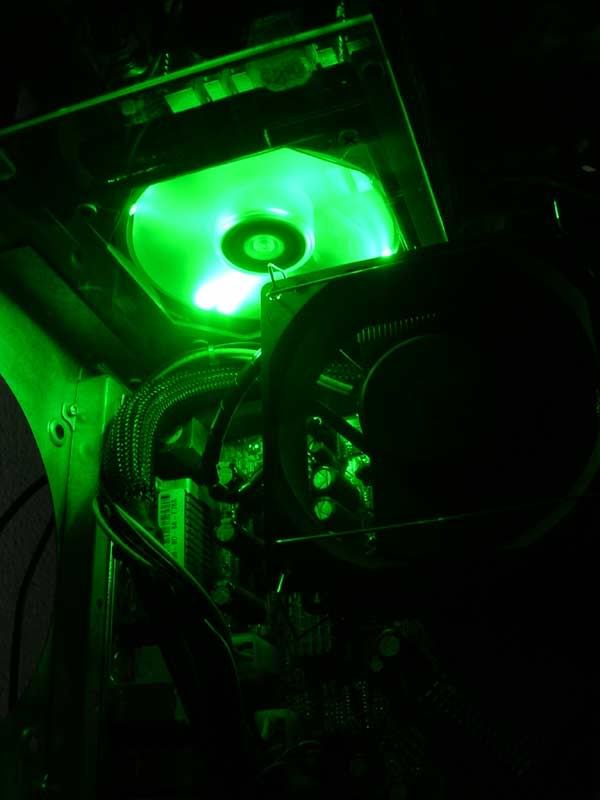
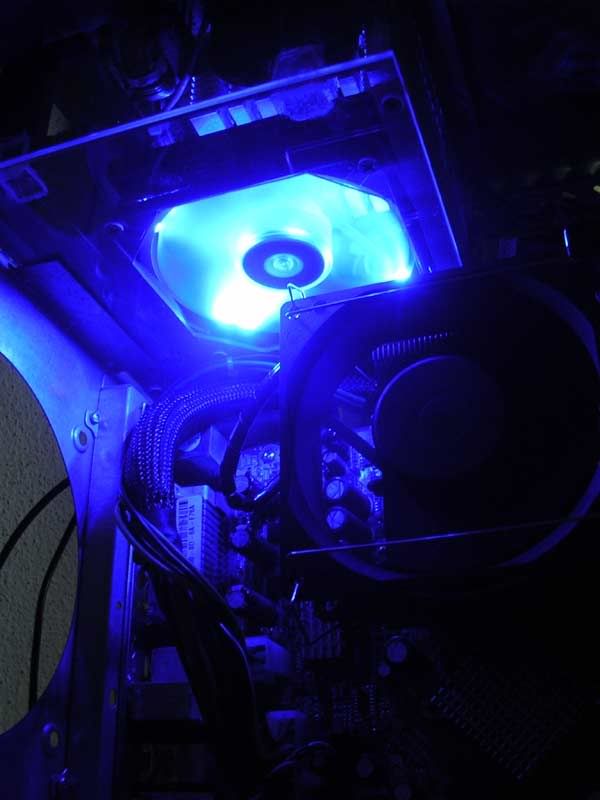
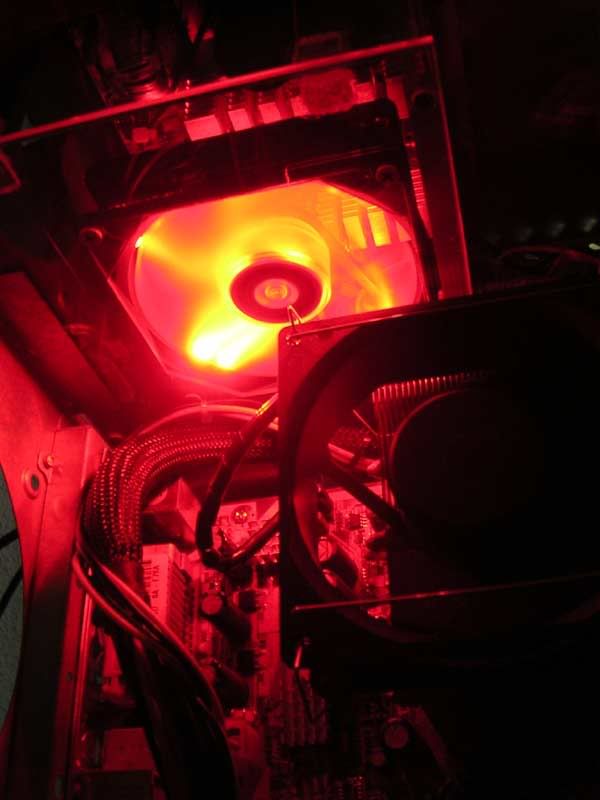
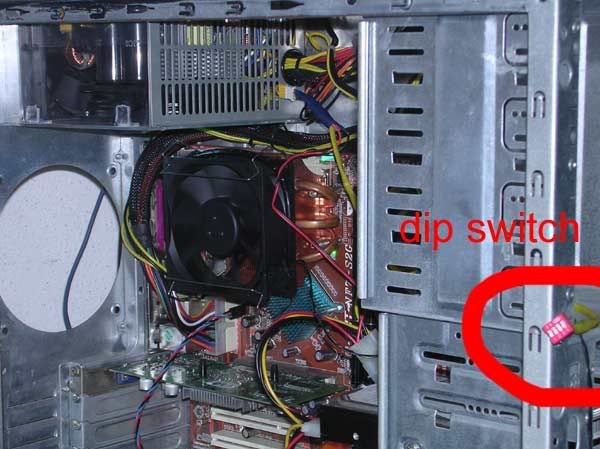
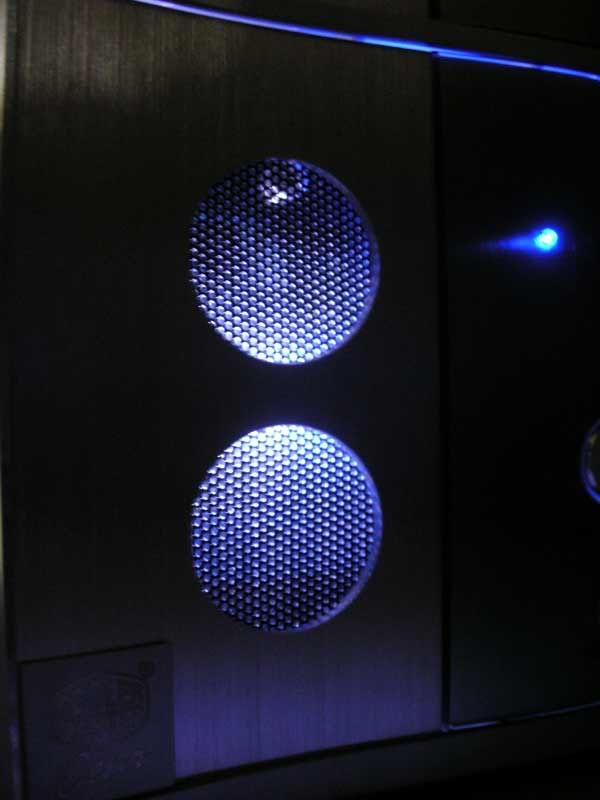
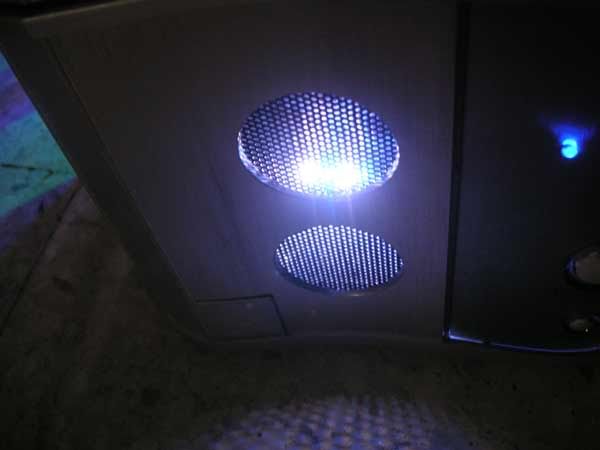
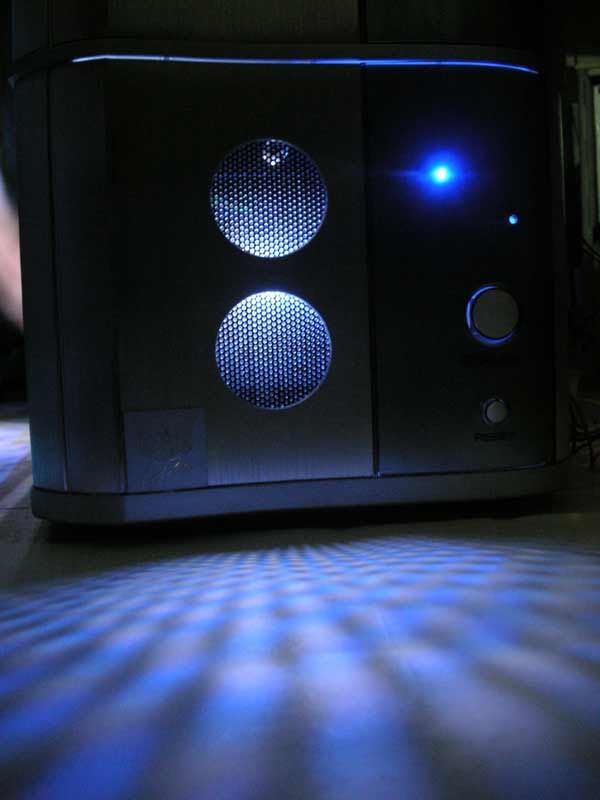
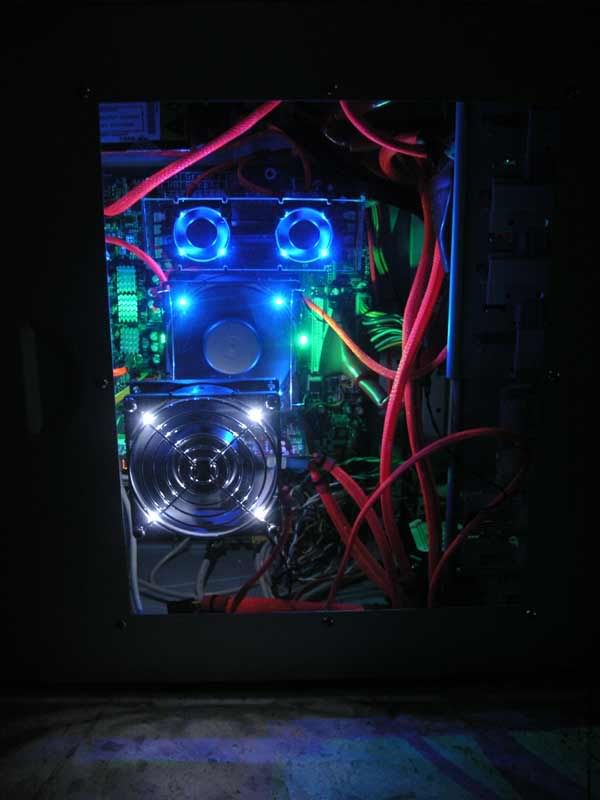
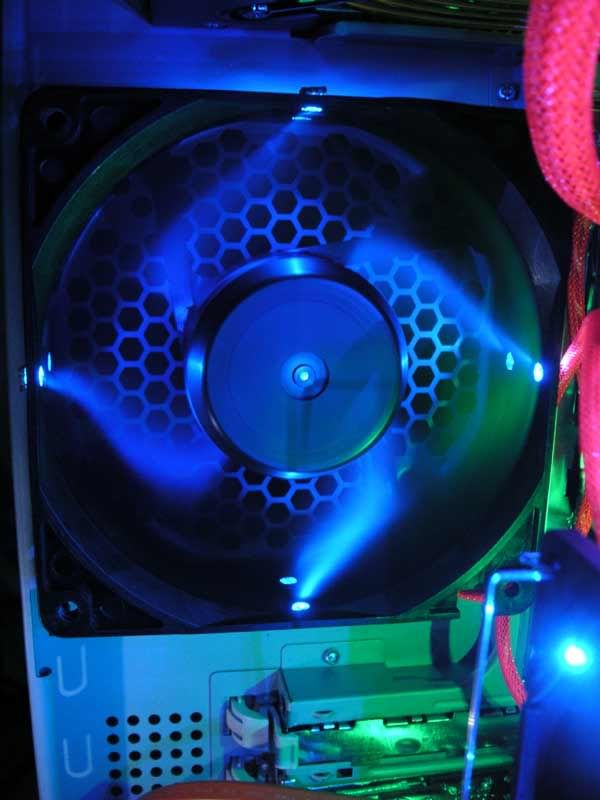
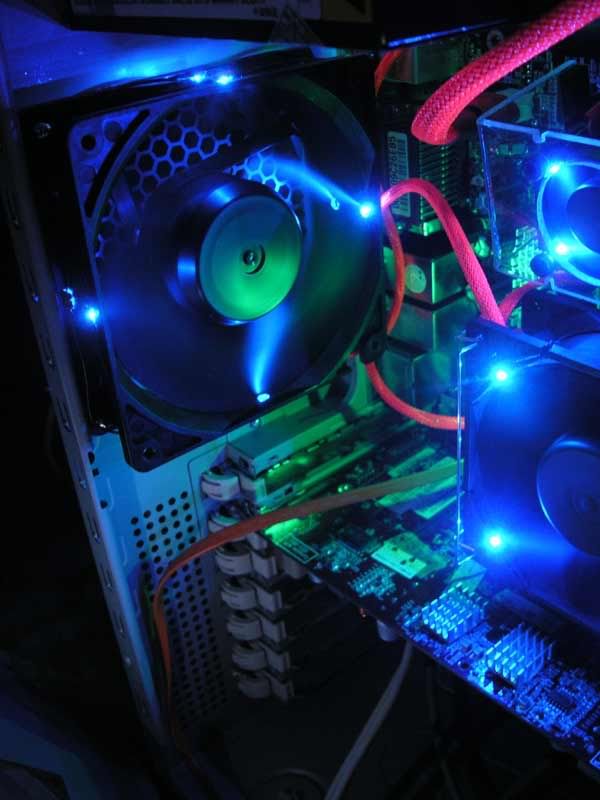
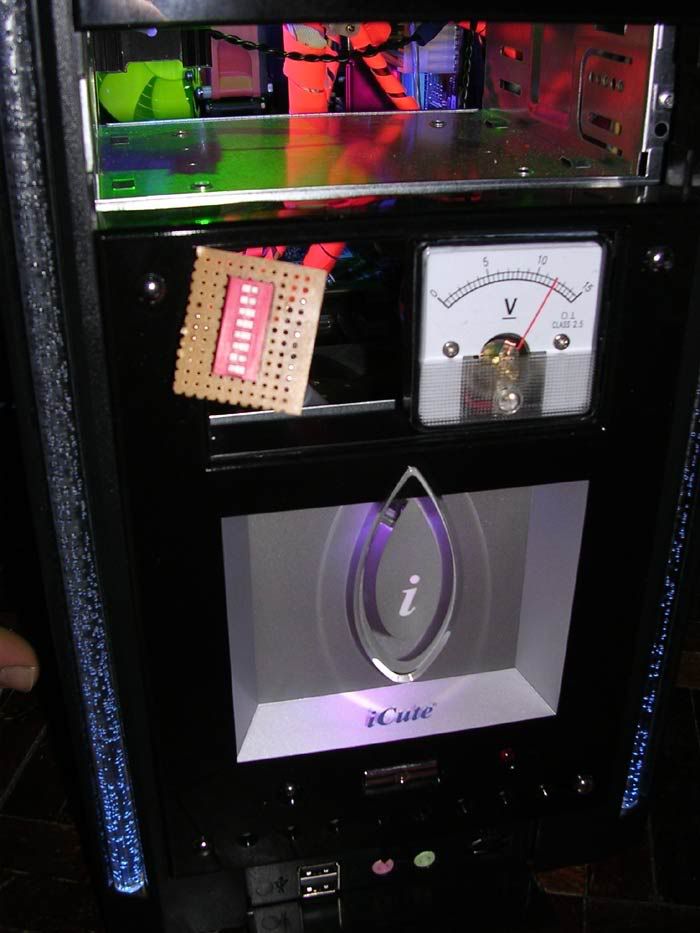
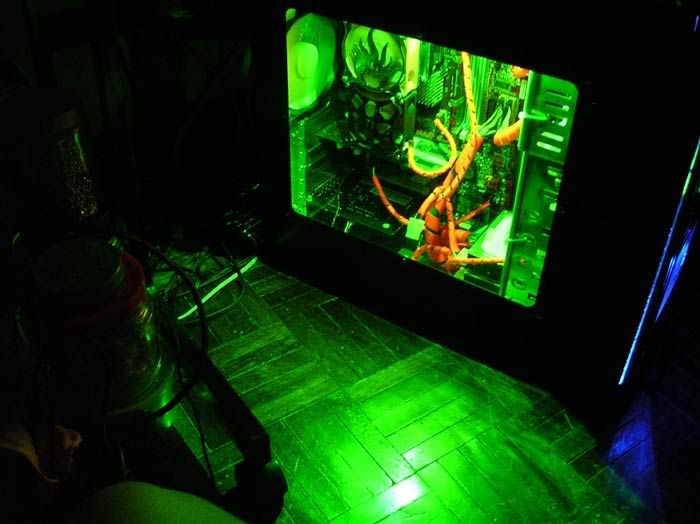
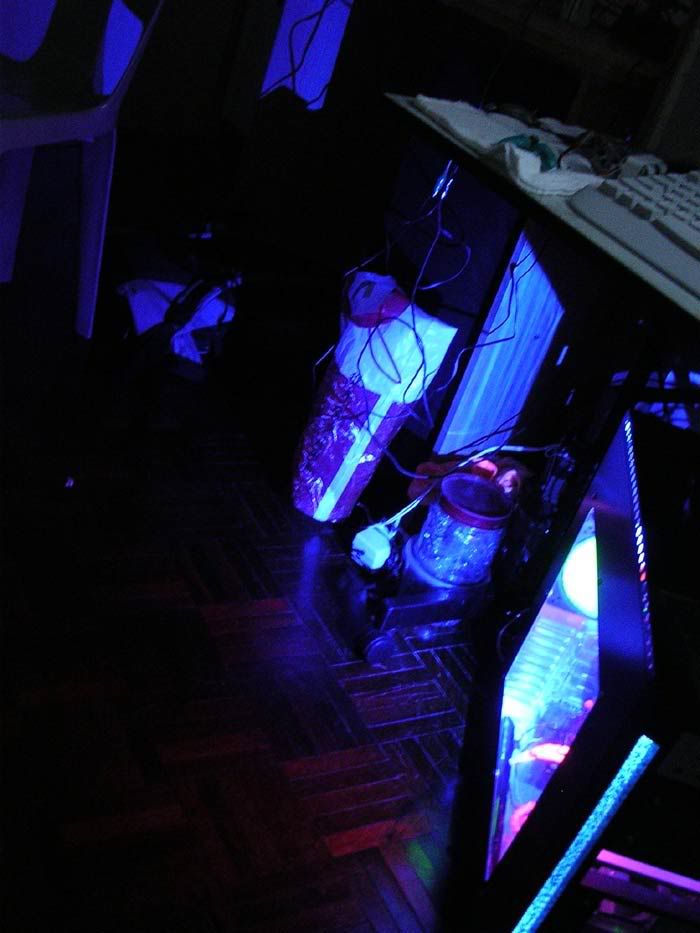
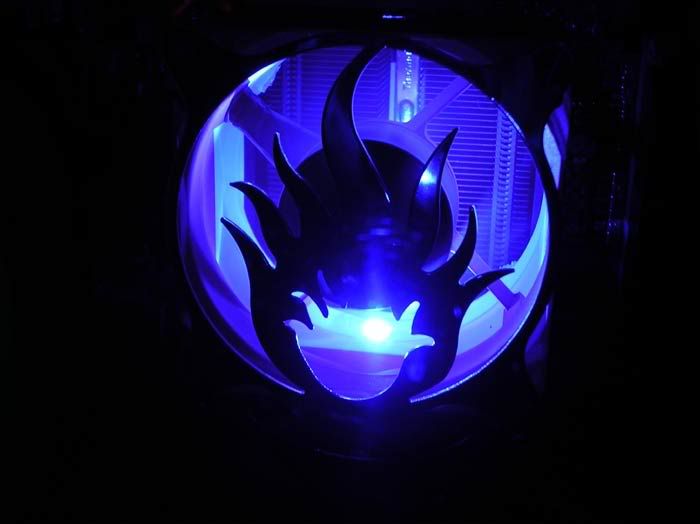
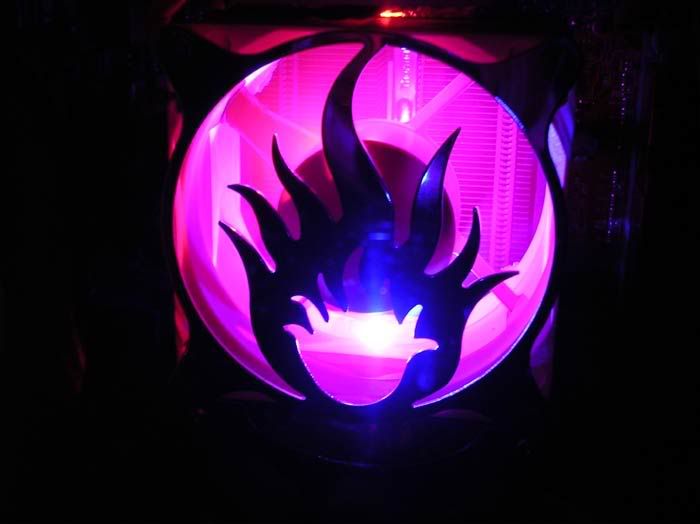
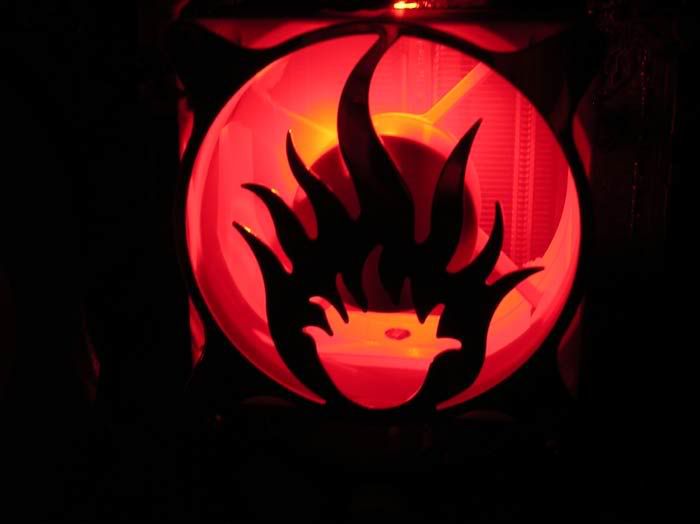
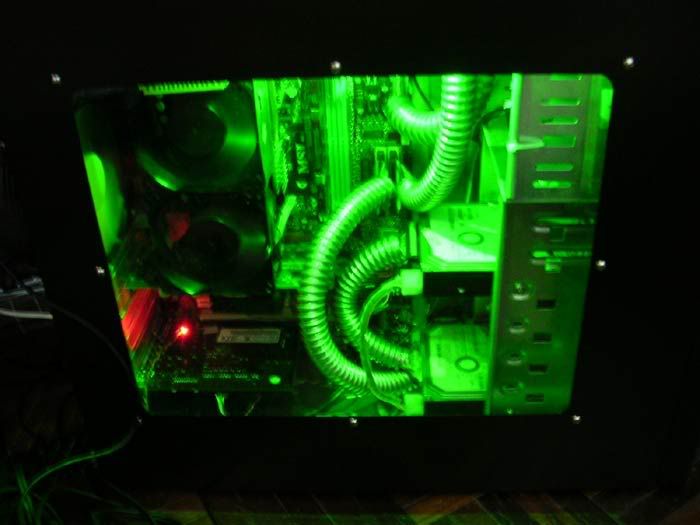
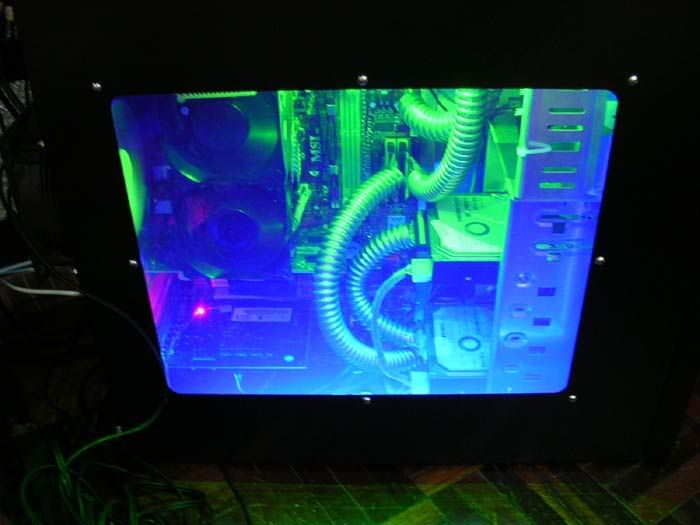
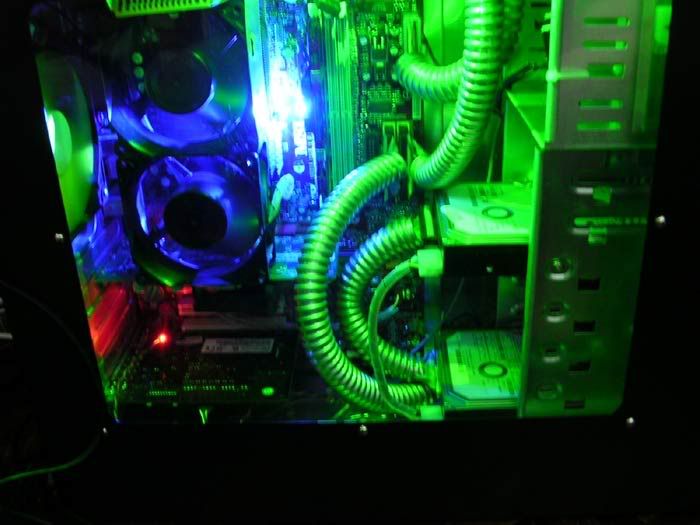
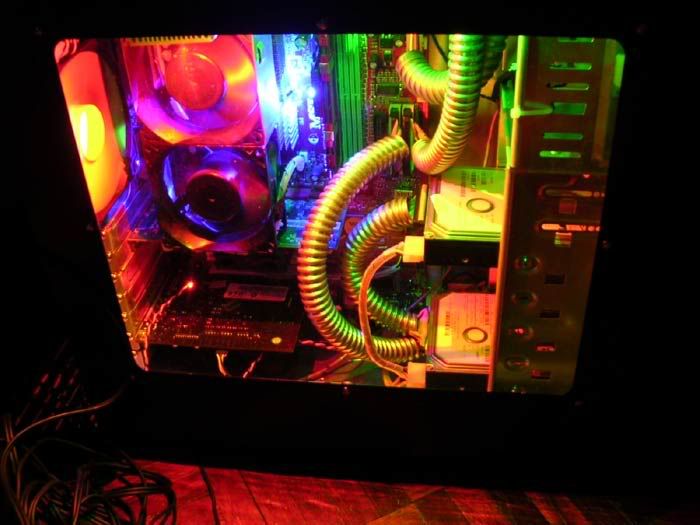
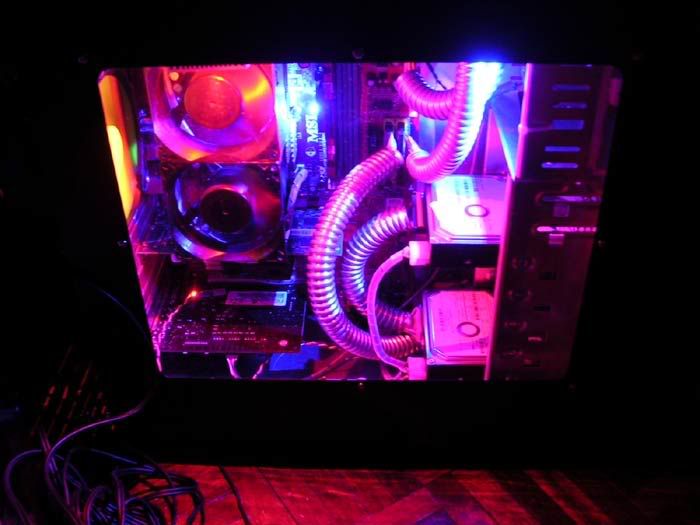
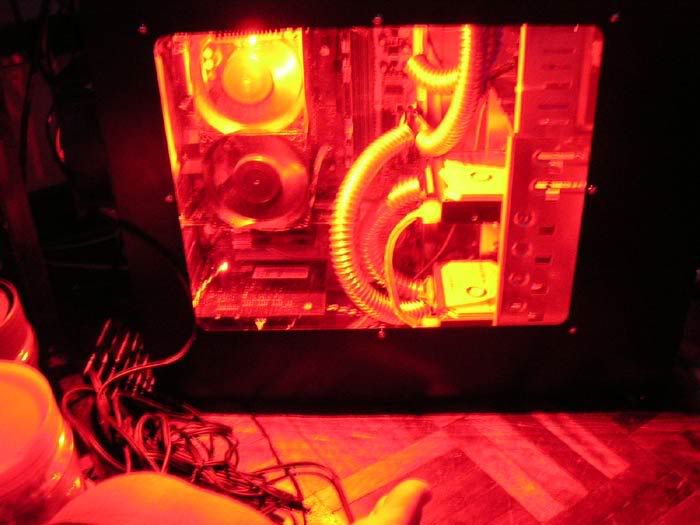
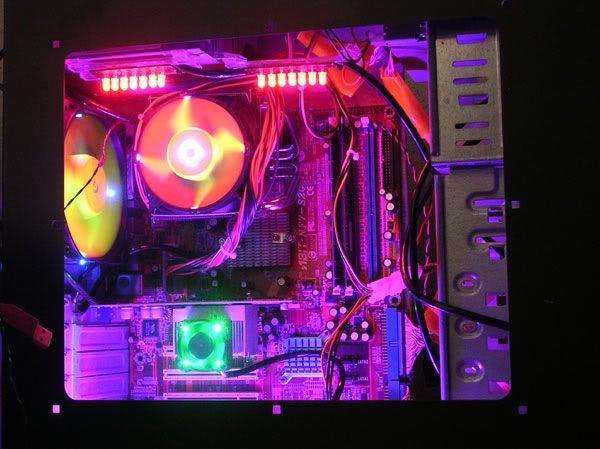
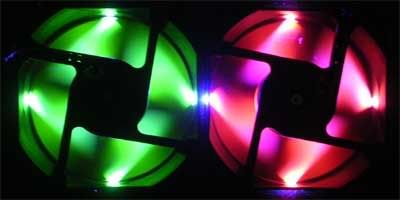
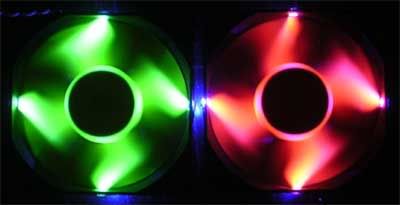
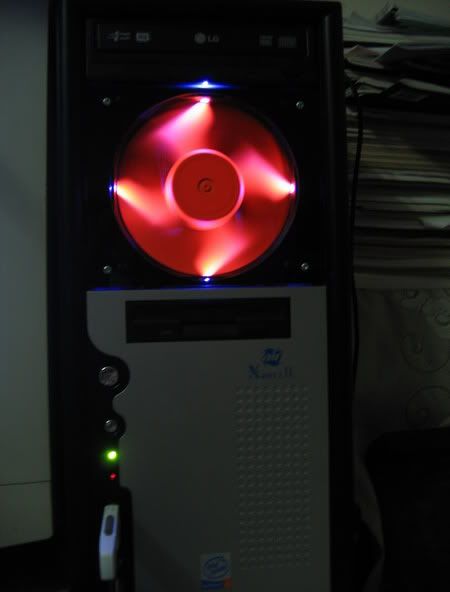
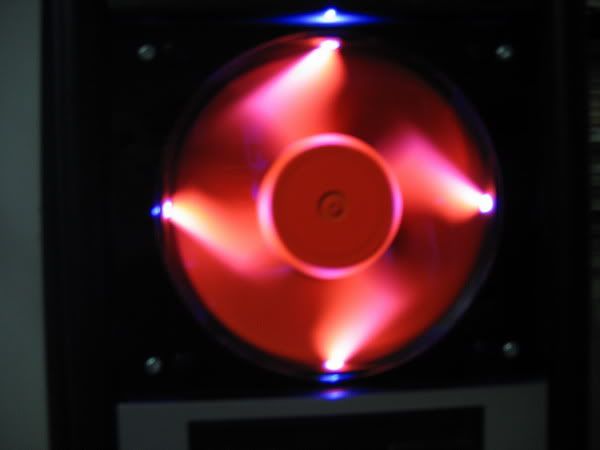
my first mod....around 2 years ago if not mistaken, mounted with Luxeon LEDs.
one green on the top panel, one blue behind the CDROM area, one red and one blue in the fan duct. all the pictures differ because this i want to show the combination of the colours 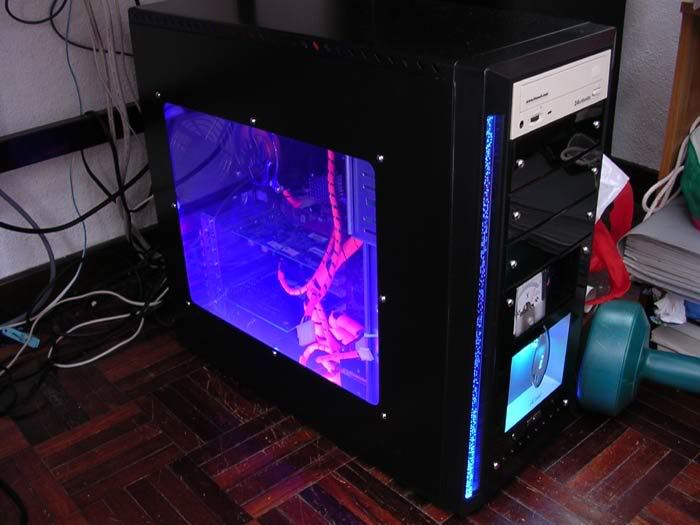  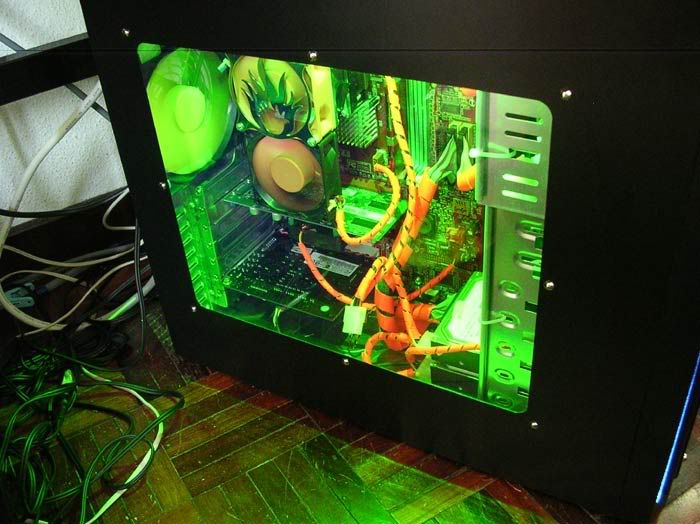 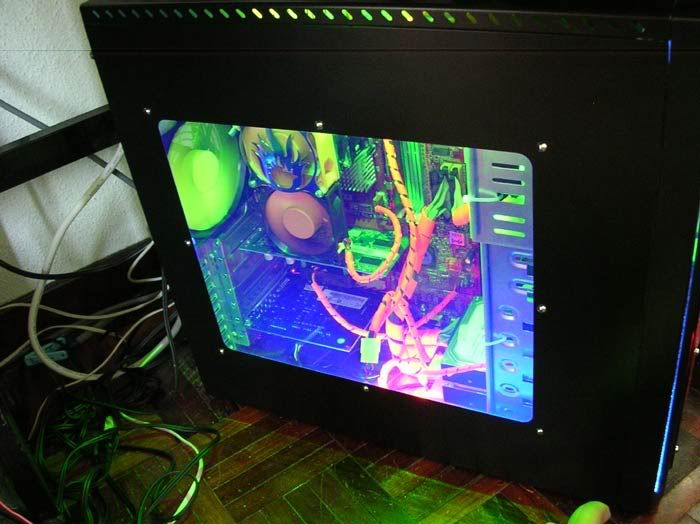 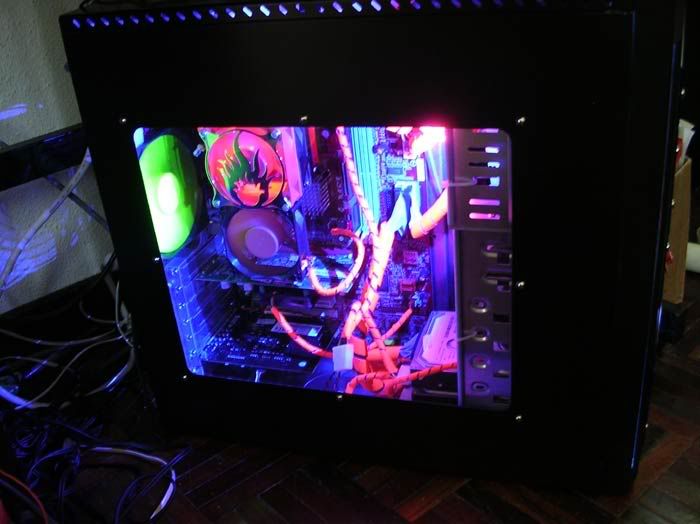  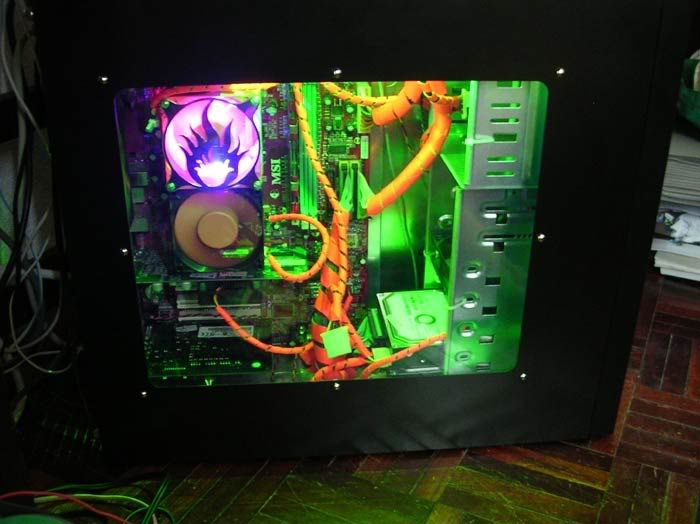 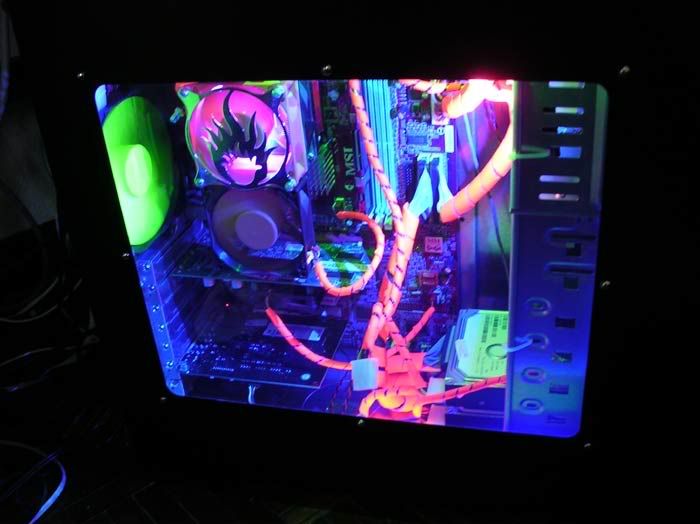 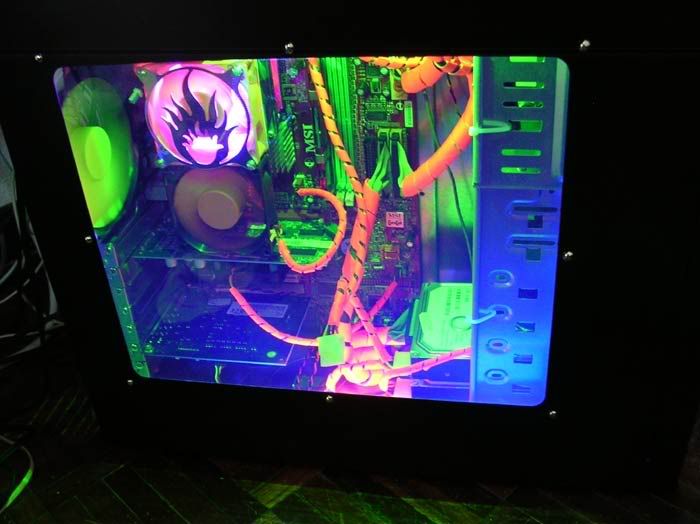  This post has been edited by AllnGap: Dec 1 2005, 02:39 AM |
|
|
Dec 1 2005, 02:45 AM
|
|
Senior Member
4,561 posts Joined: Jan 2003 From: Penangites |
          |
|
|
Dec 1 2005, 02:48 AM
|
|
Senior Member
4,561 posts Joined: Jan 2003 From: Penangites |
    This post has been edited by AllnGap: Dec 1 2005, 02:51 AM |
|
|
Dec 1 2005, 03:08 AM
|
|
Senior Member
4,561 posts Joined: Jan 2003 From: Penangites |
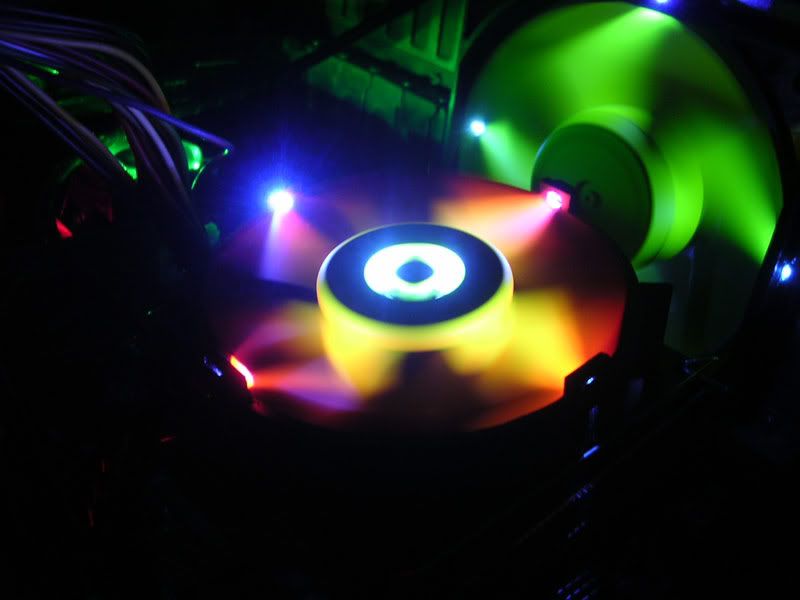
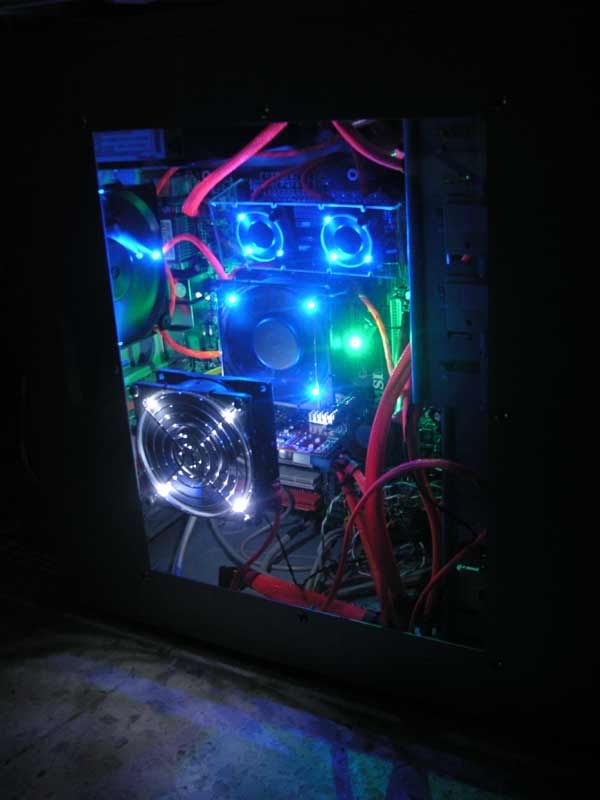
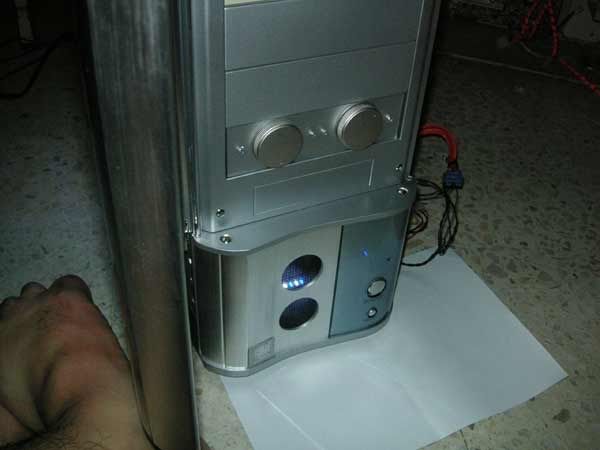
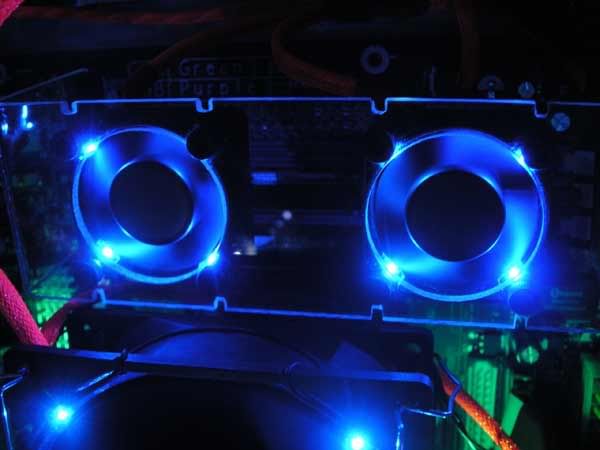
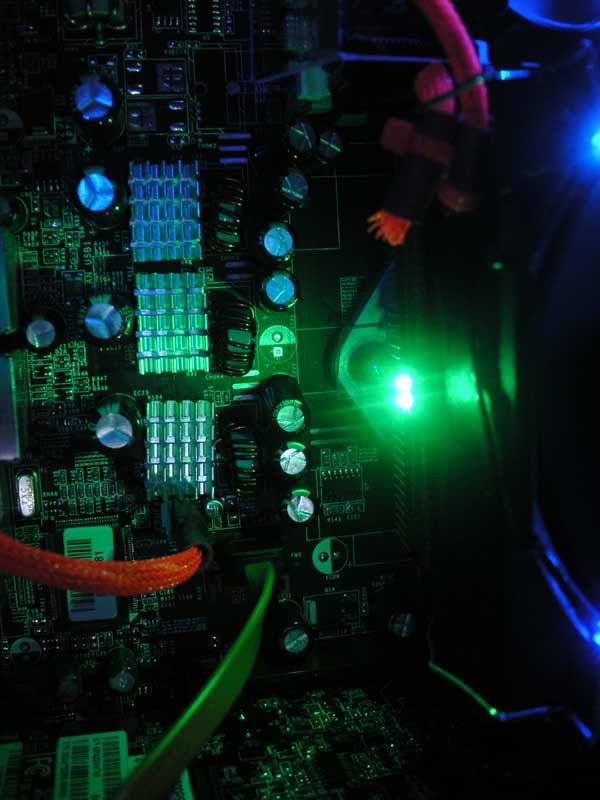
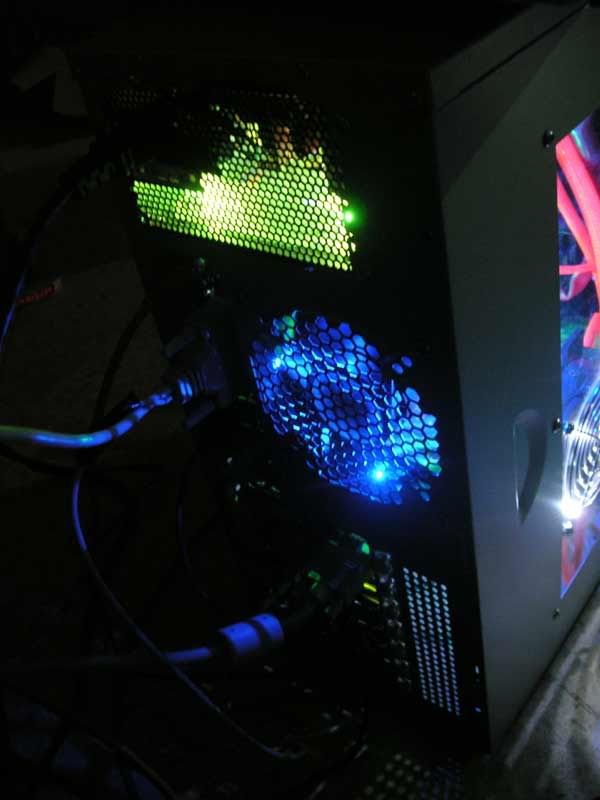
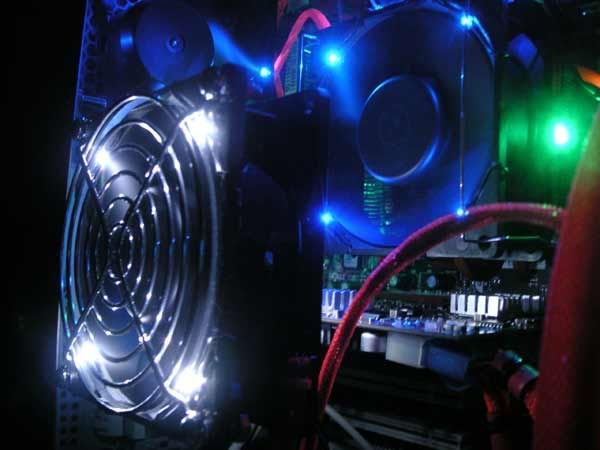
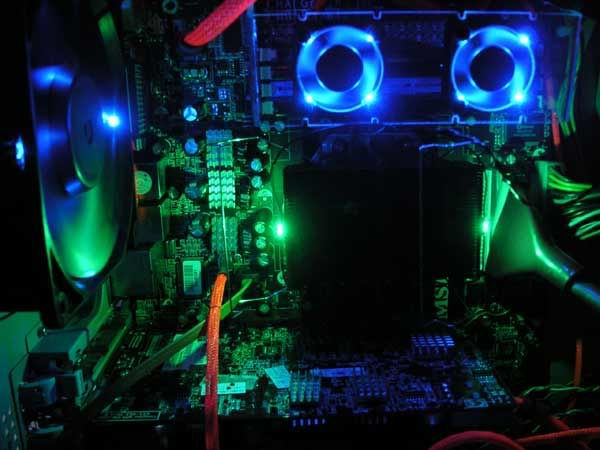
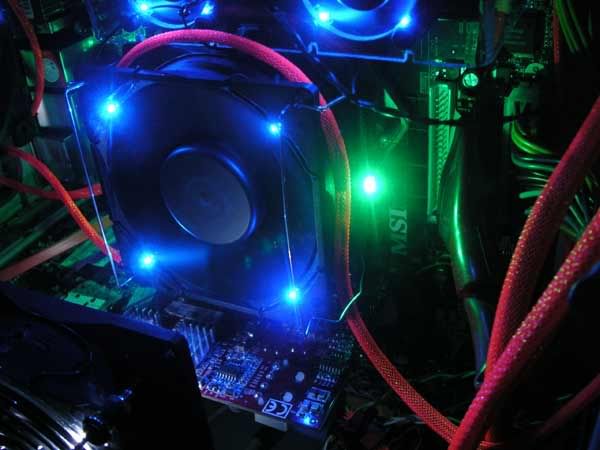
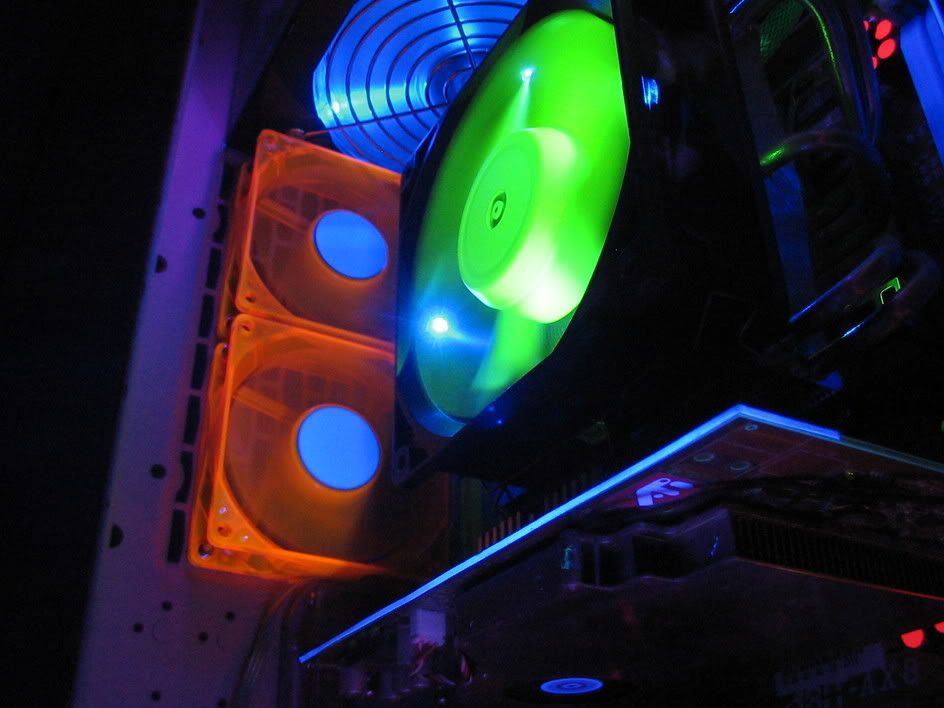
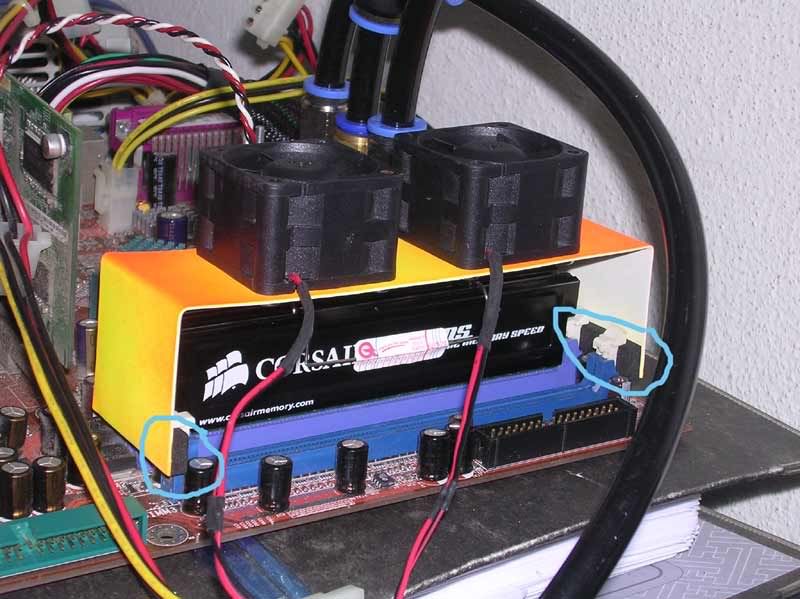
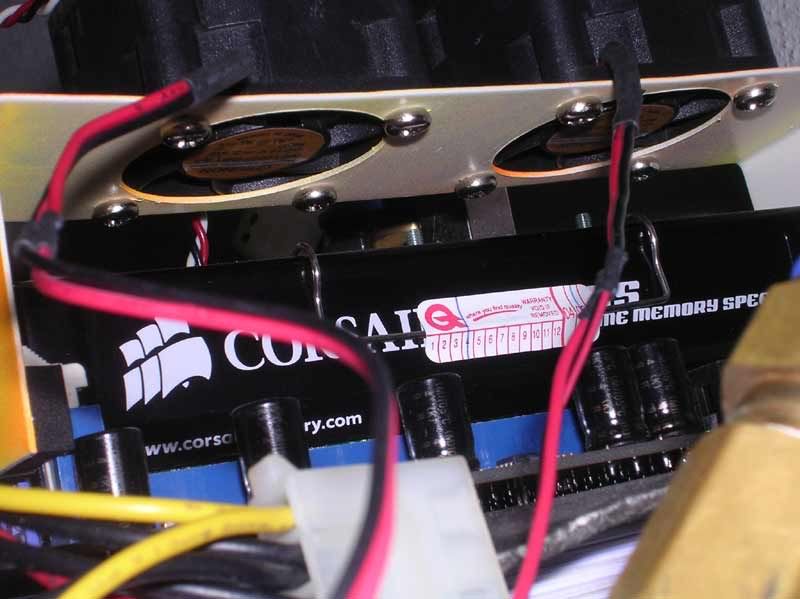
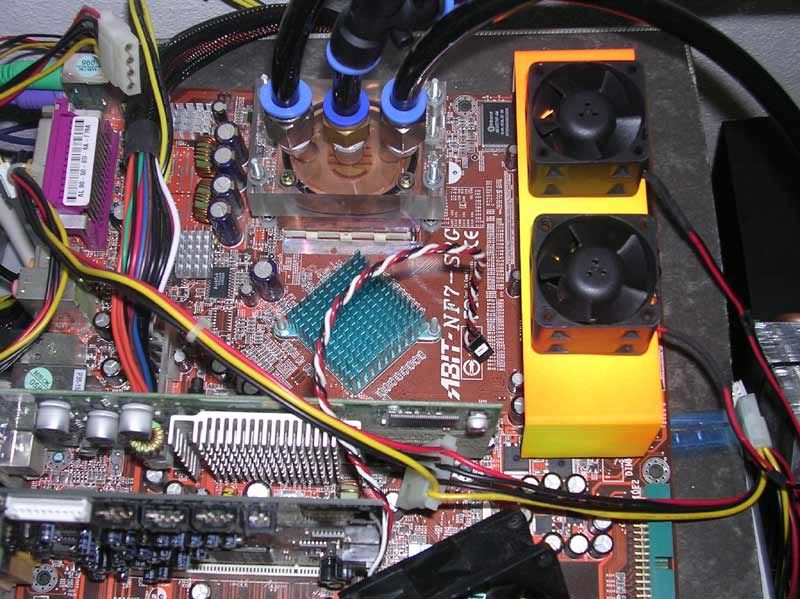
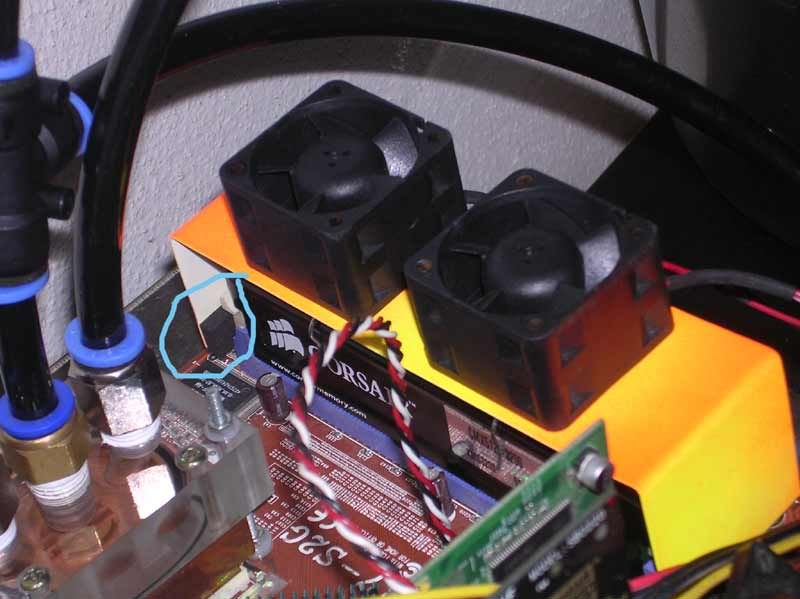
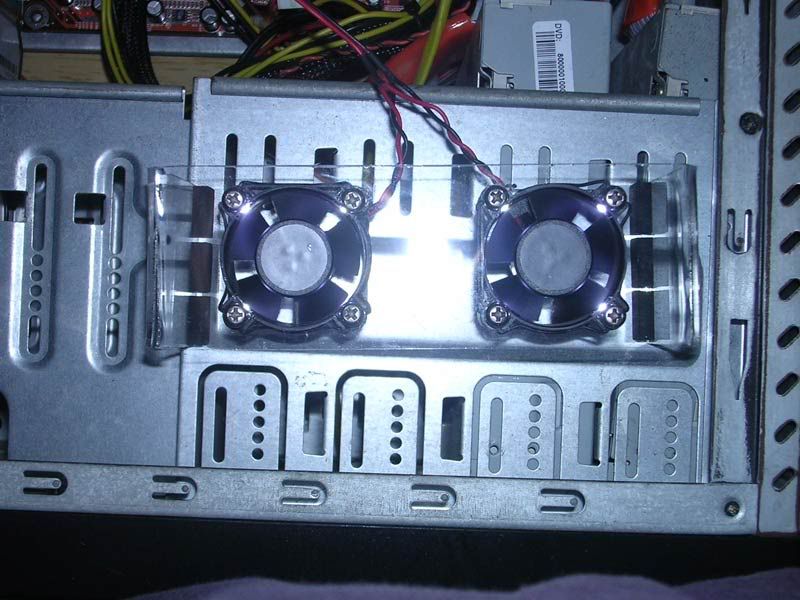
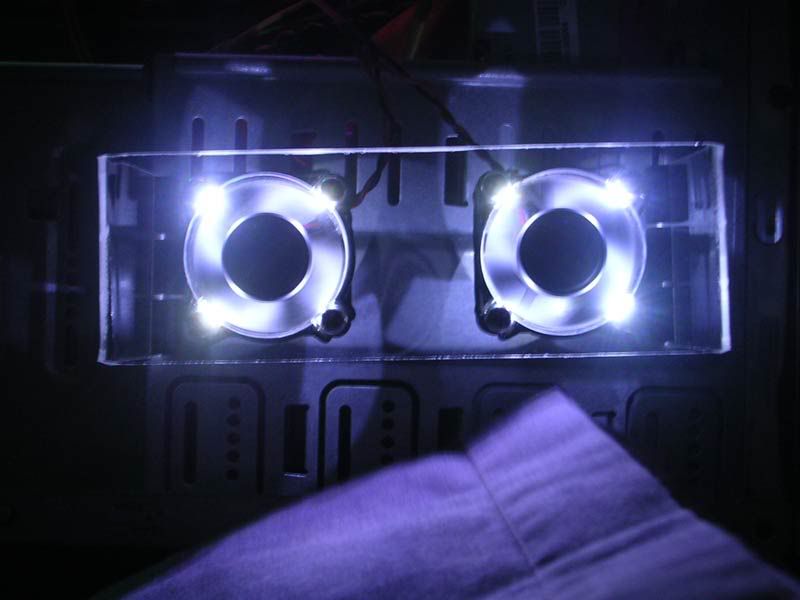
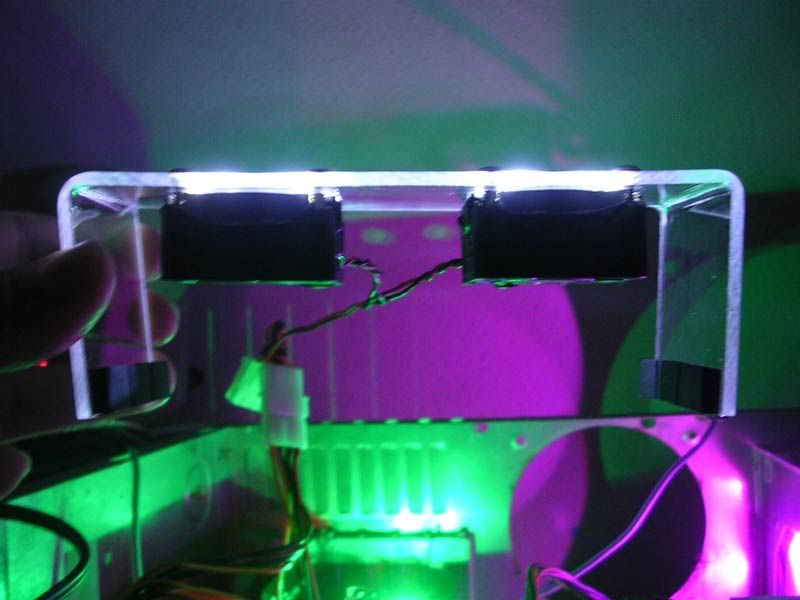
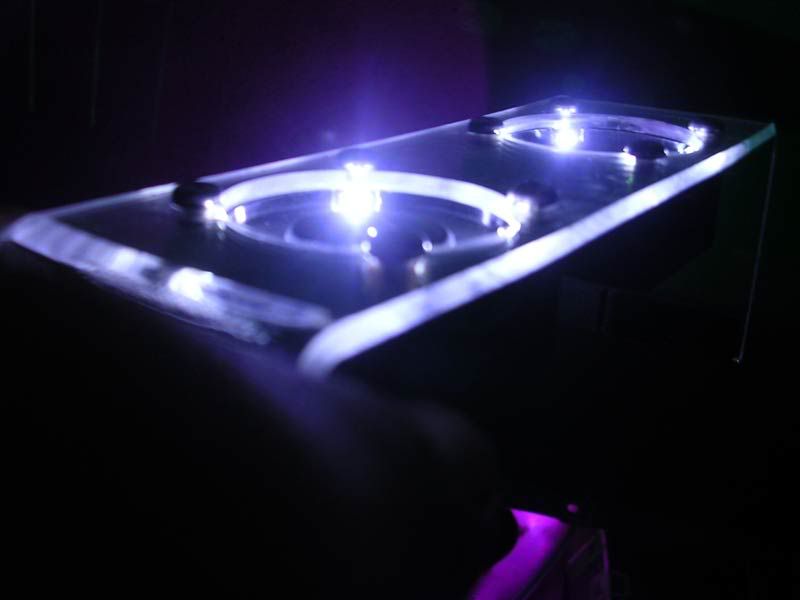
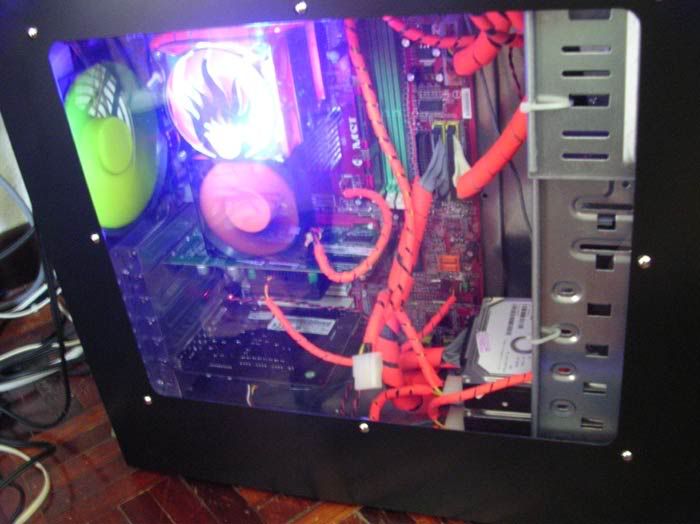
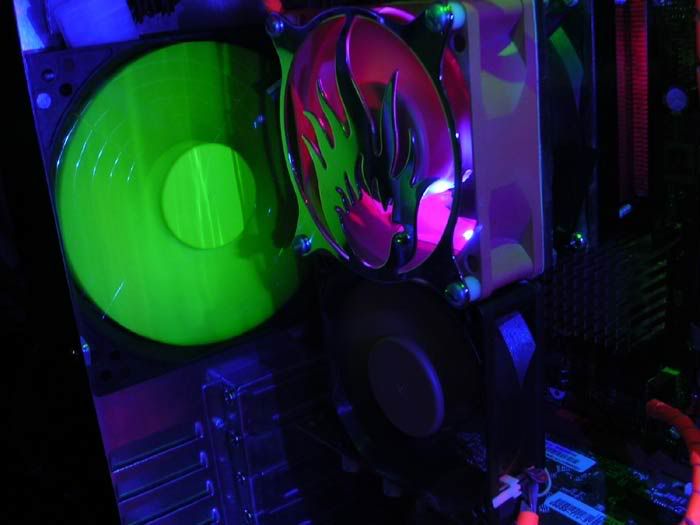
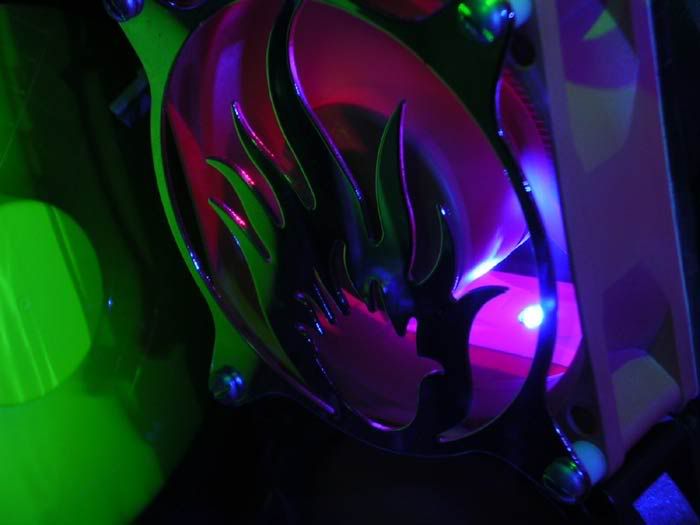
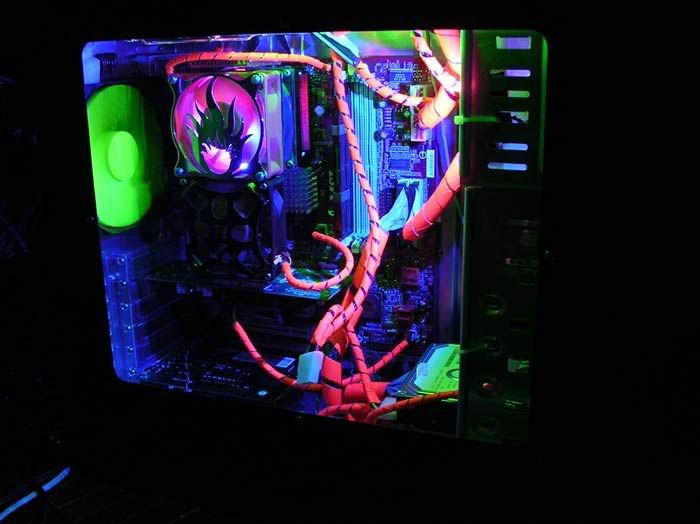
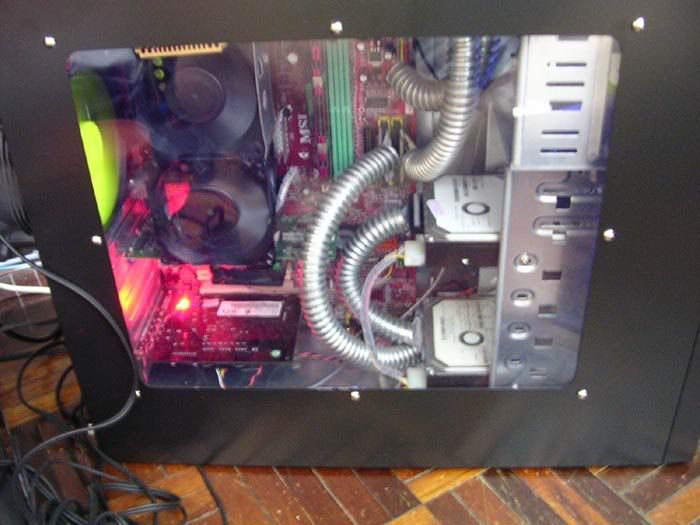
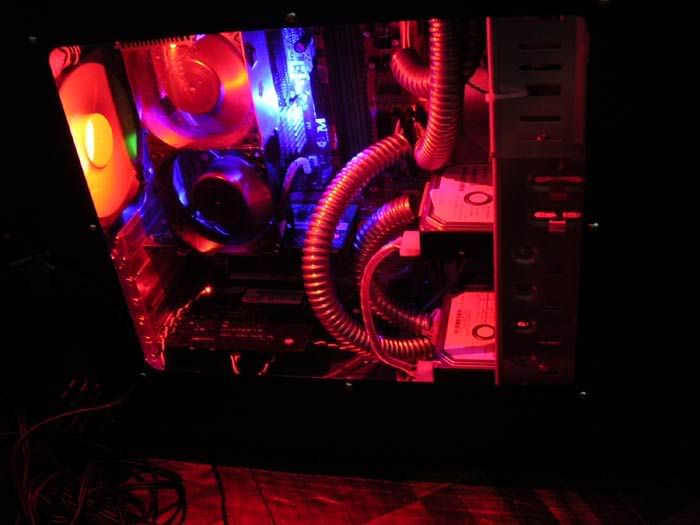
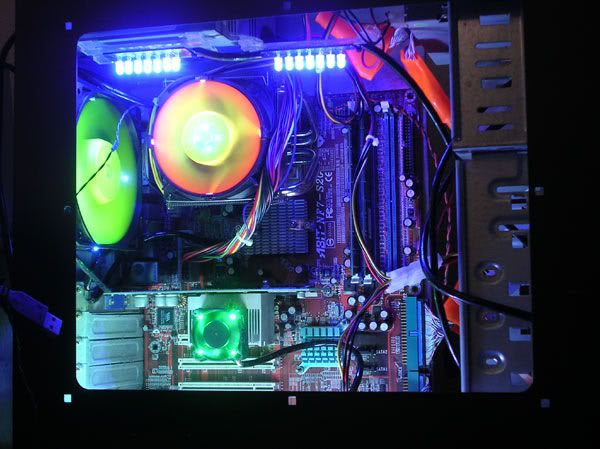
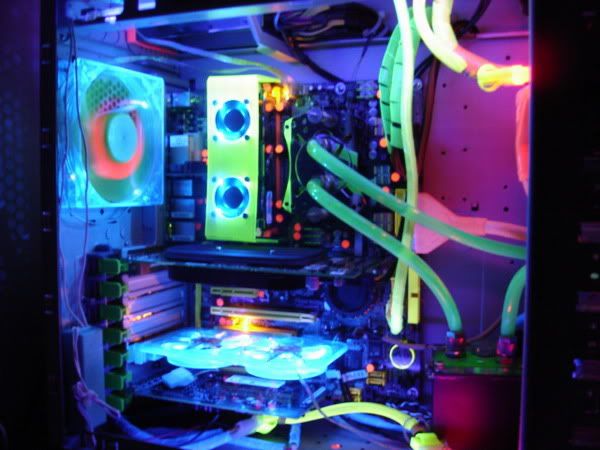
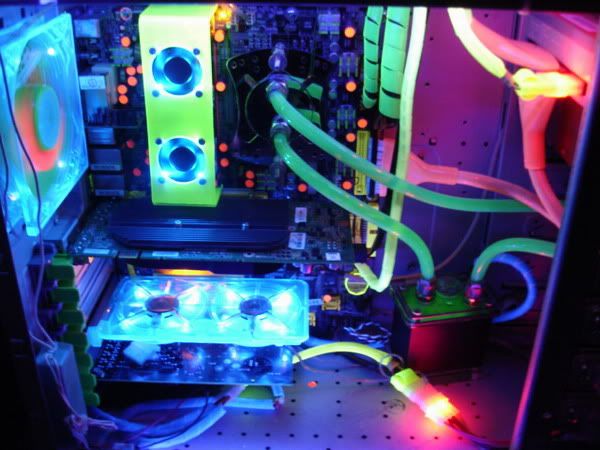
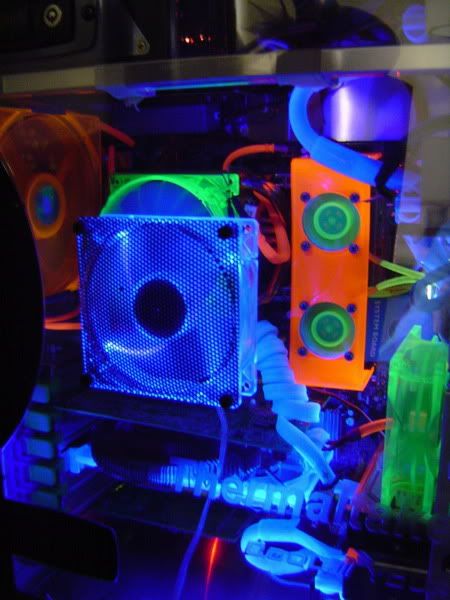
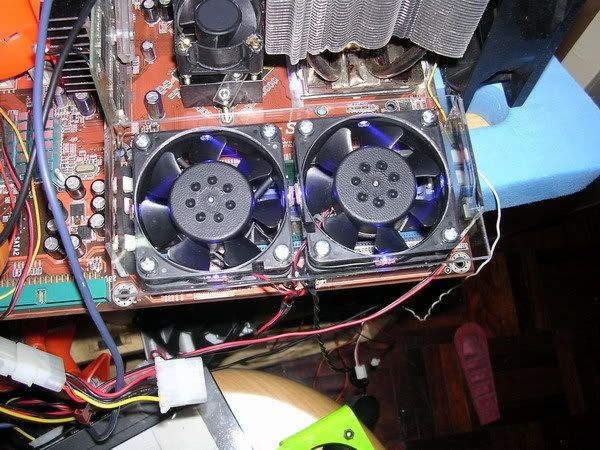
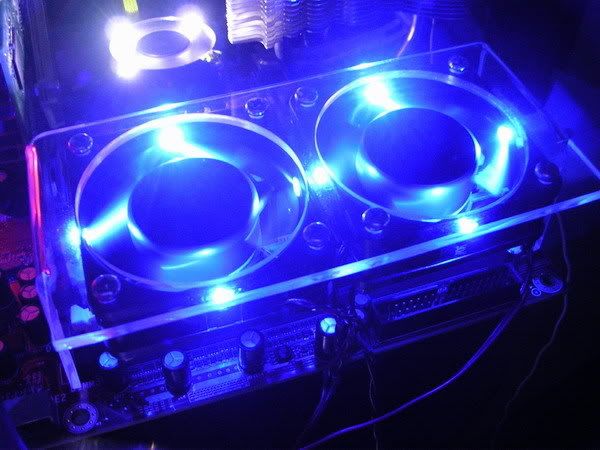
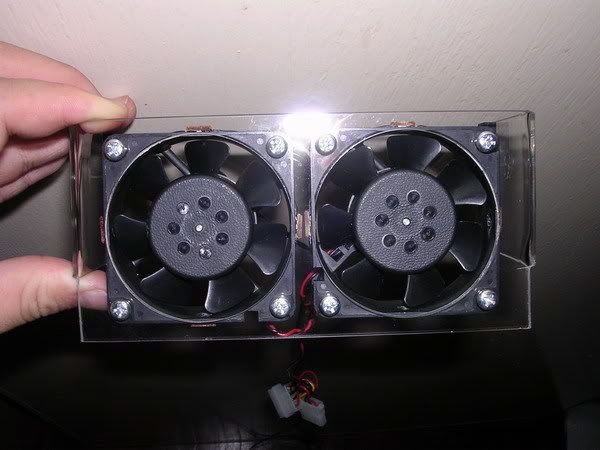
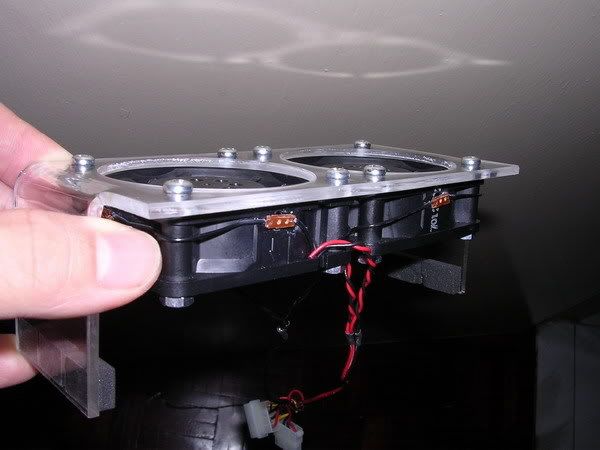
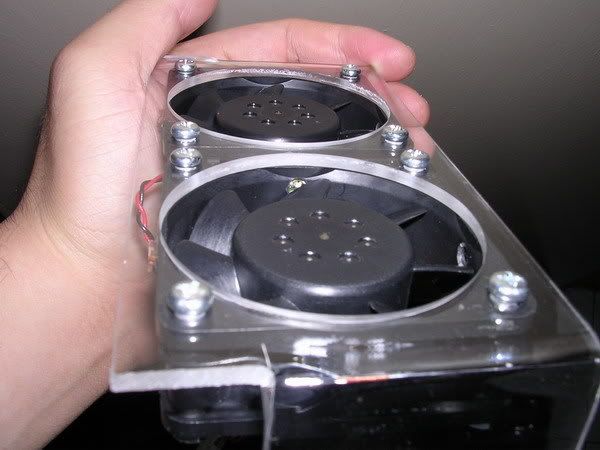
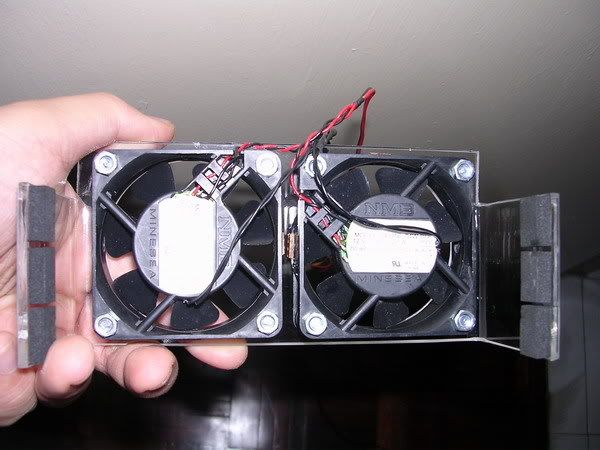
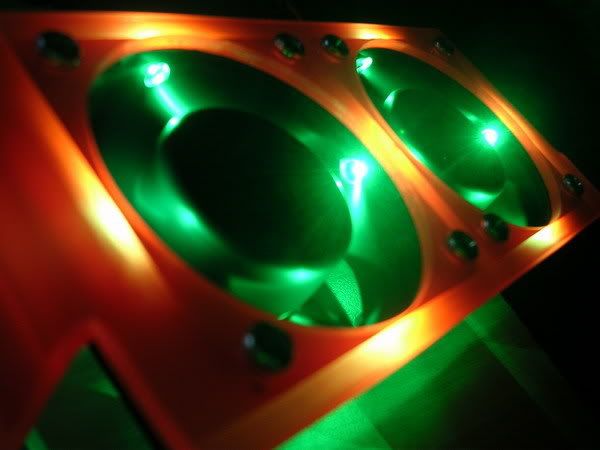
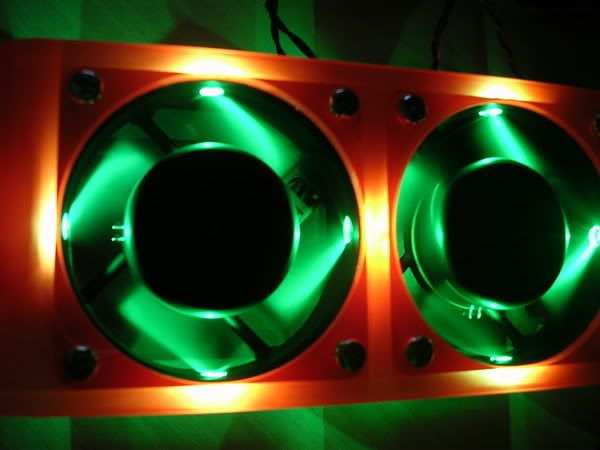
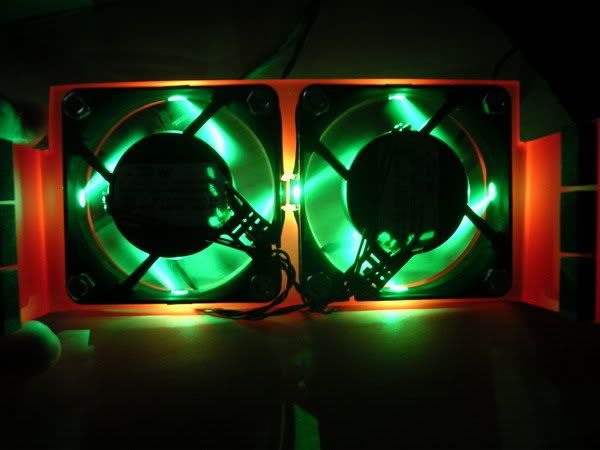
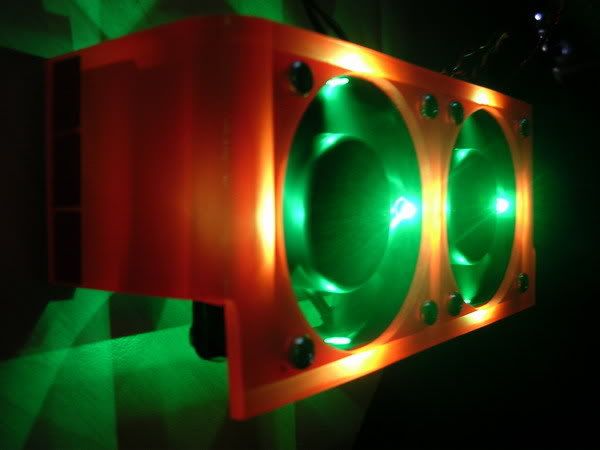
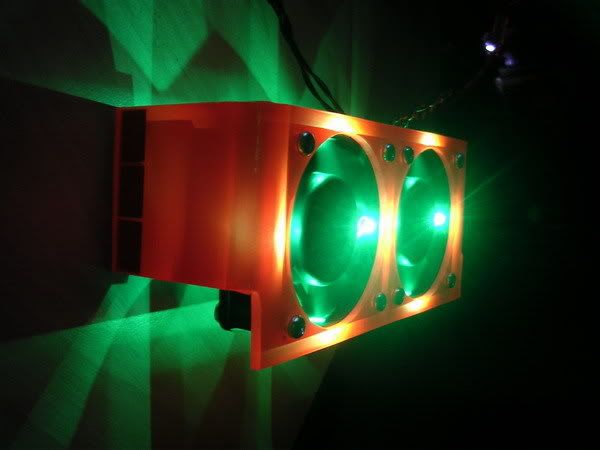
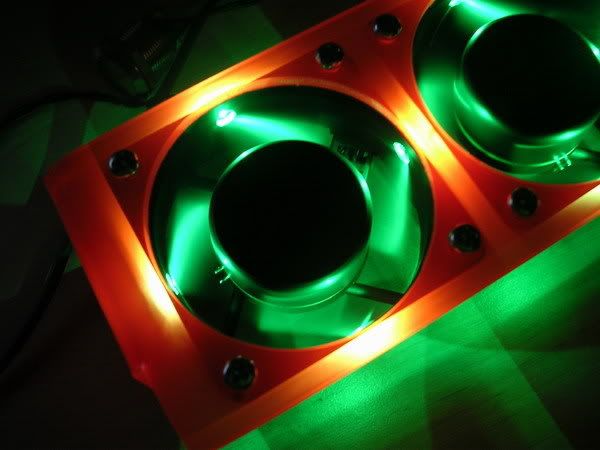
changed the theme a lil bit, got influenced by Sentinels when Matrix was still hot in the market
          |
|
|
Dec 1 2005, 03:09 AM
|
|
Senior Member
4,561 posts Joined: Jan 2003 From: Penangites |
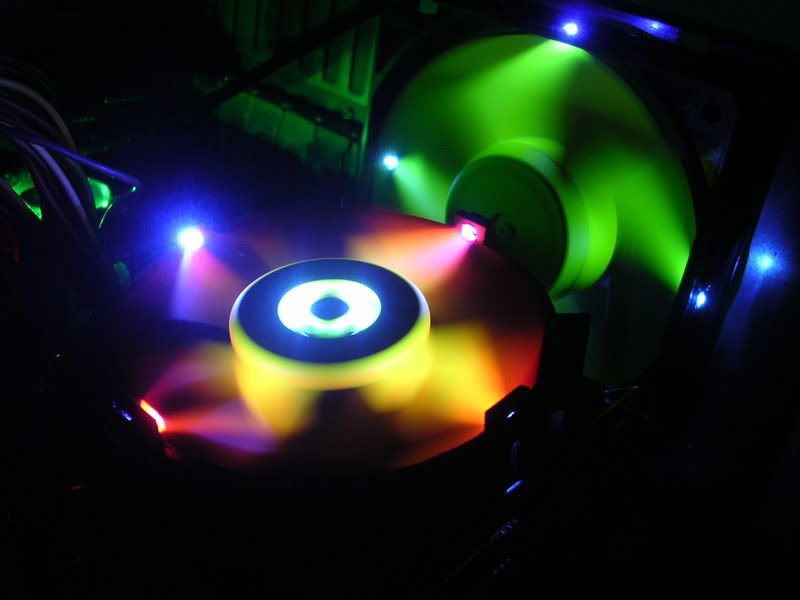
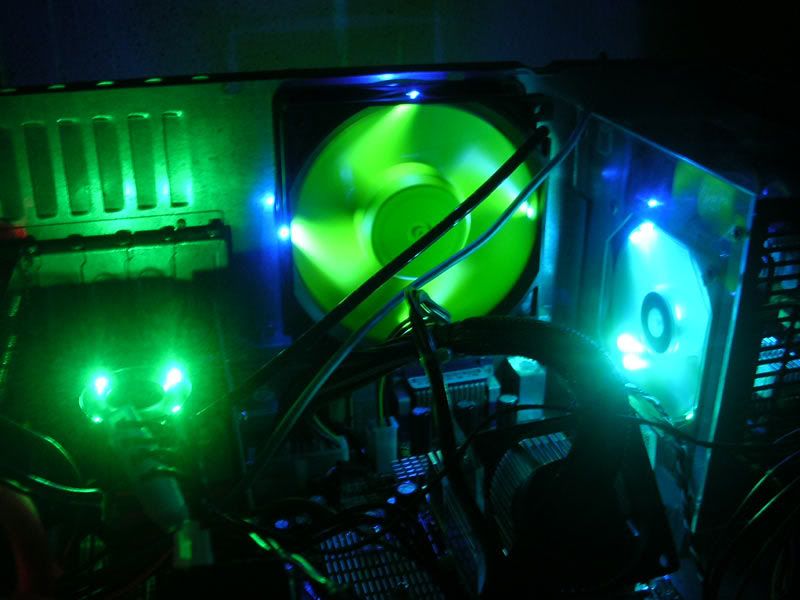
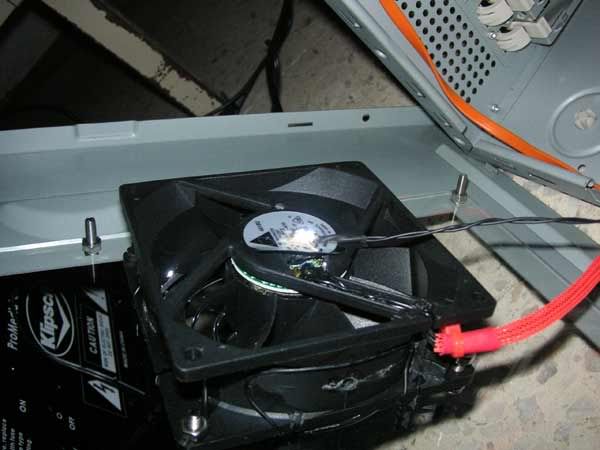
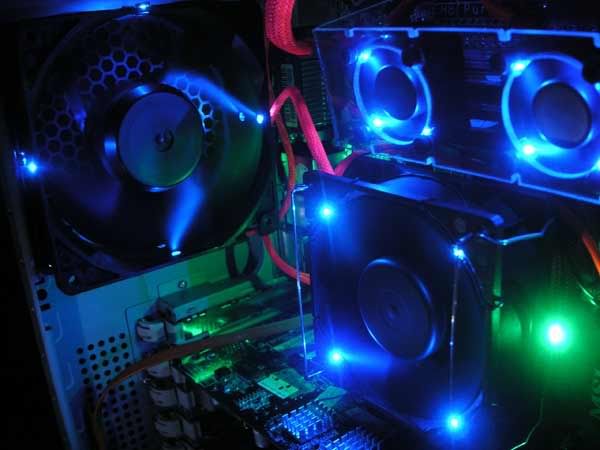
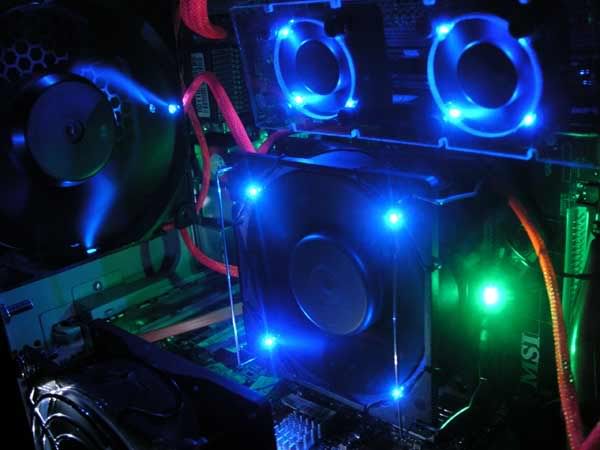
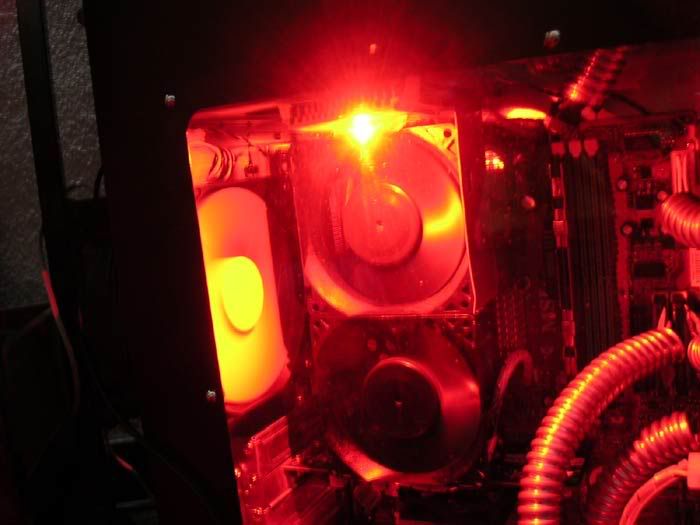
the two fans will push around 260cfm t the proc area when full speed,
it's so strong that it will push itself away from the Mobo  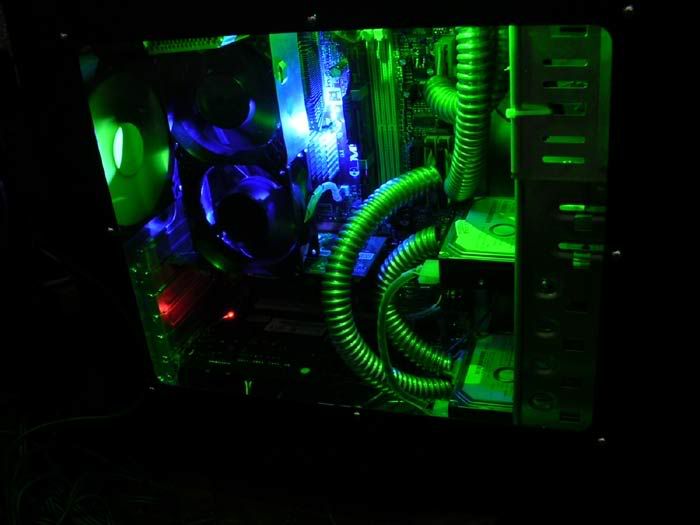 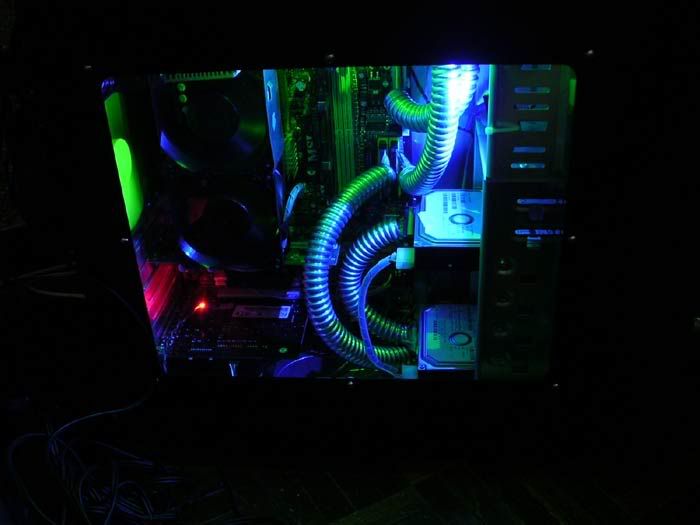 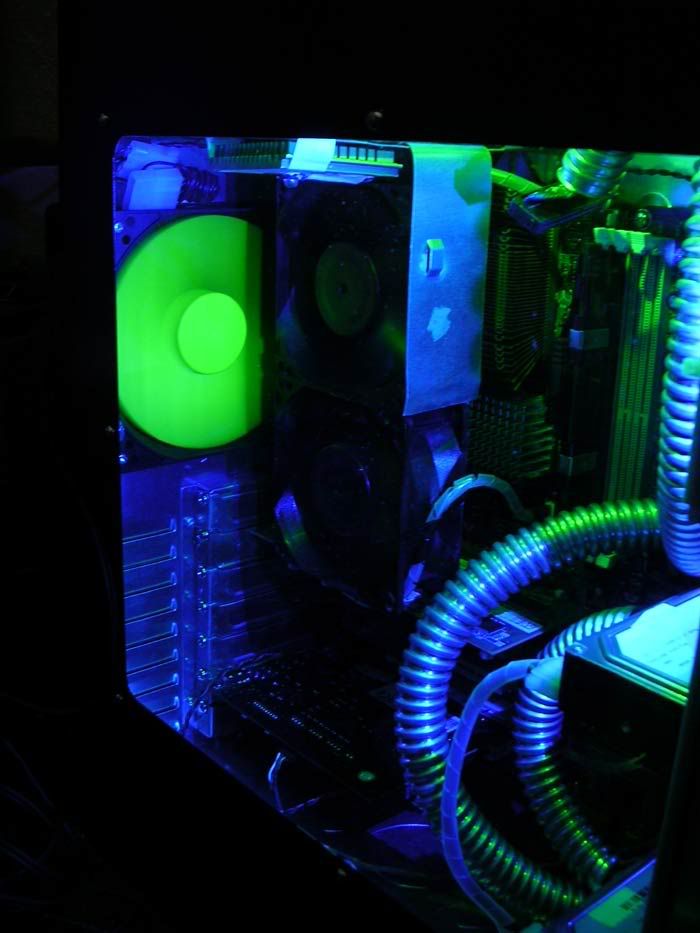 This post has been edited by AllnGap: Dec 1 2005, 03:10 AM |
|
|
Dec 1 2005, 03:12 AM
|
|
Senior Member
4,561 posts Joined: Jan 2003 From: Penangites |
okay, i've finished uploading.
|
|
|
Dec 1 2005, 10:35 AM
|

VIP
23,414 posts Joined: Jan 2003 From: Taipei |
Ok boss...post deleted as requested.
As a reminder... mod service and price etc --> Use PM ok? Cheers  |
|
|
Dec 5 2005, 11:29 PM
|
|
Senior Member
4,561 posts Joined: Jan 2003 From: Penangites |
anyone can help me with the image hosting website ?
This post has been edited by AllnGap: Dec 5 2005, 11:34 PM |
|
|
Dec 24 2005, 01:19 AM
|
|
Senior Member
4,561 posts Joined: Jan 2003 From: Penangites |
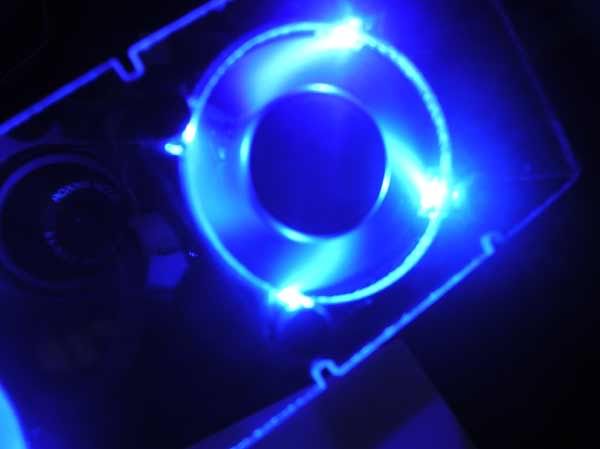
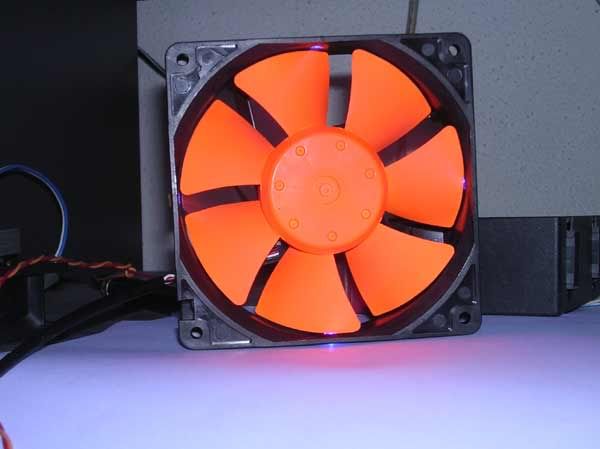
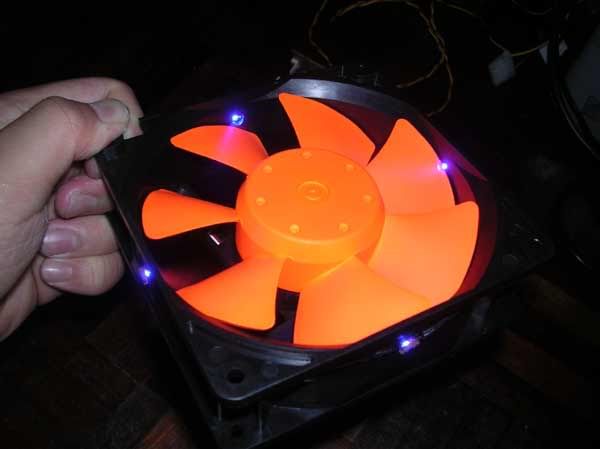
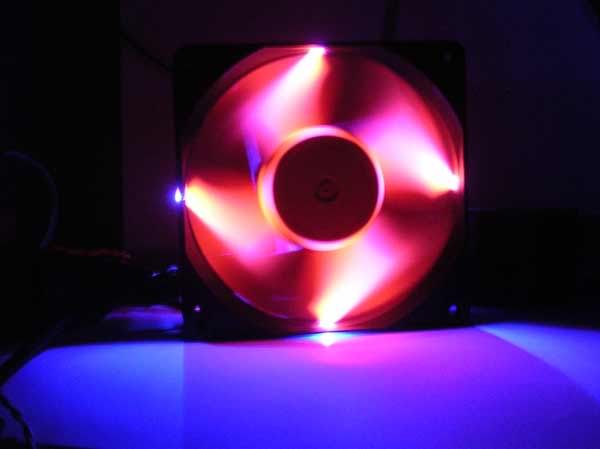
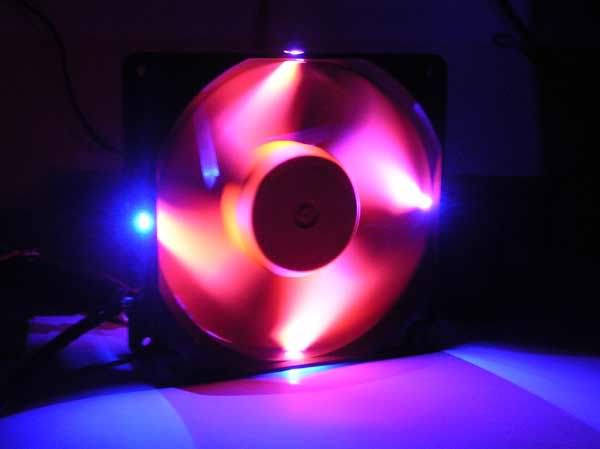
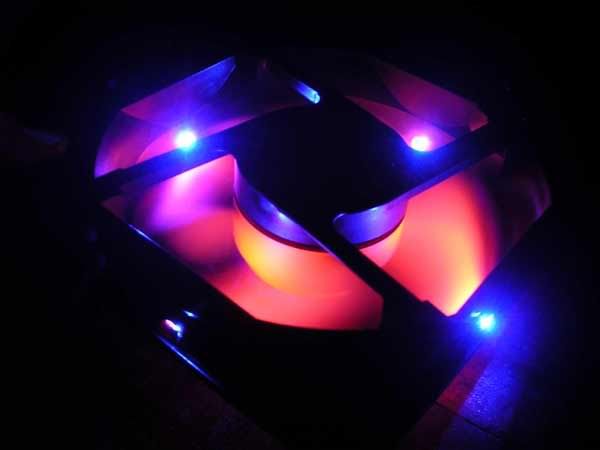
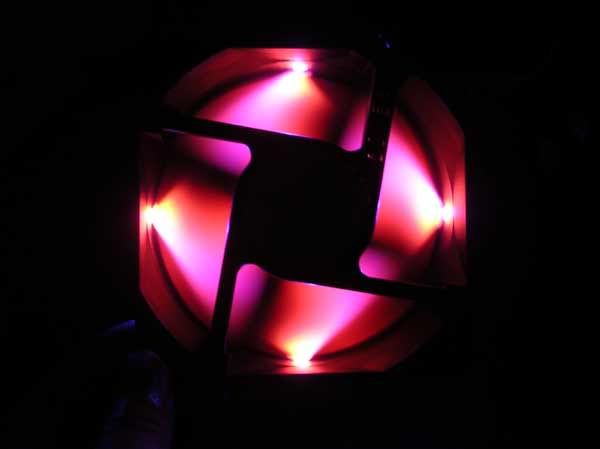
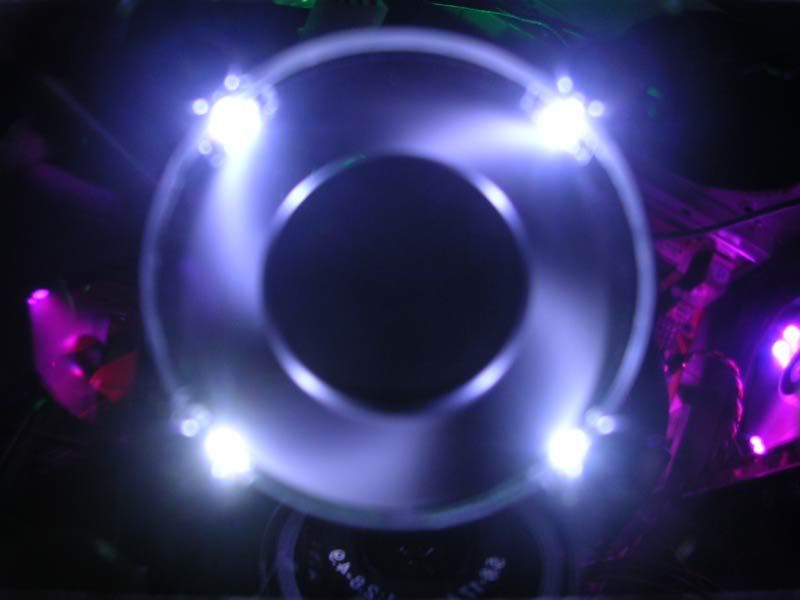
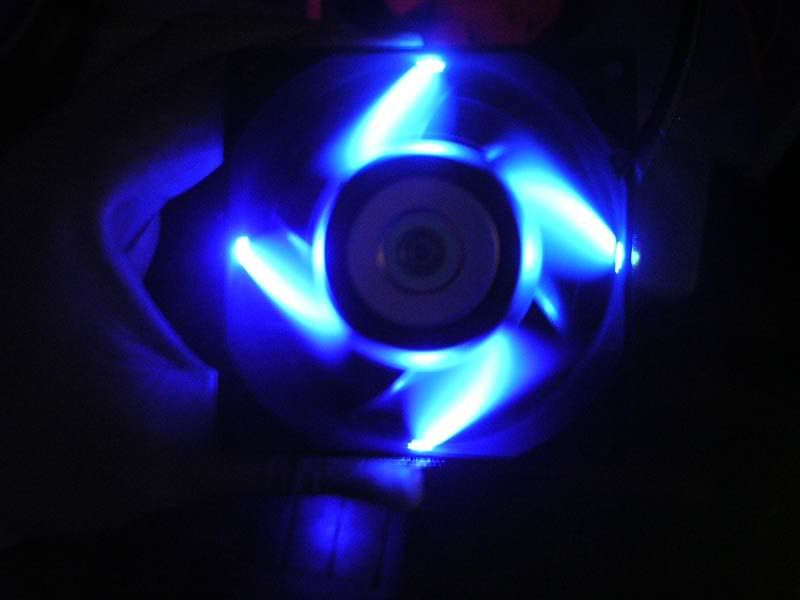
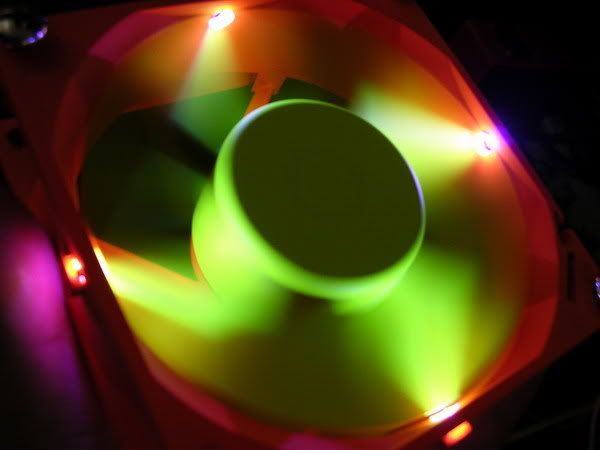
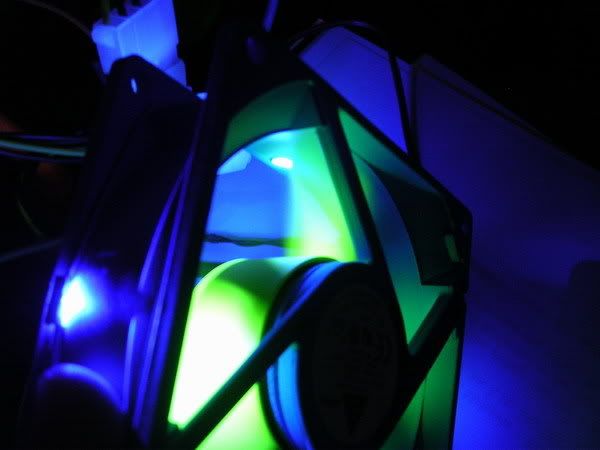
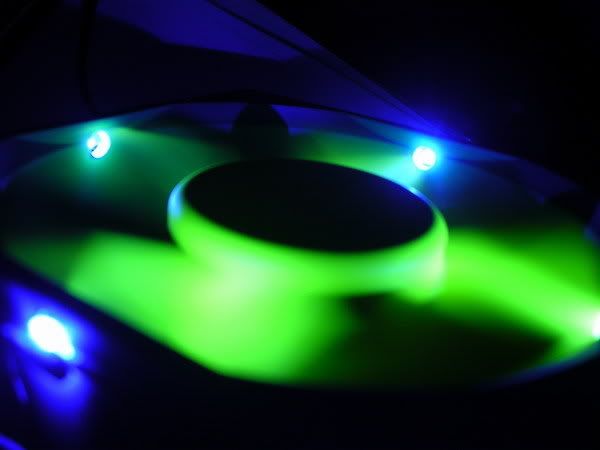
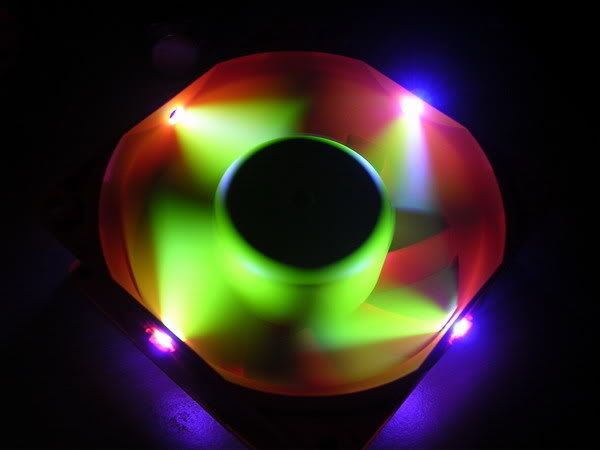
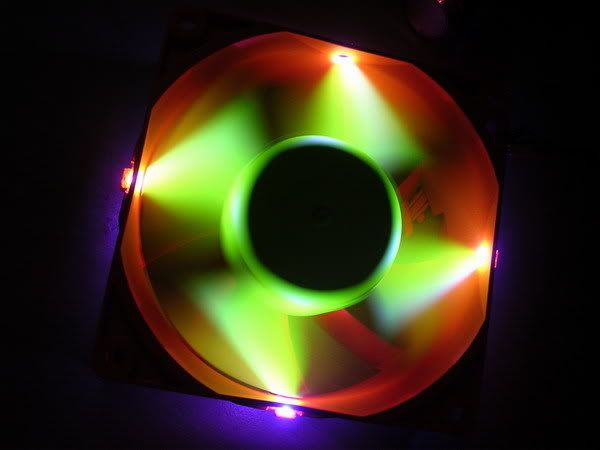
converted a dull nidec 92mm
 , 130cfm into a bling bling one... , 130cfm into a bling bling one...  just a normal mod, adding 4pcs of LED at the corners and sprayed the blades evenly  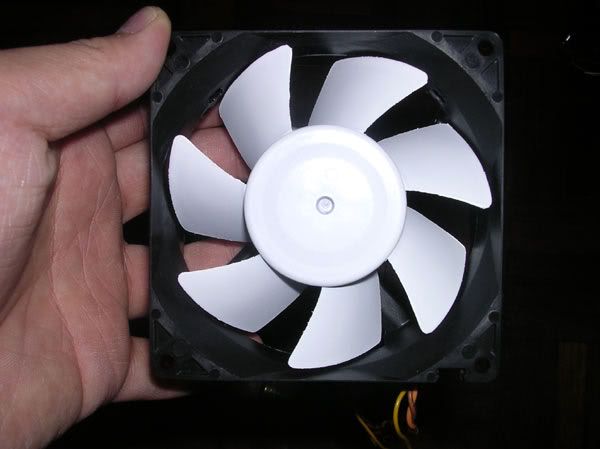 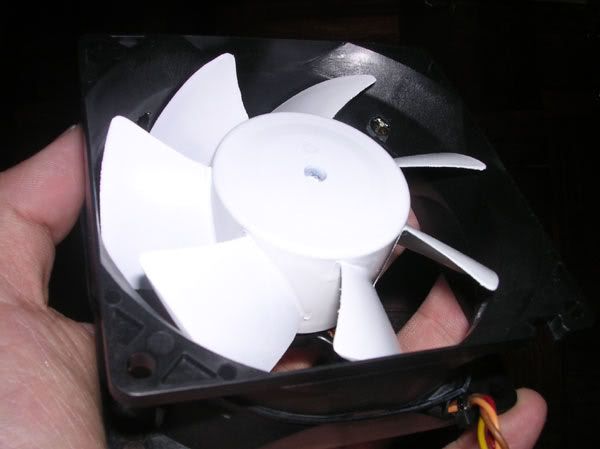 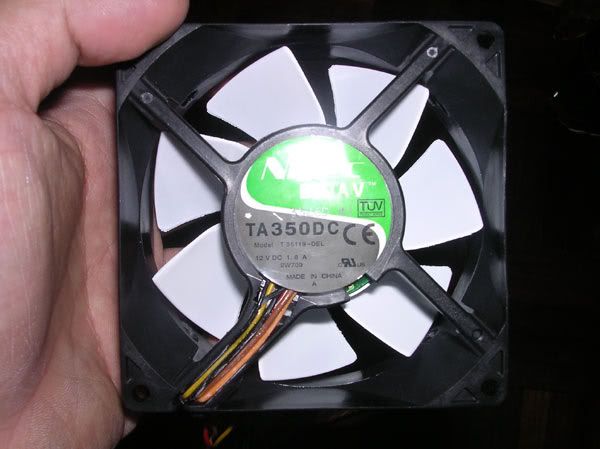 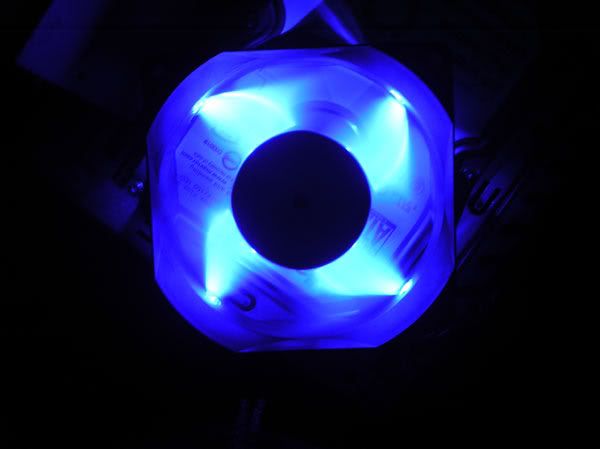 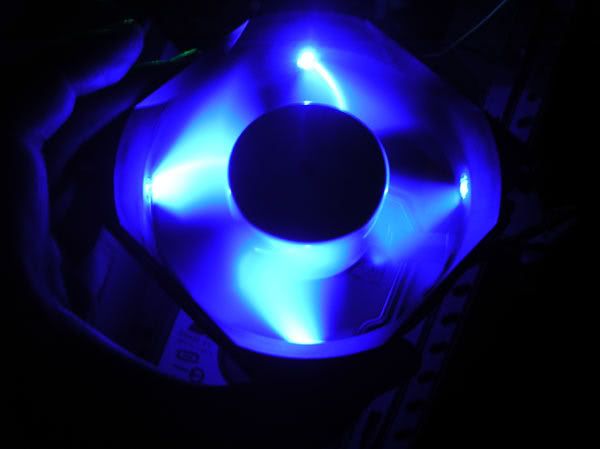 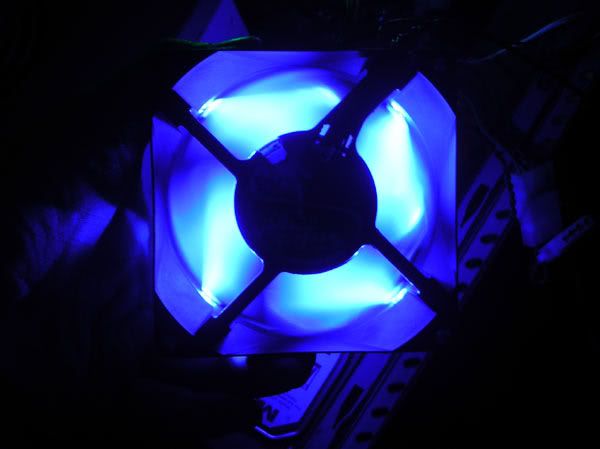 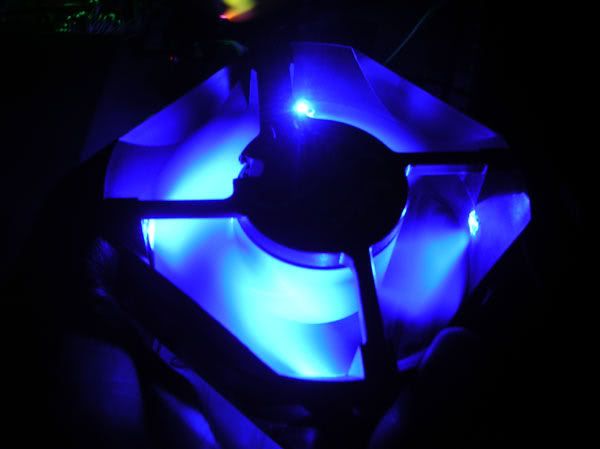 This post has been edited by AllnGap: Dec 24 2005, 08:00 AM |
|
|
Dec 24 2005, 01:21 AM
|
|
Senior Member
4,561 posts Joined: Jan 2003 From: Penangites |
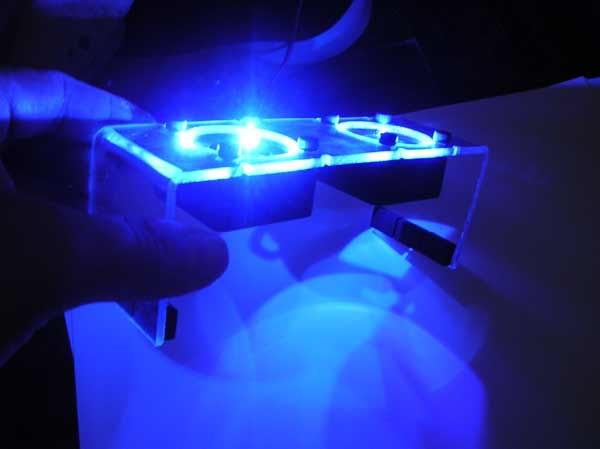
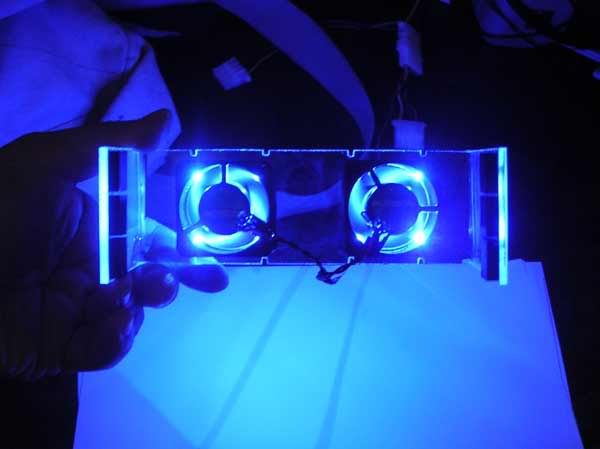
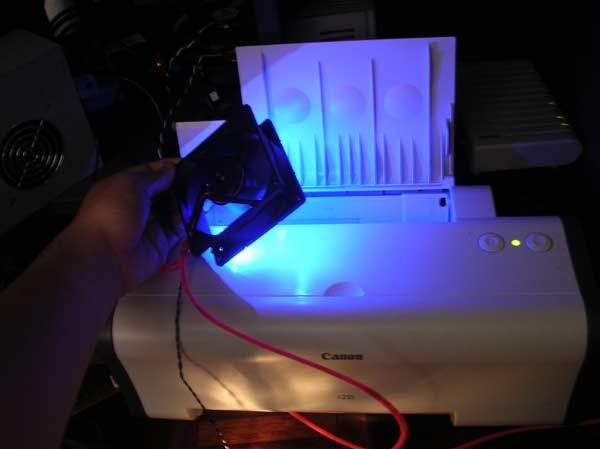
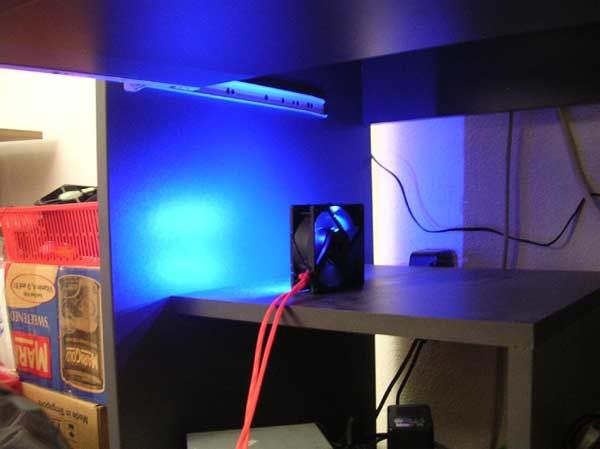
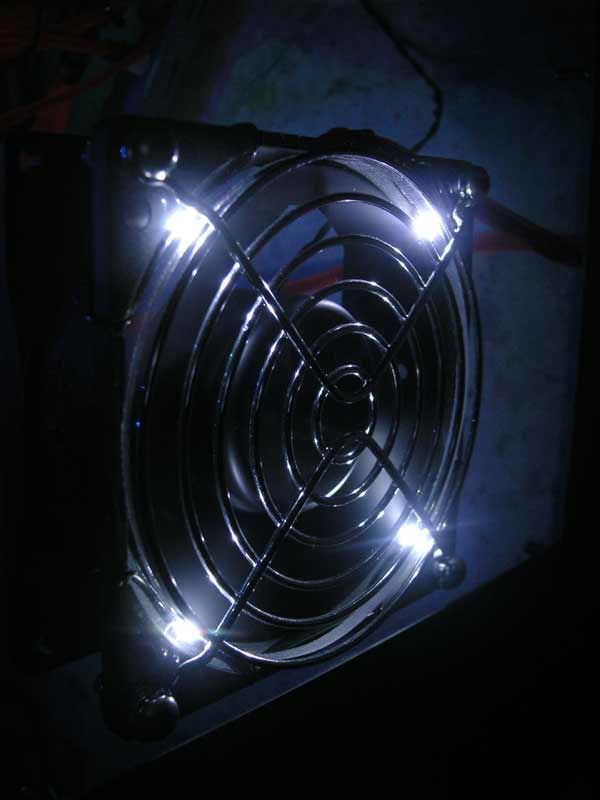
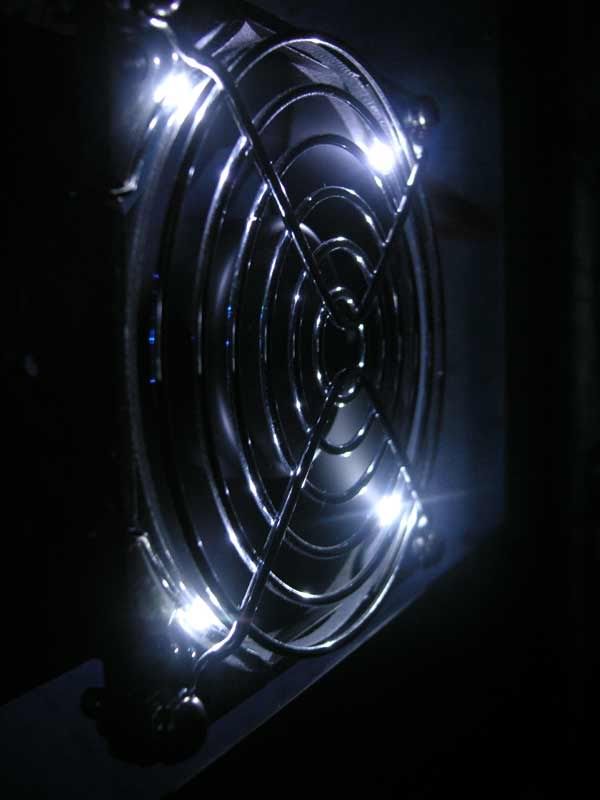
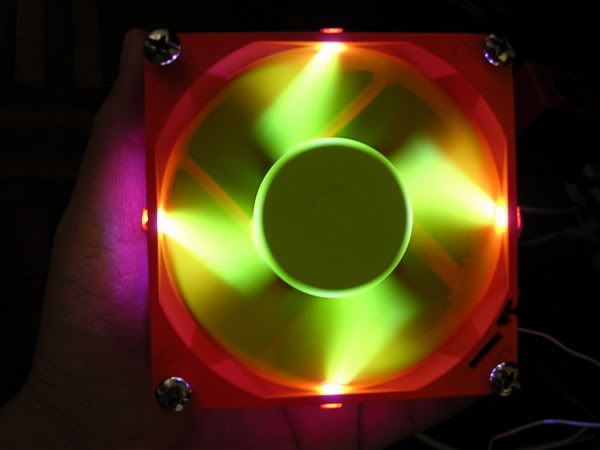
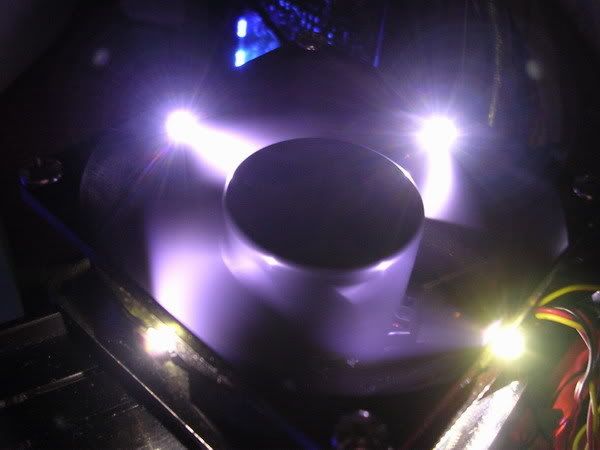
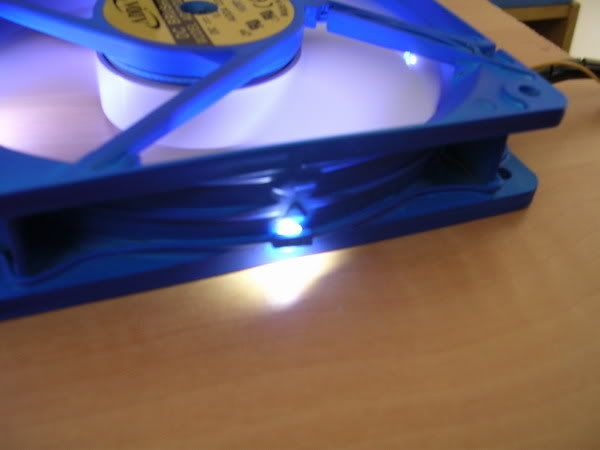
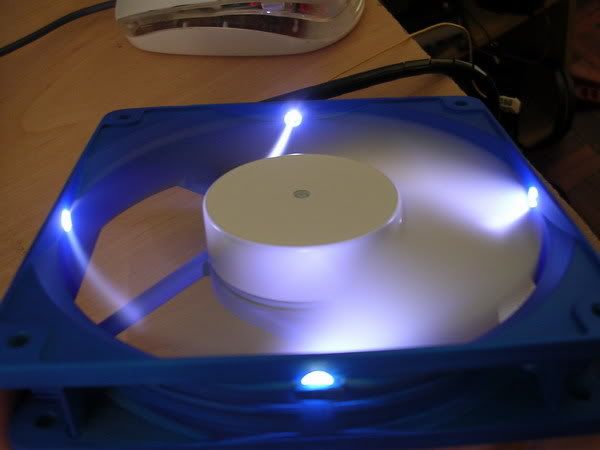
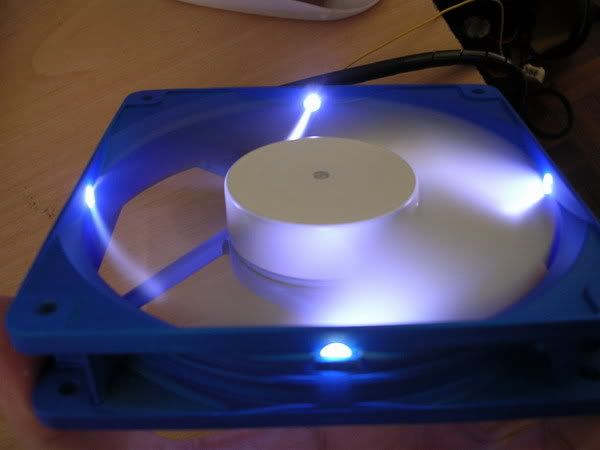
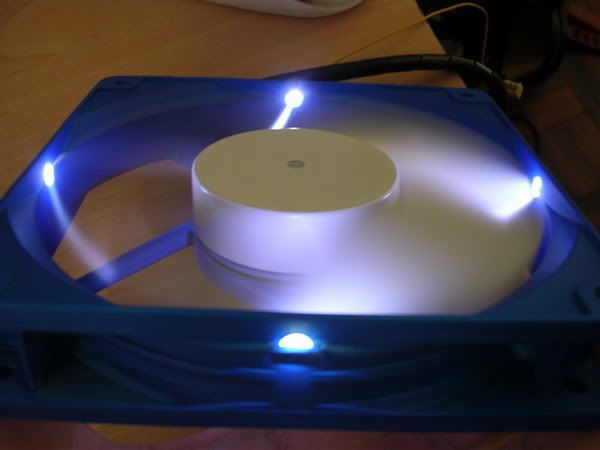
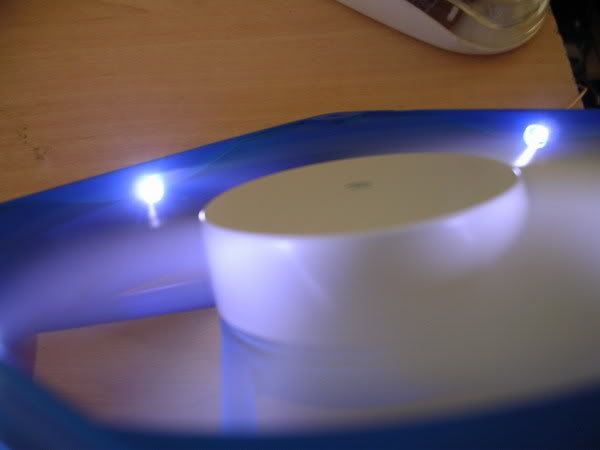
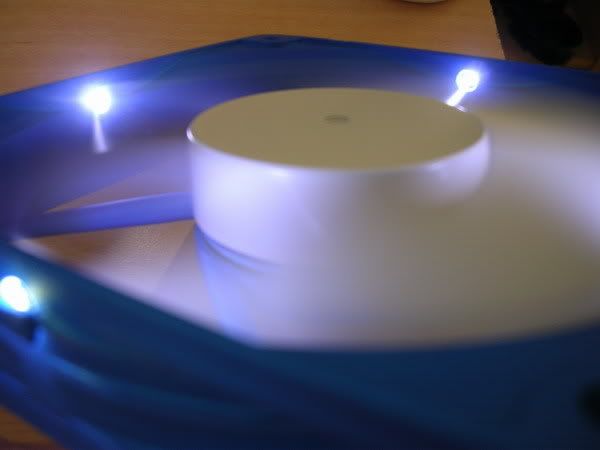
this is a forummer's item as well, he requested for ULTRA - BRIGHT AQUA
 shine to the NMB for his SI-120. shine to the NMB for his SI-120.so i proceeded with 3x SMD LEDs on each corner, total of 12 LEDs. the LEDs consists of 1 green and 2 blue with the green in the middle in order to get aqua colour as requested [ blue + green = aqua ] used acrylic as mounts to put the LEDs in place so that can get maximum lighting effect from any angle on top of that i also did some frame cutting, what is left is just the structure to hole the motor only and it actually helps to reduce noise level which originally was from the pressure from compression  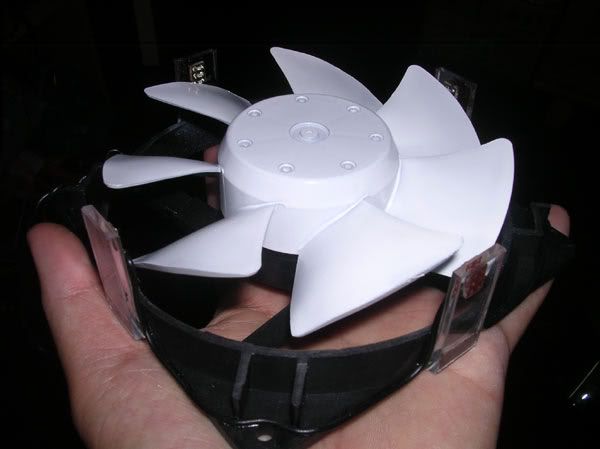 the 3 LEDs at one corner, the middle is green while the top and bottom is blue  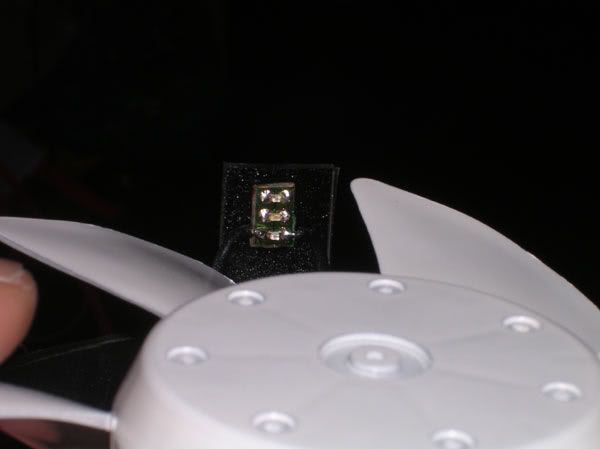 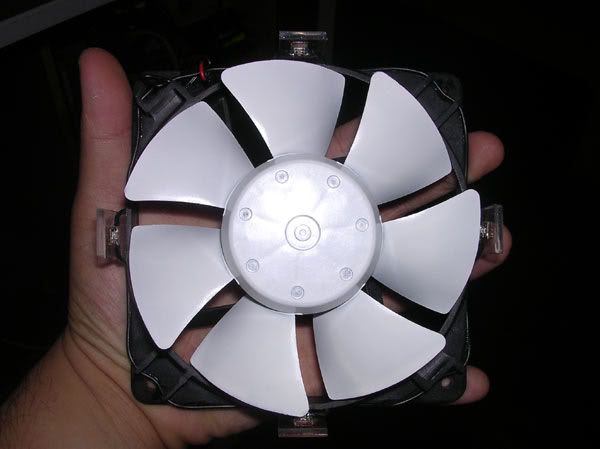 shots taken at nite....hopefully he wont complain about not being able to sleep at nite  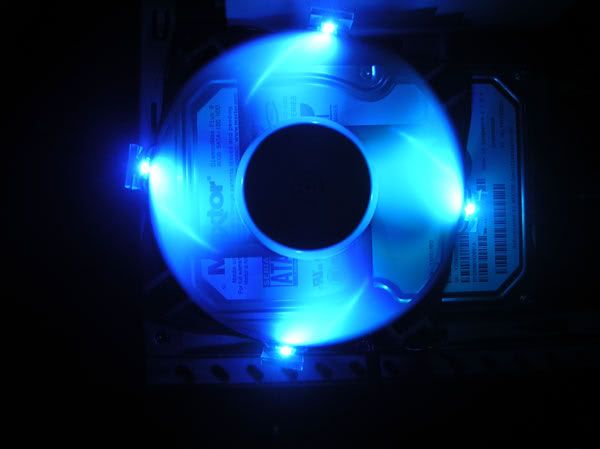 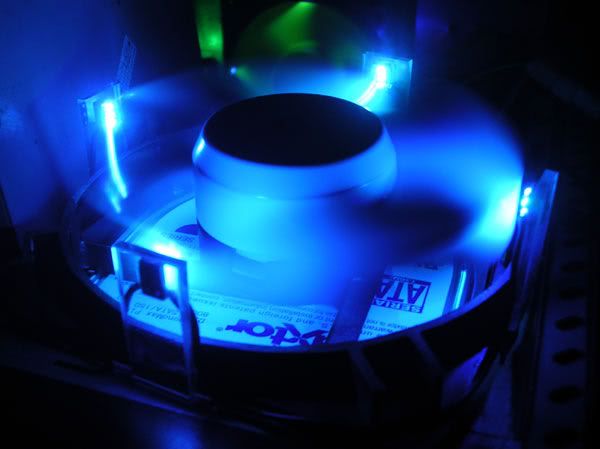 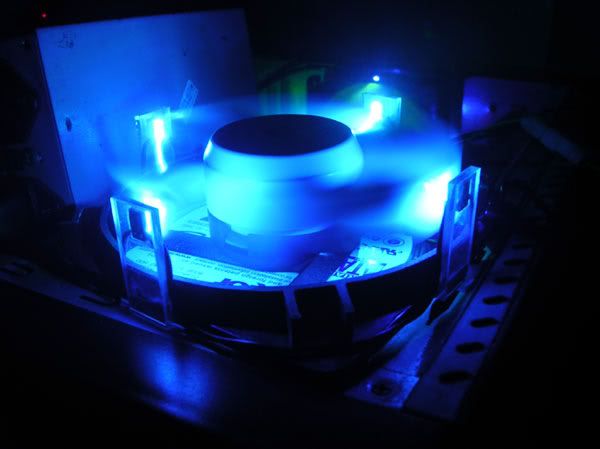 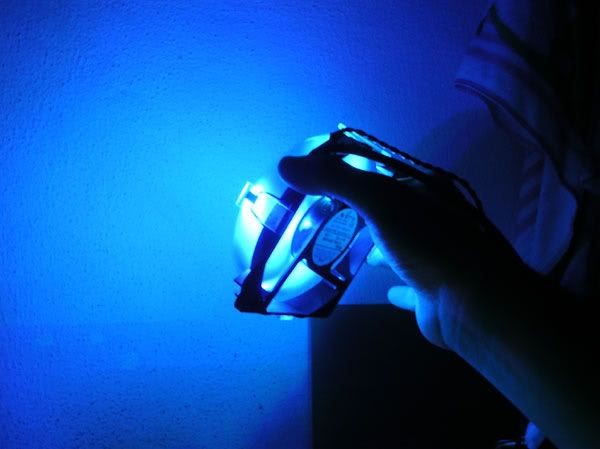 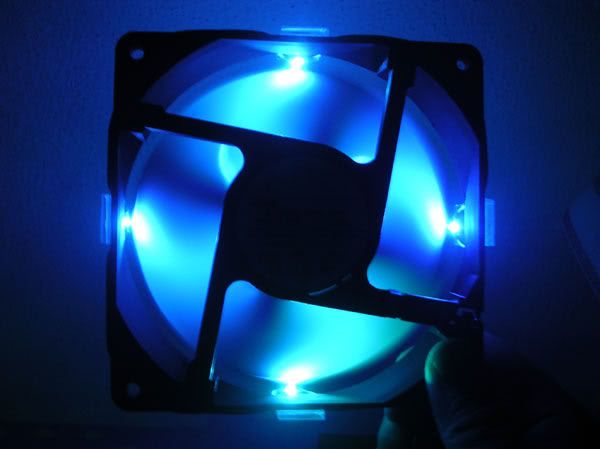 this is how bright it is.....  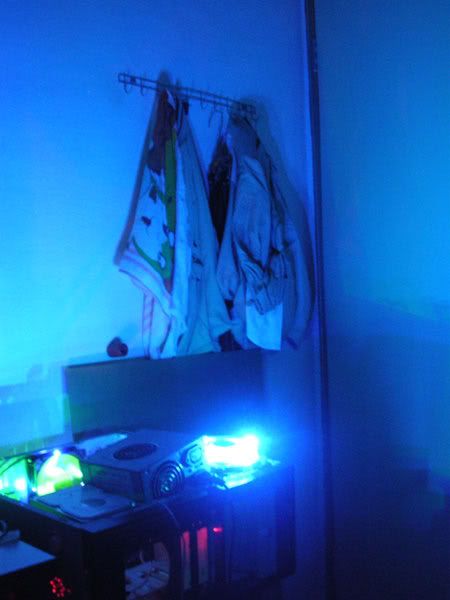 This post has been edited by AllnGap: Dec 24 2005, 01:35 AM |
|
|
Dec 24 2005, 01:37 AM
|
|
Senior Member
4,561 posts Joined: Jan 2003 From: Penangites |
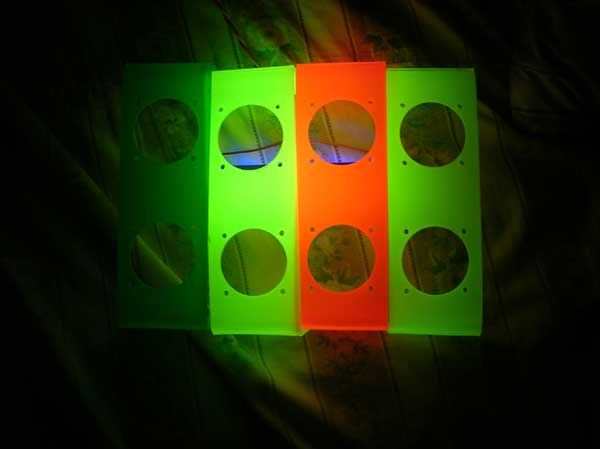
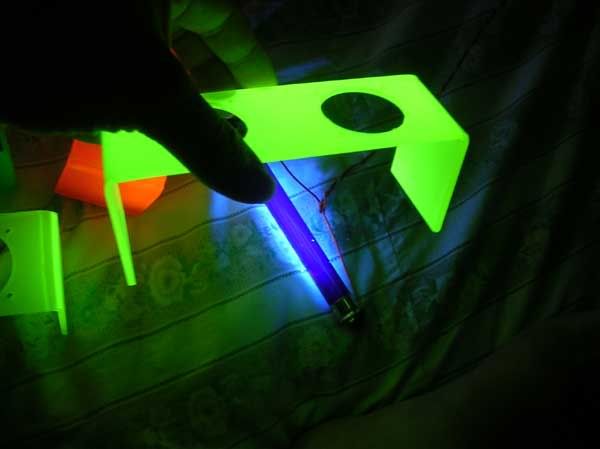
this is another custom ram cooler....
with UV reactive orange frame....pretty nice i'd say 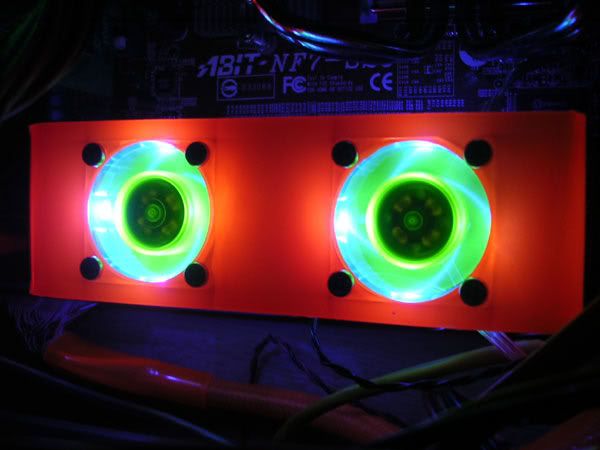 another ram cooler with UV reactive yellow frame, looks prettu cool at nite 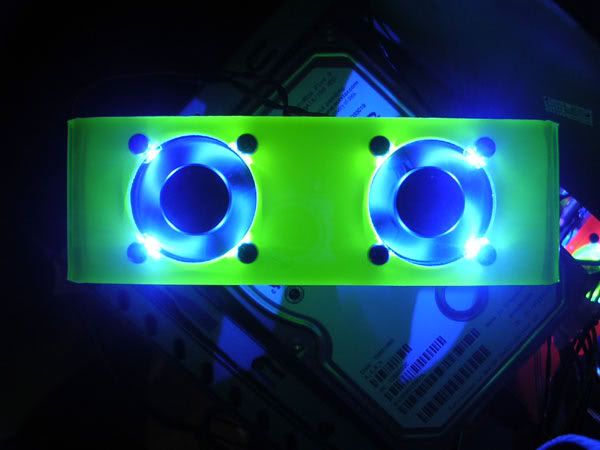 AcBel acrylic cover mod what is so special ?? the cover goes inside the PSU instead of covering outside.  very difficult task, technically speaking, need a lot of trial and error and not giving up easily 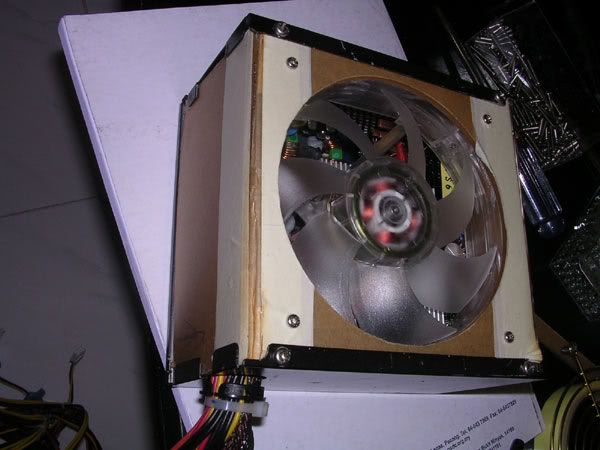 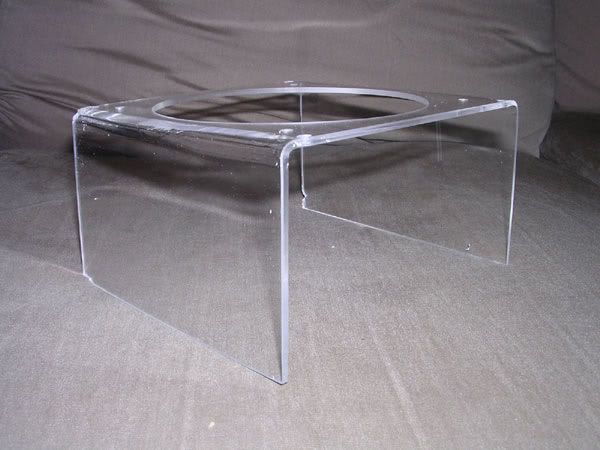 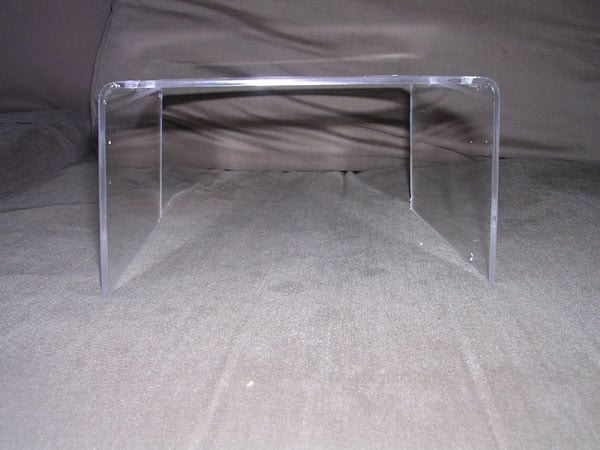 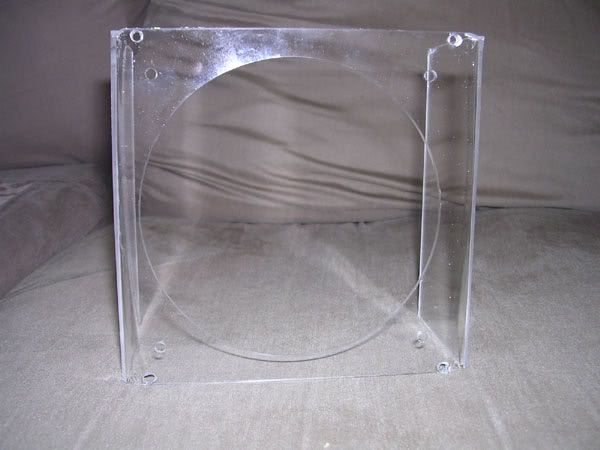 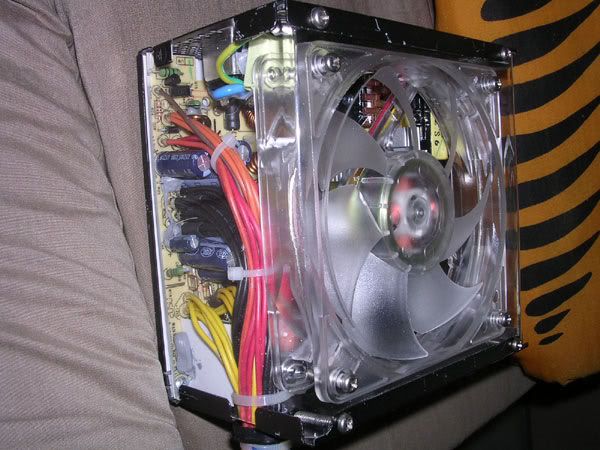 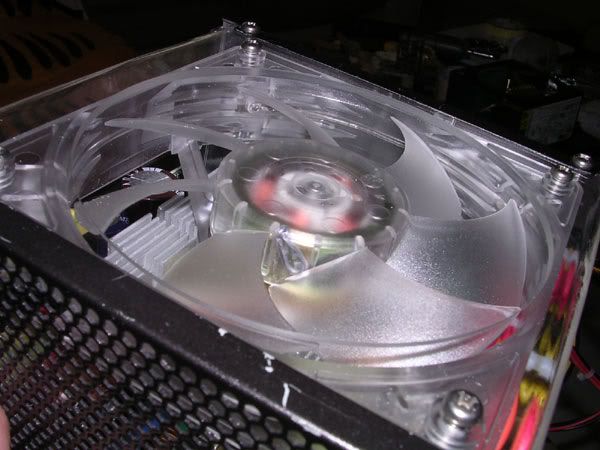  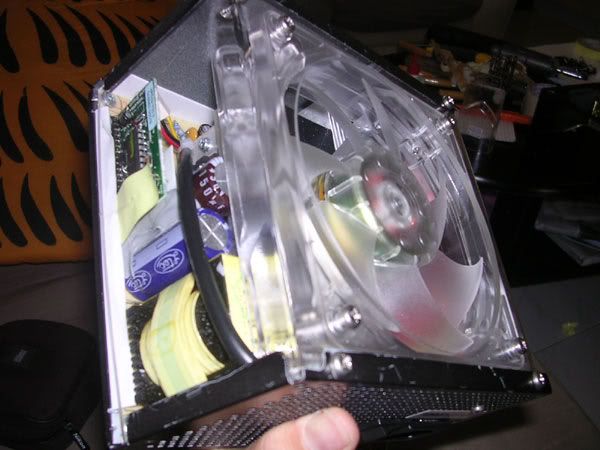 This post has been edited by AllnGap: Dec 24 2005, 01:54 AM |
|
|
Dec 24 2005, 07:56 AM
|
|
Senior Member
4,561 posts Joined: Jan 2003 From: Penangites |
QUOTE(LittleLinnet @ Dec 24 2005, 01:56 AM) oh i se.... hmmm.....good question. btw, do you still make the PSU mod ??  doing the cover means voiding warranty u know, so think about it first. anyway i need the PSU for the modding, because every PSU case is different. QUOTE(sniper on the roof @ Dec 24 2005, 02:32 AM) Lu ini macam potong means the fan lose a lot of its static pressure leh. SI-120's fins are loose, anyway, it's pushing more than 130cfm now |
|
|
Dec 24 2005, 08:34 AM
|
|
Senior Member
4,561 posts Joined: Jan 2003 From: Penangites |
QUOTE(pizzaboy @ Dec 24 2005, 08:18 AM) the CFM la..... i read somewhere that frame design like Panaflo / TT Silent Cat (copied Panaflo design)can actually put out more airflow (the comparison is between a solid frame and a frame which has got holes) and reduced the noise. this is because air is being sucked in from the sides and excessive pressure (if exists) will be able to escape thru the holes on the frame. but angle direction of the airflow would be bigger, meaning that the fan will blow outwards and as sniper said, pressure drops. so depending on which type of application to use, frameless design is more suitable towards case fans. but in this case, i want to reduce the noise. |
|
|
Jan 27 2006, 04:25 PM
|
|
Senior Member
4,561 posts Joined: Jan 2003 From: Penangites |
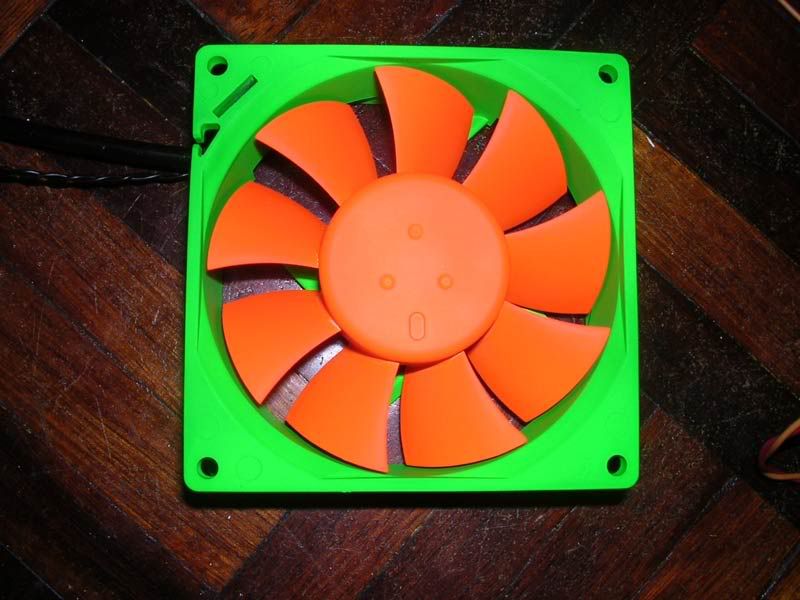
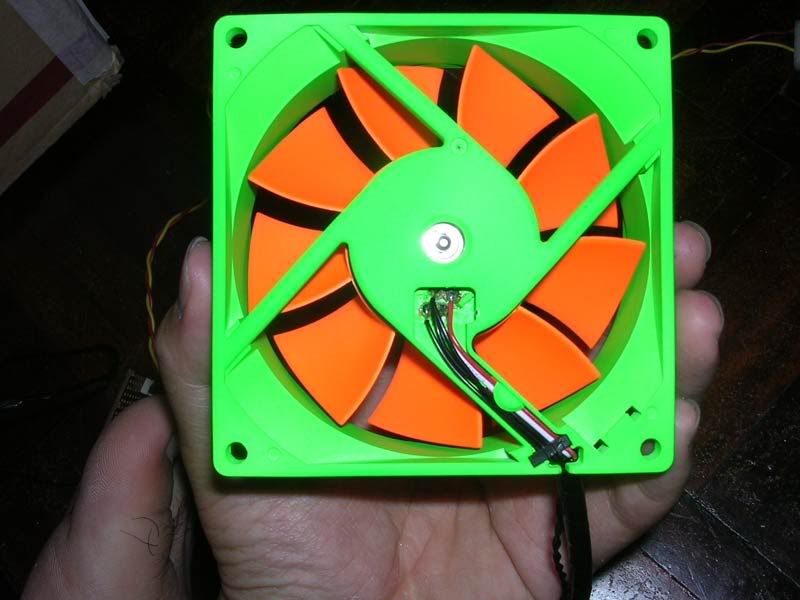
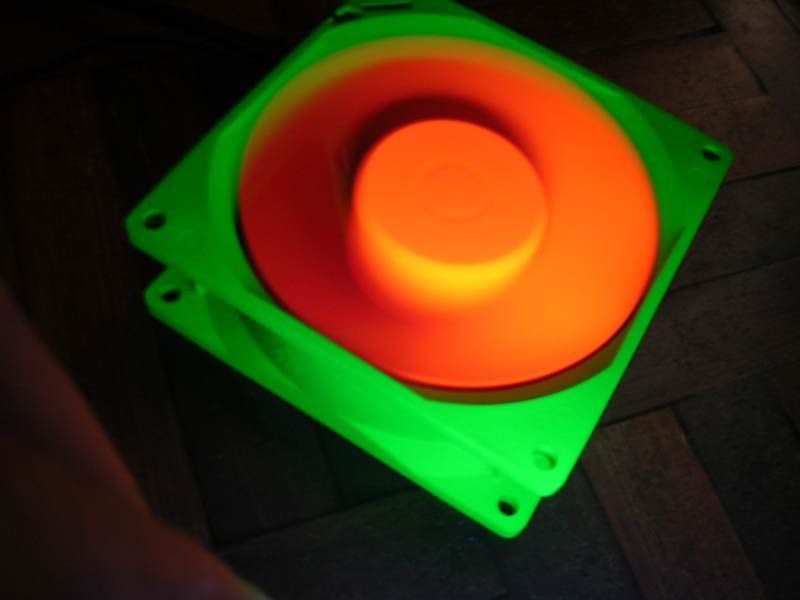
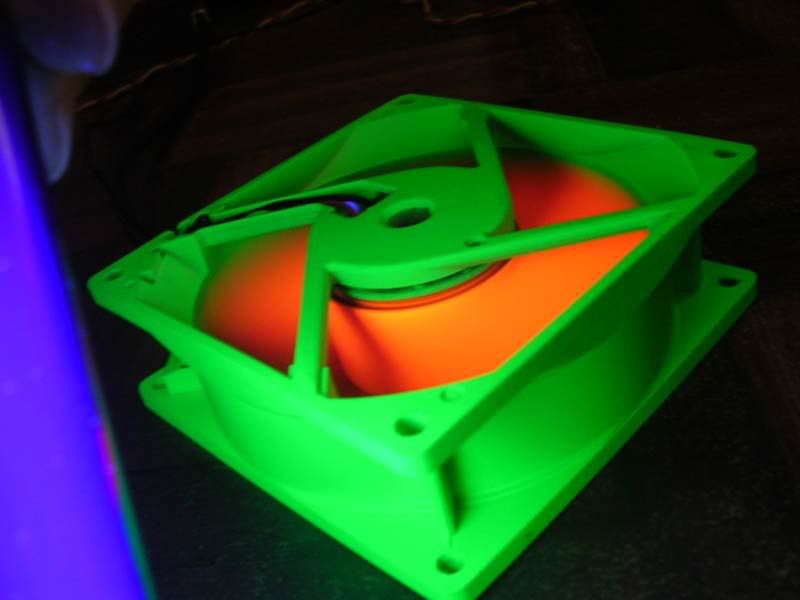
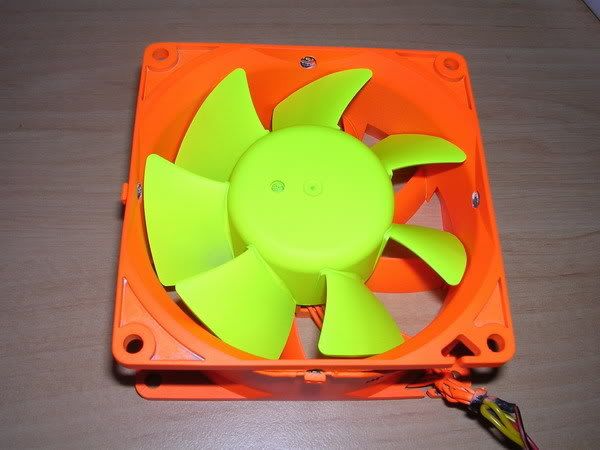
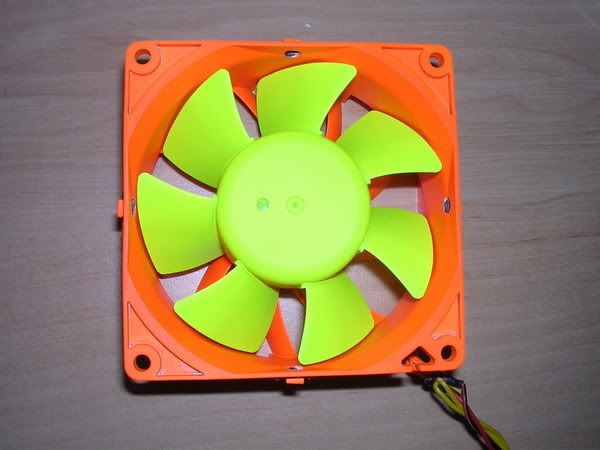
this is the 120mm NMB fan i modded for low yat 82
he wanted UV sunshine design, so i sprayed according to his request and did some frame trimming as well. any comments are welcomed  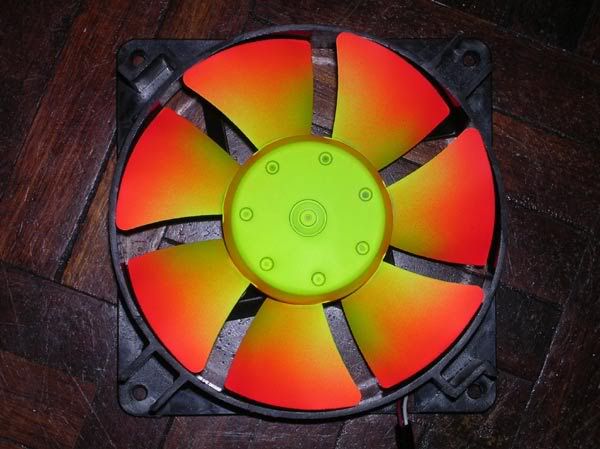 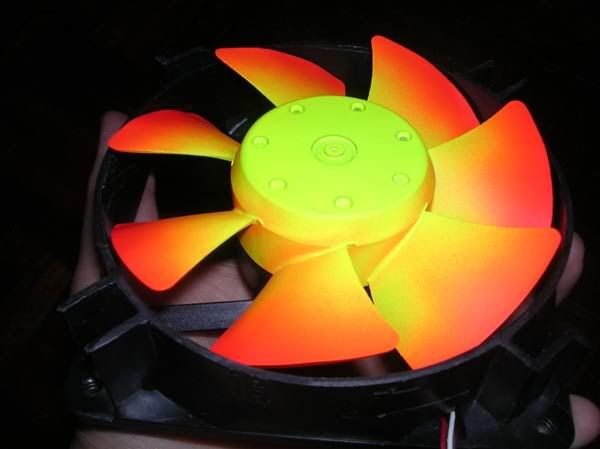  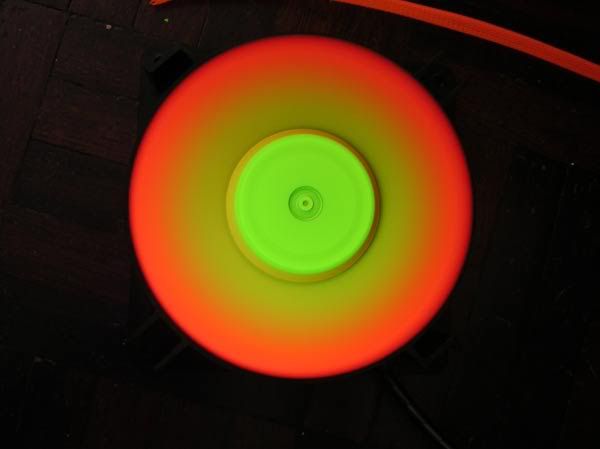 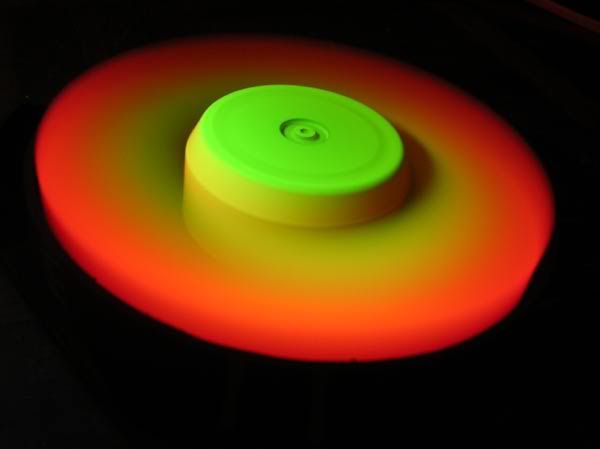 This post has been edited by AllnGap: Feb 5 2006, 02:33 PM |
|
|
Jan 27 2006, 05:24 PM
|
|
Senior Member
4,561 posts Joined: Jan 2003 From: Penangites |
when u install everything, then u show the picture....coz the whole thing is too clear until u see nothing....
|
|
|
Jan 27 2006, 07:29 PM
|
|
VIP
23,414 posts Joined: Jan 2003 From: Taipei |
Dood, merged all your threads into an easier to managed all in one thread.
|
|
|
Jan 27 2006, 07:40 PM
|
|
Senior Member
4,561 posts Joined: Jan 2003 From: Penangites |
thanks man !!!
|
|
|
Mar 22 2006, 10:01 AM
|
|
Senior Member
4,561 posts Joined: Jan 2003 From: Penangites |
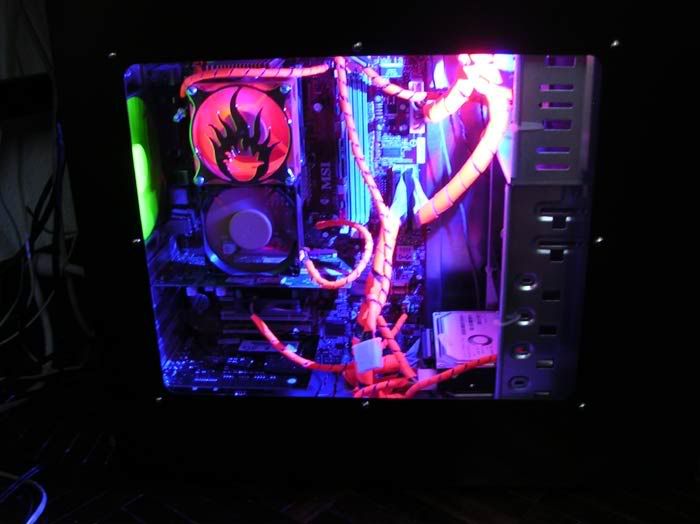
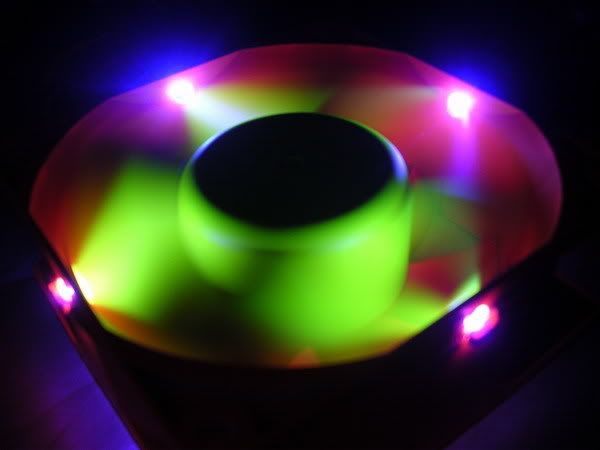
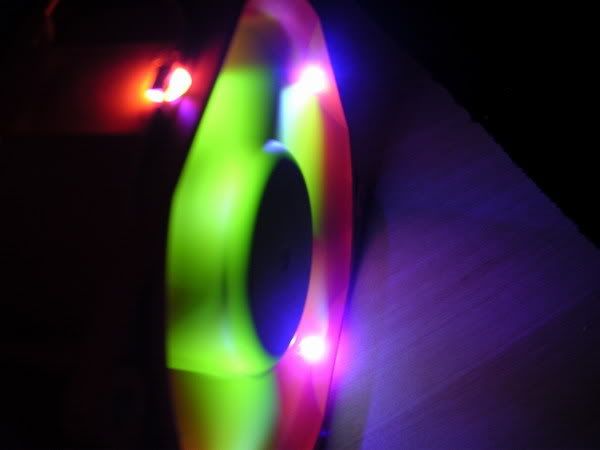
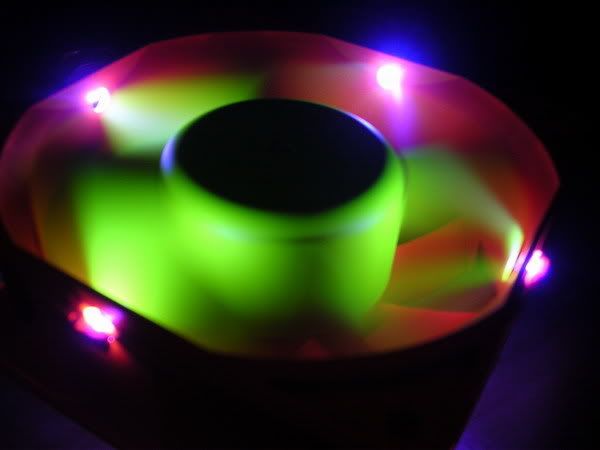
just completed this mod today, it's a 7 colour LED lighting
 with CDROM controller !!!! with CDROM controller !!!! CCFL dudes will go crazy when they see my mod it consists of 14 LEDs connected into 1 channel and there are 2 channels. basically, there are 6 flip switches which 3 flip switches are for 1 channel, which is RED, GREEN and BLUE channel so one flip switch controls one colour. it can give these colours : * red * green * blue * blue + green = aqua * blue + red = purple * red + green = yellow * red + green + blue = white so total is 7 colours !!! the colours doe the switches are arranged in [ red ] - [ blue ] - [ green ] - [ red ] - [ blue ] - [ green ] just enjoy the pictures !! 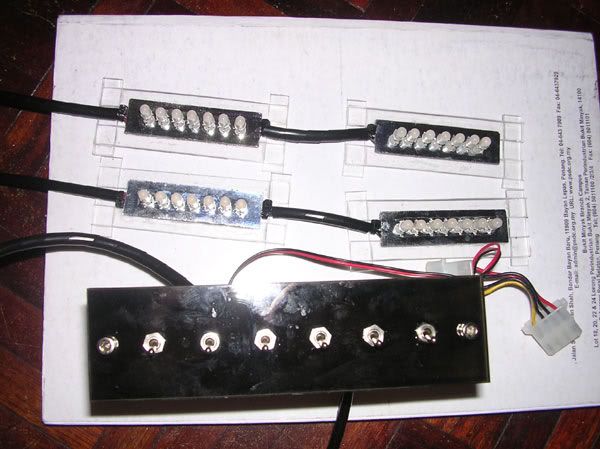 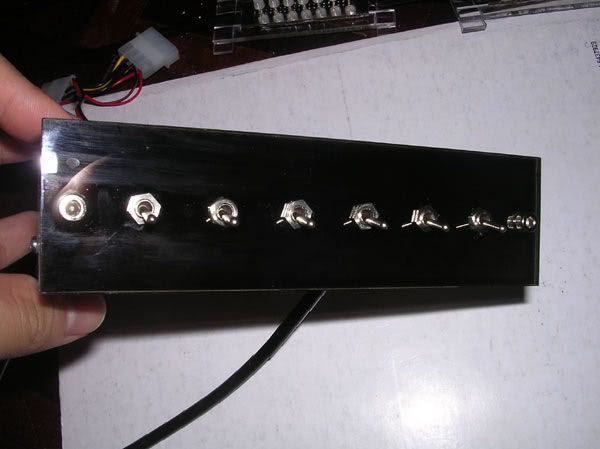 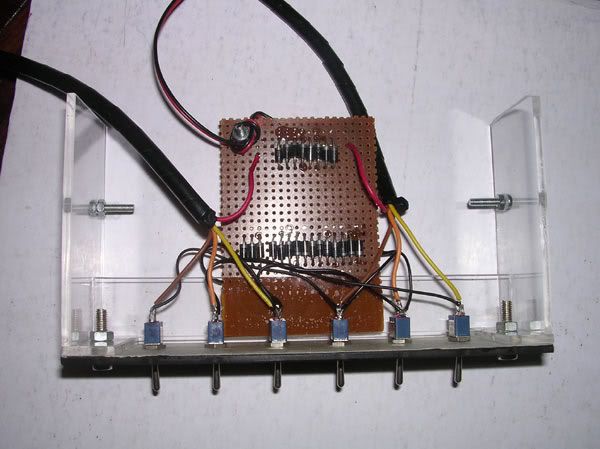 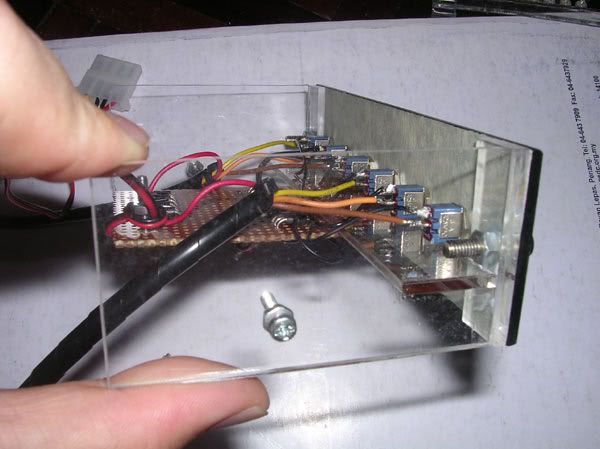 nicely positioned switches 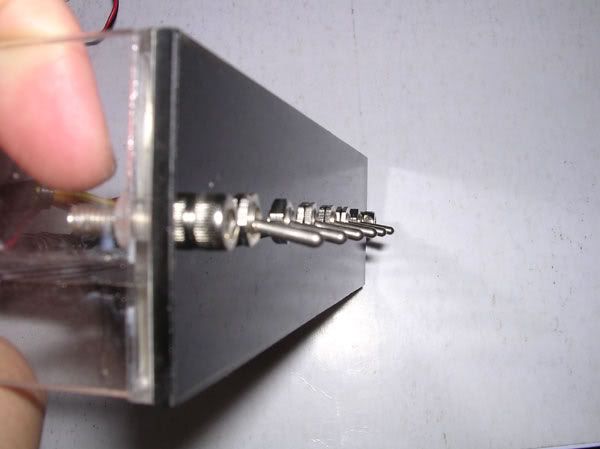 this is the LED module, i've put reflectors stickers on the PCB to reflect all the lights outwards 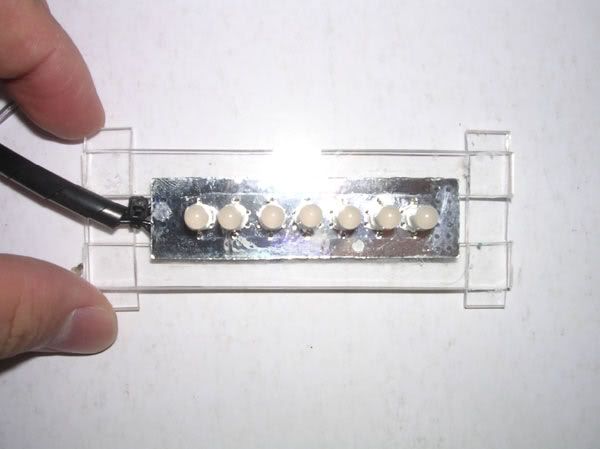 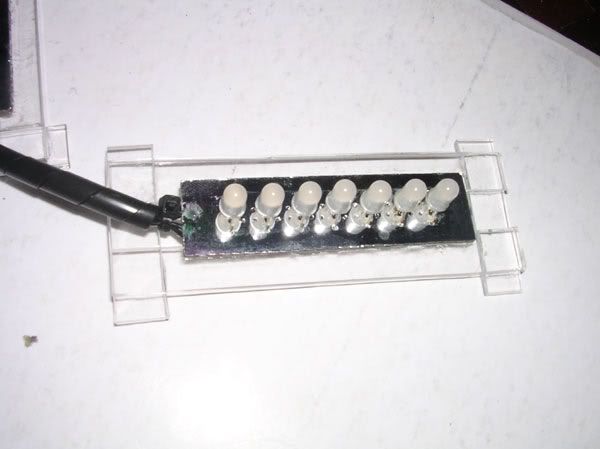 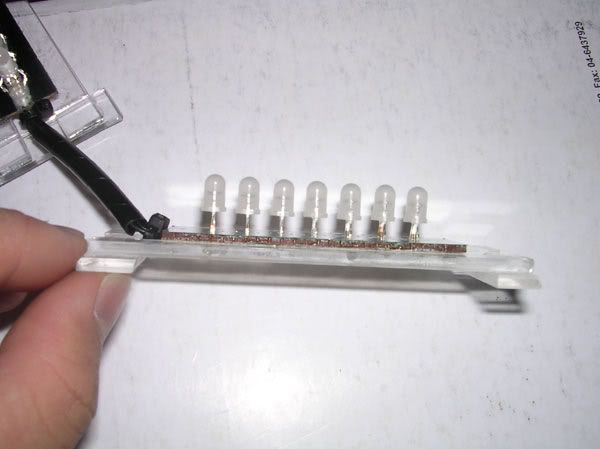 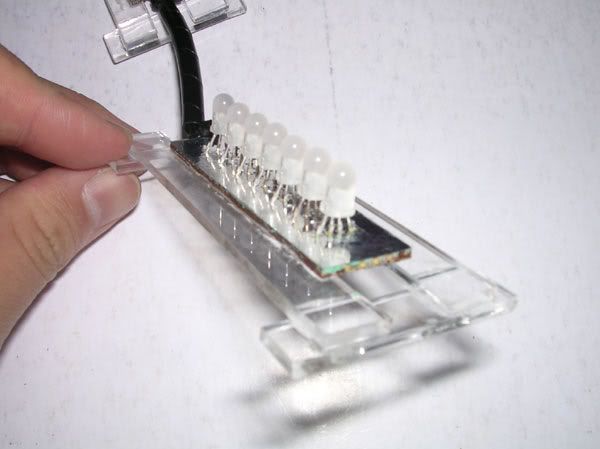 the controller bracket on my crappy casing   |
|
|
Mar 22 2006, 10:02 AM
|
|
Senior Member
4,561 posts Joined: Jan 2003 From: Penangites |
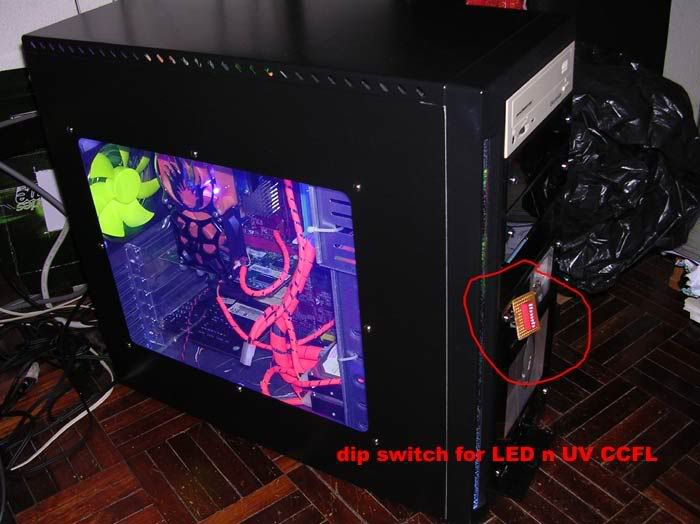
the LEDs are installed below the PSU and another channel below the casing.
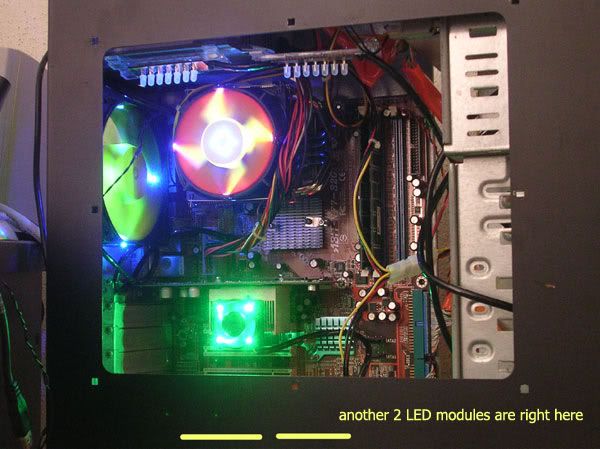  the LED colours RED 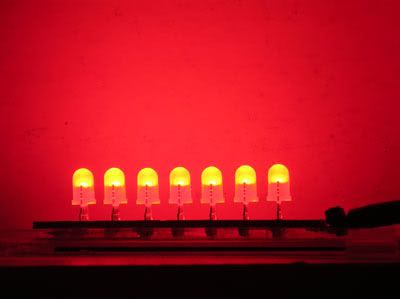 BLUE 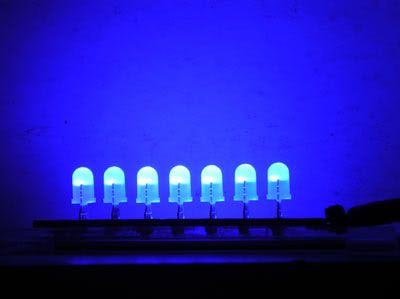 GREEN 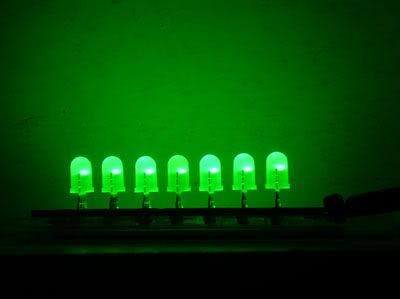 BLUE + GREEN = AQUA 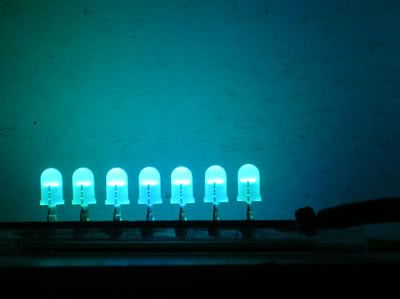 BLUE + RED = PURPLE 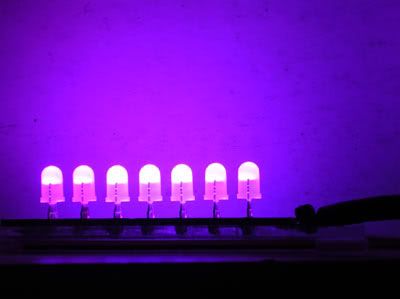 GREEN + RED = YELLOW 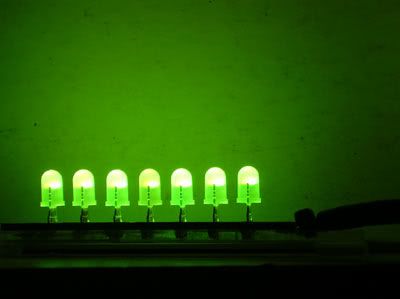 RED + GREEN + BLUE = WHITE 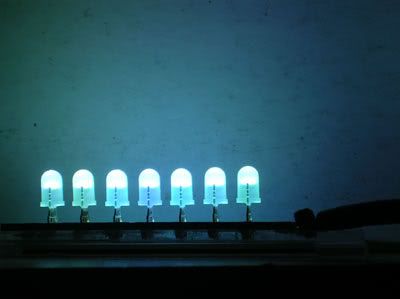 |
|
|
Mar 22 2006, 10:02 AM
|
|
Senior Member
4,561 posts Joined: Jan 2003 From: Penangites |
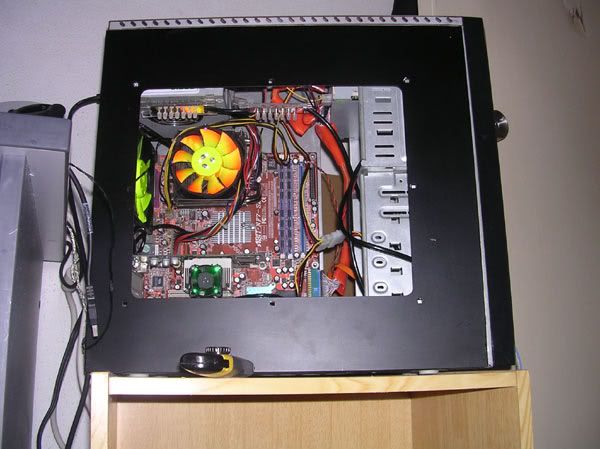
sorry for my lousy casing and cacing goin here and there, coz got no time to make another casing at the moment
ok, there are total of 56 combinations for the lightings, but i'll just show nice colour combinations. so just enjoy !!!! 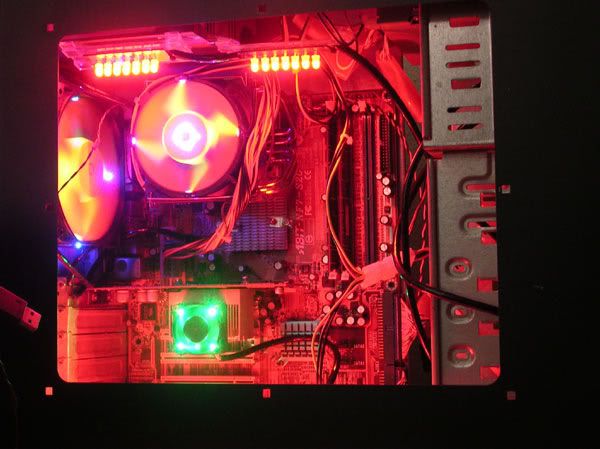  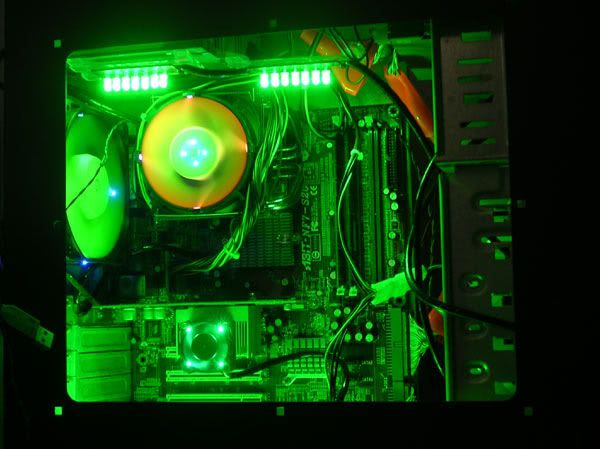 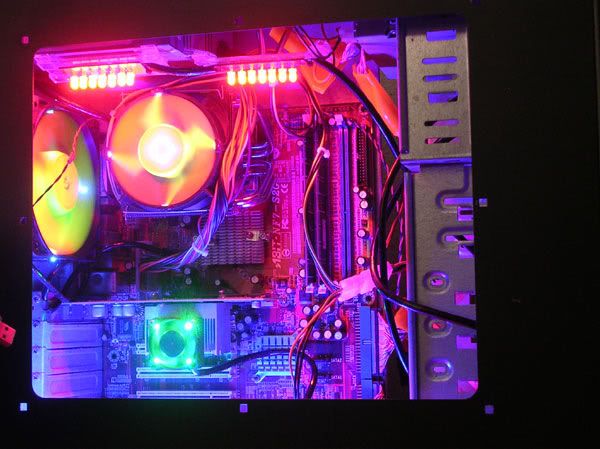 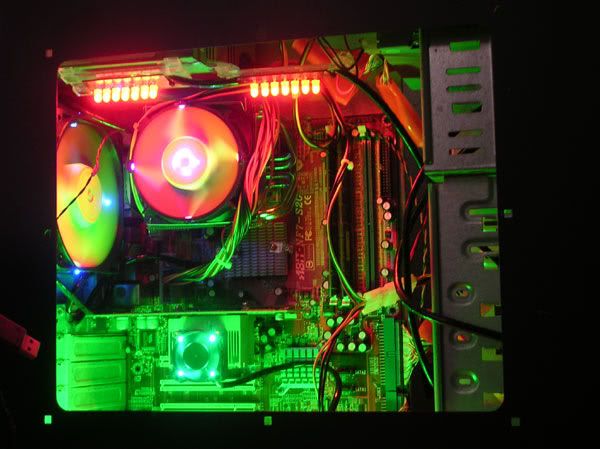 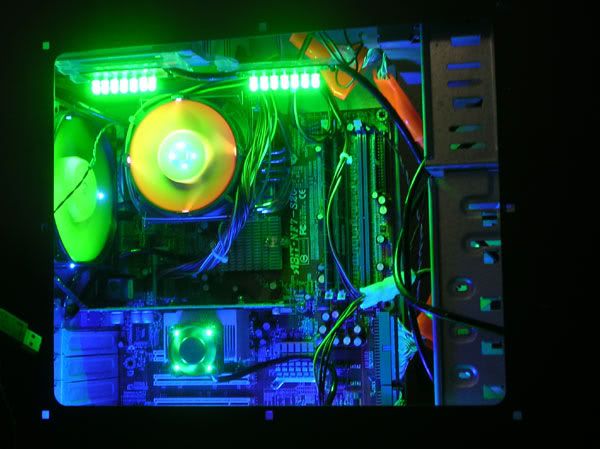 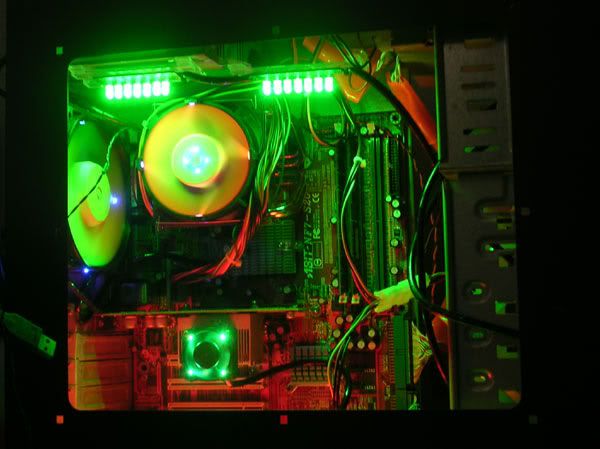 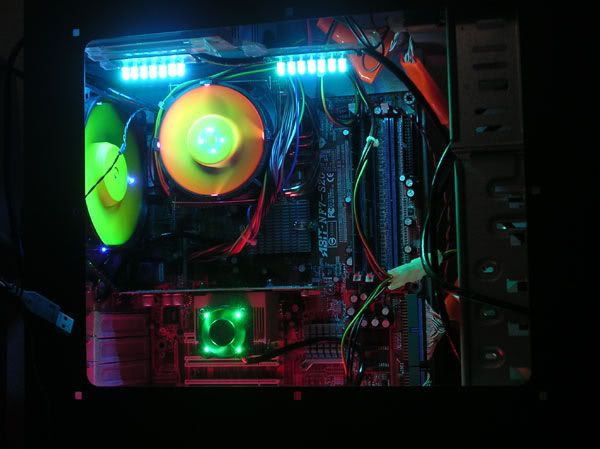 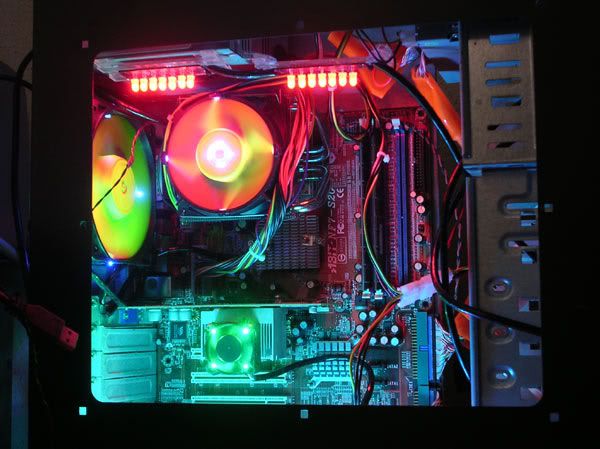 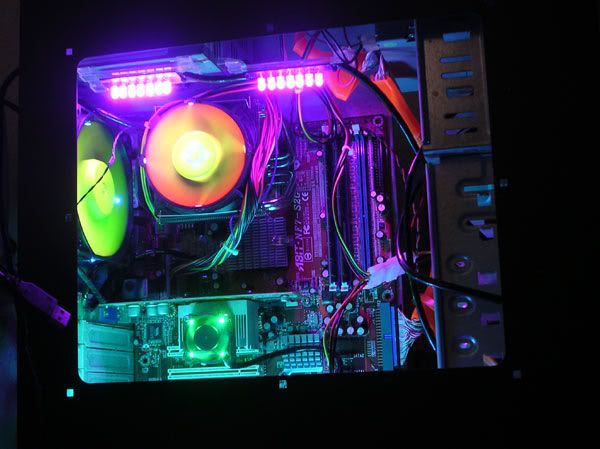 |
|
|
Mar 22 2006, 10:03 AM
|
|
Senior Member
4,561 posts Joined: Jan 2003 From: Penangites |
continue
  this is all for now. thanks !! |
|
|
Mar 22 2006, 10:19 AM
|
|
Senior Member
4,561 posts Joined: Jan 2003 From: Penangites |
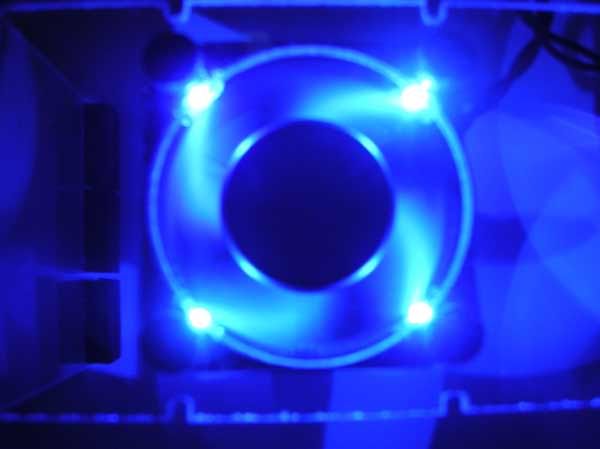
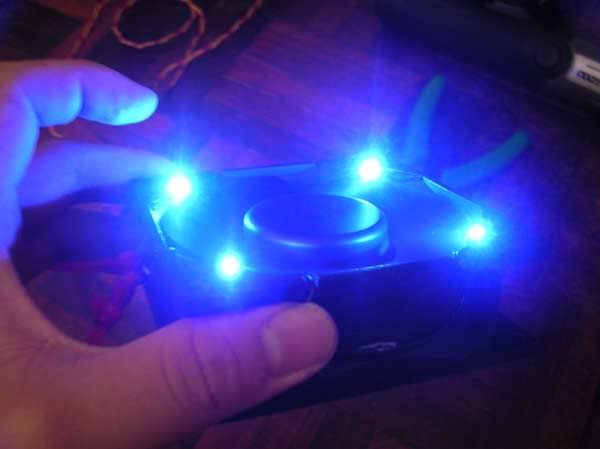
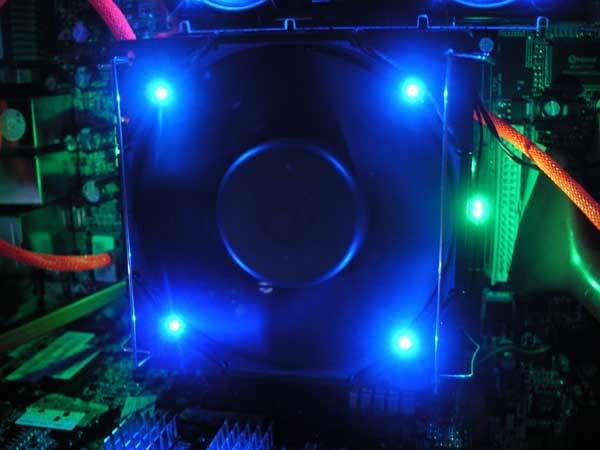
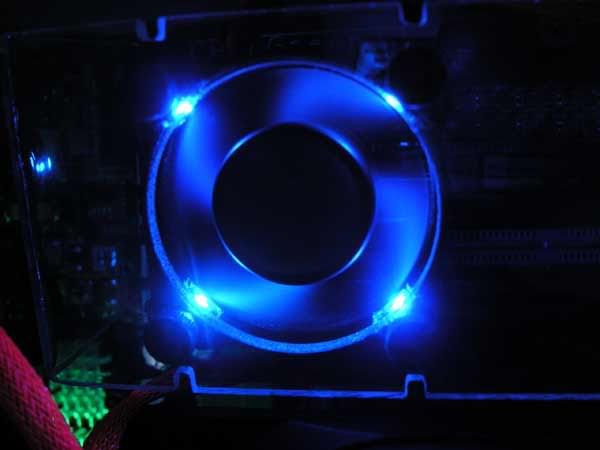
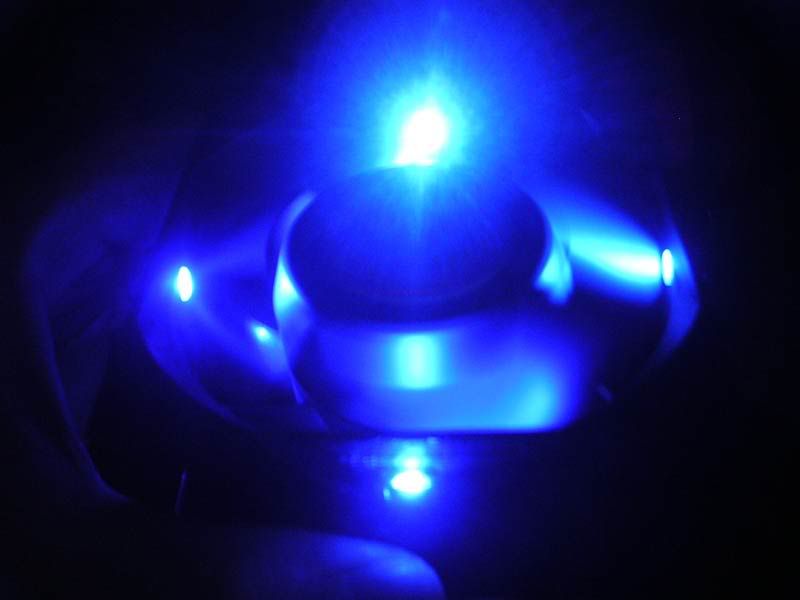
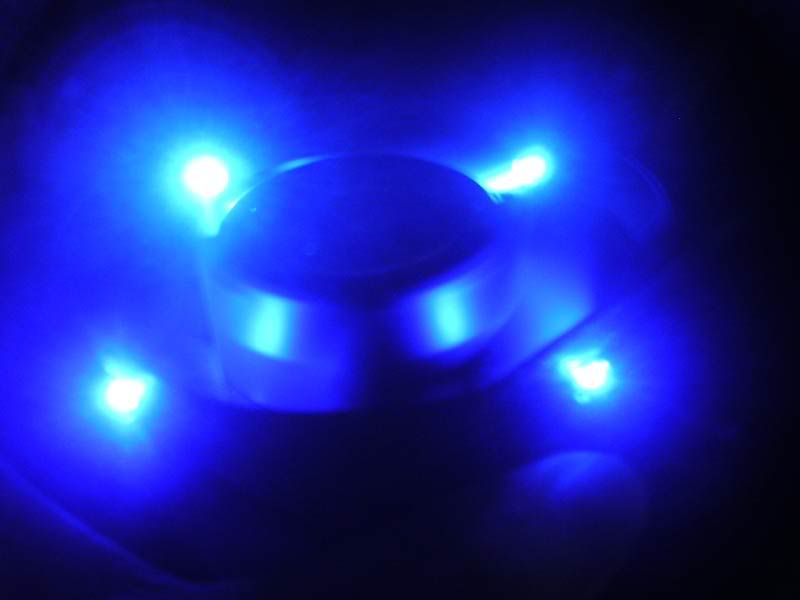
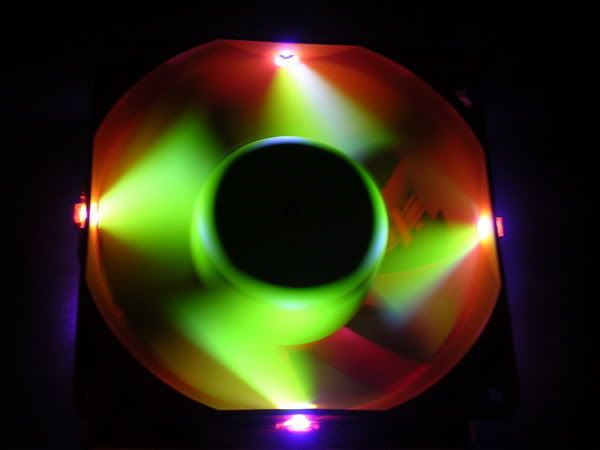
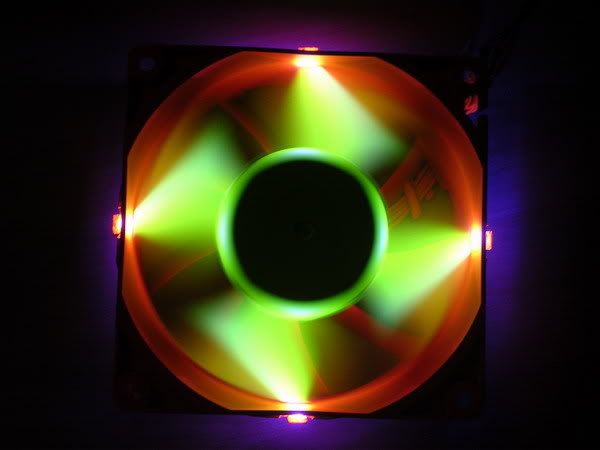
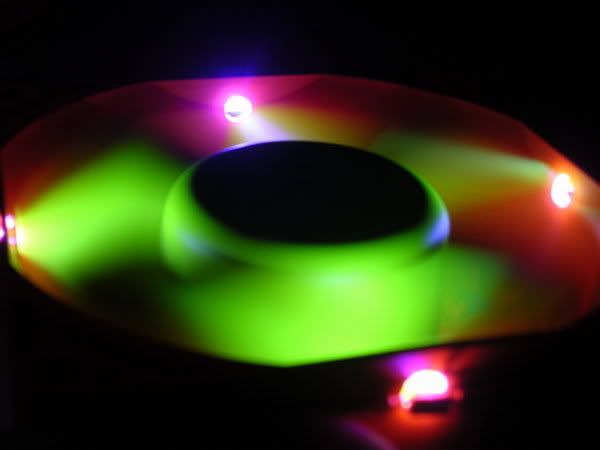
this is my latest mod, originally, this is a normal clear case fan,
so i have sprayed the blades into UV yellow, and made 4 holes and inserted 4x blue 5mm LED which i cut the oval surface and diffuse the clear epoxy. so enjoy the pics ya!! 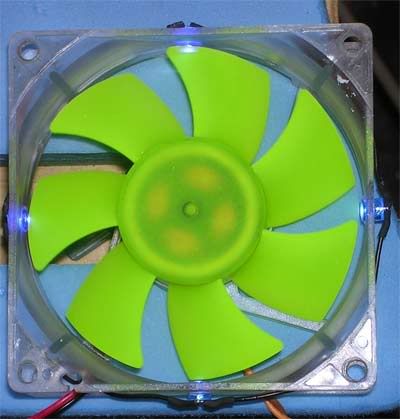 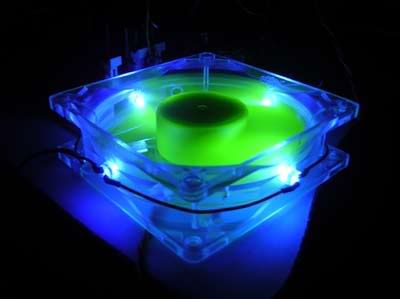  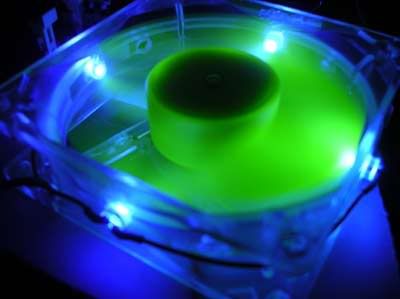 |
|
|
Mar 25 2006, 10:44 PM
|
|
Senior Member
4,561 posts Joined: Jan 2003 From: Penangites |
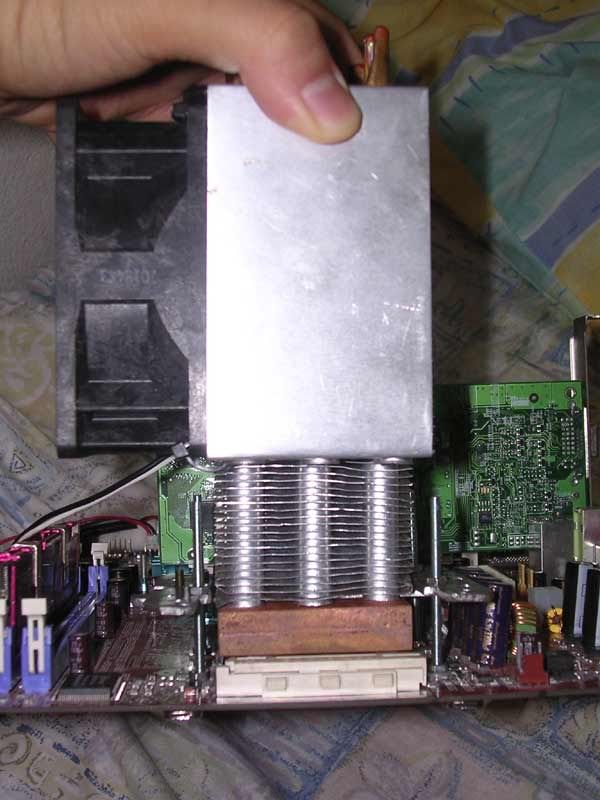
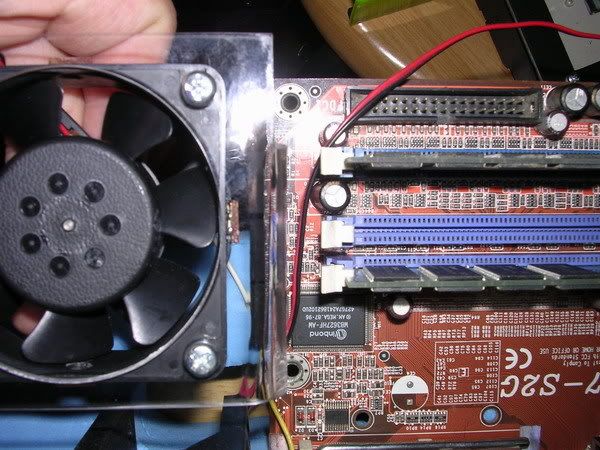
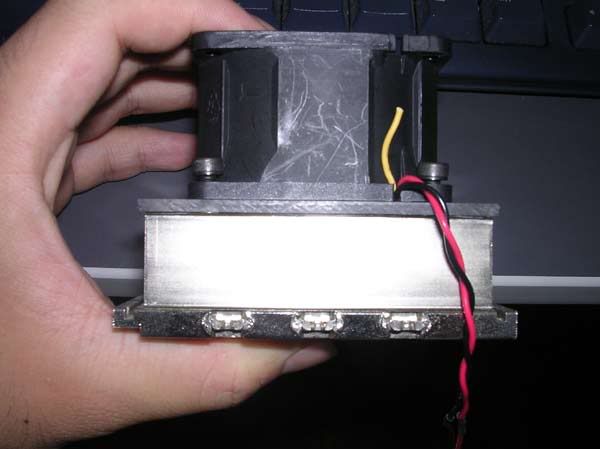 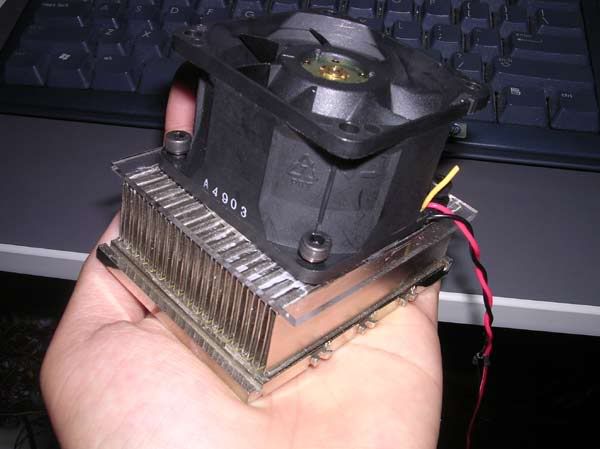 extreme compact cooling solution, for a forummer here. |
|
|
May 21 2006, 12:08 PM
|
|
Senior Member
4,561 posts Joined: Jan 2003 From: Penangites |
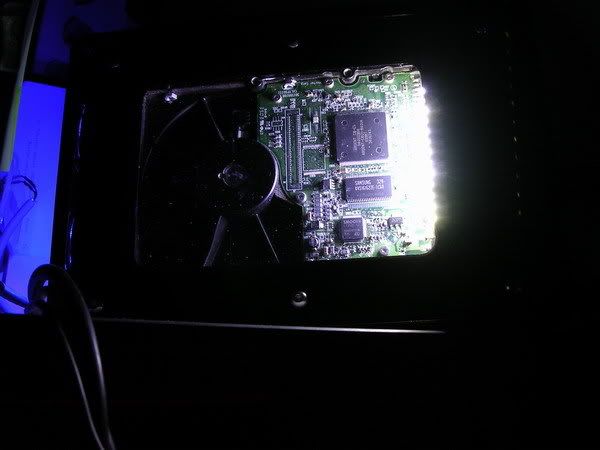
wanna look at my solution ??
  2x heatsinks sandwiched 3x HDD, i put thermal paste on the sides of the HDD. and a very low speed 92mm fan blowing in front.... it helps to lower the temperature a lot man...the heatsink is slightly warm only. |
|
|
May 24 2006, 11:24 PM
|
|
Senior Member
4,561 posts Joined: Jan 2003 From: Penangites |
naziled shots
  modded NMB 92mm low speed..... 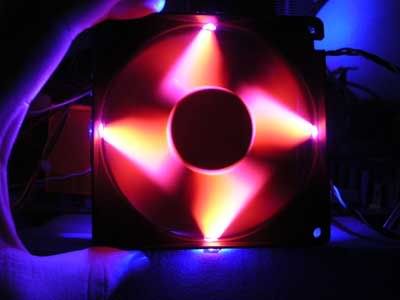 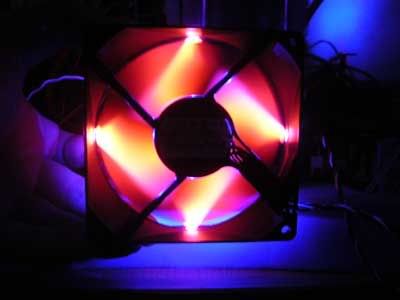 |
|
|
Aug 17 2006, 09:55 PM
|
|
Senior Member
4,561 posts Joined: Jan 2003 From: Penangites |
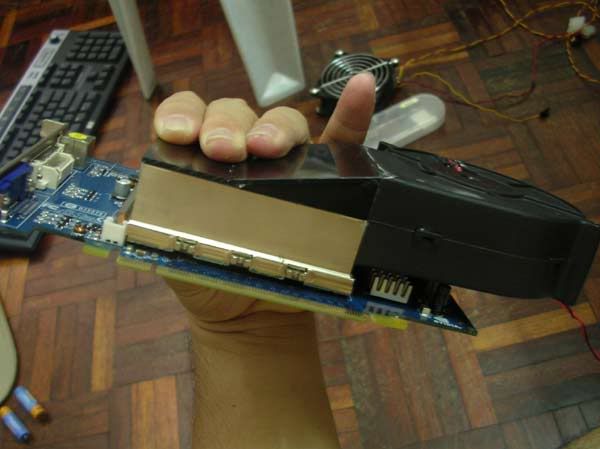
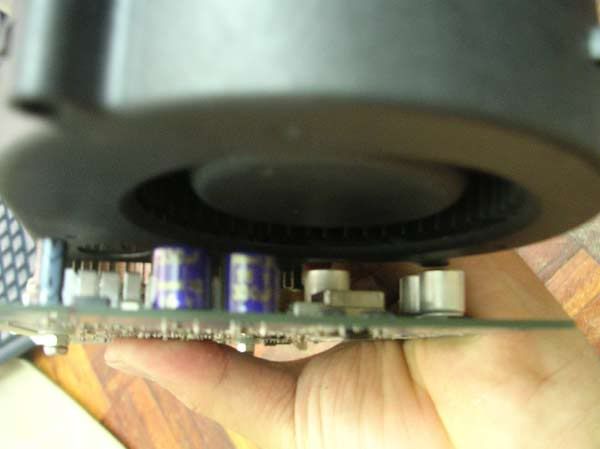
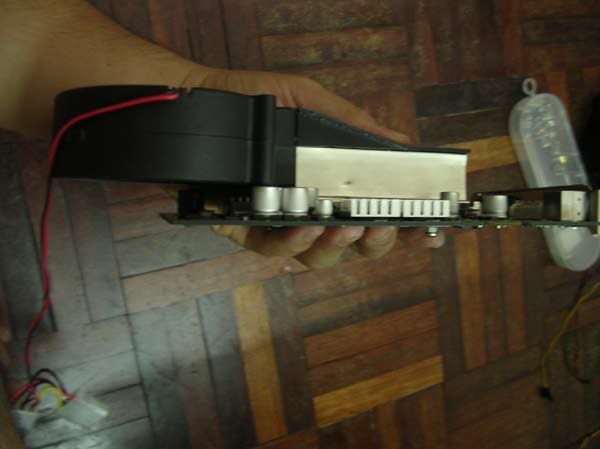
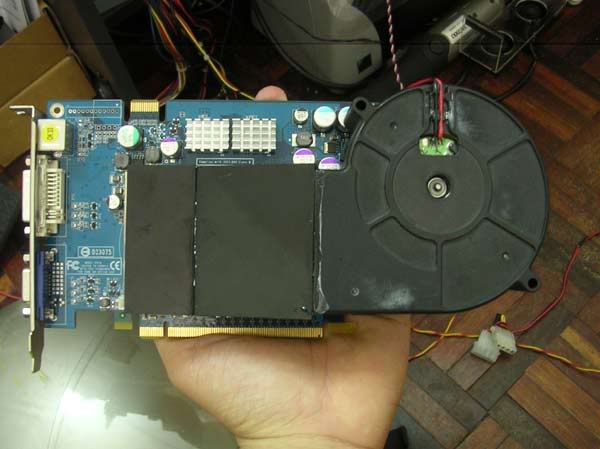
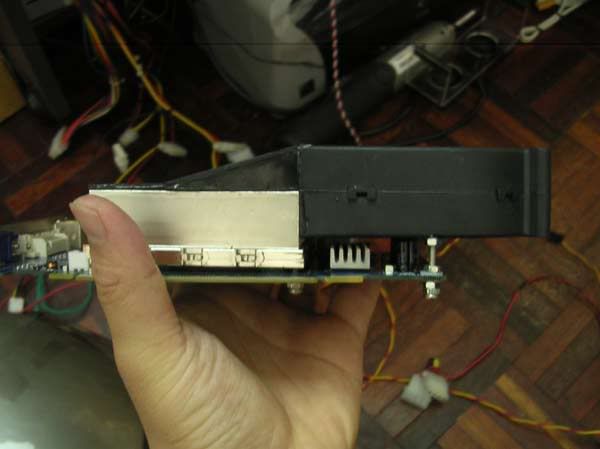
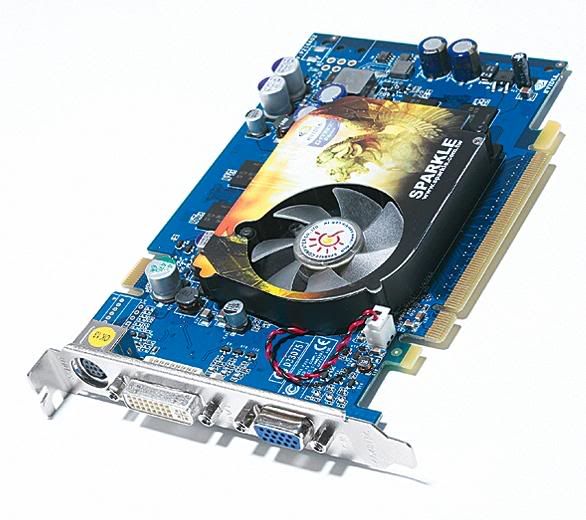
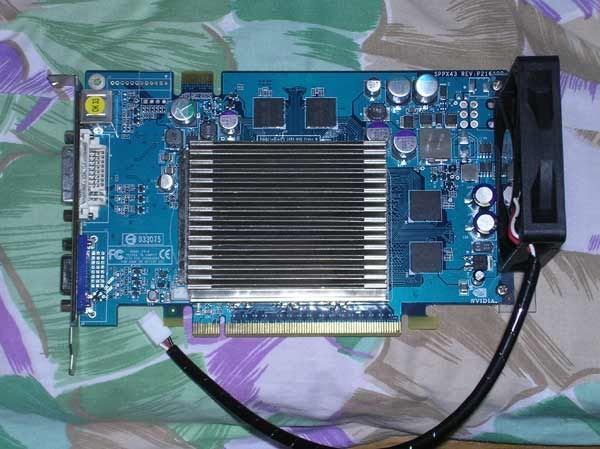
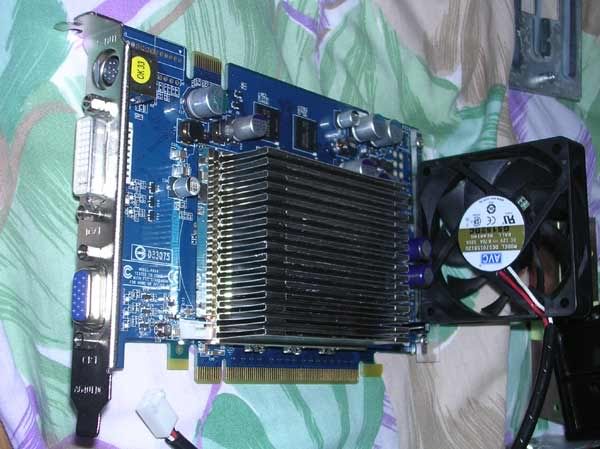
modded one XFX - 7600GS 256mb card
it comes stock with passive cooling, just a big area of Alu......user complaint that it will restart when it's running at full load.....so this is my solution !!! added one 92mm NMB fan (frameless) on it... reduced around 13�C from full load temperature and the card is running fine at full load 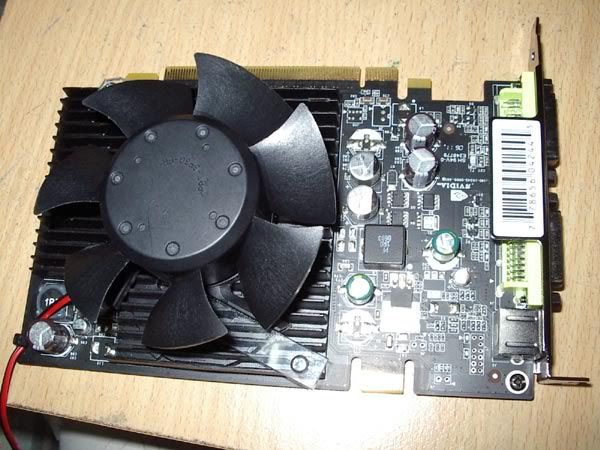 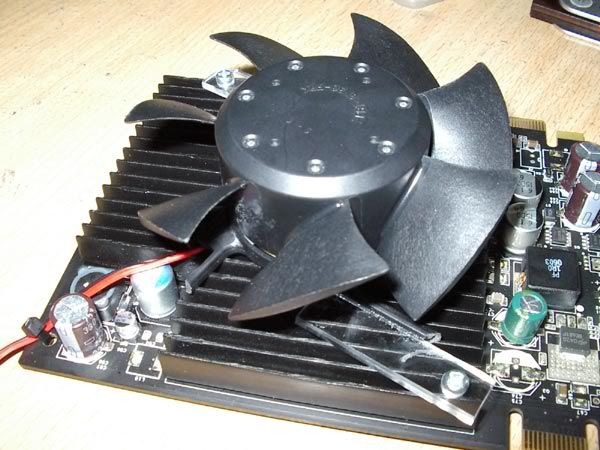 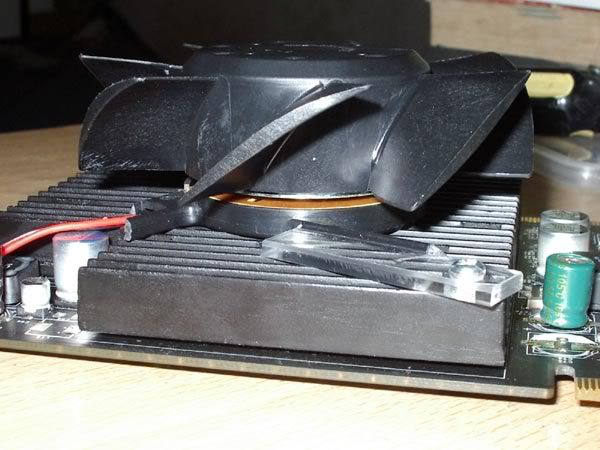 This post has been edited by AllnGap: Aug 17 2006, 09:56 PM |
|
|
Aug 28 2006, 09:36 AM
|
|
Senior Member
4,561 posts Joined: Jan 2003 From: Penangites |
this is the 120mm Naziled fitted into a acrylic faceplate at the size of 3x CDROM bay and it's placed into the front panel
    |
|
|
Aug 28 2006, 09:42 AM
|
|
Senior Member
4,561 posts Joined: Jan 2003 From: Penangites |
just some forummer's pics using my ram coolers......enjoy !
    |
|
|
Aug 28 2006, 09:57 AM
|
|
Senior Member
4,561 posts Joined: Jan 2003 From: Penangites |
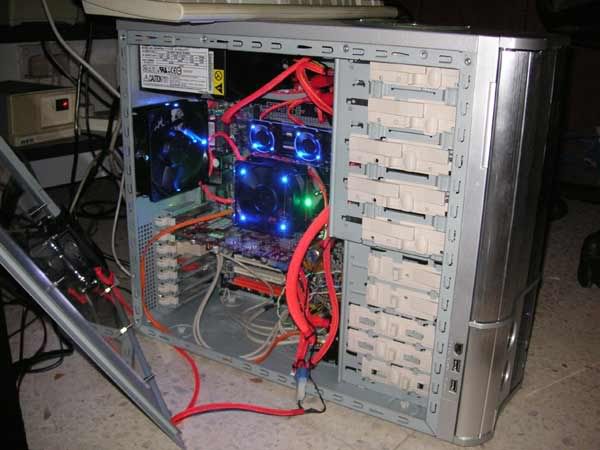
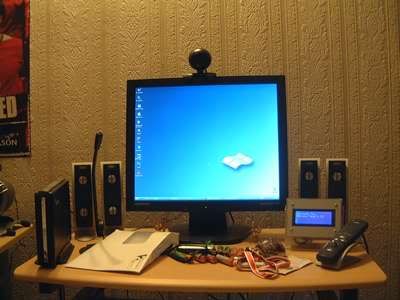
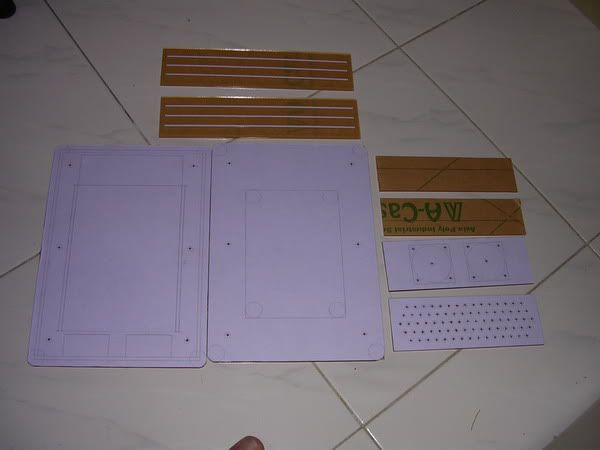
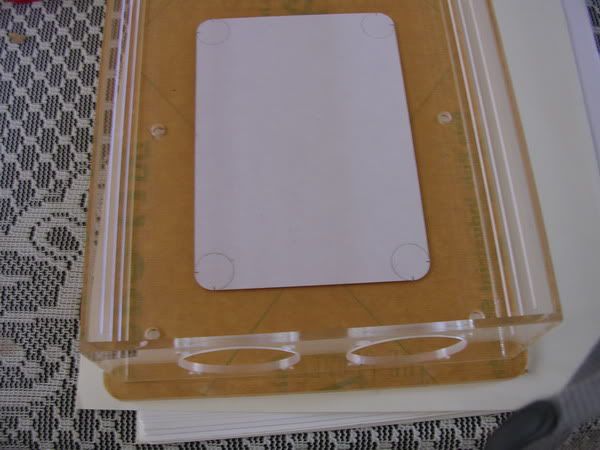
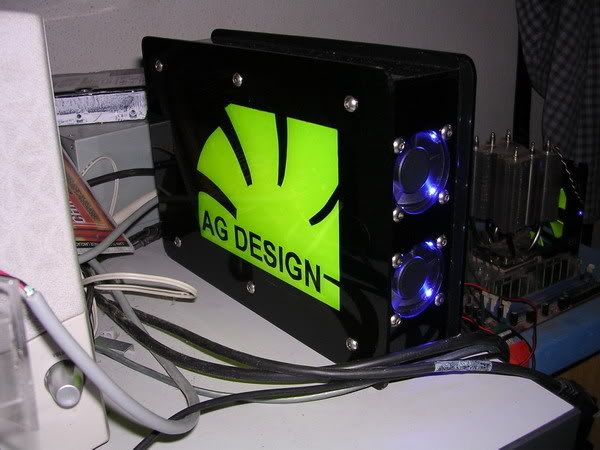
okay, since i cant afford mini Imac for her, i have to make one casing that looks like mini mac
so this is what i'm going to throw into the mini casing. - Pentium 4 1.8Ghz - Matsonic MB - 512mb value ram - lousy graphics card - DVD ROM - cap A PSU - 2 x 60mm fan - 1 x 92mm fan okay, i'm going budget on this, just nice casing, no window or whatever as long as it looks nice outside. i wouldnt want to invest on the frame, so i used the motherboard as the support for the heavy things like CDROM and HDD so basically i should stuff all these into a box measuring about 21mm(thick) x 205mm(height) x 317mm(length). 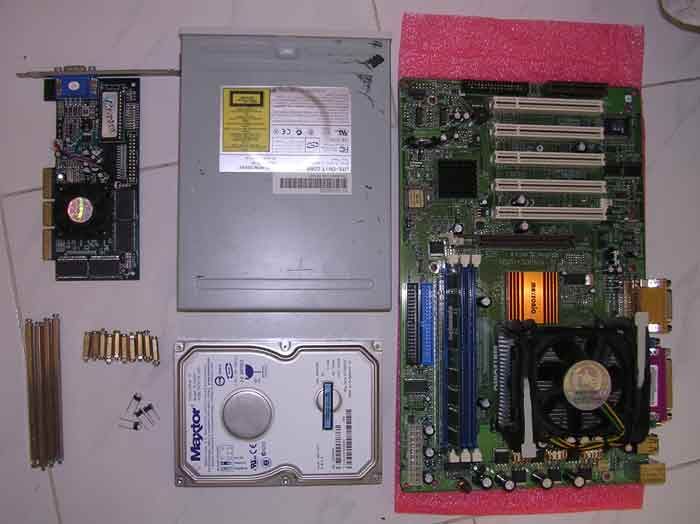 i started off with the motherboard base acrylic, drilled 7 screw holes and put in the motherboard stand. 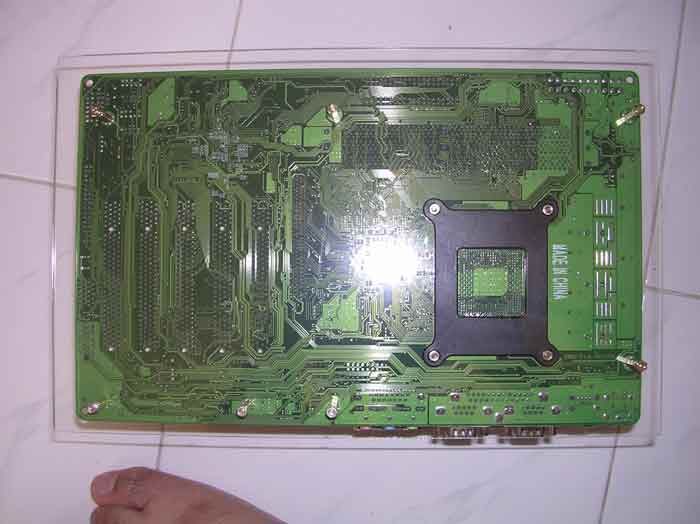 i used 4x long motherboard stands to support the base for the CDROM and HDD. those stands are really expensive but they are so useful in building workstation style design. 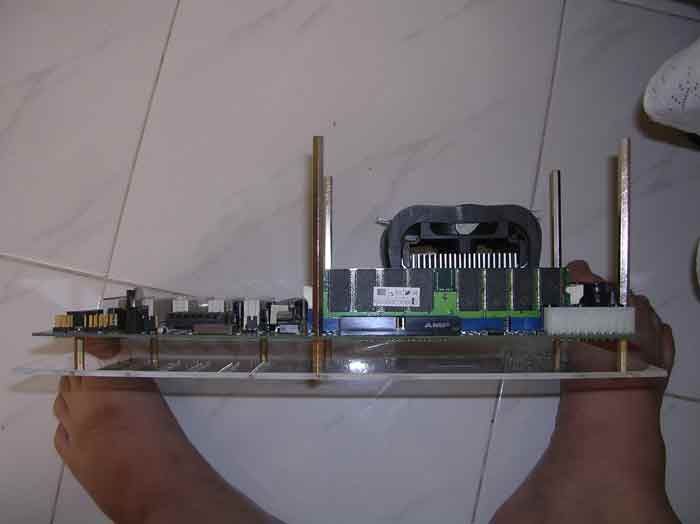 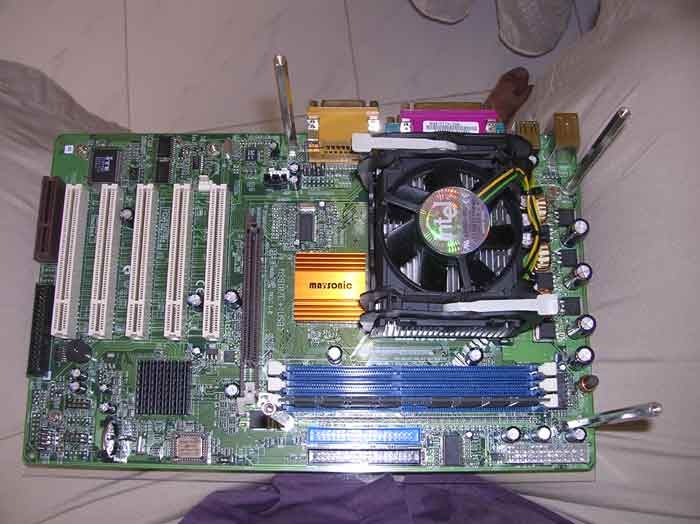 made another acrylic base for the stands 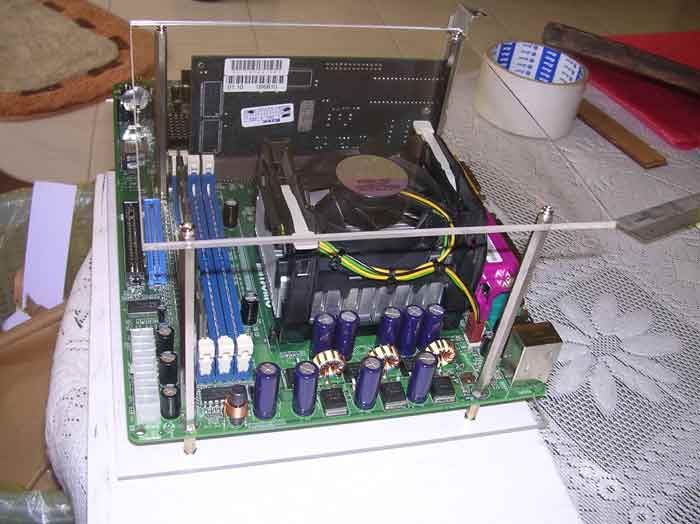 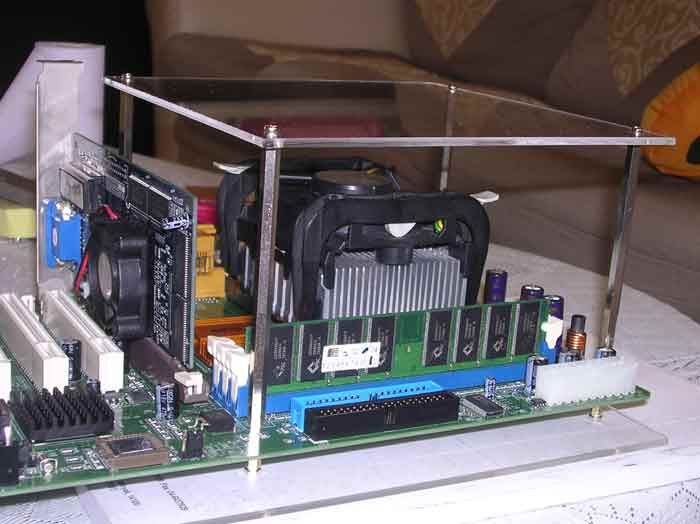 basically this arrangement is what i have in my mind, but with the PSU running naked i'm leaving the front panel for the surprise, so i have to push the fans near the heatsink and exhaust at PSU area.  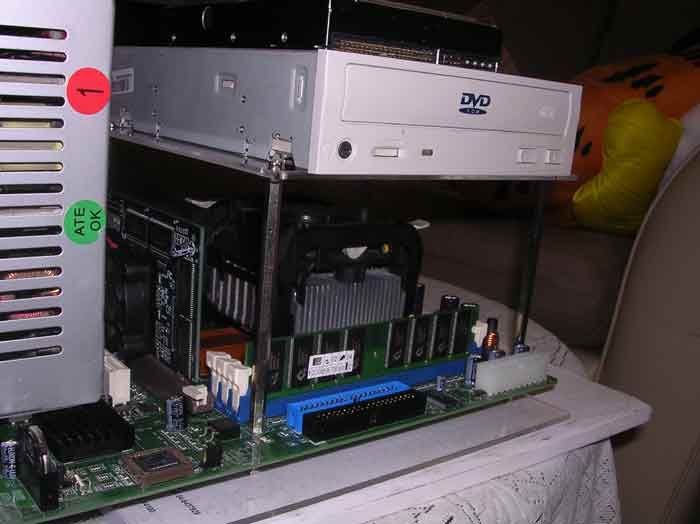 rear part of the casing 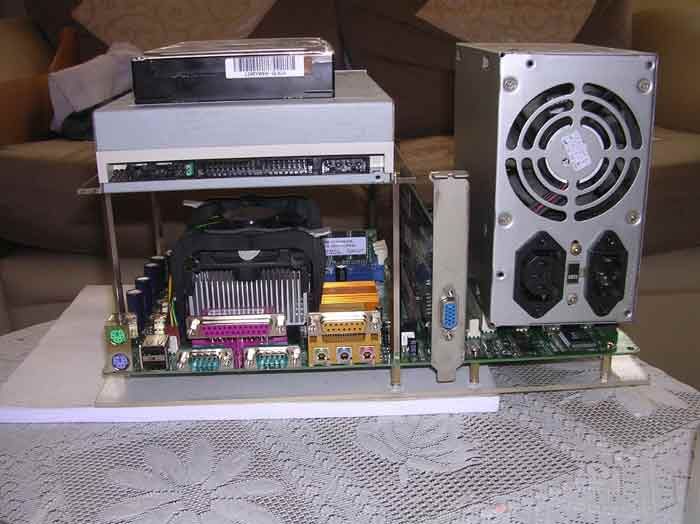 |
|
|
Aug 28 2006, 09:57 AM
|
|
Senior Member
4,561 posts Joined: Jan 2003 From: Penangites |
so i went to remove the PSU cover, chop off the fan, the power cord wires, and just a bare circuit.
as i'm using acrylic as a base, it's not grounded. hence i did some soldering to connect the 4 points. note that the 4 points are actually the Ground for the power cord 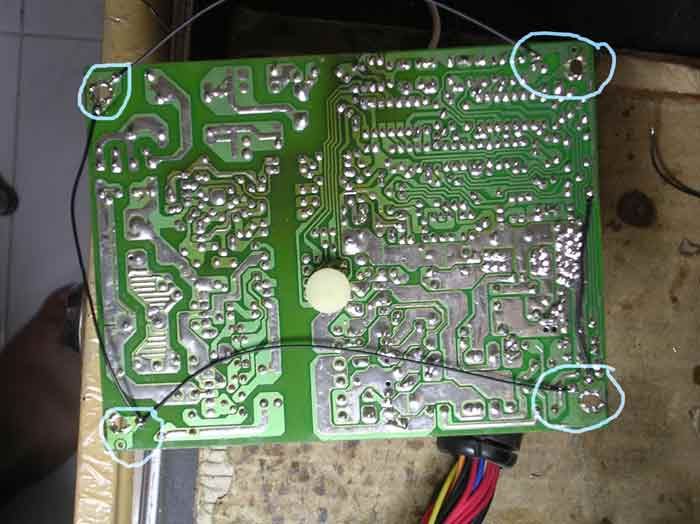 so i'll leave the PSU aside first and finish the casing before coming back to the power cord. basically this is the 2x 60mm fan holes for the intake for the CPU 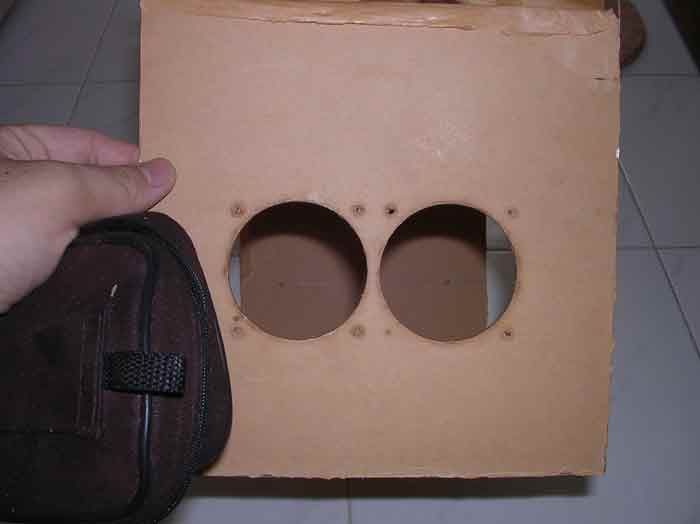 the same goes to the other side of the casing, which i made 4 holes with motherboard stand to hold the PSU. when everything is completed, i sticked them together 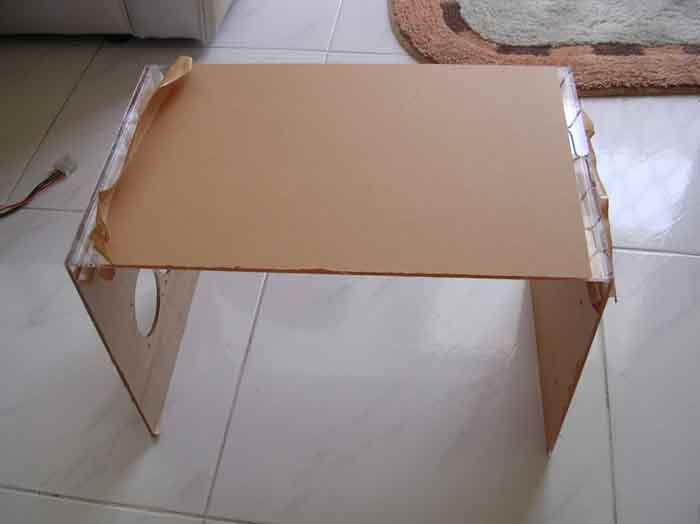 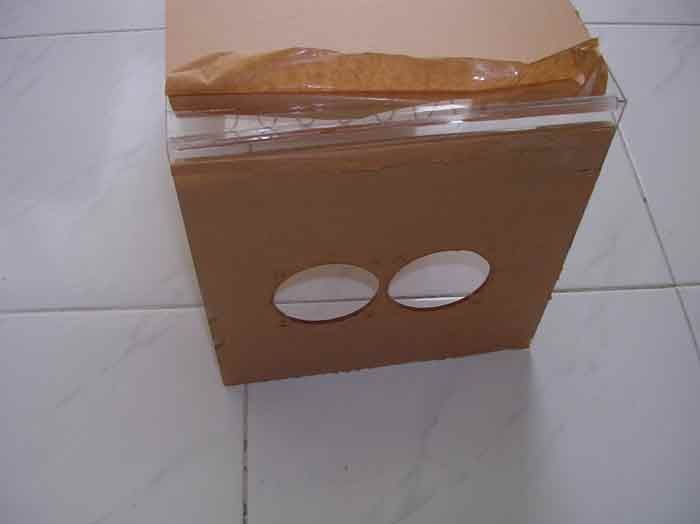 i used the triangle lining to hold the sheets 90� to each other tightly. it's really hard to use those as the adhesive could not sip nicely. i had to use syringe needle to put the adhesive to get a nice joint. had one accident there, but nvm, i'll think of a way to cover that 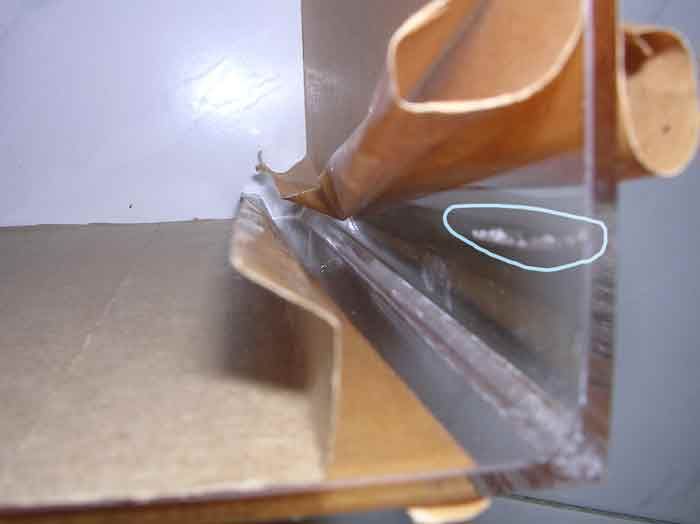 when the top and side panels are completed, it's time to finish the rear panel. i made several holes using drills, files, and hand saw, how i wished that i have a Dremel on my hand  the round hole is the 92mm fan hole while the other hole on the bottom is for the PSU power cord 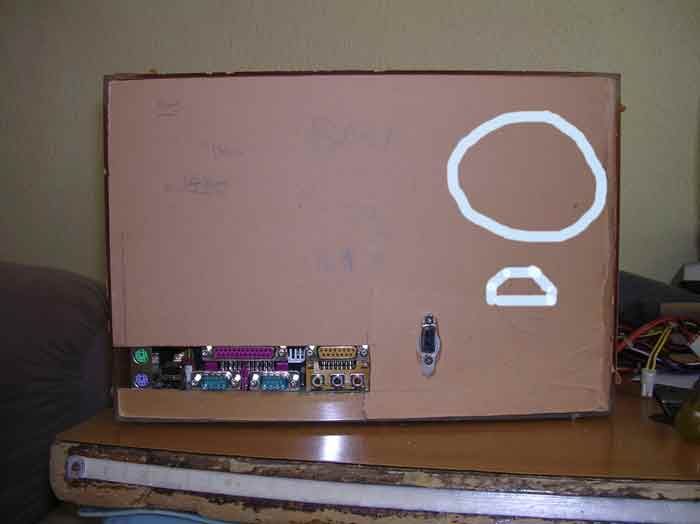 so this is how it looks like (partially) when things are being put together 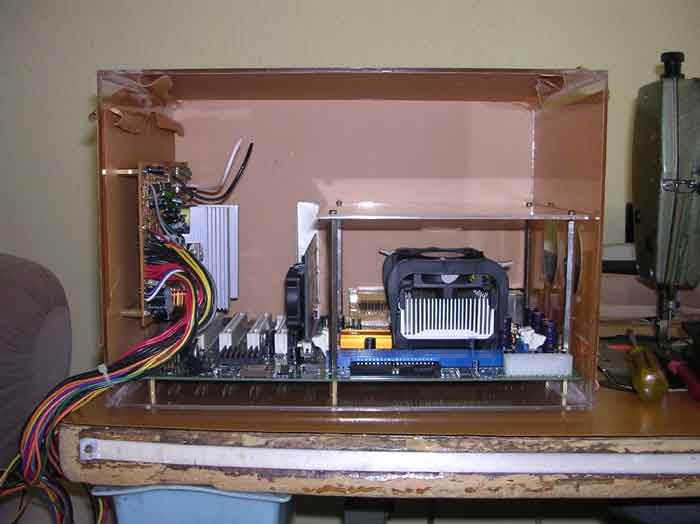 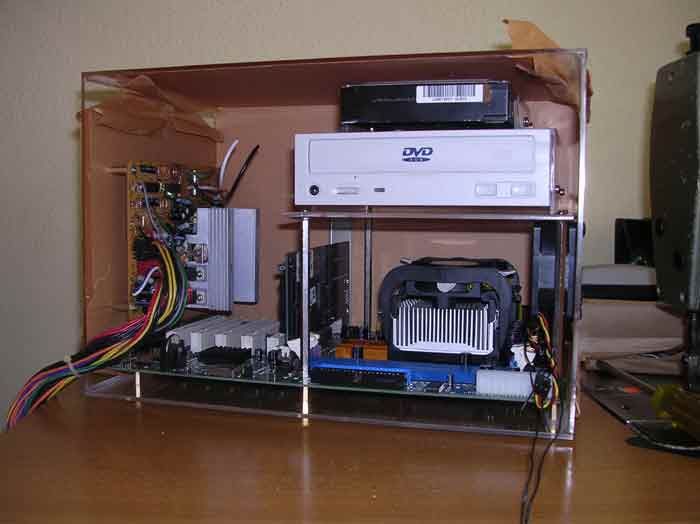 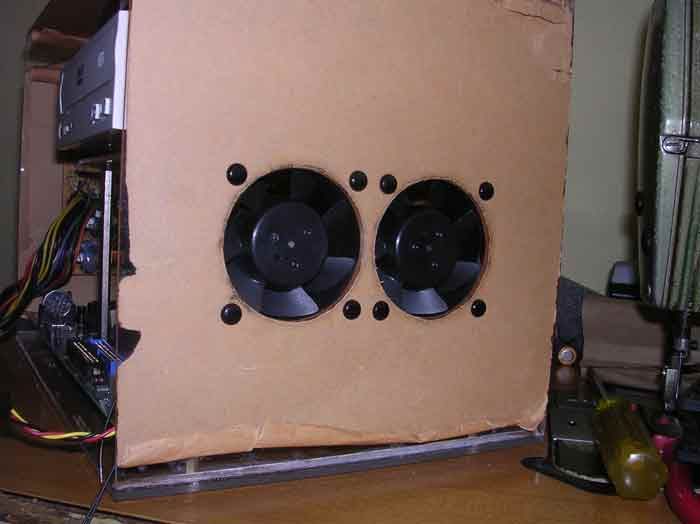 |
|
|
Aug 28 2006, 09:57 AM
|
|
Senior Member
4,561 posts Joined: Jan 2003 From: Penangites |
so i removed the motherboard from the base and then joint the whole thing.
this is how it looks without the front panel  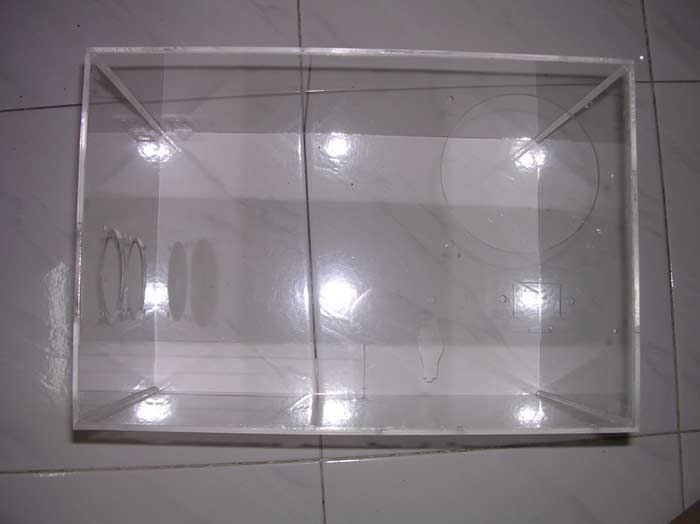 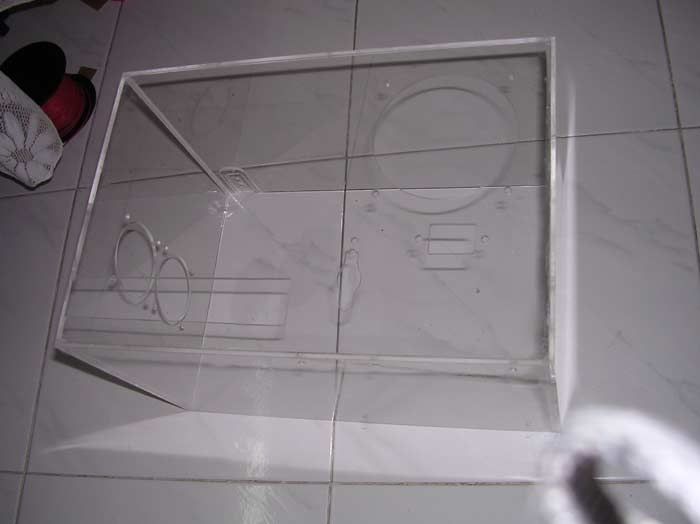 then it's spray job time !!!!! this is just the base layer coz was doing the spray job at 12.30am. note that the spray job is inside and not outside. 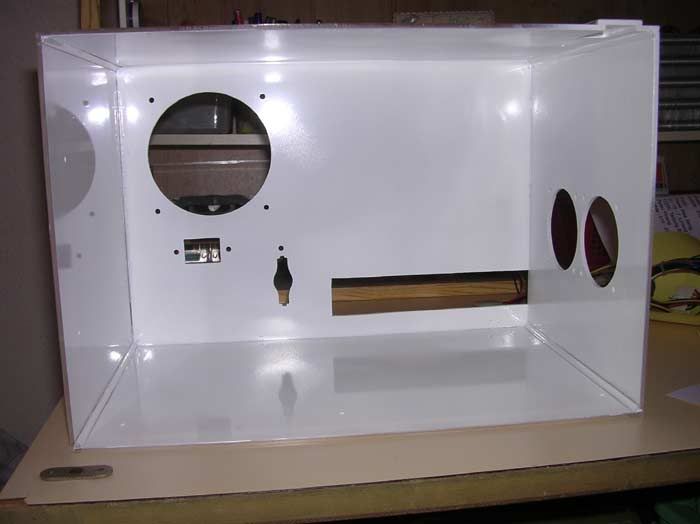 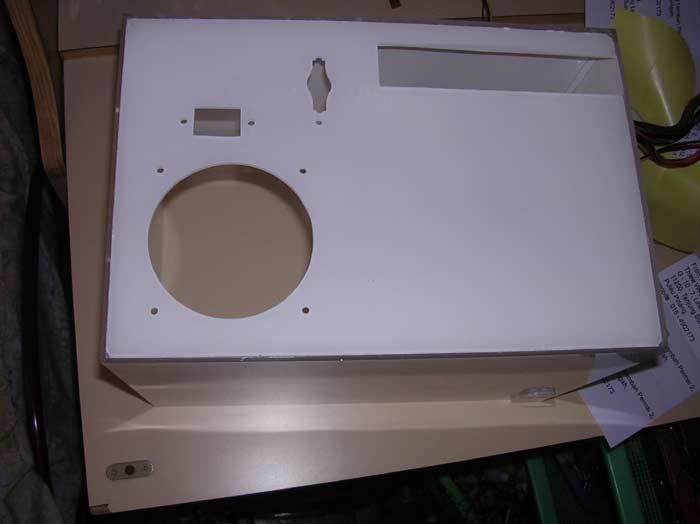 this is the left side of the casing, which is to hold the PSU 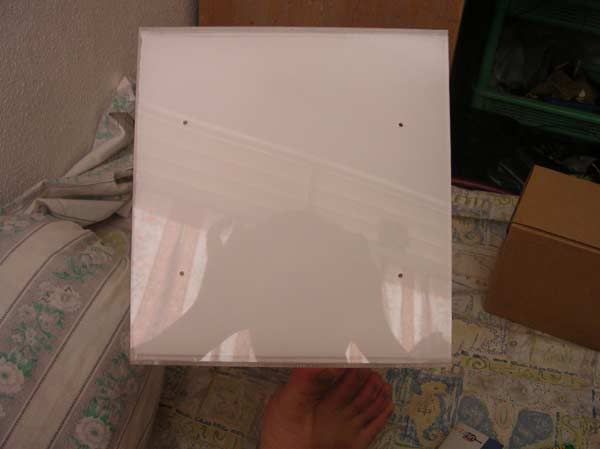 this is the rear part of the casing 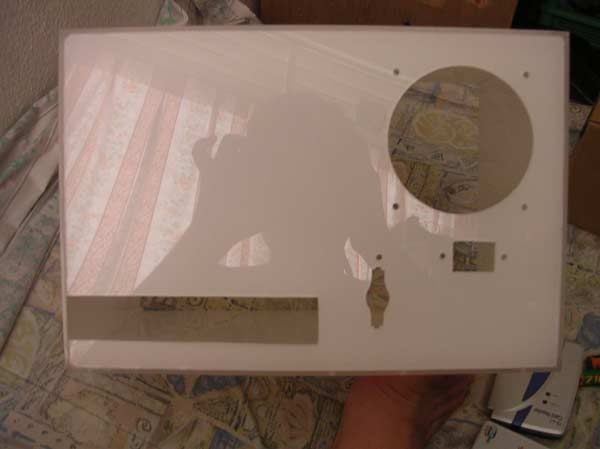 the right part of the casing, near to the CPU 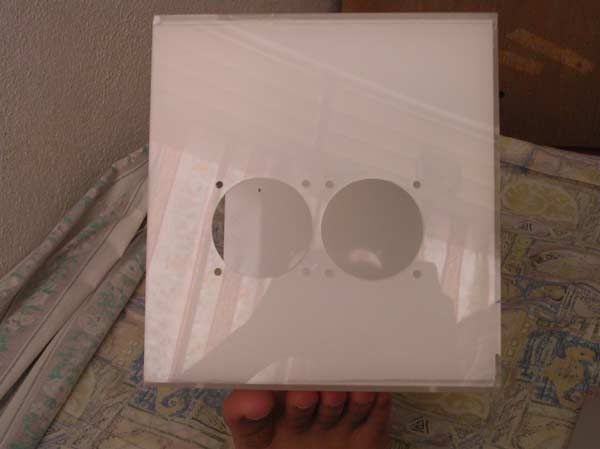 the top right corner of the PSU which had some accident just now. i cut out a corner and will put SMD LED below the 2 dots for HDD activity lighting 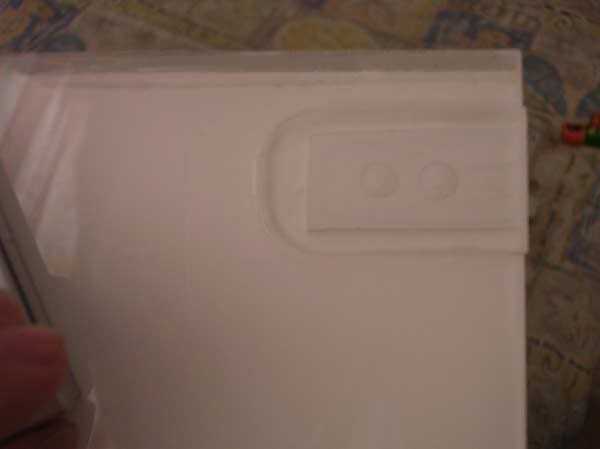 |
|
|
Aug 28 2006, 09:59 AM
|
|
Senior Member
4,561 posts Joined: Jan 2003 From: Penangites |
mounted a 80-92mm fan converter there, actually i thought of mounting a 92mm inside, but i dont have a slow speed one......anyway, the slow speed NMB is good enough to cool this baby down
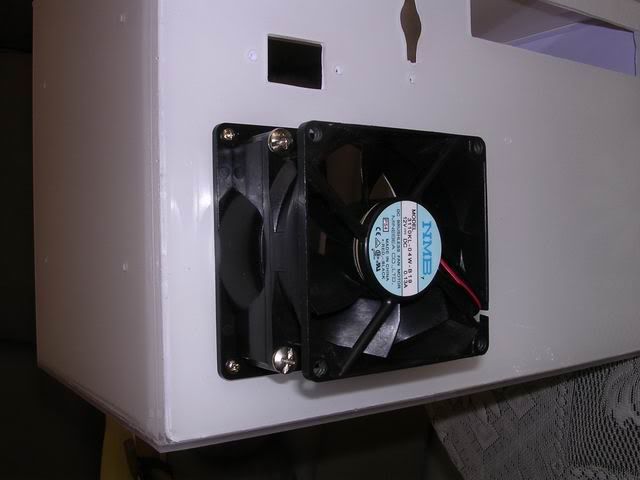 this is the picture of the fan from inside, and i've used A4 size white stickers to cover all surfaces to prevent any unwanted scratches during installation, and to make the paint look more solid, coz the base paint is just nice, but not solid enough. 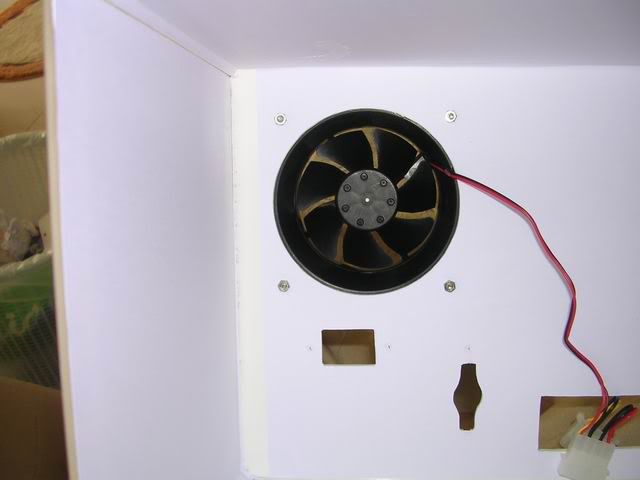 this is the front cover, by using L bracket that i fabricated to hold the thing back. but i've made some changes and i finally changed to row of L bracket instead of pcs coz it's much solid that way 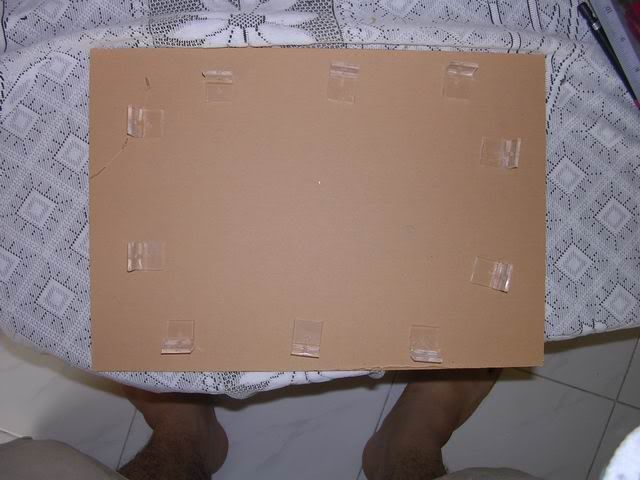 i used the plastic push pins to try the fitting. the front is the surprise part !!! total clean look for it, and i've changed the original idea to put the CDROM facing the front 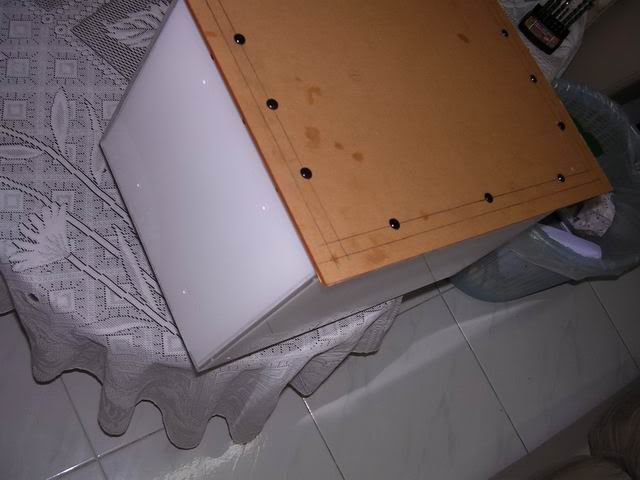 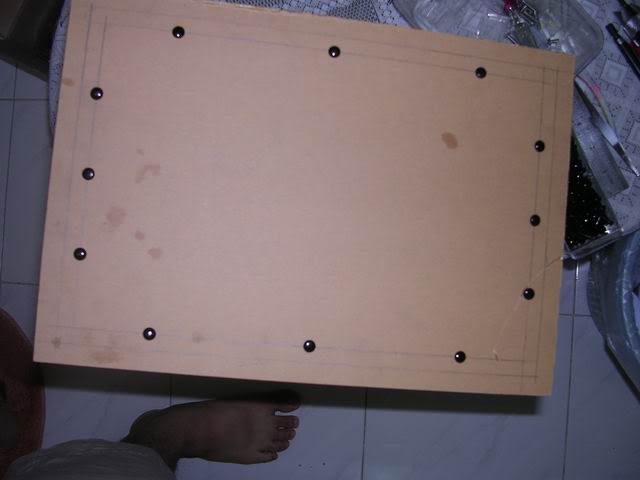 i've made an extender for to hold the CDROM and the HDD to be held from the top facing the side. 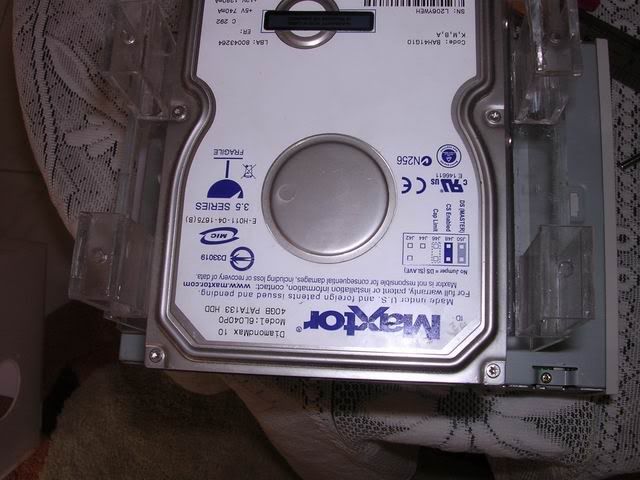 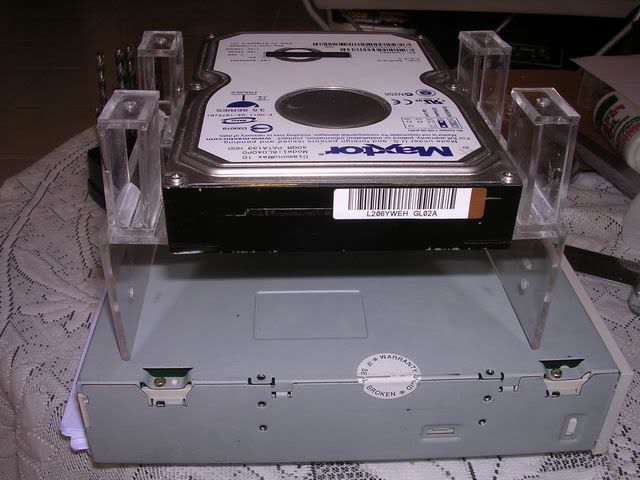 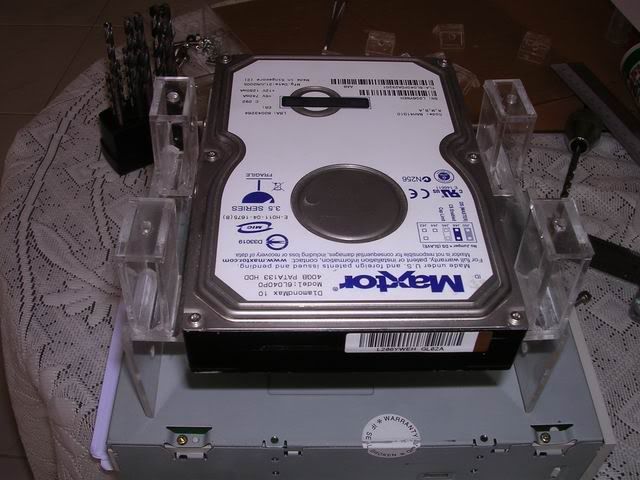 after i've mounted the CDROM, i made the markings on the position of the hole. 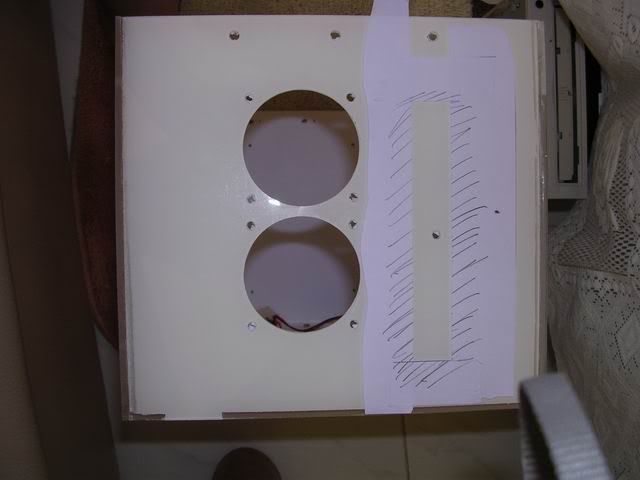 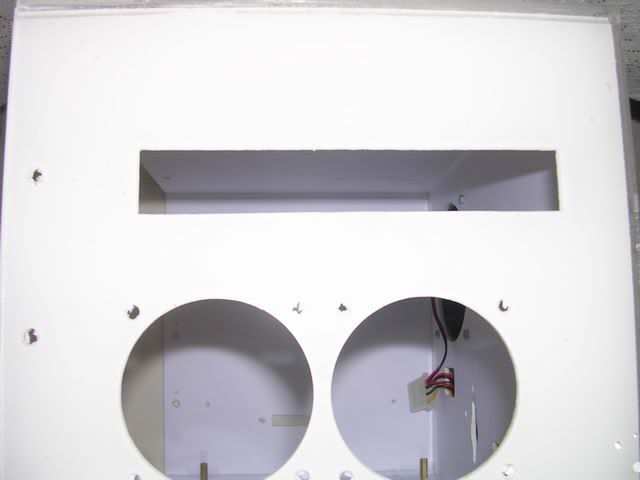 |
|
|
Aug 28 2006, 09:59 AM
|
|
Senior Member
4,561 posts Joined: Jan 2003 From: Penangites |
i've made the hole, remove the front plate of the CDROM, hook out the LED and the push button, made an 4.5mm extender so that i can use double sided tape for the new white CDROM panel with the bare CDROM tray.
the four screws are to hold the CDROM and HDD bracket 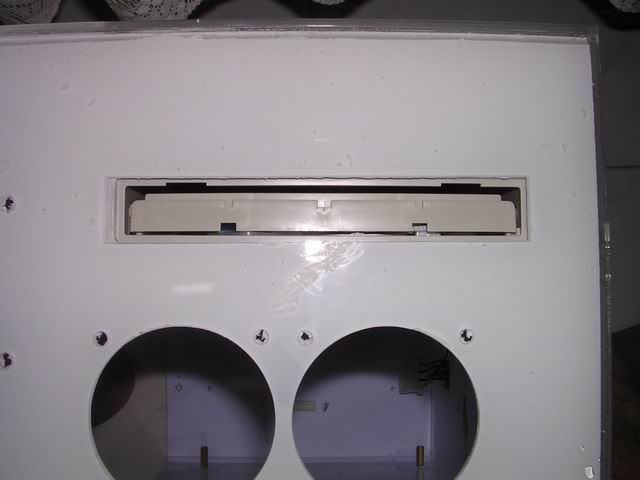 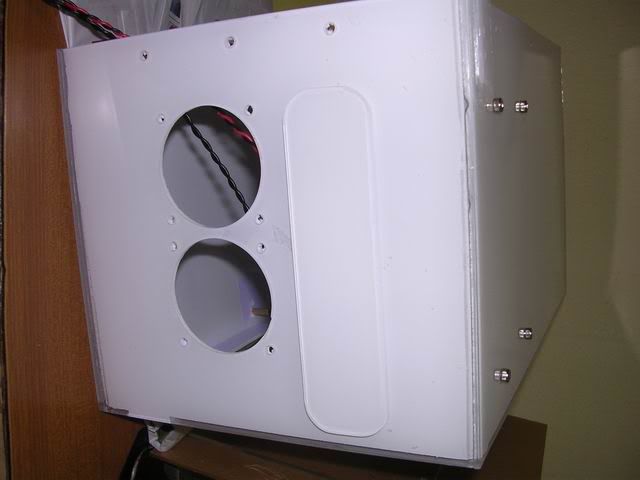  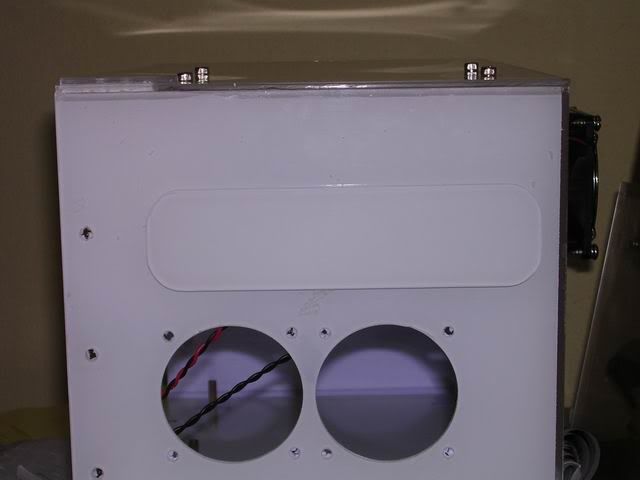 the surpise part !!! which is the front part..... took some time to get the right and cute puppies for the pics, and i had real headache arranging them nicely....  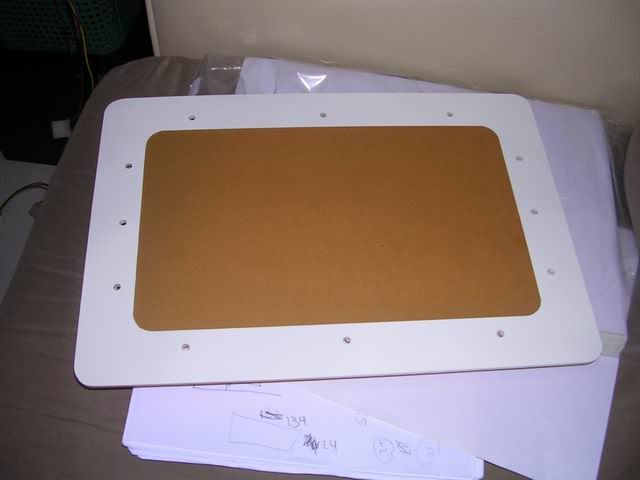  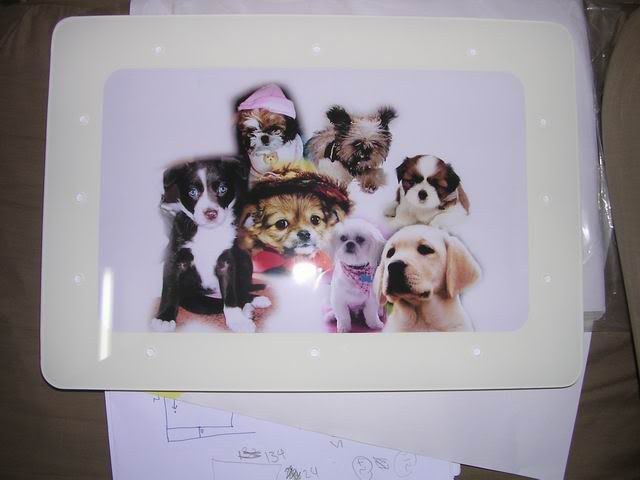 |
|
|
Aug 28 2006, 10:00 AM
|
|
Senior Member
4,561 posts Joined: Jan 2003 From: Penangites |
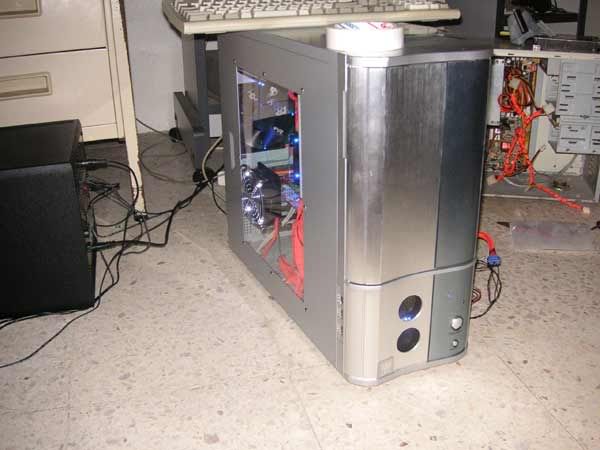
this is the completed product, but i'm really sorry coz i dint snapshot in detail the interior and some special features coz she needs her pc urgently.
i will take some pics and update this weekend. basically, i added leds on the 60mm fans.....i cant escape from bling bling fever and i added our picture on the top where the CDROM lies because excessive pressure from the CDROM made a slight crack on it, so i had to mark up with another layer and cover the flaw with a design. 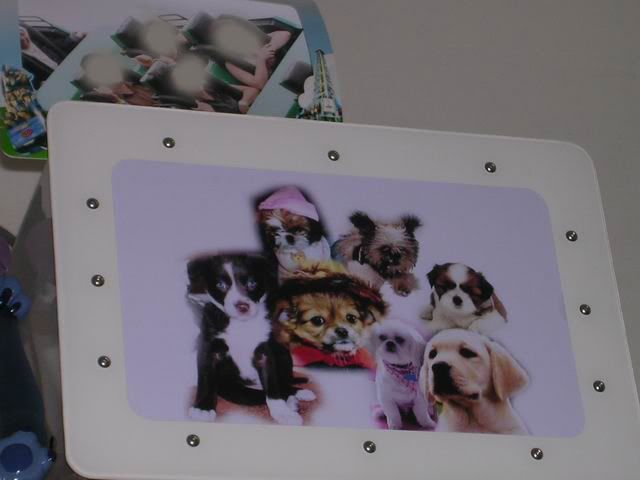 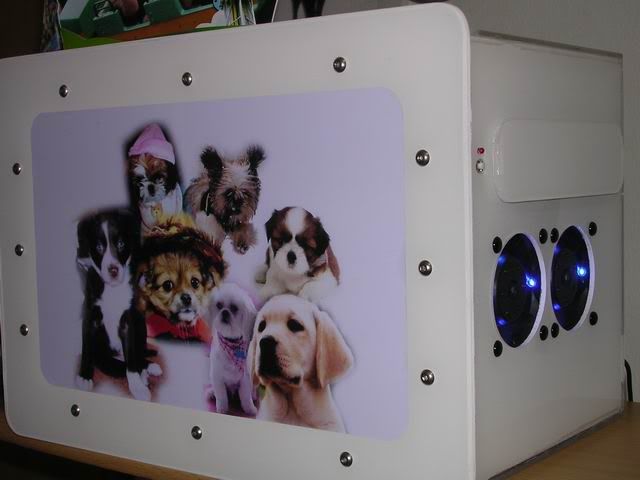 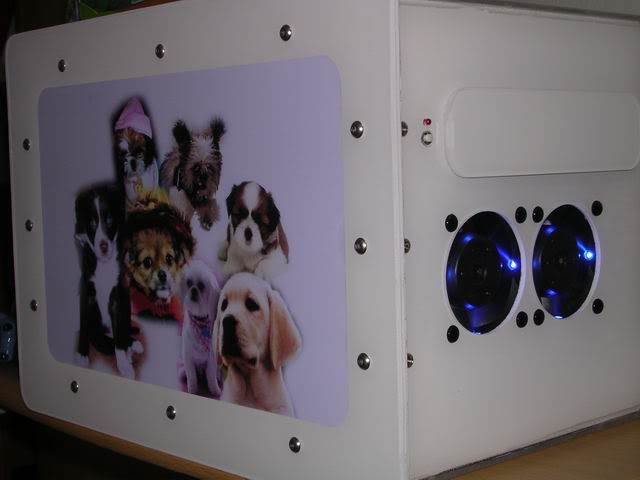 ( ianho : those are the sexy island key screws i was talking about on the front panel )i personally feel satisfied with this mod, but i would actually prefer it to be screwless coz it will give the total IMAC type of theme and the sleek look for the lady  but screw it , coz under low budget, low space, low IQ planning style, i had to come out with this design ( microwave shape with a door in front )but nevertheless, she loves the puppies in front more |
|
|
Aug 28 2006, 10:01 AM
|
|
Senior Member
4,561 posts Joined: Jan 2003 From: Penangites |
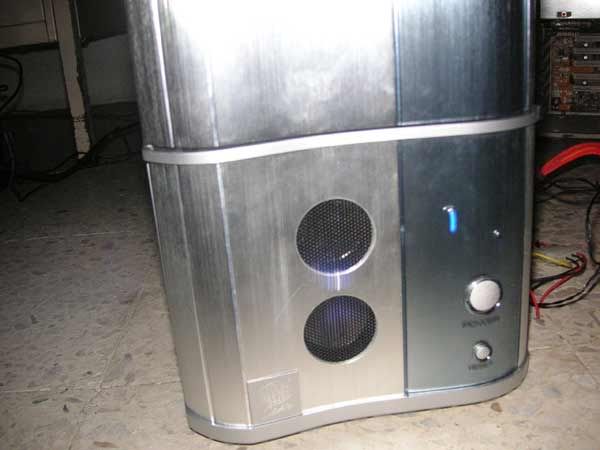
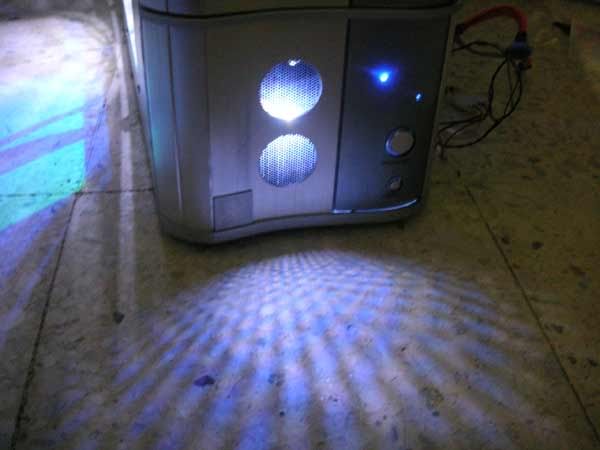
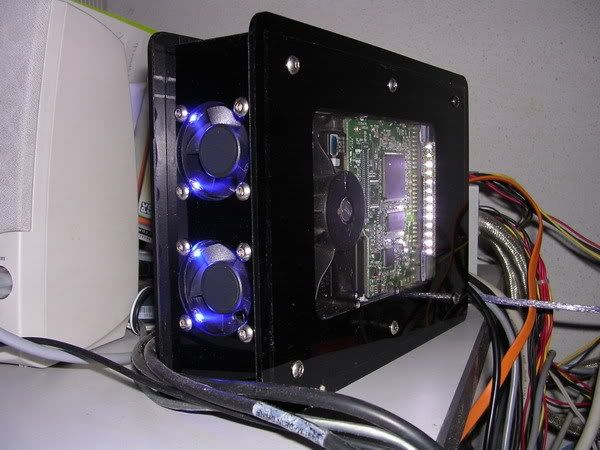
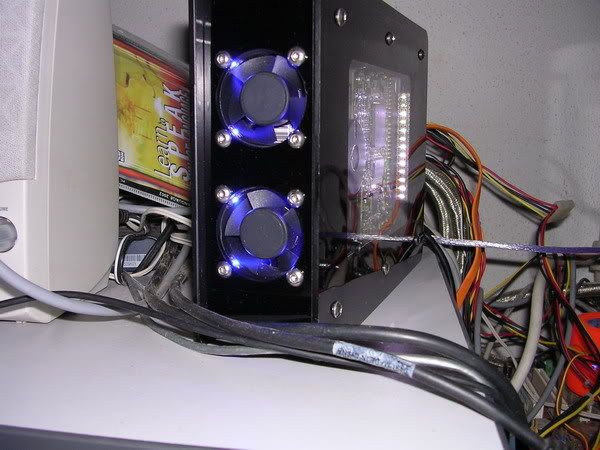
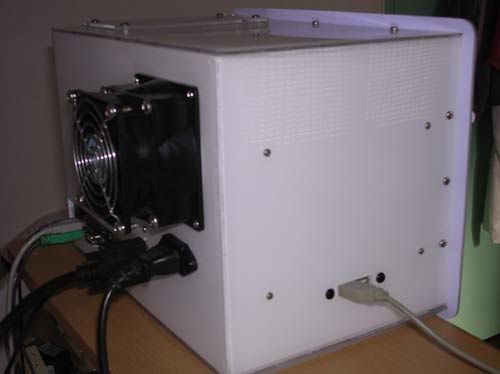 this is the back of the casing, with the 2x USB slots on the left side of the casing, the 4 screws are for the PSU PCB mounts screws. 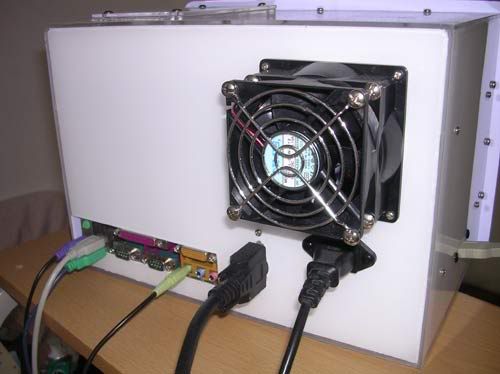 another rear shot, used 80-92mm converter, 80mm NMB low speed fan as exhaust. 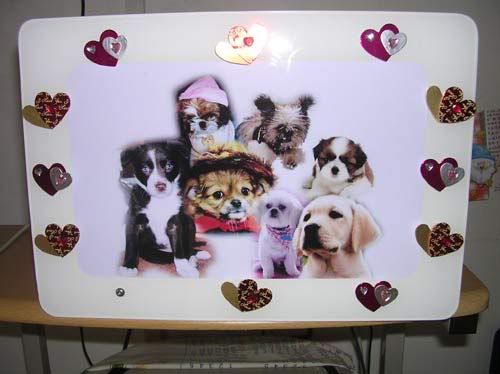 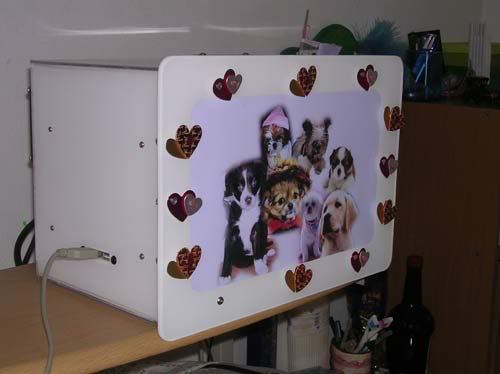 we went to the lifestyle shop and found something nice to cover those rounded allan key screw heads, it's love shape with double sided tape behind.  so she did this mod herself 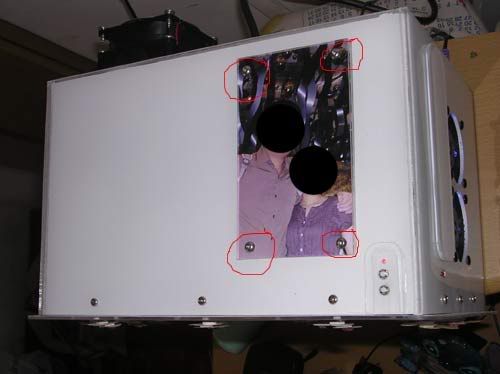 this shot is taken from the top. the 4x screws are used to hold the bracket for the CDROM and the HDD...... as i said earlier, due to the weight and the pressure from the screws, the acrylic had a small crack and i had to use this way to cover the damage. thus i stick on layer on the casing, and then used another layer to cover the pics..... the corner with the LED and 2x switches is actually the HDD activity light, ON/OFF switch and RESET 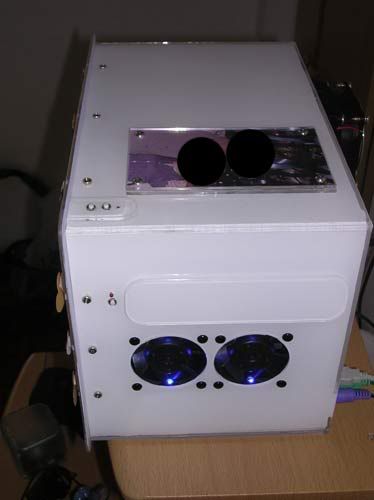 this shot is taken from the right of the casing with flash...... 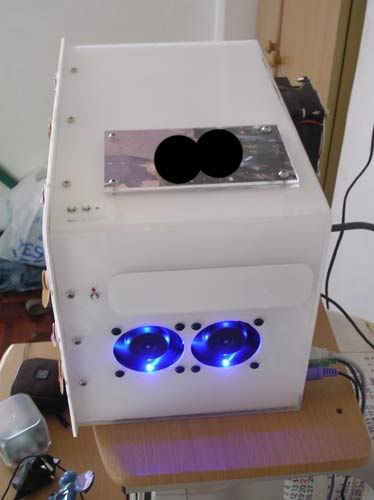 this shot is taken from the right of the casing without flash......  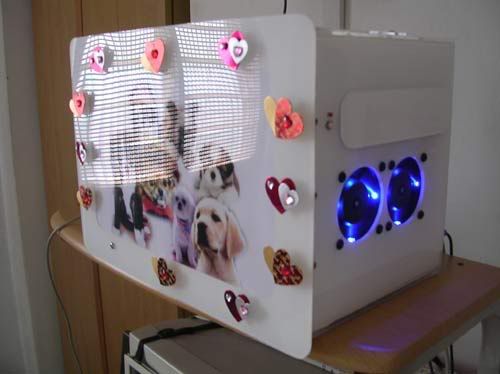 basically, this is how it looks like after some " modding " done by my gf......kinda pimpin' now 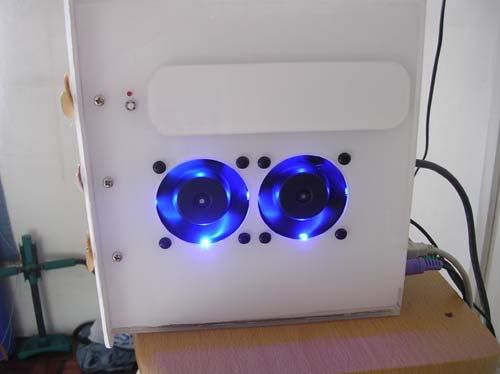 as u can see the dual 60mm fan setup with LEDs in it and the CDROM bay which i stealthed it with a white acrylic faceplate |
|
|
Aug 28 2006, 10:02 AM
|
|
Senior Member
4,561 posts Joined: Jan 2003 From: Penangites |
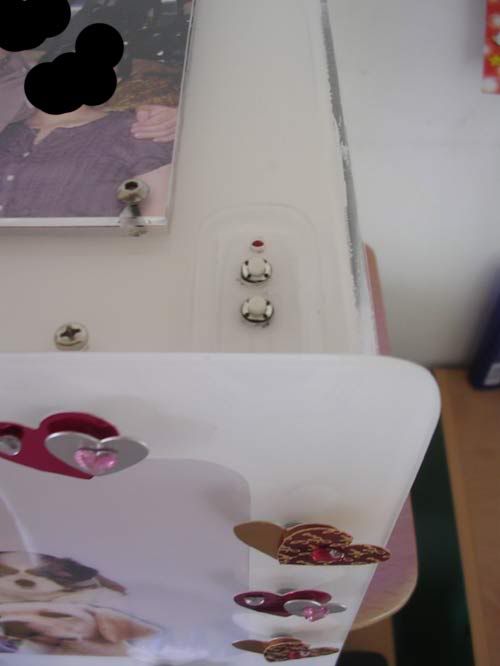 this is the pic for the switch on the top right hand corner of the casing which i used to cover another defect as well. 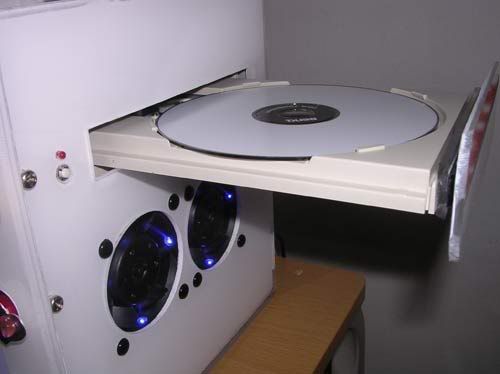 the DVDROM ejected.... 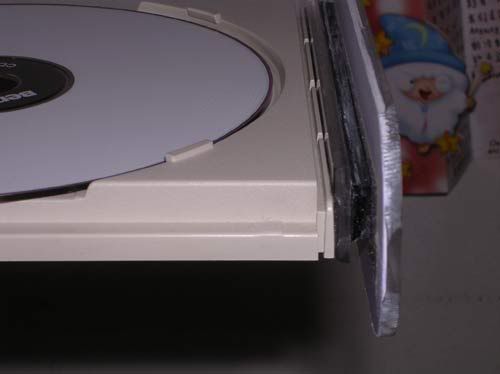 this is the extended part of the DVDROM bracket that i've done so that it can shut nicely 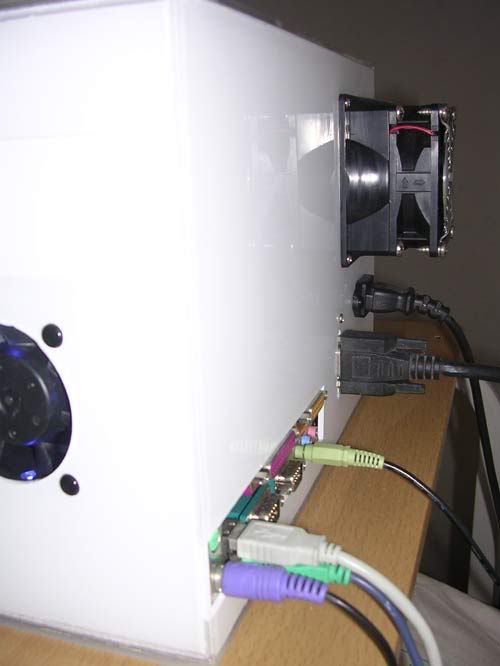 shots from the right side of the casing 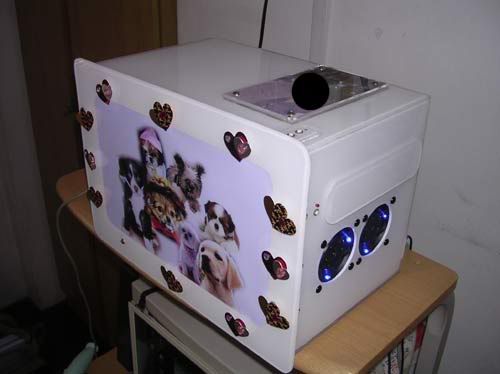 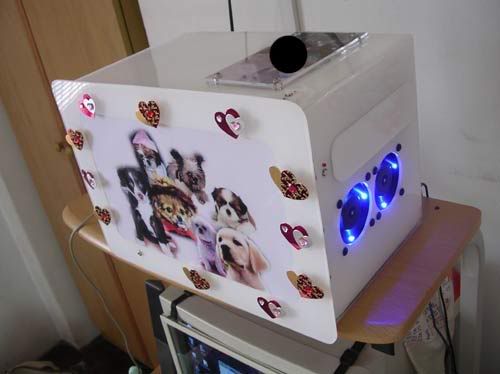 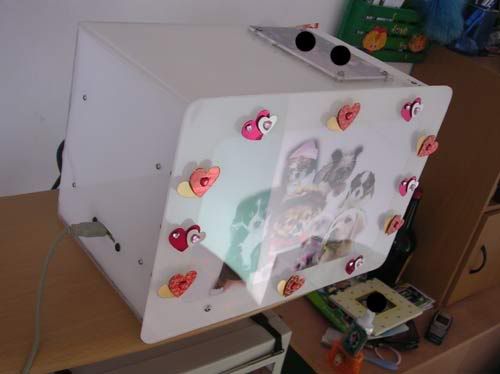 perspective shots comments are welcomed glad i've finally finished everything |
|
|
Sep 13 2006, 01:33 AM
|
|
Senior Member
4,561 posts Joined: Jan 2003 From: Penangites |
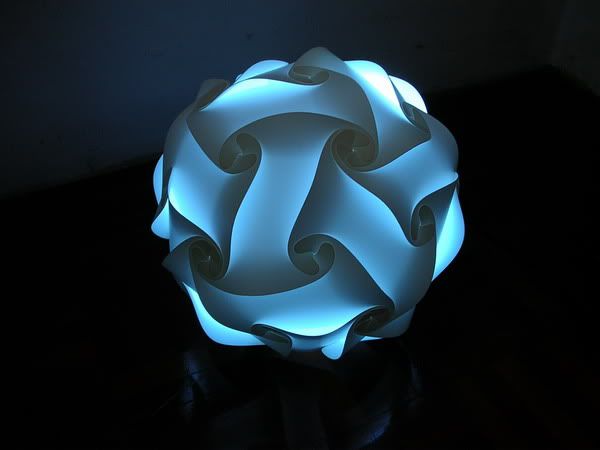
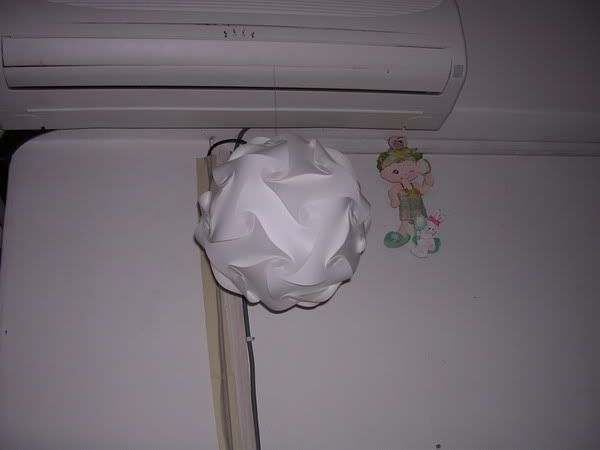
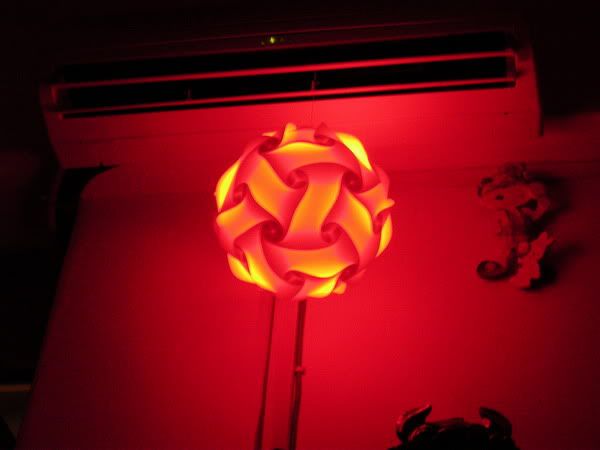
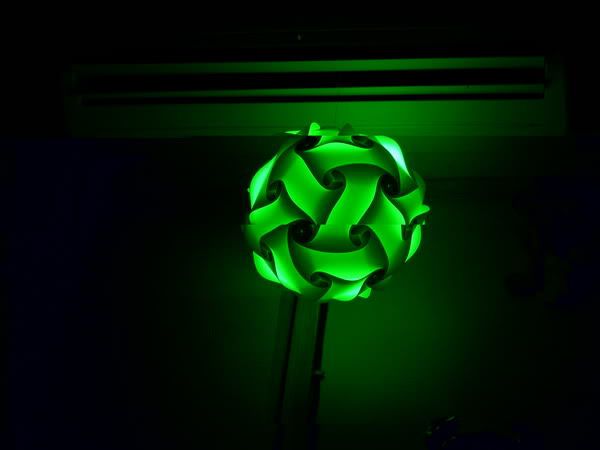
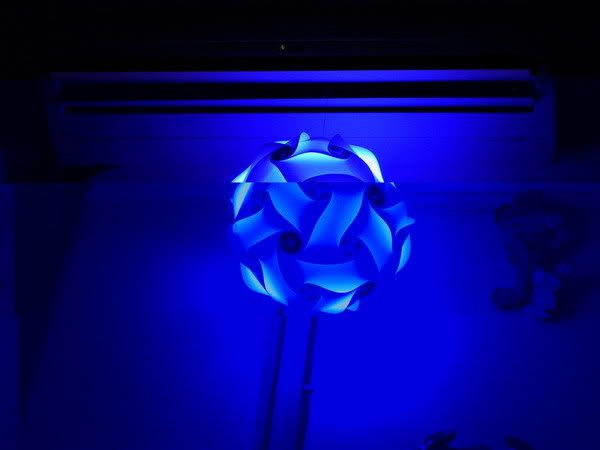
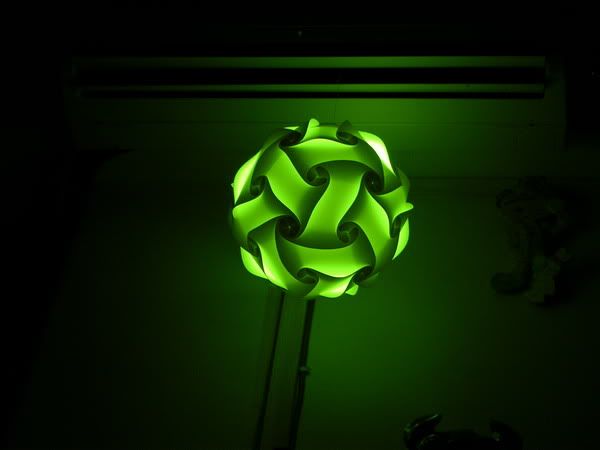
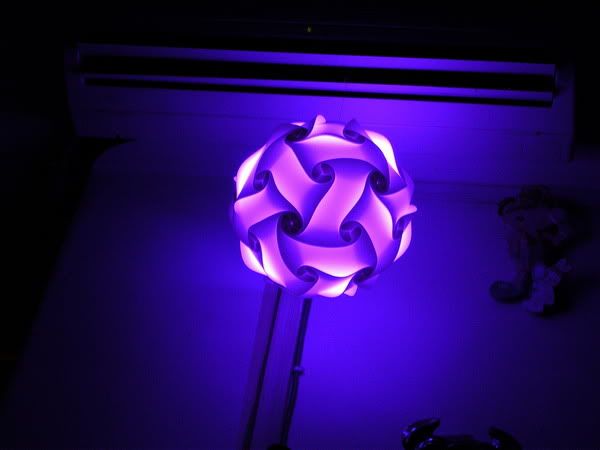
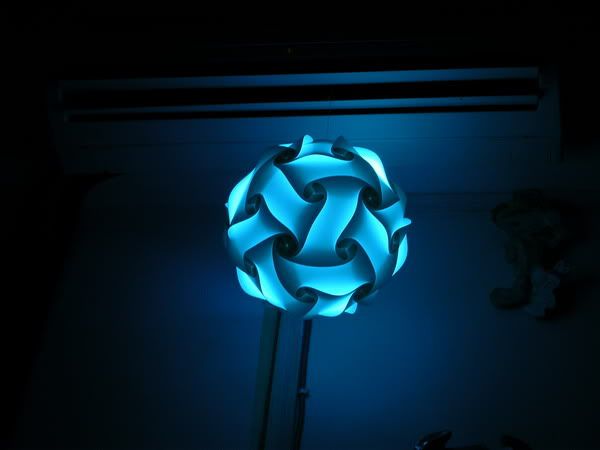
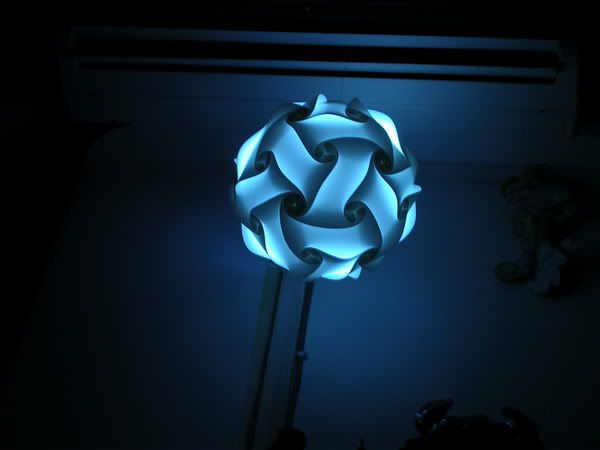
this is something which i custom made it for someone.........it's 7 colour lamp to be exact and this is done by using 7pcs of RGB LEDs.....
so enjoy !!! 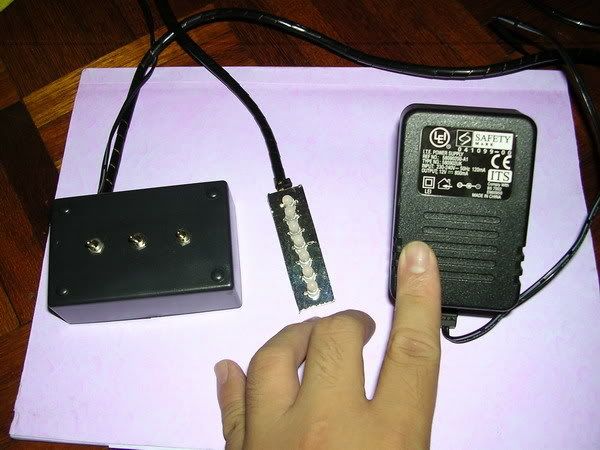 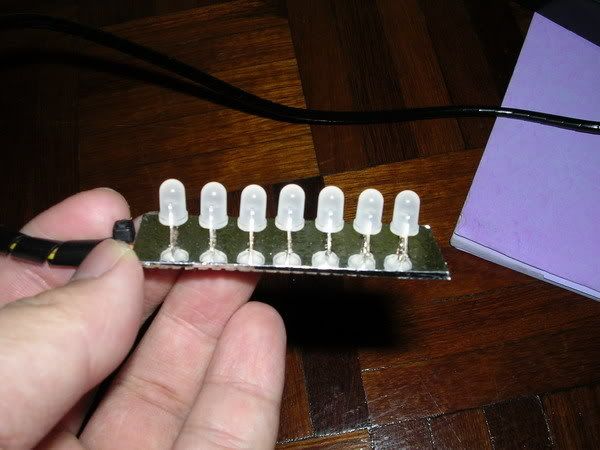 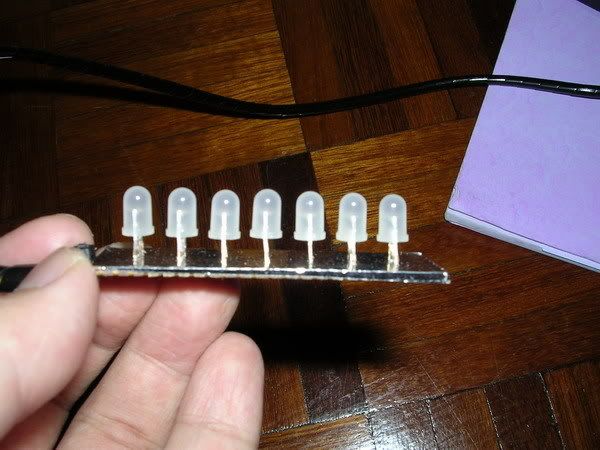  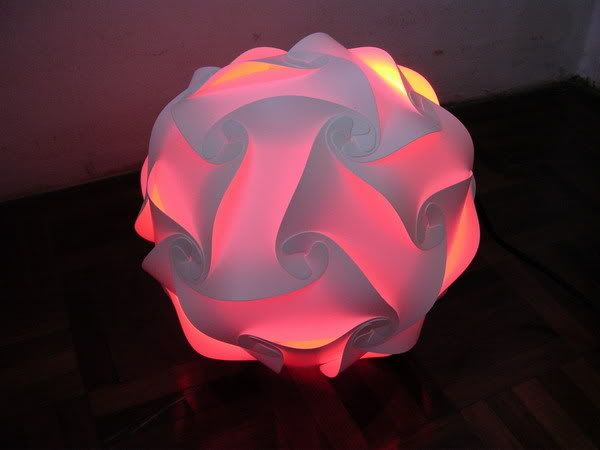 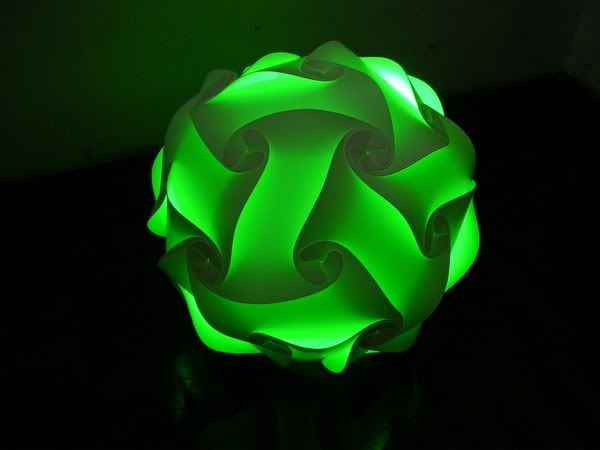 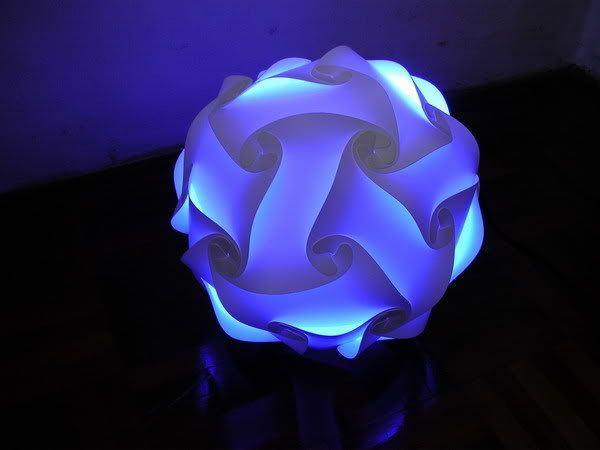 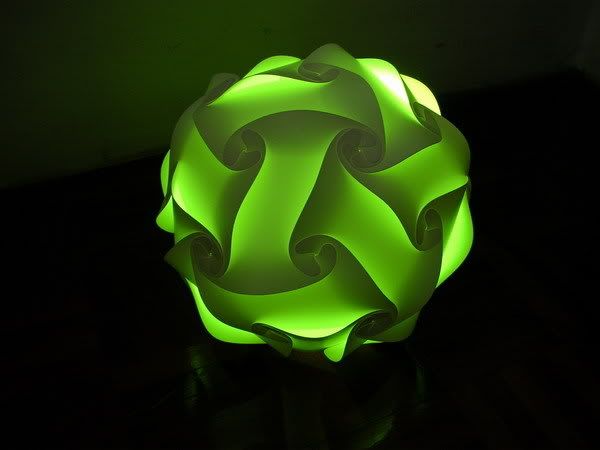 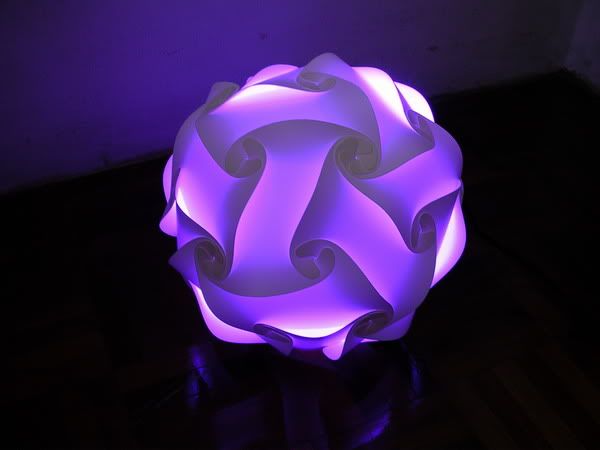  |
|
|
Sep 13 2006, 01:35 AM
|
|
Senior Member
4,561 posts Joined: Jan 2003 From: Penangites |
         This post has been edited by AllnGap: Sep 13 2006, 01:38 AM |
|
|
Sep 17 2006, 07:47 PM
|
|
Senior Member
4,561 posts Joined: Jan 2003 From: Penangites |
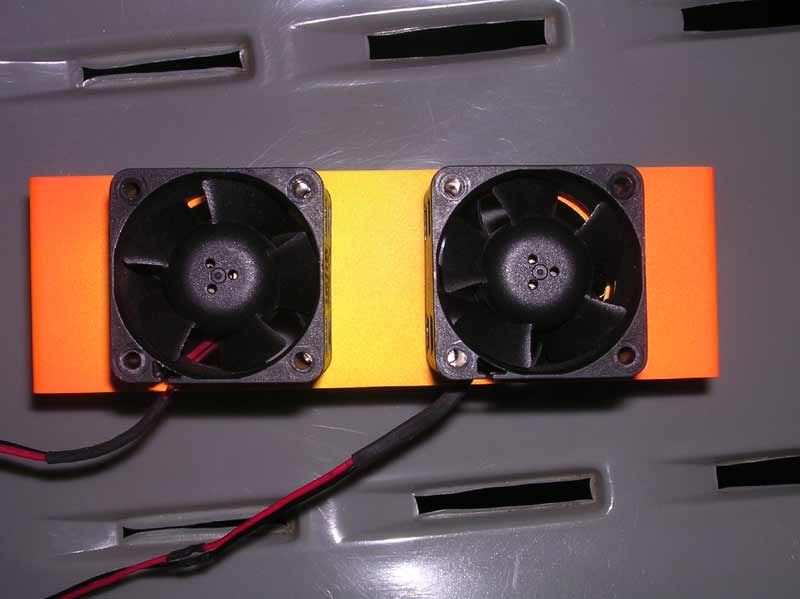
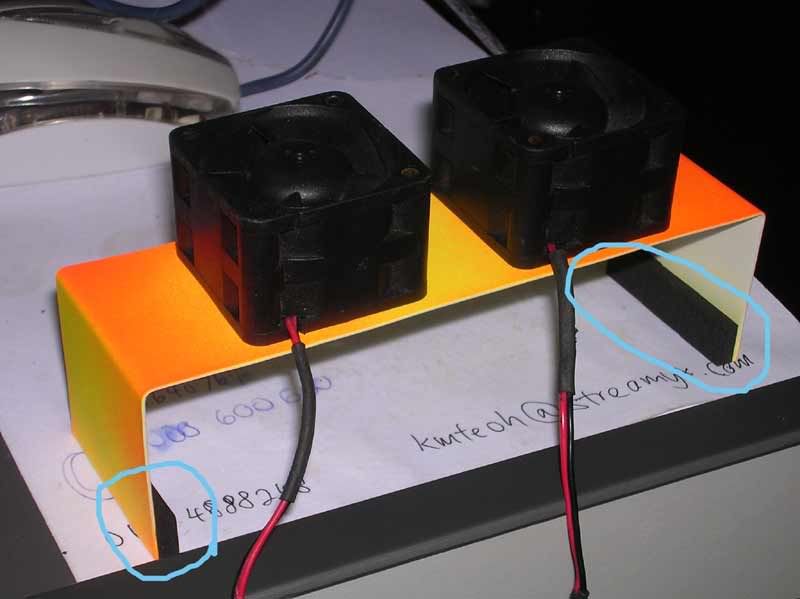
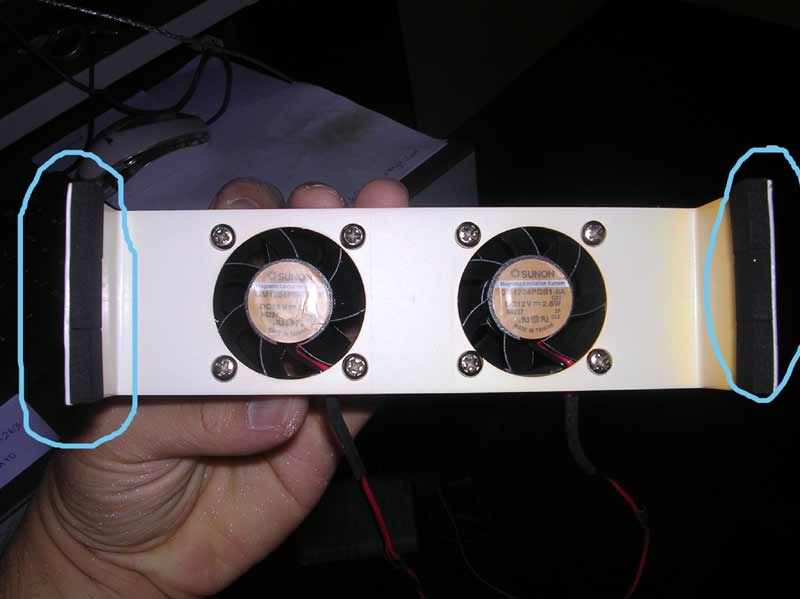
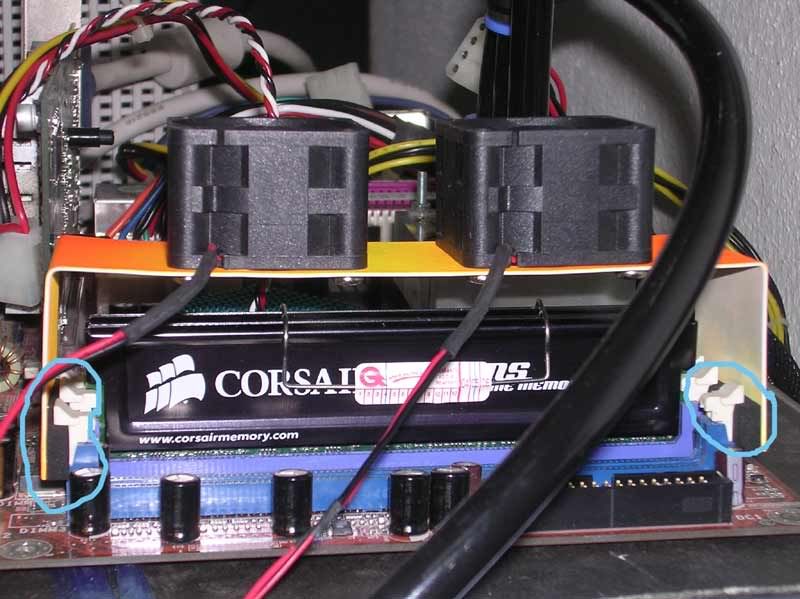
okay, this is a custom HDD cooling fitted with 2 SUNON 40mm fans like the ones that i used for ram cooler.....
It will be fitted in the 5.25" in bay (CDROM bay).... btw, this is for a forummer here.... so enjoy the pics 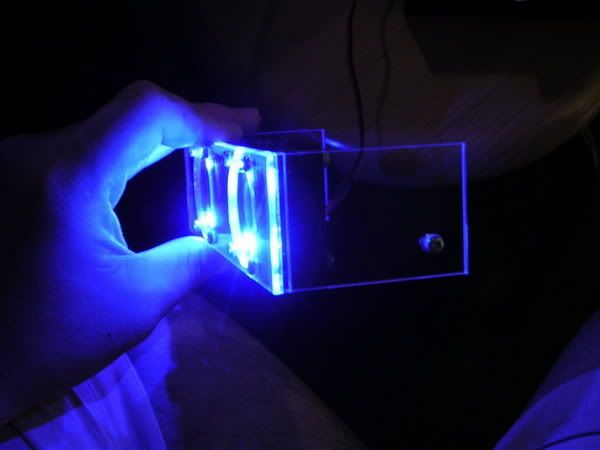 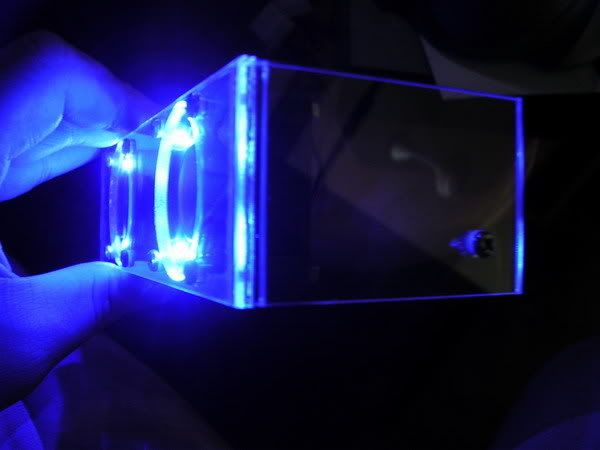 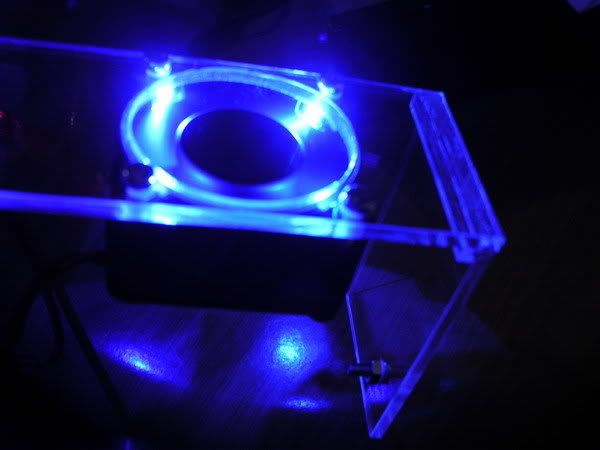 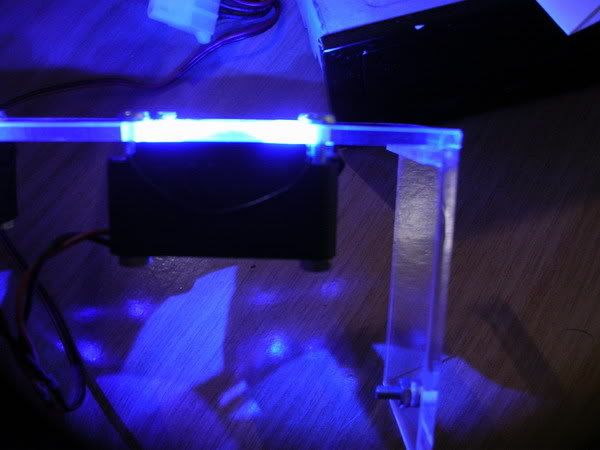 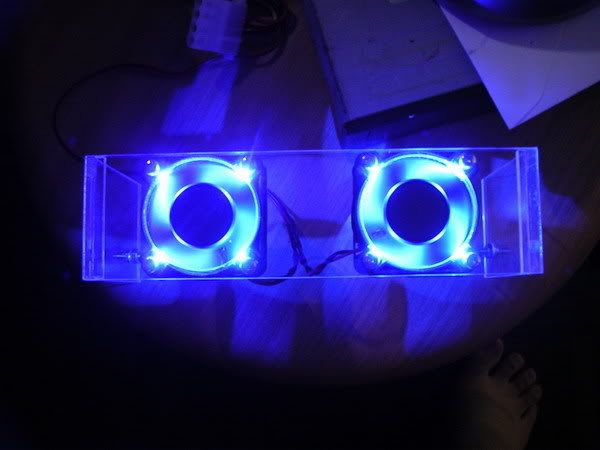  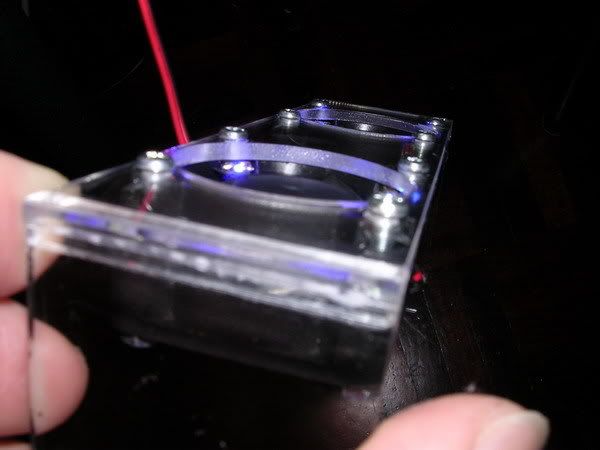 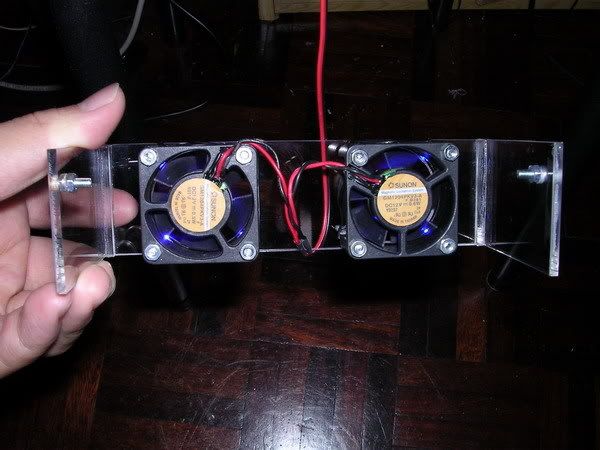 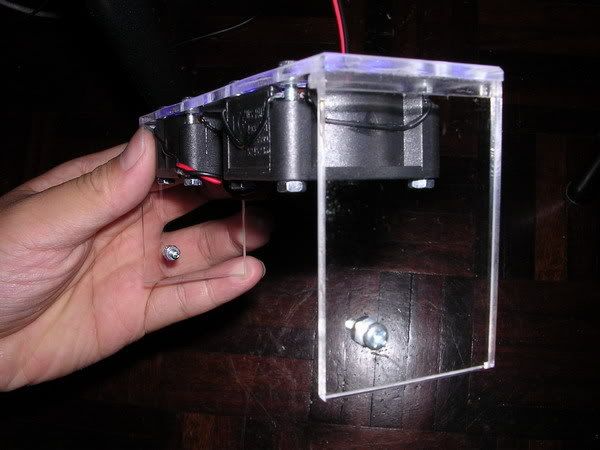 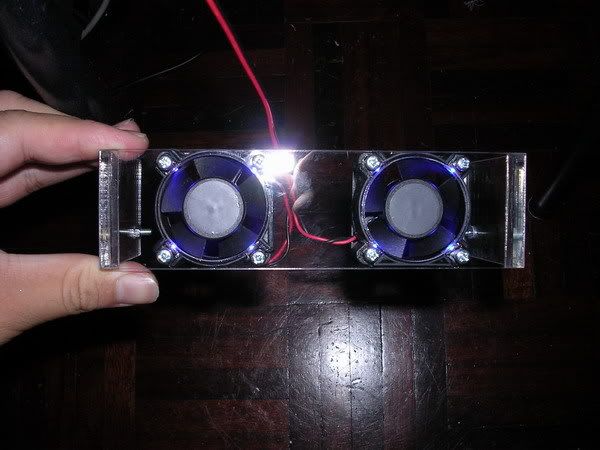 |
|
|
Sep 17 2006, 07:55 PM
|
|
Senior Member
4,561 posts Joined: Jan 2003 From: Penangites |
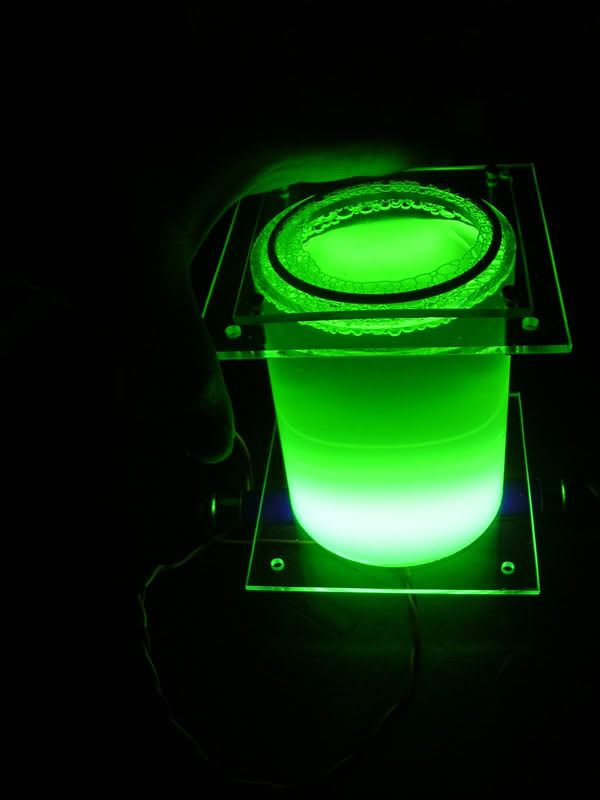
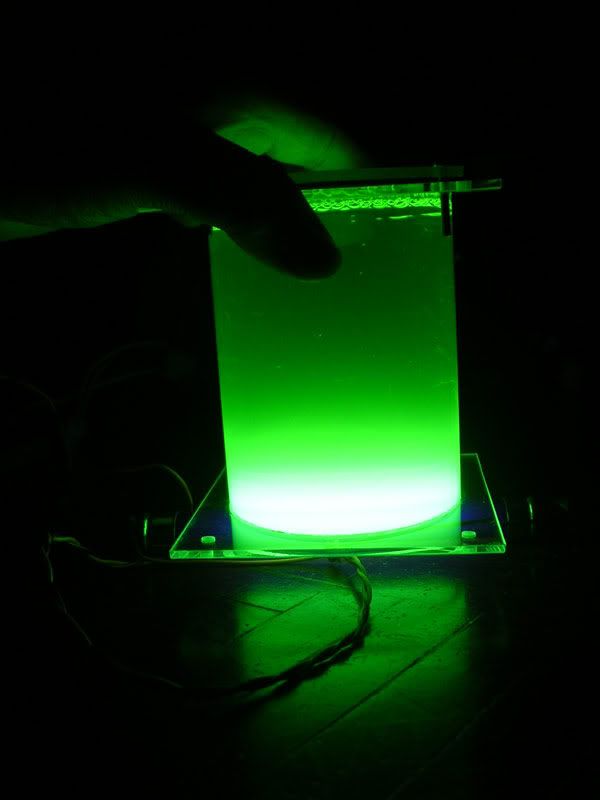
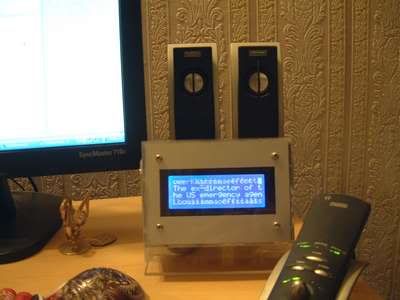
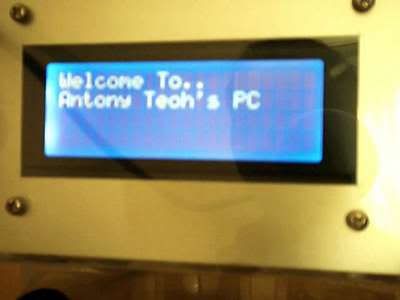
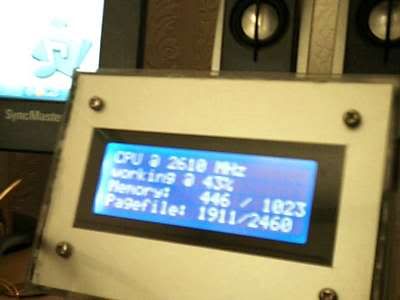
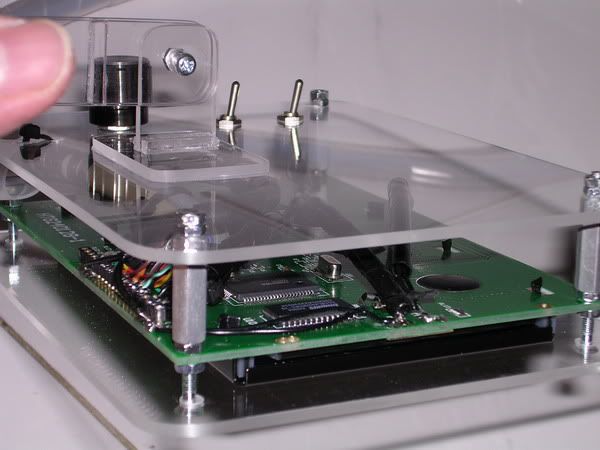
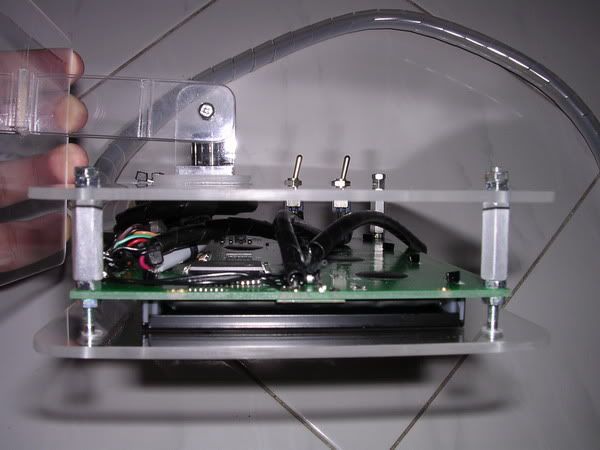
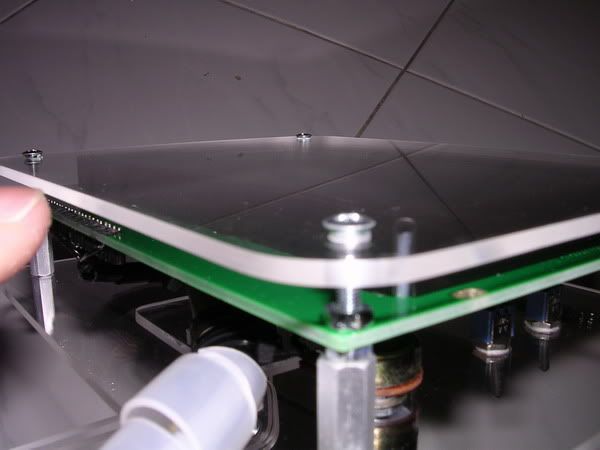
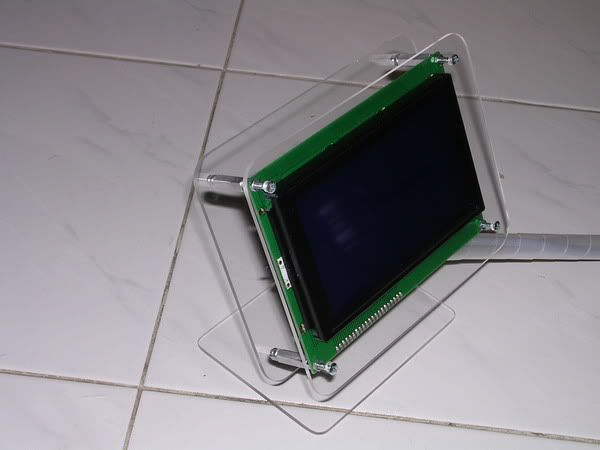
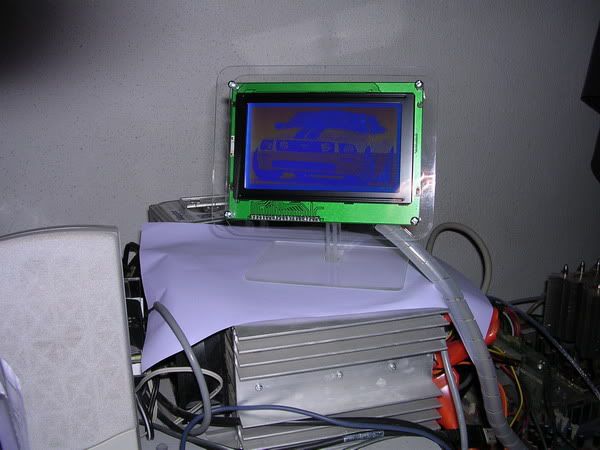
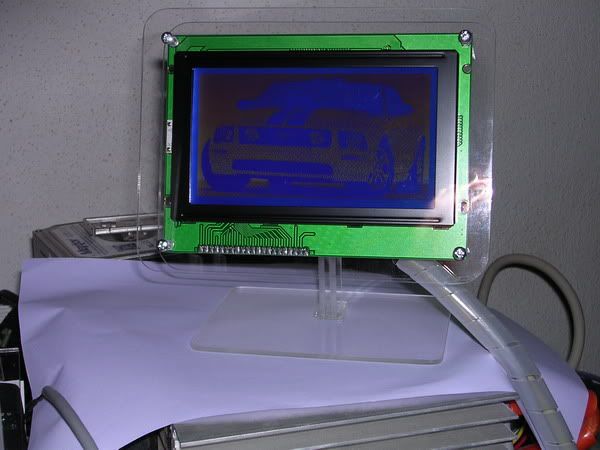
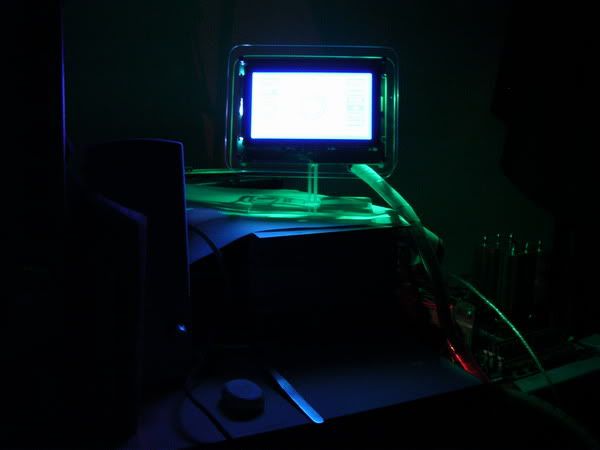
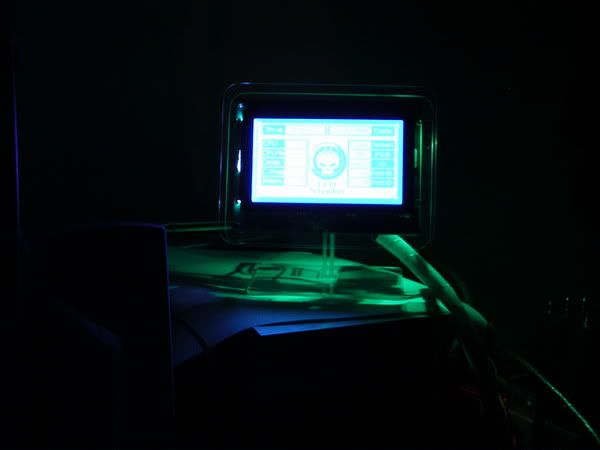
okay, basically, i've been working on graphical LCD, with the dimension of 240*128 pixels that is.
this is not mine, but a forummer here, i will COD with him maybe on friday in LYP. The journey i spent my sundays and monday to work on the exact one as this....... the modding of the graphical LCD is the hardest because i have ever attempted it and neither do i have any experience in it. But i still got to make sure that it's really cool and it will be inherit great features as well. so i started off with how is it going to look at the first place....i got the idea from IMAC, the model which has got a half sphere as the rig and the LCD mounted on top. the idea was fresh and good, but there are a lot of complications to it like : - make the wiring doesnt look messy - mount the graphical LCD nicely without dust getting into the viewing glass - not making any scratches on the acrylic during modding - making all edges smoothly and rounded - and many many more ! when i completed the first one, i was totally devastated to discover that there's problem with the display  ......thus i scrapped the whole thing and i was got really upset and discouraged by it. ......thus i scrapped the whole thing and i was got really upset and discouraged by it. after i rest for half a day, i began to pick up my spirit to make a new one again......and take note that i spent at least 9 hours to make a new one, and it must be done with full concentration and dedication, or else it's screwed up ! so, after so much struggle, i was able to present to you my idea and my design of the graphical LCD. Hope that you guys will like it. basically, this is the graphical LCD. everything is built on 3mm acrylic and all the edges is rounded and smooth 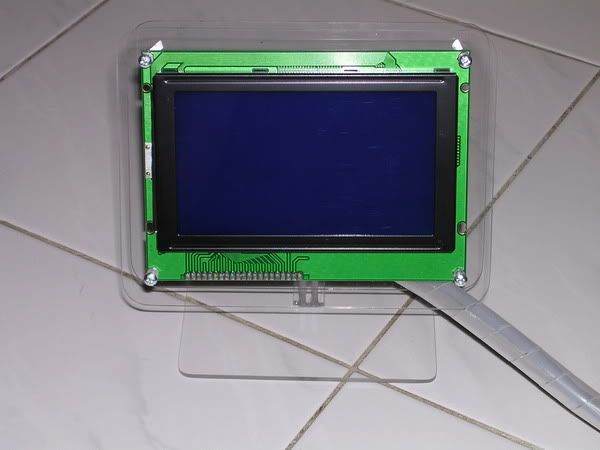 this is the rear part of the LCD, as you can see in the picture, the black cable wrap is hiding some of the wires... 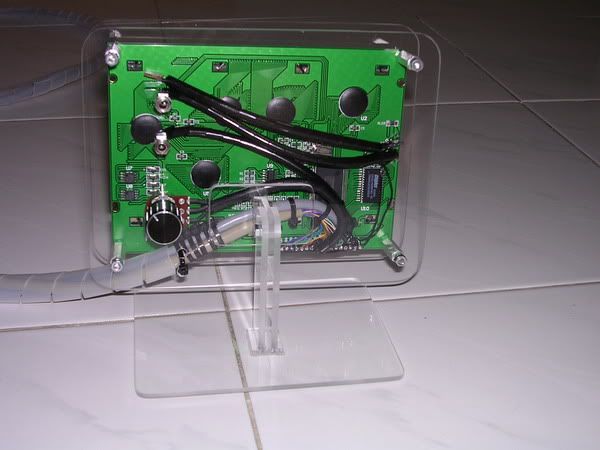 there's a small piece of circuit board(in brown) which holds the green SMD LEDs basically there are 2 switches and 1 knob. the first flip switch(on the top) is for the 2x green SMD LED while the second one is for the power for the whole LCD and the knob is something like brightness control 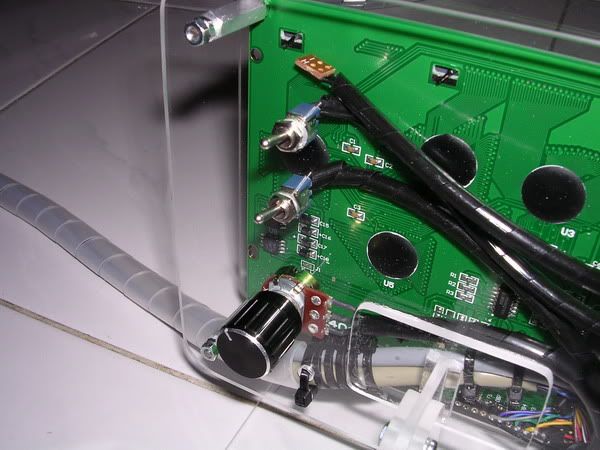 the mounts (the silver colour 'stick' in between the graphical LCD and the rear acrylic is to form a spacing between the two)  this is a side view of the graphical LCD........enjoy the pics ! 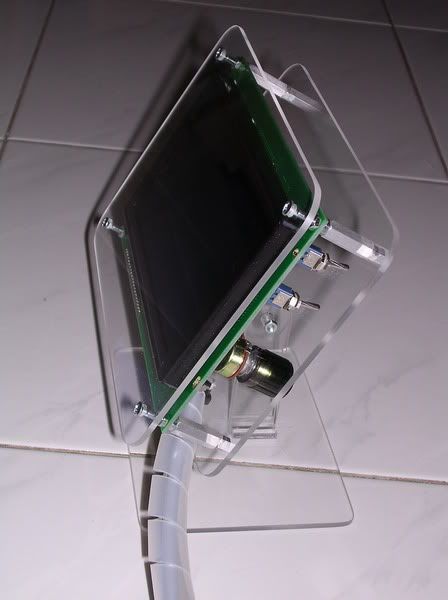 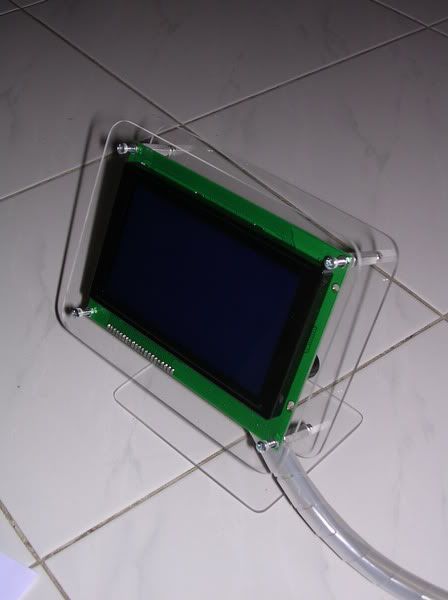  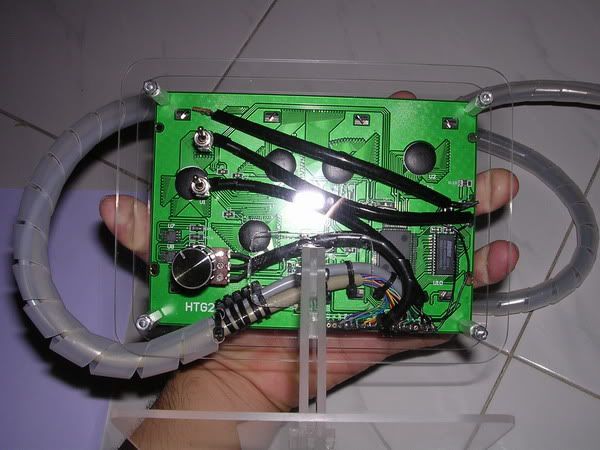 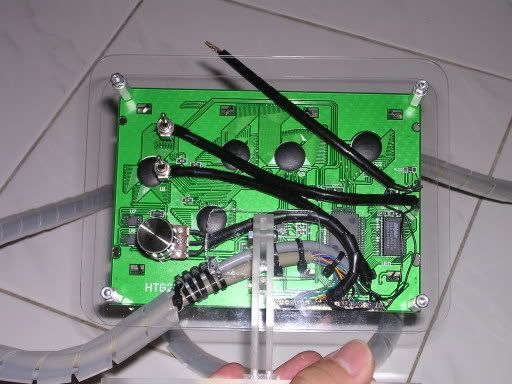 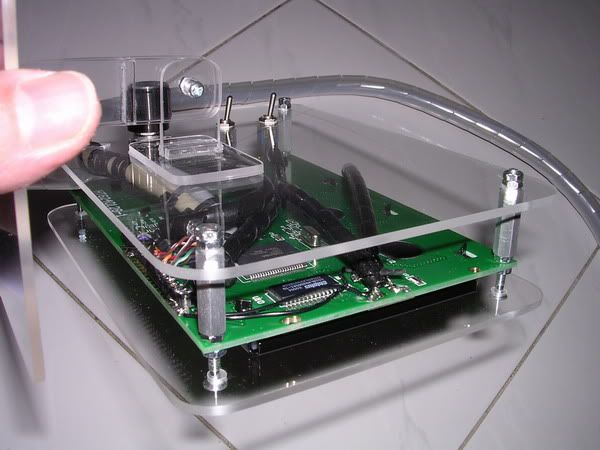 |
|
|
Sep 17 2006, 07:56 PM
|
|
Senior Member
4,561 posts Joined: Jan 2003 From: Penangites |
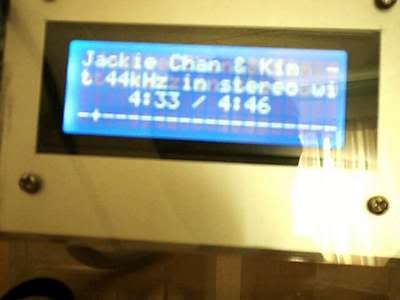
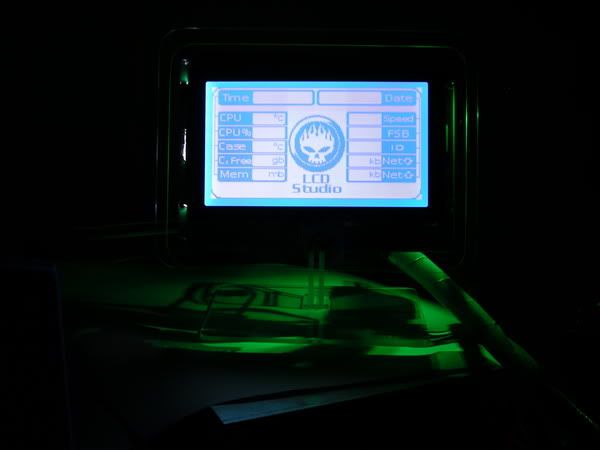
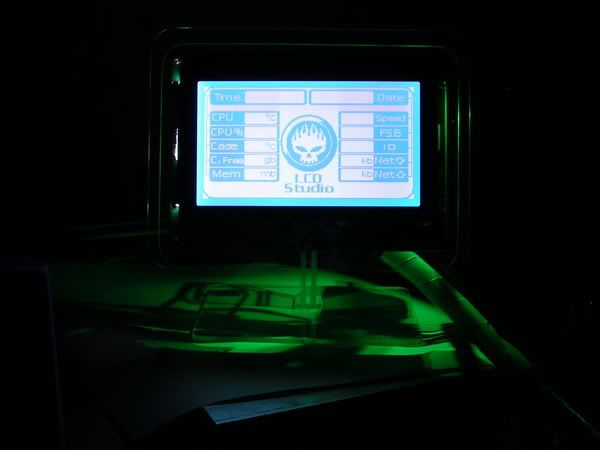
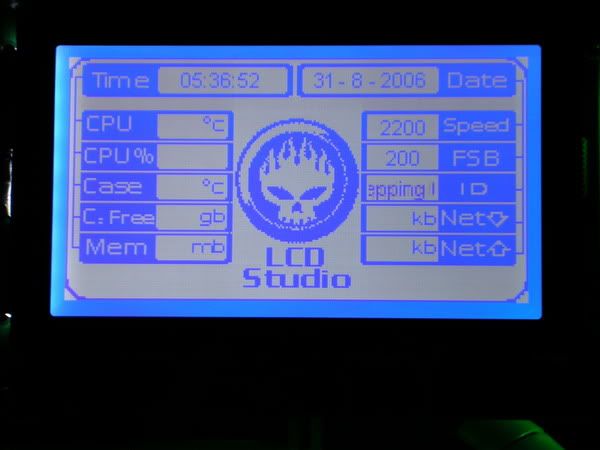
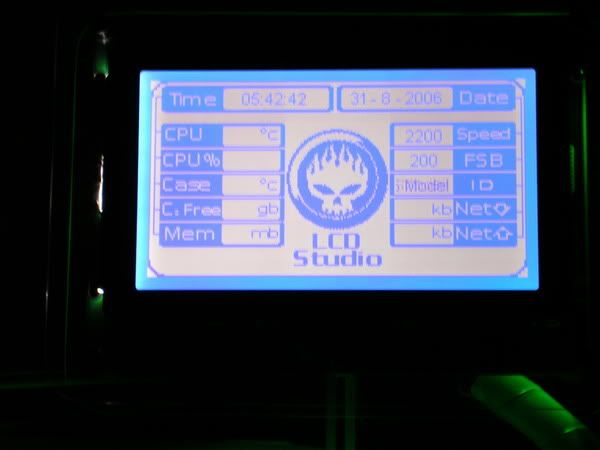
    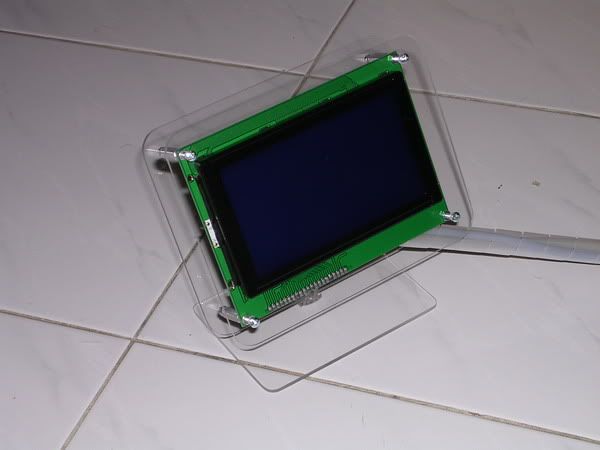   okay, so many asked what can this display do...... basically, you can display anything with it as long as you know how to program what you want into the software....... for me, i let it display my HDD space, upload and download speed, CPU speed, time/data, temperatures and so on.. 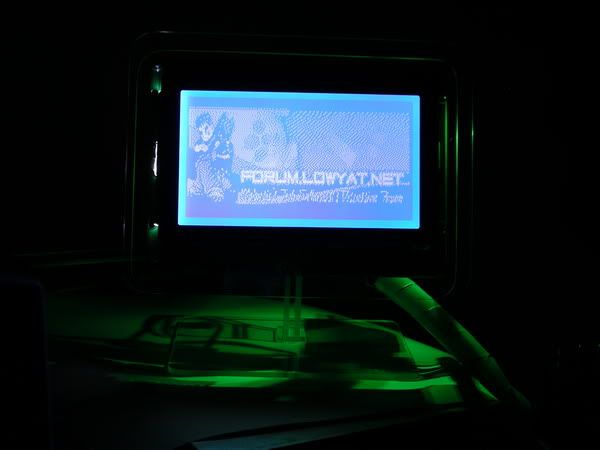 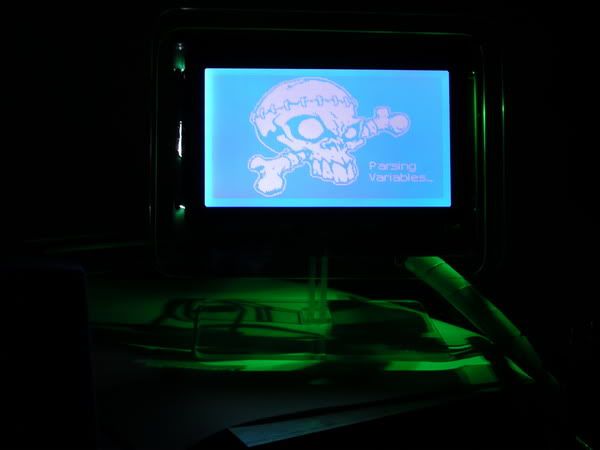  |
|
|
Sep 17 2006, 07:57 PM
|
|
Senior Member
4,561 posts Joined: Jan 2003 From: Penangites |
          |
|
|
Sep 17 2006, 07:57 PM
|
|
Senior Member
4,561 posts Joined: Jan 2003 From: Penangites |
 Edited advertising content. This post has been edited by ianho: Sep 17 2006, 10:23 PM |
|
|
Oct 24 2006, 04:33 PM
|
|
Senior Member
4,561 posts Joined: Jan 2003 From: Penangites |
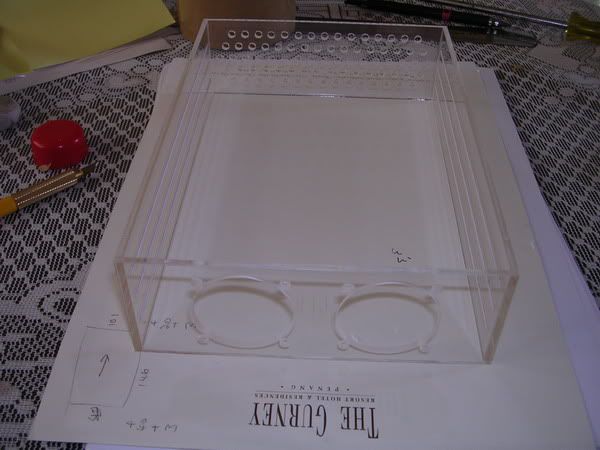
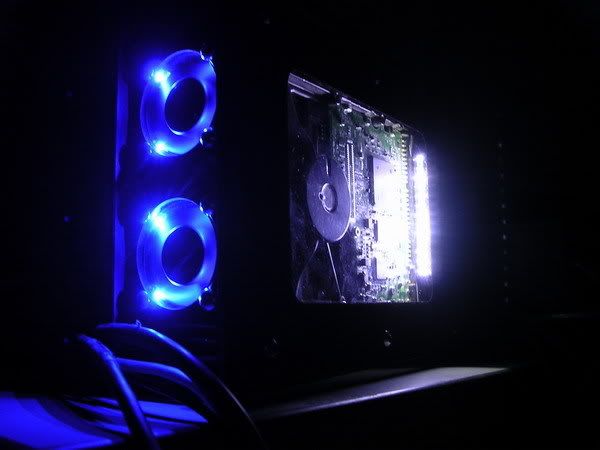
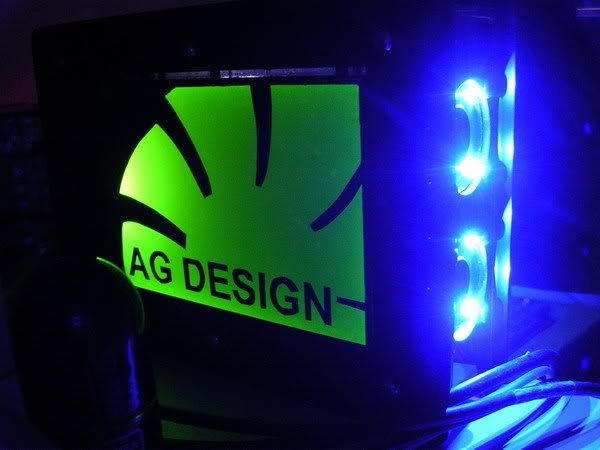
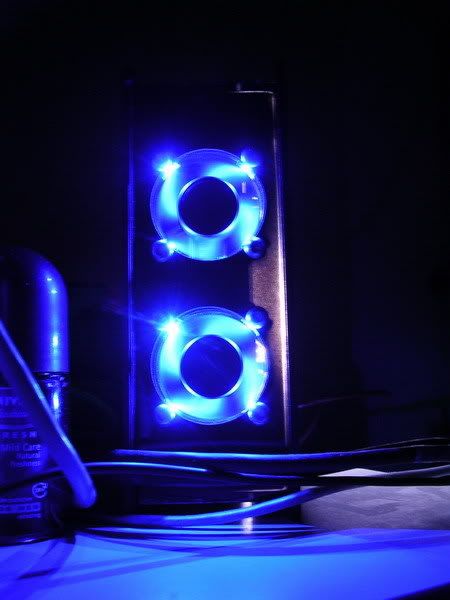
okay, this is the external HDD mod which i've done by using the IDE-USB converter....
currently i'm putting an 80Gb Maxtor inside as external HDD....the whole thing is built by using 3mm acrylic and will be black when it's done..... so, the case will have these feature : - 2x 40mm SUNON with blue LED running at 6V each ( like the ones in my signature ) - window mod to view the bottom part of the HDD ( so that you can look at the PCB and such ) - 13x white SMD LED shining onto the window part - the other side which is the top of the HDD will have some UV yellow design lighted by blue SMD LED overall, i want to have a bling bling external HDD casing okay, lets start off with the layout..... basically, this is the design that i've drawn using to precise dimension and i will print this layout onto a sticker and stick it onto the 3mm acrylic sheets. the first two pieces are the top and bottom plate while the middle 2 pieces are the sides while the last 2 pieces are the front and rear plate of the external HDD... if you can notice there, i've everything that is needed to be done on the layout itself, this will greatly improve the speed coz you dont need to spend time to measure and draw..... 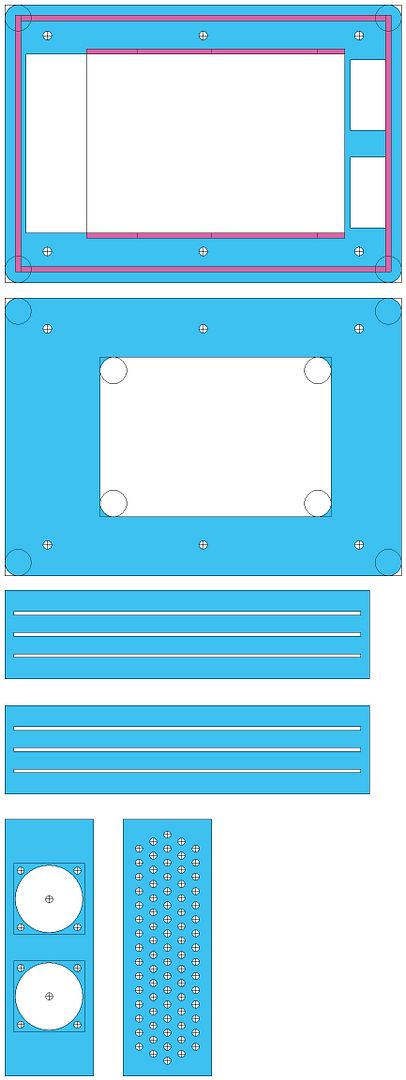 here's the layout design on the A4 sticker which i'm gonna stick it on the acrylic sheet  because i'm gonna do some etching, i had to get a blade specifically for this purpose. it's very useful coz it's really small and easier to handle as compared to a normal blade. 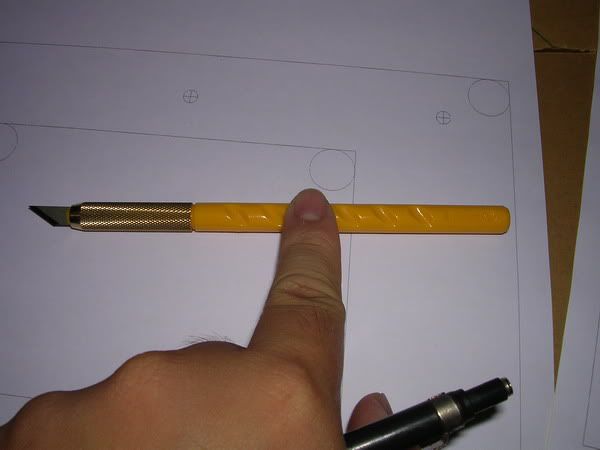 see that the blade is narrow and really ' thin ', thus you can cut curves on the sticker easily.. 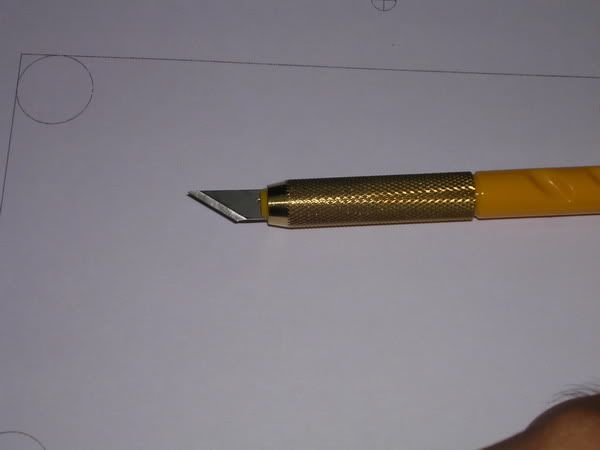 these are the acrylic plates which i've cut according to the layout. 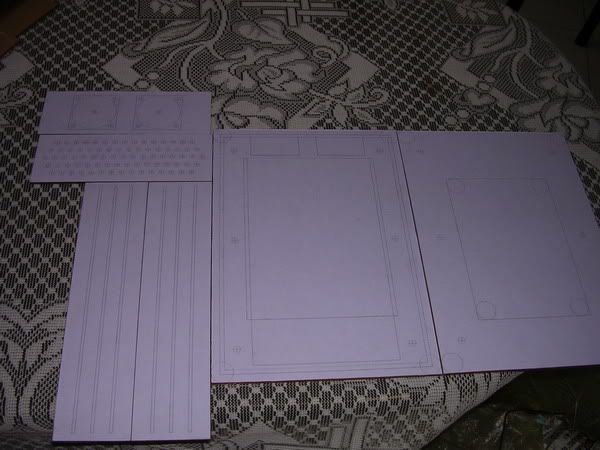 this plate is the front plate and will fit 40mm SUNON fans.  while this is the rear plate, i've added a lot of holes which i will drill to 4mm each to allow air to pass thru.....i want to get something like the honeycomb design.... it's really challenging to drill all these holes coz i need to drill them accurately or else it will look fugly man 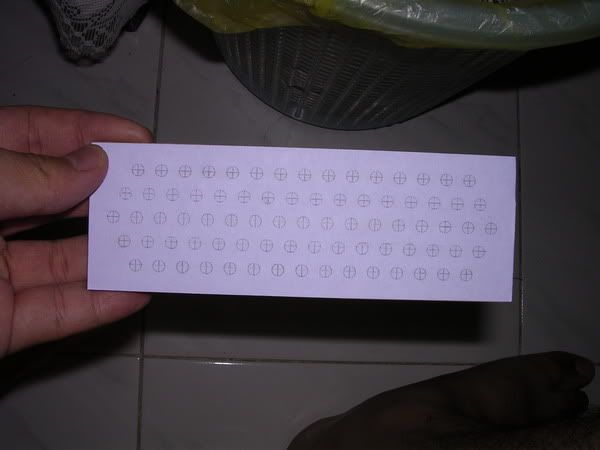 this is the side plate, it will have three 2mm stripes which will not be sprayed afterwards. 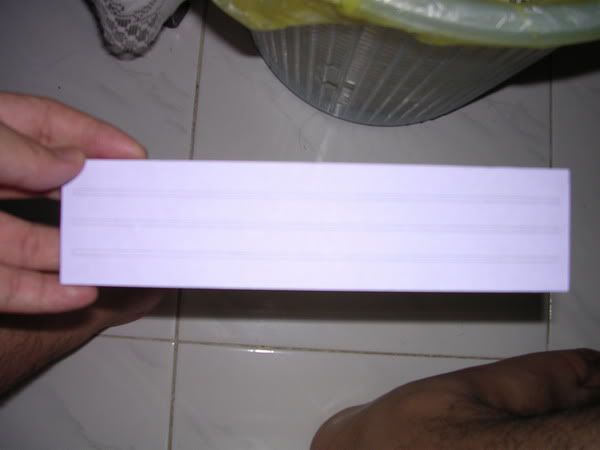 this is the top plate, notice that the sides will not be sticked onto this plate, but it will be sticked onto the bottom plate. i'll add some etching to the the blank area in the middle later 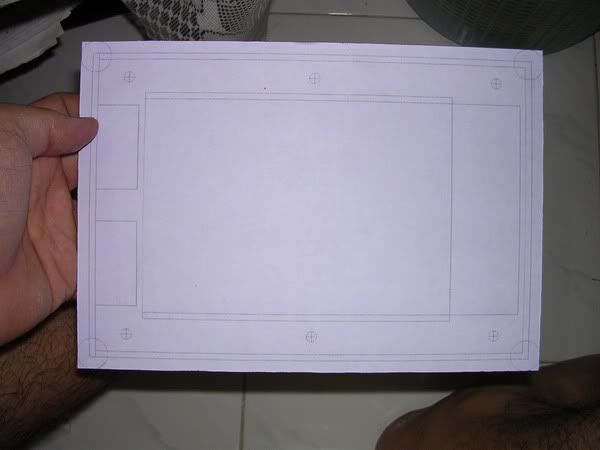 this is the bottom plate which will have a window. 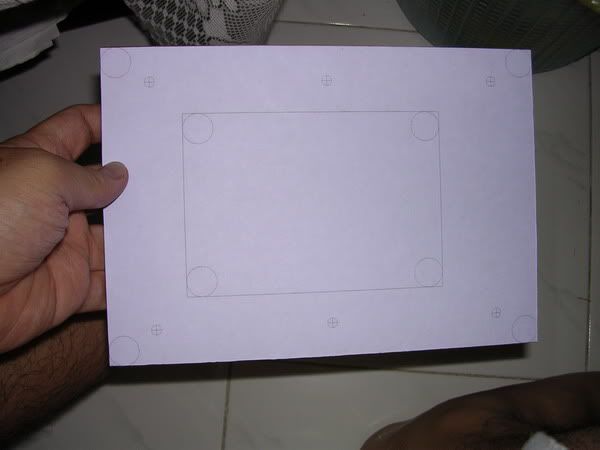 |
|
|
Oct 24 2006, 04:34 PM
|
|
Senior Member
4,561 posts Joined: Jan 2003 From: Penangites |
okay, after cutting the stripes on the side plates, i removed the sticker area which will be sprayed later
 this is the most difficult part......which i've used a smaller drill bit to lessen the margin of error that might occur......this is just the guidance hole which i've made... and it's 79 accurate holes !!!  l'll use a 4mm drill bit to make the holes 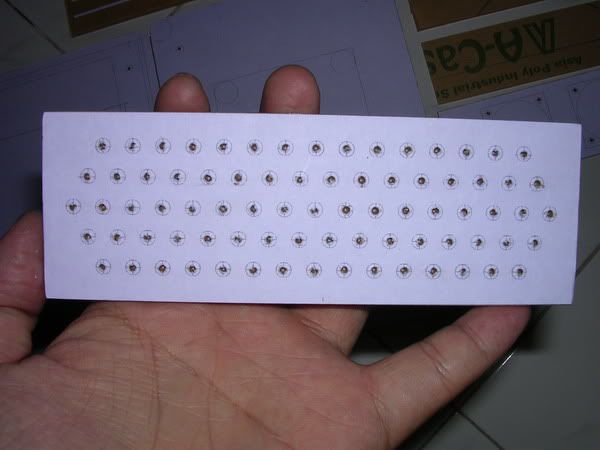 this is the top plate, which i will etch some design on it before spraying it to black. i used the blade which i showed before for this task. the shape is actually a Delta fan blade design which will have a UV yellow background lighted while the " AG DESIGN " will be a solid black. ( if you dont understand, then just fast forward to post #6 to get the real idea ) 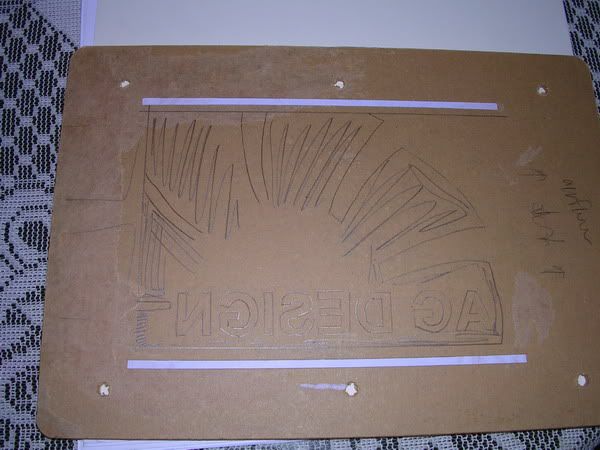 as you can see in this pics, the area which i want to be in yellow UV will be covered with the sticker, while the rest of the area is exposed so that it can be sprayed to black. the yellow sticker is actually some buffing to the sticker coz the sticker got torn off a bit..... 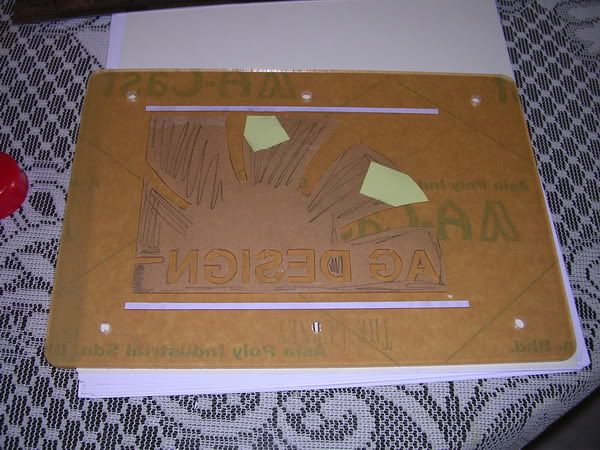 these two plates are the ones holding the HDD in place and they will be glued together to the top of the external HDD. 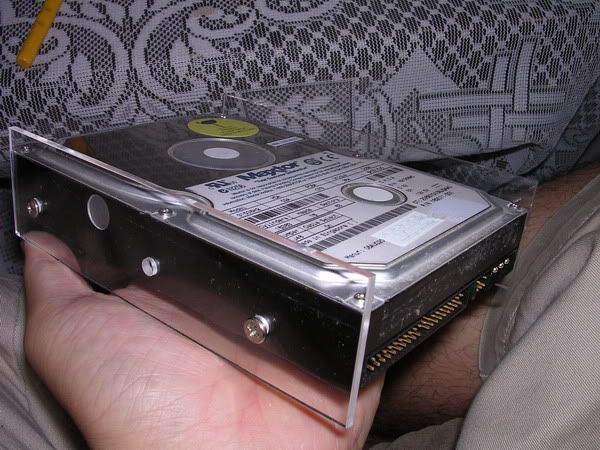 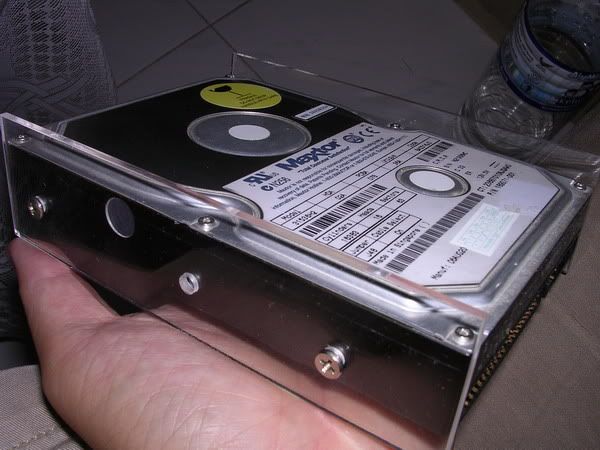 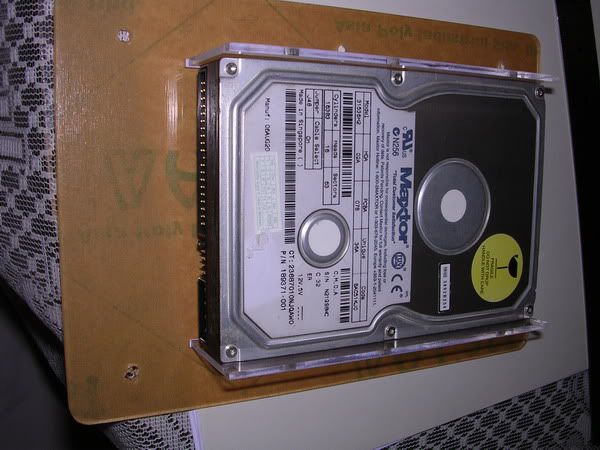 okay, the white stripe on the acrylic sheet is from the layout that i've drawn. i left it there to compare the accuracy as to reduce error in alignment. However i will remove it (the white sticker) when i'm gonna stick it 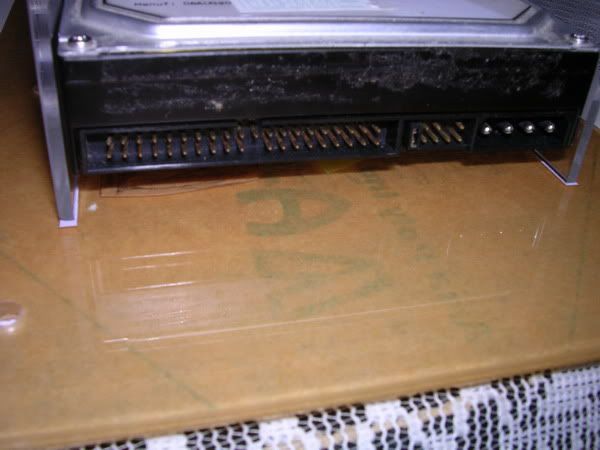 this shot is taken once i've sticked the acrylic plate which sandwich the HDD onto the top plate. 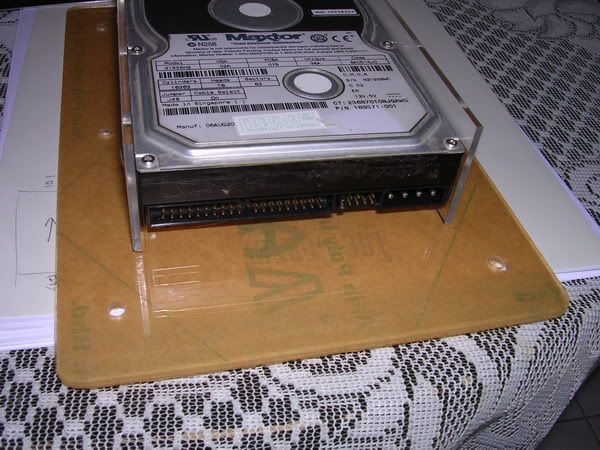 basically, i've made : - - 12 x 5mm holes - 8 x 3.5mm holes - 2 x 38mm holes - 79 x 4mm holes - cut the window mod on the bottom plate - etch the design onto the top plate - cut the stripes design on the side - stick the acrylic holding the HDD 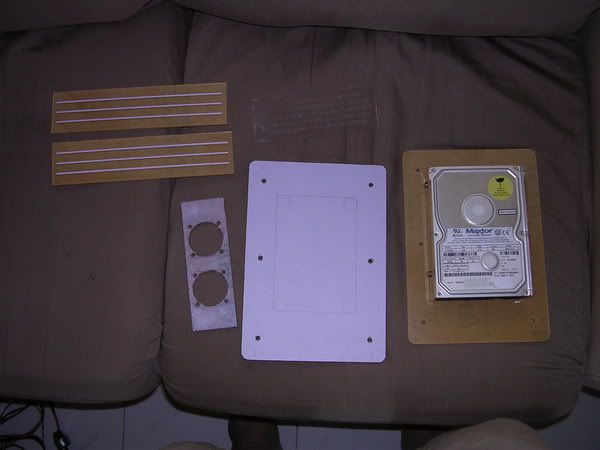 |
|
|
Oct 24 2006, 04:35 PM
|
|
Senior Member
4,561 posts Joined: Jan 2003 From: Penangites |
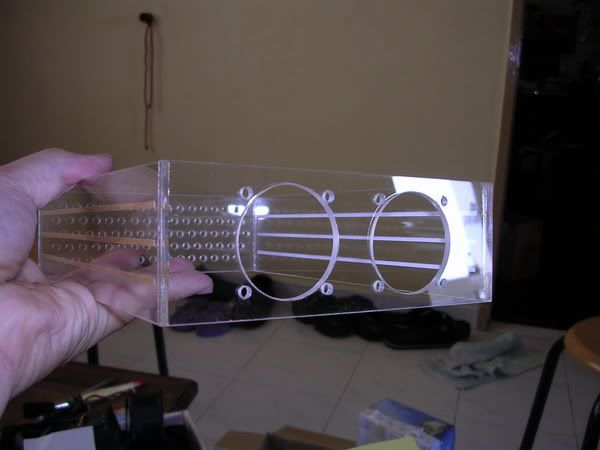
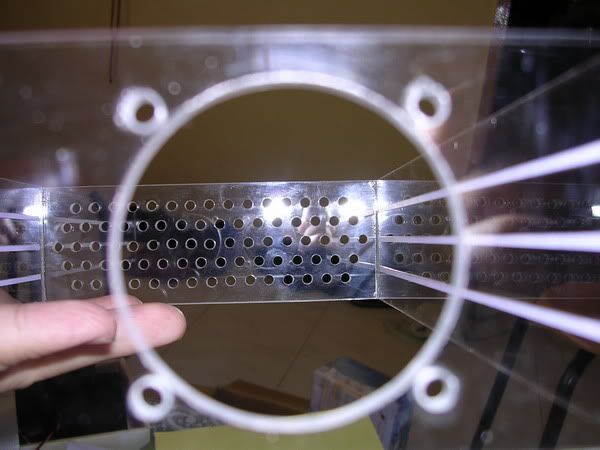
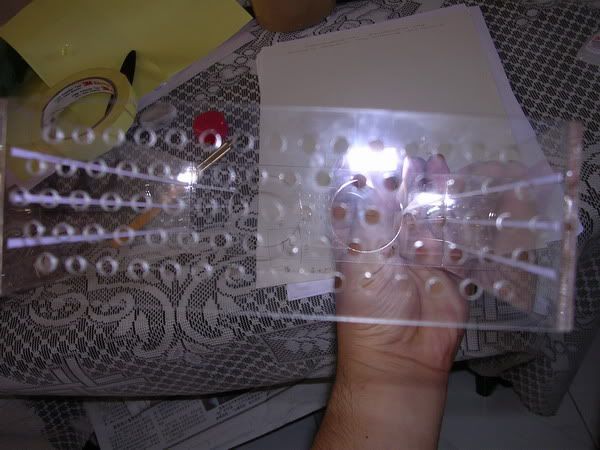
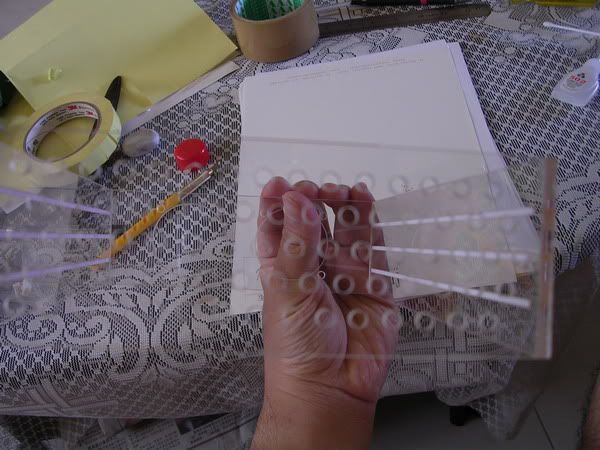
okay, this is the back plate which has got the honeycomb design but with round holes.....
altogether 79 holes..... although some went off a bit, but i think it's still with acceptable range.....it was done with full concentration and focus and it's really stressful to make those holes 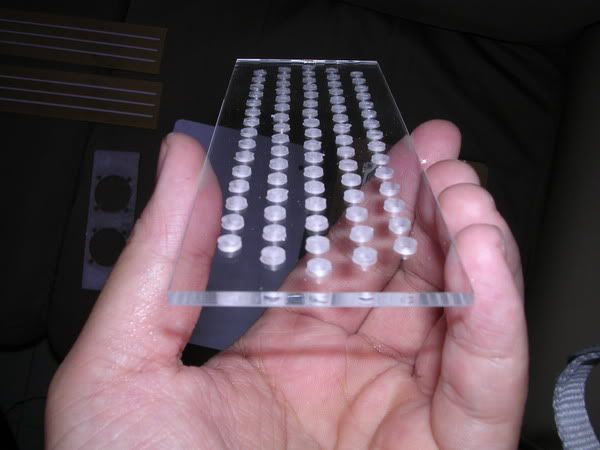 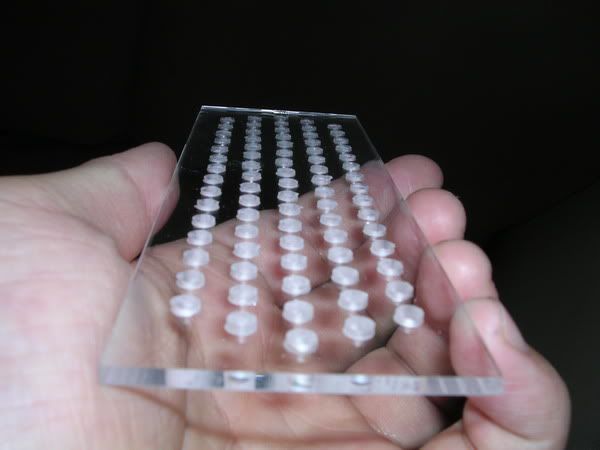 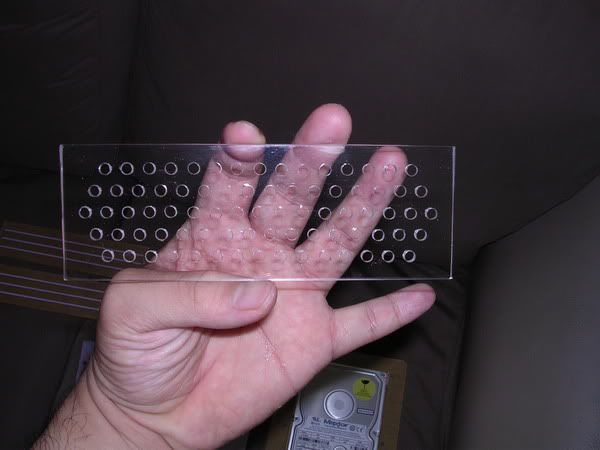 okay, this is the moment where all the plates will be joined nicely to make the external enclosure. i left the external acrylic sticker intact so that the exterior will be in mirror finish when i removed them coz i only wanted the interior to be black. 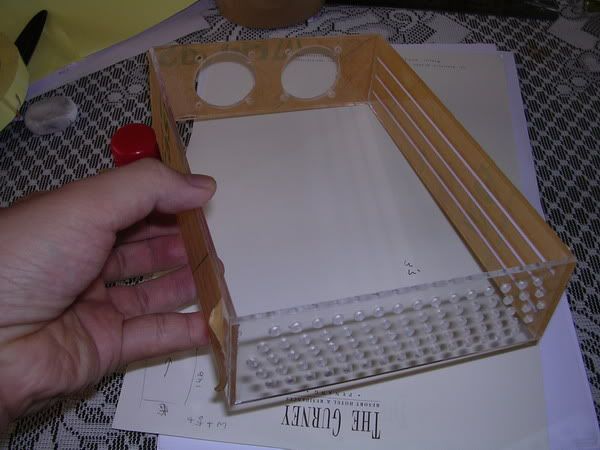 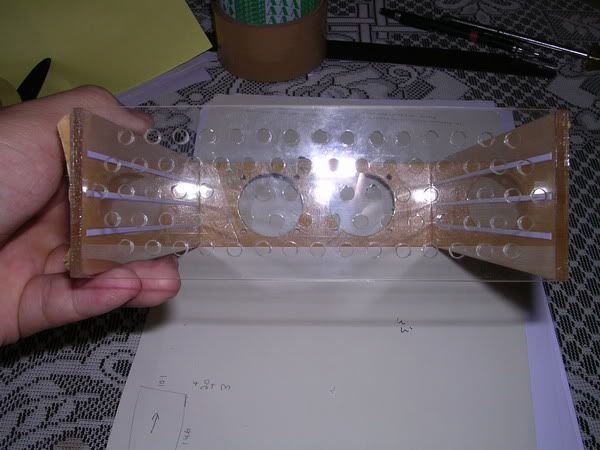 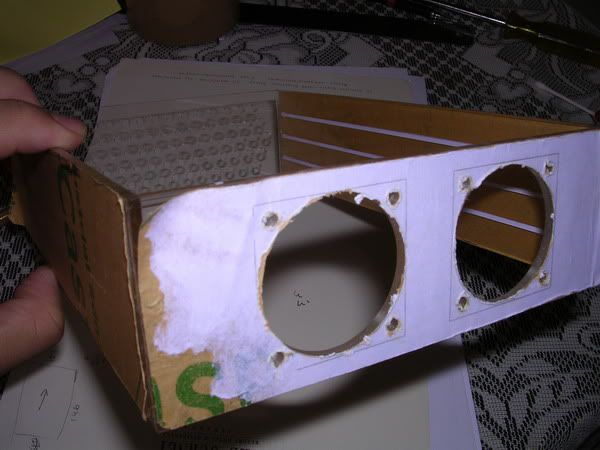 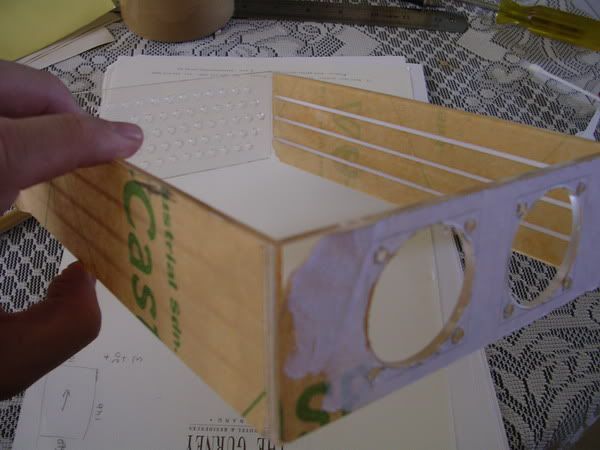  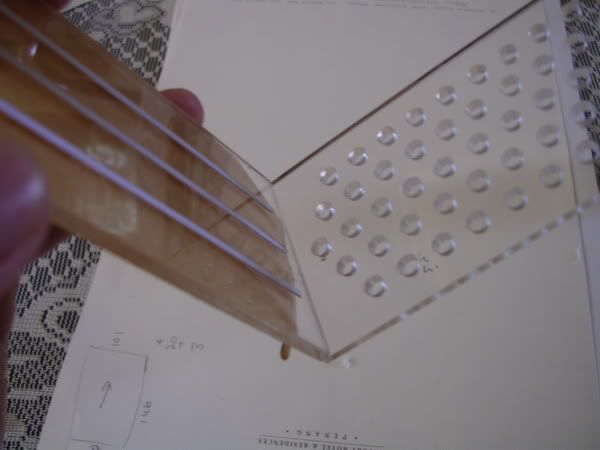 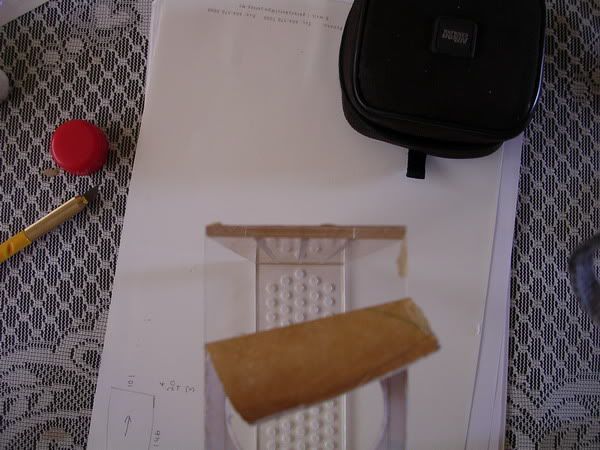 |
|
|
Oct 24 2006, 04:35 PM
|
|
Senior Member
4,561 posts Joined: Jan 2003 From: Penangites |
okay, this is how it looks like when all the stickers have been removed
      so i will stick the side to the bottom plate, which is the one with the window mod. (the white sticker is for the window mod.) 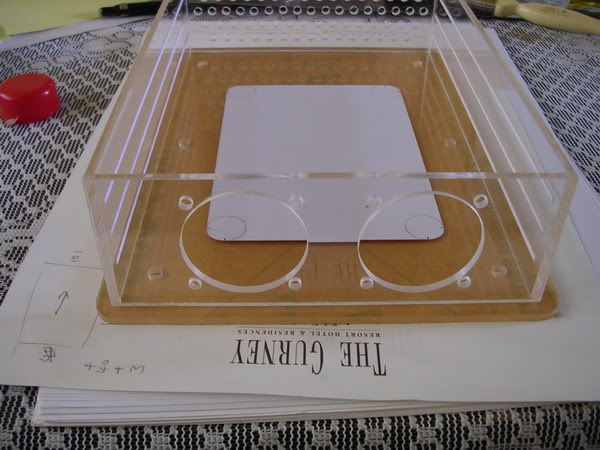 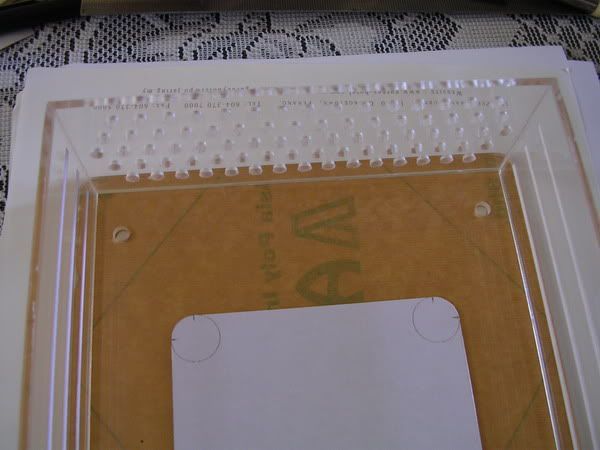 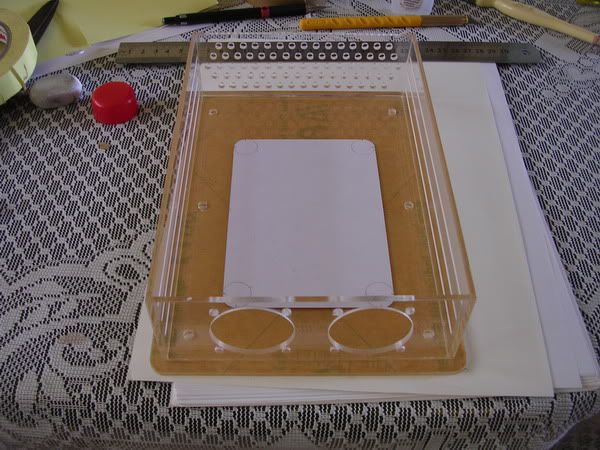 |
|
|
Oct 24 2006, 04:36 PM
|
|
Senior Member
4,561 posts Joined: Jan 2003 From: Penangites |
 okay, so this is quite completed, but without the black background yet. so these are going for a spray job. 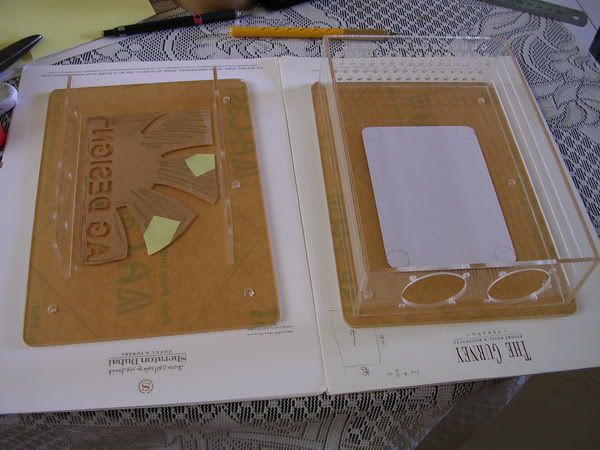 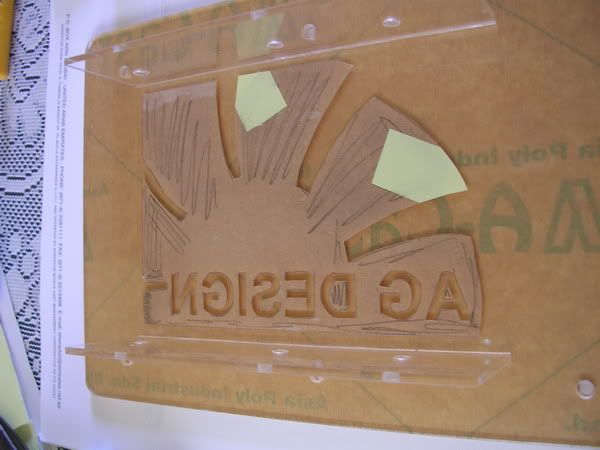 so this is after the spray job.....sorry for the blur pics... 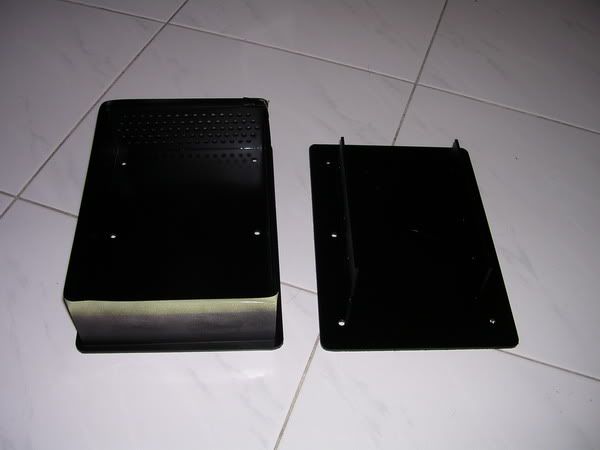 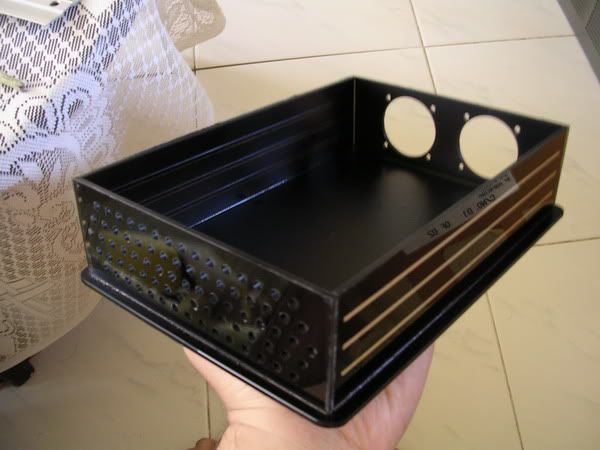 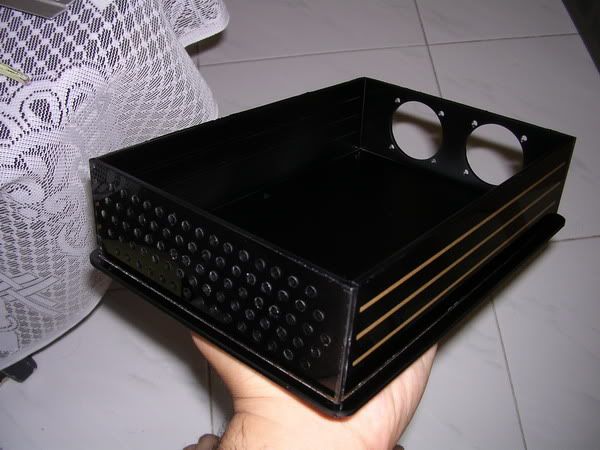 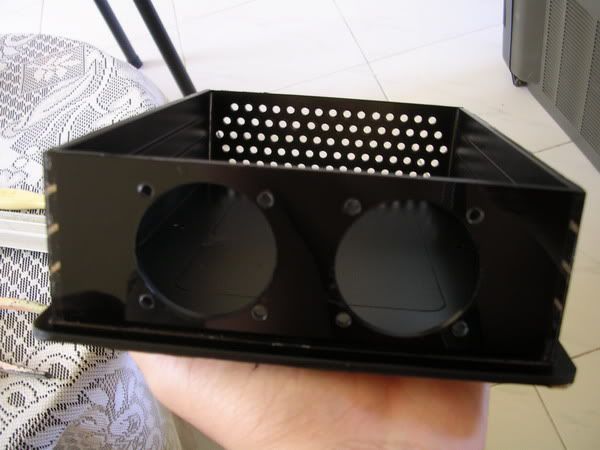  okay, to hold those two things together, i will need something like a stand, hence, 6 acrylic stands were made and they will be screwed from both the top and bottom plate. 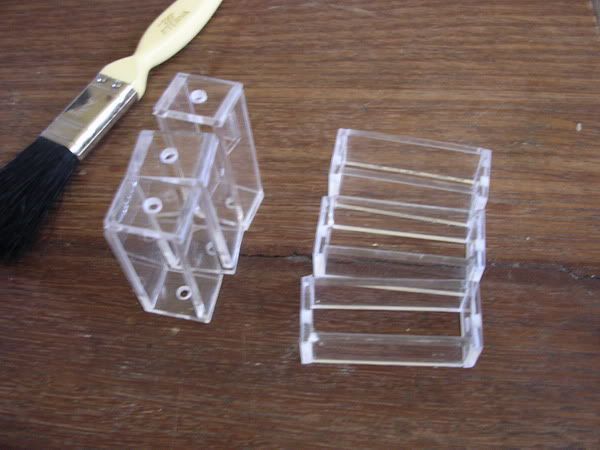 as for the screws, i used 4mm stainless steel rounded allankey screws. so this is the window mod which shows the bottom of the HDD.... 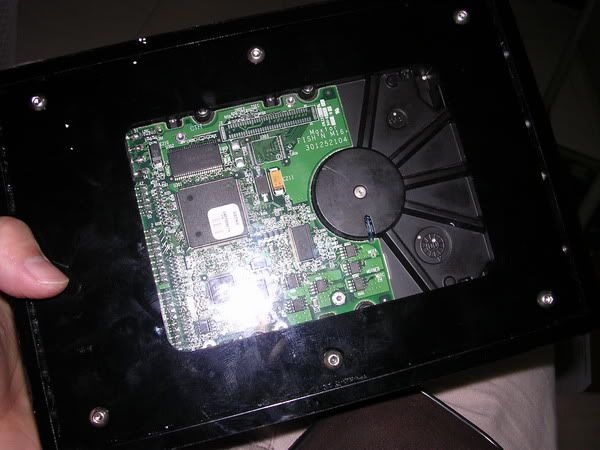 |
|
|
Oct 24 2006, 04:36 PM
|
|
Senior Member
4,561 posts Joined: Jan 2003 From: Penangites |
i used the same screws for the 40mm fan as well......
the pic shows the top and front panel of the external HDD.... did you notice it's still missing the yellow UV which i mentioned before ? 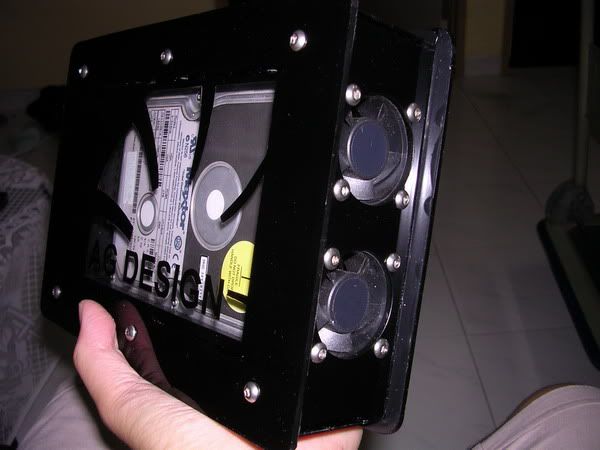 okay, on the left is the white SMD LED which is going to light up the window side while 1 of the 3 sets of the blue SMD LED will be used to light up the yellow UV acrylic.  The yellow UV acrylic is added on the top panel and it will be lighted by using LEDs... 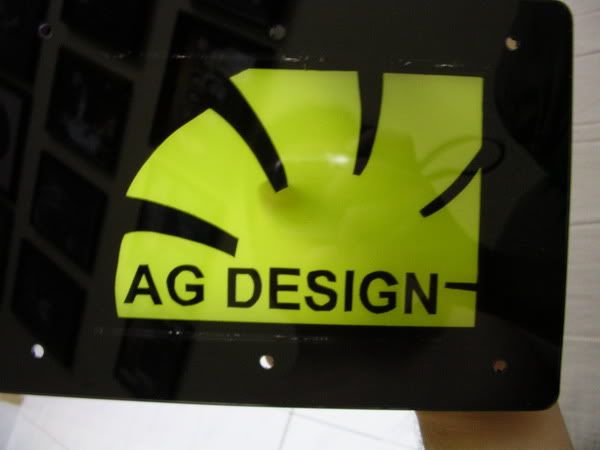 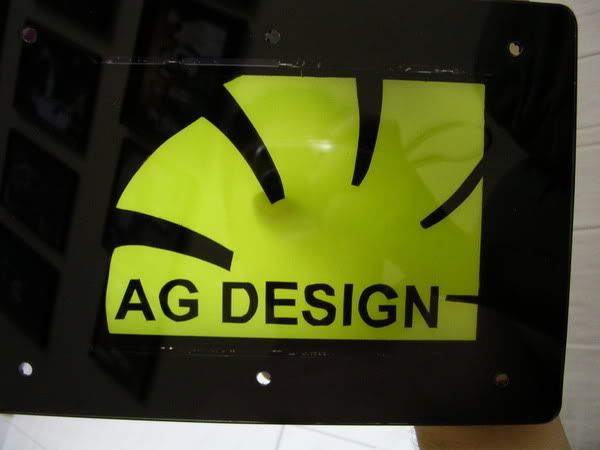 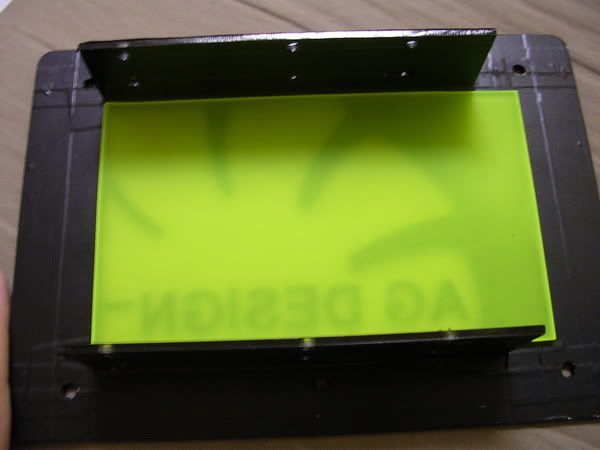 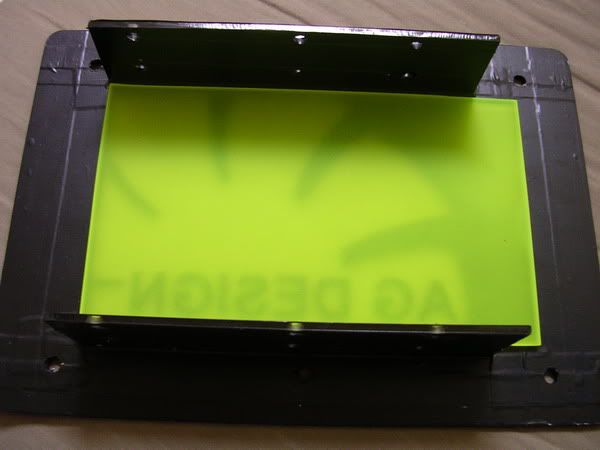 the LED that i'm holding will be running on 5V line while the blue LED on the 12V line. it will be connected later  okay, basically, i want to make the UV yellow sheet glow, so how to do it ? i will add LEDs to shine from the side of the acrylic, but in order to obtain a uniform colour or brightness distribution, the light source must not be from a focus beam such as LEDs. thats why you see in laptops, the screen is lighted up using CCFL because the light is more uniformly distributed. but i just added a set of 4 SMD LEDs into it....dint bother so much. to prevent light from escaping from the UV yellow acrylic, i used reflective sticker to cover every part of the acrylic, including the side. The blue SMD LED is also covered in this layer so that all the light will shine outward only. 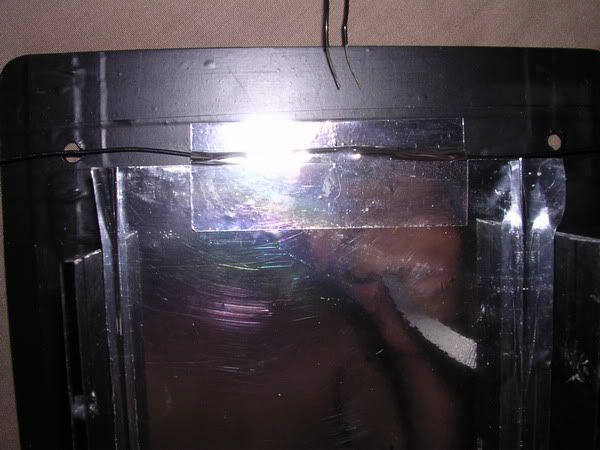 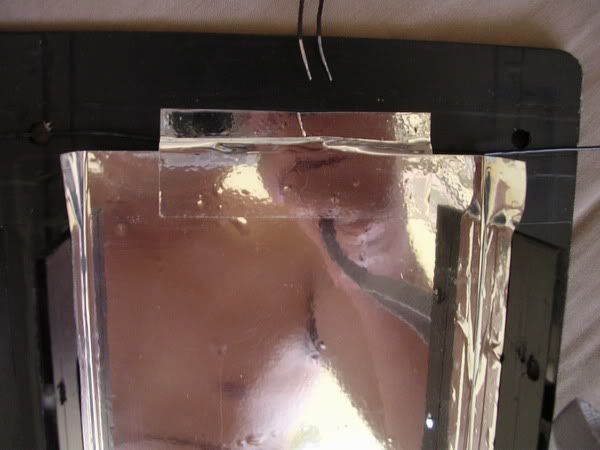  |
|
|
Oct 24 2006, 04:37 PM
|
|
Senior Member
4,561 posts Joined: Jan 2003 From: Penangites |
this is the top plate which is viewed from front
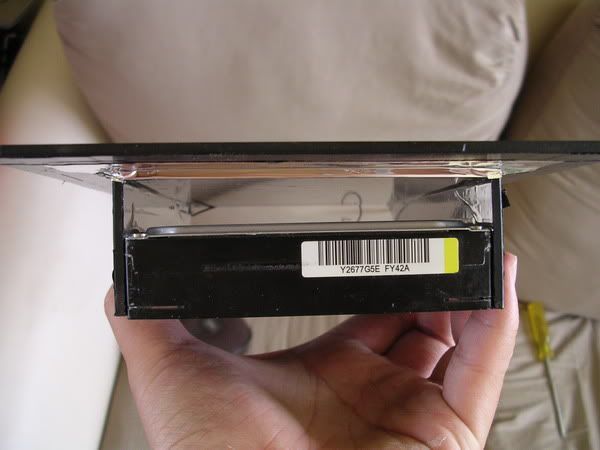 this is the bottom plate which is viewed from the rear. 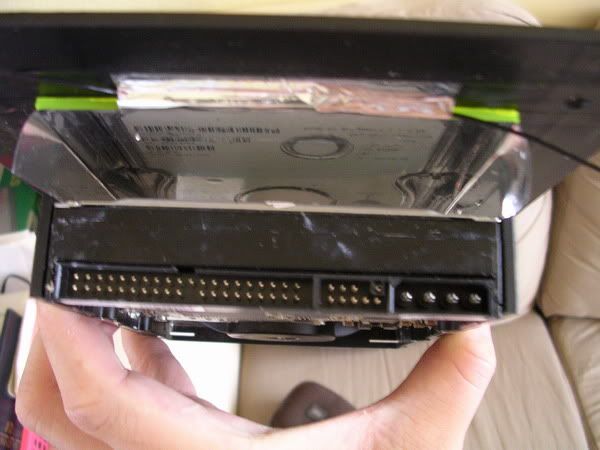 okay, this is the bottom casing, as you can see there's a window there, and on the right there's an PCB which holds the 13x white SMD LED.... the 2x 40mm fan is blowing from the front and air will escape through the rear. 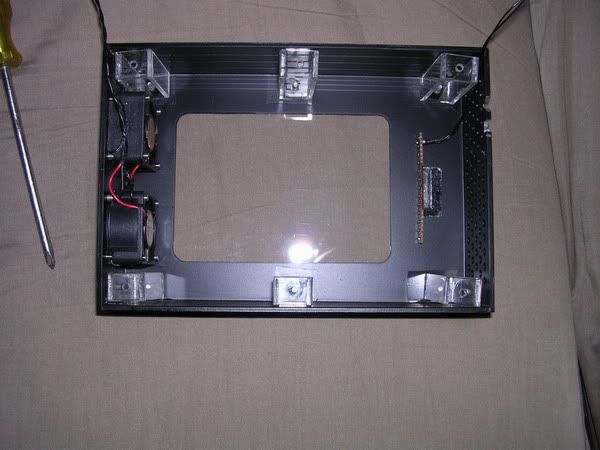 this is the molex power from the adapter that i've modified so that i can tap the 5V and 12V out of there. 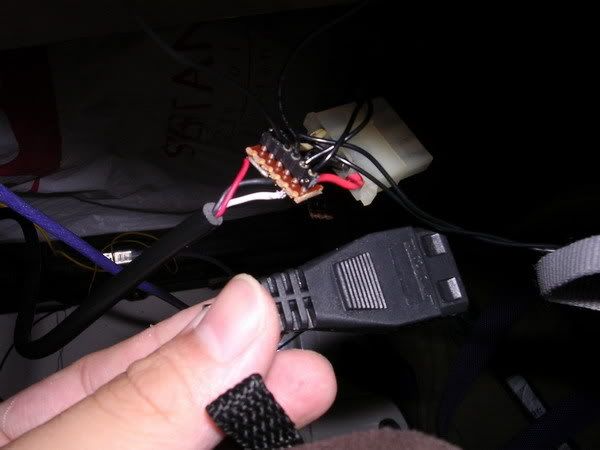 |
|
|
Oct 24 2006, 04:38 PM
|
|
Senior Member
4,561 posts Joined: Jan 2003 From: Penangites |
okay, here are the final pics....
       |
|
|
Oct 24 2006, 04:39 PM
|
|
Senior Member
4,561 posts Joined: Jan 2003 From: Penangites |
I've been quite busy these few days with fan modding.....here are the fans that i've modded
this is modded vantec 120mm UV fan, changed the LEDs to 2x blue and 2x red because the stock UV LED died already.... 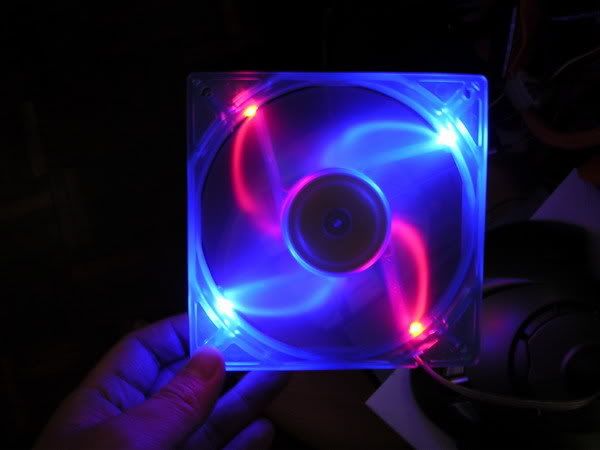 this is also a vantec fan, 92mm... sprayed the blade to orange UV and added 4x blue SMD LEDs on the side 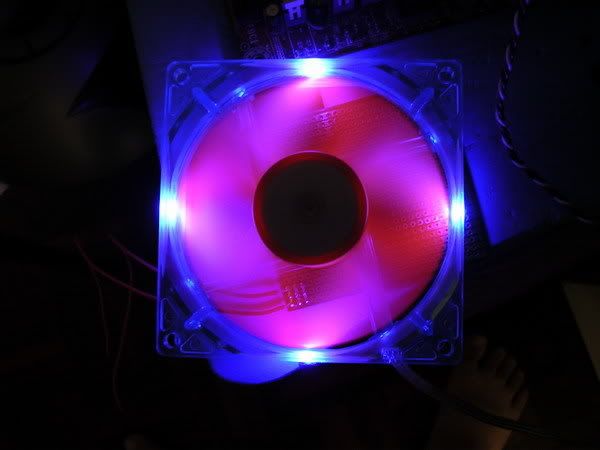 |
|
|
Oct 24 2006, 04:39 PM
|
|
Senior Member
4,561 posts Joined: Jan 2003 From: Penangites |
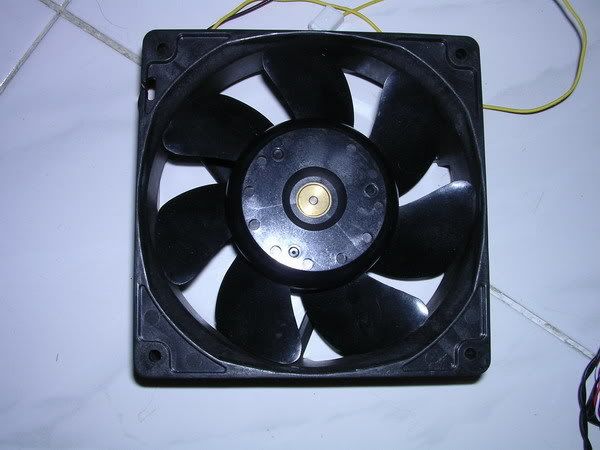
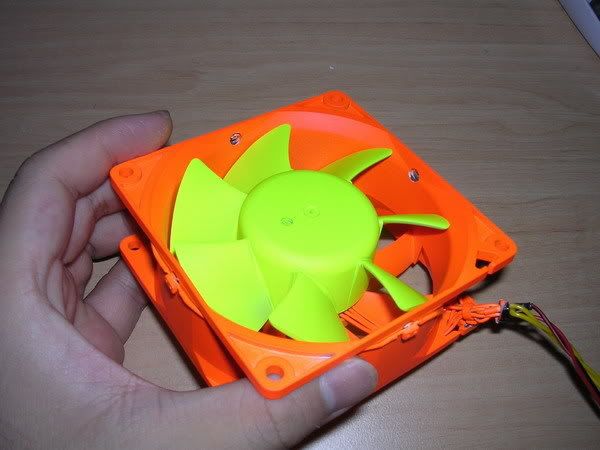
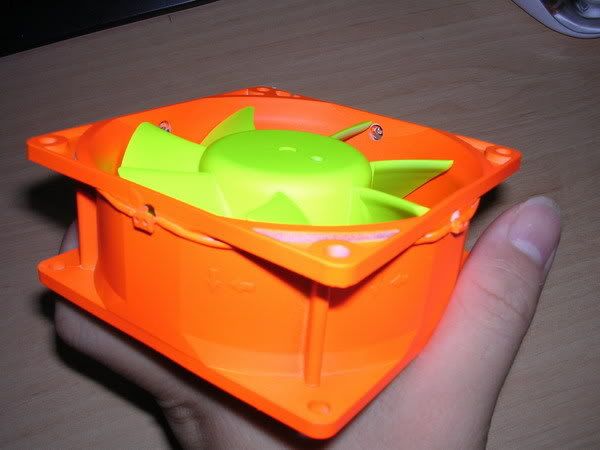
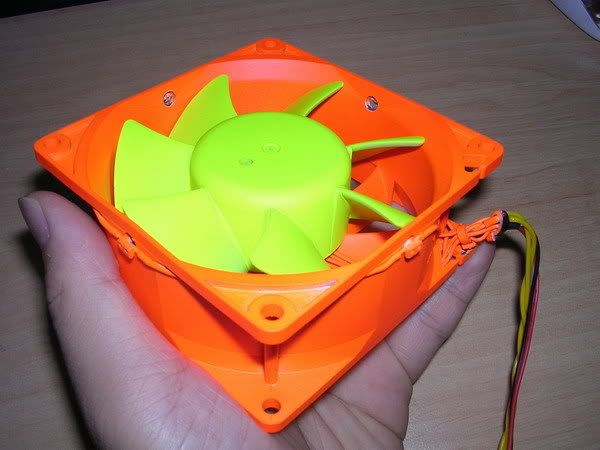
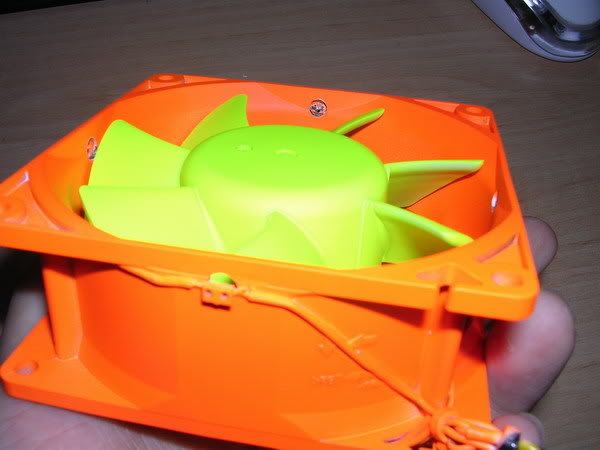
okay, this is a boring black 92mm Delta fan
 Thus i decided to use " Fire " theme on it and modded to yellow UV blade and orange UV frame with LED lighting for a forummer here in LYN. so just enjoy the pics...... 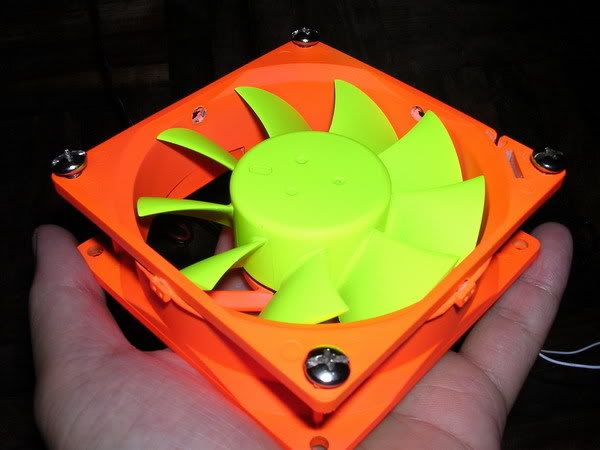 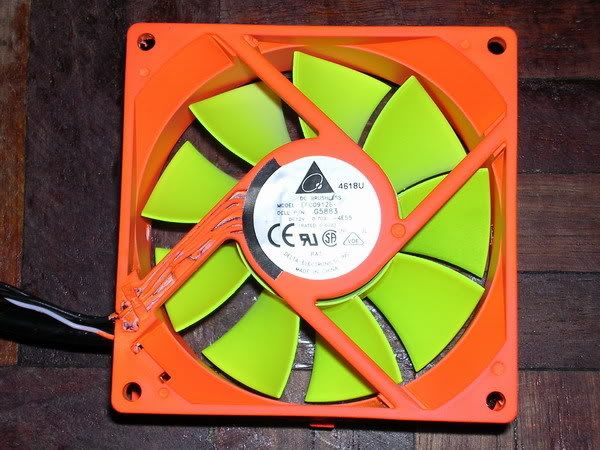 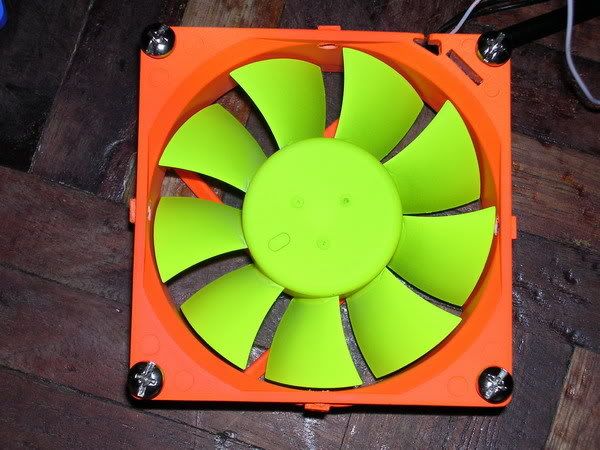  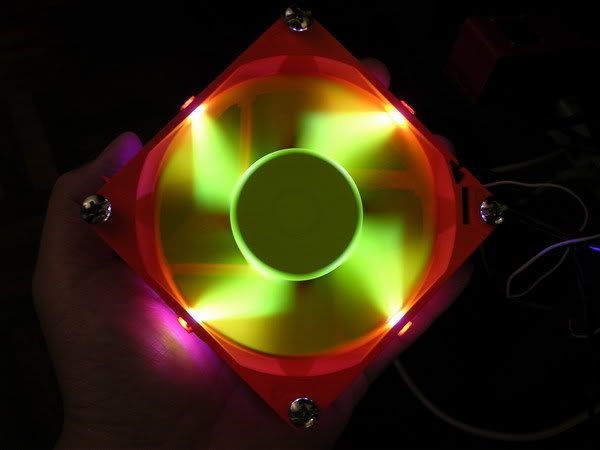 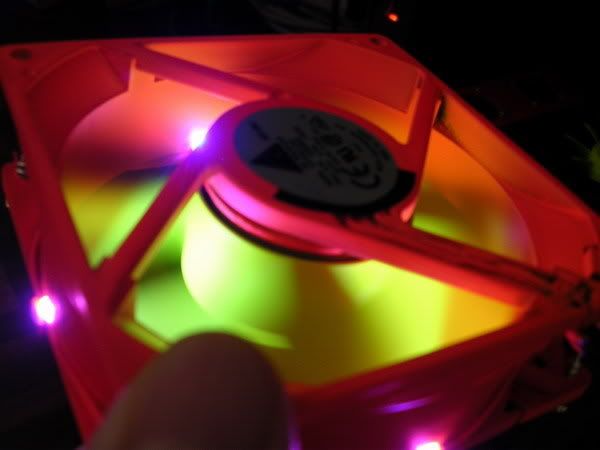 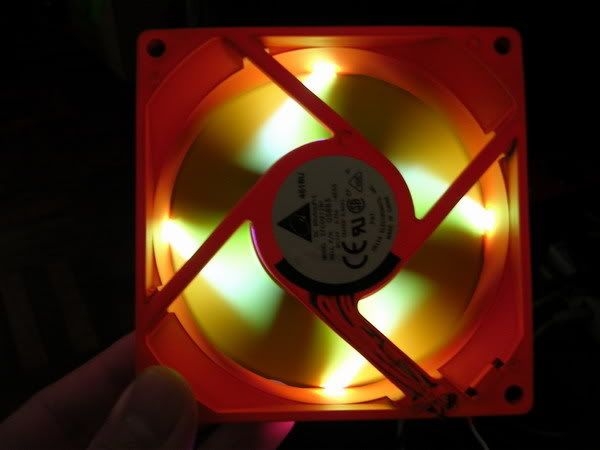 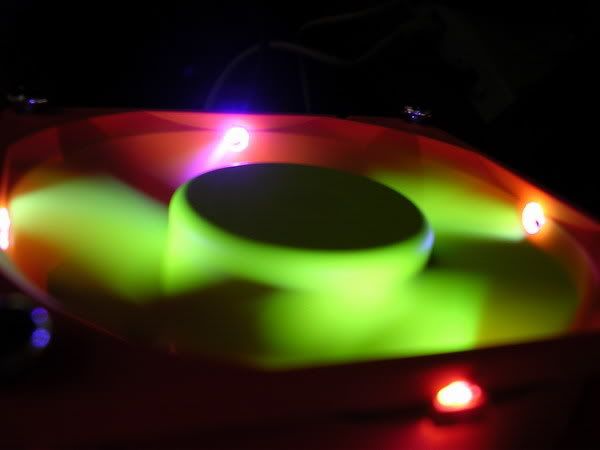 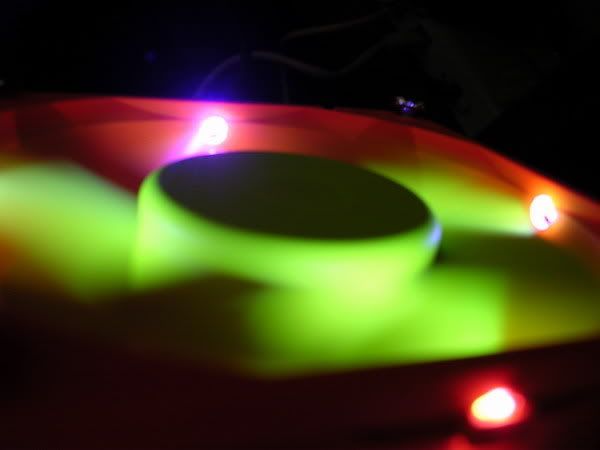 |
|
|
Oct 24 2006, 04:40 PM
|
|
Senior Member
4,561 posts Joined: Jan 2003 From: Penangites |
continue
   |
|
|
Oct 24 2006, 04:42 PM
|
|
Senior Member
4,561 posts Joined: Jan 2003 From: Penangites |
another dull 120mm Sanyo Denki here
 and i turned it into this !!! yellow UV blade + blue UV frame + LED lightings to create the Icy looks..... enjoy the pics 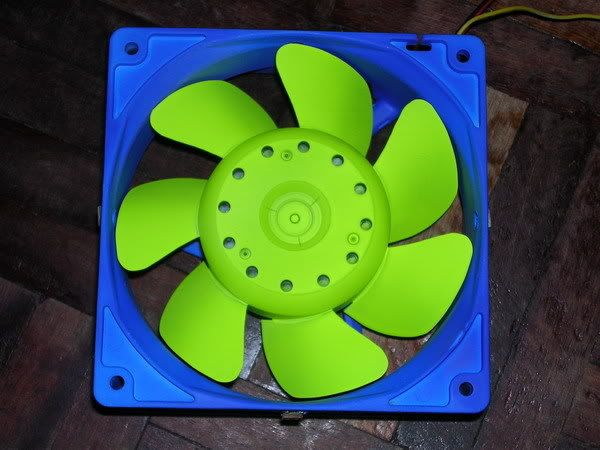  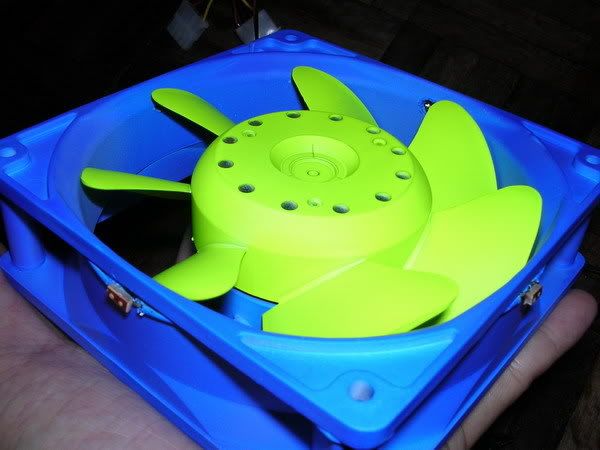 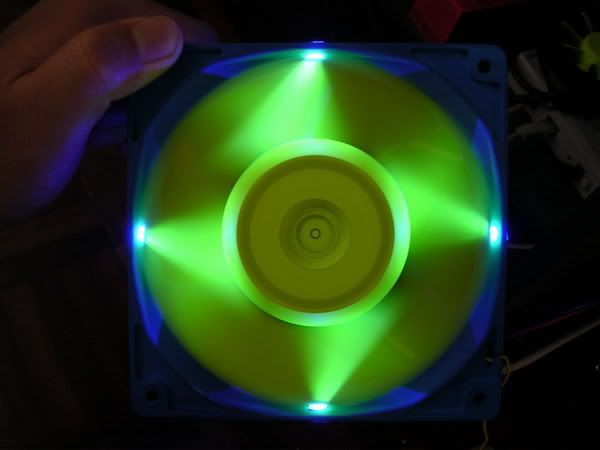 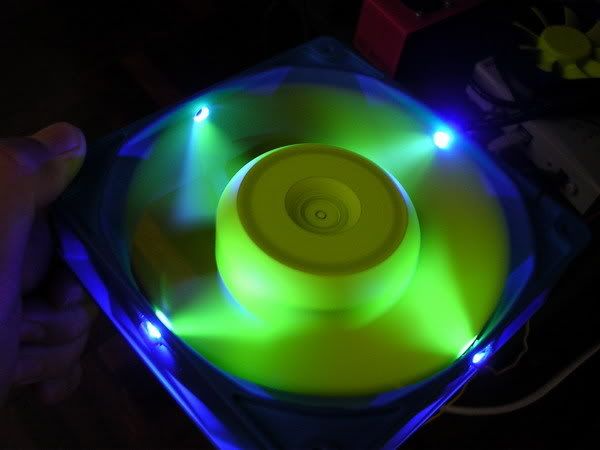 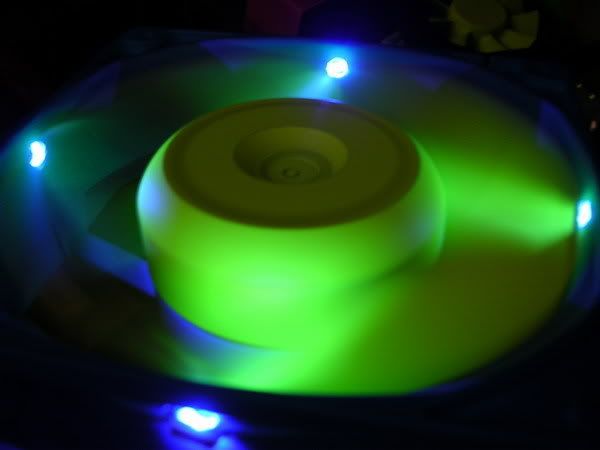 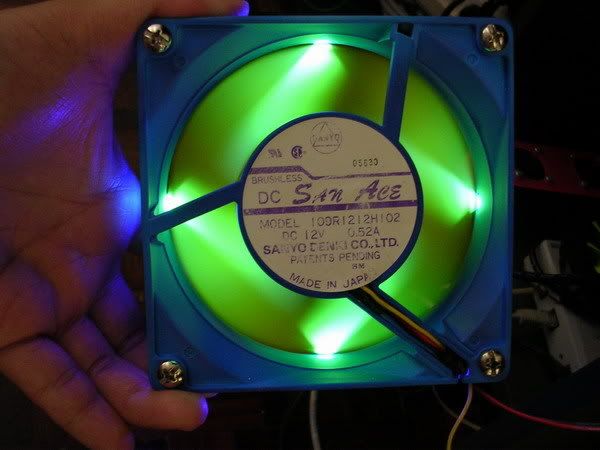 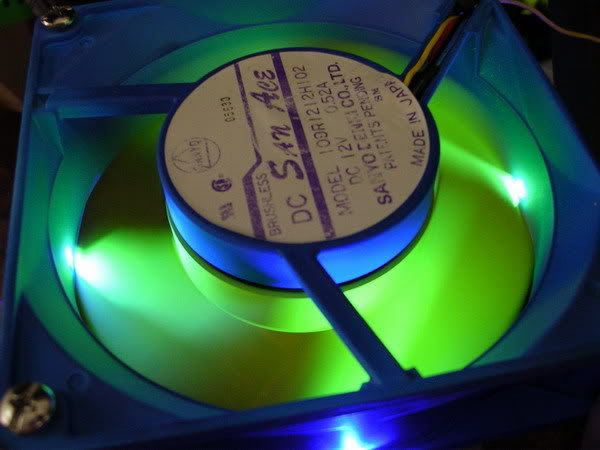 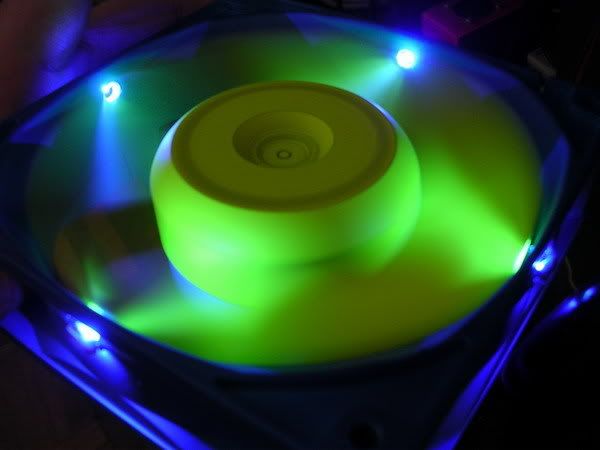 |
|
|
Nov 15 2006, 11:28 PM
|
|
Senior Member
4,561 posts Joined: Jan 2003 From: Penangites |
okay, i spent my whole weekend modding all these for the forummers here, i want to thank them for supporting my mods because i incidentally, a lot of these design are new ones and i wont be doing it unless someone wants it.....
first of all, this is an USB light......the forummer requested this to take his macro shots.... since normal 5mm has got a focussed beam, SMD is more suitable for general lighting because it has a wide angle beam.... there are a total of 20pcs of white smd led on the pcb, and it's USB powered so enjoy the pics !@ 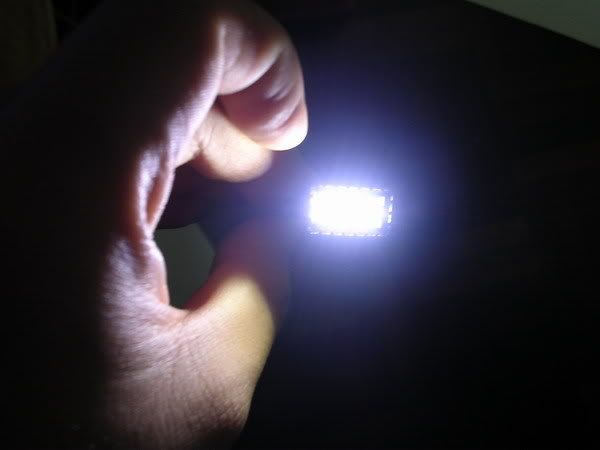 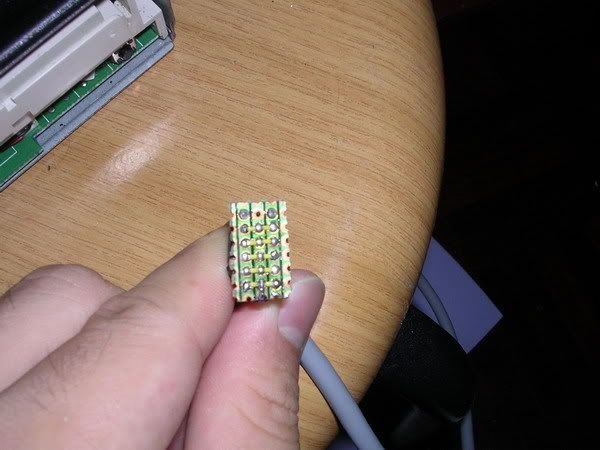 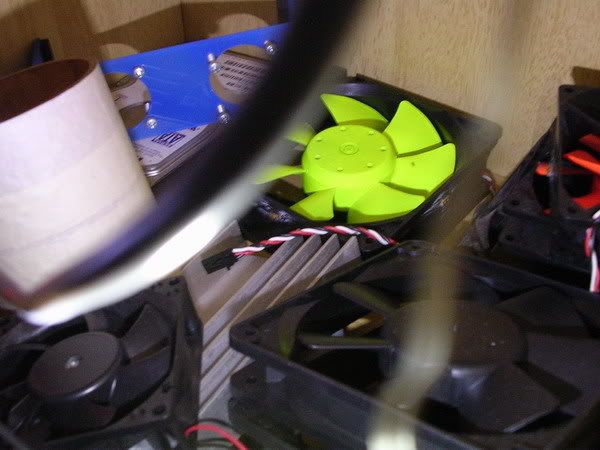 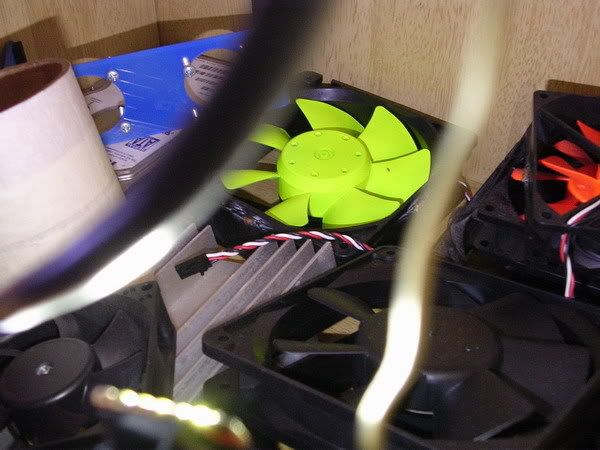 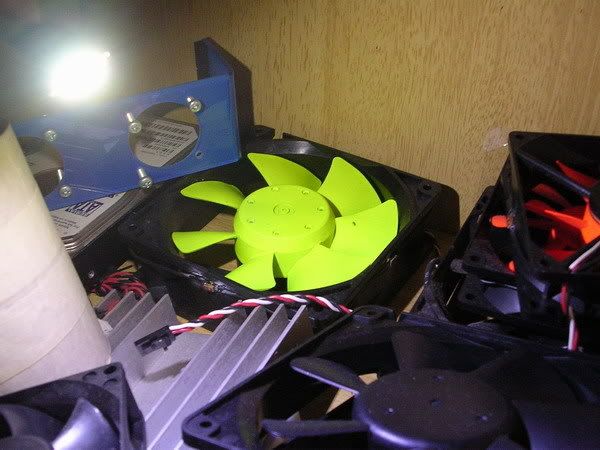 This post has been edited by AllnGap: Nov 15 2006, 11:42 PM |
|
|
Nov 15 2006, 11:29 PM
|
|
Senior Member
4,561 posts Joined: Jan 2003 From: Penangites |
this is a bling bling 120mm NMB with fire theme......used super bright red for the 4 corners and sprayed the blades to white to maintain maximum tone from the red light......
i've even modded the 5mm LED myself to obtain this kind of effect.....due to the 5mm dome shape, the light will form a line on the blade instead of the effect you see now.... so, i've reshaped the epoxy cover to make it flat so that light can come out at all direction, giving the flood effect you see now hope you guys will love it ! btw, it's also for a forummer here.....hope he likes it too 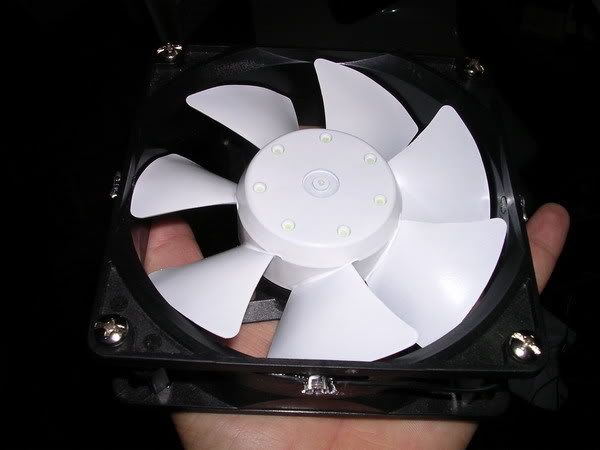 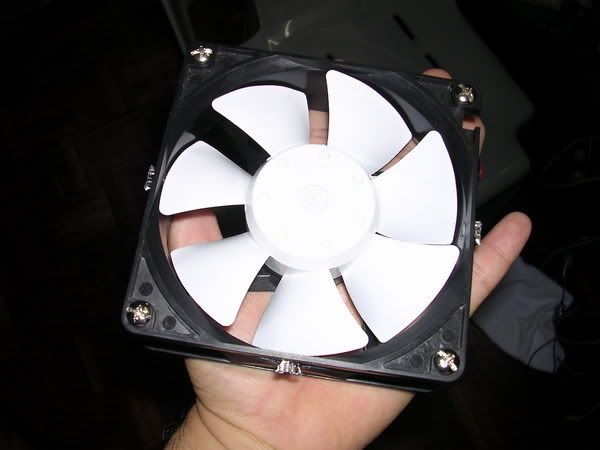 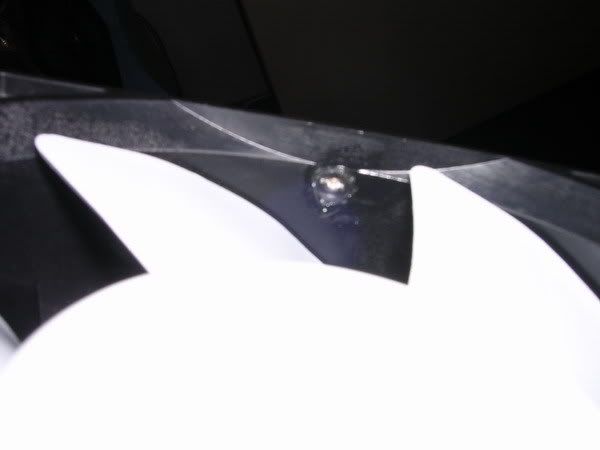 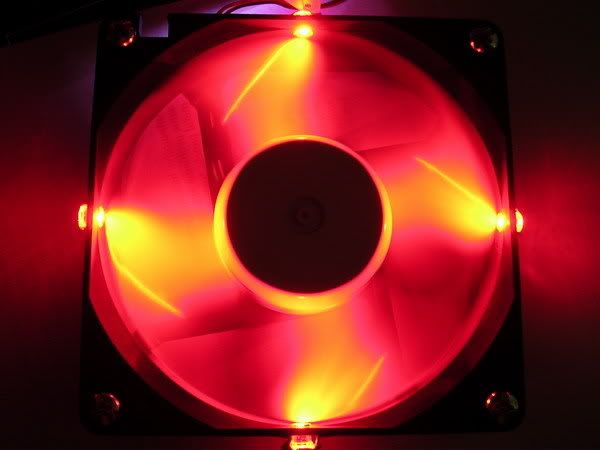 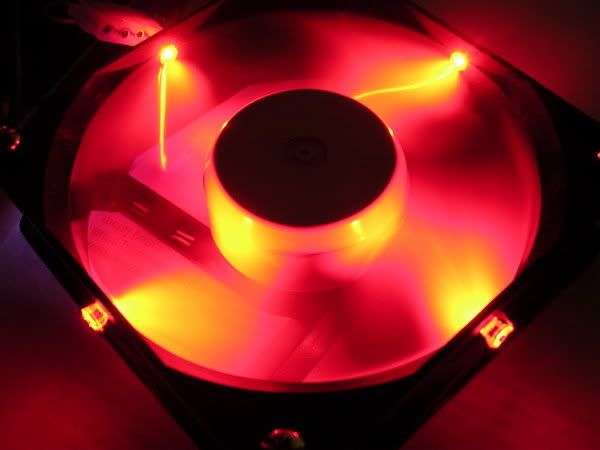 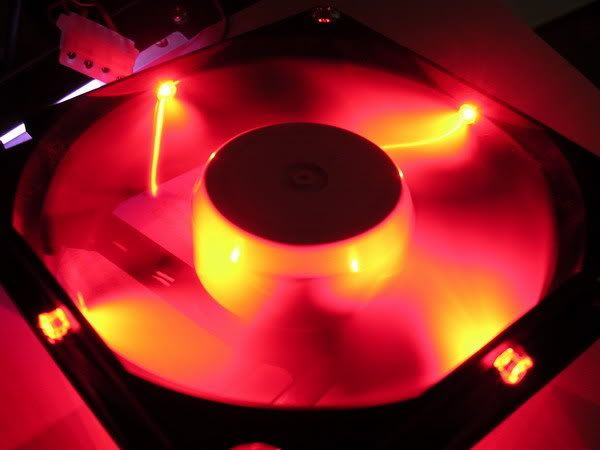 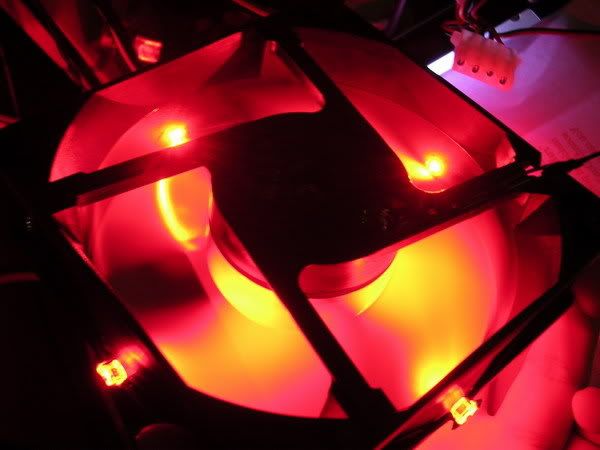 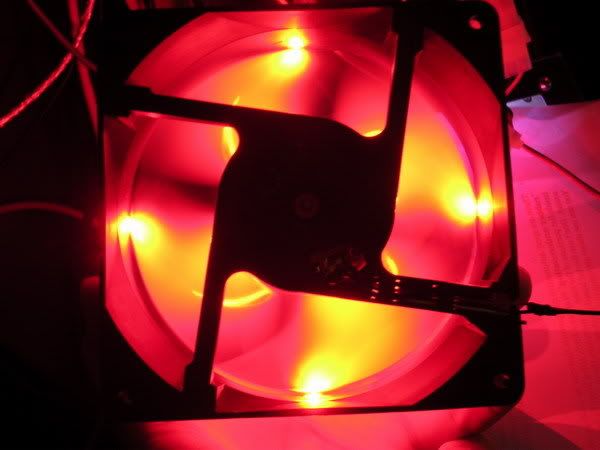 This post has been edited by AllnGap: Nov 15 2006, 11:46 PM |
|
|
Nov 15 2006, 11:29 PM
|
|
Senior Member
4,561 posts Joined: Jan 2003 From: Penangites |
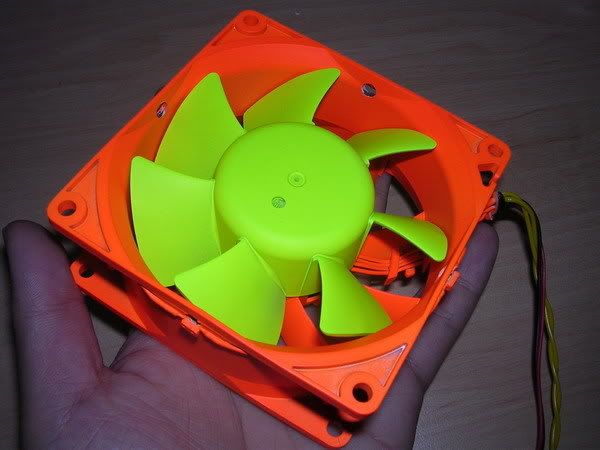
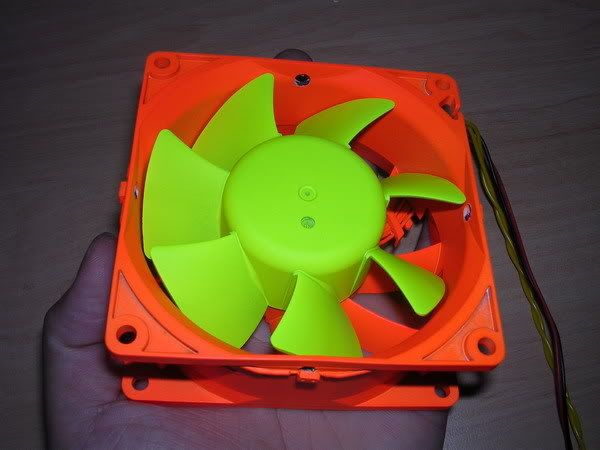
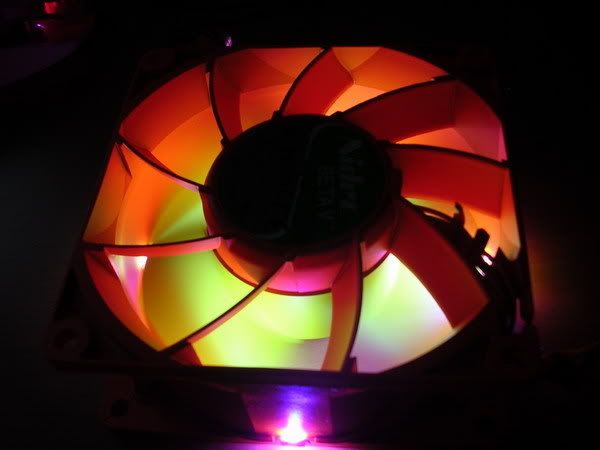
this is a modded 92mm Nidec Beta V with white SMD LEDs.....130cfm fan with bling bling
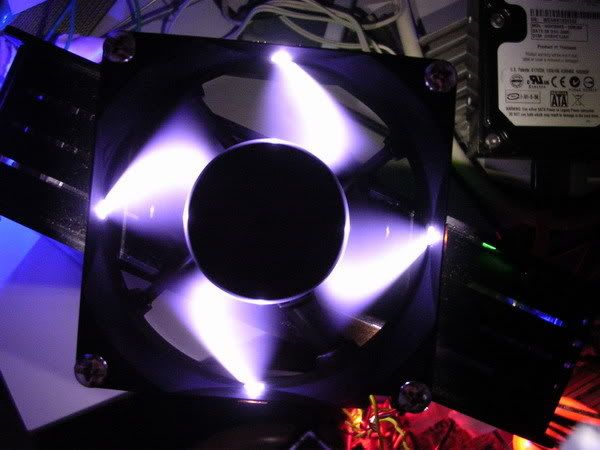  This post has been edited by AllnGap: Nov 15 2006, 11:49 PM |
|
|
Nov 15 2006, 11:30 PM
|
|
Senior Member
4,561 posts Joined: Jan 2003 From: Penangites |
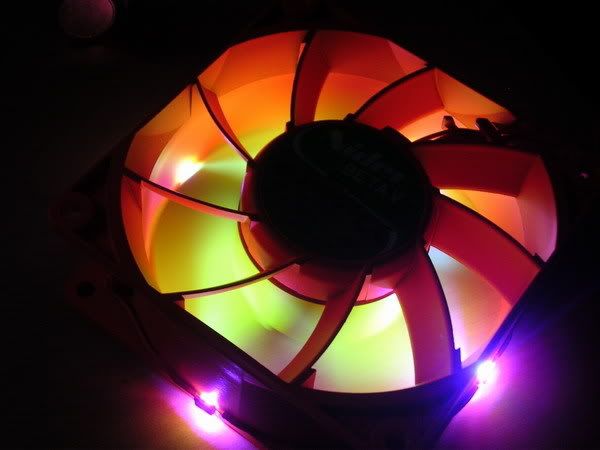
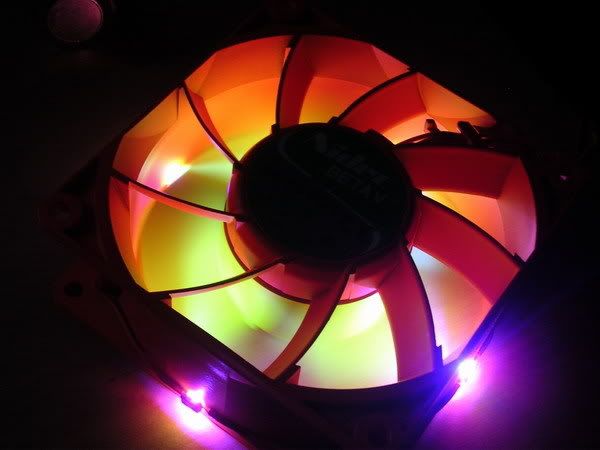
this is probably the nicest theme......the forummer ask me to mod this after he saw what i can do with the sanyo denki........
design is great, good airflow and powerful fan.....just perfect !!!!! i'm using 3x of these fans for my incoming pc  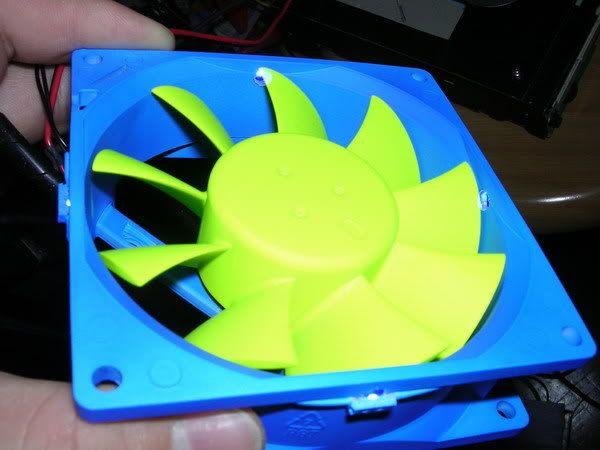 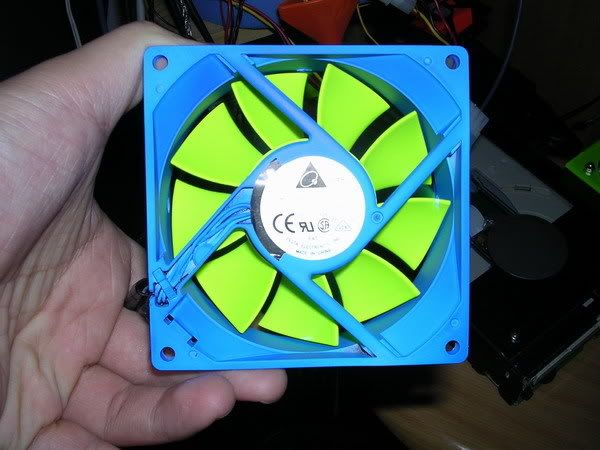 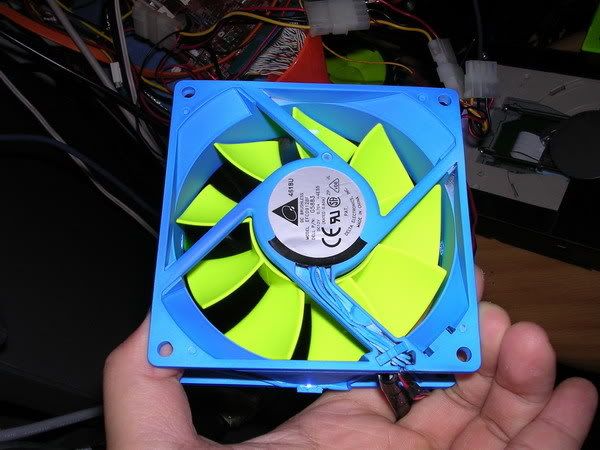 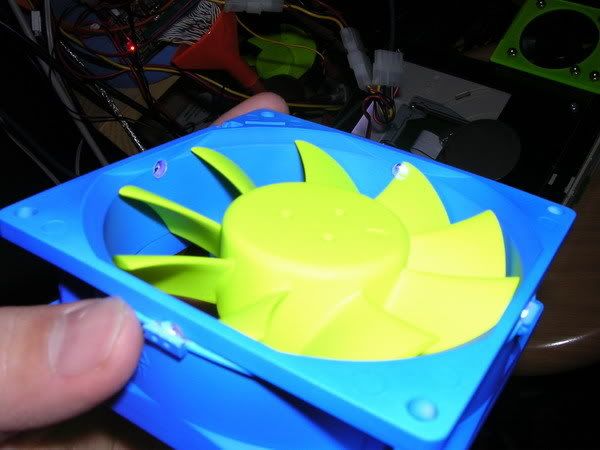 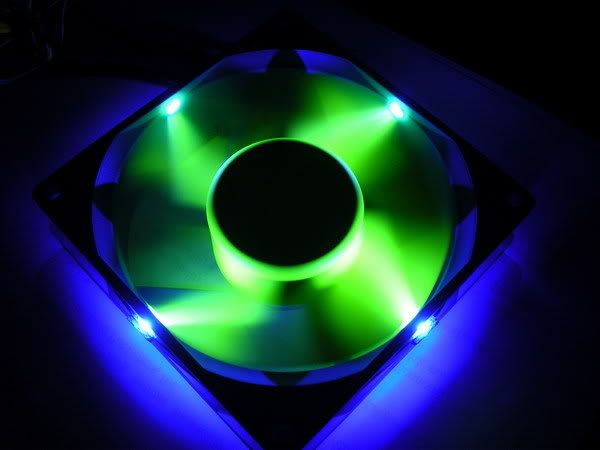 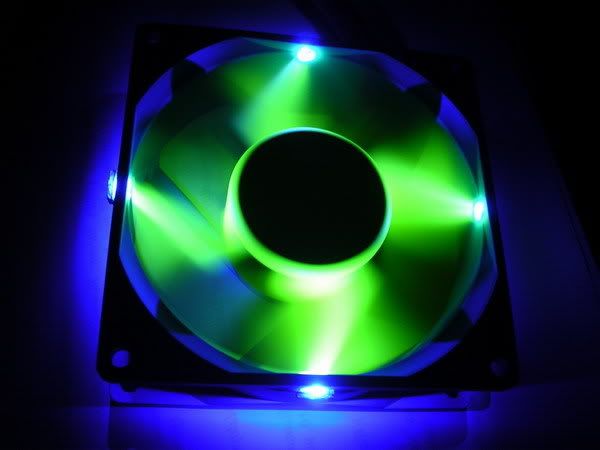 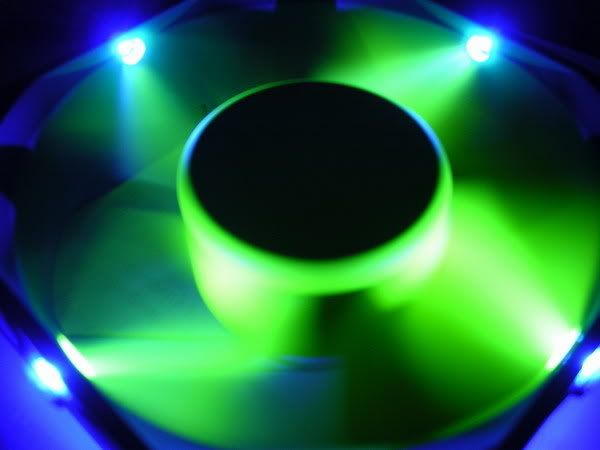 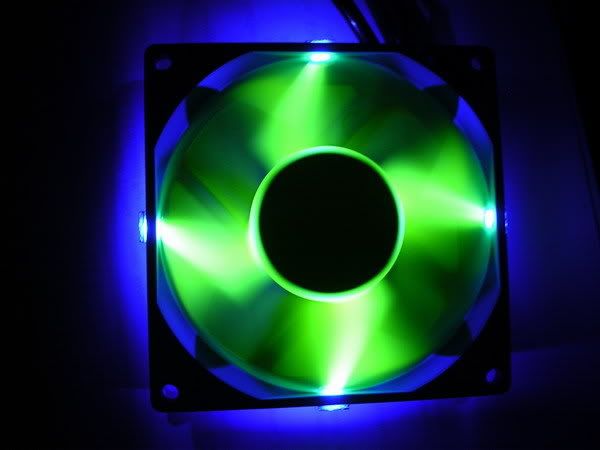 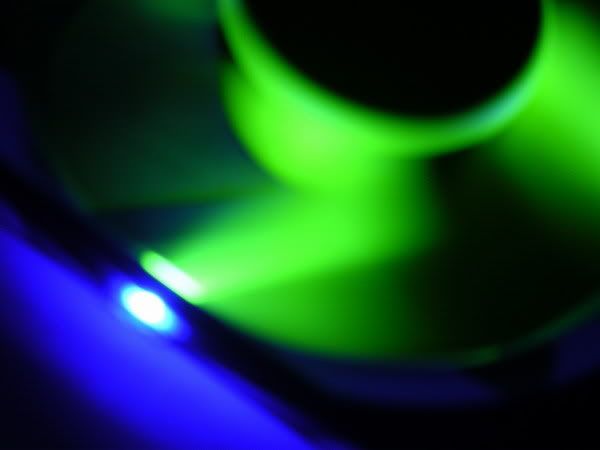 This post has been edited by AllnGap: Nov 15 2006, 11:50 PM |
|
|
Nov 15 2006, 11:31 PM
|
|
Senior Member
4,561 posts Joined: Jan 2003 From: Penangites |
   |
|
|
Nov 15 2006, 11:31 PM
|
|
Senior Member
4,561 posts Joined: Jan 2003 From: Penangites |
this is the 60mm ram cooler with fan speed controller option......the ram cooler is capable of covering 4 ram slots and capable of doing at least 23cfm per fan
        This post has been edited by AllnGap: Nov 15 2006, 11:51 PM |
|
|
Nov 15 2006, 11:32 PM
|
|
Senior Member
4,561 posts Joined: Jan 2003 From: Penangites |
this is also originally a dull Sanyo Denki 40*40*28mm, 10+cfm, 10k rpm fan.....
so added some SMDs to brighten things up.....  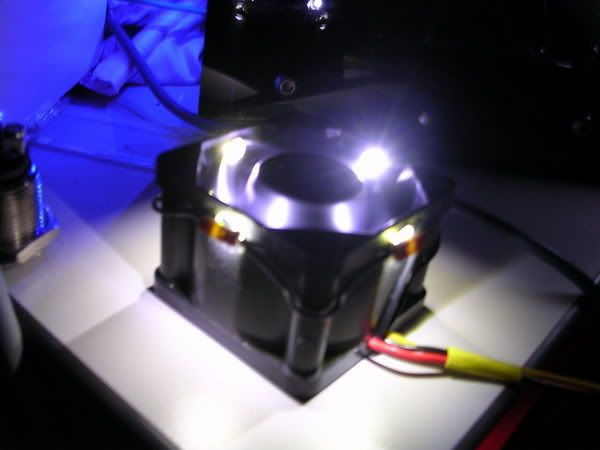 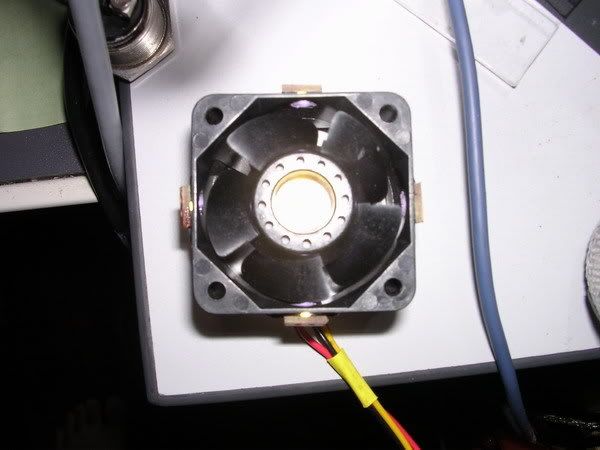 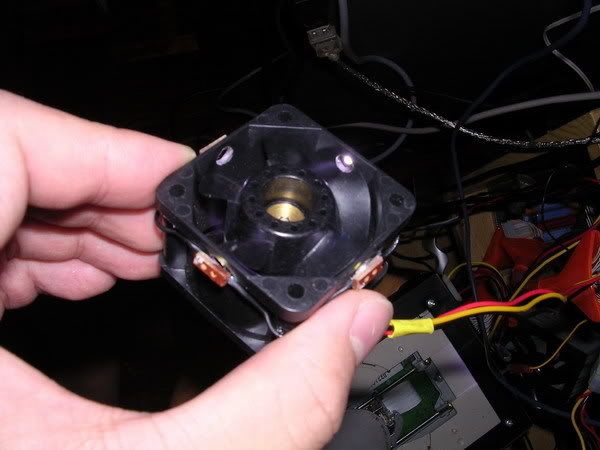 This post has been edited by AllnGap: Nov 15 2006, 11:52 PM |
|
|
Feb 27 2007, 12:31 AM
|
|
Senior Member
4,561 posts Joined: Jan 2003 From: Penangites |
          This post has been edited by AllnGap: Feb 27 2007, 12:34 AM |
|
|
Feb 27 2007, 12:46 AM
|
|
Senior Member
4,561 posts Joined: Jan 2003 From: Penangites |
  fafasfas 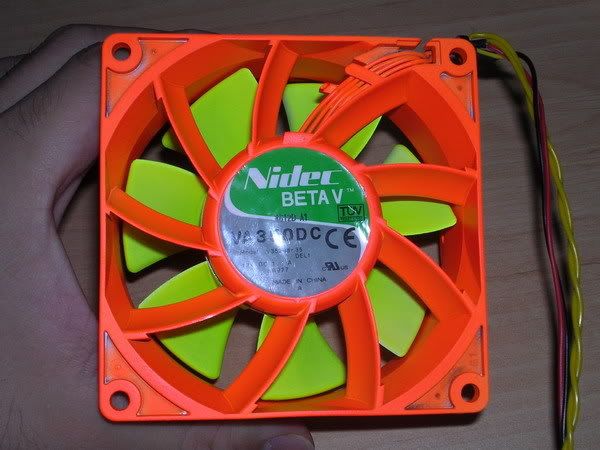  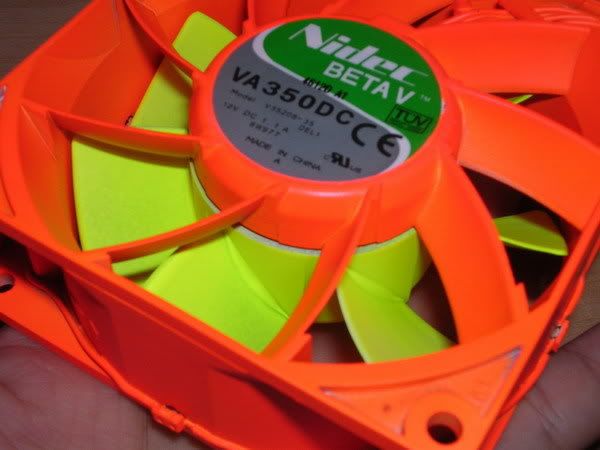  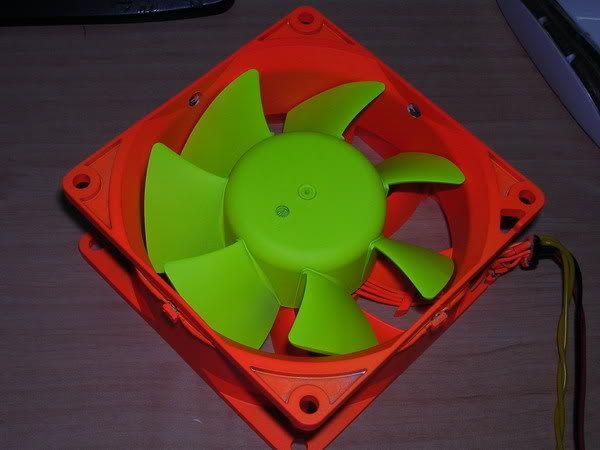  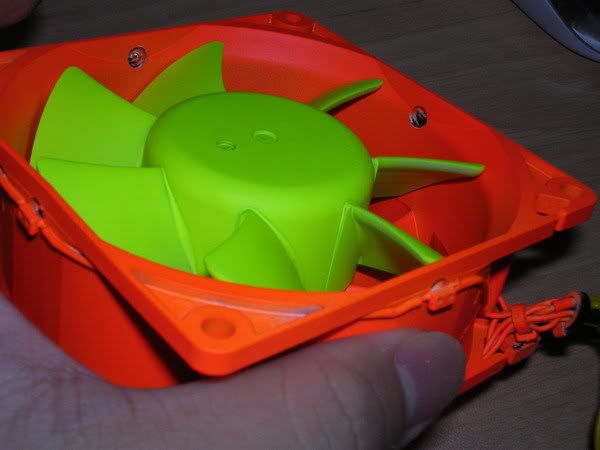 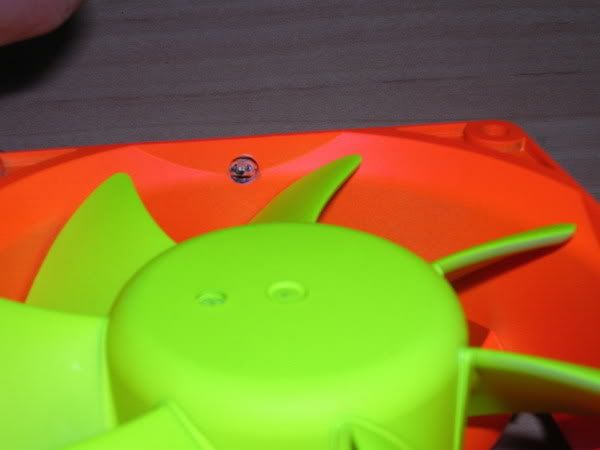 |
|
|
Feb 27 2007, 12:47 AM
|
|
Senior Member
4,561 posts Joined: Jan 2003 From: Penangites |
          This post has been edited by AllnGap: Feb 27 2007, 01:04 AM |
|
|
Feb 27 2007, 12:50 AM
|
|
Senior Member
4,561 posts Joined: Jan 2003 From: Penangites |
        This post has been edited by AllnGap: Feb 27 2007, 01:03 AM |
|
|
Feb 27 2007, 12:50 AM
|
|
Senior Member
4,561 posts Joined: Jan 2003 From: Penangites |
          This post has been edited by AllnGap: Feb 27 2007, 01:02 AM |
|
|
Feb 27 2007, 01:01 AM
|
|
Senior Member
4,561 posts Joined: Jan 2003 From: Penangites |
   |
|
|
Mar 2 2007, 04:04 PM
|
|
Senior Member
4,561 posts Joined: Jan 2003 From: Penangites |
         This post has been edited by AllnGap: Mar 2 2007, 04:07 PM |
|
|
Mar 2 2007, 04:07 PM
|
|
Senior Member
4,561 posts Joined: Jan 2003 From: Penangites |
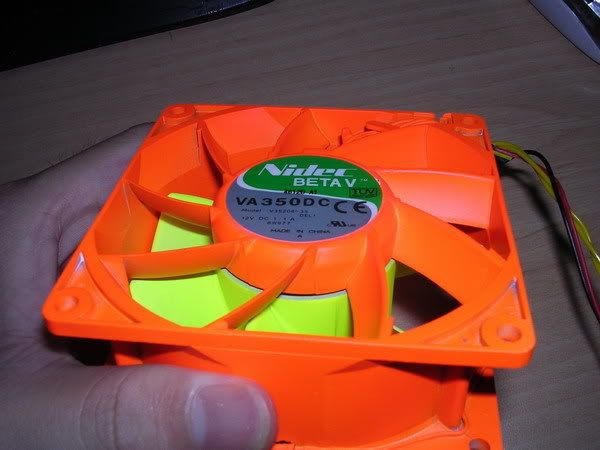
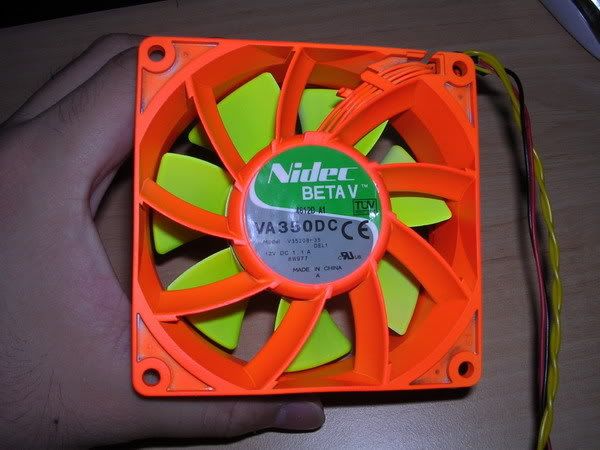
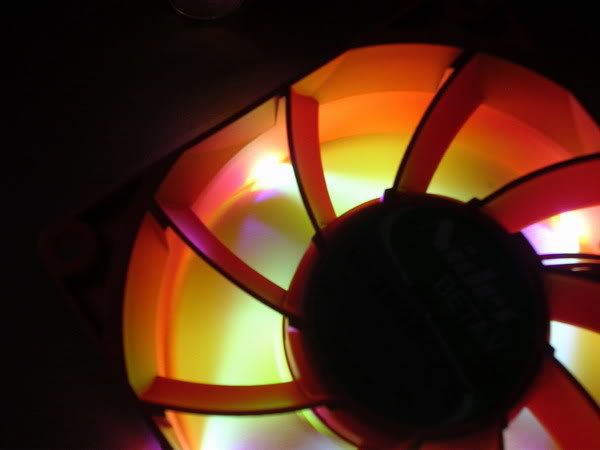
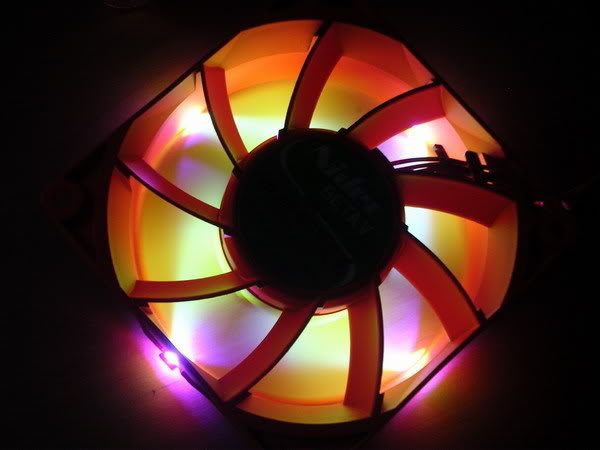
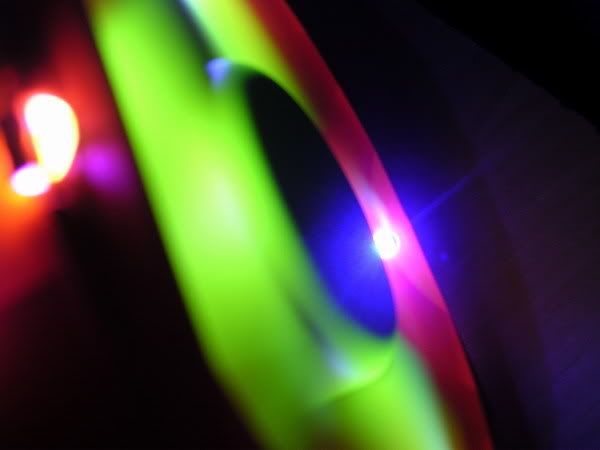
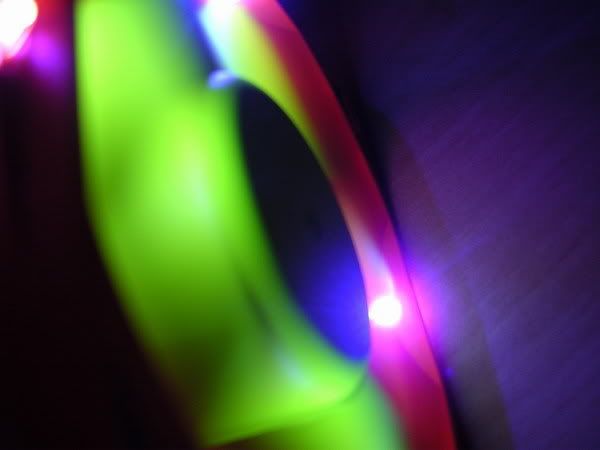
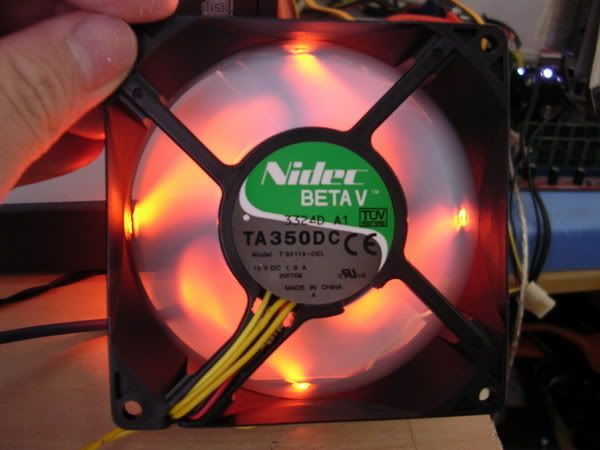
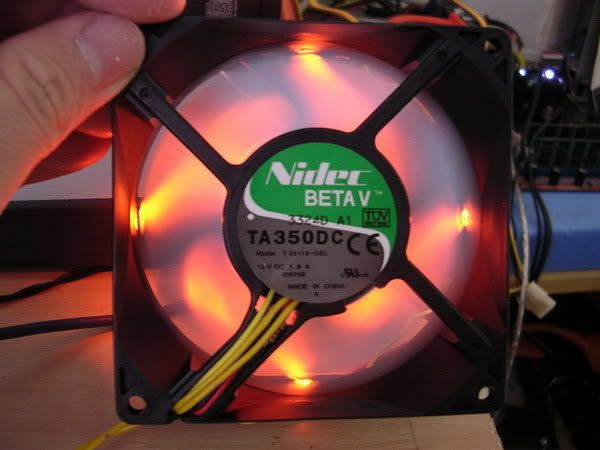
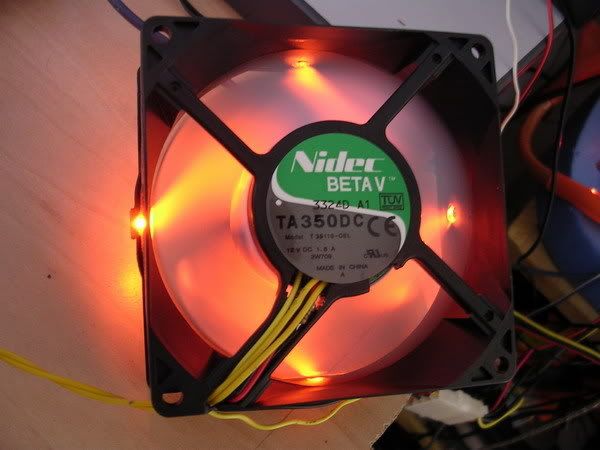
This is another modded fan, Nidec Beta V, 92*92*38mm, 130cfm, 5700rpm, 50+dB
since the motor spins at 5700rpm, the spray on the blades cannot be too thick.....so got to be skillful when it comes to controlling the spray....... btw, i've added orange SMDs on the side.....hope you guys/gals will like them 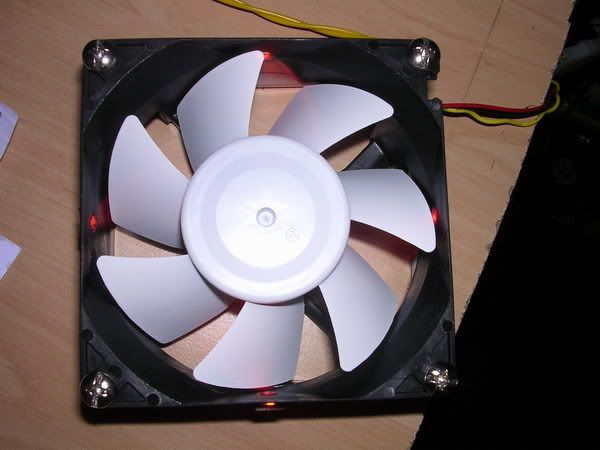 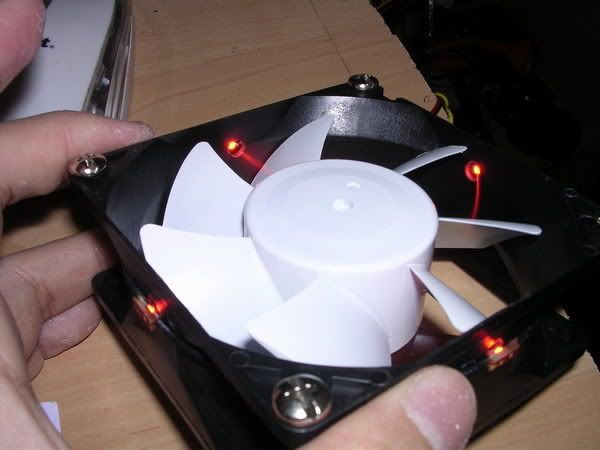 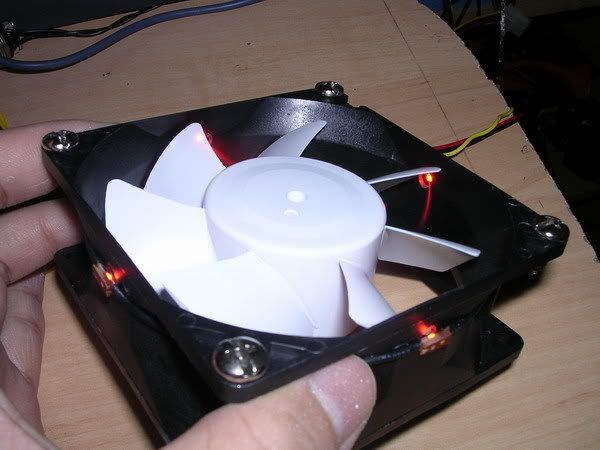 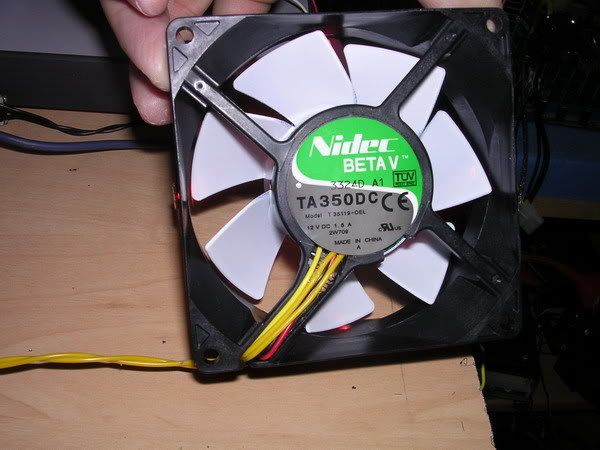 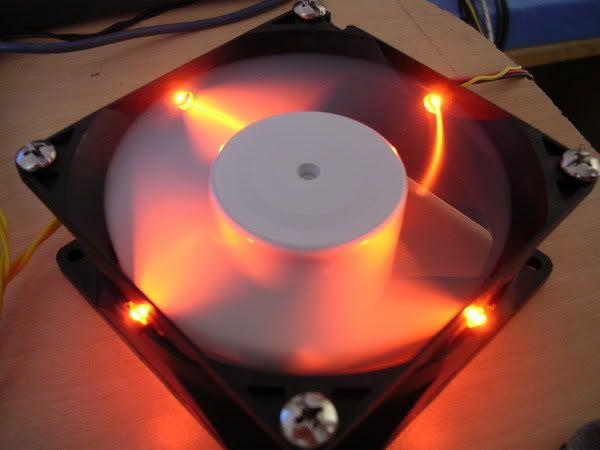 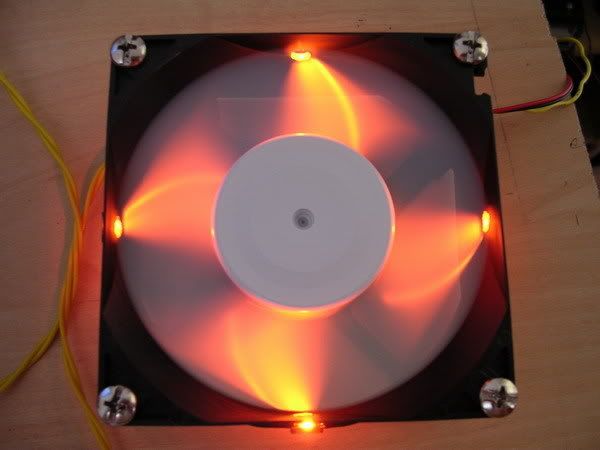  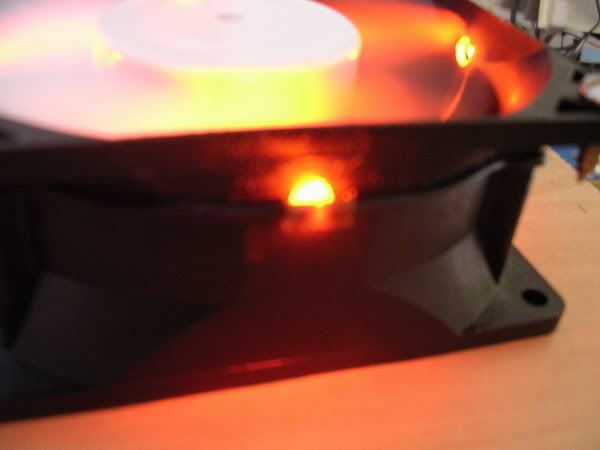 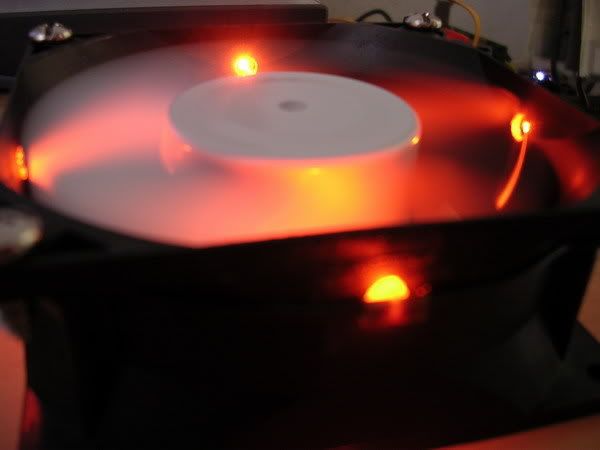 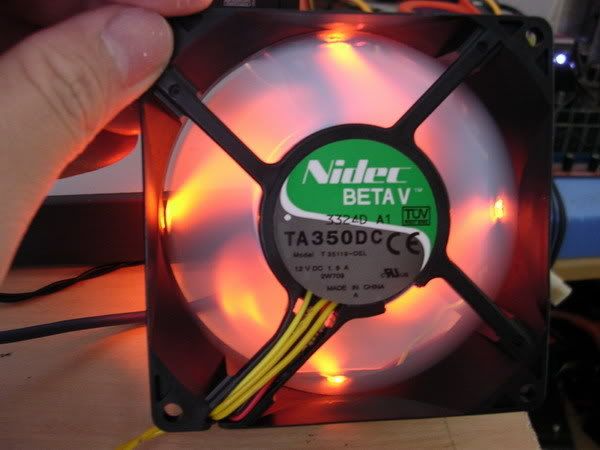 This post has been edited by AllnGap: Mar 2 2007, 04:12 PM |
|
|
Mar 2 2007, 04:12 PM
|
|
Senior Member
4,561 posts Joined: Jan 2003 From: Penangites |
   |
|
|
Mar 7 2007, 05:02 PM
|
|
Senior Member
4,561 posts Joined: Jan 2003 From: Penangites |
nice nice.....but lack of orange colour...............
|
|
|
Mar 14 2007, 03:08 AM
|

VIP
15,705 posts Joined: Mar 2005 From: Tg. Rambutan |
OK. Thread cleaned n reopened. Remember guys, this is AllnGap's gallery for him to show off all his mods. All sales enquiries belong in the Garage Sales or by PM only.
Added on June 14, 2007, 1:14 amThread cleaned. This post has been edited by ianho: Jun 14 2007, 01:14 AM |
|
|
Jun 24 2007, 02:00 AM
|
|
Senior Member
4,561 posts Joined: Jan 2003 From: Penangites |
this is the latest " Dark Shawty "
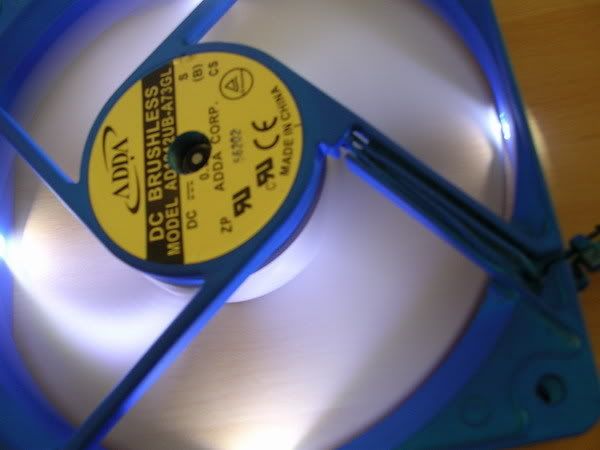
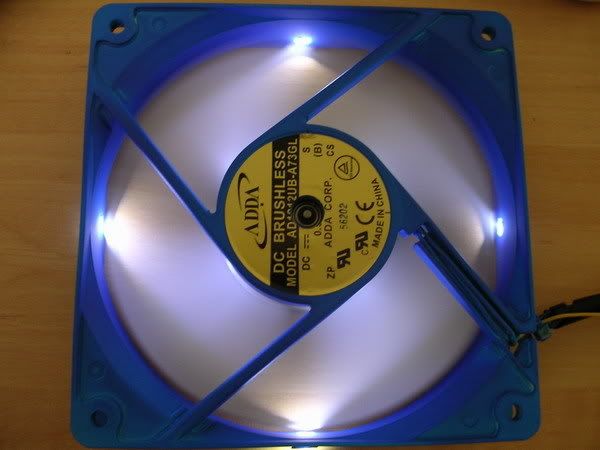
version ram cooler, custom made it for Shawty, and it really looks cool in black and orange combination as well.....  i've even used chromed nuts to hold the fans and it also comes with controller to enable the speed to be controlled.......the fans are NMB fans, which are capable of pushing 23cfm per fan at full speed (roughly 2pcs 80mm case fan airflow on the performance rams) hope you'll like the taste of the darknesssss       Added on June 30, 2007, 7:54 amKinda busy these few month, so i'll upload what i've modded for the past 2 months in one shot this is a modded 120mm ADDA fan...    This post has been edited by AllnGap: Jun 30 2007, 07:54 AM |
|
|
Jun 30 2007, 07:57 AM
|
|
Senior Member
4,561 posts Joined: Jan 2003 From: Penangites |
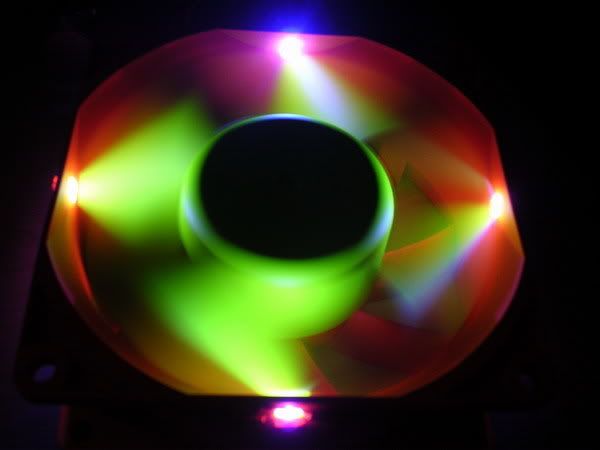
another modded fan, 92mm Nidec Focus Flow fan, 110cfm with bling bling mod !
   another theme for the 120mm ADDA, this time with blue UV frame, great fan with low noise characteristics, near to zero motor noise, speed control options, rpm monitoring....        This post has been edited by AllnGap: Jun 30 2007, 08:02 AM |
|
|
Jun 30 2007, 08:23 AM
|
|
Senior Member
4,561 posts Joined: Jan 2003 From: Penangites |
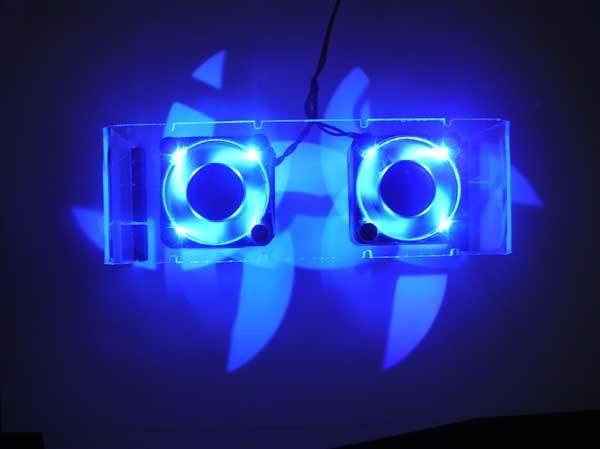
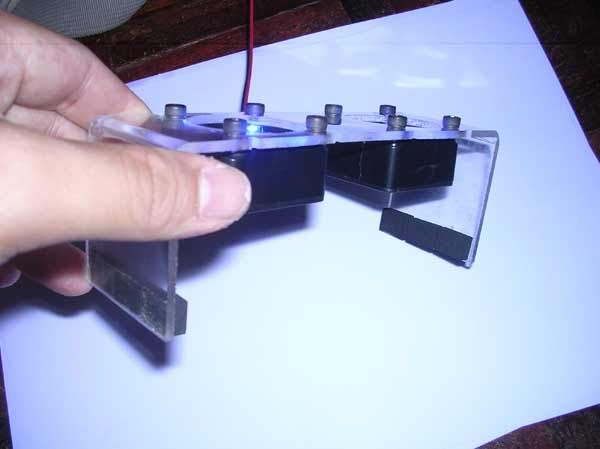
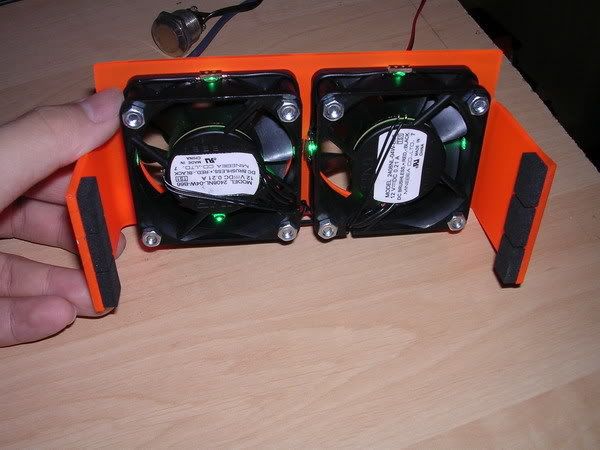
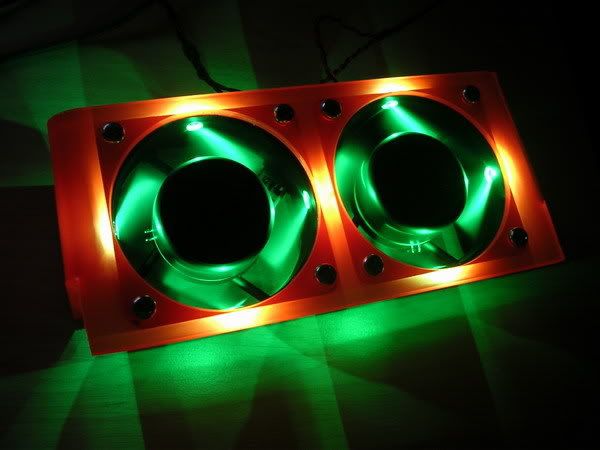
this is another version of my ram cooler, dual 60mm version....
note that the pattern on the fans is different because of the blade shape            This post has been edited by AllnGap: Jun 30 2007, 08:24 AM |
|
|
Sep 15 2008, 04:54 PM
|

Senior Member
7,318 posts Joined: Nov 2006 From: Pulau Sipadan |
cant look the image
|
|
|
Sep 15 2008, 05:32 PM
|

Senior Member
1,165 posts Joined: Jul 2007 From: Johor |
if u notice that his last post is dated Jun 30 2007. more than a year now
|
|
|
Sep 15 2008, 08:54 PM
|

Senior Member
1,626 posts Joined: Dec 2007 |
eh bro all what happen to the picture
|
|
|
Sep 15 2008, 09:16 PM
|

Senior Member
2,164 posts Joined: Jul 2006 From: Kuala Lumpur |
I think his pictures is removed la... He post his pictures long time ago...
|
|
|
Sep 16 2008, 06:38 AM
|

Junior Member
6 posts Joined: Aug 2008 From: shah alam |
woa.. how much the cost for the 7colour led?
uhm shud teach us how to do it looks cool, can change the colour with ur mood. |
|
|
Sep 16 2008, 10:41 AM
|
|
Senior Member
2,465 posts Joined: Sep 2007 From: Kuala Lumpur Status: Freeride not dead |
I thought he is coming up something new.
|
|
|
Sep 16 2008, 12:16 PM
|

All Stars
14,242 posts Joined: Jul 2007 From: JAVABUS |
happy birthday , chyu89
owh ... too bad , i was looking his fan selling thread and i realize that the pic removed by server |
|
|
Sep 16 2008, 04:36 PM
|

Senior Member
2,603 posts Joined: Sep 2006 |
» Click to show Spoiler - click again to hide... « guys, this is a gallery thread only TS can reply in here comments/ideas/questions/non-sense/happy birthday wishes shoulda done elsewhere hint: » Click to show Spoiler - click again to hide... « |
|
|
Nov 7 2008, 01:21 PM
|

Junior Member
71 posts Joined: Dec 2007 |
nice thread
too bad at page 6 no more pic to view |
|
|
Dec 14 2008, 11:12 AM
|

Senior Member
1,029 posts Joined: Apr 2007 From: All Blue |
Where can i find a guide to install LED to normal fan?
 |
|
|
Jan 28 2009, 11:28 PM
|
|
Senior Member
995 posts Joined: May 2008 |
he ain't gonna teach u coz he is charging ppl for his mod! Just be creative and u will know how. U nid some soldering skill to do that too.
|
|
|
Feb 4 2009, 07:18 AM
|

Senior Member
2,458 posts Joined: Apr 2008 From: M A N C A V E |
Nice MOD AG....
You doing a good job to keep LYN forumer look like  ha ha ha... This post has been edited by verdict: Feb 4 2009, 07:19 AM |
|
|
Feb 7 2009, 01:25 AM
|

Junior Member
341 posts Joined: Sep 2008 |
the best lyn modder...minded to open new thread to teach modding??
|
|
|
Feb 7 2009, 09:39 PM
|
|
Junior Member
10 posts Joined: Jan 2008 From: Kuala Lumpur |
anyone here know where to get the acrylic materials like he do? i wonder i can try out those things.
|
|
|
Feb 15 2009, 02:36 PM
|

Senior Member
3,812 posts Joined: Dec 2008 From: Eden |
got any LED fan that got really high speed? see VISO 90mm that got 5k rpm speed.
120x120x25-what's the highest speed for this size? (LED fan to be exact) |
|
|
Mar 30 2009, 01:00 AM
|

Senior Member
939 posts Joined: Jan 2007 |
where AllnGap gone ??
|
|
|
Mar 30 2009, 01:09 AM
|

Senior Member
844 posts Joined: Aug 2007 From: land below the wind (KK<--->KL) |
hmmm....image can't see wan??
 |
|
|
Mar 30 2009, 03:18 AM
|

Senior Member
902 posts Joined: Mar 2009 |
dude...2 years pass already...the links shud hav expired by now lol
|
|
|
Mar 30 2009, 12:34 PM
|
|
Senior Member
844 posts Joined: Aug 2007 From: land below the wind (KK<--->KL) |
lolz , but the fist page still got all the wonderful awesome fan he done.
|
|
|
Mar 30 2009, 12:48 PM
|
|
Senior Member
902 posts Joined: Mar 2009 |
allngap is indeed a colourful fella lols...
ask him do for u le =P |
|
|
Mar 30 2009, 01:24 PM
|
|
Senior Member
844 posts Joined: Aug 2007 From: land below the wind (KK<--->KL) |
He ever done one for my friend , a ram cooler. Vary nice
|
|
|
Mar 30 2009, 08:37 PM
|
|
Senior Member
939 posts Joined: Jan 2007 |
QUOTE(Jinster @ Mar 30 2009, 03:18 AM) dude...2 years pass already...the links shud hav expired by now lol where he gone ?? |
|
|
Mar 30 2009, 08:57 PM
|
|
Senior Member
844 posts Joined: Aug 2007 From: land below the wind (KK<--->KL) |
maybe out station kot.
|
|
|
Mar 30 2009, 09:58 PM
|
|
Senior Member
902 posts Joined: Mar 2009 |
maybe~
good people are hard to find? lols |
|
|
Mar 30 2009, 11:01 PM
|
|
Senior Member
844 posts Joined: Aug 2007 From: land below the wind (KK<--->KL) |
Yup's
|
|
|
Apr 2 2009, 08:57 PM
|

Junior Member
458 posts Joined: Mar 2009 |
wan buy ram cooler frm him also hard...T.T
|
|
|
Nov 13 2009, 02:47 AM
|

Junior Member
311 posts Joined: Sep 2009 |
anyone knows someone in Skudai who can mod my case? PM me please..
This post has been edited by i_djoel2000: Nov 13 2009, 02:50 AM |
|
|
Nov 14 2009, 07:12 PM
|

Senior Member
2,029 posts Joined: Oct 2008 From: KL, Seri Kembangan |
mod urself la bro... learn sumthing~
|
|
|
Apr 21 2011, 06:41 PM
|

Junior Member
410 posts Joined: Nov 2008 From: city of undead |
QUOTE(andythung @ Nov 14 2009, 07:12 PM) mod urself la bro... learn sumthing~ harsh statement but true. lol |
|
|
Jul 30 2011, 06:02 AM
|

Senior Member
5,464 posts Joined: Mar 2005 |
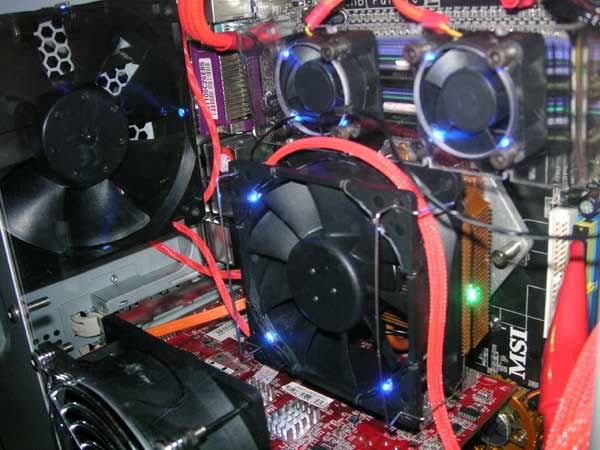
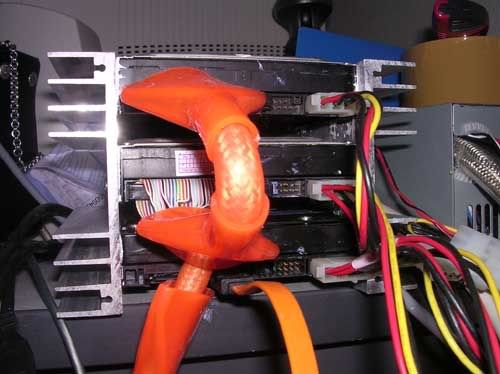
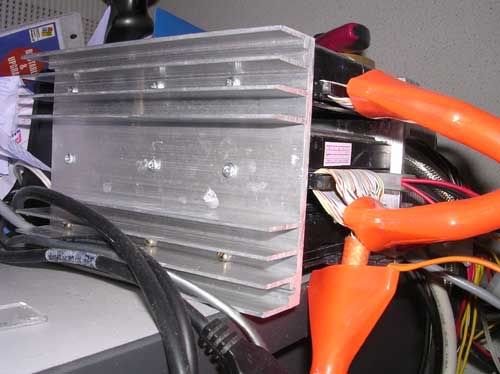
The purpose is to suck cool air from the side to cool the heatsink. Standard fan configuration is just sucking btm air but when you have a few cards in between, its sandwich in between and only circulate within the confine zone. Alu heatsinks can go passive so no worries. The only problem is, you need pressure to run pass those fins.
|
| Change to: |  0.0545sec 0.0545sec
 0.44 0.44
 6 queries 6 queries
 GZIP Disabled GZIP Disabled
Time is now: 22nd December 2025 - 05:34 AM |
 Quote
Quote