Welcome Guest ( Log In | Register )

Bump Topic Topic Closed RSS Feed

Outline · [ Standard ] · Linear+

 Coolermaster League V2.0, - Pimp ur CM rig.Make sure u read post 1

views
     
j05h
post Apr 17 2006, 05:06 PM

Casual
***
Junior Member
340 posts

Joined: Sep 2005
From: Kuala Lumpur
99. j05h: CM Centurion 5 silver w/ RealPower 550w

Been working on this all weekend.

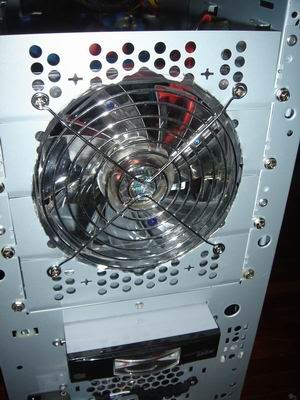
With the stock case, I kinda figured a 12cm fan would fit nicely in the unused 5 1/4" removable plate holes. After putting it in and looking at it, I figured it'll be better if I cut out a round hole to match the fan. Good thing it's fairly soft metal, and the Stewart-McDonald heavy duty fret cutter came into use.

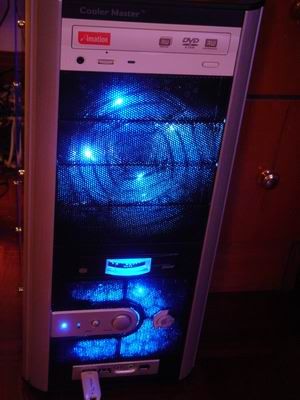
Mounted it with a 12cm fan grille, cos the holes that came with the removable plates are a bit too small. Using a CM white LED fan, cos I couldn't find any blue LED ones. I just coloured the LEDs blue with a magic marker. I mounted the primary SATA HDD right behind this fan, on 5 1/4" brackets so it gets the bulk of the cooling. Now, using brackets in with a tool-less mounting system and having to make space for a fan in front is difficult. Had to remove the plastic lock, cut off some metal around there, and finally managed to secure the HDD with three screws.

Here's the front:

user posted image

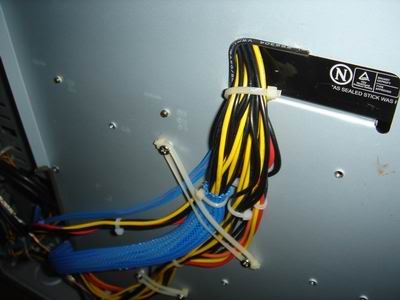
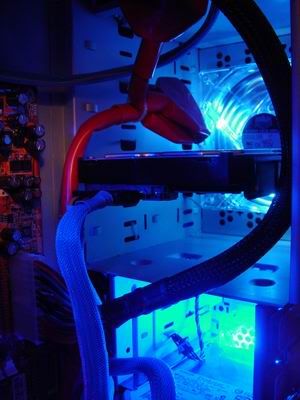
I also sleeved up the cables, and ran a whole bunch of them behind the mobo tray, from the hole just next to the PSU, so they come out right next to the HDD cage. The PSU hole and mobo tray edge were quite sharp, and cut a couple of my fingers, so I figured that would not be very good for the cables. I took a small diameter cable from somewhere, sliced it laterally with a balsa stripper, and used it to line the edges. Safe, now.

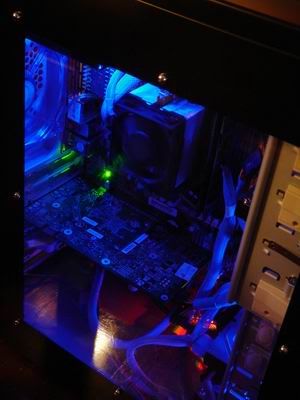
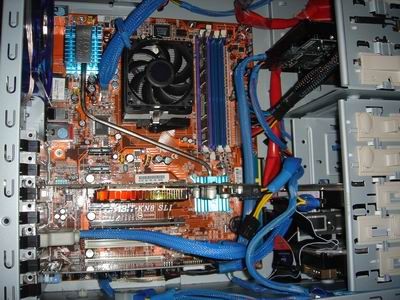
Here's an inside look:

user posted image

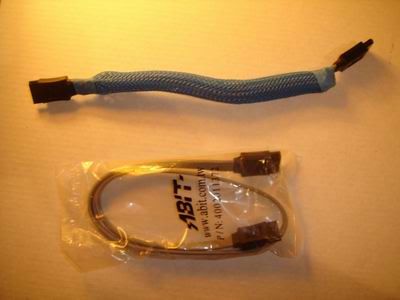
I just had a look at the cable sleeving guide. For the molex connectors, I used one sleeve throughout, and pushed the pins through the gap in the sleeve, instead of cutting four separate lengths. I wonder if I should've done it the other way... Also, I spent ages sleeving the SATA to mobo connector. I had to file the connector edges a bit so they wouldn't snag, but it worked.

Awaiting funds to get a couple of Zalman fans for the CPU and GPU, as well as a couple of UV tubes to sort out the UV reactive sleeves and rear fan.
j05h
post Apr 18 2006, 11:09 AM

Casual
***
Junior Member
340 posts

Joined: Sep 2005
From: Kuala Lumpur
QUOTE(Doom @ Apr 17 2006, 05:23 PM)
Looks cool men, can u show the image that has straight view through the side panel rather from top sliding into the side panel.....cant see much on the other side of the case rclxms.gif
*

Thanks, man. The cable management isn't as neat as I'd like, but there's still work to be done. Also, I figured there was no point stealthing all the cables if the UV reactive sleeving was gonna be hidden. The bottom of the case is a bit messy cos Abit wisely decided to locate the GPU mobo molex insert right under the lowest PCI slot. Looking at it I think I see a solution. Also thinking of removing the rear USB ports and header. That red sleeved IDE cable has got to go. Here's a pic:

user posted image

QUOTE(r4ydc24 @ Apr 17 2006, 06:58 PM)
er, how spacious is the back of ya mobo tray? cavalier n centurion 5 has the same chassis ryt?
*

There's maybe a centimeter or so clearance between the tray and the side panel on the C5. From the rear, the RealPower 550w wasn't long enough to completely cover the little hole on the mobo tray. The sharp edges along the hole and along the edge of the mobo tray further down have been lined and superglued in with cable insulation to ensure the PSU harness doesn't get cut. Spent ages figuring out a way to tie the harness flat against the reverse side of the mobo tray.

user posted image

QUOTE(r4ydc24 @ Apr 17 2006, 06:58 PM)
yeap j05h, realy would like to see how u reroute it.. and the sata to mobo cable. i can only manage to do like this.
*

The SATA-mobo cable was basically folded over, so it's a bit thicker but much shorter, just enough to reach the HDD from the mobo. The sleeve was the smallest that could fit over it, and it just barely did. It may be a bit thicker and, well, less aesthetically pleasing, but the airflow footprint remains the same. Not the ideal solution, but when the UV tubes come in, there'd be more glowy stuff inside. Also folded over the 4pin power plug that goes into the mobo next to the CPU.

user posted image

Lastly, here's a pic of the 12cm front fan in the 5 1/4" bay:

user posted image

It flows air over the master boot SATA drive. I also wanted this drive up there so there'd be a one unit gap between the PATA drives at the bottom for the little 8cm fan there to be more effective. From the front:

user posted image

The fret cutter's big and has straight jaws, so cutting curves wasn't as clean as I'd like. But the fan fits nicely in the existing holes as you can see. In retrospect I should've just used 3 bays instead of 4. Also, for the RealPower 3 1/2" bay meter, it doesn't really attach to the case because it's too short. By simply attaching two screws into the holes provided, it sits there and doesn't get pushed into the case, and it's nicely flush with the front cover.

There's still so much to do yet, and I can't wait smile.gif

Edit: Ahhhh, thinking about it, I think I'm just gonna dump the ugly fan in front and get an iCage. That way I free up a slot for another drive. Too bad I already removed a bit of metal from the 5 1/4" enclosure.

This post has been edited by j05h: Apr 18 2006, 02:48 PM
j05h
post Apr 19 2006, 10:23 AM

Casual
***
Junior Member
340 posts

Joined: Sep 2005
From: Kuala Lumpur
ALIAS, haha smile.gif I'm not liking it very much right now, though...

QUOTE(Doom @ Apr 18 2006, 11:43 PM)
u got quite a space for the cables to go through the PSU ..... mine is less than 1 cm coz the PSU is too large  cry.gif
*
The RealPower's not that large a unit for a 550watter, and there's barely just enough space to squeeze the cables through. If not, you can do what some other people did and drill a big enough hole nearby, towards the top so it's not so easily visible, and route your cables through there. Remember to line the sharp edges.

QUOTE(r4ydc24 @ Apr 19 2006, 09:22 AM)
@j05h

yeah man, d red sleeve realy got to go. uhuhuhu. Sadly, my Abit AN8 is equipped wif  red LEDs on the status indicator as well as the mosfet. does anybody knows how to disable those LED fr blinking? uhuhuhuhuh. I'm going wif an Orange+blue UV setup as soon as the sleevings I ordered reach my doorstep.. n I do wish Abit comes out wif a black mobo PCB, instead of RED. sweat.gif

Ay, u r lucky to have an unsleeved PSU,in this case. My enermax has factory sleeved shieldings dat makes it impossible to bend it into the gap near the PSU. n even it is successfully bended, the size of the sleeves will juz leave a BULGE on my right side panel. sigh~  unsure.gif

aahahhaa, n ya sata cable, realy looks fat eh in the sleeve. itz a great way to fold em into the sleeve to make it shorter, but i still prefer my wires look lyk worms, rather than a slug.. uhuuhuhuhuh. i myt wanna try ya method later on tho.  thumbup.gif 

bro, wats n iCage?  sweat.gif
*
Cannot tahan the red sleeve. Also, I'm only using the one drive, so I don't see the need for two connectors... Will look for a single connector transparent or UV blue round cable that's long enough, cos this one isn't, hence the other connector sitting uselessly in the 5 1/4" bay.

My KN8 also has red and green LEDs down at the bottom, as well as another green one for the SLI. I don't mind though, cos while the top part is blue, the bottom has a little green and red to vary the colour and give it a bit more depth. Lucky the PSU is unsleeved, even luckier there's that little gap...

The SATA cable looks sluggy in that pic cos it's the first one I made, and that was when I was planning to put the drive in the HDD cage. The one I'm using in the PC now is about 2 inches longer, and a whole lot less sluggy smile.gif

Now I'm just gonna hold off from doing anything, and just wait til I get all the parts for what I want done, and make sure what I want to do really is finalised, and then start work. Doing all these little things here and there sadly is not working out; it's putting me further away from what I want, I think... It's like losing sight of the big picture.

iCage

This post has been edited by j05h: Apr 19 2006, 10:24 AM
j05h
post Apr 19 2006, 02:28 PM

Casual
***
Junior Member
340 posts

Joined: Sep 2005
From: Kuala Lumpur
QUOTE(rainingzero @ Apr 19 2006, 01:29 PM)
wanna ask some stupid question, my noobness actually.why many of u using mesh like sleeving kit (dunno what it called) and not using normal sleeving kit??? is it a way easier than normal sleeve??how much it cost??and anybody here know which shop at lowyat can i get UV/LED molex connector and how much its cost??wanna start my own sleeving project+wire management
*
Also, to add to r4ydc24's reply:

Mesh sleeves are expandable. Compress them, and the lobang diameter becomes bigger. Because of this, and because they're very flexible, you can get a very snug and tight fit around the wiring harness. The end result is more neater, managable sleeved cables that can still bend in any direction.

If you're talking about the sleeves that look like the shower hose, they don't wrap around the cables snugly cos they're not expandable.
j05h
post Apr 24 2006, 03:49 PM

Casual
***
Junior Member
340 posts

Joined: Sep 2005
From: Kuala Lumpur
QUOTE(balsa12 @ Apr 24 2006, 03:17 PM)
just bought my cm centurion 5 from pc zone for RM195.one question, how do you hide ur firewire cabel from front panel since my mobo didnt have firewire connector onboard?n there a problem when i'll try to connect audio front panel connector to mobo..i'm using kn8-ultra.
*
Just roll up your front panel firewire cable and stick it in the cavity next to the HDD cage.

What's the problem with the front audio connectors? There should be pins for that on your bloard. Just follow your mobo manual.


Topic ClosedOptions
 

Change to:
| Lo-Fi Version
0.0331sec    0.37    7 queries    GZIP Disabled
Time is now: 6th December 2025 - 07:16 AM