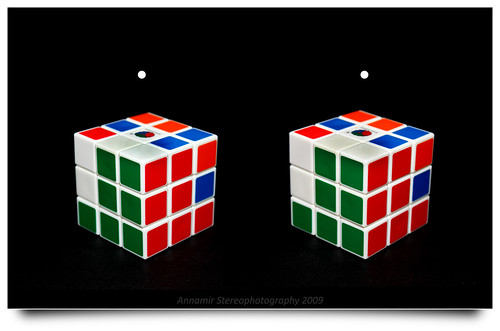
I would like to share with you all my "3D Stereography" photos here...
All were manually taken and handheld! Which mean, i have to shot the same photo twice, but with a little bit movement
on the 2nd capture.
What Is 3D Stereography (or stereoscopy)?-
Wikipedia- Definition from Wiktionary:
» Click to show Spoiler - click again to hide... «
Stereography - Definition from Wiktionary, a free dictionary:
English
Noun
stereography
stereography (uncountable)
1. Any technique for representing solid objects in two dimensions
2. stereoscopic photography, and the production of stereographs
How to SHOOT and EDIT a 3D Stereography?- Using 3D Lens like "Loreo 3D Lens In A Cup".
- Using regular compact or dslr camera.
- Using 3D camera which is in market nowadays.
-
Using your mobile camera 
- My Tutorial in Bahasa Malaysia:
» Click to show Spoiler - click again to hide... «
3D STEREOGRAPH
Suka untuk saya berkongsi satu teknik; iaitu cara mudah untuk mengambil & mengedit imej 3D! Teknik ni pun baru saya jumpa, setelah dicuba memang mengujakan saya, kerana selama ni saya shot 3D guna cara yang saya reka2 sendiri aje. Baiklah...
Alatan:- Kamera anda; (kamera digital compact pun boleh),
- Lens yang bersesuaian; (kit lens ok sesangat dah),
- Flash/Strobist; (kalau berkenaan),
- PC pastinya perlu untuk editing nanti
- Tripod? TAK PERLU!
Setting Kamera:- Setkan mode kamera anda kepada AV (Apperture priority),
- ISO ikut kesesuaian sumber cahaya,
- Setkan kepada manual focus setelah anda dapat focus point yang bersesuaian menggunakan auto focus,
Cara Mengambil Gambarnya:- Sebaiknya gambar subjek diambil dalam kedudukan portrait, landscape mode pun boleh, tapi nanti kena kecilkan saiz (lebar X tinggi) gambar supaya mata tak sakit bila sesi 'julingan' dilakukan,
- Berdiri dengan tegak dan kaki terbuka sedikit (bukan terkangkang) mengadap subjek,
- Point yang penting, sekarang tumpukan berat badan anda pada kaki kanan sahaja,
tapi pastikan kaki kiri tidak terangkat! Dan shot GAMBAR PERTAMA.
- Alihkan pula berat badan anda ke kaki kiri dan pastikan juga kaki kanan tidak terangkat dan shot GAMBAR KEDUA.
Siap dah sesi ambil gambarnya Senang bukan?
Sebenarnya dengan mengubah imbangan badan antara kedua kaki ketika mengambil kedua2 gambar tadi, viewpoint gambar sebenarnya telah pun berubah beberapa sentimeter, dah memadai nak jadikan imej tu sebagai imej 3D.
- P/S: Kedudukan kamera tak perlu ubah apa2 selepas selesai ambil shot pertama tadi, terus je fokus seperti biasa, yang penting ubah imbangan berat badan.
Cara Edit Gambar:- Sila download dan install
StereoPhoto Maker ini (Freeware).
- Perisian yang amat mudah untuk digunakan, ia secara automatik akan membetulkan tilting & twisting, kedudukan kita yang mungkin terkehadapan atau terkebelakang ketika shot gambar, dan banyak lagi correction yang dilakukan secara automatik.
- Seret (grad) kedua2 gambar ke dalam antaramuka StereoPhoto Maker ini.
- Boleh zoom guna butang skroll pada mouse.
- Sambil lakukan proses ni, boleh dah lihat imej tu secara 3D dengan teknik 'juling mata' tu, kalau nampak imej 3D nya janggal, sila klik button "Swap Left/Right" pada bar menu, sepatutnya ia dah ok.
- Langkah seterusnya, sila klik pad button "Auto Alignment" pada bar menu untuk proses kemasan secara automatik. Setakat step ni pun gambar 3D anda telah pun selesai sebenarnya.
- Tapi untuk kemasan yang lebih detail, sila klik pada "Easy Alignment" button (sebelah ngan Auto Alignment button tadi), dan start adjust secara manual kedudukan gambar yang diberikan sehingga nampak sesamaannya.
- Langkah terakhir, sila pergi pada menu File > Save Stereo Image... (atau tekan je keyboard S).
- Beres. Imej 3D anda telah pun siap!
Tambahan editing;- Gambar yang telah disave tadi akan dicantumkan kedua2 gambar tanpa sebarang framing hitam seperti dalam preview StereoPhoto Maker tadi.
- Seeloknya, imej diberikan framing seperti yang saya lakukan (frame hitam), boleh dibuat menggunakan Photoshop, tambahkan border hitam, dan letak satu garis hitam ditengah2 imej.
- Boleh juga lakukan proses Color Enhancement pada gambar dalam Photoshop.
- My Tutorial in English (google translate lol):
» Click to show Spoiler - click again to hide... «
3D STEREOGRAPH
I'd like to share a technique, which is easy to take & edit a 3D image! Even this new technique I found, after trying really excites me, because I shot this for 3D use their own ways that I reka2 aje. Well ...
Tools:- Your camera (compact digital camera also can)
- Suitable Lens (kit lens ok dah sesangat)
- Flash / Strobist (if applicable)
- PC for editing will certainly be
- Tripod? NO NEED!
Camera Settings:- Set your camera to AV mode (Apperture priority),
- ISO take appropriate light source,
- Set to manual focus after the focal point you to the appropriate use of auto focus,
How to Take the picture was:- Better picture taken the subject in the portrait position, the landscape mode can also, but will have to reduce the size (width X height) images that the eye does not hurt when the session julingan 'done,
- Stand up straight and feet slightly open (not terkangkang) facing the subject,
- Point the key, now a pile of your weight on right foot only,
but make sure your left foot is lifted! FIRST PICTURES and shot.
- Move your body weight is to make sure your left foot and right foot is not lifted and shot SECOND PICTURE.
Ready to take the photograph session at Nice is not it?
Actually, by changing the balance of the body between the legs while taking pictures kedua2 earlier, the actual picture viewpoint has changed a few centimeters, it's enough tu want to make the image as a 3D image.
- P / S: no need to change the camera position apa2 after taking the first shot today, continues to focus on as normal je, a significant change of body weight balance.
How to Edit Photos:- Please download and install this
StereoPhoto Maker (Freeware).
- The software is very easy to use, it will automatically correct the tilting & twisting, our position may be advanced or backward when shot photos, and more correction is done automatically.
- Drag (grad) kedua2 image into the interface is StereoPhoto Maker.
- Can use the zoom button on the mouse skroll.
- While doing this process, can already see a 3D image using tu 'squint eye' that, if it seems awkward 3D images, please click the button "Swap Left / Right" in the menu bar, it should be ok already.
- The next step, please click the button pad "Auto Alignment" in the menu bar for the package automatically. So far this step was a 3D image that you have actually been completed.
- But to be packing more detail, please click on the "Easy Alignment" button (next to Auto Alignment ngan button above), and start it manually adjust the image position is given to see sesamaannya.
- Finally, please go to the File menu> Save Stereo Image ... (Or press the keyboard je S).
- Beres. 3D images you have already done!
Additional editing;- Images that have been mentioned will be included disave kedua2 framing the picture without any black as in the preview last StereoPhoto Maker.
- Ideally, the image given framing as I did (black frame), can be made using Photoshop, add a black border, and put a black line image ditengah2.
- Can also do the Color Enhancement of the image in Photoshop.
- You may read
HERE or HERE- Or see this
3D Video. Credit to morn1415 for the video.
More, coming soon...
This post has been edited by AnNamir: Nov 24 2014, 12:43 PM 

 Jun 7 2011, 08:17 PM, updated 4y ago


 Quote
Quote


 0.0304sec
 0.54
0.54
 5 queries
 GZIP Disabled